
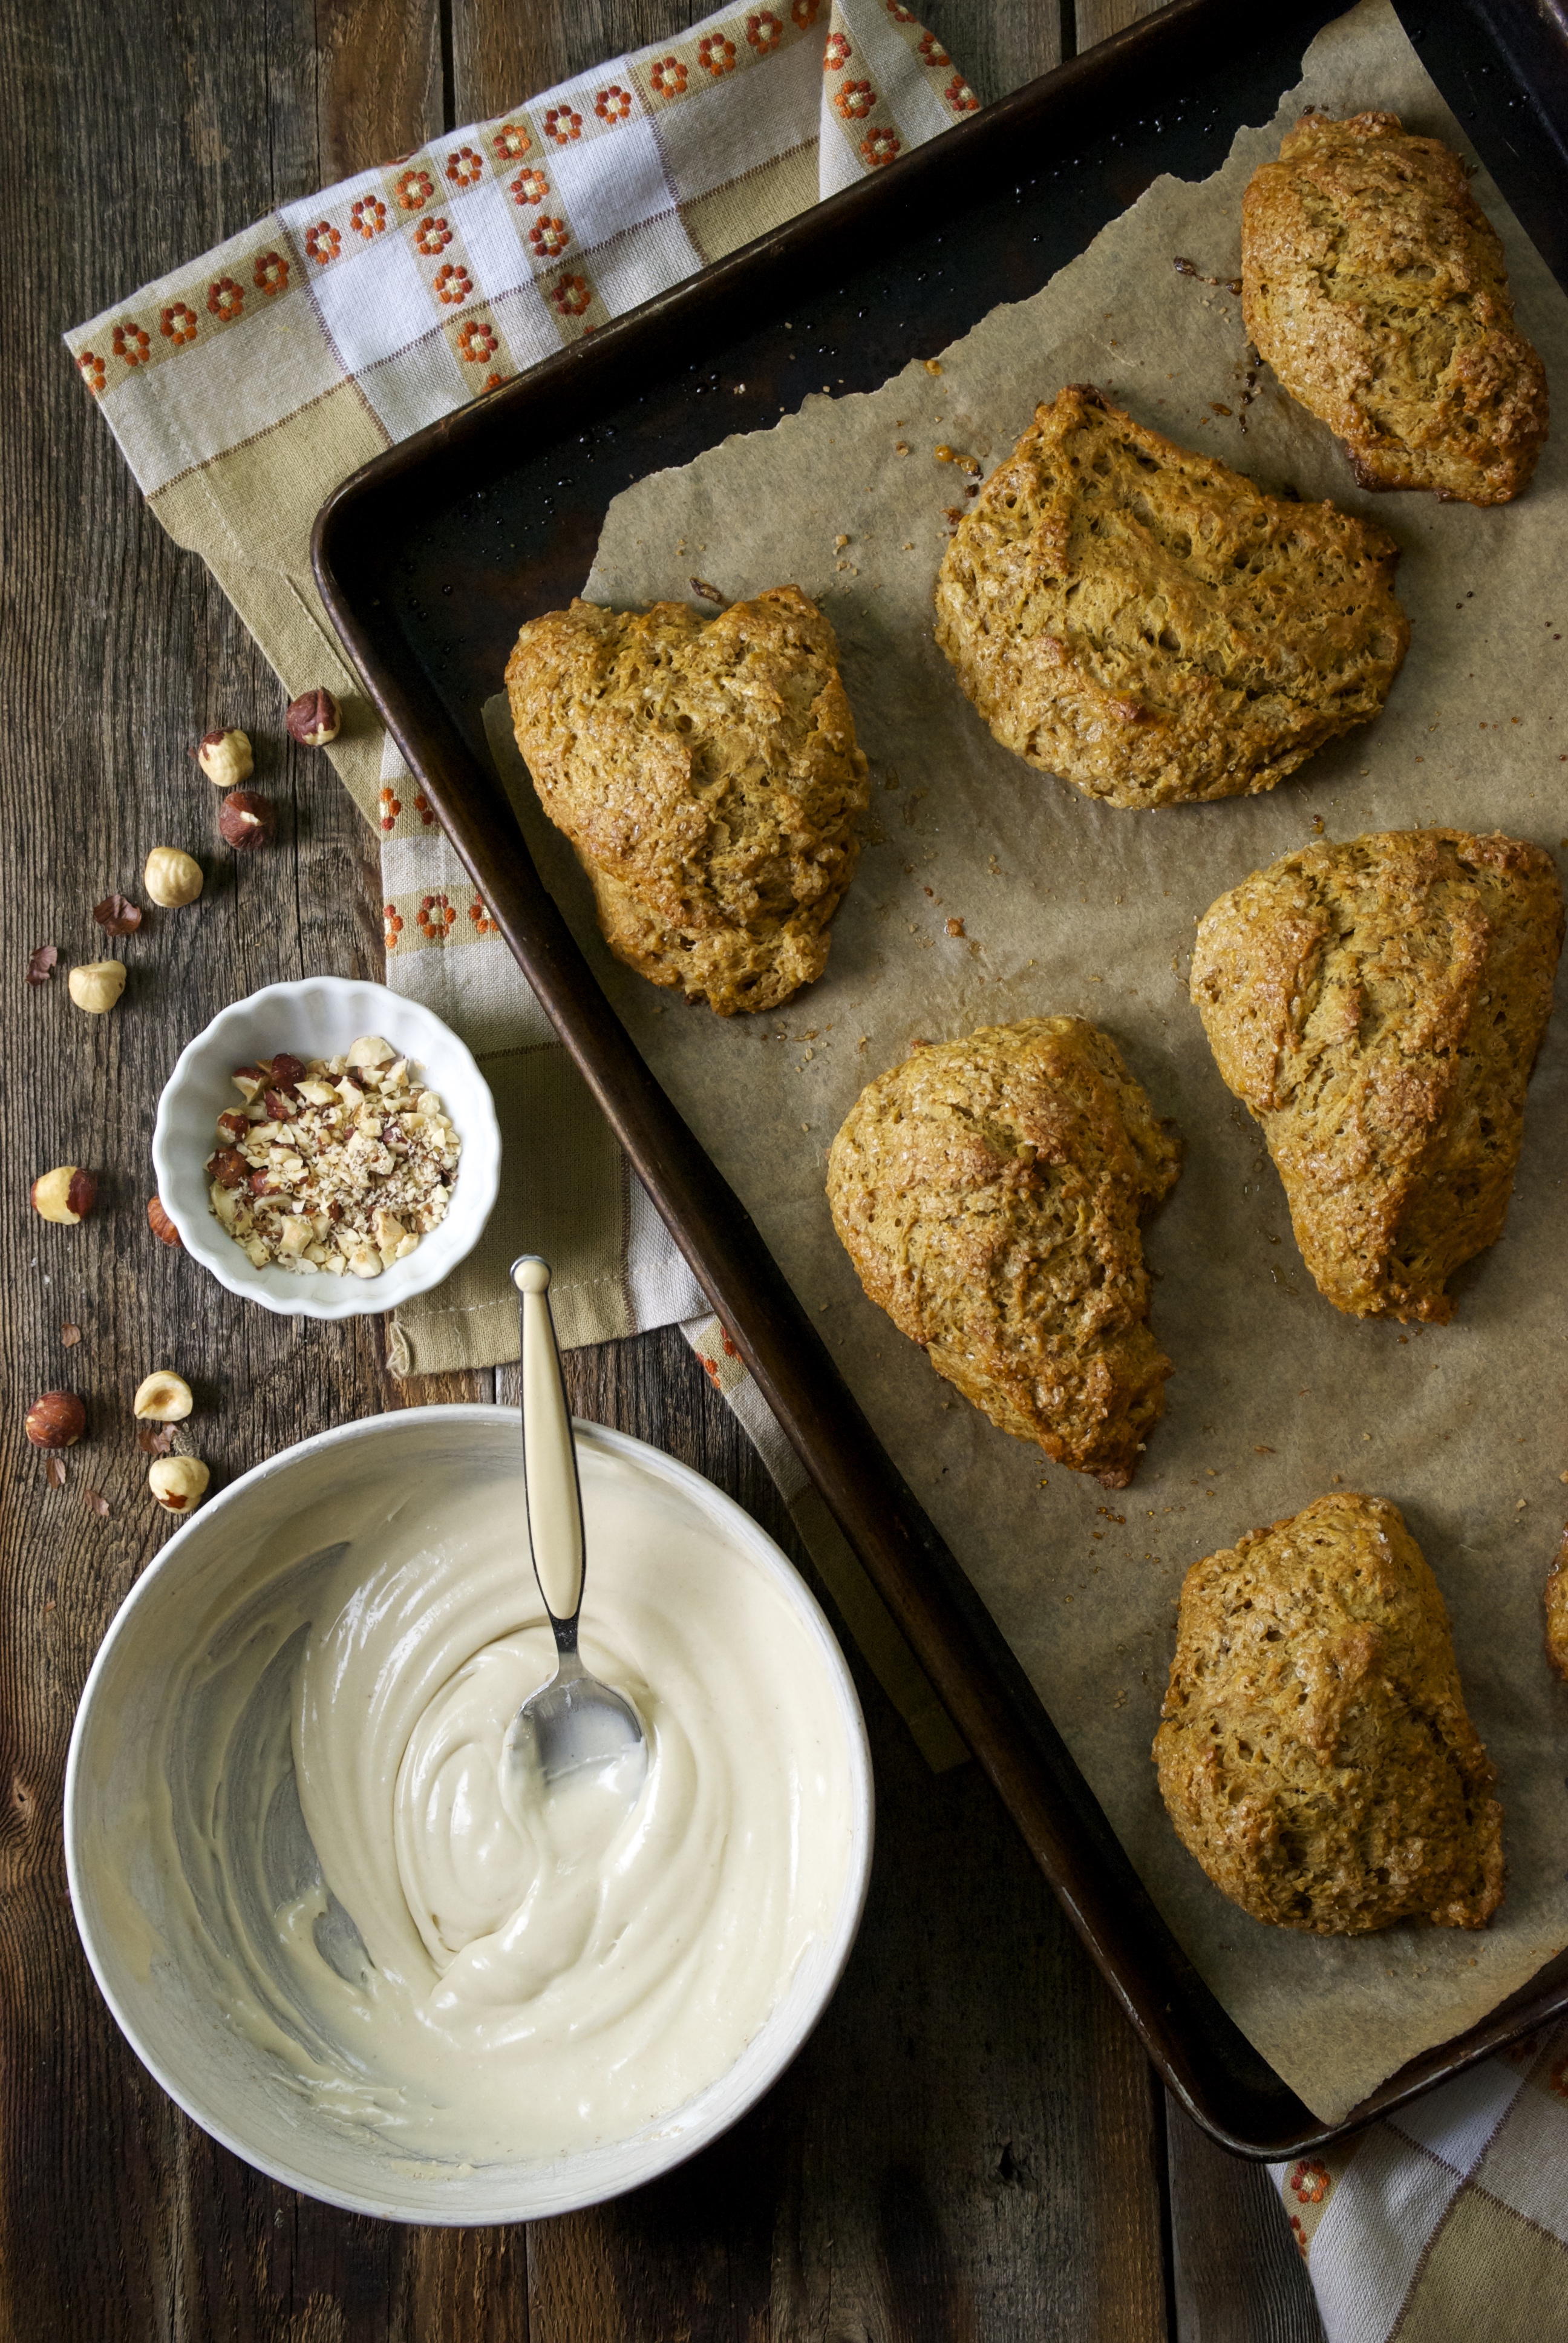
With Thanksgiving just a week away, I imagine you’re knee-deep in recipe ideas. Well here’s one more. No, it’s not a dish or dessert for the big meal, but rather something quick and delectable to pull together when your overnight guests wake in the morning. Something that will make them feel warm and cozy and loved. These pumpkin scones are fantastic, and you’d do well to remember that I’m very fussy about my scones. Too hard– forget it. Too dry– kick them to the curb. But those ones that are just right– firm on the outside and flakey on the inside– well, I could devour a whole pan. These fit into that just right, or rather “perfect” category.


So, through the years of playing around with different scone recipes, I’ve learned that one thing is the key. And I’ve shared this before, but it’s so important that I’ll emphasize it again. Use grated frozen butter. Always use grated frozen butter. In fact– use grated frozen butter for most baked goods– pie crusts and biscuits included. Keeping the dough completely cold is the key to it’s flakiness. It’s so simple to grab a stick of butter from the freezer on a whim and whip these up. Aside from the convenience, grated butter means that you don’t have to work as hard to incorporate it into the flour. It’s already in tiny pea-sized pieces. I’ve found that using my hands works best. Toss it around a bit and then mix in the wet ingredients with a fork or spatula. The less you work with scone dough, the better they’ll turn out.


Keep in mind that all of the flour does not need to be fully incorporated– it’s ok if your dough has a bit of flour on the top– in fact it’ll be easier this way. This dough is more wet than my usual scone recipe because of the pumpkin. So be sure to sprinkle a bit of flour on your hands before you pat it out into a circle and cut it into wedges. Because it’s a wetter dough, freezing them on the pan for 15 minutes before they bake is also important to help them keep their shape. These scones have all the autumnal spices you’d expect and taste amazing with a hot cup of coffee. I love the addition of maple and nutmeg into the icing. It adds character. I hope these scones find their way onto your kitchen table one of these cold, snowy mornings. Enjoy!
The Recipe: Pumpkin Scones with Maple Nutmeg Icing
(makes 6-8)
For the Scones:
2 1/4 cups all-purpose flour (11 1/4 ounces)
1 tablespoon baking powder
1 teaspoon kosher salt
1/2 teaspoon fresh nutmeg
1/2 teaspoon ground cloves
1/2 teaspoon ground allspice
1 1/2 tablespoons ground cinnamon
3 tablespoons packed light brown sugar
1/2 cup plain canned pumpkin (Farmers Market Organic Pumpkin is my favorite brand)
1/2 cup plain whole milk yogurt
3 eggs, divided
1 teaspoon vanilla extract
6 tablespoons frozen unsalted butter, coarsely grated
turbinado or demerara sugar for sprinkling
For the Icing:
1 cup confectioners sugar
2 tablespoons real maple syrup
1/2 teaspoon freshly grated nutmeg
about 5 tablespoons heavy whipping cream
pinch of salt (this is important– it will enhance the flavor of the icing, so don’t be stingy)
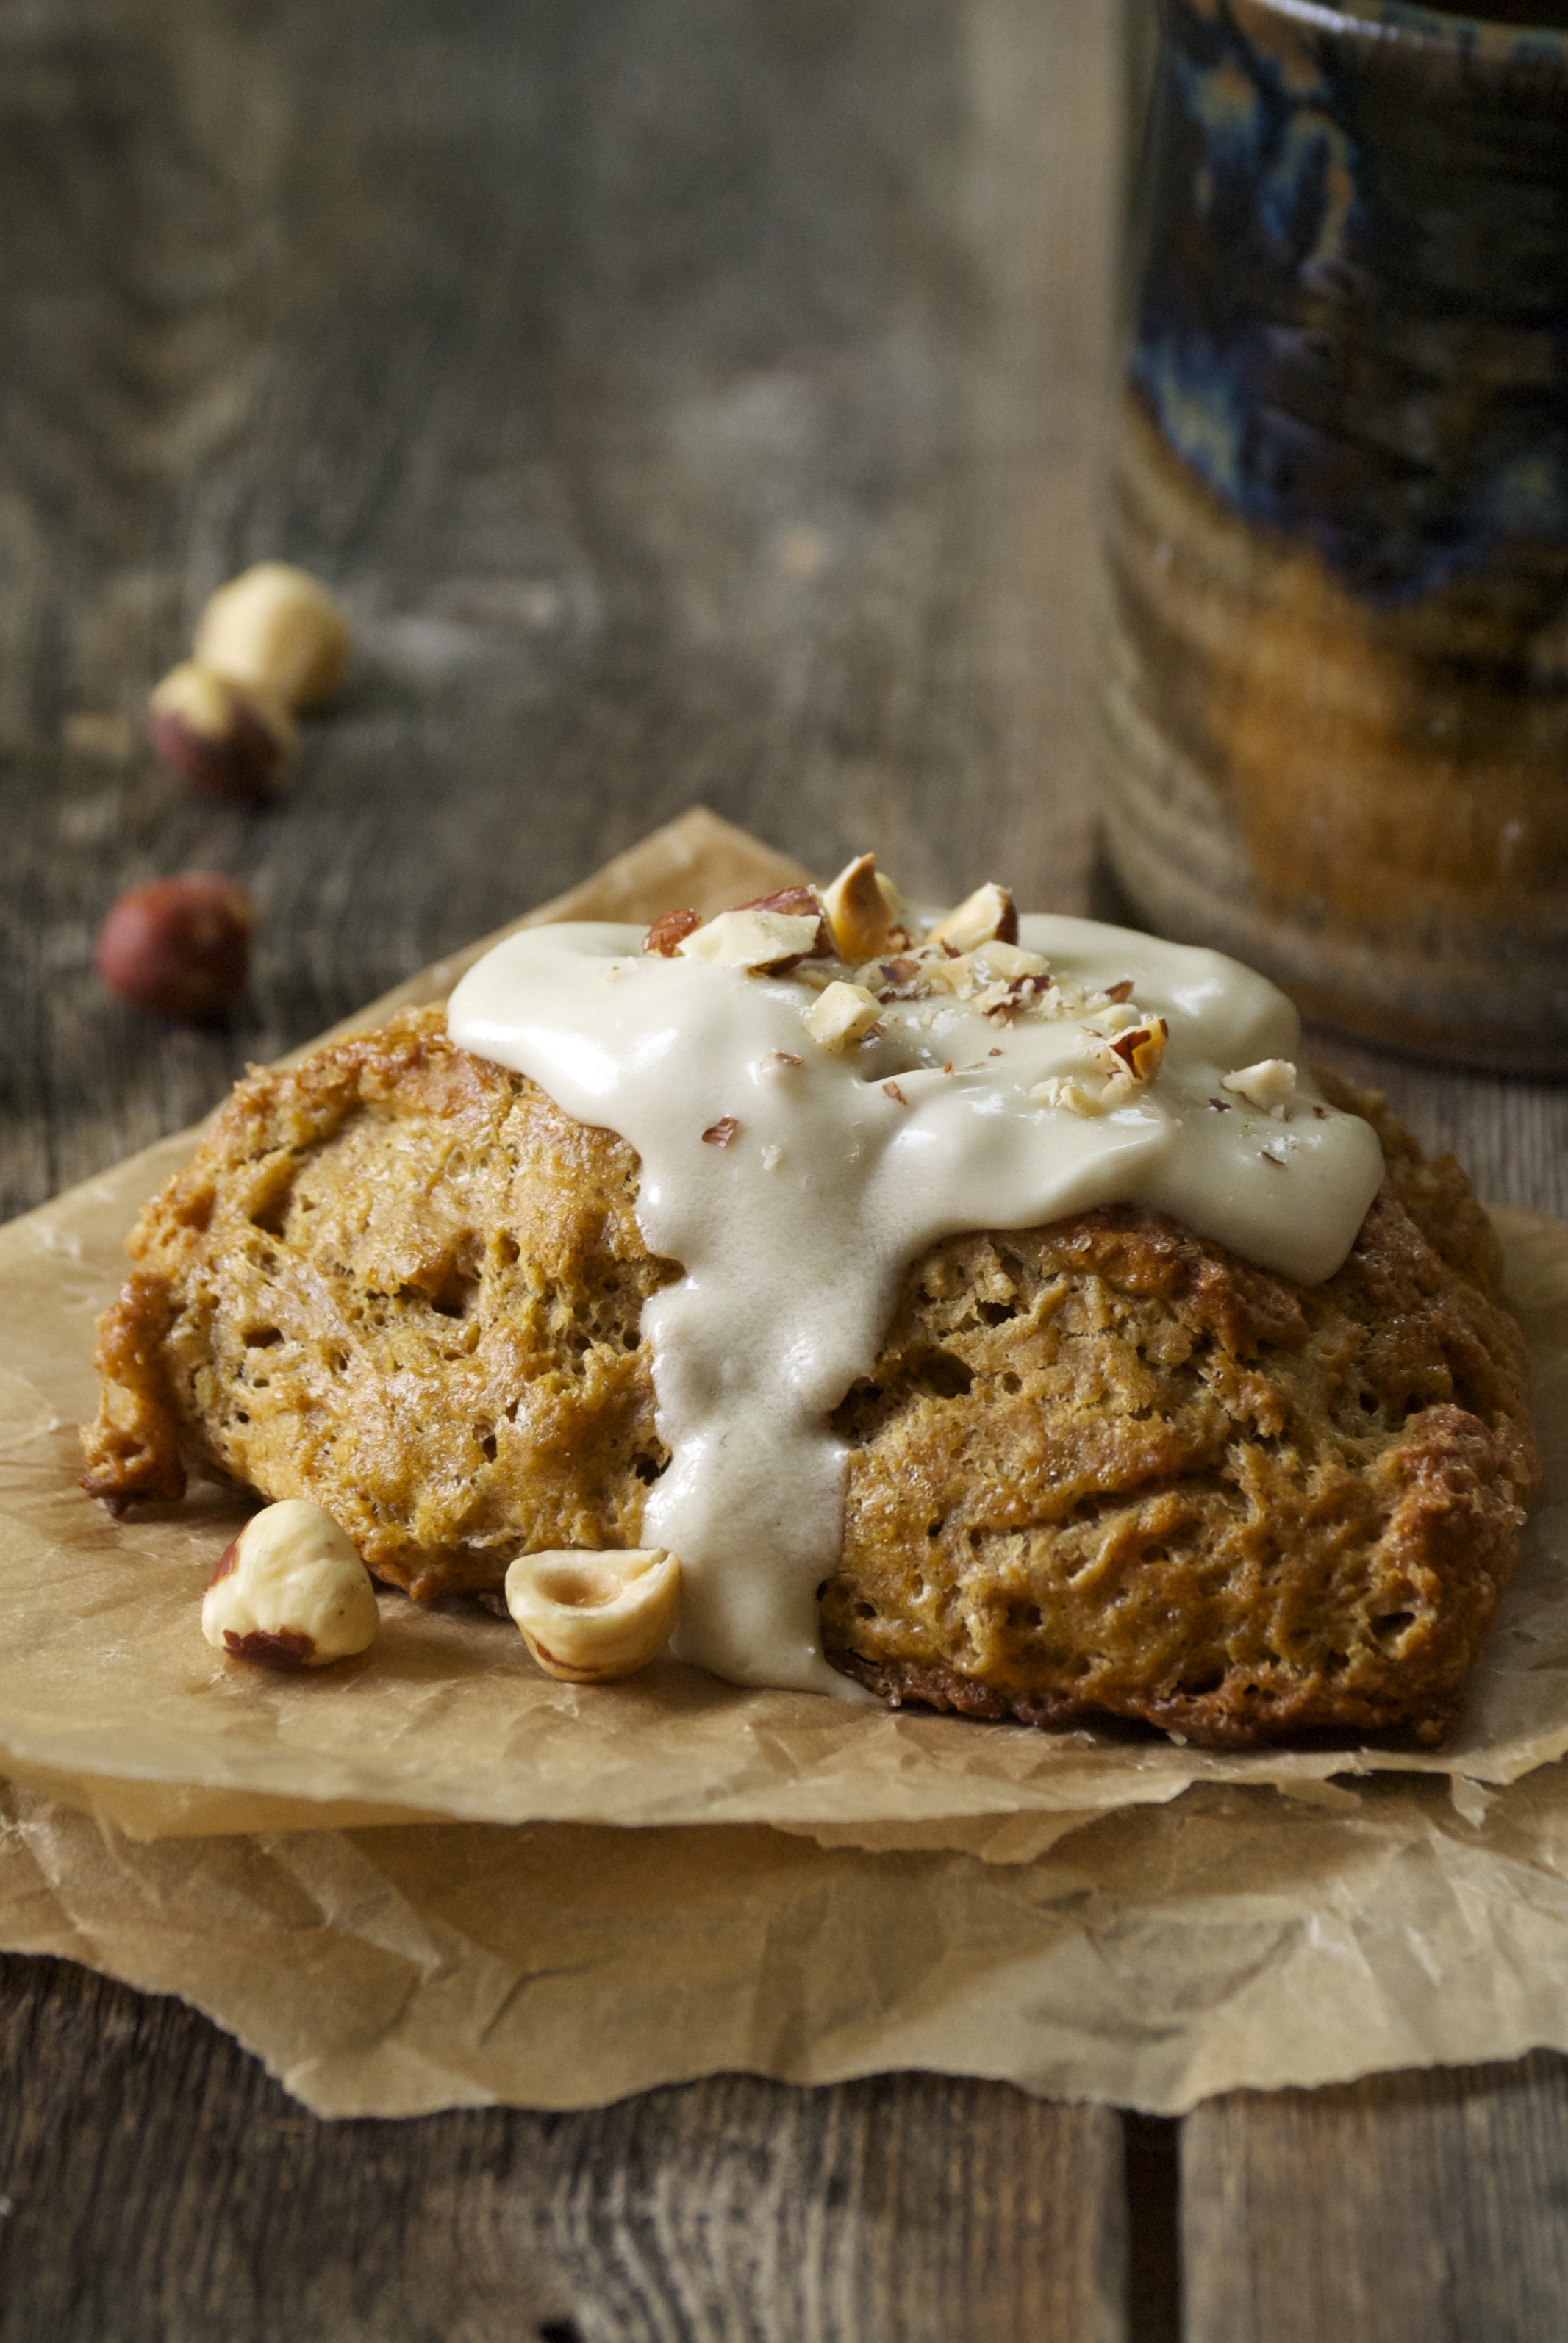
roasted salted hazelnuts, for topping (almonds, pistachios, or walnuts would work, too)
Preheat oven to 400°F. Line a large baking sheet with parchment paper.
In a large bowl, whisk together the flour, baking powder, salt, nutmeg, cloves, allspice, and cinnamon.
In a medium-sized bowl mix together the brown sugar, pumpkin, yogurt, 2 eggs, and vanilla.
In a small bowl, use a fork to mix 1 egg with 1 teaspoon of water, the the egg wash.
Coarsely grate the butter using the largest holes on a box grater. Work quickly, so the ingredients stay cold. Mix the butter into the flour mixture using your fingertips. You want the butter to be coated with the flour. Work quickly. Then, using a fork or spatula, mix the wet ingredients into the butter/flour mixture. Do not over-mix. It’s ok to see specks of flour that haven’t been fully incorporated. Sprinkle countertop with flour, as well as your hands. The dough will be sticky. Place dough on the counter and pat into a 6-inch round circle. Use a bench knife or a chef’s knife to cut into 6-8 wedges. Place the wedges on the lined baking sheet and put into the freezer for 15 minutes.
Remove from freezer and apply egg wash with a pastry brush. Then sprinkle generously with turbinado sugar. Bake for 25 minutes, or until they feel set in the middle and they have developed a beautiful deep golden color. Remove from oven and let cool slightly.
To make the Icing: Whisk all of the ingredients together until creamy. Add more cream, if need be. Dollop the icing onto the scones and smooth out. Top with salted roasted hazelnuts, or your nut of choice. Store leftovers in an airtight container, but they are best if eaten the first day. Enjoy!
Thanks for stopping by Relishing It!
Laurie
