Feeds:
Posts
Comments

Archive for August, 2013

Rustic Apple Galette | Relishing It

The end of our summer.  I honestly don’t know whether to jump for joy or curl up into a ball and sulk.   My boy starts school next week– first grade.  He isn’t dreading school this year– unlike the last two– when he saw it only as a limitation on ‘play time’.  That’s not to say that he didn’t love school.  He did, once he got there.  But he has serious home-body tendencies that can be a bit…difficult to overcome sometimes.  Now the prospect of making new friends has him excited.   And my baby, Aria, starts the following week in pre-kindergarten.  She is so excited.  She has Aanen’s previous teacher, whom we all adore.  Aria starting school really brings out mixed emotions in me.  Joy because I’ll finally get to enjoy an hour or two of quiet each day.  Aria is a talker.  Nonstop.  Really.  She’s a relentless, wonderful hurricane.  A true sensing extrovert on the Meyers-Briggs scale.  The other three of us are the opposite.  But even though I’ll get to enjoy some quiet, I’m also a bit panicked.  Not having my baby at home reminds me just how fast time is passing.  And to add to my melancholy of another season ending, and my kids off to school, I turned 39 on Monday.  Time.  It just rolls on.

Rustic Apple Galette | Relishing It

It’s very strange, because it’s not just the days, or even years that are flying past.  It’s the decades!  I don’t feel 39 years old, but somehow it just happened.  I’ll turn around tomorrow and my kids will be off to college.  But to be brutally honest, my kids growing up, and me aging isn’t what really hurts.  No, the most painful realization is that my parents are aging right along with us.  It seems like just yesterday that I’d watch my dad play softball, goofing off on the pitcher’s mound or galloping around the bases like a kid.  Strange to think that that was 20 years ago.  The fact is, they’re getting older.  And while they’re both still doing great and keeping busy, they’re slowing down.  Through a daughter’s eyes…I can tell.  I know I can’t do anything about it, but I really don’t want the next 20 years to pass as quickly as the last have.  I need time to slow a bit, so I can savor every moment with my loved ones.

Rustic Apple Galette | Relishing It

Rustic Apple Galette | Relishing It

Rustic Apple Galette | Relishing It

It feels a bit strange to delve into such deep issues here on a food blog, but there it is.  I guess if there’s a tie-in to Relishing It, it’s that working in the kitchen soothes me.  It’s my balm, so to speak.  This week a kind neighbor offered up her gorgeous apple tree– free for the picking.  Aria and I gathered a huge box-ful, which I’ve turned into several apple galettes.  I’ve written before here about my love for galettes.  They’re perfect in that un-perfect, rustic way.  I like my apple desserts with just a hint of cinnamon and not much else.  I want to taste the apples.  I also like to add a drizzle of icing to apple galettes that I normally don’t with other fruits, since the apples don’t have that beautiful sheen that you get with a berry or peach galette.  The icing makes it look so much more appealing, and adds a subtle sweetness.  Enjoy!

Rustic Apple Galette | Relishing it

The Recipe:  Rustic Apple Galette

3 cups / 400 grams sliced firm tart apples (from 6 small apples)

3 teaspoons fresh lemon juice (from 1 small lemon)

1/3 cup granulated sugar

1 teaspoon ground cinnamon

1/2 teaspoon kosher salt

2 tablespoons cold butter, diced

1 egg mixed with 1 teaspoon water, for egg wash

1 tablespoon turbinado sugar, for sprinkling

1 cup powdered sugar with a splash of milk, for the glaze

1 single All-Butter Pie Crust

Preheat oven to 375°F.

Follow the instructions for making the All-Butter Pie Crust. After it has chilled for at least 2 hours, it will be ready for use.

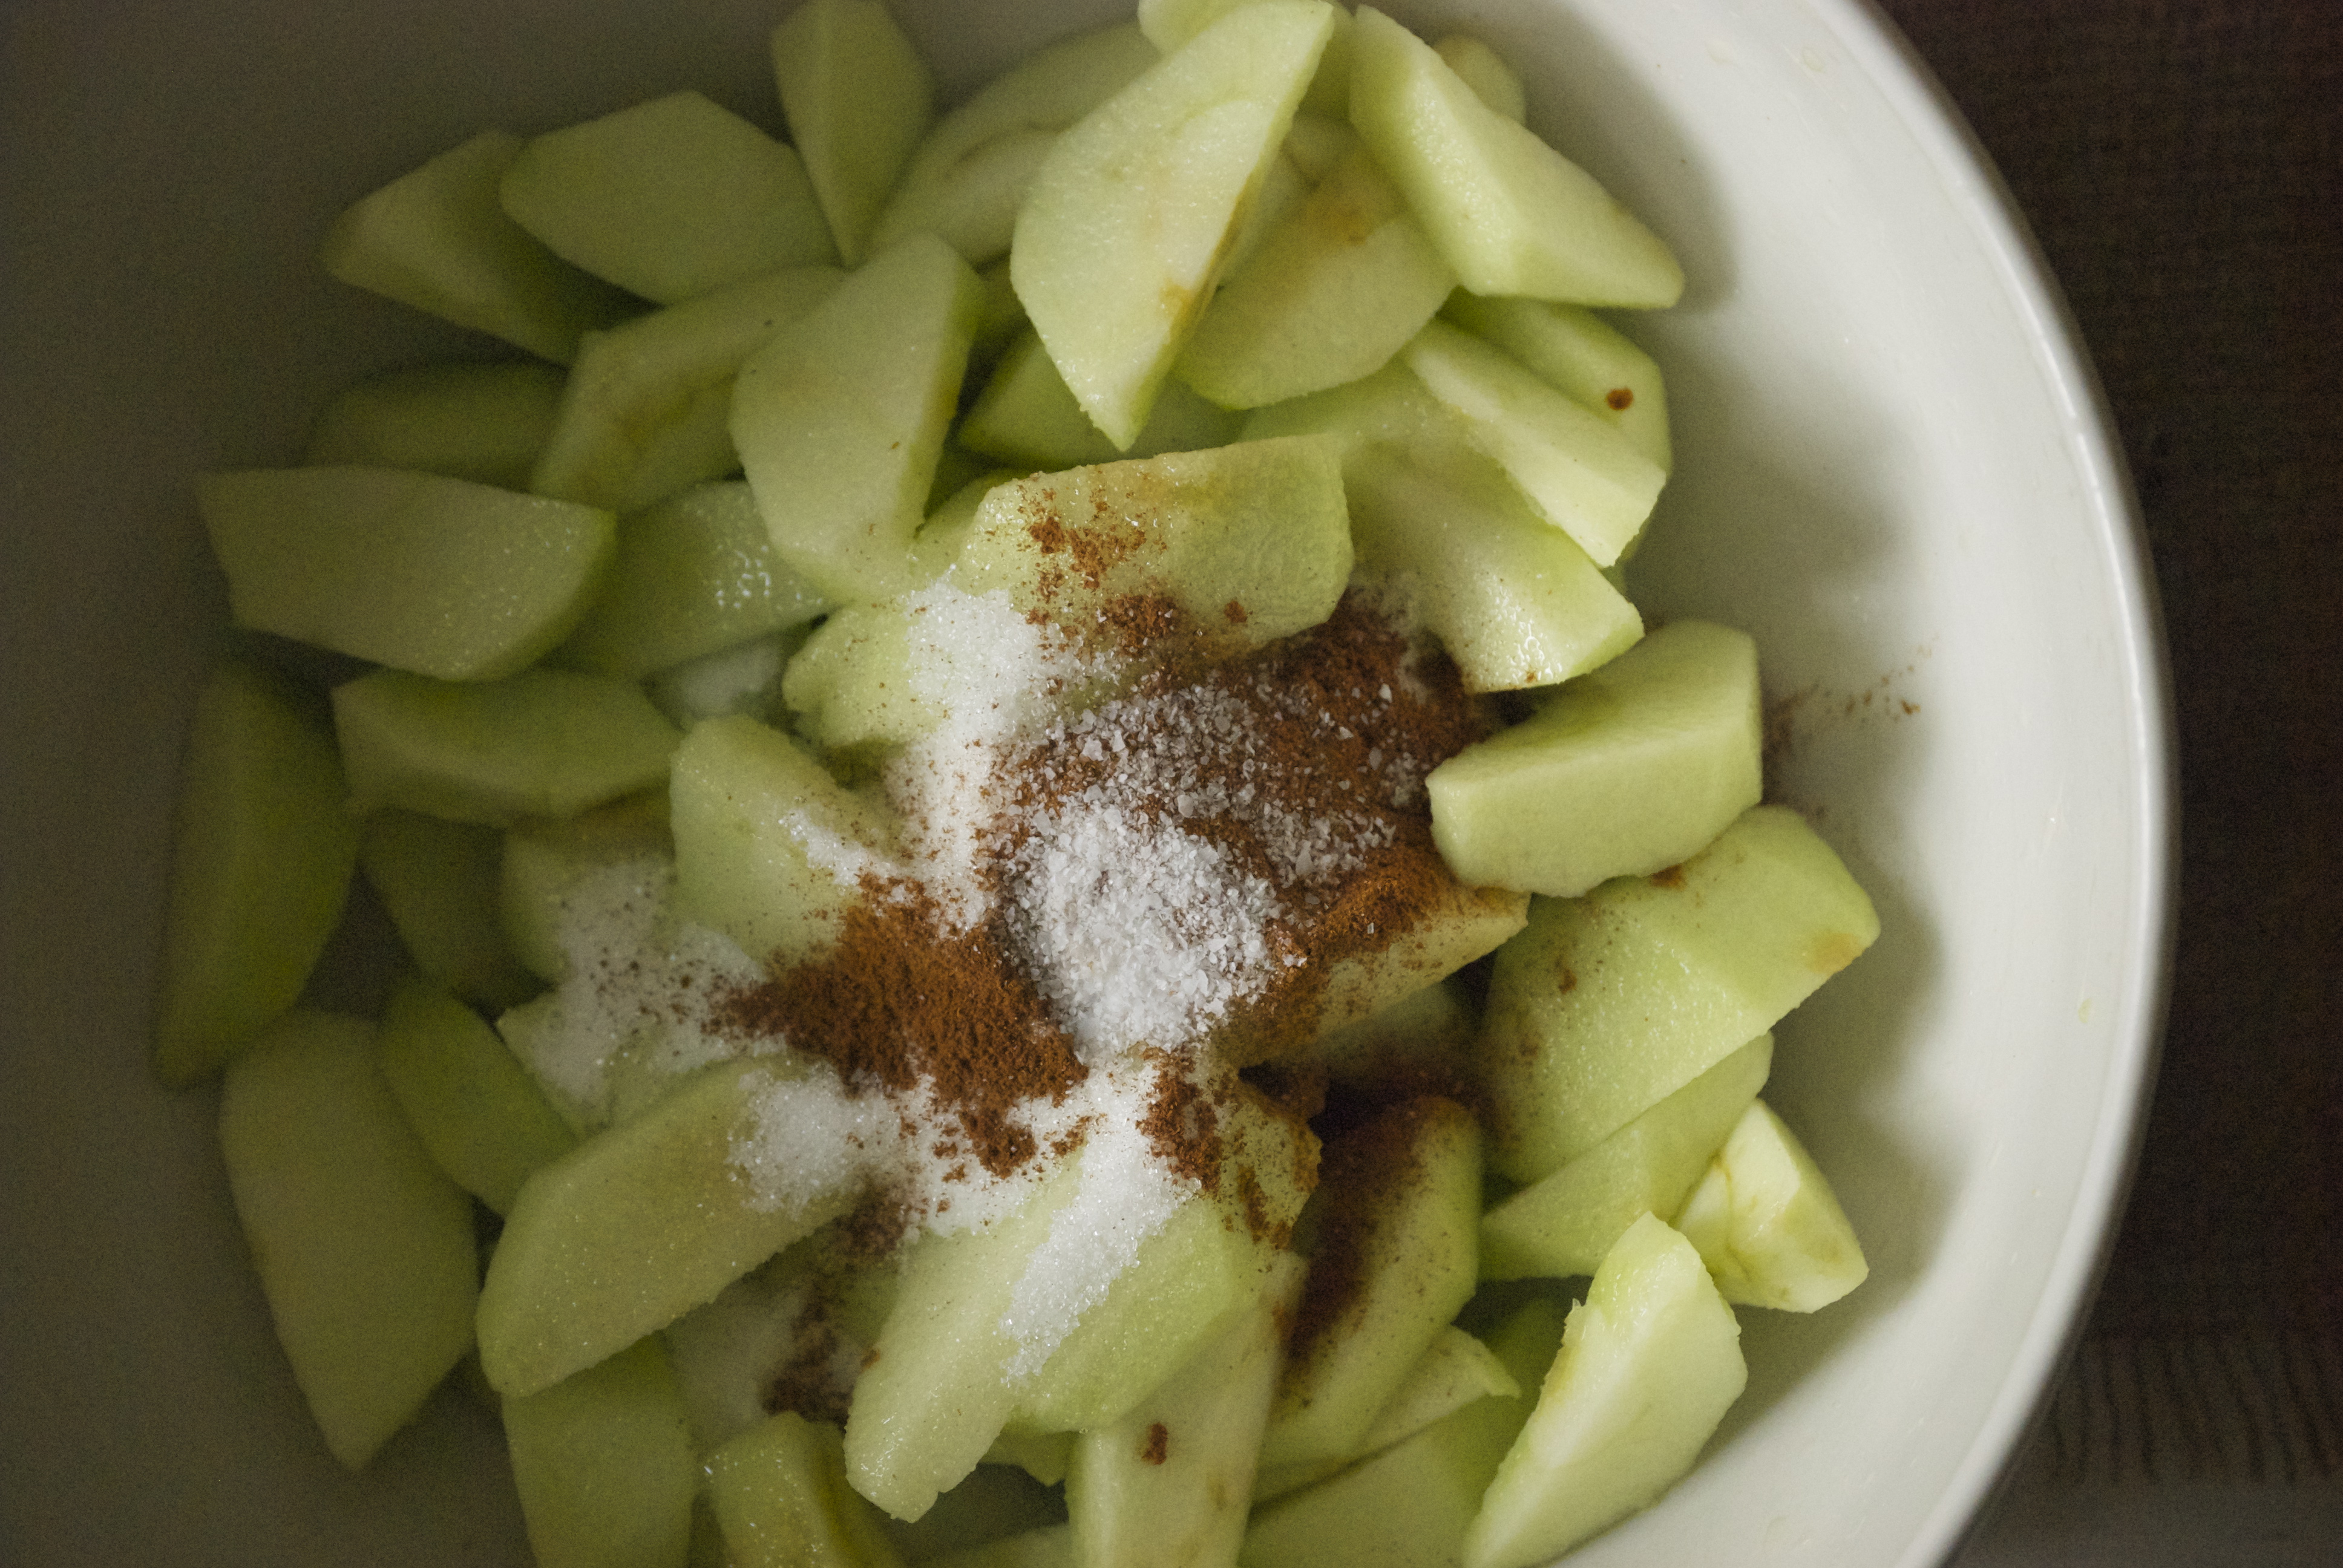
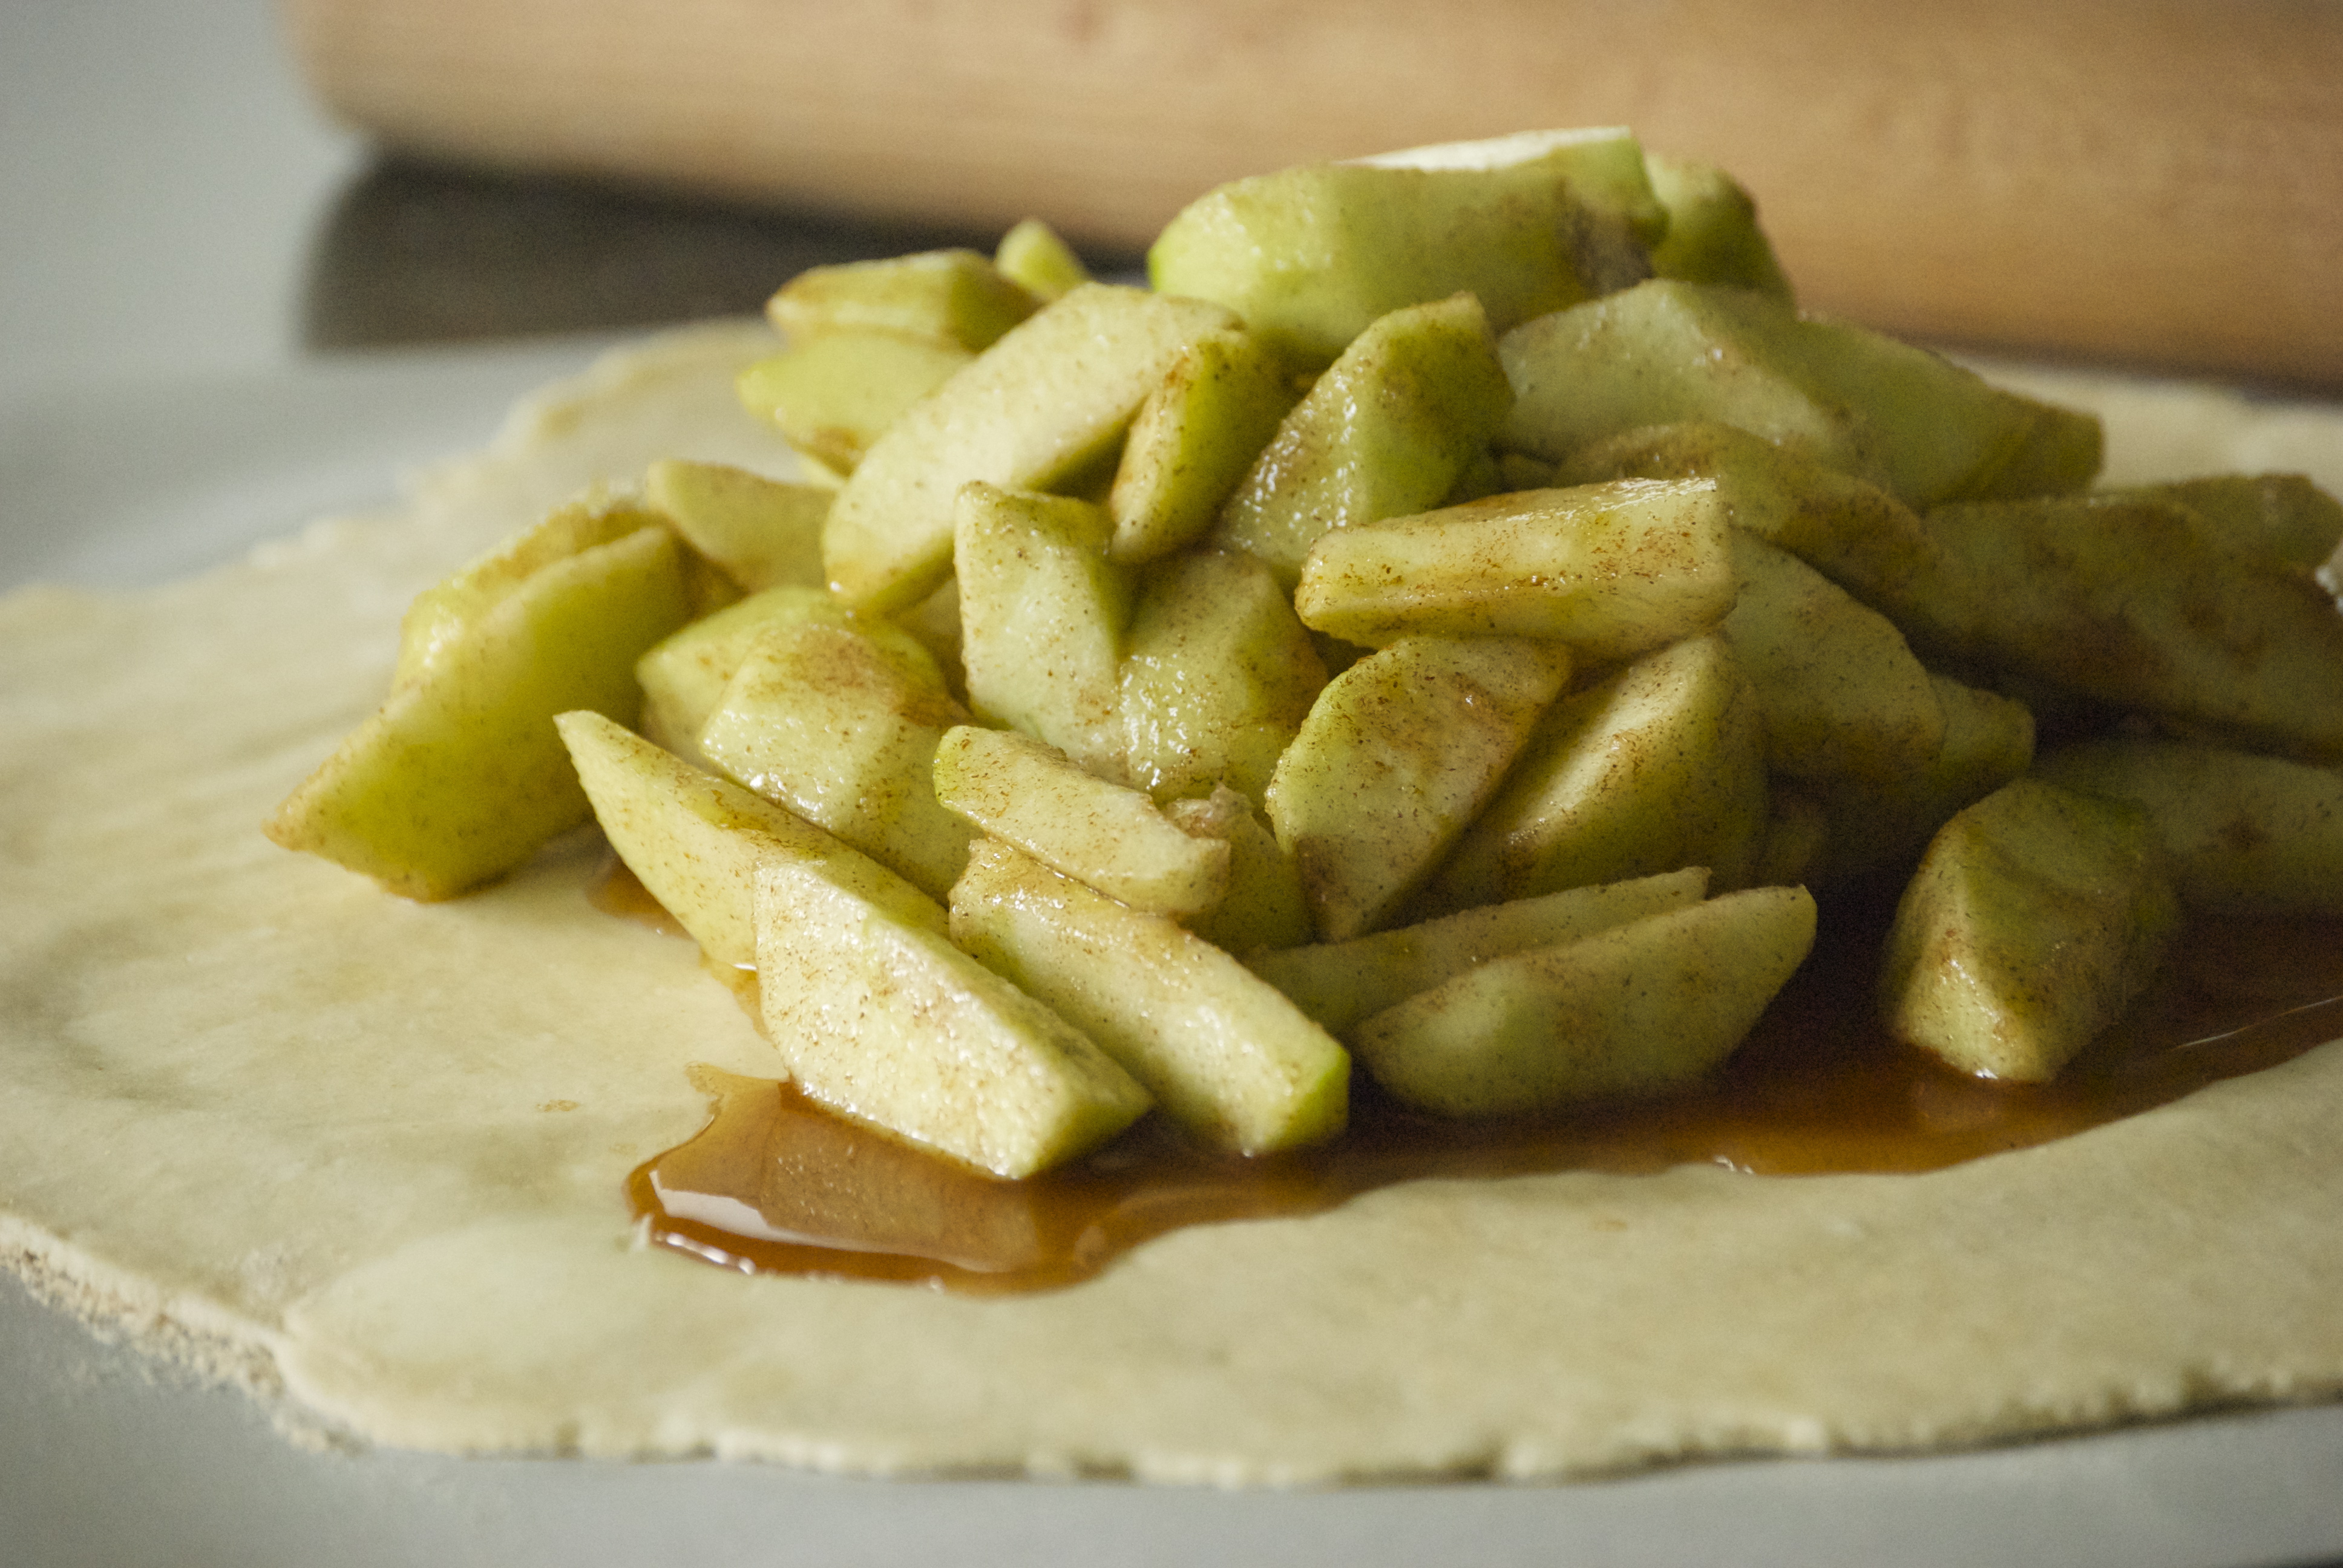
Peel and slice, not too thick (so they bake properly) and not too thin (so they don’t turn to mush) the apples.  Place into a large bowl and toss with the lemon juice.  Then add the sugar, cinnamon, and salt.  Toss again.  Set aside.

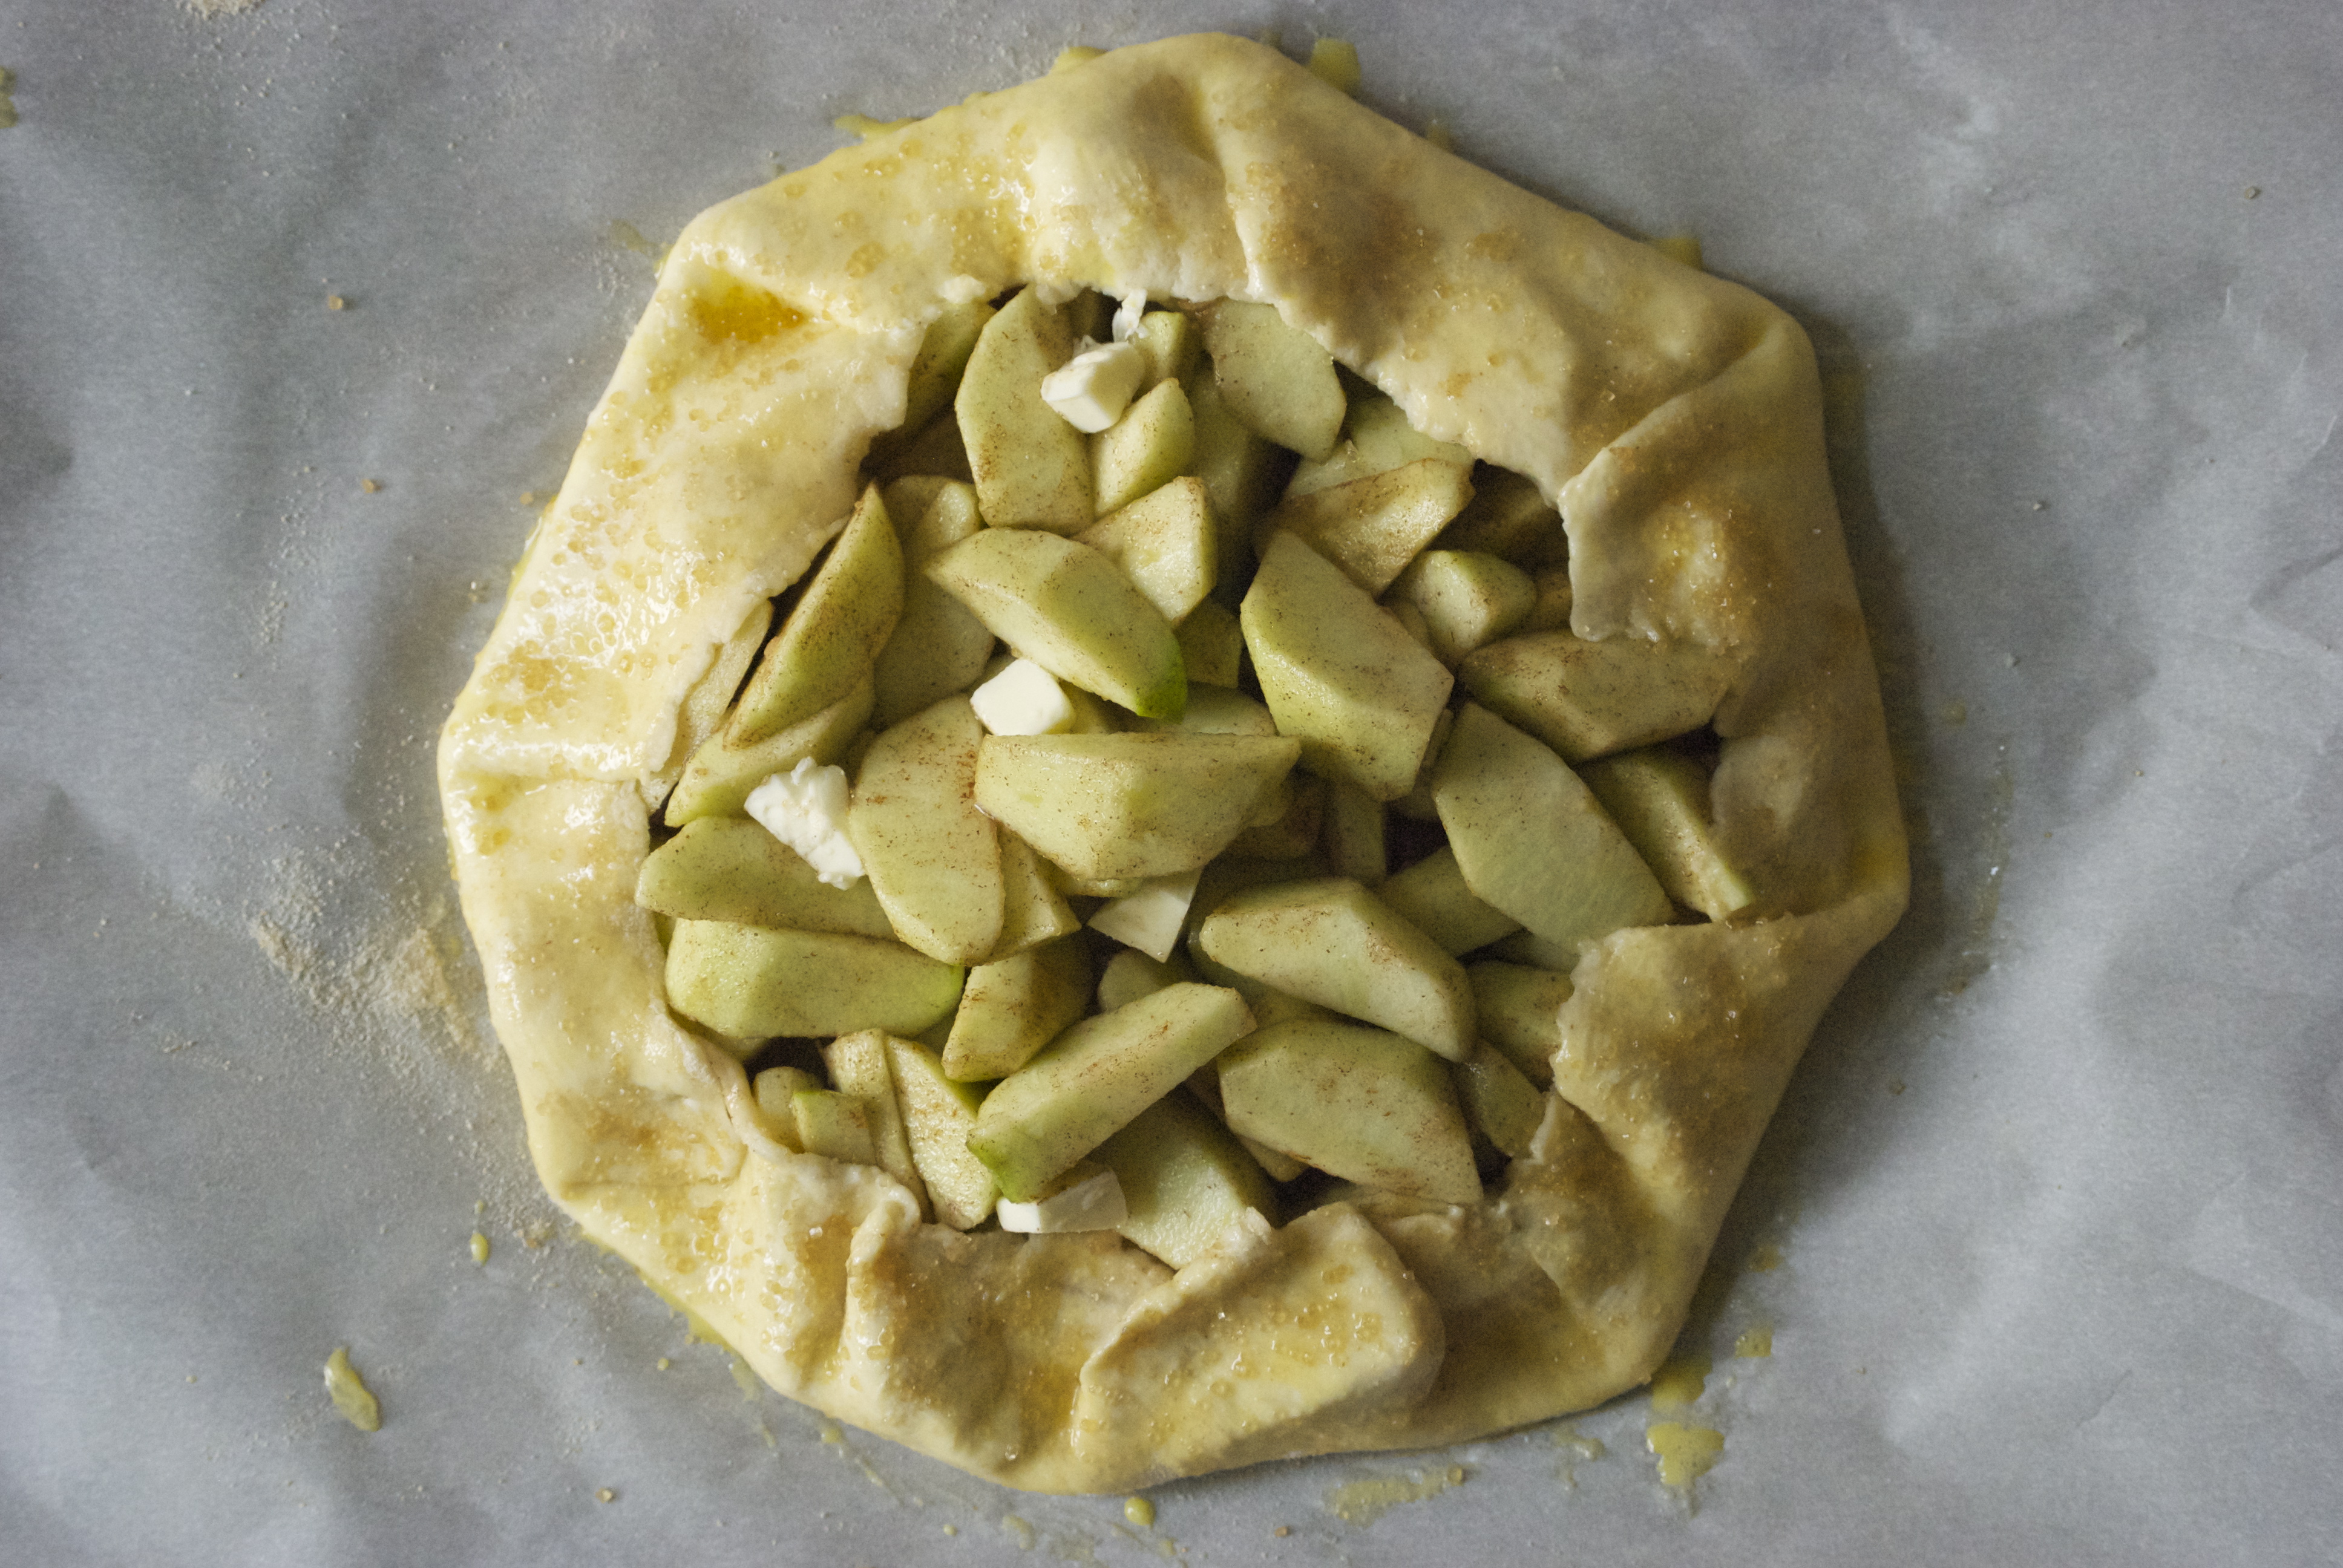
Roll the pie dough out onto a piece of parchment paper.  Lightly dust parchment and rolling pin with flour.  Roll the pie dough into a 12-inch circle.  Place the apples and juices into the center.  Place the butter pieces on top of the apples.   Gently flip the edges over the apples.  Pinch the seams together as much as possible, to prevent leaking while baking.  Using a pastry brush, apply the egg wash to the dough.  Then sprinkle with turbinado sugar.  Gently pat down the apples so they are somewhat level– this will prevent the peaks from burning.

Bake for about 40 minutes, or until the crust is a beautiful golden brown and the apples are tender.  Keep an eye on the apples in the final minutes, so they don’t get too dark.  Remove from oven and let cool.  Mix the glaze to your desired consistency and drizzle over the galette when cool.  Enjoy!

Thanks for stopping by today!

Laurie

Read Full Post »

Whole Grain Blueberry Scones | Relishing It

Alright, let’s have a serious talk about scones.  I absolutely love them, but I’m amazed at how difficult it is to get a good scone at most bakeries.  They’re often too cake-y, too hard, or too dry.  I can’t count the number of times I’ve ordered a scone that looked just right behind the display, but ended up disappointed once I took that first bite.  Of course, there are those few bakeries that get it perfectly right.  I’ve tried to capture their perfect combination of texture and flavor in this recipe.

Whole Grain Blueberry Scones | Relishing It

For me, the ideal scone needs to be both dense and airy.  And no, I don’t think those qualities are mutually exclusive.  A scone should have heft, or substance, but at the same time not resemble a cake.  If I wanted cake, I’d have made one.  And I don’t want a dry scone that crumbles apart and leaves a dusty, parched feel in my mouth.  I guess what I’m trying to say is that a really good scone requires a delicate balance– and I think this receipe gets that balance just right.  Plus, you get the added bonus of whole grains and delicious blueberries that transform into something close to a jam when baked.  Delicious.

Whole Grain Blueberry Scones | Relishing It

Whole Grain Blueberry Scones | Relishing It

Whole Grain Blueberry Scones | Relishing It

Whole Grain Blueberry Scones | Relishing it

These scones take only a few minutes to mix up and about 20 minutes to bake.  The less you fuss with them, the better they tend to be.  In other words, don’t overmix these babies.  Those butter clumps will melt in the oven and result in that beautiful airy quality that you’re looking for.   Frozen butter works just as well here as refrigerated, so don’t stress if you forgot to thaw it.  So whether it’s for a weekday breakfast or a relaxing one on the weekend– these scones are what you’re looking for.  Give them a try.

Whole Grain Blueberry Scones | Relishing it

Whole Grain Blueberry Scones | Relishing It

The Recipe:  Whole Grain Blueberry Scones

Makes 6-8

1 1/2 cups fresh blueberries or frozen (not thawed)

10 ounces (2 cups) white whole wheat flour

3 tablespoons granulated sugar

1 tablespoon baking powder

1 teaspoon kosher salt

3 eggs, divided

1/2 cup whole milk yogurt

6 tablespoons very cold, or frozen butter

zest of one lemon

1 tablespoon turbinado sugar, for sprinkling

For the Glaze:

1 cup powdered sugar

1 1/2 –  2 tablespoons fresh lemon juice

Preheat an oven to 400 °F.  Line a baking sheet with parchment paper.  Set aside.

In a small bowl, mix 2 eggs, the yogurt, and lemon zest together.  Set aside.

In another small bowl, mix 1 egg with 1 teaspoon water for an egg wash.  Set aside.

In a large bowl, whisk the flour, granulated sugar, baking powder, and salt together.  Then cube or grate (with the large holes of a box grater) your cold or frozen butter.  Use a pastry blender to mix it together.  Incorporate it until the clumps are pea sized.  This will take virtually no time if using grated butter.  Just be sure to coat all the butter with the flour.  Then add the blueberries.  Use the pastry blender to incorporate by flipping/tossing the ingredients together.  Don’t smash the blueberries, for goodness sakes.  Then, add the egg/yogurt mixture and stir together with a fork or a rubber spatula.  Remember to not overwork the dough.

Sprinkle a bit of flour down on a clean surface and pour the dough onto it.  Pat it into a 6-inch round.  Use a knife or a bench knife to cut it into 6-8 triangles.  Place them on the parchment paper and use a pastry brush to lightly cover each scone with the egg wash.  Sprinkle with the turbinado sugar and bake for 20 minutes, or until a nice golden brown.  Let cool.

In a small bowl, mix the powdered sugar and lemon juice together until your desired consistency.  Drizzle over the scones.   They keep well for days in an airtight container.  Enjoy!

Thanks for stopping by Relishing It today!

Laurie

Read Full Post »

Caprese Salad with a Basil Vinaigrette | Relishing It

Now I’ve mentioned here before how much I love tomotoes, but just in case you’re new to Relishing It, let me emphasize this.  It’s not just that I love tomotoes– I’m obsessed with them.  Every summer I wait.  And wait.  And wait until the first ripe tomotoes show up at the farmers’ market.  And then I try to fit them into almost every meal.  For the record, I don’t buy tomatoes when they’re not in season for a number of reasons.  First, obviously, is the taste.  Out-of-season tomatoes tend to be stiff and flavorless.  Second, I have serious ethical concerns about the industrial tomato industry, which is where many of our “winter” tomatoes come from.  Take a look at ‘Tomatoland’, a brilliant book by Barry Estabrook if you’re interested in just how terrible the industry is.  Here’s a link to the NY Times review.  Now that THAT is out of the way…

Caprese Salad with a Basil Vinaigrette | Relishing It

I love creating all sorts of dishes with tomatoes.  This heirloom tomato tart is among my favorite summer dishes.  And this tomato Jam is a versitle spread for both sweet and savory things.  If you’ve ever wanted to make your own homemade ketchup–this recipe is a good one to try.  I also can salsa every year to share with family and friends, and can a huge supply of plain tomatoes that help get us through the winter.

Caprese Salad with a Basil Vinaigrette | Relishing It

Basil Vinaigrette | Relishing It

As much as I love to use them as an ingredient, nothing beats eating them in their natural state.  They are so juicy and slightly tender.  A sprinkle of salt brings out their amazing robust flavor.  I love a good caprese salad.  However, I’ve discovered that I’m not a huge fan of eating whole basil leaves.   A few here and there are fine, but I much prefer the basil flavor to come through in a delicious vinaigrette that I can let my tomatoes and fresh mozzarella swim in.  Every bite gets a little basil burst.  It works for me, and I hope it works for you!  Enjoy!

Caprese Salad with a Basil Vinaigrette | Relishing It

The Recipe:  Caprese Salad with a Basil Vinaigrette

Heirloom tomatoes, big and small

Fresh mozzarella

Extra basil leaves, for garnish

Sea salt and freshly ground pepper

For the Basil Vinaigrette:

(makes enough for a small platter)

2 tablespoons white wine vinegar

1 garlic clove, sliced

1/2 cup packed fresh basil

2 large anchovy fillets in olive oil, minced

1/3 cup extra virgin olive oil

sea salt and pepper, to taste

To make the Basil Vinaigrette:  Place all of the ingredients except the olive oil in a mini food processor.  Pulse it a few times to finely chop the basil.  Scrape the sides, as needed.  Slowly add the olive oil and continue running the machine until the vinaigrette is a relatively smooth consistency.  Use immediately, or store covered in the refrigerator for a few days.  Let it come to room temperature before using.

Arrange the heirloom tomatoes and fresh mozzarella on a platter, using as many as you would like (double the vinaigrette recipe, if making a larger portion).   Pour the dressing over and sprinkle with sea salt and pepper.  Eat immediately.  Enjoy!

Thanks for stopping by Relishing It!  Have a lovely weekend.

xo

Laurie

Read Full Post »

Homemade Mayonnaise via Relishing It

Are you ready for another do-it-yourself recipe?  This time it’s homemade mayonnaise.  And yes, there’s a pattern here– I love making my own condiments.  If you missed them, here’s are a few recipes for ketchup, mustard, and tomato jam.  They taste more interesting, and to be honest, better than the same old highly-processed formulas you find at the grocery store.  Making your own mayonnaise is easy, and despite what you may have read, doesn’t take long.  There’s only one catch– you’ll need to use it up within a week since it contains a raw egg yolk.  Trust me, you won’t have a problem finishing it off with all the fresh produce out this time of year.  Sandwiches, BLTs (fresh tomatoes, yay!), potato salad, aioli’s, everything tastes better with homemade mayonnaise.

Homemade Mayonnaise via Relishing It

Homemade Mayonnaise via Relishing It

Homemade Mayonnaise via Relishing It

Homemade Mayonnaise via Relishing It

Homemade Mayonnaise via Relishing It

I like to make my mayonaisse with healthy olive oil, which gives it a wonderful layered flavor.  You can use canola instead if you prefer something more subtle.  Or feel free to do a mix, just make sure you equal the amount of oil listed in the recipe and you’ll be fine.  One other note on this recipe that’ll make it almost foolproof.  A trick I learned from food writer, Melissa Clark.  Add one teaspoon of water to the mixture.  It’s such a simple step, but it can make a huge difference on whether or not the mayonnaise turns out perfectly silky.  That’s it.  It works every time for me.  Now get in there and whip up your own batch of homemade mayonnaise.  And don’t forget you can make it as interesting as you like by adding fresh herbs, spices, or harissa. Or you can simply fold it into a bowl of steamed fingerlings and top with freshly chopped parsley.  It’s one of the quickest and most delicious potato salads around.  Enjoy!

Homemade Mayonnaise via Relishing It

Fingerling Potato Salad with Homemade Mayonnaise via Relishing It

Fingerling Potato Salad with Homemade Mayonnaise via Relishing It

The Recipe: Homemade Mayonnaise

1 teaspoon Dijon mustard

1 pasteurized egg yolk, at room temperature

1 tablespoon lemon juice (from 1/2 large lemon)

1/4 teaspoon fleur de sel

1 teaspoon water

3/4 cup extra virgin olive oil (I prefer California Olive Ranch— both for the fantastic quality and the great price)

In a medium sized bowl, whisk all of the ingredients together, except the olive oil, for a minute or so until frothy.  Then, while continuously whisking, slowly begin adding the olive oil a drop at a time.  As it begins to thicken, you may start adding it in a very thin stream, remembering to whisk the entire time.  The slower you add the olive oil, the better chance you have of it not breaking.   The whole process will take about 15 minutes, or so.  Transfer it to a jar, and store in the refrigerator.  Re-season with salt, if necessary.  Use within one week.  Enjoy!

Thanks for stopping by!

Laurie

Read Full Post »