Feeds:
Posts
Comments

Posts Tagged ‘Breakfast’

Healthy Chocolate Zucchini Muffins | Relishing It

As you know I sent my little girl off to Pre-Kindergarten on Monday– and she is absolutely loving it.  I sometimes like to bake treats for their lunch boxes, or for an after-school sweet when they get home.  I distinctly recall getting off the school bus as a kid and walking into the house to the smell of something wonderful that my mom had made during the day.  She’d have batches of cookies ready, or even racks (yes, racks) of pies on the counter.  And she always timed it out so they were ready when my brother and I walked through the door.  However… I’m a little hesitant to bake such delights using all of that sugar on a daily– or even weekly– basis.  Don’t get me wrong, my kids get their share of sugar, but it’s nice to be able to put something a little healthier, something more substantial, into their little growing bodies.

Healthy Chocolate Zucchini Muffins | Relishing It

Healthy Chocolate Zucchini Muffins | Relishing It

Healthy Chocolate Zucchini Muffins | Relishing It

I was able to create a healthy muffin recipe that was made with whole grains, healthy coconut oil, and no processed sugar (alright, there are chocolate chips, but they’re optional…kind of.  You’ll want them in there).  These muffins are also loaded with vegetables, and your kids will be none the wiser!  What more could one want?  They are perfectly chocolate-y, but not overly sweet.  They stay very moist– quite like a small cake.  I really have no guilt about giving this treat to my kids, or eating it myself for that matter.  I hope you like them as much as we do!

Healthy Chocolate Zucchini Muffins | Relishing It

Healthy Chocolate Zucchini Muffins | Relishing It

The Recipe:  Healthy Chocolate Zucchini Muffins

(makes 12)

1 cup white whole wheat flour (whole wheat pastry flour works, too)

1/2 cup unsweetened cocoa powder

1/2 teaspoon kosher salt

1 teaspoon baking soda

1 teaspoon baking powder

1/2 cup virgin coconut oil (warmed to the liquid state, but not hot)

1/2 cup honey

2 eggs, at room temperature

1 teaspoon vanilla

1 1/2 cups coarsely grated zucchini (about 1 medium)

3/4 cup chocolate chips (Ghirardelli 60 % Cacao Bittersweet are the best, in my opinion)

Note:  The coarsely grated zucchini is definitely visible in these muffins, which is how I prefer them.  If you don’t fancy that, simply grate the zucchini finer.

Preheat the oven to 350°F.  Spray or butter a 12-cup muffin tin.  Set aside.

In a large bowl, sift, then whisk together the flour, salt, baking powder, baking soda, and cocoa.   Toss the chocolate chips into the mixture. Set aside.

In another large bowl, thoroughly mix the honey, coconut oil, vanilla, and eggs together until uniform.  Add the zucchini and mix until evenly coated.

Combine the two bowls together, mix until everything is wet.  Do not over mix. Evenly distribute the batter–1/4 cup per muffin is about right.  Bake for about 18 minutes, or until a tester inserted into a muffin comes out clean.  Remove from oven and let cool for about 3 – 5 minutes before removing from the pan.  Keeps well for days in an airtight container.  Enjoy!

Thanks for stopping by Relishing It!

Laurie

Read Full Post »

Whole Grain Blueberry Scones | Relishing It

Alright, let’s have a serious talk about scones.  I absolutely love them, but I’m amazed at how difficult it is to get a good scone at most bakeries.  They’re often too cake-y, too hard, or too dry.  I can’t count the number of times I’ve ordered a scone that looked just right behind the display, but ended up disappointed once I took that first bite.  Of course, there are those few bakeries that get it perfectly right.  I’ve tried to capture their perfect combination of texture and flavor in this recipe.

Whole Grain Blueberry Scones | Relishing It

For me, the ideal scone needs to be both dense and airy.  And no, I don’t think those qualities are mutually exclusive.  A scone should have heft, or substance, but at the same time not resemble a cake.  If I wanted cake, I’d have made one.  And I don’t want a dry scone that crumbles apart and leaves a dusty, parched feel in my mouth.  I guess what I’m trying to say is that a really good scone requires a delicate balance– and I think this receipe gets that balance just right.  Plus, you get the added bonus of whole grains and delicious blueberries that transform into something close to a jam when baked.  Delicious.

Whole Grain Blueberry Scones | Relishing It

Whole Grain Blueberry Scones | Relishing It

Whole Grain Blueberry Scones | Relishing It

Whole Grain Blueberry Scones | Relishing it

These scones take only a few minutes to mix up and about 20 minutes to bake.  The less you fuss with them, the better they tend to be.  In other words, don’t overmix these babies.  Those butter clumps will melt in the oven and result in that beautiful airy quality that you’re looking for.   Frozen butter works just as well here as refrigerated, so don’t stress if you forgot to thaw it.  So whether it’s for a weekday breakfast or a relaxing one on the weekend– these scones are what you’re looking for.  Give them a try.

Whole Grain Blueberry Scones | Relishing it

Whole Grain Blueberry Scones | Relishing It

The Recipe:  Whole Grain Blueberry Scones

Makes 6-8

1 1/2 cups fresh blueberries or frozen (not thawed)

10 ounces (2 cups) white whole wheat flour

3 tablespoons granulated sugar

1 tablespoon baking powder

1 teaspoon kosher salt

3 eggs, divided

1/2 cup whole milk yogurt

6 tablespoons very cold, or frozen butter

zest of one lemon

1 tablespoon turbinado sugar, for sprinkling

For the Glaze:

1 cup powdered sugar

1 1/2 –  2 tablespoons fresh lemon juice

Preheat an oven to 400 °F.  Line a baking sheet with parchment paper.  Set aside.

In a small bowl, mix 2 eggs, the yogurt, and lemon zest together.  Set aside.

In another small bowl, mix 1 egg with 1 teaspoon water for an egg wash.  Set aside.

In a large bowl, whisk the flour, granulated sugar, baking powder, and salt together.  Then cube or grate (with the large holes of a box grater) your cold or frozen butter.  Use a pastry blender to mix it together.  Incorporate it until the clumps are pea sized.  This will take virtually no time if using grated butter.  Just be sure to coat all the butter with the flour.  Then add the blueberries.  Use the pastry blender to incorporate by flipping/tossing the ingredients together.  Don’t smash the blueberries, for goodness sakes.  Then, add the egg/yogurt mixture and stir together with a fork or a rubber spatula.  Remember to not overwork the dough.

Sprinkle a bit of flour down on a clean surface and pour the dough onto it.  Pat it into a 6-inch round.  Use a knife or a bench knife to cut it into 6-8 triangles.  Place them on the parchment paper and use a pastry brush to lightly cover each scone with the egg wash.  Sprinkle with the turbinado sugar and bake for 20 minutes, or until a nice golden brown.  Let cool.

In a small bowl, mix the powdered sugar and lemon juice together until your desired consistency.  Drizzle over the scones.   They keep well for days in an airtight container.  Enjoy!

Thanks for stopping by Relishing It today!

Laurie

Read Full Post »

Healthy Banana Bread via Relishing it

I figure it’s finally time to share my favorite banana bread with all of you.  Really, what’s a food blog without a banana bread recipe, right?  I bet I make banana bread at least every couple of weeks.  My freezer is packed with bananas that don’t get eaten right away.  I just keep adding to the pile…one here, one there.  This recipe is a bit unusual because it calls for six bananas– so start saving up!

Healthy Banana Bread via Relishing It

Since we eat banana bread so often, I really wanted my version to be healthy.  I tweaked and tweaked and finally arrived at this recipe a while ago. It’s exactly what I wanted it to be.  Since over-ripe bananas are sweeter, you’ll only need a little bit of honey to get the sweetness just right.  No sugar added here.  The larger number of bananas really gives this bread deep flavor, as well as keeps it moist without much fat.  And speaking of fat,  I used a healthier virgin coconut oil in it.  The flavor combines perfectly with the bananas and chocolate.  I used a mixture of oat flour and whole wheat pastry flour for the base.  Combined, they give the bread a perfect texture– just slightly lighter than ordinary banana bread, but with enough heft to be satisfying.

Cacao Nibs for Healthy Banana Bread via Relishing It

Healthy Banana Bread via Relishing It

When it comes to the chocolate, you have a decision to make.  I prefer adding cacao nibs, but my kids/husband like chocolate chunks.  If you aren’t familiar with cacao nibs, they’re crushed cacao beans.  They are unsweetened and have a bit of a crunch that adds a nice texture.  They’re also loaded with antioxidants.  Alone they are somewhat bitter, but adding them to sweet things makes them delicious. Try throwing them into your next smoothie!  And lastly, I added chia seeds for more health benefits, because why not?

Healthy Banana Bread via Relishing It

A few reminders:  First, make sure to use really over-ripe bananas.  You’ll want that extra sweetness since you won’t be adding sugar.  I’m talking the blacker, the better.  Also, make sure you bake your banana bread long enough.  There is nothing worse than under-baked banana bread.  A longer bake time is better.  There are so many bananas in there that the chances of it being dry are very slim.  Hope you enjoy this as much as we do!

Healthy Banana Bread via Relishing It

The Recipe:  Healthy Banana Bread

(makes one loaf)

1/3 cup virgin coconut oil

1/4 cup honey

2 eggs, at room temperature

1 teaspoon vanilla

6 smashed over-ripe bananas (about 1 1/2 cup — a tablespoon or two extra is fine)

1/2 cup (2 1/4 ounces) oat flour

1  1/4 cup (7 ounces) whole wheat pastry flour

2 teaspoons baking powder

1 teaspoon kosher salt

1/2 cup cacao nibs  OR  1 cup chocolate chunks

1 tablespoon chia seeds (optional)

Preheat oven to 350°F.  Lightly grease a 9 x 5 loaf pan.  Set aside.

In a medium bowl, combine the oat flour, whole wheat pastry flour, chia seeds, salt, and baking powder with a whisk.  Set aside.

In a bowl of a stand mixer (or regular bowl if mixing by hand), add the honey and coconut oil.  Combine for a minute on medium speed until somewhat creamy.  Add the eggs and vanilla.  Mix for another minute, or so.  Then add the fork-smashed bananas.  Mix until well combined and somewhat smooth.  Next, sift the flour mixture over the wet ingredients.  Combine on low just until all of the ingredients are moistened.  Do not over-mix.  Add the cocoa nibs or chocolate chunks and fold in with a rubber spatula.  Scoop mixture into the prepared pan and smooth the top.  Bake for 45-48 minutes, or until a tester comes out clean from the middle of the loaf.  The center should feel somewhat firm when you feel it.  Let cool in pan for about 20 minutes, then run a knife around the edge and gently remove from pan.  Continue to let cool on a cooling rack.  For best results, after cutting into it, place the cut side down on a cutting board and leave the rest of the bread uncovered for the first day.  The texture will remain true this way.  Enjoy!

Thanks for stopping by Relishing it!  Hope you all are having a lovely Summer, so far!

Laurie

Read Full Post »

Whole Grain Lemon Ricotta Pancakes via Relishing It

Mother’s Day is less than a week away, so I thought I’d give you a breakfast recipe to help you treat that special lady right this Sunday.  These pancakes are the perfect “something special” to show your mom, grandma, or wife just how much they mean to you.  And if you make sure to clean up once everything is made, she’ll appreciate it all the more.

Whole Grain Lemon Ricotta Pancakes via Relishing It

Lemon ricotta pancakes are one of our favorite Spring breakfast dishes.  The flavors here combine to give a fresh twist on the old pancake routine.  As usual, I’ve tossed in a few tricks from my “make things more healthy” repetoire.  Using white whole wheat flour not only makes these more healthy, but it adds a bit more substance than you’ll find in a typical lemon ricotta pancake, which tends to be feather-light.  I’ve also used coconut oil throughout the recipe– both in the pancakes, as well as for the frying oil.  The coconut flavor pairs beautifully with the lemon here.  Just a quick side note, I love coconut oil.  Absolutely love it.  I try to use it as a substitute whenever the dish allows.   I used just a touch of honey as the sweetener in these pancakes,  since I don’t like them overly sweet.  Add a bit more, if you like.  Or top them with a lovely fruit purée.  The ricotta gives them a wonderful, creamy texture, and the lemon– well it’s simply fabulous.

Whole Grain Lemon Ricotta Pancakes via Relishing it

I’m lucky enough to have two beautiful women in my life that I get to honor on Mother’s Day– my Mom and my Mother-in-Law. Both are strong, compassionate, women who have helped guide and nurture me and my family.  They’re incredible grandmothers to my children, and that means the world to me.  (I love you both!)  I’ll be traveling to North Dakota later this week with my kiddos to celebrate with my Mom– so I’ll be back here at Relishing It next week. I hope all of you Moms have a great, sun-filled day surrounded by your loved ones!

Whole Grain Lemon Ricotta Pancakes via Relishing It

The Recipe:  Whole Grain Lemon Ricotta Pancakes

2 cups white whole wheat flour

2 teaspoons baking powder

1/2 teaspoon kosher salt

Juice and zest of 3 smallish lemons

2 tablespoons virgin coconut oil, melted

3/4 cup ricotta cheese

1 teaspoon vanilla

2 tablespoons honey, or more to taste

1 1/4 – 1 1/2 cup milk

2 eggs

virgin coconut oil, for frying

In a large bowl, whisk together the flour, baking powder, and salt.  In another bowl, combine the coconut oil, lemon juice/zest, ricotta cheese, honey, eggs, vanilla, and 1 1/4 cup milk.  Pour the liquid ingredients into the dry ingredient and combine them using a wooden spoon.  Add a bit more milk, if necessary.  Be careful not to over mix.  Let the batter rest for a few minutes.

Heat some coconut oil in a large skillet.  When it is hot enough, ladle batter into the pan– make the pancakes as big, or as small as you like.  When they begin to get speckled with “holes”, it’s time to flip them over.  Repeat the procedure, adding more coconut oil to the pan each time.  Serve with your favorite pancake toppings.  Enjoy!

Thanks for stopping by Relishing It!  xo

Laurie

Read Full Post »

Blueberry Coffe Cake via Relishing It

Hello, friends!  I hope you all had a wonderful weekend.  Since we had no prior obligations, we were able do whatever we wanted on Saturday and Sunday.  First up was a visit to one of our favorite summer spots,  Minnehaha Falls.  This beautiful little park in Minneapolis is full of trails, waterfalls, bike paths, and best of all, Sea Salt Eatery.  I really don’t complain much about living in Minnesota, but if I have one gripe (no, not the weather), it’s that we’re so far from the ocean and all of that amazing seafood.  Sea Salt eases the pain a bit.  They offer amazing, fresh seafood.  Stopping in for the ridiculously tasty fish tacos and a catfish po’boy was a great start to the weekend.  It’s the little things like this that make me happy.

Blueberries

Aside from fish tacos, we also ate plenty of this amazing blueberry coffee cake.  I baked this up the night before so we could enjoy the relaxing morning at home while the kids played in the living room.  Coffee cake is one of my favorite things– this one is gorgeous, and so is this one.  Today’s blueberry version is one of my son’s very favorite things that I bake.  He loves it.  The beautiful thing about this cake is that it is just as brilliant with fresh blueberries as it is with frozen.  Which makes it perfect to eat throughout the winter.  When organic frozen blueberries are on sale, I generally stock up for smoothies and this cake.  And blueberry season is just around the corner (thankfully) so, fresh ones aren’t far off!

Blueberry Coffee Cake via Relishing It

As usual, I’ve swapped out the all-purpose flour in this recipe for a whole grain version.  It works well here.  It gives the cake a bit more substance. The lemon zest brings a bit more life to the blueberries and the addition of walnuts to the crumb topping supplies a nice bit of texture to each bite.  I will warn you to keep a close eye on this cake near the end of the baking time.  Be careful not to over-bake it, as it will be a bit more dry than it should be.  When a toothpick inserted into the center comes out crumb-free– it’s done.  It keeps well for days covered with aluminum foil and sitting at room temperature.  Hope this coffee cake becomes a family favorite in your house, too!

Blueberry Coffee Cake via Relishing It

The Recipe:  Blueberry Coffee Cake

(Makes an 8×8 cake)

For the Crumbs:

1/3 cup (1 1/2 ounces) white whole wheat flour

1/4 cup sugar

1/3 cup packed brown sugar

pinch of kosher salt

1/2 cup toasted walnut halves, chopped

5 tablespoons room temperature butter

For the Cake:

2 cups and 2 teaspoons white whole wheat flour (10 ounces)

2 teaspoons baking powder

1/2 teaspoon baking soda

1/2 teaspoon kosher salt

1/4 teaspoon ground cinnamon

pinch of freshly grated nutmeg

2/3 cup sugar

zest of 2 small organic lemons, or 1 large

6 tablespoons room temperature butter

2 large eggs, at room temperature  (*see note)

1 teaspoon vanilla

1/2 cup buttermilk  (*see note)

2 cups fresh or frozen organic blueberries (do not thaw)

Note:  It’s important to use room temperature eggs in baked goods.  Eggs at room temperature add more volume to your finished product.  Place your eggs in a bowl of warm water for about 10-15 minutes, they will then be room temperature and ready to use.  Don’t have any buttermilk?  No worries.  Don’t just add regular milk as a substitute, as the baking soda in the cake will only be activated with an acid, therefore leaving you with a flat cake.  To make a 1/2 cup of buttermilk add 1 1/2 teaspoons white vinegar to 1/2 cup of milk.  Stir and let it sit for about 10 minutes.  

Preheat the oven to 350°F.  Prepare a square 8×8 pan with butter.

To make the crumbs:  In a small bowl, combine the flour, sugar, brown sugar, and salt with a whisk.  Using a fork, mash in the butter.  When it is mostly uniform, gently mix in the walnuts.  Put into the refrigerator until ready to use.

Prepare the blueberries by putting them into a medium bowl and gently tossing them with 2 teaspoons of the flour.  Set aside.

To make the cake: In a medium bowl, whisk together the remaining 2 cups of flour, baking powder, baking soda, kosher salt, cinnamon, and nutmeg.  Set aside.  In a bowl of a stand mixer, combine the sugar and lemon zest by rubbing it together with your fingers.  When it is fragrant and combined, add the butter and beat together with the sugar using the paddle attachment for about 3 minutes on medium speed,  or until it is light and pale in color.  Add the eggs one at a time, beating for about 1 minutes after each one.  Then add the vanilla extract.  The batter may look curdled at this point and that’s ok — it will smooth out.  Reduce the mixer speed to low and add the flour mixture and buttermilk alternately in two additions.  Starting and ending with the flour.  Be careful not to over mix.  Gently fold in the blueberries using a rubber spatula.

Pour the batter into the prepared pan and smooth out with a rubber spatula.  Add the crumb mixture to the top.  Gently pat the mixture into the batter.  Bake for 55-65 minutes, or until a toothpick inserted into the center comes out clean.  Let cool.  Keeps well for days at room temperature covered with aluminum foil.  Enjoy!

Source:  Adapted from Dorie Greenspan’s Baking: From My Home To Yours

Thanks for stopping by Relishing It!

Laurie

Read Full Post »

Apple Challah via Relishing It

Despite the frigid weather, we survived this week’s arctic blast here in Minnesota.  And while I managed to get out-and-about a couple of times, much of the long weekend was spent tidying up the house and pre-Spring cleaning.  By January our home is so cluttered with Christmas toys, winter gear, and heaping piles of kindergarten projects that it’s almost unbearable.  So we bought more toy shelves (I really need to have a garage sale this Spring), organized the important school work, and re-arranged a few rooms.  And somehow, once everything was in order, it felt like we’d uncovered two new rooms.  Now I can finally think clearly again!

Apples for Apple Challah via Relishing It

Diced apples for Apple Challah via Relishing It

Aside from the re-organization and playing countless games of Munchkin and Memory with the little ones, I also managed to squeeze in a little baking.  It was a nice way to help warm the house when the windchill dropped to -30°F.  This apple challah turned out perfectly.  One of my favorite things to play around with in the kitchen is bread made with yeast.  I’m fascinated by how yeast grows and changes, creating such interesting flavor.  Baking bread takes patience and planning, but not a lot of work.  And the aroma of freshly baked bread, alone, is worth the small effort.

Challah dough stuffed with apples via Relishing It

Challah stuffed with apples via Relishing It

Apple Challah ready to bake via Relishing It

If you have reservations about working with yeast, just relax and start with something simple.  This apple challah is a nice entry point.  You basically shove everything into a pan and bake it up.  But the results are a magical, tender, rustic-looking bread.  This one isn’t overly sweet– it’s amazing flavors come from the apples, honey, and cinnamon.  One of my favorite characteristics of this challah is the nice ‘crunch’ provided by sprinkling turbinado sugar on top.  The crust is best on the day it’s baked, since it tends to soften over time in a sealed container.  Even so, it keeps well for several days, and the inside stays soft and moist.  Enjoy it drizzled with a bit of honey and a nice cup of hot coffee.

Apple Challah via Relishing It

Apple Challah via Relishing It

The Recipe:  Apple Challah

For the Dough:

4 cups (20 ounces) unbleached all-purpose flour  (see note)

1 1/2 teaspoons kosher salt

6 tablespoons canola oil

2 large eggs, at room temperature

1/4 cup honey

1 package instant yeast  (2 1/4 teaspoons)

1/2 cup luke-warm water (between 100-110°F)

For the Filling:

3 smallish apples, diced into 3/4-inch chunks with the skin on

1 teaspoon cinnamon

3 tablespoons granulated sugar

For the Glaze:

1 large egg beaten with 1 teaspoon water

Turbinado sugar for sprinkling

Note: The recipe from King Arthur called for 4 cups of flour.  I generally assume that 1 cup of all-purpose flour weighs 5 ounces.  So, I added 20 ounces of flour to this recipe.  King Arthur called for 4 cups of flour, but stated 17 ounces as their weight measurement.  I did feel the dough was a bit stiffer than I was accustomed to working with, but the outcome was absolutely perfect.  It was a soft and tender bread that was sublime.  I think it’s safe to say that anything between 17-20 ounces would work here, though I haven’t tried the 17 ounce version first-hand.  Can you tell that I love my scale? 

In a bowl of a stand mixer (the recipe can also be done by hand, of course), mix the yeast, honey, and water together until it is dissolved.  Let stand for 5-10 minutes, or until it begins to get a bit foamy.

Add the remaining ingredients for the dough to the yeast mixture and slowly mix using the paddle attachment until the dough just comes together.  Remove the paddle attachment and add the dough hook.  Knead the dough for a few minutes until it is soft and smooth.  Place the dough in a slightly oiled large bowl and cover it with a dishtowel or lightly greased plastic wrap.  Allow to rise for about 2 hours, or until it has doubled in size.

Lightly grease a 9 or 10-inch springform pan or a 9-inch cake pan that is at least 2-inches deep.  Mix the apple filling ingredients together in a bowl.

Gently deflate the dough and transfer it to a lightly floured work surface.  Roll the dough out into a 8 x 10-inch rectangle.  Place the apples on the dough in two 10-inch rows near the center of the dough.  Fold each side over the row of apples closest to it.  Pushing down as you go to seal it.  Using a sharp knife, cut the dough down the center, and then across 8 times.  You should end up with 16 pieces of dough.  Hopefully the photographs will help with a visual.  Place the pieces of dough into the prepared pan so they create a single layer.  Tuck any apples that have fallen out into the mixture.

Cover the challah with a lightly greased piece of plastic wrap.  Allow to rise for about 1 1/2 hours, or until it’s about 2-inches high.

Preheat the oven to 325°F toward the end of rising time.  Brush the top of the dough with the egg wash and sprinkle heavily with turbinado sugar (or any coarse sugar).  Bake for about 55 minutes, or until the top is a beautiful golden brown.  Some of the higher pieces may get dark brown, and that’s ok.  The dough needs to bake all the way through in the middle, so be patient.  Remove challah from oven and after 5 minutes loosen the edges and transfer it to a rack.  Serve hot or cold, preferably with a drizzle of honey.  Keeps well for days in a covered container.  Enjoy!

Source:  Adapted from King Arthur Flour

Thanks so much for stopping by!  xo

Laurie

Read Full Post »

Rustic Rhubarb Tartlets via Relishing It

Rhubarb in January?!  No, I haven’t lost my mind, and I generally try to prepare and write about foods that are in season.  But every now and then I get tired of following the unwritten ‘rules’ of food blogging.  And since I had a few bags of rhubarb in my freezer just crying out to be made into more of these lovely tartlets, I figured why not?  So rhubarb in January it is.  Rhubarb freezes remarkably well, so there is no reason you shouldn’t be enjoying it’s unique, tart, splendor any time of the year.

Rhubarb

Rustic Rhubarb Tartlets via Relishing It

I’ve always loved rhubarb.  Especially the gorgeous, vibrant, red variety.  These tartlets are one of my favorite ways to enjoy this sometimes overlooked fruit.  Or vegetable.  Actually, it turns out rhubarb is a vegetable, but– and I’m not making this up– a court in New York ruled in 1947 that rhubarb is classified as a fruit in the U.S.  Anyway… the whole grains in the crust work impeccably well here.  One of the best ingredients in this recipe is the addition of the cornmeal.  It lends a nice toothsome bite that perfectly contrasts the soft rhubarb compote.

Rustic Rhubarb Tartlets via Relishing It

Rustic Rhubarb Tartlets via Relishing It

Aside from the flavors, I love the size of these tartlets.  They’re perfect little individual servings.  I’m not sure why, but I’m a sucker for most any miniaturized dessert.  There’s something so appealing about them.  I also love the rustic, ‘free-form’ look of the crust.  They have that homemade quality that just feels…genuine.  Like it was made just for you.  And since they’re ‘free-form’, there’s no wrong way to shape them.  Enjoy!

Rustic Rhubarb Tartlets via Relishing It

The Recipe:  Rustic Rhubarb Tartlets

(Makes 10 individual Tartlets)

The Rhubarb Compote:

1 pound fresh or frozen rhubarb, cut into pieces

1/2 cup brown sugar

1 teaspoon orange zest

The Pastry Dough:

1 cup unbleached all-purpose flour

1 cup whole wheat flour

1/2 cup fine cornmeal

1/4 cup granulated sugar

1 teaspoon kosher salt

1 stick cold butter, cut into small cubes

1/4 cup plus 2 tablespoons heavy cream

2 egg yolks

1 egg plus 1 teaspoon water, mixed together for an egg wash

To make the rhubarb compote:  Place the rhubarb plus brown sugar in a heavy-bottomed saucepan over medium heat.  Stir frequently.  Cook for 10-15 minutes, or until the rhubarb has softened and broken down a bit.  Remove from heat and stir in the orange zest.  Set aside.

Preheat your oven to 375°F.  Line a large baking sheet with parchment paper.

To make the pastry dough:  In a small bowl, mix the egg yolks and cream together.  Set aside. Sift the all-purpose flour, whole wheat flour, cornmeal, sugar, and kosher salt together and place into the bowl of a food processor (this recipe can easily be done by hand, too).  Next, add the butter and turn the mixer to low.  Increase to medium once the butter begins to get incorporated.  When the flour is coarse, like cornmeal, add the egg yolks/cream mixture and mix until just combined.  The dough will appear crumbly, but will hold it’s shape when squeezed together.

This dough is best when shaped right away, as it is really easy to work with.  If you need to refrigerate it for some reason, make sure to let it warm up before trying to roll it out.

Divide the dough into 10 equal pieces.   Lightly flour your work surface and roll each dough ball out to about a 5-inch circle.  Use a bench scraper, if your dough begins to stick.  Divide the rhubarb compote evenly among the circles — about 1/4 cup each.  Turn the edges of the dough up and around the compote and pinch the sides together.  The dough may split or break, but just keep pinching it together to create a seal.  Place the tartlets onto your prepared baking sheet.  Use a pastry brush and brush the dough with the egg wash.  Bake for about 35 minutes, or until the edges are a beautiful deep golden brown.  Remove from oven and cool.  These will keep well for days in a sealed container.  Enjoy with freshly whipped cream and a sprinkle of turbinado sugar!

Source:  Adapted from Good to the Grain by Kim Boyce

So glad you stopped by today ! xo

Laurie

Read Full Post »

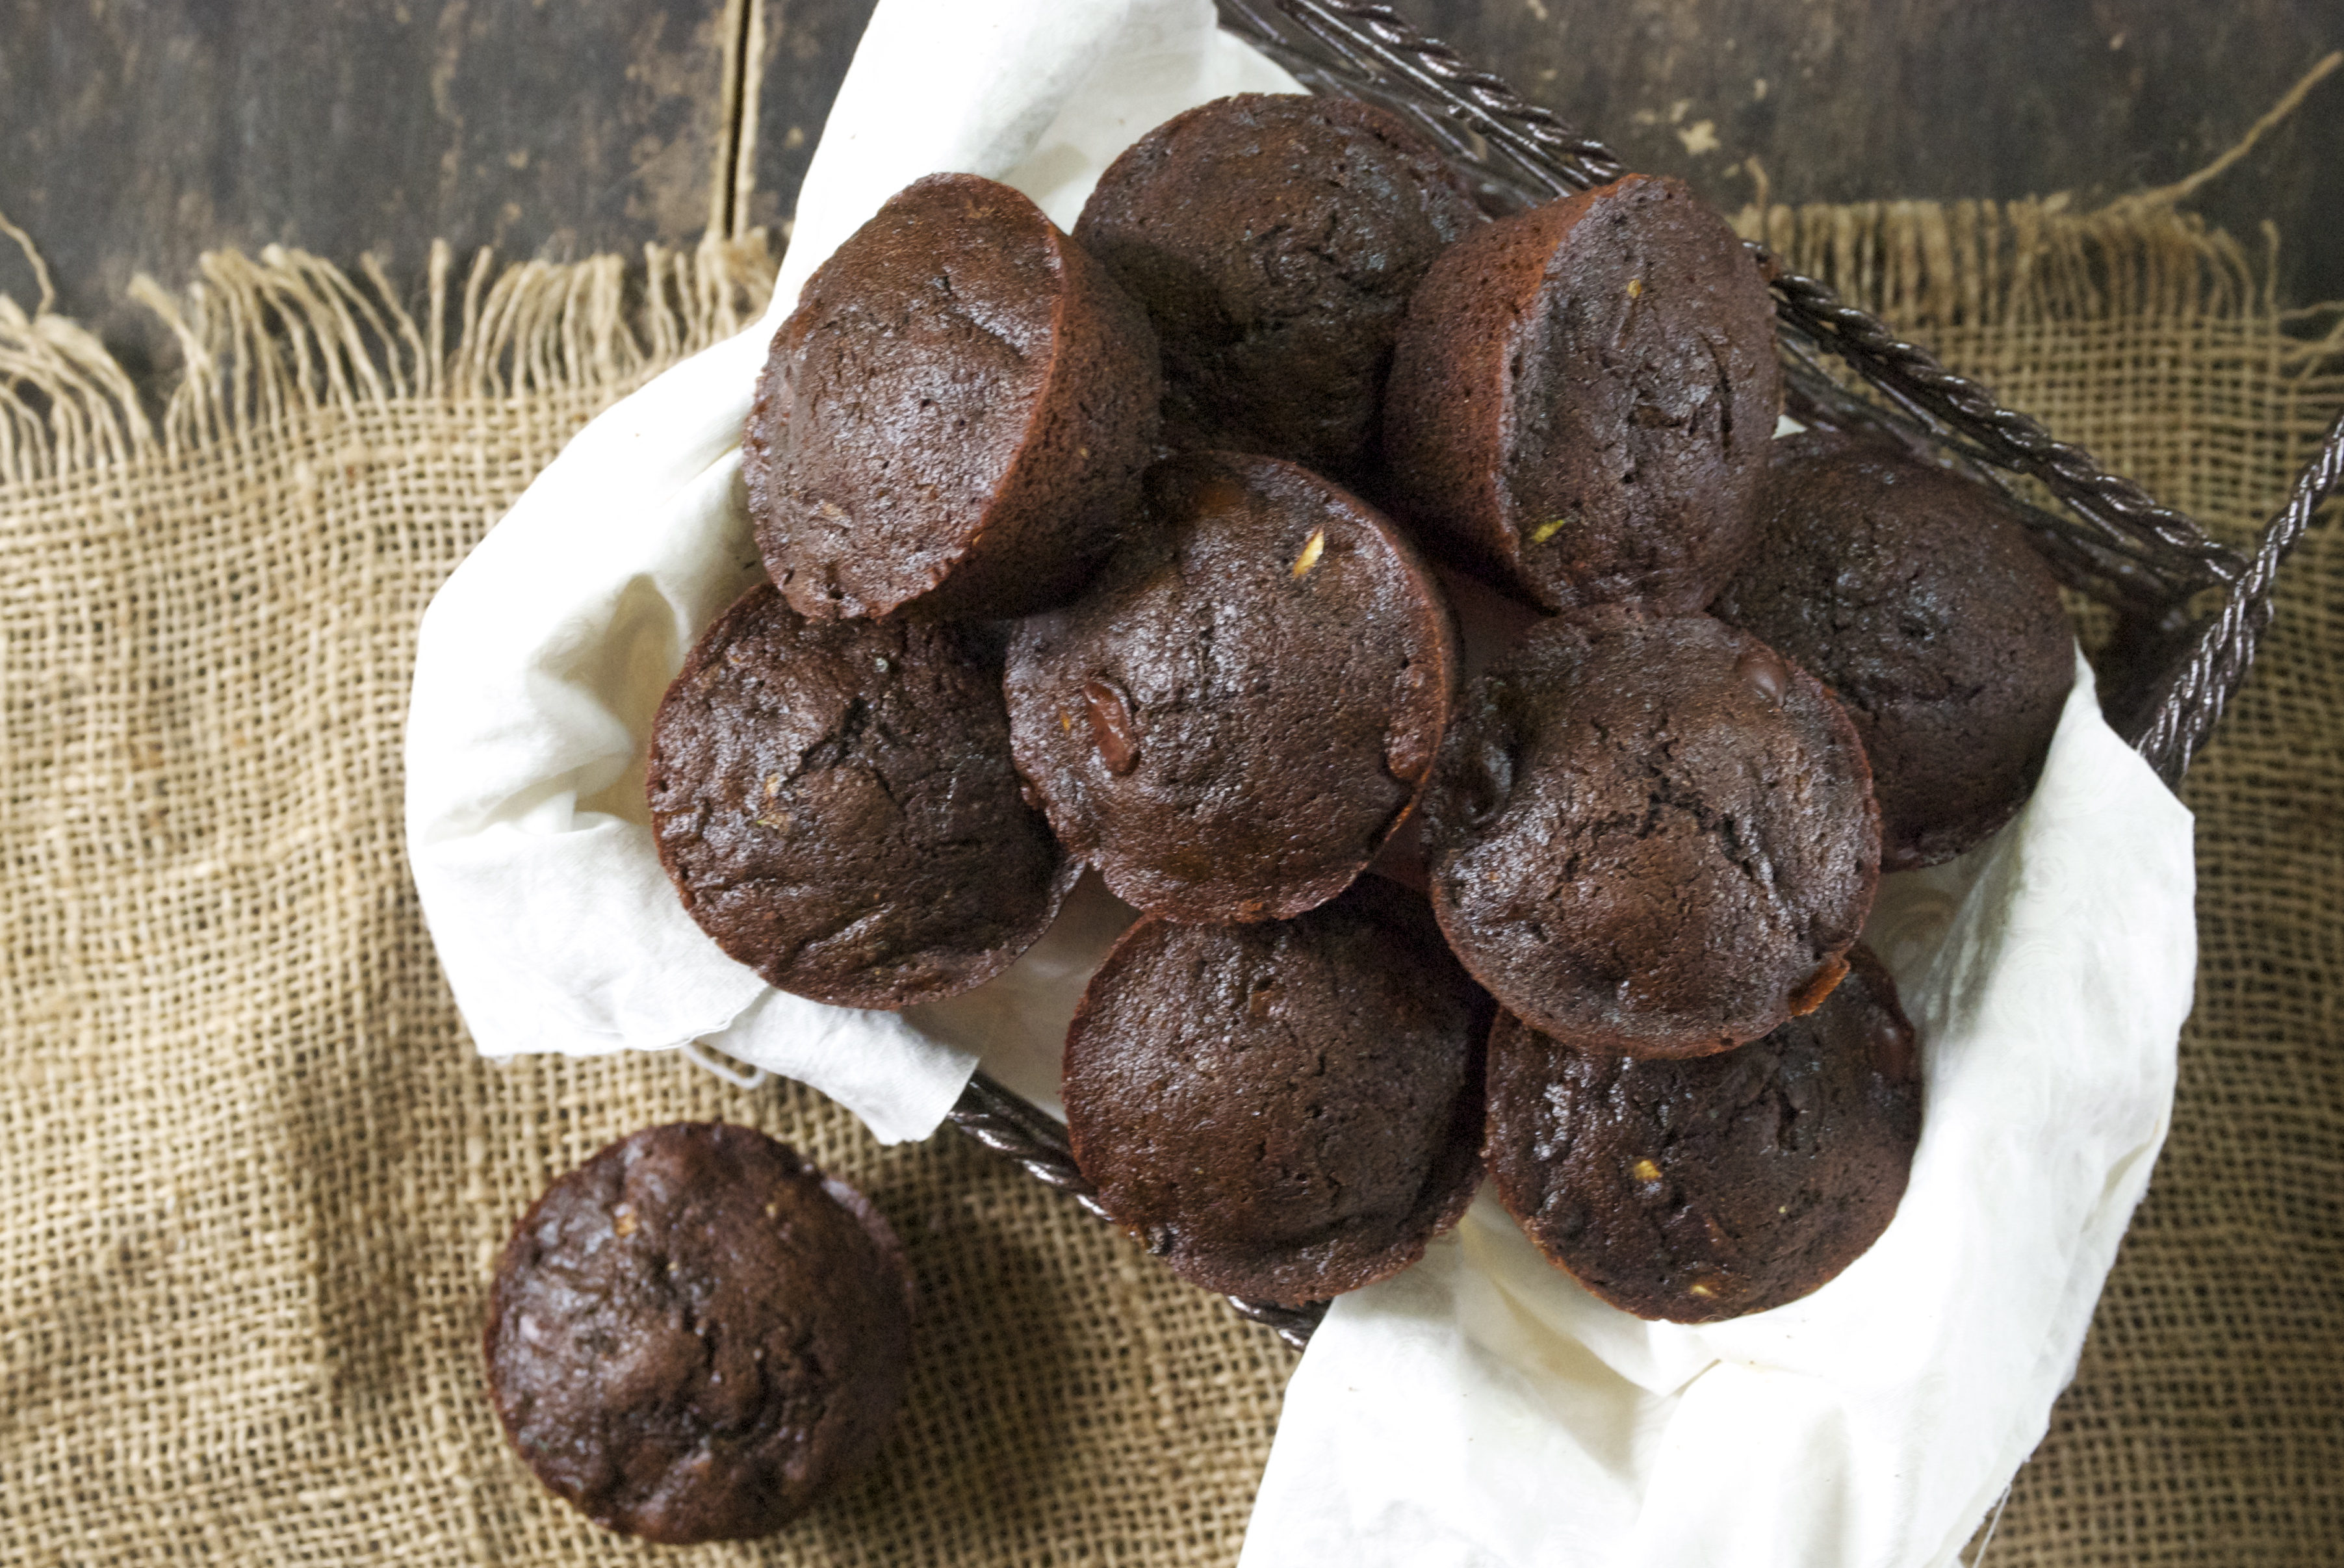
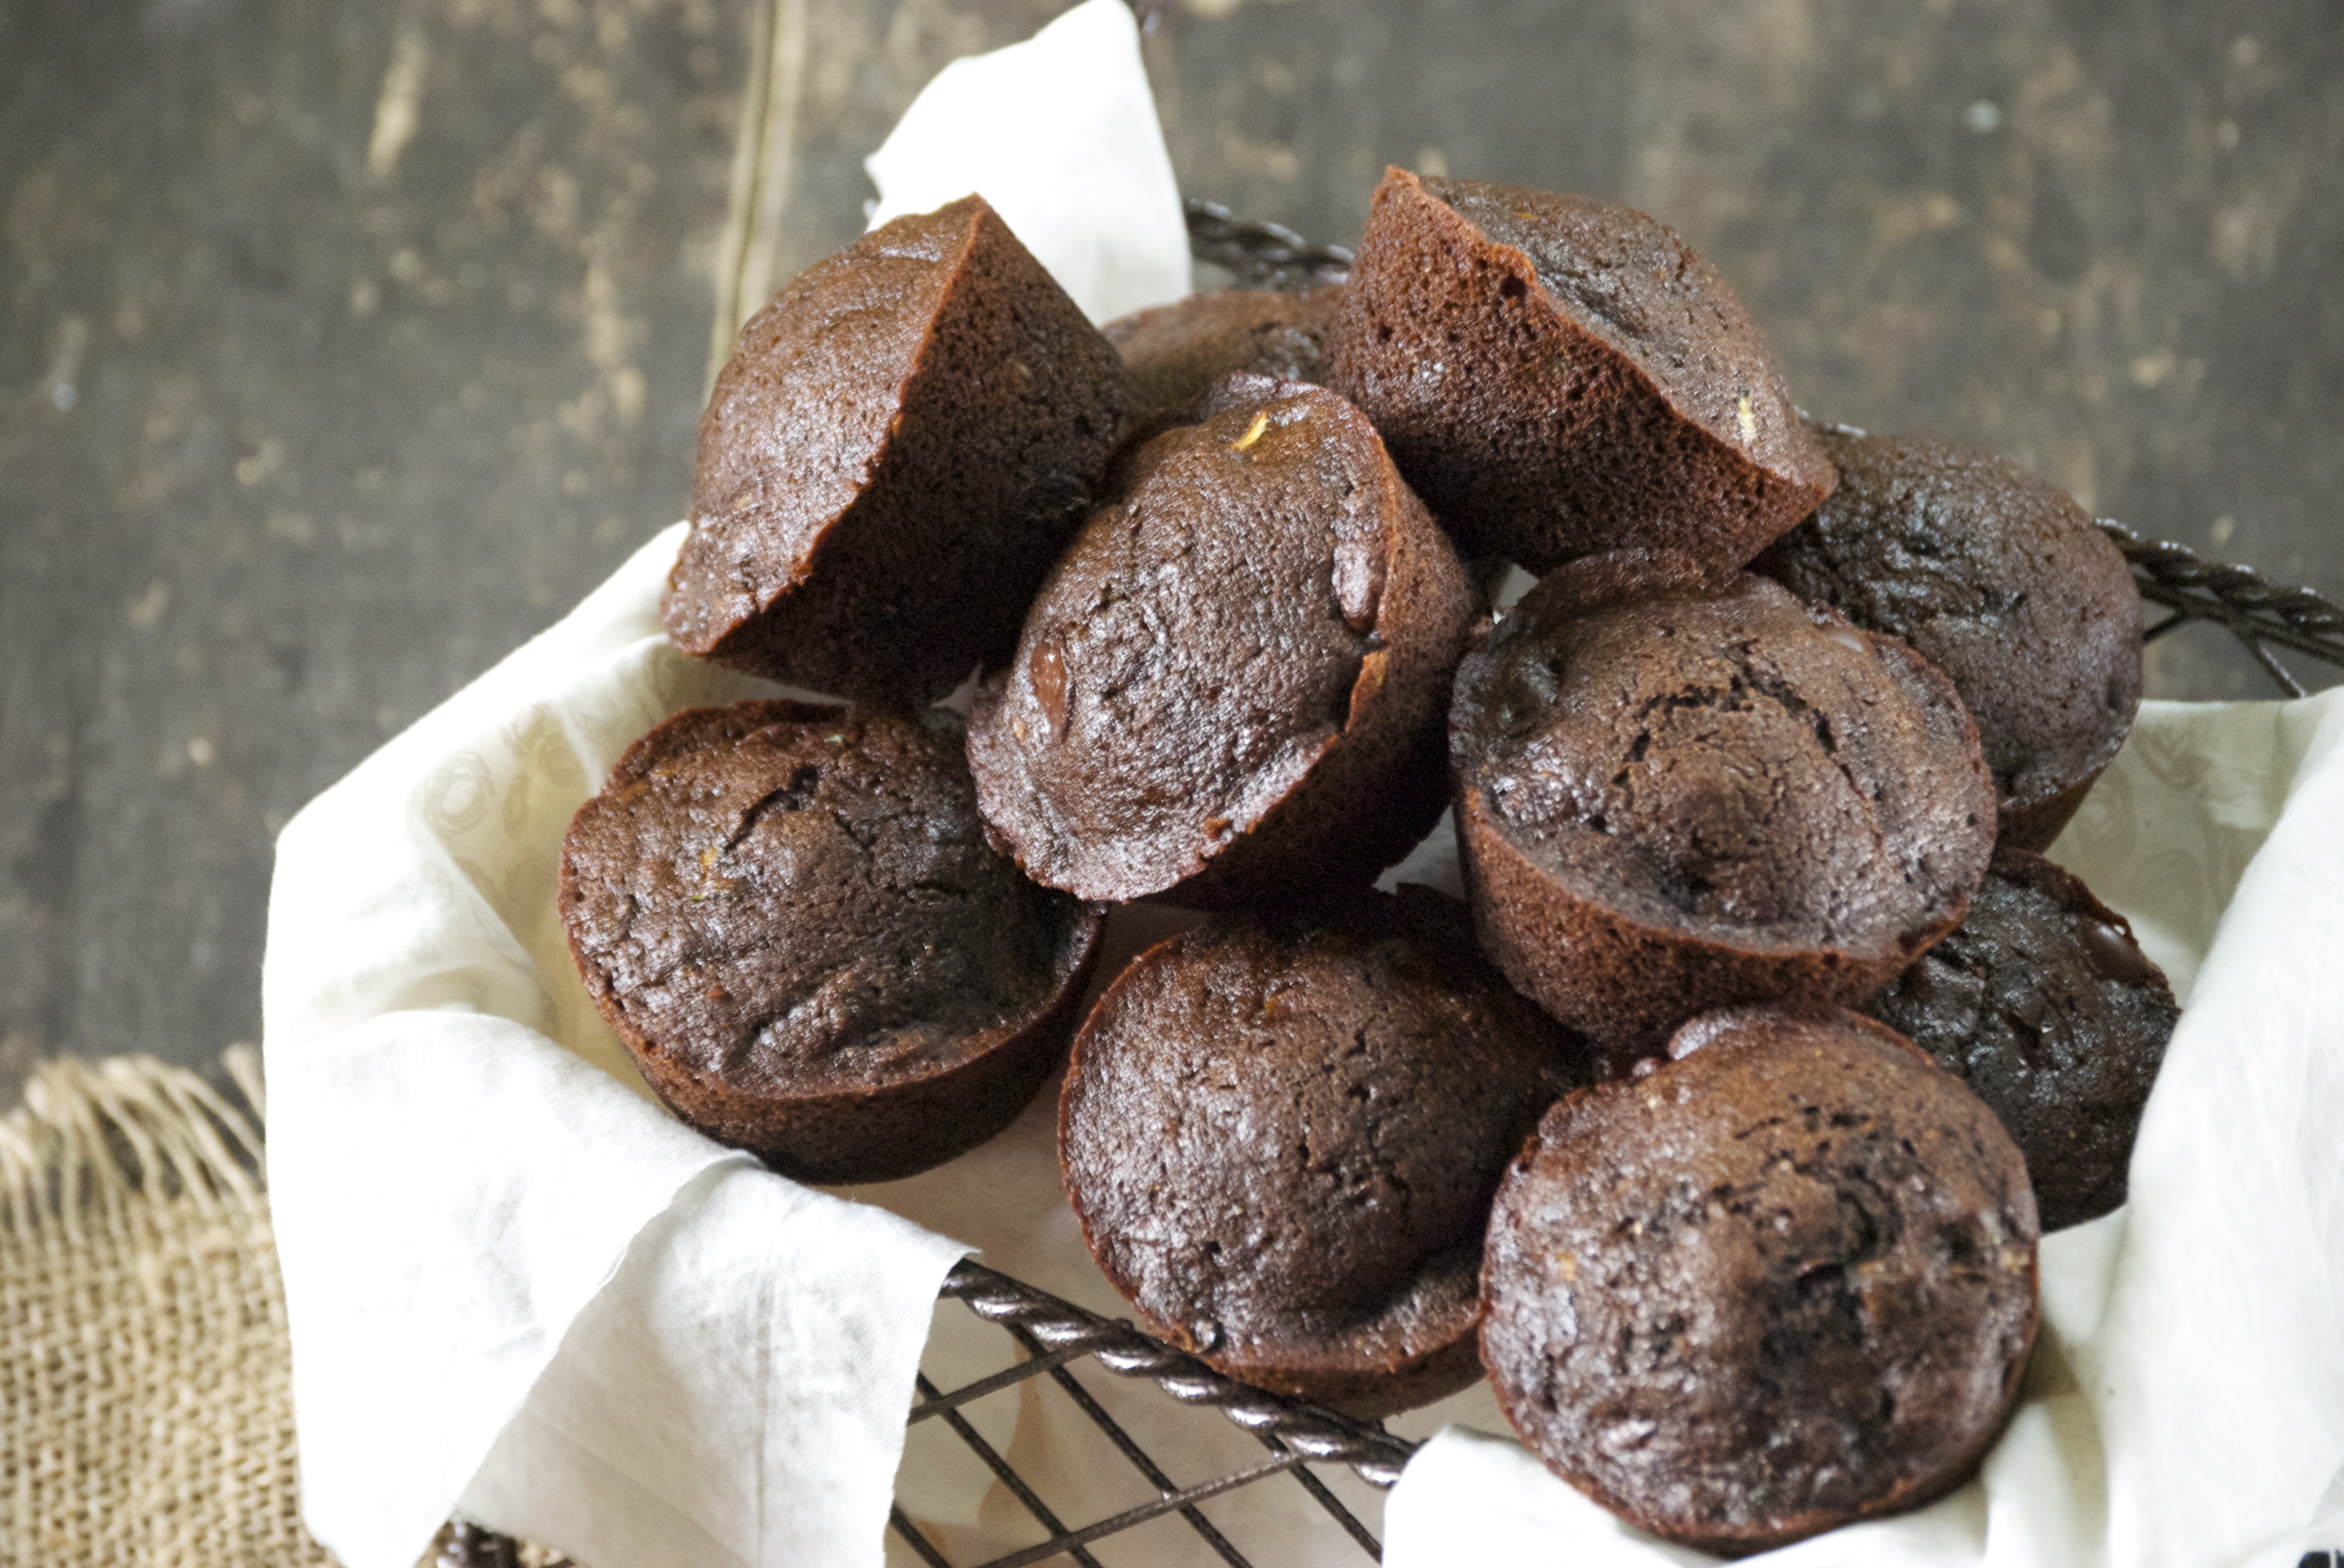
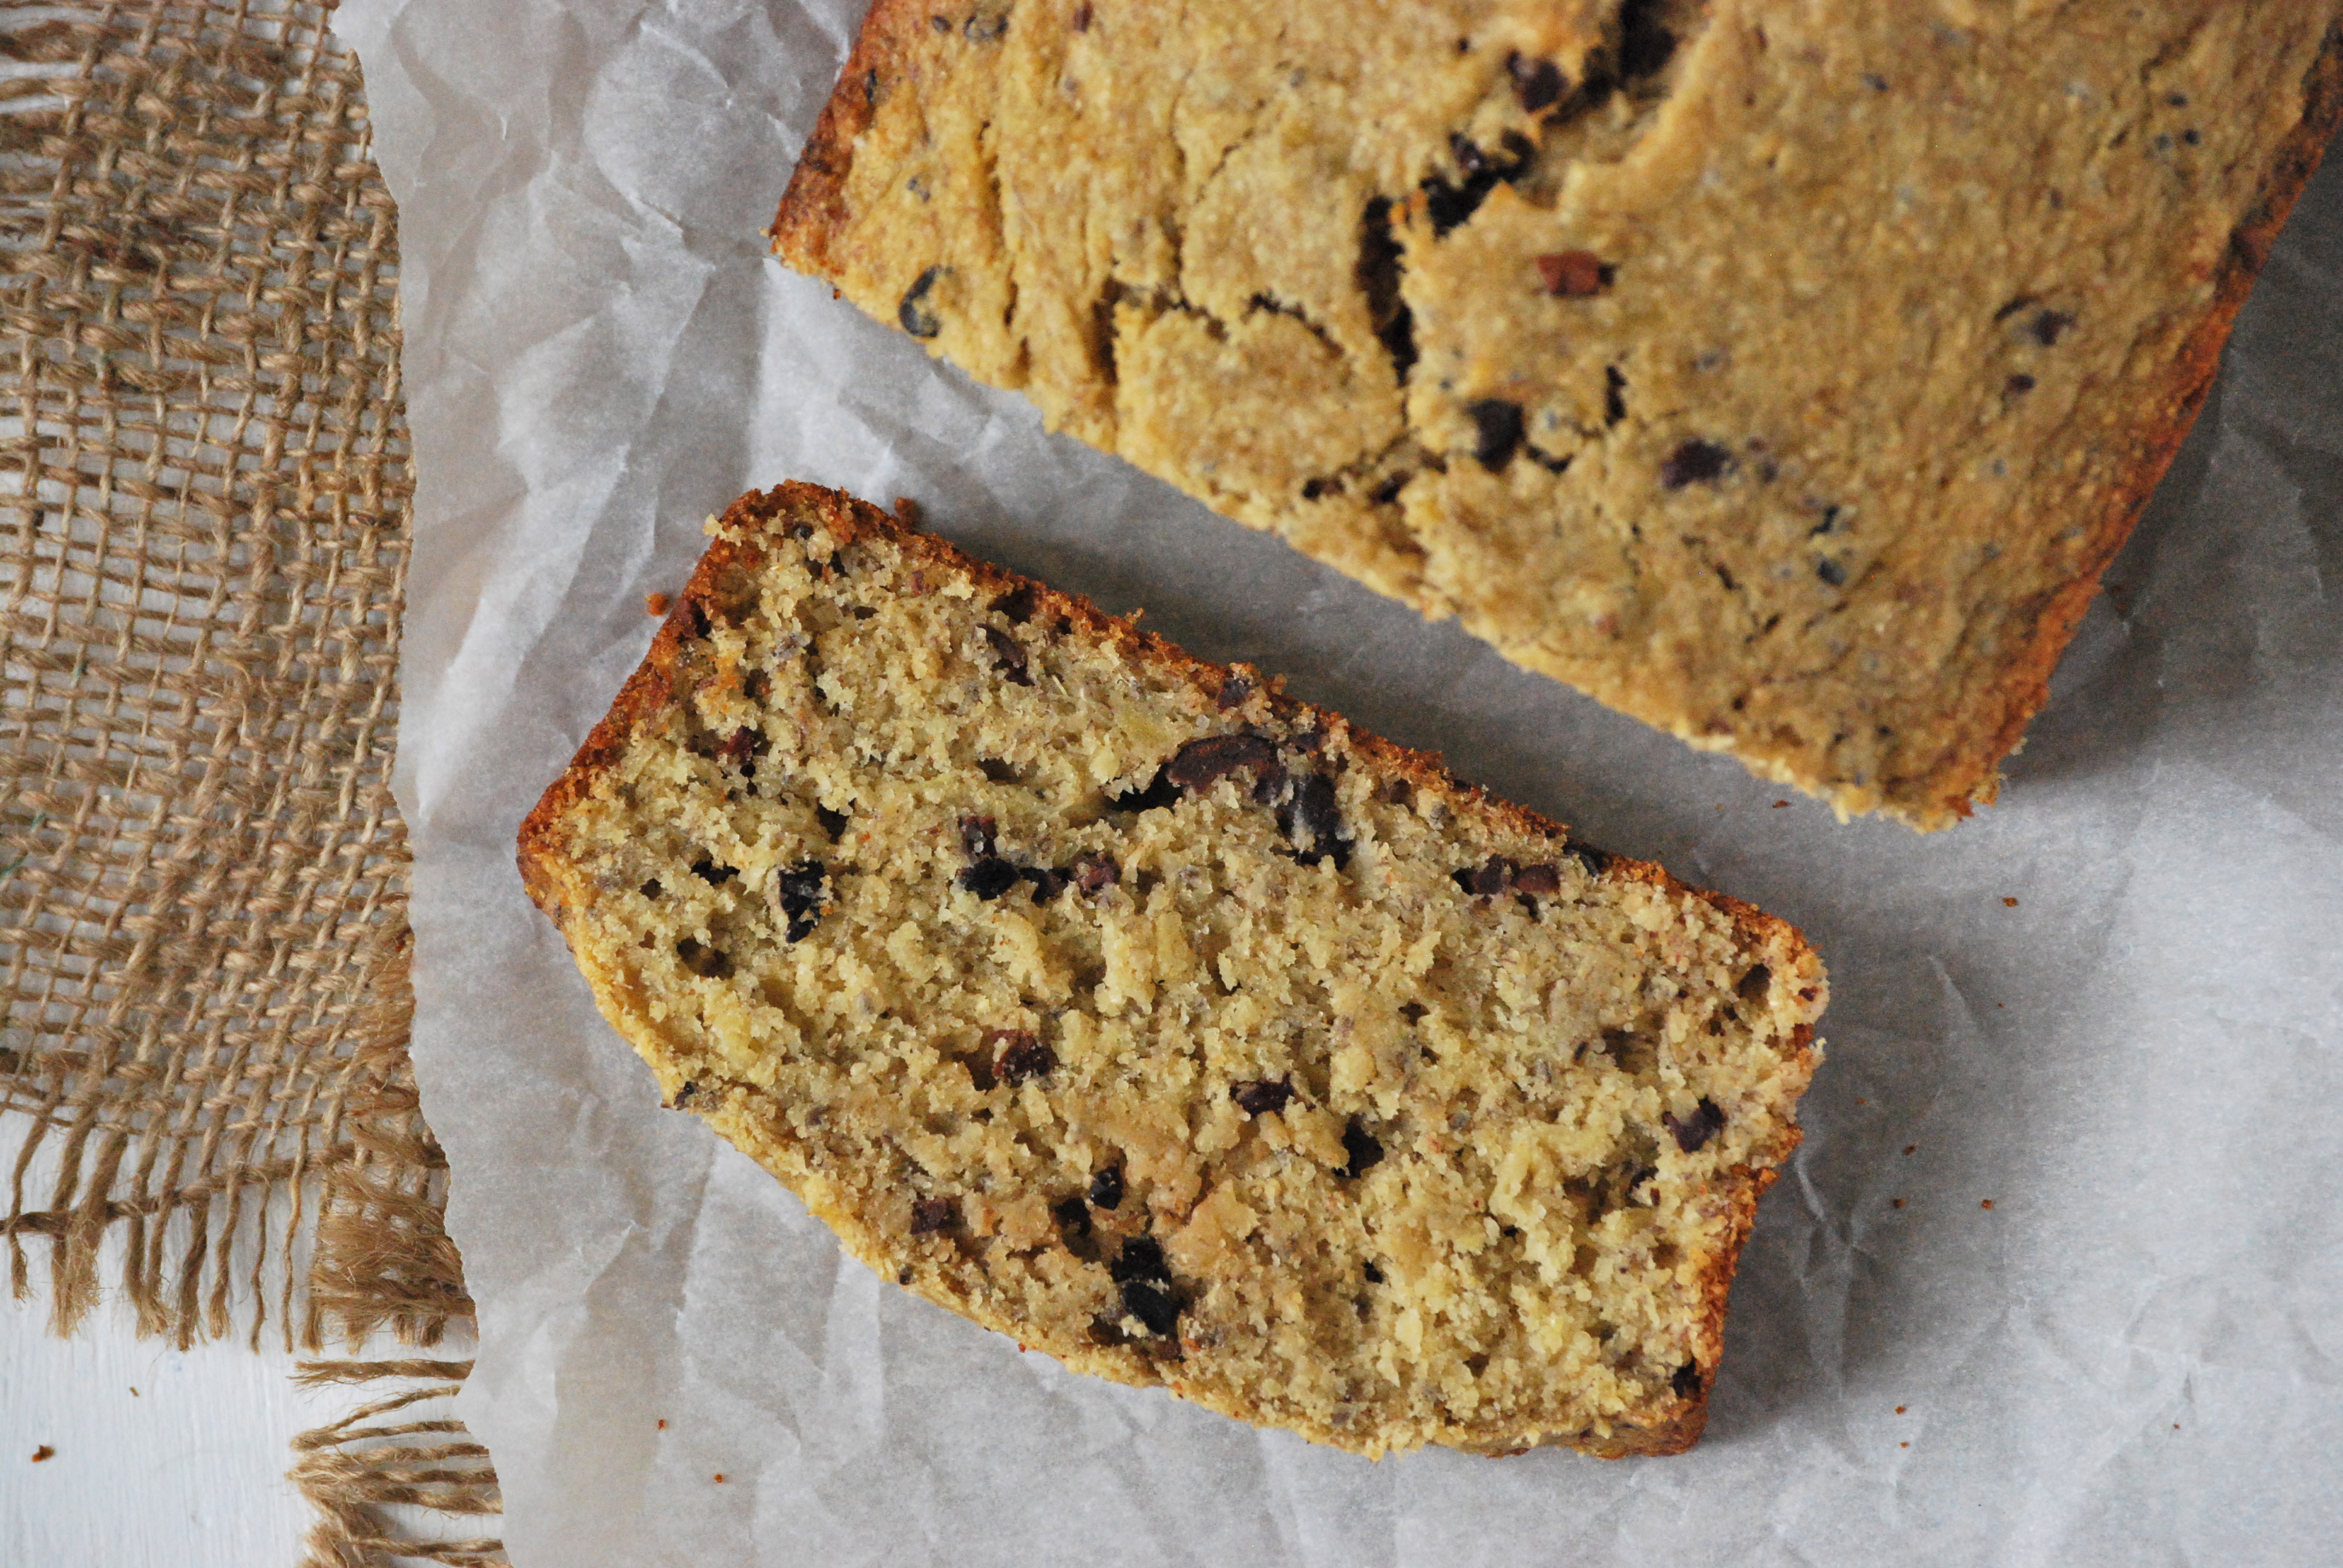
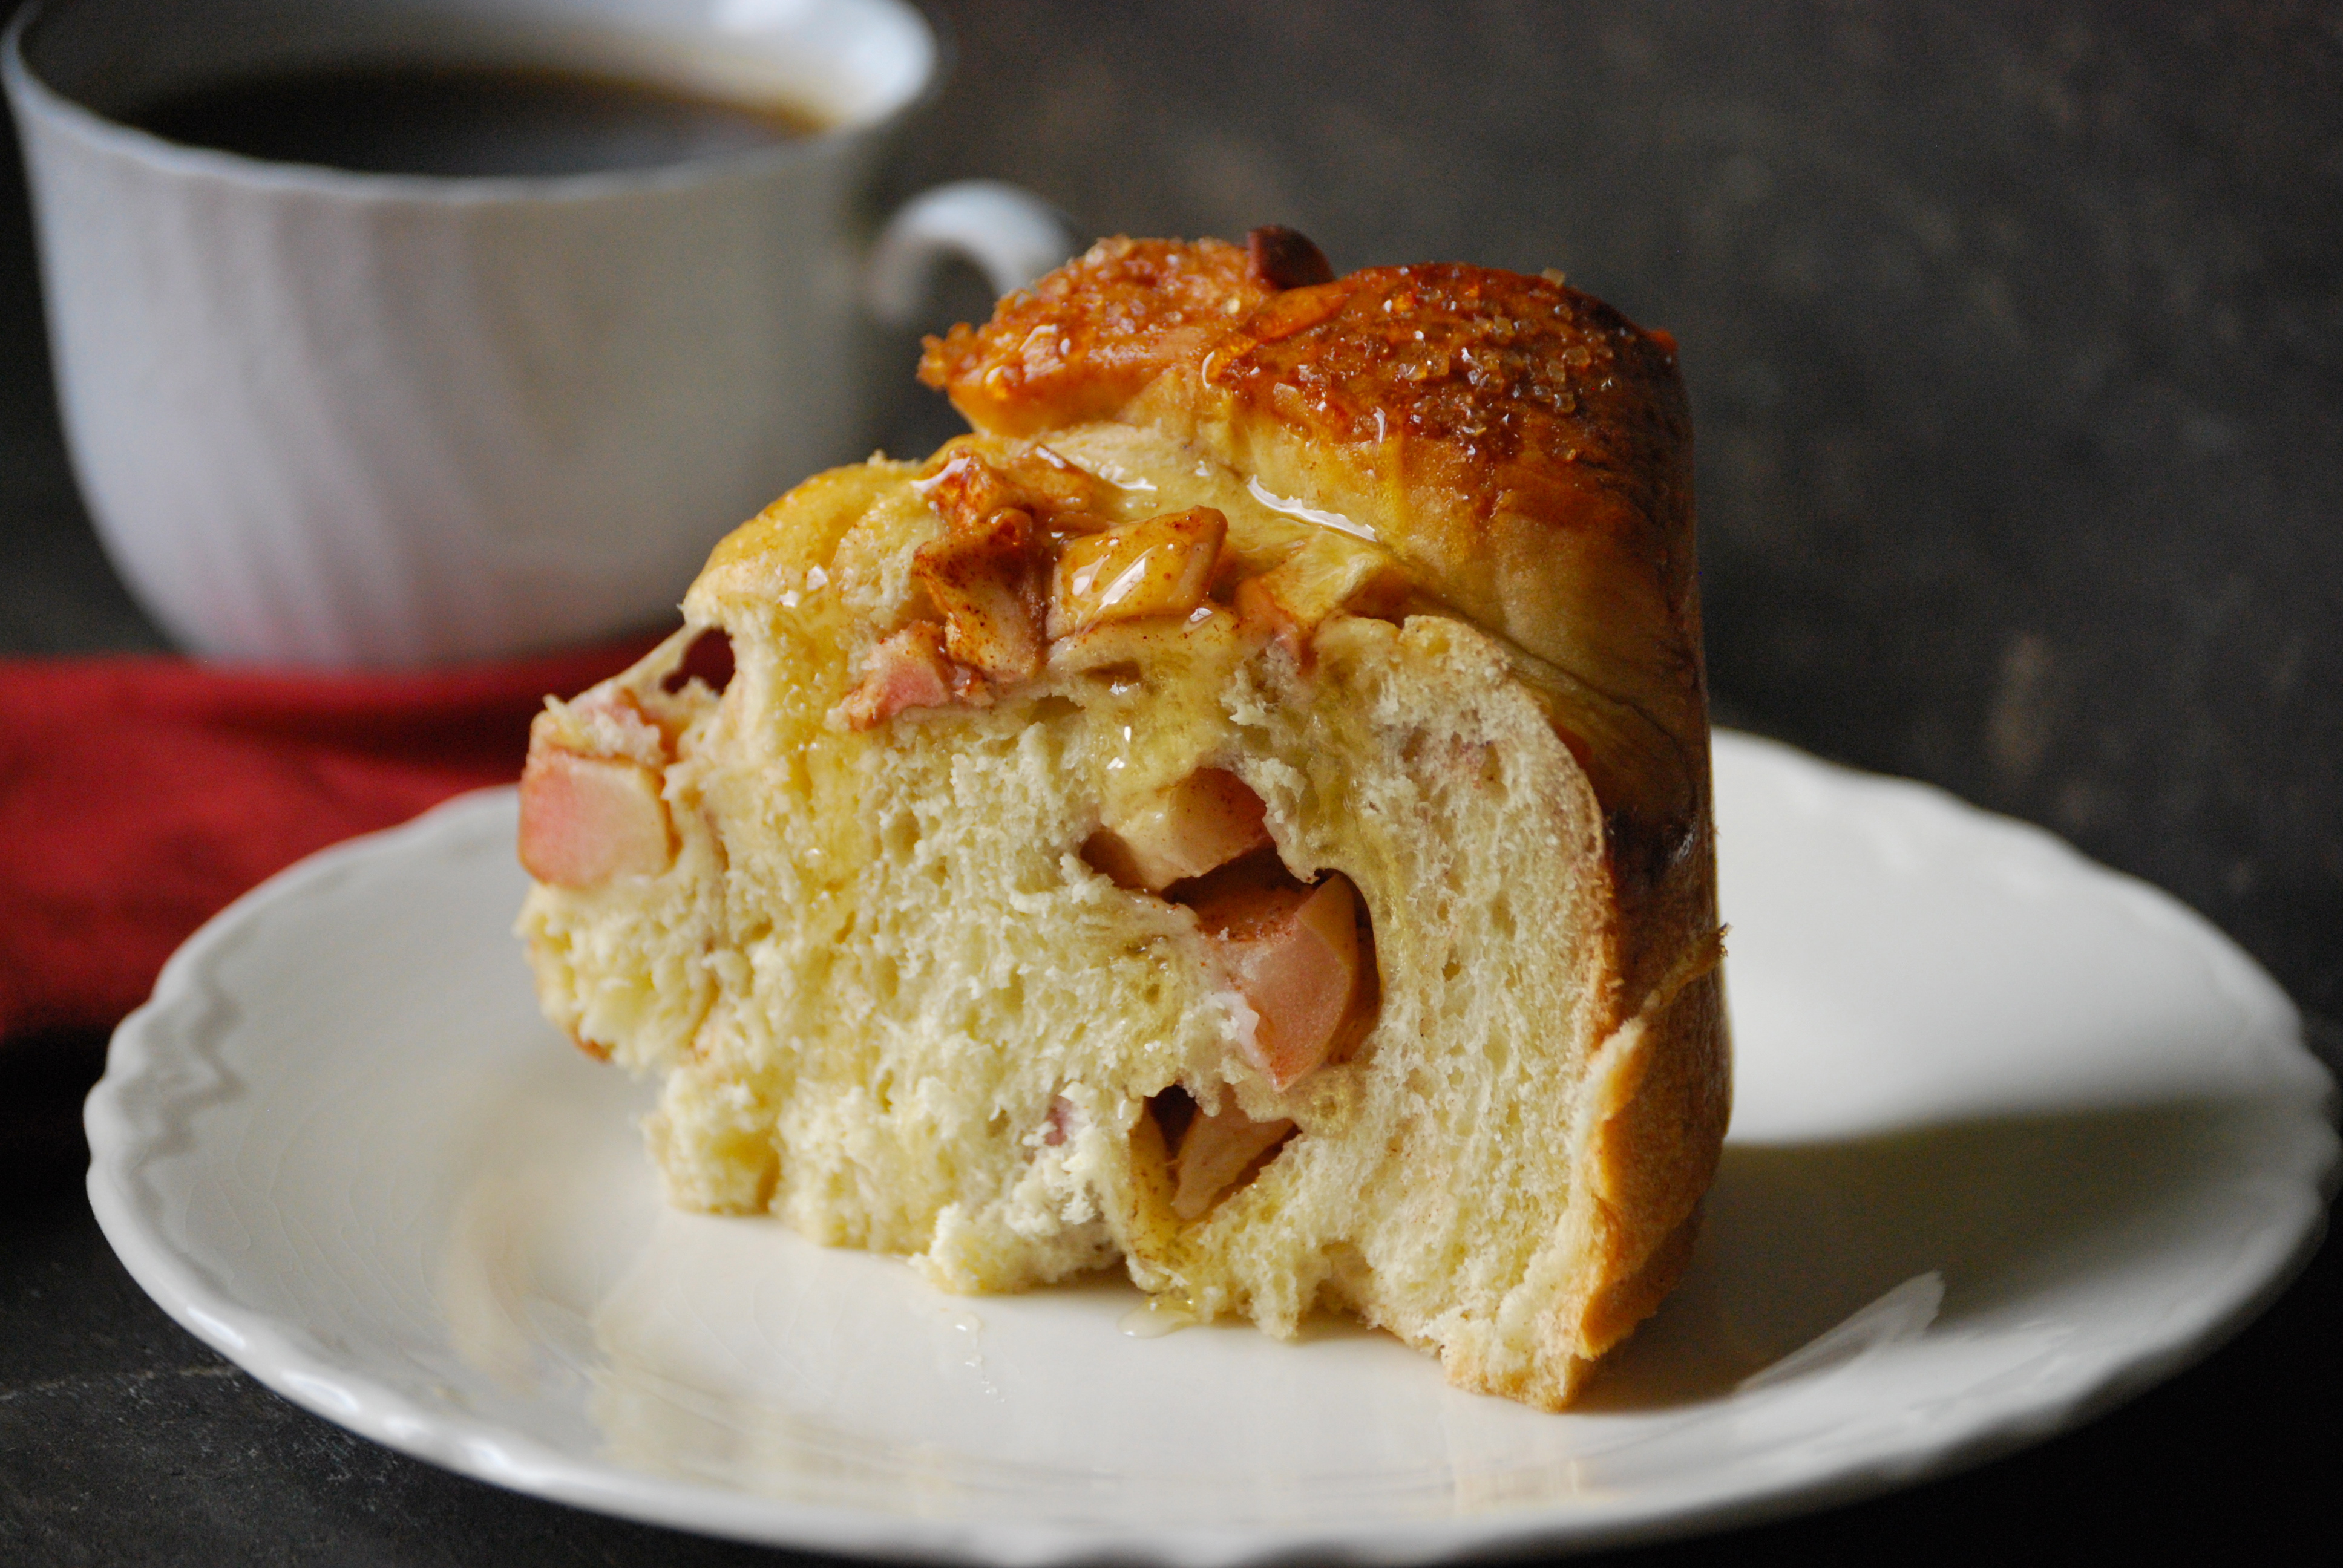
One of the best smells in the world– especially on a weekend morning– has to be homemade caramel sticky buns baking in the oven.  The sweet scent of cinnamon wafting through the house, along with the earthy aroma of toasted pecans, is just… divine really.  Caramel sticky buns are one of my family’s favorite weekend treats, so a few years ago we began to scour the Twin Cities for the best ones.  We found a few gems, but more often than not, we were disappointed.  Many were too ‘bread-y’, others were covered in so much caramel that they were just a mess, and a few were hard, crunchy disasters.

Aside from returning to that handful of favorites that we did find, I decided to work on a version that was just right.  I try new sticky bun recipes all the time– I really do.  We’ve gone through a few that are really tasty, but this one is the best.  And it’s better than any we’ve found in local bakeries or cafe’s.  Honestly, it’s perfect.  It makes a nice tall bun that is soft and tender– not too dense– with a lightly-crunchy top.  The dough is soft, buttery, and very easy to work with.  It rolls out beautifully.

One interesting thing about this recipe is that the caramel is on the top and bottom of the roll.  This means you don’t invert the rolls when they’re finished.  Instead, you top them with another helping of caramel.  The result is an even distribution of the caramel throughout the roll.  It’s a simple difference, but it’s genius.

Another thing that makes these buns different from most recipes is that for the filling, you whip the butter along with the brown sugar, cinnamon, and nutmeg (nutmeg makes everything better).  In most other versions, you just spread the butter and sprinkle on the spices.  It makes an amazing difference, so do not avoid this step.  You’re going to want to lick the mixture right off the spoon!

These buns are wonderful to prepare ahead of time.  You can do this a few ways.  First, the dough can be refrigerated (it needs to chill for at least to two hours before it can be rolled into buns, anyway).  Another option is to finish the buns, get them into the pan, and refrigerate overnight.  The rise time will be a bit longer (because the dough is cold), but it makes having a fresh sticky bun in the morning so much easier.  Finally, you can just make them the night before– including the baking– since these one’s stay soft and moist.  In the morning, just top them with the last of the caramel and toasted pecans.  Hope you enjoy these sticky buns as much as we do!

The Recipe:  Perfect Caramel Sticky Buns

(Makes 9)

For the Dough:

2/3 cup whole milk

5 tablespoons sugar, divided

1 3/4 teaspoon active dry yeast (from one 1/4-ounce envelope)

2 large eggs, at room temperature

2 3/4 cup (14 ounces) unbleached all-purpose flour

1 teaspoon kosher salt

1/2 cup (1 stick) unsalted butter at room temperature, cut into 1-inch pieces, plus a bit more melted

For the Caramel Topping:

2 cups chopped pecans, toasted

1/2 cup (1 stick) unsalted butter

3/4 cup (packed) dark brown sugar

3/4 cup heavy cream

1/3 cup honey

1/2 teaspoon kosher salt

For the Filling:

1/2 cup (1 stick) unsalted butter, at room temperature

1/2 cup (packed) dark brown sugar

1 teaspoon ground cinnamon

1/2 teaspoon freshly grated nutmeg

pinch of kosher salt

flour, for dusting

1 egg, for brushing on the buns

Sea salt

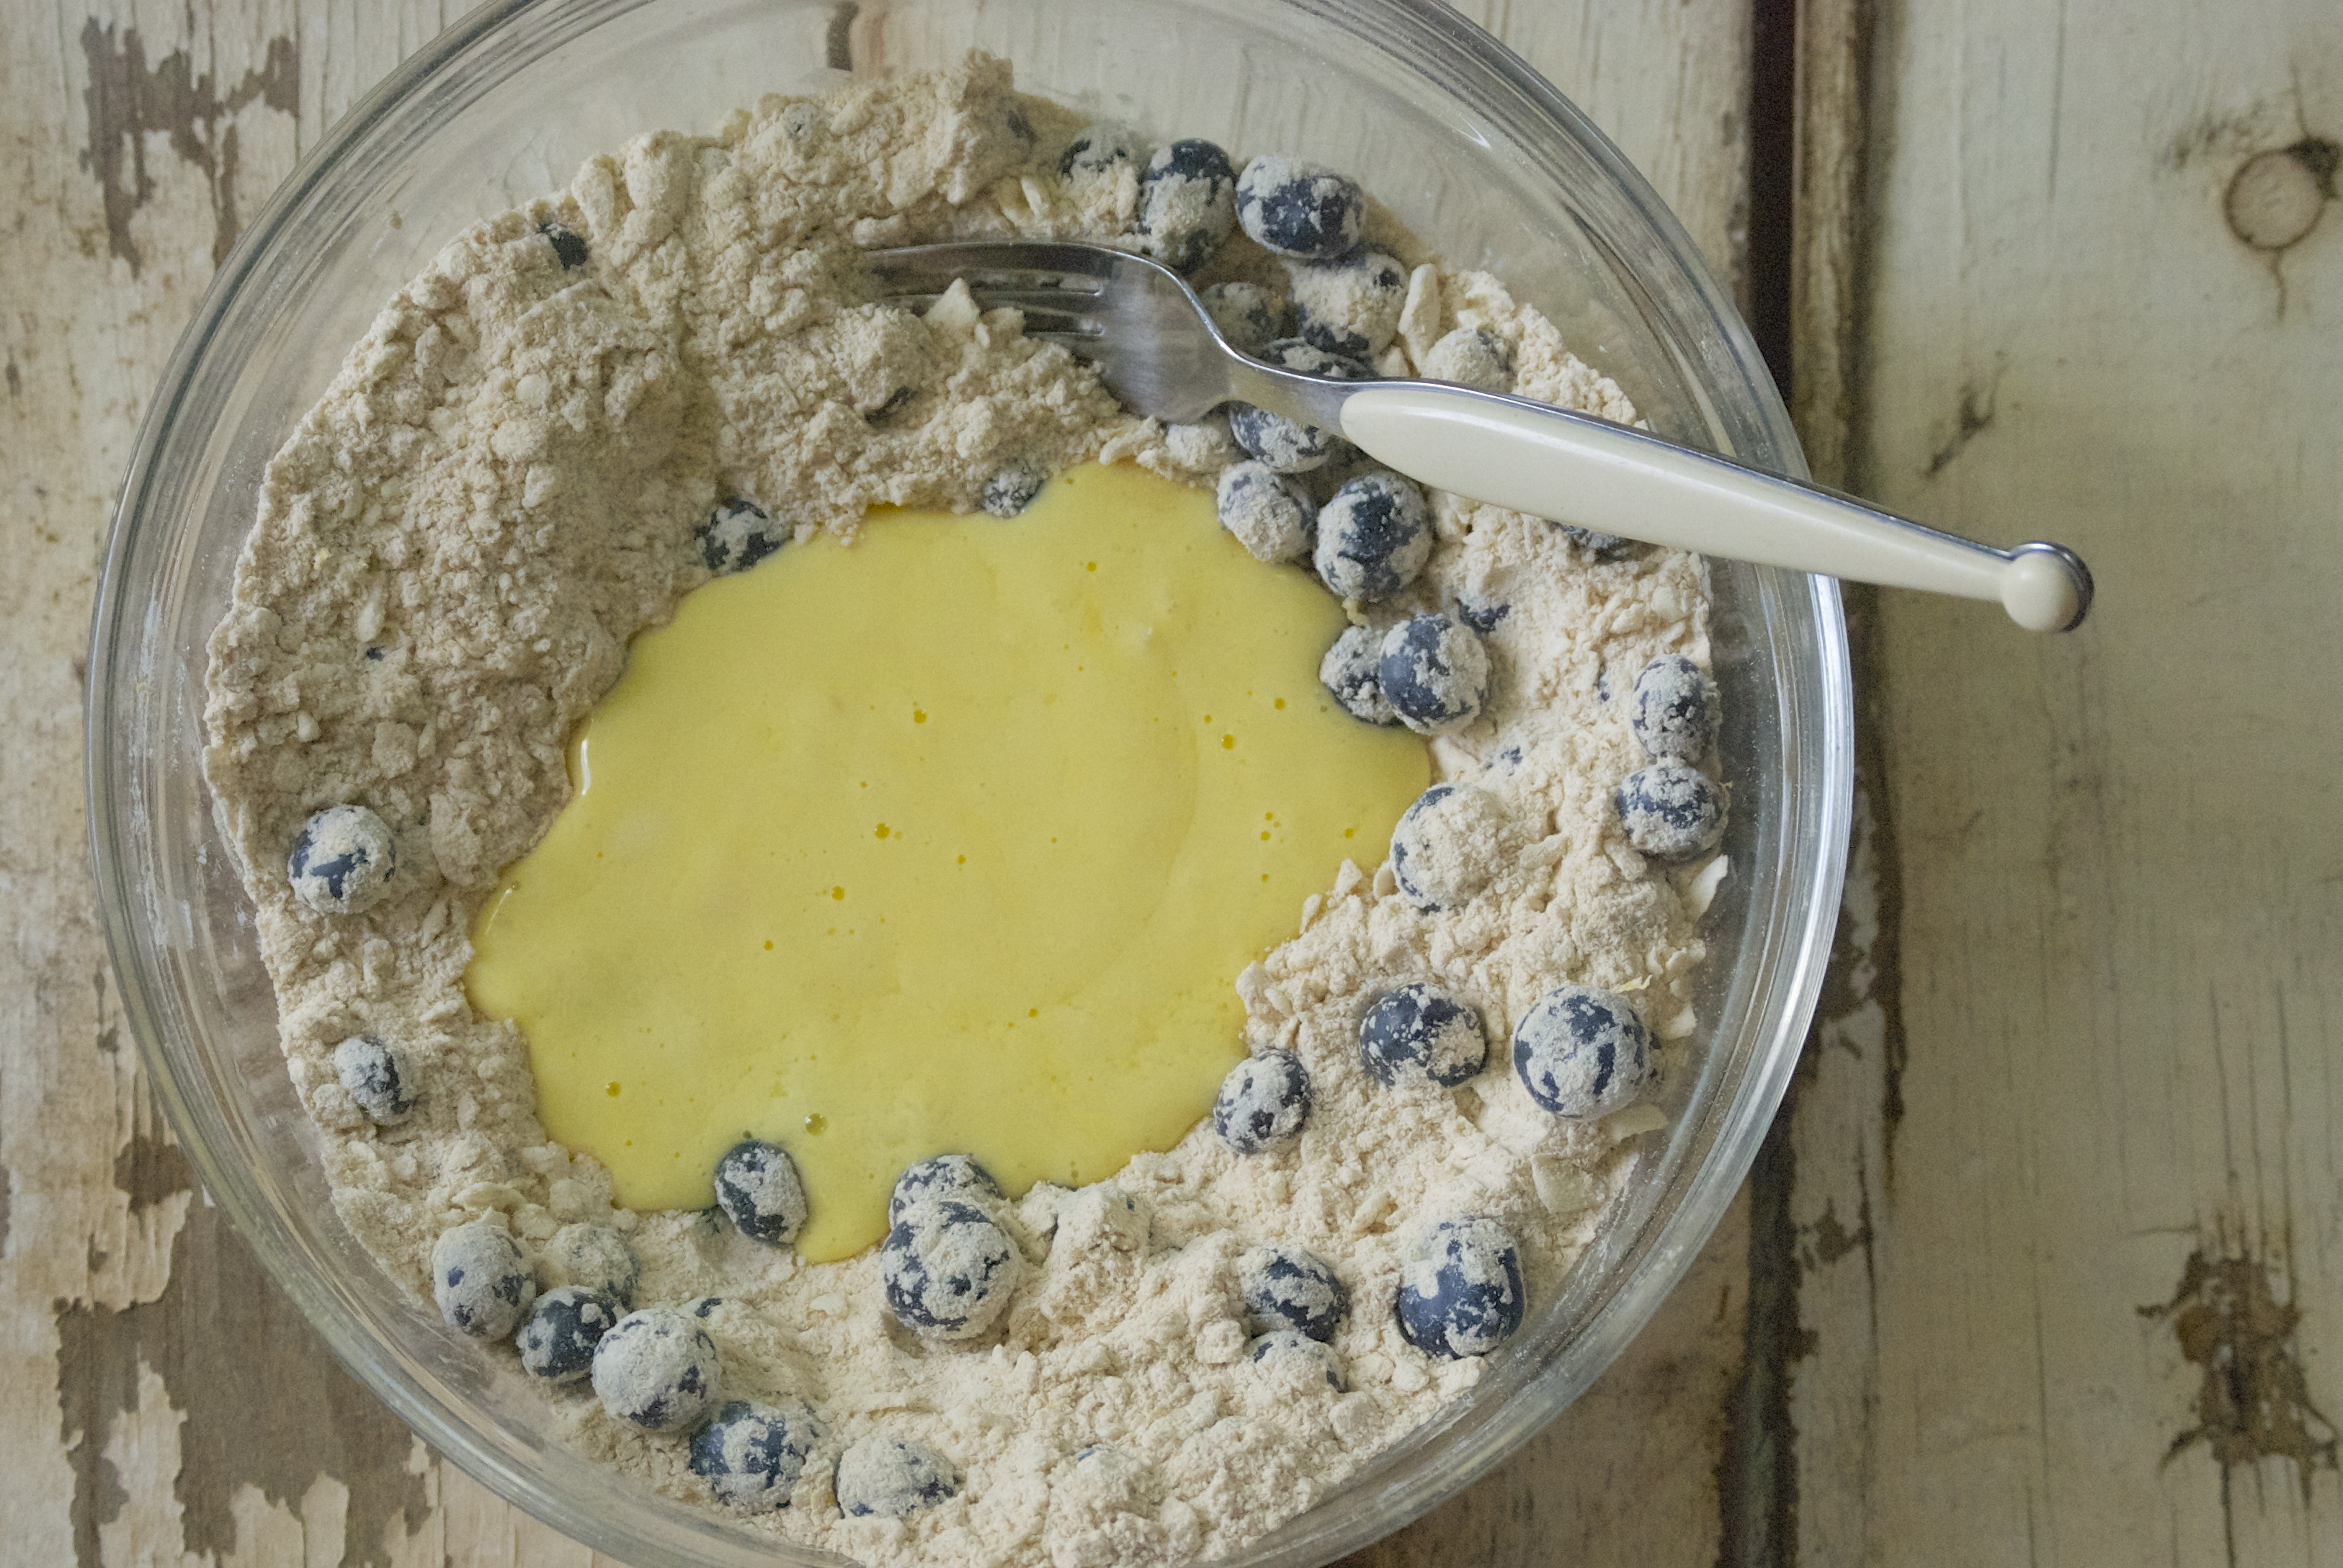
Prepare the dough by heating the milk in a saucepan or microwave until the temperature registers 110-115°F.  Mix in the yeast and 1 tablespoon of the granulated sugar.  Let it sit for 5 minutes to get foamy.  Add the eggs and whisk until smooth.  Add the remaining sugar, flour, and salt into the bowl of a stand mixer fitted with a hook attachment.  Give the mixture a quick stir with a whisk, then add the wet ingredients.  Turn the machine on and mix until it’s a shaggy mess.  Add the butter, one chunk at a time, making sure to wait until each piece is mostly incorporated.  When everything is incorporated, knead the dough on medium  for about 5 minutes.  The dough should be soft and silky.  Place the dough into a large bowl that has been lightly coated with melted butter.  Pour a bit more of the melted butter on top of the dough and spread evenly with your hands.  Cover with plastic wrap and refrigerate for at least 2 hours or up to 1 day.

Toast the pecans by placing them on a baking sheet in a 350°F oven for 10-12 minutes, or until fragrant.  Let cool.

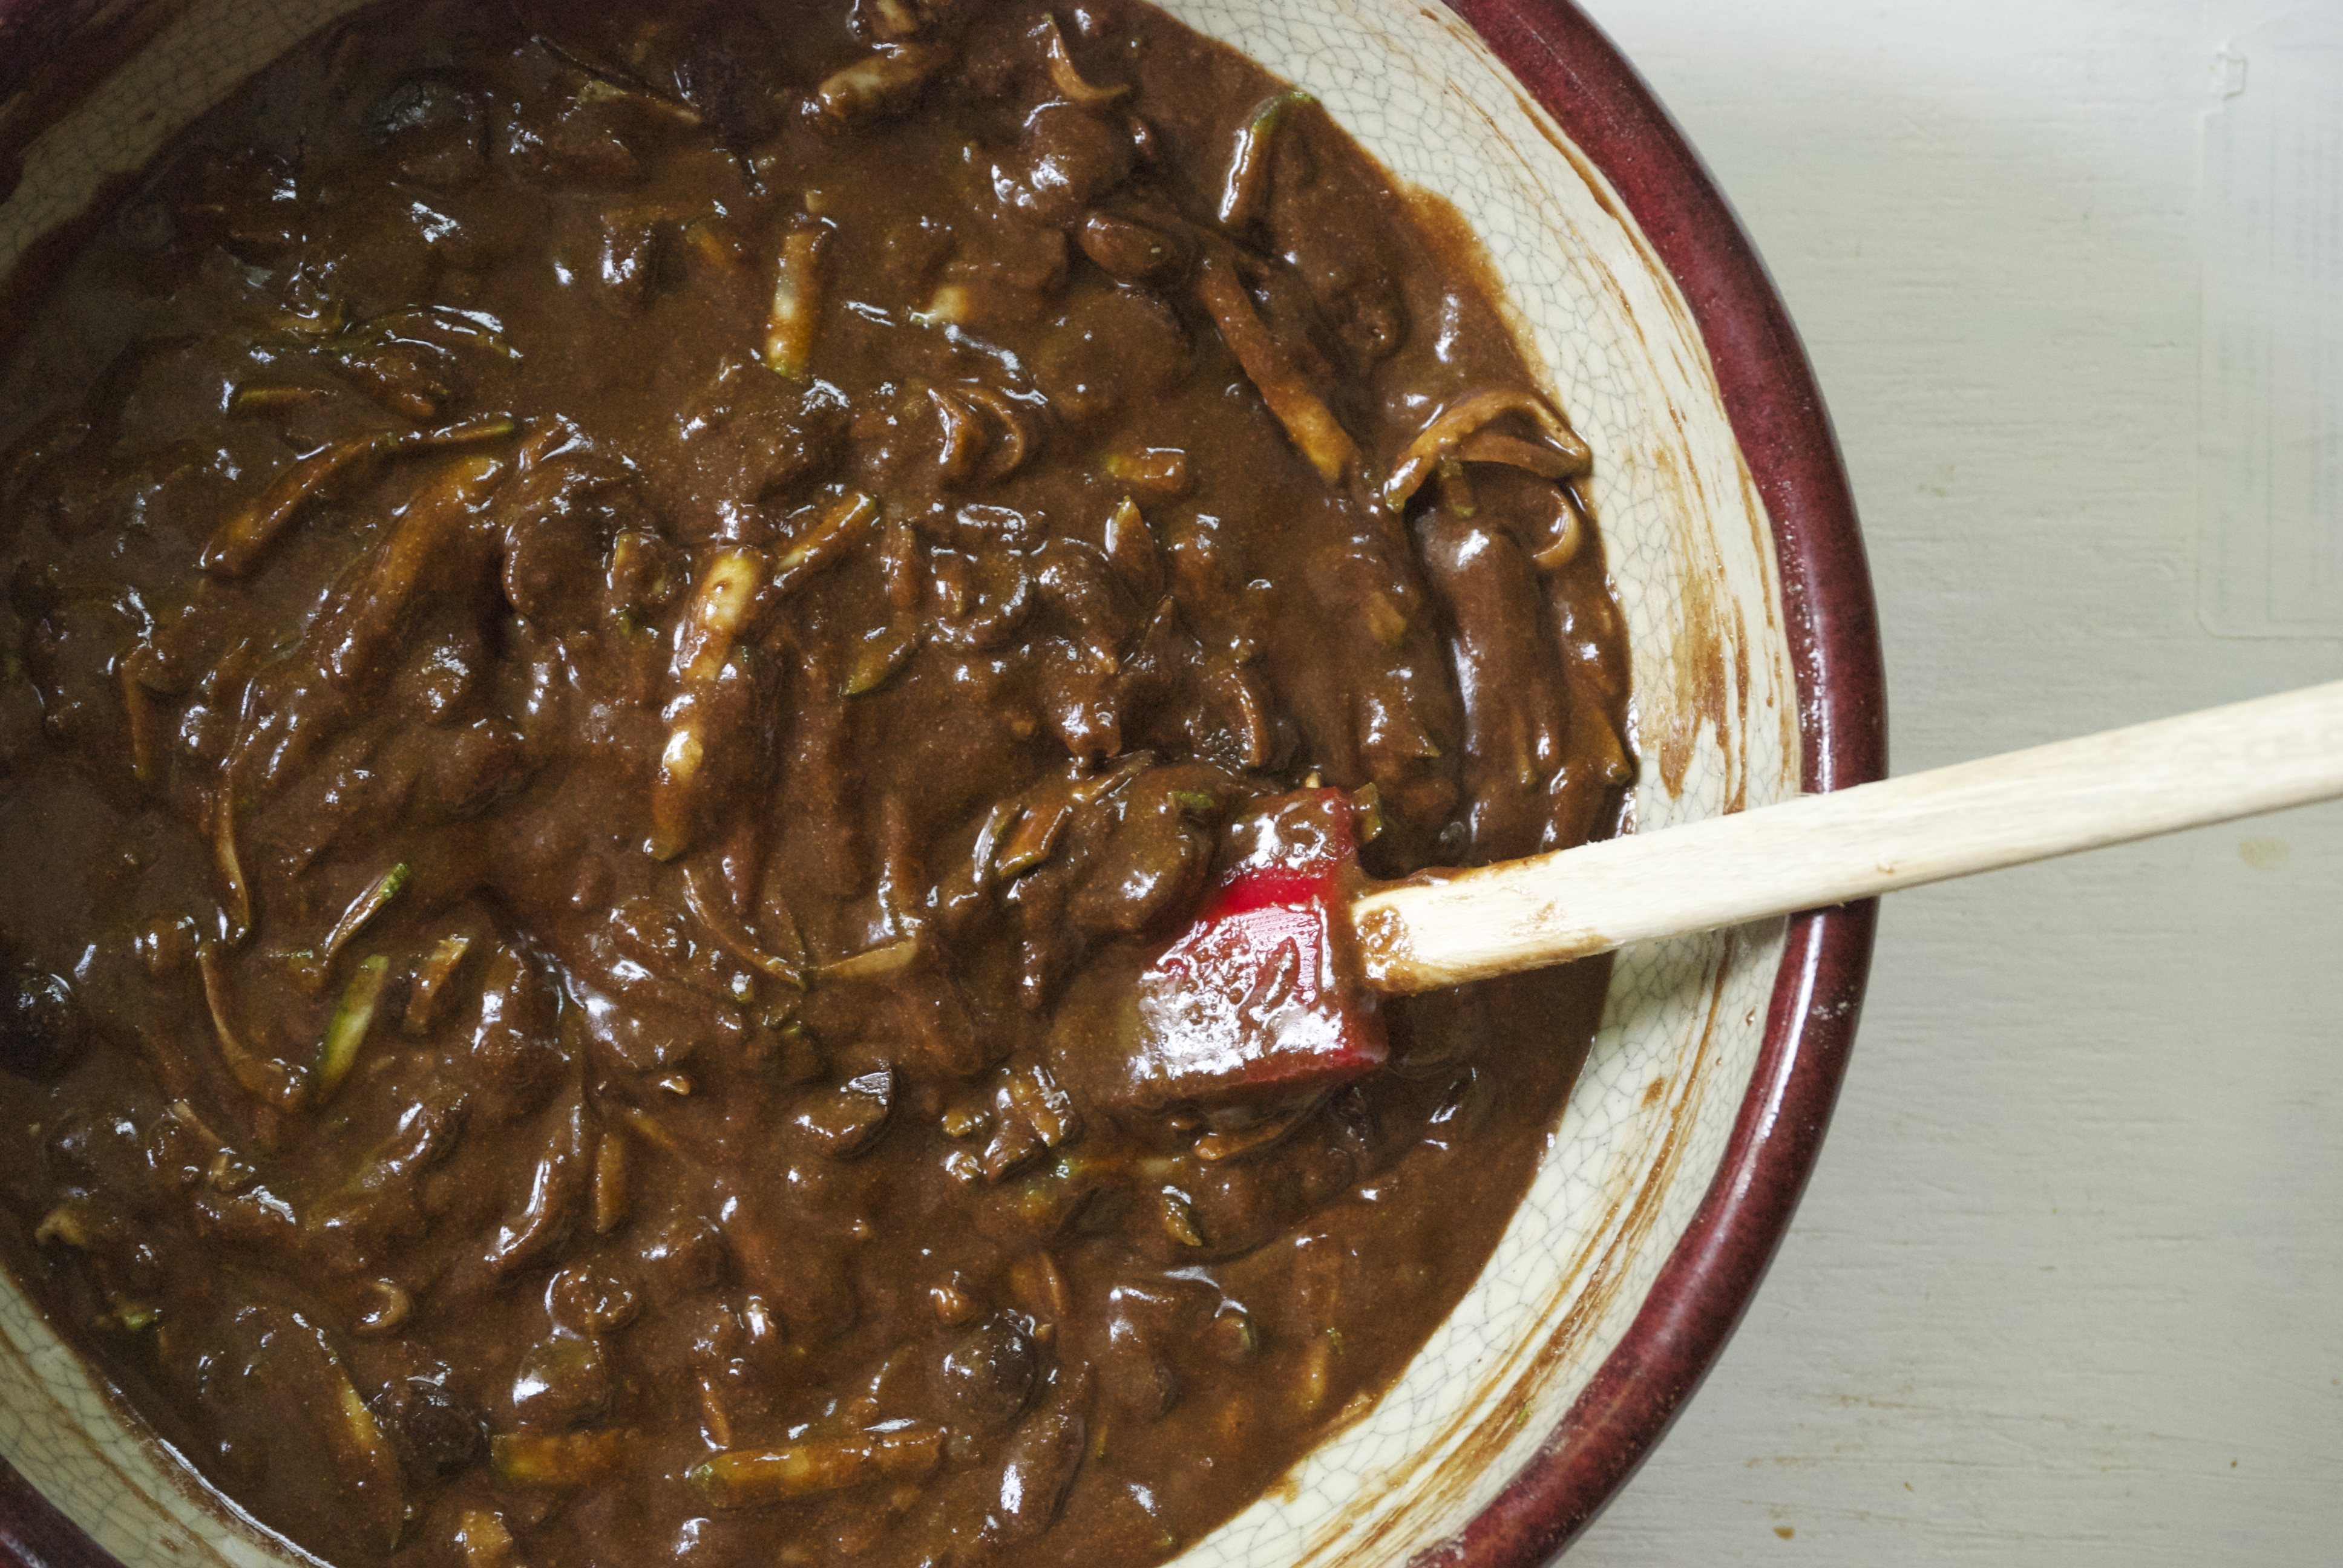
Prepare the caramel by melting the butter in a small saucepan.  Add the brown sugar, cream, honey, and salt.  Bring to a boil and reduce heat to medium.  Let continue to cook for about 3-4 minutes.  The glaze will be a deep golden brown.  Pour one cup of the glaze into an 8×8-inch pan.  Sprinkle 1/2 cup of the toasted pecans over the glaze.  Reserve the remaining glaze (refrigerate with a cover, if using much later).  Note: I’ve made these rolls by lining the pan with parchment paper so they could be easily removed and placed on a platter.  It also works just as easily to put them into the pan with nothing at all — the choice is yours.

Prepare the filling by placing the butter, cinnamon, salt, brown sugar, and nutmeg in the bowl of a stand mixer fitted with a paddle attachment. Mix for 2-3 minutes, or until light and fluffy.  Set aside.

Form the buns by putting a light coat of flour down on a work surface.  Roll the chilled dough into a 12 x 16-inch rectangle.  Spread the butter/spice mixture on it, leaving a 1-inch plain border on the side furthest away from you.  Sprinkle 3/4 cup of the pecans over the butter (reserve the remaining pecans — put into an airtight container, if using much later).  Roll the dough into a tight log.  Cut and discard the very edges, if they are uneven.  Cut the remaining dough into 9 equal pieces.  Re-shape if they flatten out in the cutting process.  Place them in the pan and cover with plastic wrap or a light kitchen towel.  Let rise in a warm, draft-free area for about 45 minutes, or until the dough has doubled in size ( 1 1/2 – 2 hours, if the dough has been chilled overnight).

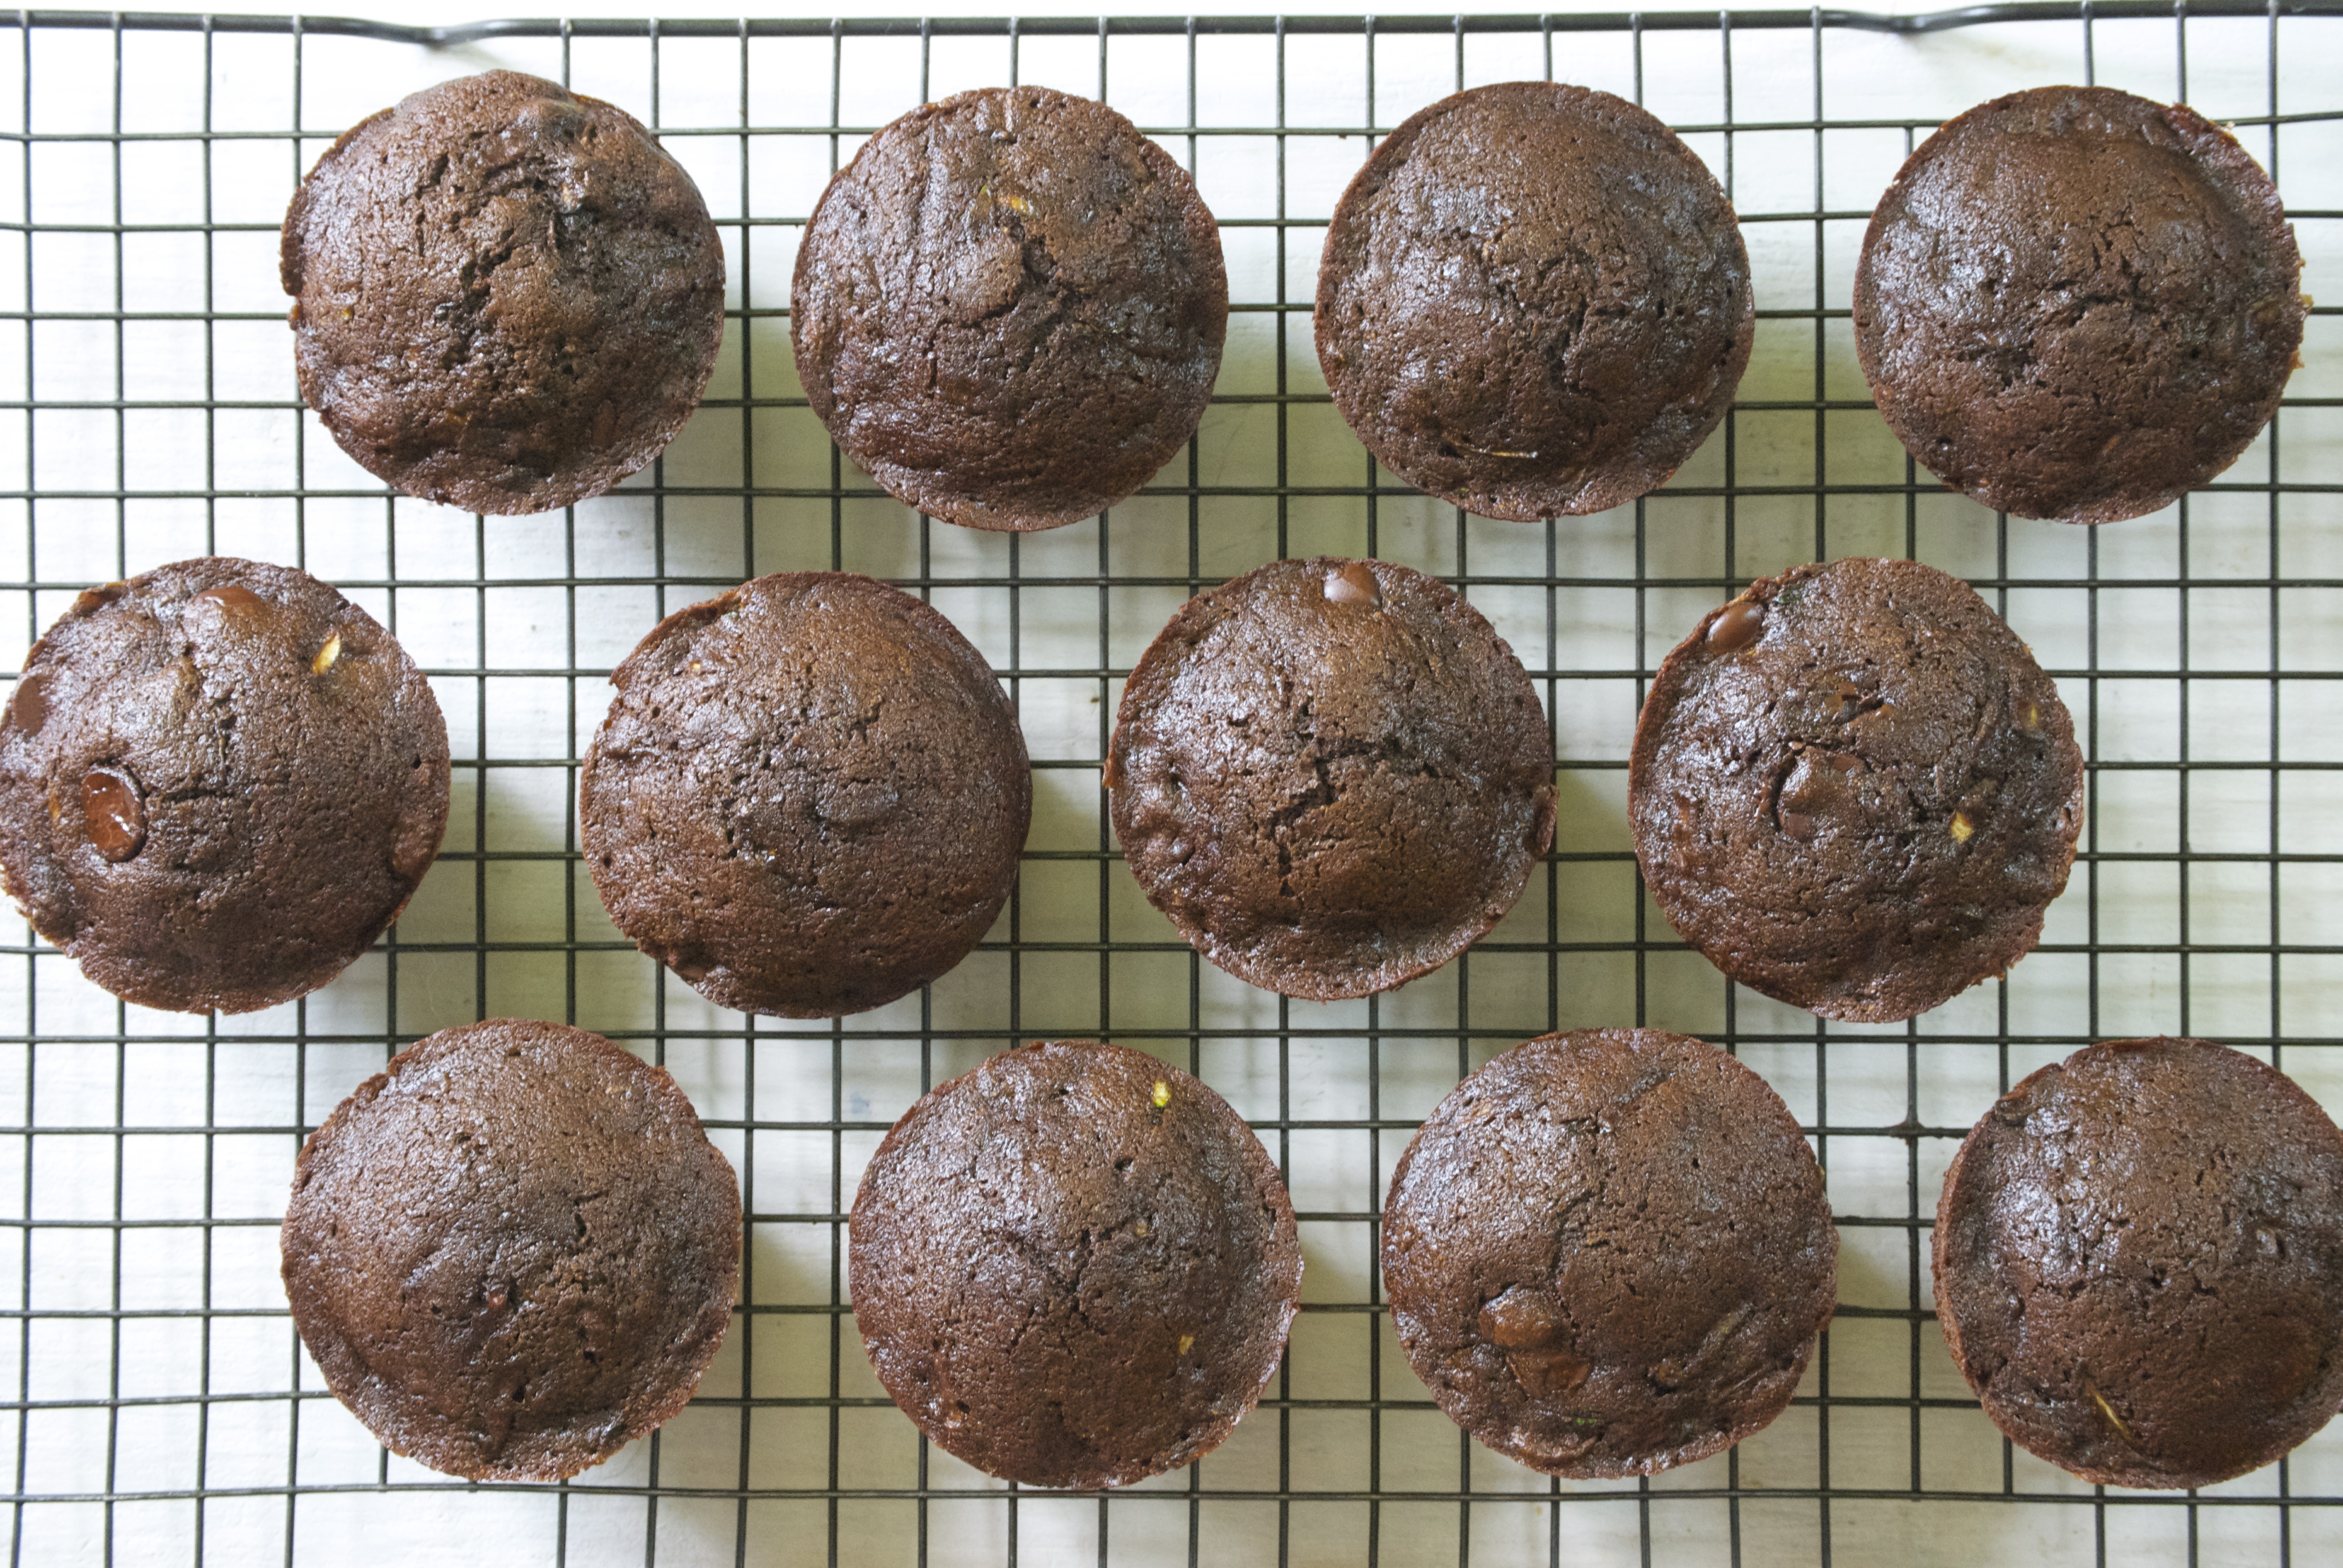
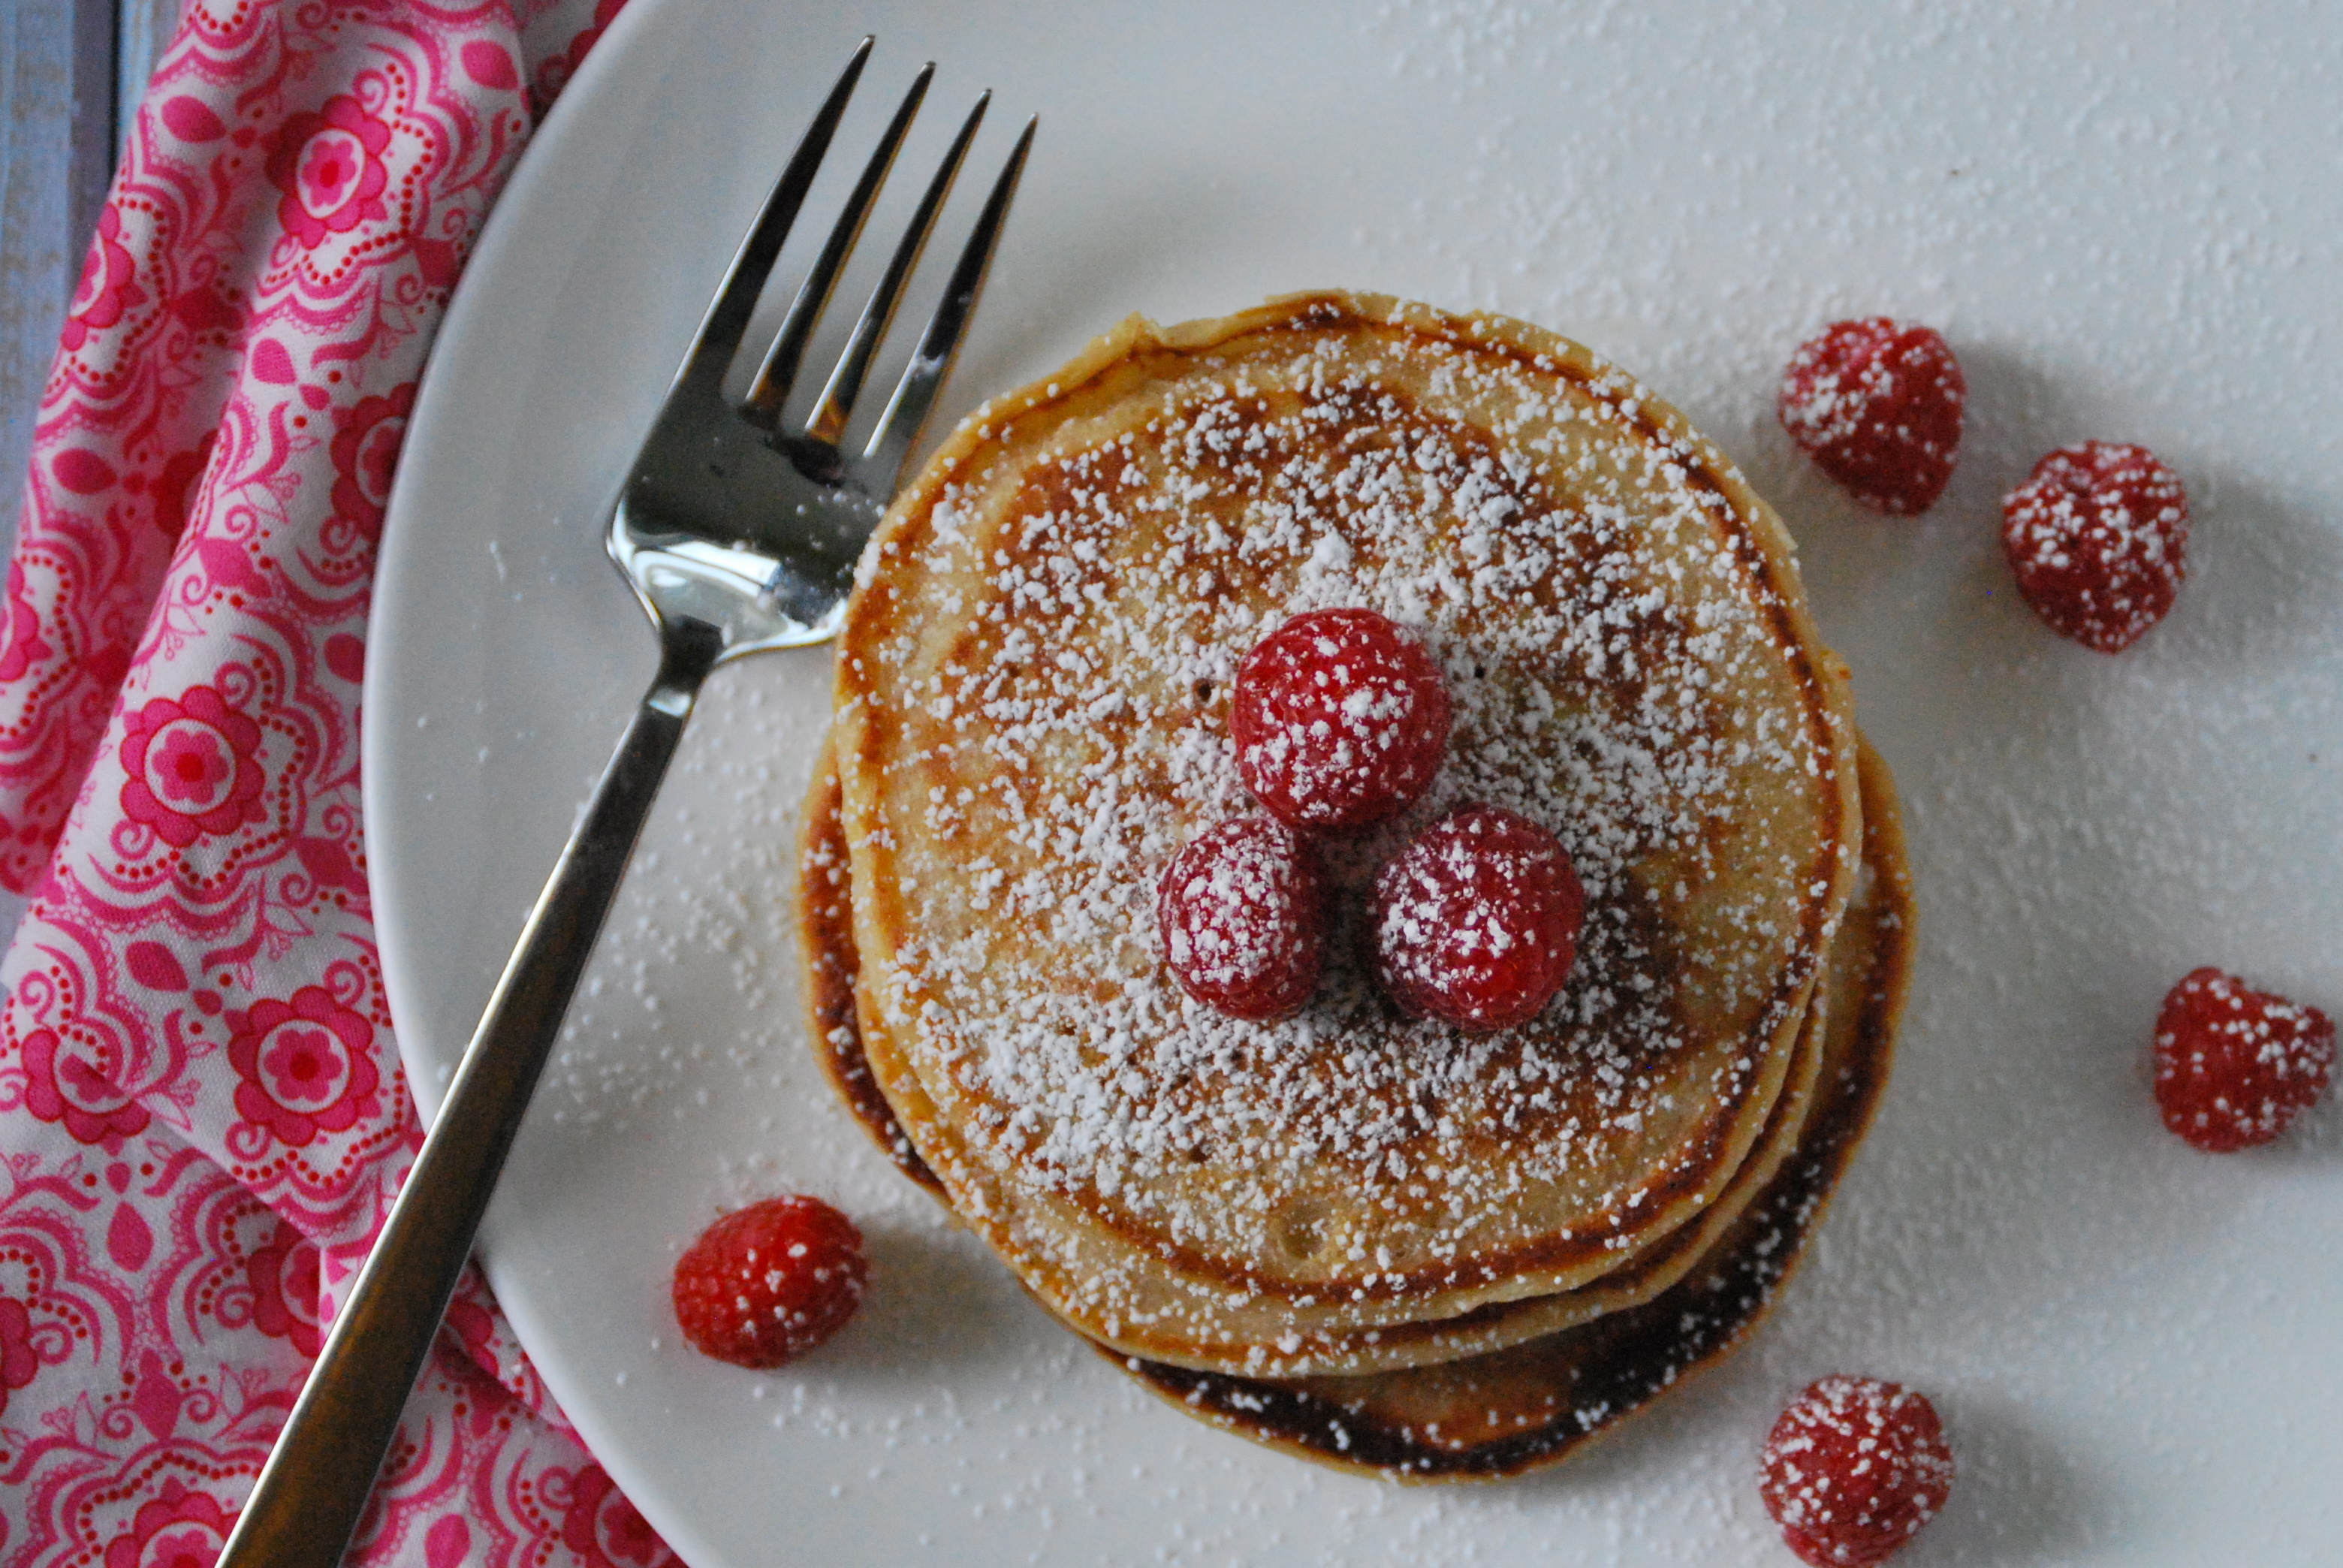
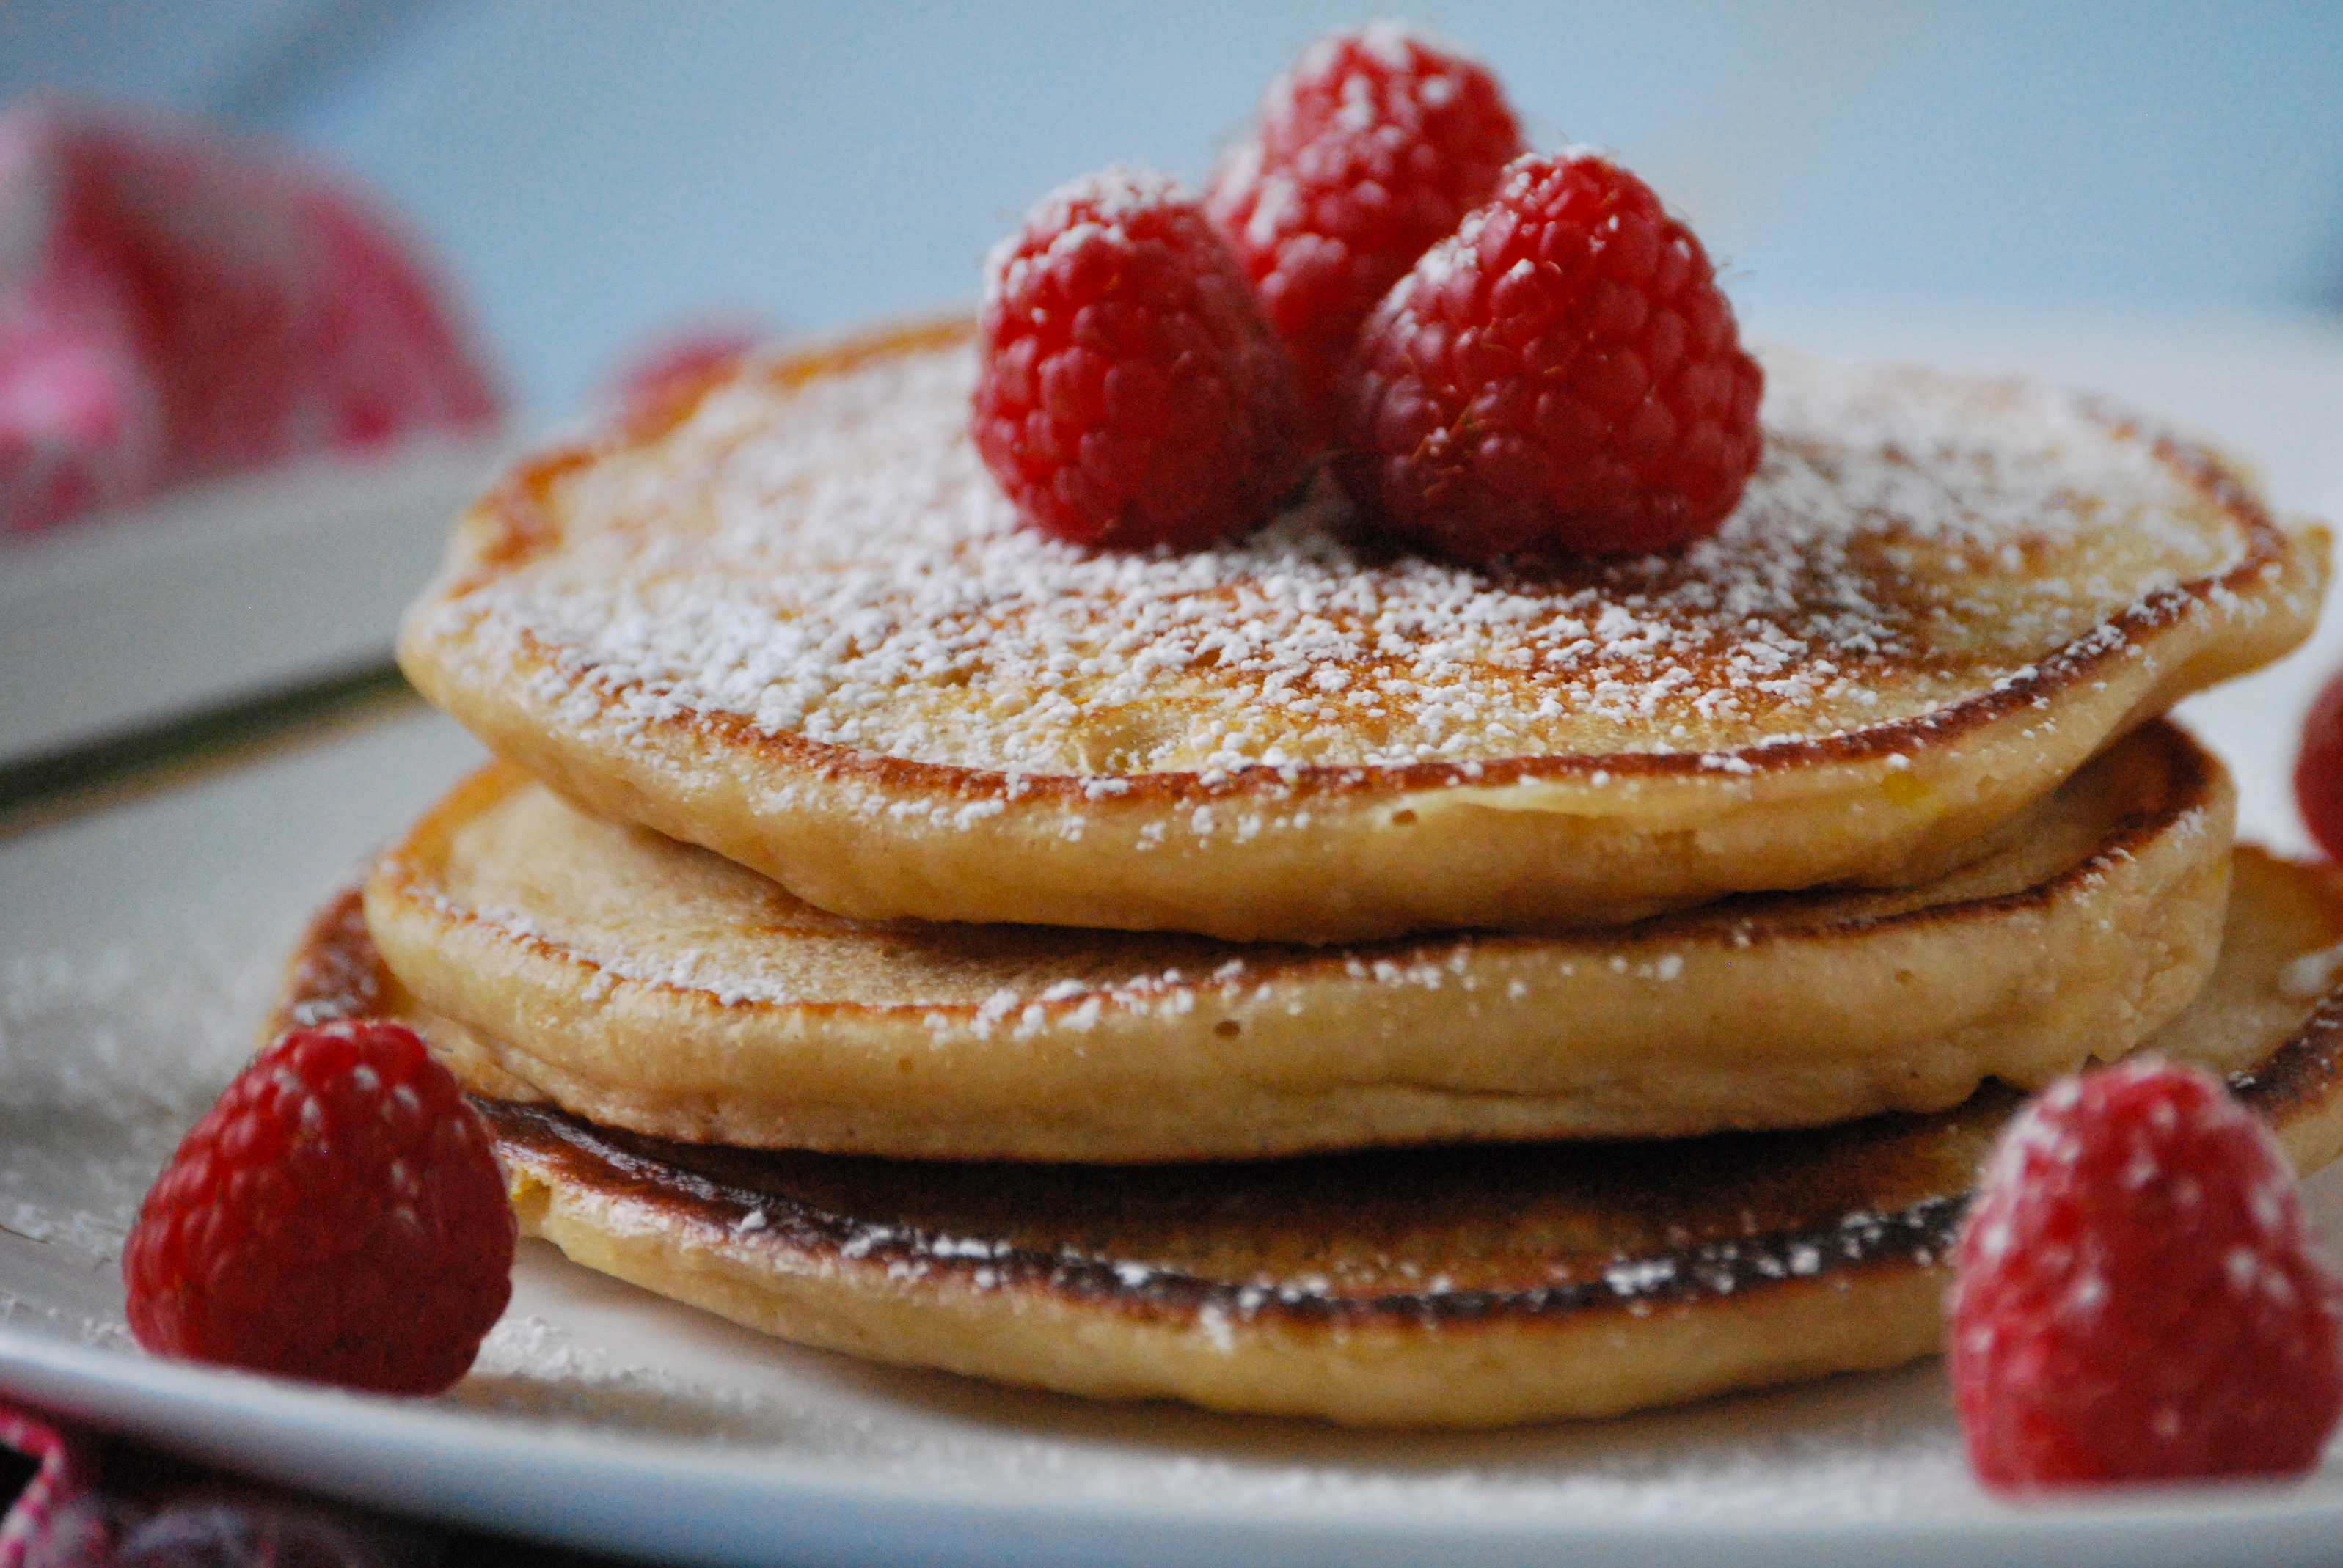
After the buns have properly raised, whisk the egg with 1/2 teaspoon of water and brush onto the buns.  Place the pan of buns on a baking sheet and put into a 350°F oven and bake for about 50 minutes, or until a thermometer registers 185°F in the center.    Remove from oven and let cool for a bit.  Pour remaining glaze on the buns and top with the pecans.  Sprinkle with sea salt and enjoy with a hot cup of coffee.

Source:  Adapted from Bon Appetite

Thanks for stopping by RelishingIt today!

Laurie

Read Full Post »

And another seasonal food makes it’s first appearance!  This time it’s rhubarb’s turn in the spotlight.  You’ll probably see a similar line here next week with another ingredient–maybe even every week throughout Spring and Summer as I blog.  I can’t help it!  I just get so excited for all of this seasonal gorgeous, vibrant produce.

Rhubarb has been cropping up everwhere around here in the last week.  The first Twin Cities farmers’ markets of the season opened this weekend, so I hauled the family to our favorite one in St. Paul.  It was fun getting a chance to chat with the vendors again after the Winter break.  I’ve found that the first few weeks are a good time to connect with them– to see what they’ll be offering and how the season is shaping up– since they aren’t quite as busy as they’ll be by Summer.  I bought many things, including a bunch of rhubarb.  Even better, a friend was also kind enough to give me a huge bundle.  Perfect.

So what to do with all this rhubarb?  Well, this cake and this crumble are two of my favorite things to make with it.  But I’ve also found the coffee cake that you see in this post.  I love coffee cakes.  They’re perfect for…well…coffee in the afternoon, of course.  They’re also easy to make and stay moist for days.

The rhubarb is obviously the main attraction here.  It adds a notable, though restrained tartness.  The cake is perfectly sweetened.  I used my homemade 1 % yogurt, which was a nice substitute for sour cream.  It kept the cake wonderfully moist, and as a bonus, it has less calories.  The next time I make this one, I’m going to try it with white whole wheat flour to get the benefits of using a whole grain.  I’ll let you know how it turns out.  And if you try it that way first, let me know about it.  Enjoy!

The Recipe:  Rhubarb Crunch Coffee Cake

1/2 cup (1 stick) unsalted butter

1 cup granulated sugar

2 eggs at room temperature

1 teaspoon vanilla

1 cup yogurt or sour cream

2 cups all-purpose flour

1 1 /2 teaspoon baking powder

1 teaspoon baking soda

1/2 teaspoon kosher salt

For the Rhubarb and Crunch Topping:

2 cups chopped rhubarb

1 /4 cup plus 2 tablespoons brown sugar

1 tablespoon all-purpose flour

1 teaspoon cinnamon

1/2 cup chopped walnuts

1 tablespoon butter, softened

pinch of kosher salt

Preheat the oven to 350°F.   Butter an 8-inch square cake pan.

To prepare the Rhubarb and the Crunch Topping: Combine 2 cups of rhubarb with 2 tablespoons of brown sugar in a small bowl; set aside.  Using a fork, combine 1/4 cup of brown sugar, 1 tablespoon of flour, cinnamon, 1 tablespoon of butter, and a pinch of kosher salt in a small bowl until crumbly.  Stir in the walnuts; set aside.

In a medium-sized bowl, sift or whisk together 2 cups of all-purpose flour, baking soda, baking powder, and kosher salt; set aside.

In a bowl of a stand mixer fitter with a paddle attachment, cream together 1 stick of butter and granulated sugar until creamy.  Add the eggs, one at a time, scraping down the sides of the bowl after each one.  Cream for 2-3 minutes, until light and fluffy.  Add the yogurt and vanilla and mix until combined.  The mixture may look curdled at this point.  That is ok.  Add the dry ingredients and mix until everything is just combined, being careful not to over mix.

Place half of the cake batter into the pan and smooth out.  Sprinkle half of the crunch topping over the batter in the pan.  Dollop the remaining cake batter on top of the crunch topping and smooth out with an offset spatula.  Combine the remaining crunch topping with the rhubarb and pour that mixture evenly on the top of the cake.  Place in the oven and bake for about 55-60 minutes.  Check the center for doneness with a toothpick.  This cake will taste great right away and will be even more moist the following day.  Store covered at room temperature.  Enjoy!

Source:  Adapted from Kitchen Simplicity

Thanks for stopping by Relishing It!

Laurie

Read Full Post »

A quick stroll through my dessert and cookie sections pretty much confirms that I have an insatiable sweet tooth.  Even so, when we go to our near-by patisserie, I choose a savory bite almost every time.  And if they’ve made a savory tartlet, my decision is easy.  Thankfully, I now have a recipe to make these little beauties at home– and this is one of the best tartlets I’ve ever had.

This wonderful, firm but flakey crust is made from olive oil rather than butter.  It lends a light floral, almost earthy, quality to the dish. Even though it is not par-baked, the crust becomes perfectly crispy on the outside, yet is still substantial enough to hold up to the liquid center.  Even after days in the refrigerator, the crust has an excellent texture.  And you know what that means– this is a great dish to make ahead of time.

The savory filling contains ramps, gouda, and goat cheese.  That’s right, it’s ramp season.  Remember last year when I was so excited and made this ramp pesto?  Well, I’m just as excited this year– and Radd is again making fun of the fact that I talk about ramps far too much.  If you don’t recall, or are unfamiliar with them, ramps are basically a wild leek.  They taste a bit like green onions combined with garlic.  If you find them, buy and enjoy them right away.  They’re not in season for long.  If you can’t find ramps, substitute green onions or leeks with a couple cloves of garlic.  It will still taste amazing.  I love the combination of ramps and goat cheese, and in this dish it really shines.  The goat cheese is soft and pillowy as you bite into the tartlet, while the gouda melts into the creamy center.  Enjoy!

The Recipe:  Ramp and Goat Cheese Tartlets

(Makes six 4-inch tarts or one 9 – 10-inch tart)

For the Savory Tart Dough:

3/4 cup all-purpose flour

1/2 cup white whole wheat flour

1/2 teaspoon kosher salt

1/2 teaspoon granulated sugar

2 large eggs, lightly beaten

1/4 cup olive oil

For the Tart Filling:

about 1  1/4 ounces goat cheese, crumbled

about 1  1/2 ounces gouda, grated

3 ramps, chopped (about 1/4 cup plus 1 tablespoon)

4 eggs

1/4 cup heavy whipping cream

kosher salt and black pepper, to taste

To make the Savory Tart Dough:  Place both flours, salt, and sugar in a food processor and pulse a few times to combine.  Add the eggs and olive oil and pulse about 10-15 times until the dough forms a ball.  Remove dough and place on a lightly floured work surface.  Knead  3-4 times, careful not to over work the dough.  Wrap in plastic wrap and place in the refrigerator for at least 1 hour.   Can be made ahead and kept in the refrigerator for up to 2 days or frozen.  The dough will defrost quickly at room temperature when you are ready to use it.

Preheat oven to 400°F.  Position rack in the center of the oven.  If making tartlets, measure out the dough into 6 equal portions, about 1  7/8 ounces each.  Roll the dough in a circle 1-inch larger than the tartlet pan or just press the dough evenly into the pans.  Distribute the goat cheese, gouda, and ramps evenly between the 6 pans.  In a small bowl, combine the eggs and cream and pour over each of the tarts, careful not to over fill them.

Place tartlets on a baking sheet and put into the oven.  Bake for about 35 minutes, or until the crust is a deep golden brown and the filling is puffed and becoming golden brown, as well.  Serve the tartlets warm or at room temperature.  They keep well for about 3 days in a covered container in the refrigerator and can be reheated in a 350°F oven.  Serve with a dollop of creme fraiche, if desired. Enjoy!

Source:  Olive Oil Crust adapted from Nick Malgieri’s How to Bake

Thanks for stopping by!

Laurie

Read Full Post »

Older Posts »

%d bloggers like this: