Feeds:
Posts
Comments

Posts Tagged ‘Whole Foods’

Lemony Artichoke Chicken Salad with Carrots | Relishing It

As usual around this time of year, I find myself in a bit of a food rut.  It feels like we should be eating local fresh asparagus and ripe sweet strawberries, but our finicky Minnesota climate just can’t decide if it wants to launch into full-on Spring or not. So, I wait patiently for these beautiful gems to show up at the Farmers Market– because, nothing comes even close to tasting as good.  In the meantime, lighter fare is slowly creeping into my subconscious and I find myself using my Dutch oven less and less.

Lemony Artichoke Chicken Salad with Carrots | Relishing It

Back in my college days (many years ago), I worked as a caterer.  I really enjoyed working the events and learning about different foods.  One of my favorite dishes we did was one that is similar to the salad I’m sharing today commonly known to us then as the “President’s Salad”, because it was the President of the University’s favorite salad and he always requested it for his catered functions.  It was delicious.

Lemony Artichoke Chicken Salad with Carrots | Relishing It

This is my version of that salad.  I like to keep things simple and light and pack it full of robust lemon flavor.  It is definitely customizable, adding pasta stretches it a bit for larger crowds (just double the amount of sauce), which is nice for summer gatherings.  Some people may prefer the sauce in more abundance, so adding a bit more mayonnaise is completely do-able.  Surprisingly, the combination of lemon, artichokes, and carrots are a fantastic match and can make it feel like you’re eating Spring, even if you are still waiting for it to fully arrive.  Finishing it with creamy cashews add a nice crunch that this salad definitely needs.   I hope you are all enjoying a lovely Spring in your parts!

Lemony Artichoke Chicken Salad with Carrots | Relishing It

The Recipe: Lemony Artichoke Chicken Salad with Carrots

(serves 4)

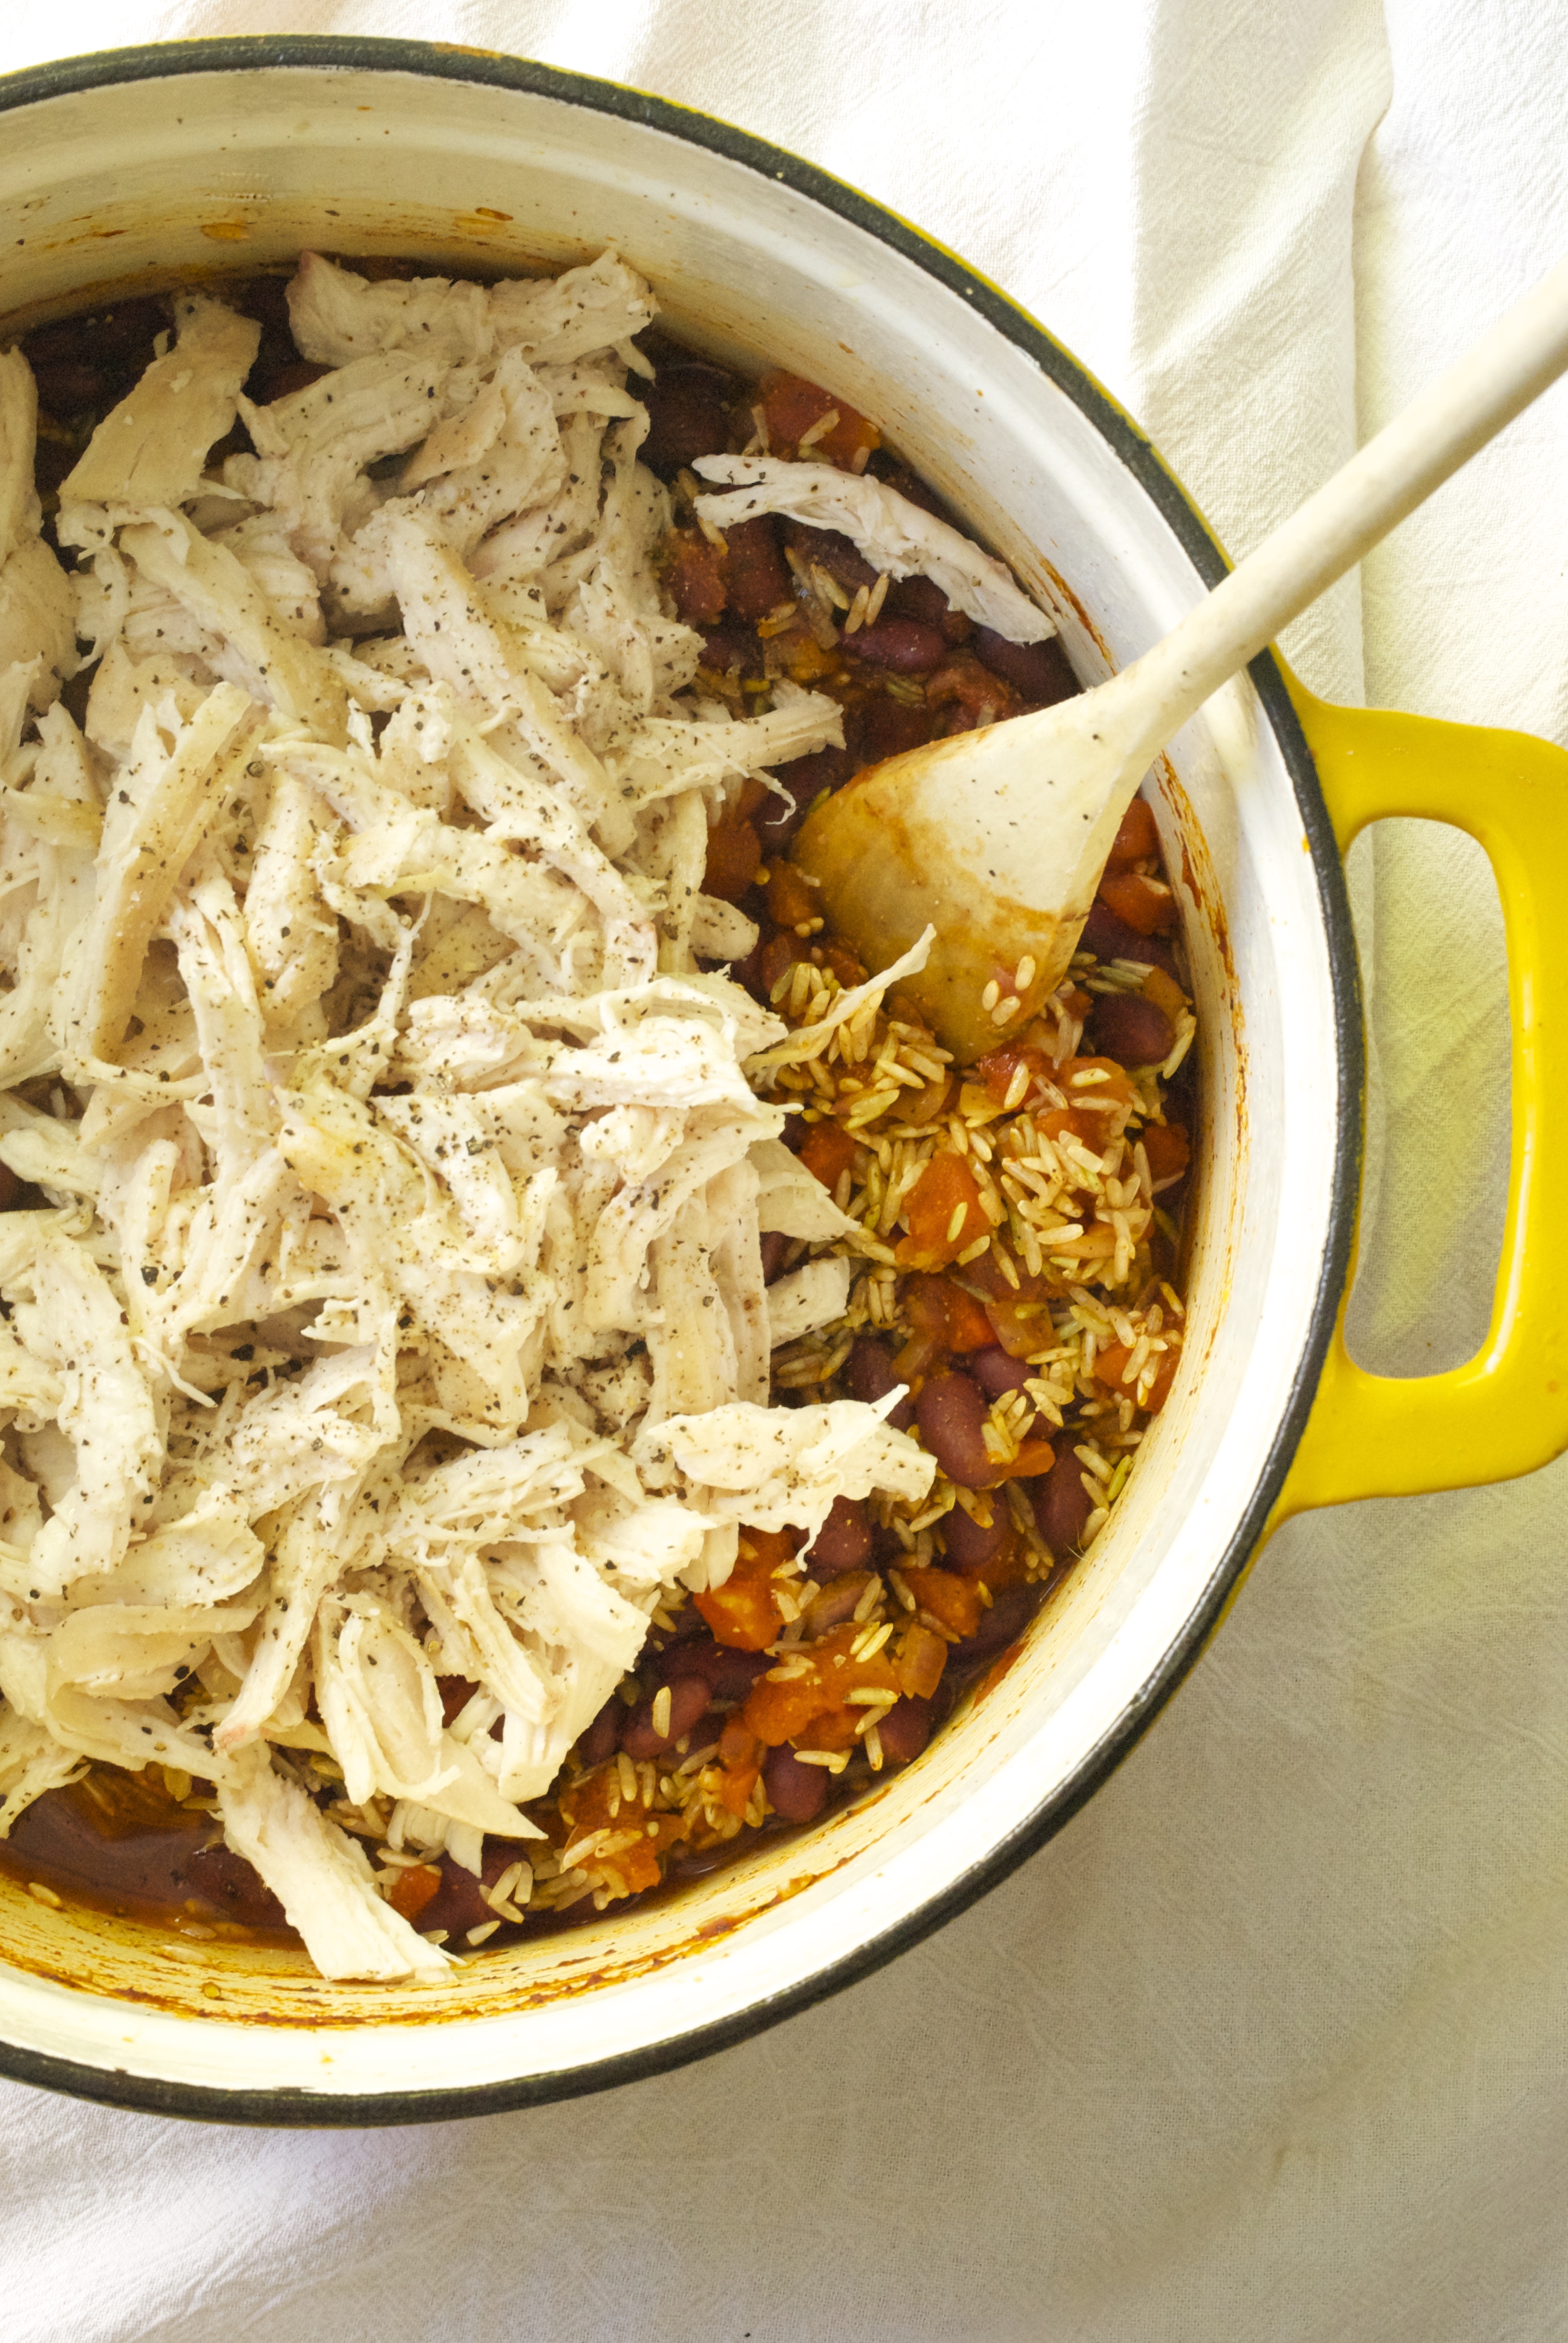
2 pounds bone-in, skin-on chicken breasts, roasted and shredded or about 2 1/2 cups rotisserie chicken, shredded

4 large carrots, peeled and julienned (or coarse grated)

1 small celery stalk, chopped

1 14-ounce can of quartered artichoke hearts, rinsed

handful of cashews and extra cilantro, for garnish

The Sauce:

1/4 cup mayonnaise (or more, if desired)

juice of 1 medium lemon

1 tablespoon extra-virgin olive oil

1 tablespoon chopped cilantro

1 garlic clove, minced

salt and pepper

Preheat oven to 375°F.  Line a baking sheet with parchment paper.  Drizzle a bit of olive oil on both sides of the chicken breasts.  Sprinkle with salt and pepper.  Roast for about 40 minutes (the time will vary depending upon the size of the breasts) or until a thermometer inserted into the thickest part of the breast reads 165°F.  Remove from oven.  Cover with foil and let rest for about 10  minutes.  Shred with forks or your hands, when cool.

In a small bowl, whisk the sauce ingredients together and set aside.

Combine the shredded chicken, artichoke hearts, carrots, and celery in a large bowl.  Pour the sauce over the contents and use tongs to gently fold everything together (so the chicken doesn’t fall apart too much).  Taste and re-season with salt and pepper, if necessary. This salad is best if it spends a little time in the refrigerator for the flavors to meld.  Serve with cashews and additional cilantro sprinkled on top.  Enjoy!

As always, thanks so much for stopping by Relishing It!  Take care.

Laurie

Read Full Post »

Mexican Bake | Relishing ItSo, what are you planning to do with all of those delicious turkey leftovers after Thanksgiving?  Sandwiches?  Really?  I like a good cold-turkey sandwich as much as anyone, but today I have a recipe that is a great alternative.  And to be honest, even if you don’t have turkey leftovers you should make this dish.  It’s wonderful, and so versatile that you can make it with turkey, chicken, ground beef or even just beans, for a vegetarian option.

Mexican Bake | Relishing It

You’ve probably noticed that I’m into making ‘bakes’ a lot this year.  I’ve been having fun incorporating legumes, grains, and quinoa (technically a seed) into meals.  Aside from being so easy to throw together, they’re incredibly satisfying and a healthy option.  A big bowl of hot food is just what we all need as we gather around the dinner table together while it snows outside.  This particular bake has a Mexican flare. I’ve made it a number of ways depending on what we have in the house. I’ve been challenging myself this year to make meals out of food that we have, rather than running to the store every time an idea enters my brain. Aside from a smaller grocery bill, it cuts down on wasting otherwise-usable food, so that makes me happy.

Mexican Bake | Relishing It

This dish is fabulous with shredded chicken or turkey, but it’s also equally tasty using ground beef (or shredded beef, if you happen to have that).  Substituting beef broth for the chicken broth is an easy swap.  Of course, going completely vegetarian is a no-brainer, too.  Just add more beans and use vegetable broth, or even water.  Just amp up the spices a bit more to compensate. Whatever protein you decide to use, it will pair wonderfully with the brown rice, corn, and beans.

Mexican Bake | Relishing It

You all know that I pretty much can all of my tomatoes that I need to get me through the winter.  However, Red Gold Tomatoes generously sent me some different varieties of canned tomatoes to try (thanks, guys!).   So, I incorporated them in this dish and they were fantastic! I used the the lime juice and cilantro variety.  Of course, you can use any type of canned tomato that you have on hand, but these added a nice zesty flavor to the dish.

Mexican Bake | Relishing It

Load the bake up with as much cheese as you would like– that’s a personal preference.  Before serving, squeeze on some fresh lime juice, sprinkle with cilantro, slice up some jalapeños, and dollop on the sour cream.  Serve it with tortilla chips or plain tortillas and you are set.  You’re going to love this dish!

Mexican Bake | Relishing It

The Recipe: Mexican Bake

(serves 4)

olive oil

about 1 pound (or a bit more) of cooked shredded chicken, turkey, ground or shredded beef (see note)

1 small red or white onion, diced

about 4 garlic cloves, minced

about 14-15 ounces of cooked beans, drained and rinsed (any kind– red, black, pinto, or even white) (when I forget to soak my own, I’ve really been enjoying Simply Balanced Organic Beans (found at Target) for both the texture and the flavor.)

1 cup long grain brown rice, rinsed (any type of rice will work–if wanting to use white, just note that the cooking time will decrease)

1 tablespoon ancho chili powder

2 teaspoons ground cumin

1-2 teaspoons ground coriander

kosher salt and cracked pepper

about 1 cup frozen corn

1 1/2 cups homemade chicken or beef broth heated (depending upon what protein you are using)

1 15-ounce can Red Gold diced tomatoes with lime juice and cilantro (or anything similar)

shredded cheese, 1-2 cups  (sharp cheddar, mozzarella, and monterey jack are great options)

chopped fresh cilantro, fresh jalapeños, sour cream, fresh limes, hot sauce, tortilla chips, and/or fresh tortillas for serving

Note:  If wanting to use shredded chicken, simply sauté one pound (or a bit more) of chicken breasts seasoned with salt and pepper in a skillet with olive oil.  They should take about 3-4 minutes on each side, depending upon how high your heat is.  Check for doneness, then shred with a fork.  Or use rotisserie!

Preheat oven to 375°F.

In a large Dutch oven add a couple tablespoons of olive oil and sauté the onion and garlic for a couple of minutes over medium-high heat until somewhat soft (you would brown the ground beef just prior to this, if using).  Add the chili powder, cumin, coriander, about 1-2 teaspoons of kosher salt, and cracked pepper to the pan.  Then add the canned tomatoes with juices, beans, rice, meat, corn, and heated broth and continue to cook for a couple of minutes over medium-high heat until everything is hot.

Mix in the meat.  Flatten everything with a spatula so the rice can cook properly in the liquids.  Place in the preheated oven and bake covered for 1 hour.  Remove from oven and add the cheese.  Return to oven, covered, for about 5 more minutes, or until cheese has melted.

Serve with lime wedges, chopped cilantro, sliced jalapeños, sour cream, hot sauce, tortilla chips and/or fresh tortillas.  Enjoy!

I hope you all have a safe and Happy Thanksgiving celebrating with your loved ones!  Peace to all.

Laurie


Read Full Post »

Quinoa Bake with Broccoli and Chickpeas | Relishing It

When I’m developing a new recipe for a meal there are two criteria that generally need to be met.  First, the recipe has to be mostly healthy.  Since I’m the main person that pumps food into my family, I need it to be loaded with nutrients.  Second– and this is the tricky one– I need it to be a meal that my family actually likes and will eat.  Finding this balance is often a challenge, but today’s recipe was spot-on.

Quinoa Bake with Broccoli and Chickpeas | Relishing It

Quinoa Bake with Broccoli and Chickpeas | Relishing It

Luckily for me, my family actually likes broccoli.  Seriously.  So, if I toss that into a dish I’m already one step to the good.  Here, I also relied on chickpeas for the protein and the texture.  And quinoa is one of my favorite things to build a meal around.  It cooks quickly, has a nice nutty flavor, and happens to be loaded with protein, as well.  Though it looks like a grain, quinoa is actually a seed–so it is gluten-free.

Quinoa Bake with Broccoli and Chickpeas | Relishing It

This isn’t a heavy bake loaded with cream or lots of cheese.  It’s simple and clean, if you will.  Aside from the main components of the dish, the subtle flavors of garlic and lemon really come through and work so well together.  I like to use my homemade chicken broth here because I always have it on hand and I love its flavor.  However, if you are vegetarian, feel free to use vegetable broth.  Finishing it with parmesan cheese that has become golden and chopped almonds for the texture is perfect.

Quinoa Bake with Broccoli and Chickpeas | Relishing It

One of the best parts about this dish just how easy it is to prepare.  From start to finish, your family will be eating dinner in about 30 minutes.  That’s not bad, especially considering most of that time it is in the oven. And you can feel good about the fact that every bite is healthy for them.  Hope you enjoy!

Quinoa Bake with Broccoli and Chickpeas| Relishing It

The Recipe: Quinoa Bake with Broccoli and Chickpeas

(serves 4)

olive oil

2 cups chopped broccoli

3 garlic cloves, finely minced

1 small red onion, finely chopped (about 1/3 cup)

1/4 cup chopped fresh parsley

13-15 ounces cooked chickpeas (about 1 1/3 cup)

1 cup dry quinoa, rinsed (any color will work)

zest of 1 large lemon

1 1/2 cups chicken broth (heated)

kosher salt and cracked pepper, to taste

handful of parmesan (about 1/2 – 3/4 cup)

handful of chopped roasted almonds, for garnish

Preheat oven to 450°F.

Heat olive oil in a cask-iron skillet, or anything similar. Sauté the onion, garlic, broccoli, and chickpeas for about 3 minutes.  Sprinkle with about 1 teaspoon of salt and some cracked pepper.  Then add the lemon zest, parsley, quinoa, and heated broth.  Make sure all of the quinoa is covered by the broth.  Cover with foil and place in the oven.

Bake for about 20 minutes, or until the quinoa has absorbed all of the liquid and is tender.  Remove from oven.  Place oven rack near the broiler and turn it on.  Sprinkle parmesan over the quinoa and return to oven uncovered.  Broil for just a couple of minutes until the parmesan has turned golden brown.  Keep a watchful eye, as it can burn quickly.  Remove from oven and sprinkle with chopped almonds before serving.  Leftovers can be kept in the refrigerator and reheated easily.  Enjoy!

Thanks for stopping by Relishing It!

Laurie


Read Full Post »

Healthy Stuffed Cabbage Roll Soup | Relishing It

It’s early November and the first winter storm of the season just rolled through Minnesota.  I generally try to have a positive tone when I share my thoughts here, but this… sucks.  No time to acclimate to lower temperatures over a few weeks, no light dusting of snow that melts away in the sun.  Nope.  Winter is here and I’m not ready for it yet.  Thankfully, we got the leaves raked (barely) and taken to the compost pile, the summer furniture is tucked away in the shed, and my small garden has been cut down.  But still, this is ridiculous.  Last winter was grueling, to say the least.  I want more crunchy leaves on the sidewalks and more bonfires with our neighbors.  I want more outdoor runs without the worry of slipping on ice. I realize that I’m going to have to wait months for these simple pleasures again.  And I will wait patiently and enjoy them all-the-more when they arrive.  There.  Now I’m feeling a little bit better.

Healthy Stuffed Cabbage Roll Soup | Relishing It

Healthy Stuffed Cabbage Roll Soup | Relishing It

For now, I will pour myself into doing the things that I love to keep my mind off of the frigid temperatures.  Today it’s warm soup and fresh bread.  This stuffed cabbage roll soup is a favorite in our house.  It has all the wonderful flavors and textures of stuffed cabbage rolls with less work.  It’s hearty and filling– total comfort food.  But, it’s also healthy.  Like, really healthy.  It’s loaded with whole foods–grass-fed beef, fresh cabbage, canned tomatoes, brown rice, and zingy fermented sauerkraut.  I love to eat cabbage year-round– it’s an underrated vegetable, in my opinion.  Not only is it good for you, it has a long refrigerator life.  This is much more than a soup– almost a stew.  Feel free to add more broth or tomatoes if you like it a little less thick.  I think it’s perfect as is, but especially fantastic with a dollop of sour cream or plain yogurt on top and a sprinkle of fresh dill or parsley.  I hope you give it a try.  Enjoy!

Healthy Stuffed Cabbage Roll Soup | Relishing It

Healthy Stuffed Cabbage Roll Soup | Relishing It

The Recipe: Healthy Stuffed Cabbage Roll Soup

(serves 4)

1 pound grass-fed ground beef

3/4 cup dry long grain brown rice

1 small white or yellow onion, diced

2 garlic cloves, minced

2 teaspoons kosher salt, plus more if needed

cracked black pepper

1 quart chicken broth, preferably homemade

2 cups crushed canned tomatoes (or a 15 ounce can–Muir Glen Organic is great)

2 cups homemade tomato sauce (or a 15 ounce can — again, go with Muir Glen)

3 cups, thinly shredded cabbage ( I used 1 somewhat smallish one)

1 teaspoon fresh thyme

1 bay leaf

1/4 cup packed chopped fresh parsley

2 cups homemade sauerkraut or store-boughten, preferably fermented

sour cream or yogurt, dill or parsley for garnish

Begin by rinsing the brown rice.  Then add it along with 1 1/2 cups of cold water and a pinch of salt to a large sauce pan.  Bring to a boil, then cover and reduce heat to a simmer and cook until the rice is tender and the water has been absorbed, about 40 minutes.  Keep a watchful eye or you may burn the rice.  You can always add more water and drain any extra, if you’re worried about that happening.

In a large Dutch oven over medium-high heat, brown the ground beef.  Drain the grease, if there is any and add the onion and garlic to the pan along with 2 teaspoons of kosher salt and some cracked black pepper.  Cook the ground beef/onion mixture for just a few minutes, stirring occasionally, until the onion softens a bit.

Add the crushed tomatoes, tomato sauce, chicken broth, chopped cabbage, cooked brown rice, fresh thyme, and bay leaf to the Dutch oven.  Cook for about 30-40 minutes over low-medium heat, or until the cabbage has wilted and is tender.  Add the sauerkraut and freshly chopped parsley and cook for another 5 minutes, or until the sauerkraut has warmed.  Remove bay leaf before serving.  Top with sour cream or plain yogurt and fresh dill or parsley.  Leftovers may become somewhat thick from the rice absorbing more liquid– it can be thinned out with more tomatoes or broth.

Thanks for stopping by Relishing It!

Laurie


Read Full Post »

Roasted Brussel Sprouts, Mushrooms, and Beef with Horseradish Cream Sauce | Relishing It

Today’s recipe is a simple little dish that my my husband and I both love.  You’ll note that I didn’t say my kids love it, because…well they’re kids, and I guess they just don’t yet appreciate brussel sprouts and horseradish   I, on the other hand, love brussel sprouts and I’m always trying to put them into new dishes.  I enjoy them raw, such as in this salad that I still make often.  But I also love to roast them to add a little complexity to their flavor.  Roasted Brussel sprouts alone can be a meal or a hearty side, but adding leftover braised beef and crimini mushrooms takes them from “boring vegetable” status in my husbands eyes to “that was an amazing meal”.  Topping the entire dish with a delicious horseradish cream sauce made it perfect.

Roasted Brussel Sprouts, Mushrooms, and Beef with Horseradish Cream Sauce | Relishing It

Roasted Brussel Sprouts, Mushrooms, and Beef with Horseradish Cream Sauce | Relishing It

Roasted Brussel Sprouts, Mushrooms, and Beef with Horseradish Cream Sauce | Relishing ItAs a kid, my grandpa used to grow horseradish in his massive garden. He’d process it into a creamy version and my parents and grandparents would slather it on the homemade sausage. Like my kids, at the time I didn’t appreciate the horseradish… or the sausage, for that matter. The horseradish was strong– it had “bite” to it, as my grandpa would always say.  I’m sure you’ve all made a beef roast and wanted to create something new with the leftovers.  Well, this is a nice quick option.  No leftover beef on hand?  No problem– it will still be amazing without it. This meal only takes about 15-20 minutes to make and it’s so satisfying.  Top it with a drizzle of the horseradish cream sauce and a few chopped hazelnuts (trust me on this) for crunch.  It’s a perfect weeknight dinner and you can feel good about the fact that you’re eating healthy, whole foods.  Enjoy!

Roasted Brussel Sprouts, Mushrooms, and Beef with Horseradish Cream Sauce | Relishing It

Roasted Brussel Sprouts, Mushroom, and Beef with Horseradish Cream Sauce | Relishing It

The Recipe: Roasted Brussel Sprouts, Mushrooms, and Beef with Horseradish Cream Sauce

brussel sprouts, halved (or quartered if very large)

crimini mushrooms, halved

leftover braised beef, preferably grass-fed

hazelnuts, coarsely chopped

olive oil

kosher salt and cracked pepper

For the Horseradish Cream Sauce:

1/4 cup sour cream

2 tablespoons creamy, prepared horseradish

2 tablespoons whole milk (any kind will work)

1 tablespoon apple cider vinegar  ( I use Bragg’s organic raw)

1 tablespoon finely minced shallot or red onion

1 tablespoon finely minced fresh chives

1 garlic clove, finely minced

kosher salt and cracked pepper

You’ll notice that I didn’t give amounts for the main ingredients.  Amounts aren’t really needed in this recipe, make as much or as little as you want.  One pound of brussel sprouts will generally feed about four people.  Add as much mushrooms and beef as you like.

To make the Horseradish Cream Sauce: add all of the ingredients to a medium-sized bowl and mix with a spoon.  Taste and properly season with salt and pepper.  Set aside.

Preheat the oven to 400°F.  On a large rimmed baking sheet, toss the halved brussel sprouts with 1-2 tablespoons of olive oil and a sprinkle of salt and pepper.  Roast for about 10-15 minutes, flipping once.  You want a nice golden brown color to appear on the brussels. When they are nearly done and have nice color, add the mushrooms and beef to the pan and roast for a few more minutes until they are heated through and the mushrooms begin to shrink in size. Remove from pan.  Place onto a serving dish and top with the horseradish cream sauce immediately (so it can warm slightly) and hazelnuts.  Enjoy!

Thanks for stopping by Relishing It!

Laurie


Read Full Post »

Wild Rice, Roasted Butternut Squash, and Kale with Citrus Curry Dressing | Relishing It

We have had a busy couple of weeks, in the most wonderful way.  We went on an epic vacation to Disney World with our extended family.  There were twelve of us in all– six adults and six children– and it was fantastic,  I’m more than a little sad that this long-planned trip has now come and gone.  Luckily, the transition back to our normal lives here in Minnesota was pretty easy.  We’re having a beautiful fall, with stunning colors and perfect temperatures.  October is my favorite month anyway, and this one is living up to every expectation I’ve ever had.  Both of my sweet little ones celebrate birthdays this month– which makes me love it even more.

Wild Rice, Roasted Butternut Squash, and Kale with Citrus Curry Dressing | Relishing It

As for that getting back into the swing of things, we went to a neighborhood potluck last night where our friends smoked an impressive 36 pounds of pork.  It was ridiculously delicious!  I made this autumnal dish for the get-together and received some nice comments, so I figured I’d share it with you as well.  It’s a cross between a side dish or a salad, or maybe even a main course.  Let’s just call it food, shall we?  It has a wonderful feel of fall to it and contains some of my favorite things.   I fancy rice and squash as a combination, and a few of you may remember this dish from last year? This time I went with the nutty, toothsome, wild rice.  I’ve been tossing it into soups and salads whenever I can.  I also stocked up on Winter squash at the farmers market yesterday, so I figured I’d add some in as well.

Wild Rice, Roasted Butternut Squash , and Kale with Citrus Curry Dressing | Relishing It

Wild Rice, Roasted Butternut Squash, and Kale with Citrus Curry Dressing | Relishing It

Wild Rice, Roasted Butternut Squash, and Kale with Citrus Curry Dressing | Relishing It

Then I decided to make this delicious citrus curry dressing to pour on top of everything.  I’d been dreaming about this dressing after having recently gone out to lunch with a couple girlfriends.  This dressing was on all of our salads and it was insanely delicious.  (No worries, ladies– I think I’ve got it down.  Or something very close and fantastically delicious in it’s own right.) The dressing’s base is orange juice that has been reduced to amp up its flavor.  The curry addition makes it unique and almost addictive.  Bite after bite, you’ll keep wanting more.  I also decided to add some kale into the mix, since I had a bit left from my final CSA box.  I massaged it first with a tiny drizzle of olive oil and salt for about 3-5 minutes.  Massaging kale helps it soften a bit, and in this dish, it is worth the little extra effort.

Wild Rice, Roasted Butternut Squash, and Kale with Citrus Curry Dressing | Relishing It

Wild Rice, Roasted Butternut Squash, and Kale with Citrus Curry Dressing | Relishing It

I came across some wonderful honey goat cheese at our co-op and knew it would work perfectly in this dish.  Wow!  There is a smidge of honey in the dressing, so it tied in beautifully.  Of course regular goat cheese would work fine, too.  I topped the dish with coarsely-chopped roasted and salted hazelnuts, but walnuts or even almonds would serve the purpose, too.  Anything that provides a little crunch for texture. The dish can be served warm, but I prefer it at room temperature.  Which makes it a perfect make-ahead dish for the holidays.  Hope you are all doing well– enjoy!

Wild Rice, Roasted Butternut Squash, and Kale with Citrus Curry Dressing | Relishing It

The Recipe: Wild Rice, Roasted Butternut Squash, and Kale with Citrus Curry Dressing

1 cup uncooked wild rice

1 medium-large butternut squash, peeled and cut into small cubes

1 1/2- 2 cups coarsely chopped kale (any variety will work)

roasted and salted hazelnuts, for garnish (about 1/2-3/4 cup)

crumbled honey goat cheese (or regular), for garnish (about 1/2 cup)

olive oil

kosher salt and cracked pepper

For the Citrus Curry Dressing:

1 cup freshly squeezed orange juice, from 2 oranges  (Valencia worked great)

1 tablespoon finely minced shallot or red onion

1 garlic clove, finely minced

1/2 teaspoon Dijon mustard

1 teaspoon honey

1 tablespoon cider vinegar

2 teaspoons sweet curry powder

1/3 cup extra virgin olive oil

kosher salt and cracked pepper to taste

Preheat oven to 400°F.  Place the diced butternut squash on a large rimmed baking sheet and coat with a little bit of olive oil, salt, and pepper.  Roast for about 20-25 minutes, or until tender.  Turn the squash once while roasting.  The amount of roasting time will depend on how big or small the squash pieces were cubed, so keep a watchful eye.  Remove from oven when tender and let cool a bit.  Squash that is really hot is fragile and will fall apart more easily.

Meanwhile, rinse the wild rice in water and place into a large saucepan with 4 cups of cold water a little salt.  Bring to a boil, then reduce heat to a simmer.  The rice should be tender after about 45 minutes.  Then drain the remaining water and fluff with a fork.  Let cool for a bit. This method uses a bit more water than usual, but helps in that you don’t have to keep such a watchful eye so it doesn’t burn.

To make the dressing, begin by placing the orange juice into a small saucepan and reduce (uncovered) over medium-high heat for about 10 minutes, or until 1/3 cup orange juice remains.  Stir often. Let cool.  Then you may begin making the dressing by using one of two methods.  The first method uses an immersion blender (which I couldn’t live without).  Place all of the dressing ingredients into a tall cylinder shaped container (my blender came with one) and pulse a few times with an immersion blender until the dressing is uniform and well blended.  If you don’t have an immersion blender, you can simply use the bowl and whisk method to make the dressing (or even shake in a lidded jar).   Add all of the ingredients to the bowl, except the olive oil.  Mix together, and then slowly whisk in the olive oil.  Season with kosher salt and cracked pepper.  You may be surprised that you’ll have to add a bit of salt to bring out the flavor of the dressing.

Add the coarsely chopped kale to a medium-sized bowl and drizzle with a tiny bit of olive oil and salt. Massage kale for a few minutes until it is tender and has wilted a bit.

When all of the ingredients are ready, add them to a huge serving platter or bowl.  Pour half of the dressing over everything and gently mix.  Taste.  Add more dressing if you like.  Season with salt and pepper.  Then top with crumbled goat cheese and chopped roasted hazelnuts.  I prefer this dish at room temperature.  Refrigerate leftovers.  Enjoy!

Thanks for stopping by Relishing It!

Laurie

Read Full Post »

Enchilada Bake with Butternut Squash, Black Beans, and Shredded Chicken | Relishing It

So, I’m assuming you have all made your homemade batch of enchilada sauce from my post a couple days ago, right?  Now, what are you going to do with that bowl of deliciousness?  You could use it for regular ol’ enchiladas, but why not try something different– like this enchilada bake? An enchilada bake is kind of like an Italian lasagna but with a Mexican twist.  It’s a lot of layering of ingredients of your choosing separated by tortillas, cheese, and sauce.  And it’s wonderful.

Enchilada Bake with Butternut Squash, Black Beans, and Shredded Chicken | Relishing It

Enchilada Bake with Butternut Squash, Black Beans, and Shredded Chicken | Relishing It

Enchilada Bake with Butternut Squash, Black Beans, and Shredded Chicken | Relishing It

Of course, you can use any sort of filling that you want, but I chose to go with butternut squash because it’s in-season right now.   Shredded chicken probably isn’t necessary as the black beans give this dish protein and a nice Mexican vibe.  With that said, the chicken was perfect in this dish– and my husband probably would have rioted without it.  Plus, I had some in my refrigerator from making broth the other day.  I love the combination of the squash, black beans, and chicken– they compliment each other so well.  And the enchilada sauce ties everything together.

Enchilada Bake with Butternut Squash, Black Beans, and Shredded Chicken | Relishing It

Enchilada Bake with Butternut Squash, Black Beans, and Shredded Chicken | Relishing It

If you’re not entirely sure how to cut into that butternut squash, I took a few photos that should help you out.  It’s quite easy to dice.  And if you have extra squash, roast it and freeze it for later.  I love doing that this time of year, since they are so plentiful and inexpensive at the farmers markets.  Something to think about if you’re like me and stocking your freezer full of summer goodness to get you through the winter.  Be well, my friends.

Enchilada Bake with Butternut Squash, Black Beans, and Shredded Chicken | Relishing It

Enchilada Bake with Butternut Squash, Black Beans, and Shredded Chicken | Relishing It

The Recipe: Enchilada Bake with Butternut Squash, Black Beans, and Shredded Chicken

(makes an 11 x 8 casserole)

1 butternut squash, cubed into small pieces (you’ll only use about 1 1/2 cups of it)

1 cup cooked black beans

1 1/2 cups shredded monterey jack cheese

about 12 corn or flour tortillas, or more depending upon your pan size

1 cup shredded, cooked chicken ( *see note)

2 cups homemade enchilada sauce, plus more for serving

olive oil

salt and pepper

green onions, sour cream, and jalapeños, for garnish

*Note: If you don’t have any cooked chicken on hand, you can easily roast some.  You’ll need about 2 bone-in, skin-on chicken breasts.  Place on a small baking sheet lined with foil.  Drizzle with olive oil, salt, and pepper. Bake at 375°F for about 45 minutes, or until the chicken reaches between 165-170°F when inserted with a thermometer. You can bake the chicken and squash at the same time, the chicken will just need to bake a bit longer.  Let the chicken rest for at least 10 minutes before shredding it

Preheat oven to 375°F.  Place the cubed squash on a large baking pan lined with parchment paper.  Drizzle with olive oil and sprinkle with salt and pepper.  Roast for about 25 minutes, or until tender.  Remove from oven.  You will not use all of the squash.  Store remaining squash in the refrigerator to use throughout the week, or freeze.

Next, begin layering the enchilada bake.  The amounts I listed were for a casserole dish that measures 11 x 8.  Use whatever dish you have, but just know that you may need to make adjustments to the amounts.  Start by putting 1/2 cup of enchilada sauce on the bottom, followed by about 1 cup of roasted squash.  Then place about 4 tortillas on top of that, followed by 1/2 cup of black beans, 1/2 cup of shredded chicken and 1/2 cup shredded cheese. The next layer will be 4 more tortillas, 1/2 cup of black beans, 1/2 cup of shredded chicken, and 1/2 cup of roasted squash.  Then, the final layer is 4 tortillas, 1 1/2 cup of enchilada sauce topped with about 1 cup of monterey jack cheese. Slightly push down on the layers, as you go.

Bake uncovered at 375°F for about 40-45 minutes, or until the cheese is a beautiful golden brown.  Remove from oven and serve with extra enchilada sauce, sour cream, chopped green onions, and jalapeños.  Leftovers can be kept in the refrigerator and are wonderful when served with a little extra enchilada sauce.  Enjoy!

As always, thanks for stopping by!

Laurie


Read Full Post »

Easy Homemade Enchilada Sauce | Relishing ItWith the exception of this past warm weekend– a farewell gift from summer as it left– my mind has been drifting towards cool-weather comfort food.  You know, those meals that you can settle in to and cozy up with in the evening.  I’m ready for less running about, more family meals at the table, and that smell that you greets you at the door and permeates the house– when you know something delicious awaits you for dinner.  Yes, I’m ready for fall food.  I’m ready to eat hot soups and sip hot drinks.  I’m ready to braise things again.

Easy Homemade Enchilada Sauce | Relishing It

Easy Homemade Enchilada Sauce | Relishing It

Enchiladas may seem like an odd place to start, but for me, it’s a perfect seasonal-transition meal.  It’s warm, substantial, and very much a comfort food.  I intended to share this really quick enchilada sauce with you last year, but didn’t get to it.  If you’re a regular reader here, you know that I’m a big proponent of making homemade sauces.  It takes just a little extra effort, and the results are almost always worth it.  They taste so much fresher than store-bought jars, and I like having control over exactly what goes into them.  This homemade enchilada sauce is no exception.  It tastes delicious and comes together in a matter of minutes.  This is a quick enchilada sauce, made from already ground spices, which works well for weeknight meals.  I have a fantastic recipe coming up later in the week for you that uses this sauce. It’s a perfect meal for those crisp, autumn nights.  Be well, everyone.

Easy Homemade Enchilada Sauce | Relishing It

Easy Homemade Enchilada Sauce | Relishing It

The Recipe: Easy Homemade Enchilada Sauce

(makes 3 1/4 cup)

1 tablespoon olive oil

4 garlic cloves, minced

1/2 cup diced onion

3 1/2 tablespoons ancho chile powder

2 tablespoons ground cumin

1 bay leaf

15 ounces organic tomato sauce (plain)

1 1/2 cups chicken broth (preferably homemade)

1/4 teaspoon dried oregano

1 dried bay leaf

kosher salt, to taste

In a large sauce pan, heat the olive oil over medium-high heat.  Sauté the onion and garlic for a few minutes until soft.  Add the remaining ingredients and let simmer for about 15 minutes, stirring occasionally.  Remove the bay leaf and blend ingredients together with an immersion or regular blender. Season with more kosher salt, if necessary.  At this point, the sauce is ready to use.  Refrigerate it to use later in the week, or freeze for another time. Enjoy!

As always, thanks for stopping by to say hello or just to peek around!

Laurie

Read Full Post »

Roasted Tomatillo and Pork Stew | Relishing It

It has been a busy couple of weeks around our household lately.  School started for both of my kids and I’m happy to report that they are really loving it. Honestly, getting back onto the swing of things wasn’t that difficult despite the transition from late summer bedtimes and laid-back mornings around the house.  And I suddenly have a bit more free time now, which has fallen perfectly in-line with canning season! That wonderful time of the year when I dream of tomatoes. I’ve been busy in the kitchen stocking up on salsa, sauces, and plain tomatoes for the winter. Two more boxes I picked up from the farmers market this weekend are waiting for me as I write this. But, I wanted to share this ridiculously delicious recipe with you before I dive into chopping my day away again.

Roasted Tomatillo and Pork Stew | Relishing It

Roasted Tomatillo and Pork Stew | Relishing It

Roasted Tomatillo and Pork Stew | Relishing It

Roasted Tomatillo and Pork Stew | Relishing It

I was never exposed to tomatillos while growing up.  In fact, I didn’t really ever buy them before I moved to Minnesota.  Now, I just love them and making salsa with them is a no-brainer.  However, we’ve been getting a beautiful bag almost weekly from our CSA, so I wanted to do something a bit different, because how many chips can a girl really eat?  Kidding…I can eat A LOT of chips.  Pork and tomatillos are a perfect combination together– the tang from these little green gems is perfect.  This stew could not be easier to make or more satisfying. The flavors are bright and the pork is tender, yet doesn’t need to cook all day long, which makes it a bonus for a weeknight meal.  I love to serve it with a scoop of brown rice on top, but it can be equally satisfying if you prefer it without grains.  If your family loves heat, preparing it with jalapeños in the sauce would be ideal.  We put them on the side, because…kids.  I really hope you make this stew– it’s perfect with the changing weather.  Now, if you’ll excuse me– I need to get back to my little tomato factory.  Hope you are all well!

Roasted Tomatillo and Pork Stew | Relishing It

The Recipe: Roasted Tomatillo and Pork Stew

(serves 4)

2 pounds tomatillos, husks removed and tomatillos cut in half

1 bulb (yes, the entire bulb) garlic, separated into cloves

1 large white onion, chopped into large pieces

1/2 bunch fresh cilantro, roughly chopped

2 1/2 pounds – 3 pounds boneless pork shoulder, cut into 1-inch cubes

1 teaspoon cumin seed, toasted then ground with mortar and pestle OR 1 1/4 teaspoon ground cumin

fresh cilantro, jalapeño,and lime for garnish

olive oil, salt and pepper

1 cup uncooked brown rice, cooked according to directions, for serving

Preheat oven to 400°F.  Line a large baking sheet with parchment paper.  Place the tomatillos, onion chunks, and garlic cloves on the baking sheet.  Drizzle with olive oil and sprinkle with salt and pepper.  Roast for 30 minutes, then broil for 2-5 minutes until slightly browned.  Keep a watchful eye.

Meanwhile, heat a large Dutch oven over medium-high heat with about 2 tablespoons of olive oil.  Sprinkle the pork shoulder with salt and pepper and begin browning the meat in two batches, so as to not to overcrowd the pan.  When meat is done place it all back into the Dutch oven.

Reduce oven temperature to 375°F.

In a large food processor, place the contents of the roasting pan, plus 1/2 bunch of fresh cilantro, and ground cumin seed and pulse a few times.  You don’t want the mixture to be completely pureed– a little texture is nice.  Add the mixture to the browned pork.  Stir.  Bring almost to a boil on the stovetop then immediately place in the oven.  Bake for about 1 hour, or until the pork is tender.  Reseason with salt and pepper, if necessary.  Serve immediately with a scoop of rice, jalapeño, more fresh cilantro and a wedge of lime.  Enjoy!

Thanks for stopping by Relishing It!

Laurie


Read Full Post »

Roasted Smashed Potatoes with Rosemary and Preserved Lemon | Relishing It

I finally did the thing that’s been weighing on my mind for the last year.  I turned 40 years old on Tuesday.  My apprehension wasn’t about the number itself, or the accumulation of tiny wrinkles gathering under my eyes– it was heavier than that.  Those are superficial things that I can live with.  Instead, my dread has been a bit more existential.  Knowing that other inevitable changes are coming, like my children growing up, my parents aging, and that my limited time here is diminished with each passing year.  Those are the things that are harder to accept.

Roasted Smashed Potatoes with Rosemary and Preserved Lemon | Relishing It

But now that 40 has arrived, I’ve decided to do my best and be optimistic.  I’ll focus on the positives instead of dwelling on future loss.  I’m surrounded by  wonderful friends, and have been lucky enough to be born and married into two incredible families.  I get to spend every day with my best friend and love of 23 years, and we have two sweet children.  I’ve been fortunate with my health.  Right now, things are good by pretty much any standard.  I’m a lucky, lucky gal and I know it (and don’t think for one second that I didn’t knock on my wooden desk as I wrote that sentence).

Roasted Smashed Potatoes with Rosemary and Preserved Lemon | Relishing It

I’ve also decided to tackle new challenges.  My kids are at an age that I now have more time to pursue my own interests.  I’m ready to learn new things.  I want to take up pottery, learn to play the guitar and violin, to knit, and to read more.  I want to become more patient.  Mostly, I want to consciously be in the present, rather than always waiting for some vague future to just “happen”.   I also want to continue to learn new and exciting things about food and photography– this is the stuff that thrills me. Preparing the food, taking photos, and writing this blog make me very happy. I love connecting with all of you.

Roasted Smashed Potatoes with Rosemary and Preserved Lemon | Relishing It

With that little essay out of the way, there’s really no subtle segue into a recipe post, so I’ll just throw it out there– today I made simple, roasted smashed potatoes.  They’re kind of a hard one to name, but hopefully the photos help you out a bit. These little gems are all about texture, texture, texture!  Soft and pillowy on the inside and perfectly crispy on the outside.  I love to pick them up and snack on them, but they also pair well with a burger or steak.  Throw any herbs you fancy on them, but I particularly love the rosemary/preserved lemon combination.  So, so good!  Enjoy these potatoes over the weekend and thanks for listening to me ramble.

The Recipe: Roasted Smashed Potatoes with Rosemary and Preserved Lemon

about 2 pounds of small yukon gold potatoes (halve or quarter larger ones)

1 1/2 tablespoons finely chopped fresh rosemary, plus fresh sprigs for serving

1 1/2 tablespoons finely chopped preserved lemon

extra-virgin olive oil

good sea salt and freshly cracked pepper

Preheat oven to 400°F.  Line a large baking sheet with parchment paper.  Set aside.

Begin by steaming the potatoes until they feel done when a knife is inserted into them– about 15-20 minutes (depending upon how big your potatoes are).  Remove from heat and continue to let sit in covered pan just to be certain they are fully cooked.

Dry the potatoes off if any water remains on them.  Then place them on the prepared baking sheet and gently smash them down with a fork.  You don’t want the potato to completely fall apart, but you do want some of the inside to be exposed– that way more crevices can become crisped.  Drizzle a few glugs of olive oil over the potatoes, then the chopped rosemary, salt, and pepper.  Roast for about 20-25 minutes, or until they have become a beautiful golden brown (check the bottoms, too).   Remove from oven and top with more olive oil, more rosemary, preserved lemon, and salt and pepper to taste.  Enjoy!

Thanks for stopping by Relishing It!

Laurie


Read Full Post »

Older Posts »

%d bloggers like this: