Feeds:
Posts
Comments

Posts Tagged ‘Apple’

Sour Cream Apple Pie | Relishing It

I thought I’d share my husband’s all-time favorite pie with you today.  It’s an interesting twist on the typical apple pie, and it would make a great Thanksgiving-day dessert.  I’ll explain the pie in a minute, but first I want to take a moment to talk about my husband– because that’s way more fun.

Sour Cream Apple Pie | Relishing It

Radd.  Yep, that’s his real, full, first name.  The one his parents made-up and named him, though according to family lore, it was mostly his mom’s choice.  I think it’s one of the best names I’ve ever heard.  And I’ve never heard anyone else with it– it’s unique, which suits him.  Radd and I started dating in high school, a looong time ago.  He had this gangly teenage-boy body that looked too small for his large head, while I was sporting huge early 90’s hair to go with my rolled jeans, and a mouth full of braces.  We really were just kids.  We ventured off to college together and he became my home, so to speak.  You know that feeling– that wherever you are together is home and quite possibly the most comfortable place in the world.  Yes, that feeling.  Why am I writing about this now?  Well, we recently celebrated Radd’s 40th birthday.  And while I was excited to celebrate this milestone with him, I was also taken aback.  I had a hard time wrapping my head around the fact that this boy I’ve been with for 23 years is now a middle-aged man.  Where did the time go?  At any rate, I adore him.  He’s intelligent, hilarious, bizarre (in a great way), and an incredible dad.  Not to mention, he understands me– I mean really gets me.  Which is probably the most important thing of all.

Sour Cream Apple Pie | Relishing It

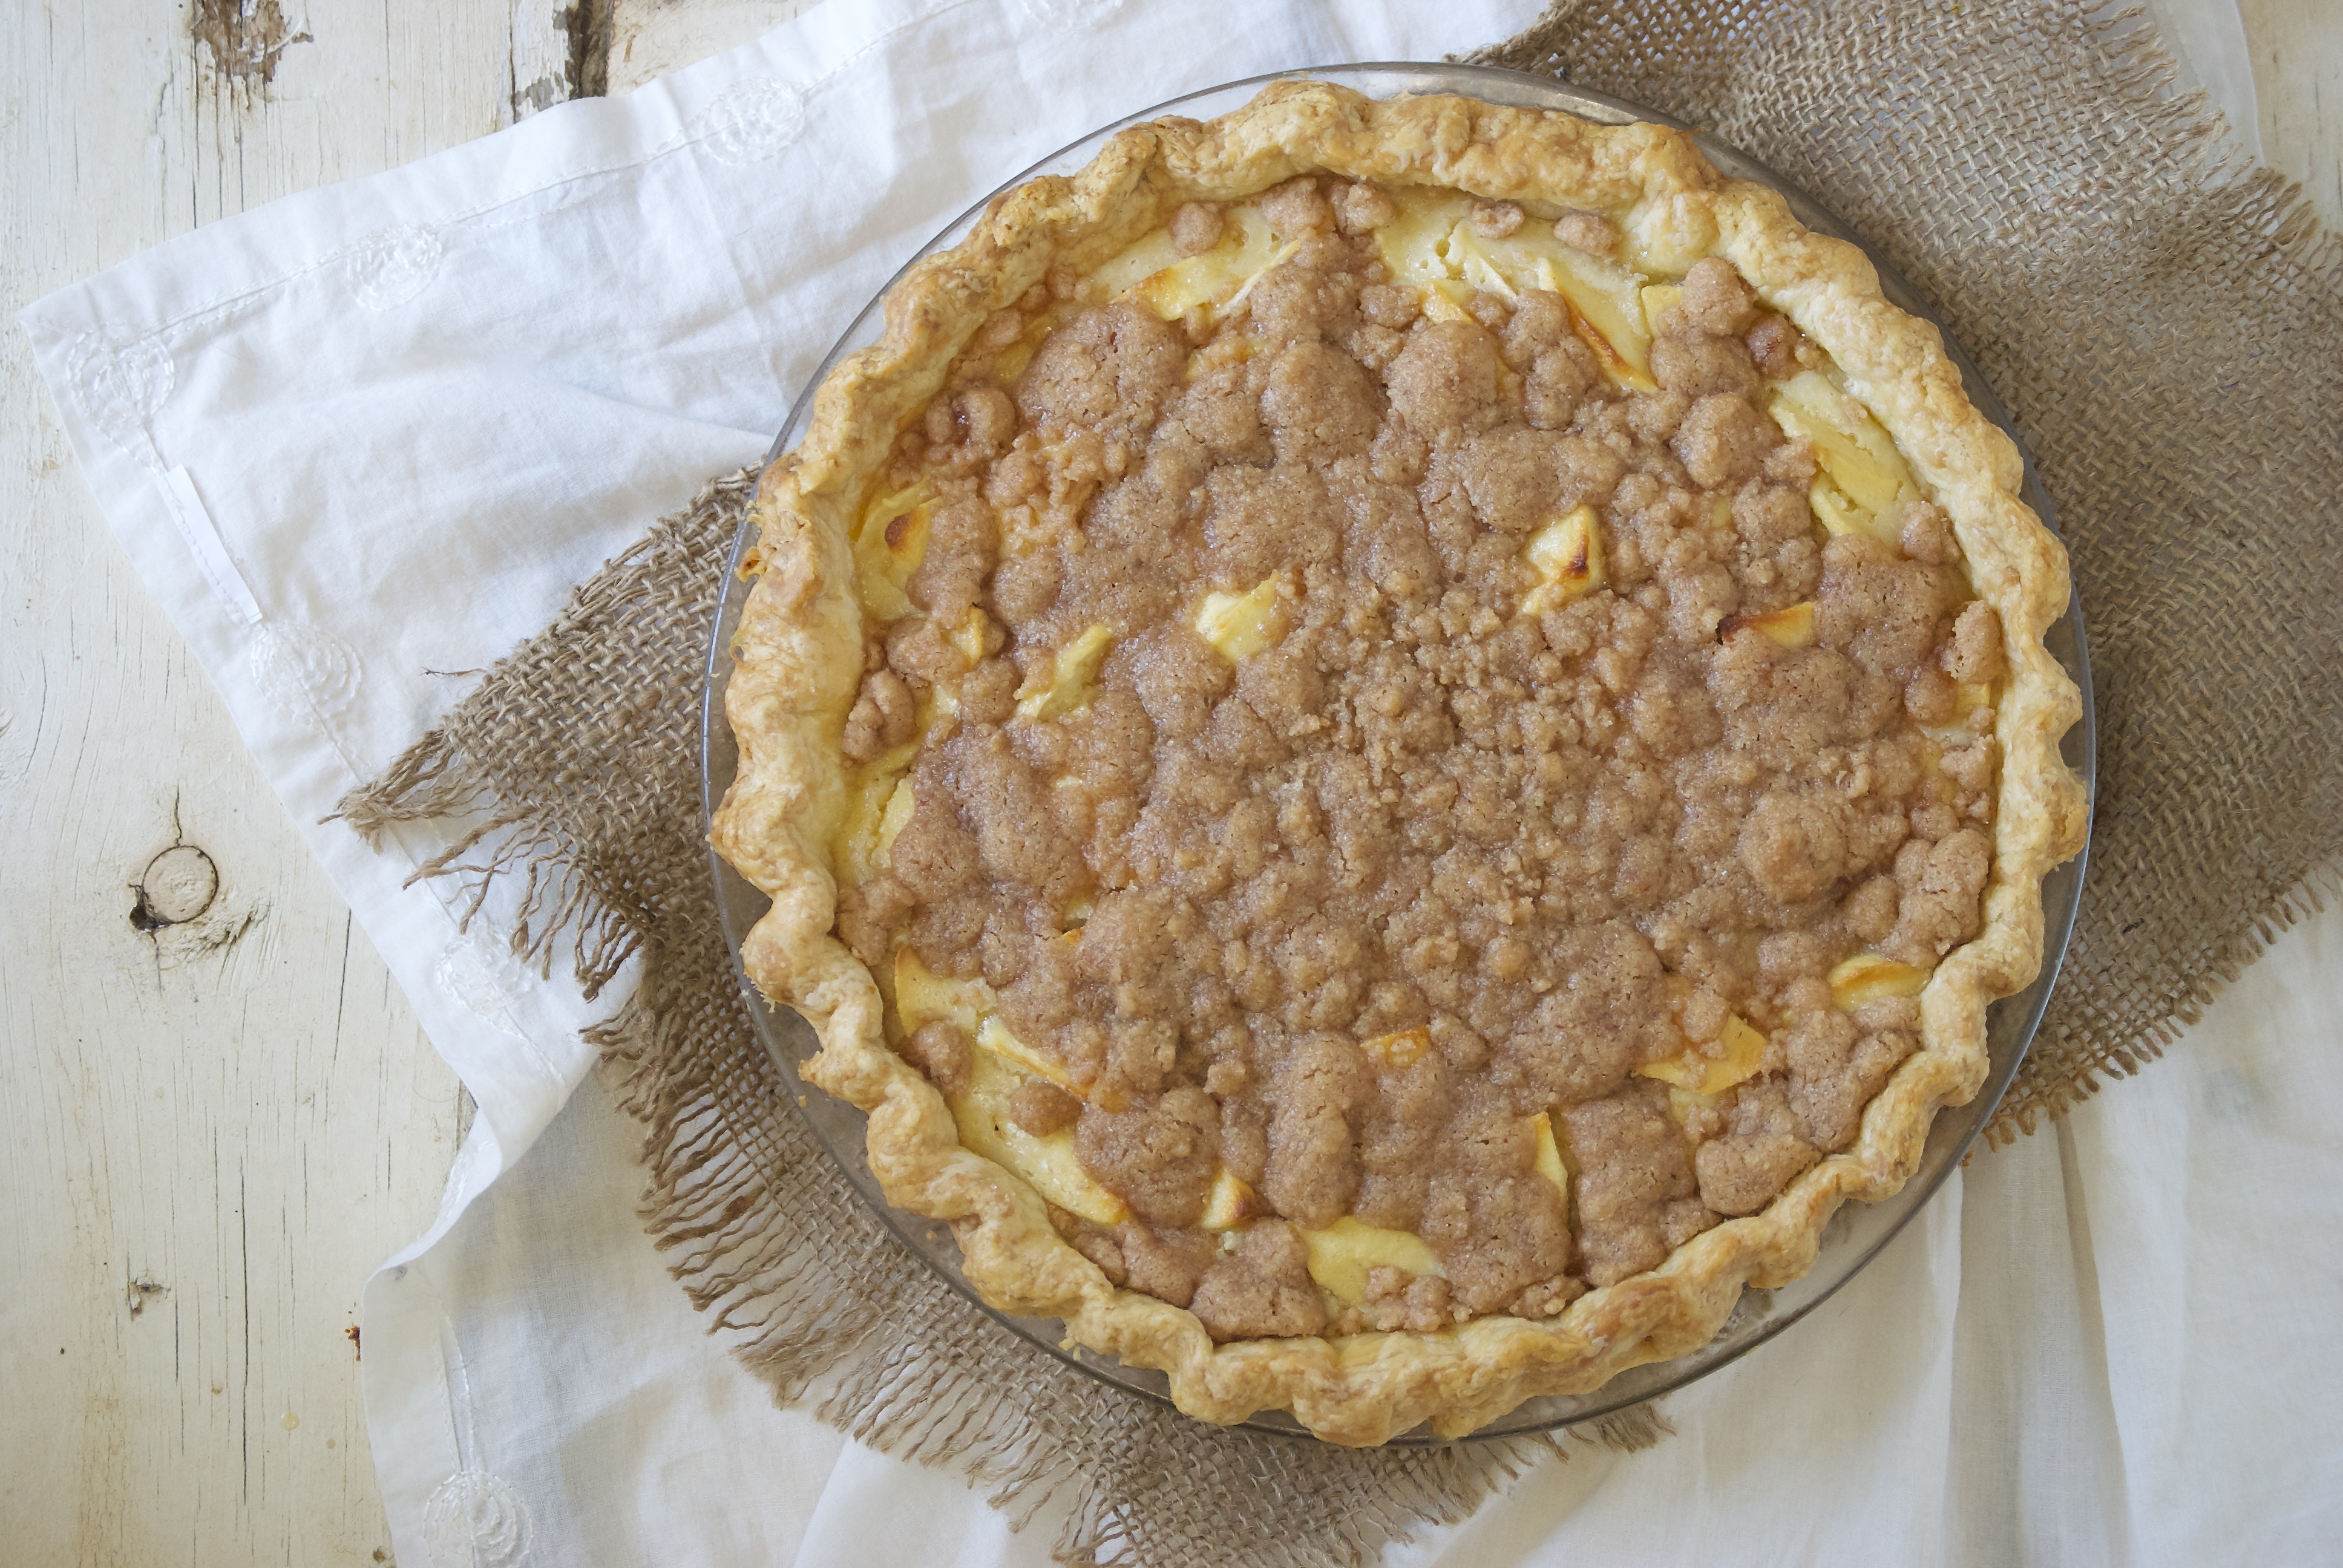
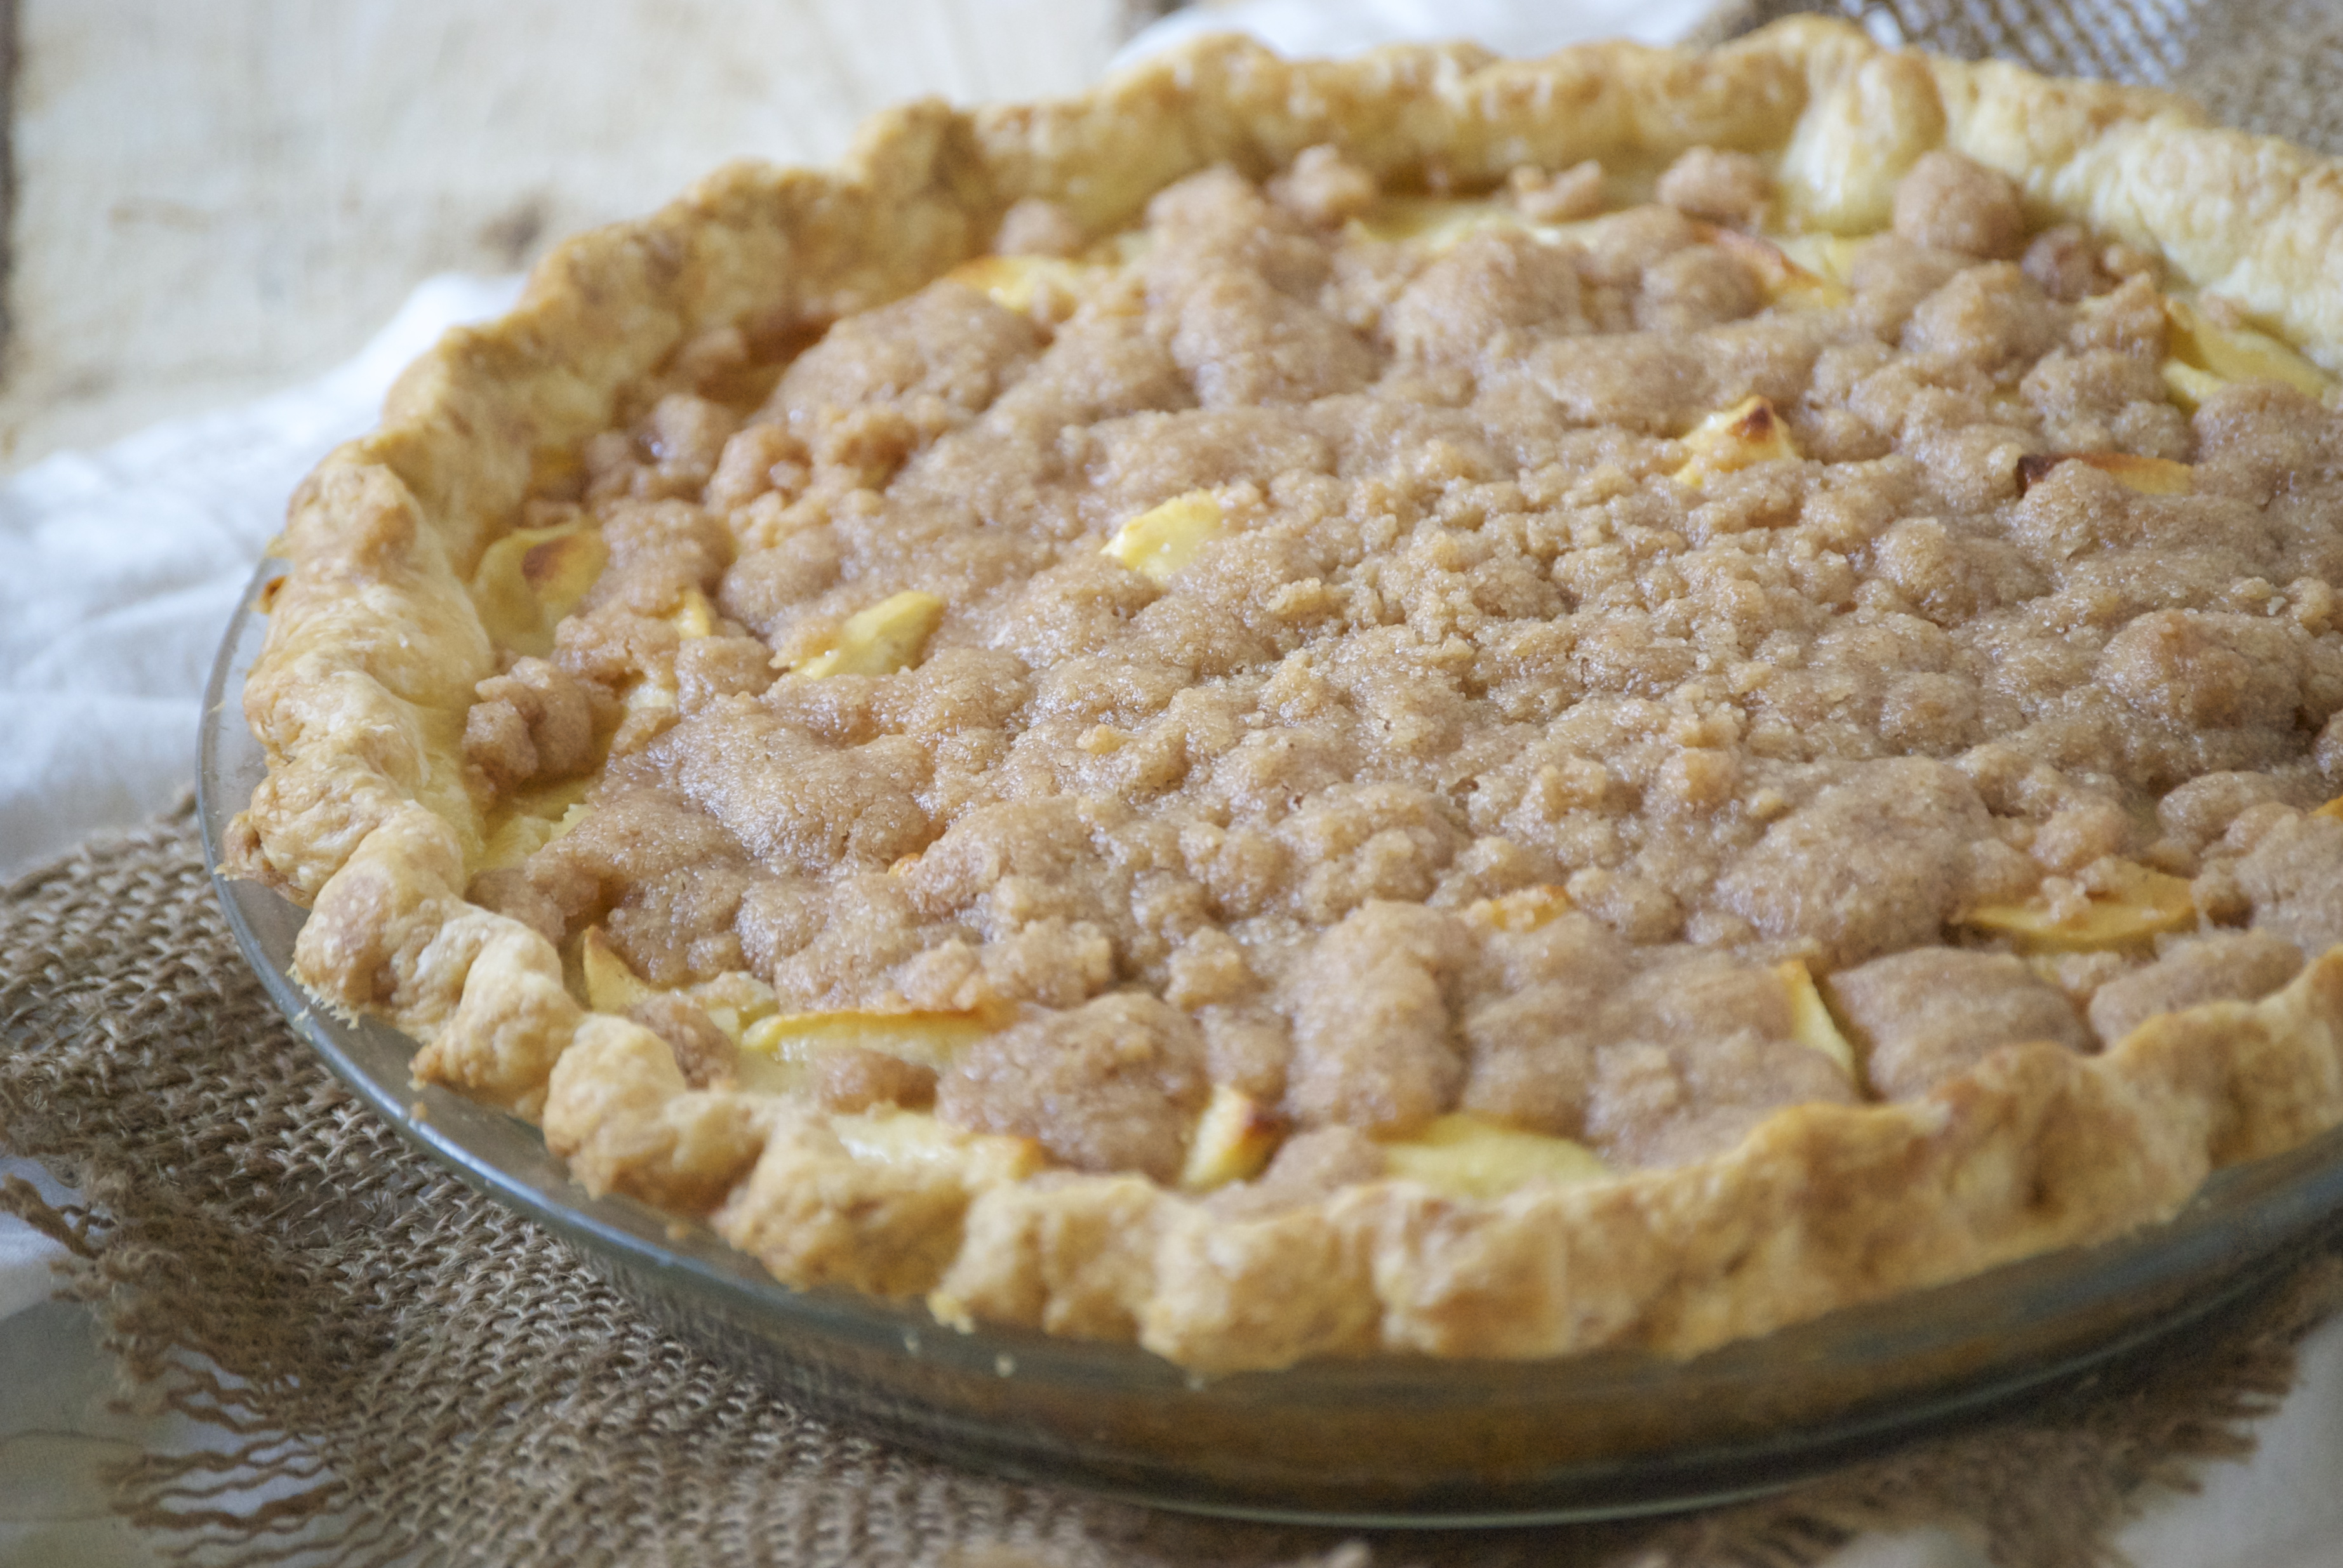
Now to the pie that I made Radd for his birthday.  This Sour Cream Apple pie is his favorite.  Full Stop.  The recipe comes from my Mom– she made it for him once many years ago and he’s loved it ever since.  It’s a delicious apple crumble-like pie with a lovely slightly tart sour cream custard-like filling.  There are notes of nutmeg (which is one of my favorite spices) and cinnamon.  Taken as a whole, it’s pretty amazing.  This pie is perfect for Thanksgiving, or any type of entertaining, because it actually gets better if it’s left in the refrigerator for a day.  The custard has time to set up and the flavors seem to meld even more after a bit of time.  Though, I know that some of you prefer a warm apple pie, so feel free to bake it at the last minute.  Whichever you prefer, I’m sure you’ll enjoy it.

Need more great Holiday dessert ideas?  This Brown Butter Pumpkin Layer Cake  and this Bourbon-Chocolate Pecan Pie remain some of my all-time favorites.

Sour Cream Apple Pie | Relishing It

The Recipe:  Sour Cream and Apple Pie

Use 1/2 of this all-butter pie crust recipe

1 cup full-fat sour cream

1/2 cup granulated sugar

1 teaspoon kosher salt

2 tablespoons all-purpose flour

1 egg

1 teaspoon vanilla

1/4 – 1/2 teaspoon freshly grated nutmeg (I like mine to have a definite nutmeg taste so I use 1/2 teaspoon)

2 cups diced apples ( about 4 apples)

For the Crumble Topping:

1/3 cup granulated sugar

1/3 cup all-purpose flour

1 teaspoon cinnamon

1/4 cup cold unsalted butter, diced

Follow the recipe and instructions from this recipe to prepare the pie dough.  Either make the entire recipe for the dough, and save half for later.  Or simply make only half of the recipe.  You decide.

Pre-heat your oven to 400°F.

To make the Crumble Topping:  In a small bowl, stir the dry ingredients together with a fork.  Then, using that fork, cut the butter into the mixture until it’s crumbly and all of the dry ingredients are incorporated into the butter.  Store in the refrigerator until ready to use.

To make the Pie Filling, beat together the first seven ingredients in a medium-sized bowl until smooth.  Gently stir in the apples.  Set aside.

Shape the pie dough in a 9-inch pie plate.  Pour the apple/sour cream filling into the pie.  Bake for 15 minutes.  Then reduce heat to 350°F for 30 minutes.  Remove pie from oven and add the crumble mixture to the top of the pie.  Return to oven and increase the heat to 400°F and bake for another 10 minutes.  Remove from the oven and let cool completely on a cooling rack.  Cover and place in the refrigerator if wanting to serve it cold.  Enjoy!

Image

Thanks for stopping by today!

Laurie

Read Full Post »

Apple Challah via Relishing It

Despite the frigid weather, we survived this week’s arctic blast here in Minnesota.  And while I managed to get out-and-about a couple of times, much of the long weekend was spent tidying up the house and pre-Spring cleaning.  By January our home is so cluttered with Christmas toys, winter gear, and heaping piles of kindergarten projects that it’s almost unbearable.  So we bought more toy shelves (I really need to have a garage sale this Spring), organized the important school work, and re-arranged a few rooms.  And somehow, once everything was in order, it felt like we’d uncovered two new rooms.  Now I can finally think clearly again!

Apples for Apple Challah via Relishing It

Diced apples for Apple Challah via Relishing It

Aside from the re-organization and playing countless games of Munchkin and Memory with the little ones, I also managed to squeeze in a little baking.  It was a nice way to help warm the house when the windchill dropped to -30°F.  This apple challah turned out perfectly.  One of my favorite things to play around with in the kitchen is bread made with yeast.  I’m fascinated by how yeast grows and changes, creating such interesting flavor.  Baking bread takes patience and planning, but not a lot of work.  And the aroma of freshly baked bread, alone, is worth the small effort.

Challah dough stuffed with apples via Relishing It

Challah stuffed with apples via Relishing It

Apple Challah ready to bake via Relishing It

If you have reservations about working with yeast, just relax and start with something simple.  This apple challah is a nice entry point.  You basically shove everything into a pan and bake it up.  But the results are a magical, tender, rustic-looking bread.  This one isn’t overly sweet– it’s amazing flavors come from the apples, honey, and cinnamon.  One of my favorite characteristics of this challah is the nice ‘crunch’ provided by sprinkling turbinado sugar on top.  The crust is best on the day it’s baked, since it tends to soften over time in a sealed container.  Even so, it keeps well for several days, and the inside stays soft and moist.  Enjoy it drizzled with a bit of honey and a nice cup of hot coffee.

Apple Challah via Relishing It

Apple Challah via Relishing It

The Recipe:  Apple Challah

For the Dough:

4 cups (20 ounces) unbleached all-purpose flour  (see note)

1 1/2 teaspoons kosher salt

6 tablespoons canola oil

2 large eggs, at room temperature

1/4 cup honey

1 package instant yeast  (2 1/4 teaspoons)

1/2 cup luke-warm water (between 100-110°F)

For the Filling:

3 smallish apples, diced into 3/4-inch chunks with the skin on

1 teaspoon cinnamon

3 tablespoons granulated sugar

For the Glaze:

1 large egg beaten with 1 teaspoon water

Turbinado sugar for sprinkling

Note: The recipe from King Arthur called for 4 cups of flour.  I generally assume that 1 cup of all-purpose flour weighs 5 ounces.  So, I added 20 ounces of flour to this recipe.  King Arthur called for 4 cups of flour, but stated 17 ounces as their weight measurement.  I did feel the dough was a bit stiffer than I was accustomed to working with, but the outcome was absolutely perfect.  It was a soft and tender bread that was sublime.  I think it’s safe to say that anything between 17-20 ounces would work here, though I haven’t tried the 17 ounce version first-hand.  Can you tell that I love my scale? 

In a bowl of a stand mixer (the recipe can also be done by hand, of course), mix the yeast, honey, and water together until it is dissolved.  Let stand for 5-10 minutes, or until it begins to get a bit foamy.

Add the remaining ingredients for the dough to the yeast mixture and slowly mix using the paddle attachment until the dough just comes together.  Remove the paddle attachment and add the dough hook.  Knead the dough for a few minutes until it is soft and smooth.  Place the dough in a slightly oiled large bowl and cover it with a dishtowel or lightly greased plastic wrap.  Allow to rise for about 2 hours, or until it has doubled in size.

Lightly grease a 9 or 10-inch springform pan or a 9-inch cake pan that is at least 2-inches deep.  Mix the apple filling ingredients together in a bowl.

Gently deflate the dough and transfer it to a lightly floured work surface.  Roll the dough out into a 8 x 10-inch rectangle.  Place the apples on the dough in two 10-inch rows near the center of the dough.  Fold each side over the row of apples closest to it.  Pushing down as you go to seal it.  Using a sharp knife, cut the dough down the center, and then across 8 times.  You should end up with 16 pieces of dough.  Hopefully the photographs will help with a visual.  Place the pieces of dough into the prepared pan so they create a single layer.  Tuck any apples that have fallen out into the mixture.

Cover the challah with a lightly greased piece of plastic wrap.  Allow to rise for about 1 1/2 hours, or until it’s about 2-inches high.

Preheat the oven to 325°F toward the end of rising time.  Brush the top of the dough with the egg wash and sprinkle heavily with turbinado sugar (or any coarse sugar).  Bake for about 55 minutes, or until the top is a beautiful golden brown.  Some of the higher pieces may get dark brown, and that’s ok.  The dough needs to bake all the way through in the middle, so be patient.  Remove challah from oven and after 5 minutes loosen the edges and transfer it to a rack.  Serve hot or cold, preferably with a drizzle of honey.  Keeps well for days in a covered container.  Enjoy!

Source:  Adapted from King Arthur Flour

Thanks so much for stopping by!  xo

Laurie

Read Full Post »

The leaves have been tumbling down for the last couple of weeks here.  It seems that even after several hours of weekend raking– or what Radd calls ‘the worst possible way to spend an afternoon’– we wake on Monday morning to a blanketed backyard.  I don’t mind it so much.  Having a huge, majestic tree makes it worthwhile.  In the Spring, I love seeing the new green leaves come in. It also protects us from the brutal afternoon Summer sun while the kids play in the backyard through July and August.  And for a few all-to-brief weeks in October, I get to enjoy the transformation of leaves from deep green to brilliant yellow and orange.  Then they fall.  And they keep falling.  I’ll take it though, even if it means we have to rake our tails off for a few days every October.

Speaking of October, I’m still hooked on those delicious, tart apples, so I thought I’d throw together an apple dessert.  This Double Apple Bundt cake is one of my favorite styles.  It’s dense, moist, and fuss-free.  To be honest, I actually find most bundt cakes to be better the day after they’re made.  It’s as if they’ve had a chance to consolidate, or come together a bit more…it’s hard to explain, but there’s just more substance the day after baking.  Aside from having fantastic flavors, this cake is also a great make-ahead dessert.

This cake has a BIG apple flavor.  It combines a double-shot of grated apples and either apple butter or apple sauce.  I’ve made it both ways, and they’re equally good.  The addition of toasted walnuts and white raisins provide nice texture, though neither is overpowering.  I’m not a huge raisin fan, but they really work here.  I also added whole grains and cut back on the sugar and butter.   Make this cake– with a cup of coffee, it tastes like Fall.

The Recipe:  Double Apple Bundt Cake

1 cup all-purpose flour

1 cup white whole wheat flour (substitute all-purpose, if necessary)

1/2 teaspoon baking soda

2 teaspoons baking powder

1 teaspoon cinnamon

1/4 teaspoon freshly grated nutmeg

1/4 teaspoon ground ginger

1/2 teaspoon kosher salt

1 stick unsalted butter  (8 tablespoons)

1 cup brown sugar

3 eggs, room temperature

1 cup apple butter or applesauce

2 medium apples, peeled, cored, and grated

1 cup walnuts, chopped and toasted

1/2 cup plump golden raisins  (regular will work, too)

Confectioners’ sugar for dusting, optional

For the Icing

1/3 cup confectioners’ sugar

about 2 tablespoons orange juice

Preheat oven to 350°F.  Butter a 9-to-10-inch (12 cup) Bundt pan.  Dust pan with flour if it’s not non-stick.

Whisk together the flours, baking powder, baking soda, spices, and salt.  Using a stand mixer fitted with the paddle attachment, beat the butter and the sugar on medium speed for about 3 minutes.  Scrape the bowl as needed.  Add the eggs one at a time, beating for about 1 minute after each addition. Reduce the speed to low and add the apple butter or sauce — your batter will look curdled.  Add the grated apples and mix to completely blend.  Add the dry ingredients  and mix until just combined.  Do not over mix.  Using a rubber spatula, fold in the nuts and raisins.

Pour mixture into the prepared Bundt pan and smooth the top.  Do not place on a baking sheet.  Bake for 35-45 minutes, or until a toothpick inserted into the center comes out clean.  Transfer to a rack to cool for 5 minutes before unfolding and cooling the cake to room temperature.  If you can stand it — cover the cake overnight with either plastic wrap or a cake dome and let sit at room temperature.  This will allow the flavors to meld and the texture of the cake will be wonderful.

Make the icing by combining the confectioners’ sugar and some of the orange juice into a bowl.  Slowly add more of the juice until you get your desired consistency to drizzle on the cake.  Ice the cake and allow a few minutes to dry before slicing into it.  Enjoy!

Source:  Adapted from Dorie Greenspan’s Baking From My Home To Yours

Thanks for stopping by Relishing It today– enjoy your weekend!

Laurie

Follow me on Twitter

Read Full Post »

%d bloggers like this: