Feeds:
Posts
Comments

Posts Tagged ‘Bread’

Bittersweet Chocolate Cinnamon Rolls | Relishing It

I’ve been on a reading tear lately, and it’s just what I needed.  Usually it feels like my mind never gets a chance to focus on one thing, or to just contemplate.  I’m constantly jumping from topic to topic, and though technology certainly contributes to this, in the end the responsbility is mine.  So I’ve slowed down a bit and decided to concentrate on a few good books.  It’s the perfect cure for all of the multi-tasking that seems to take up my day. In the past, I’ve often had a hard time jumping into another book right after reaching the end of a good one.  It was like I went through a period of mourning.  I’m done doing that.  I’m diving right back into the next one, and thankfully I’ve been getting some great recommendations with the help of friends.   But, I’d like more!  Please share with me any must-reads.

Bittersweet Chocolate Cinnamon Rolls | Relishing It

Bittersweet Chocolate Cinnamon Rolls | Relishing It

Why am I going off about books right now?  Well actually, because these amazing chocolate cinnamon rolls were the result of one of my last reads.  The book was ‘The Storyteller’ by Jodi Picoult.  It takes place partially in present day and partially during World War II.  It’s a wonderful read.  The recipe is the one the father (a baker) would lovingly make for his daughter.  After reading about the delicious description of the bittersweet chocolate and cinnamon twirled together into a soft roll, I couldn’t get them out of my mind.  Luckily for me, there was a recipe at the end of the book.  So I made them.

Bittersweet Chocolate Cinnamon Rolls | Relishing ItBittersweet Chocolate Cinnamon Rolls | Relishing ItBittersweet Chocolate Cinnamon Rolls | Relishing It

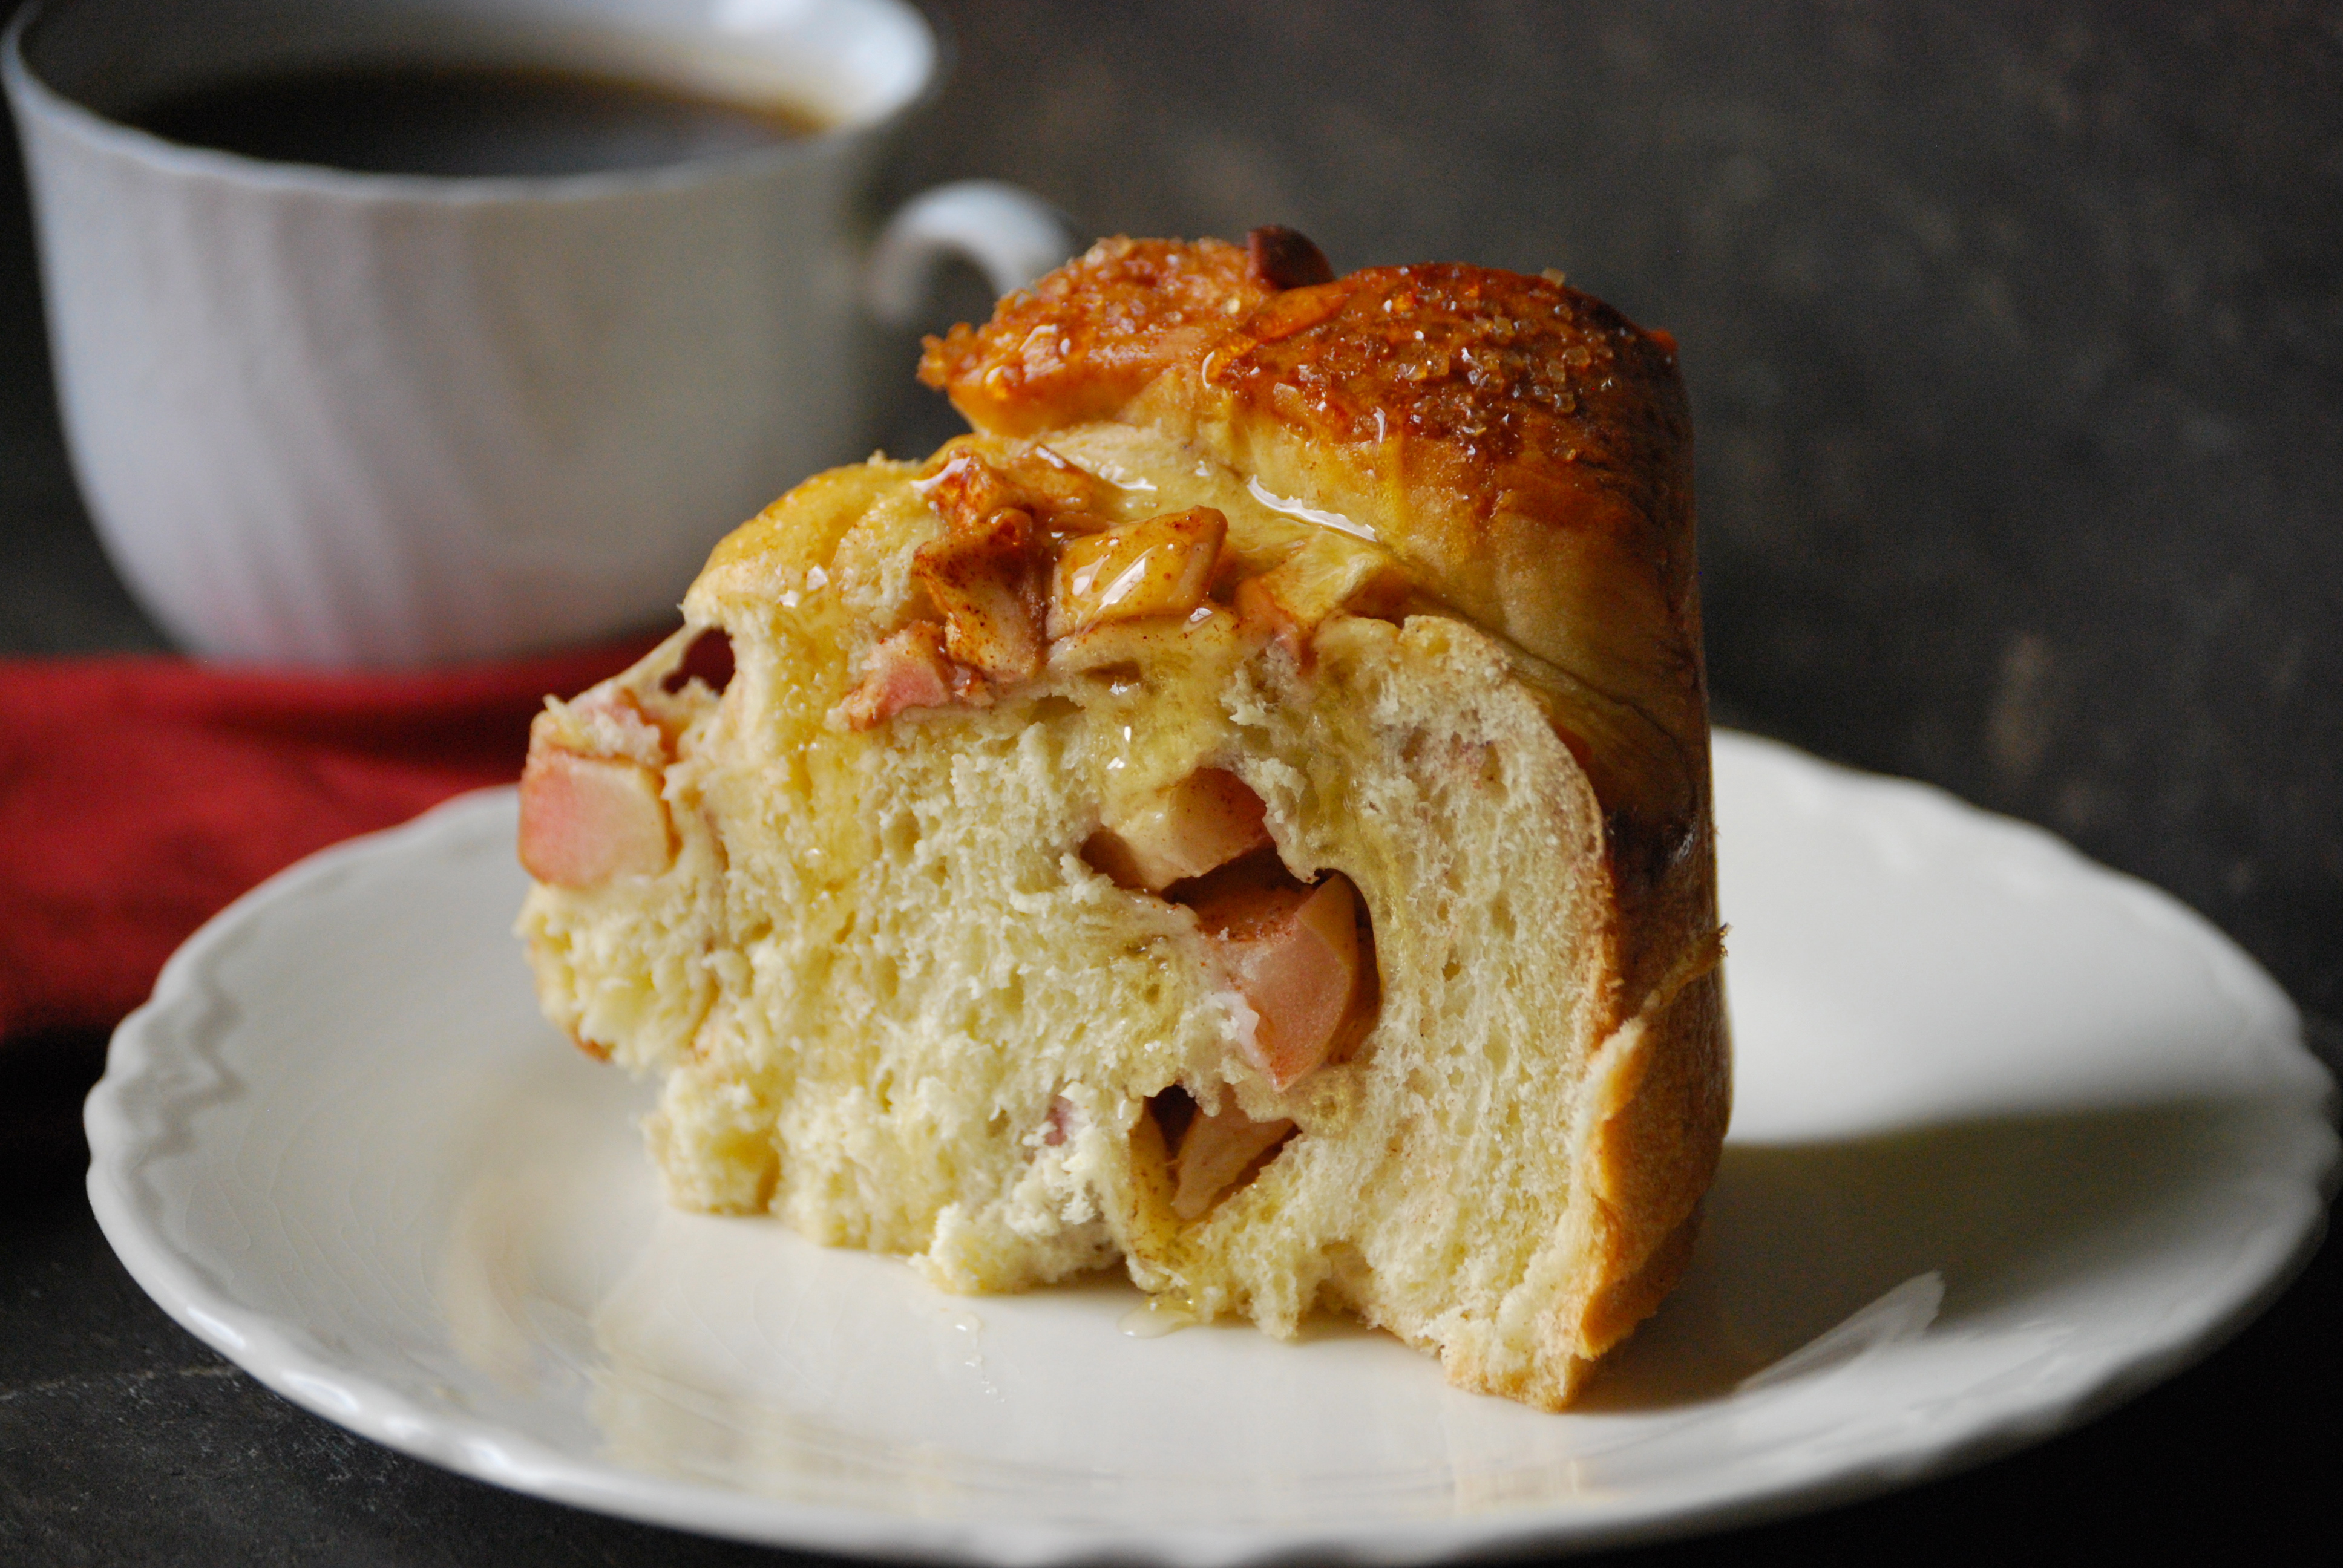
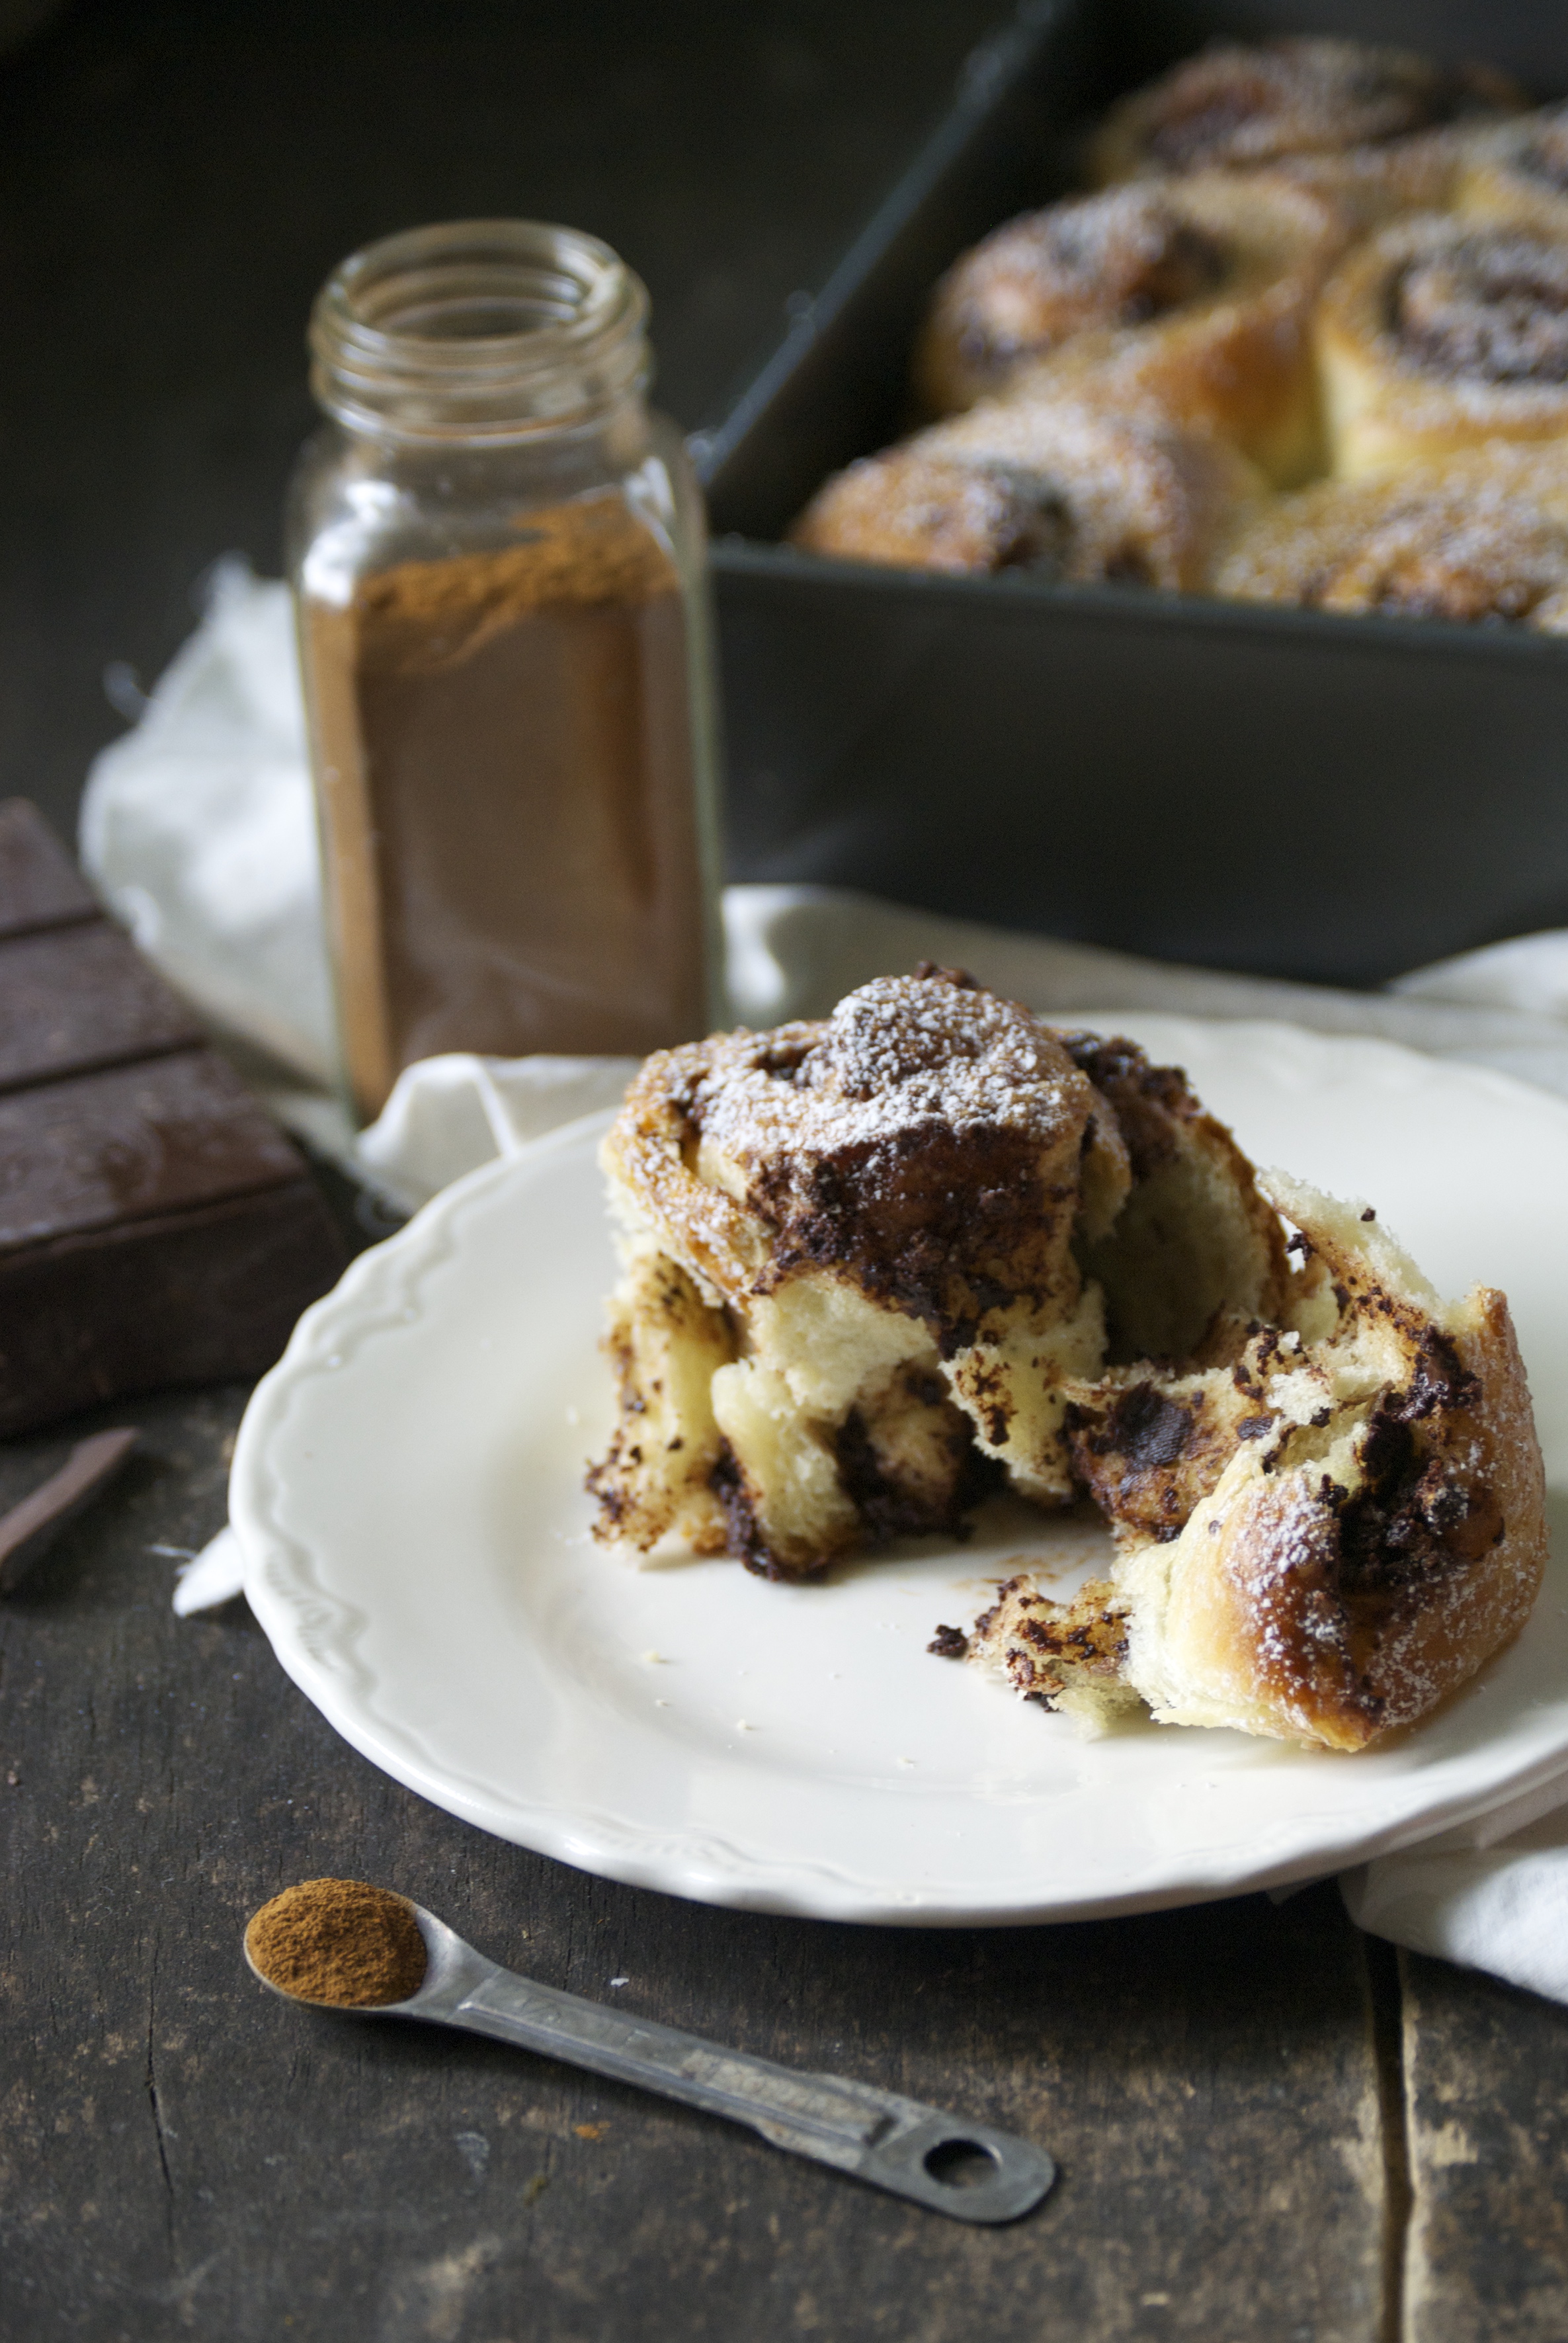
I’m so glad that I did, because my kids absolutely loved them.  And chocolate and bread are a perfect combination.  This has been a family favorite for some time.  These rolls are about to earn the same title.  These are a perfect chocolate cinnamon combination, with neither overpowering the other.  You may be tempted to chop more chocolate, but don’t.  This amount was spot on.  I can already imagine snowy winter weekend mornings with the smell of these bittersweet cinnamon rolls wafting through the air, as I sip my coffee and read another incredible book.  That is until my kids shout “Mommy!”, and need something.  Hope you enjoy the rolls!

Bittersweet Chocolate Cinnamon Rolls | Relishing ItBittersweet Chocolate Cinnamon Rolls | Relishing It

The Recipe: Bittersweet Chocolate Cinnamon Rolls

1/2 cup warm milk, (I used whole) (110°F)

2 teaspoons active dry yeast

1/2 cup plus a pinch, granulated sugar, divided

2 large eggs, room temperature

1 large egg yolk

2 cups all-purpose flour (9 ounces), plus extra

1/4 teaspoon kosher salt

6 tablespoons room temperature unsalted butter, divided, plus more for pan

1/4 pound bittersweet chocolate, finely chopped

1 teaspoon cinnamon

coarse sugar (such as turbinado or demerara)

powdered sugar to sprinkle

Pour the milk into a small bowl and sprinkle with the yeast and a pinch of sugar. Whisk. Let stand for 5 minutes until foamy.

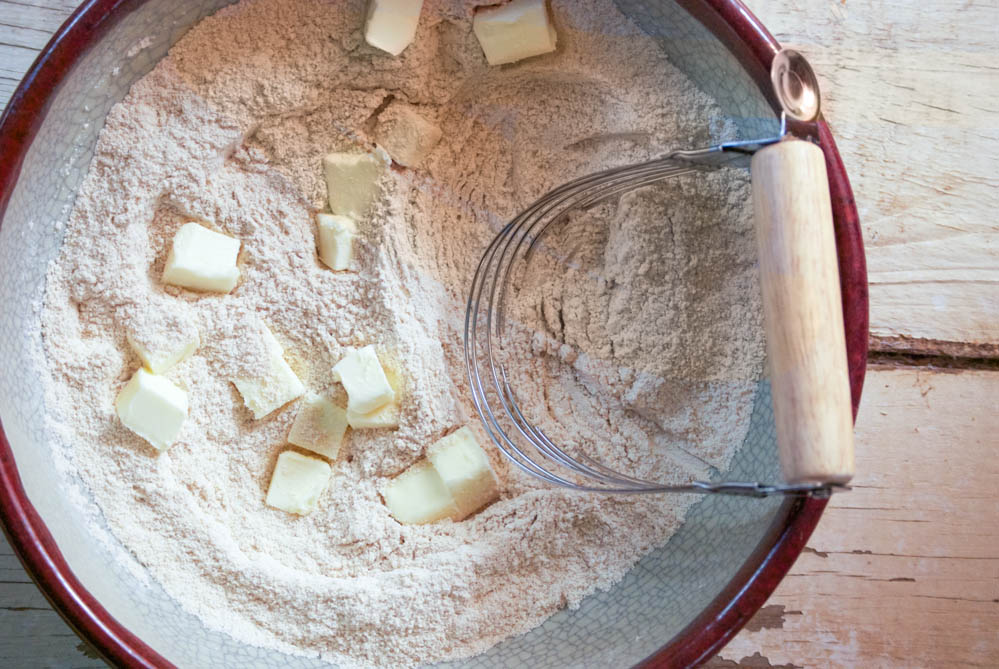
In a large bowl, whisk together 1/4 cup of sugar, 1 egg and 1 egg yolk.  Whisk the egg mixture and the yeast mixture together. In a bowl of an electric mixer fitted with the paddle attachment (or using a bowl and wooden spoon), combine the flour and salt. Add the egg mixture and beat on low until most of the flour is incorporated. Switch to the dough hook and knead on low adding 1 tablespoon of butter at a time until 3 tablespoons of the butter are incorporated. You will knead the dough for about 10 minutes.  You may need to stop the machine and remove the dough from around the hook to make sure everything is getting properly incorporated along the way.  The dough will be sticky.

Place the dough in a large buttered bowl. Cover with plastic wrap or a dishtowel.  Set in a warm, draft-free place to rise until the dough doubles in size.  About 1 hour. The length of time will depend upon how warm your area is.

Prepare the filling by using a fork to mix the chocolate, remaining 1/4 cup sugar, and cinnamon in a medium bowl.  Add the remaining 3 tablespoon of butter and use the fork to combine. Set aside.

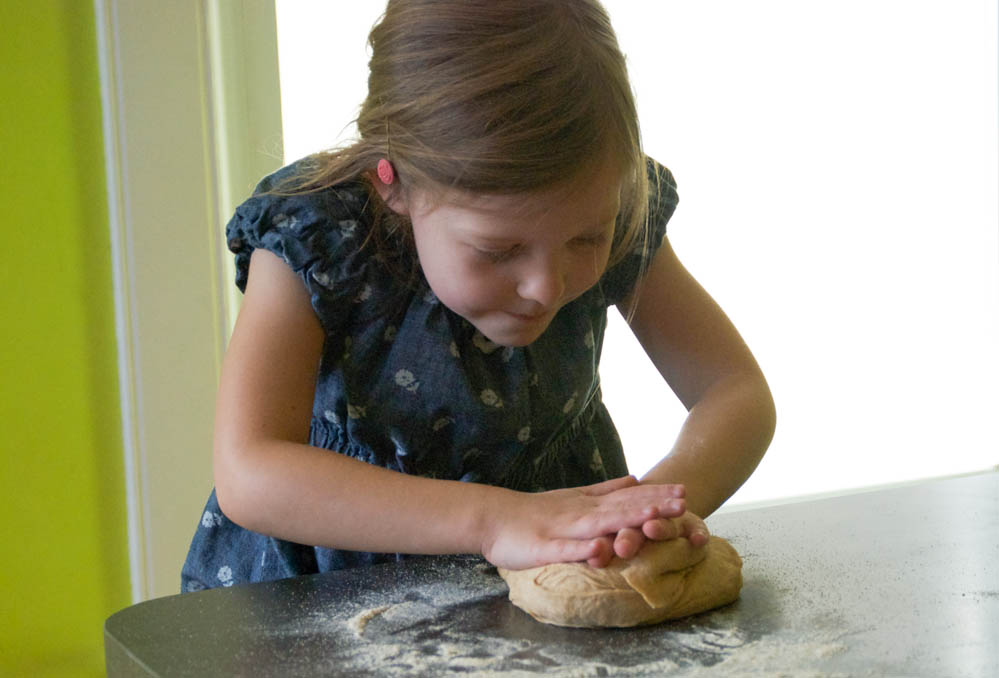
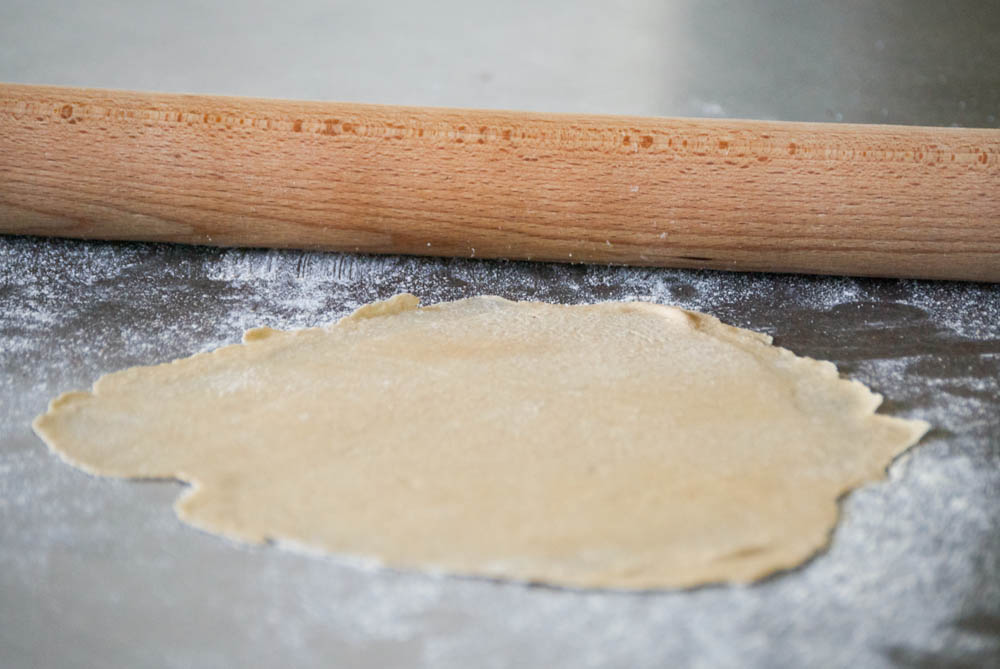
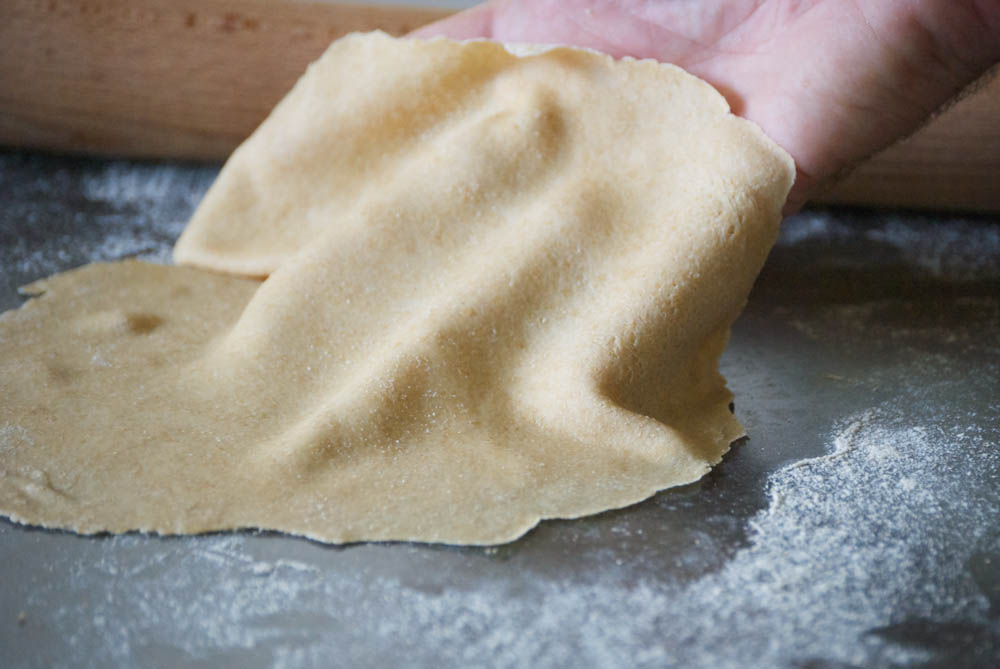
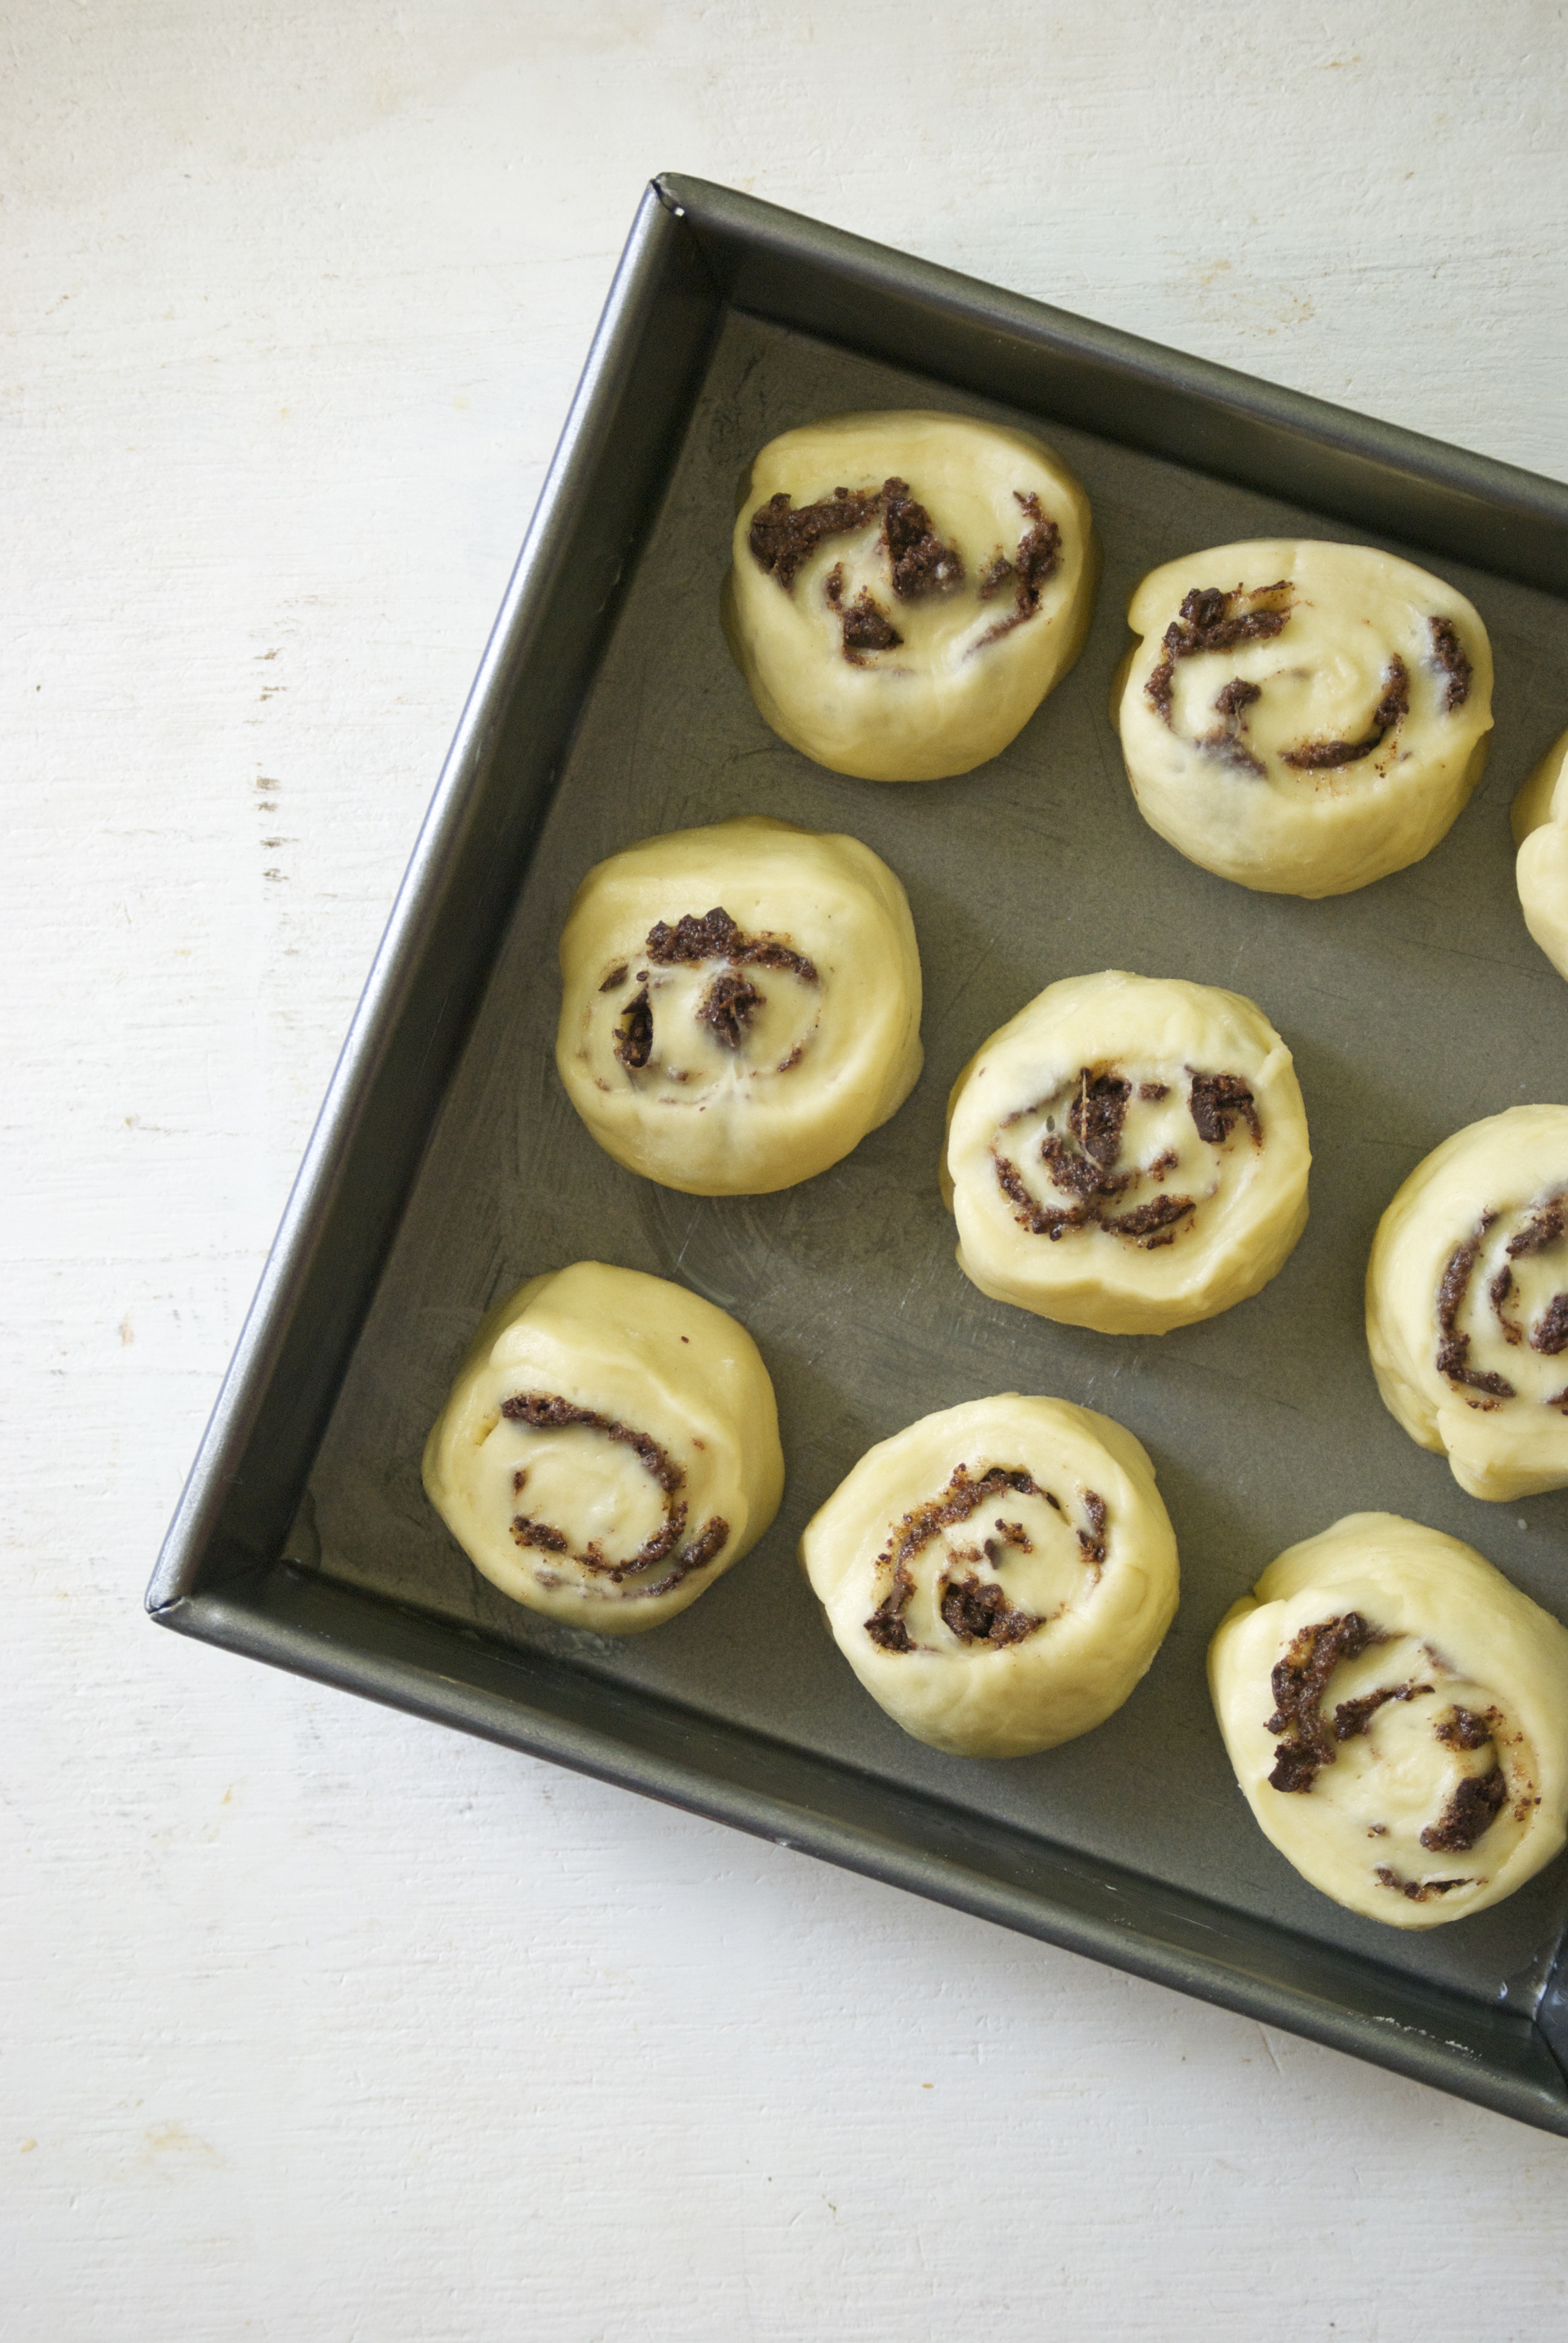
Preheat oven to 350°F. Once the dough has double, roll it out into a 16 x 12 rectangle on a well-floured surface.  Sprinkle filling over the dough and roll into a log.  You may need to trim the jagged end of the log slightly. Cut the log into 9 equal pieces. Place into a 8 x 8 buttered pan. Cover with plastic wrap and let rise again for about 20 minutes.

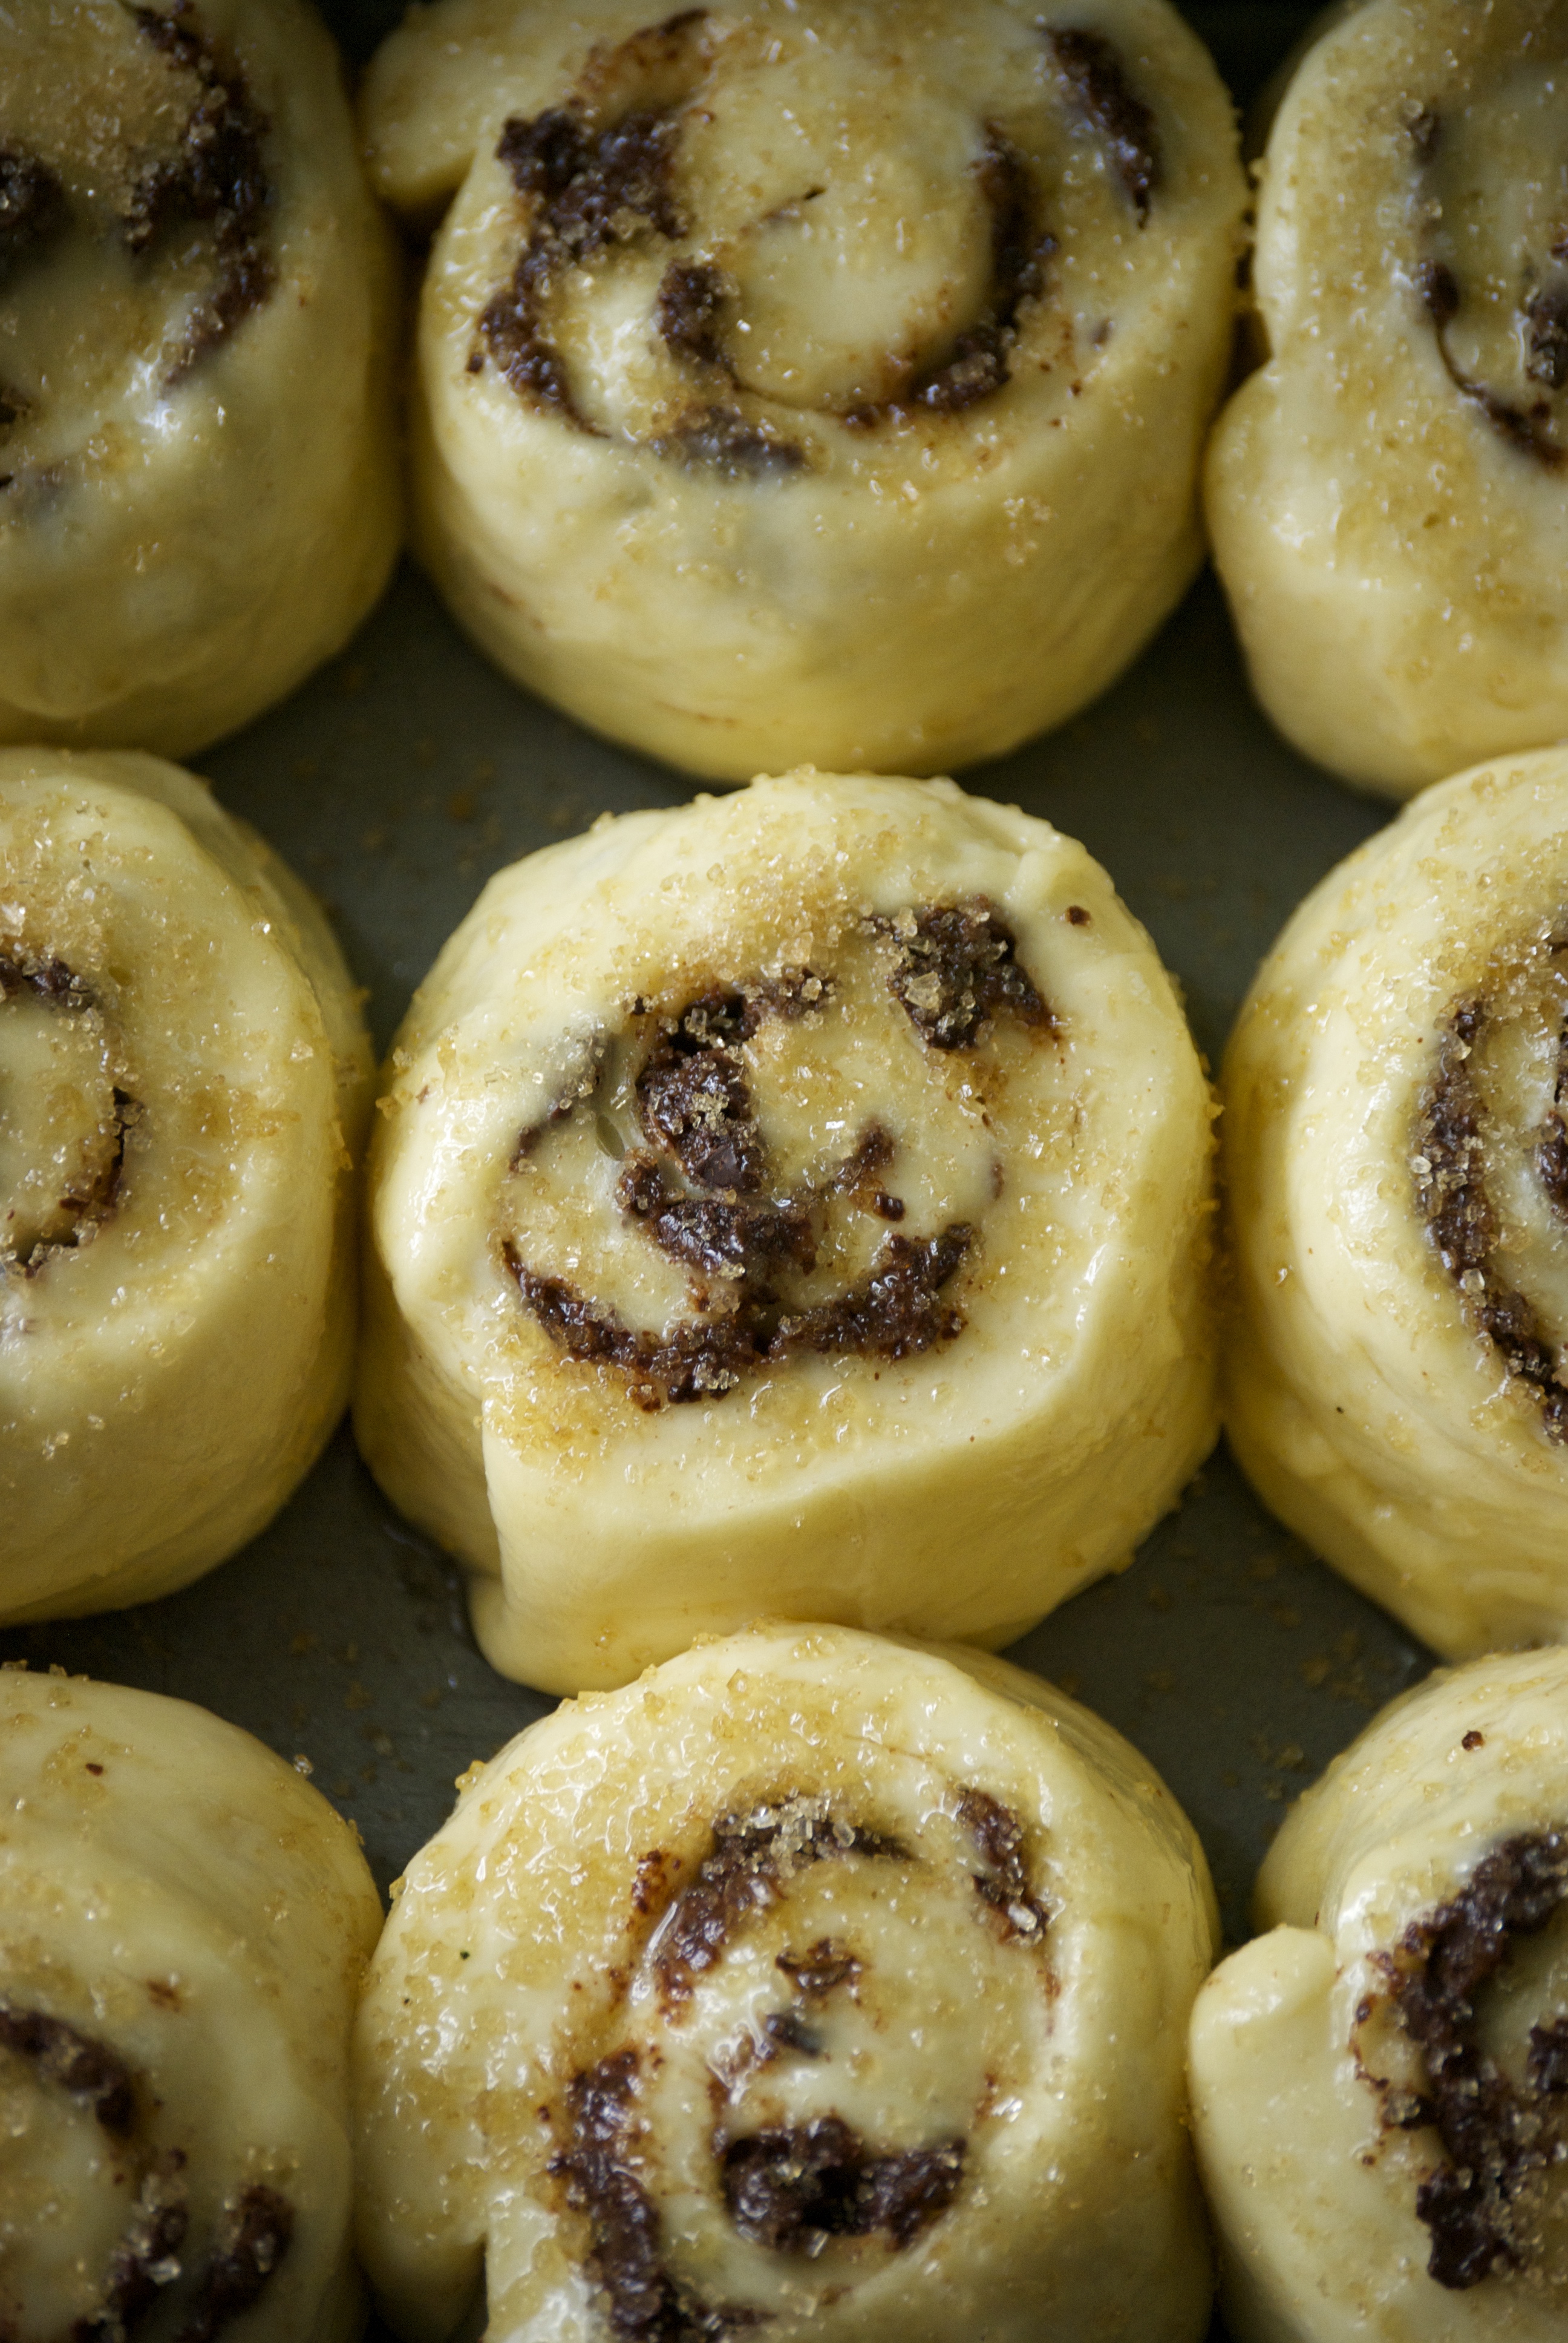
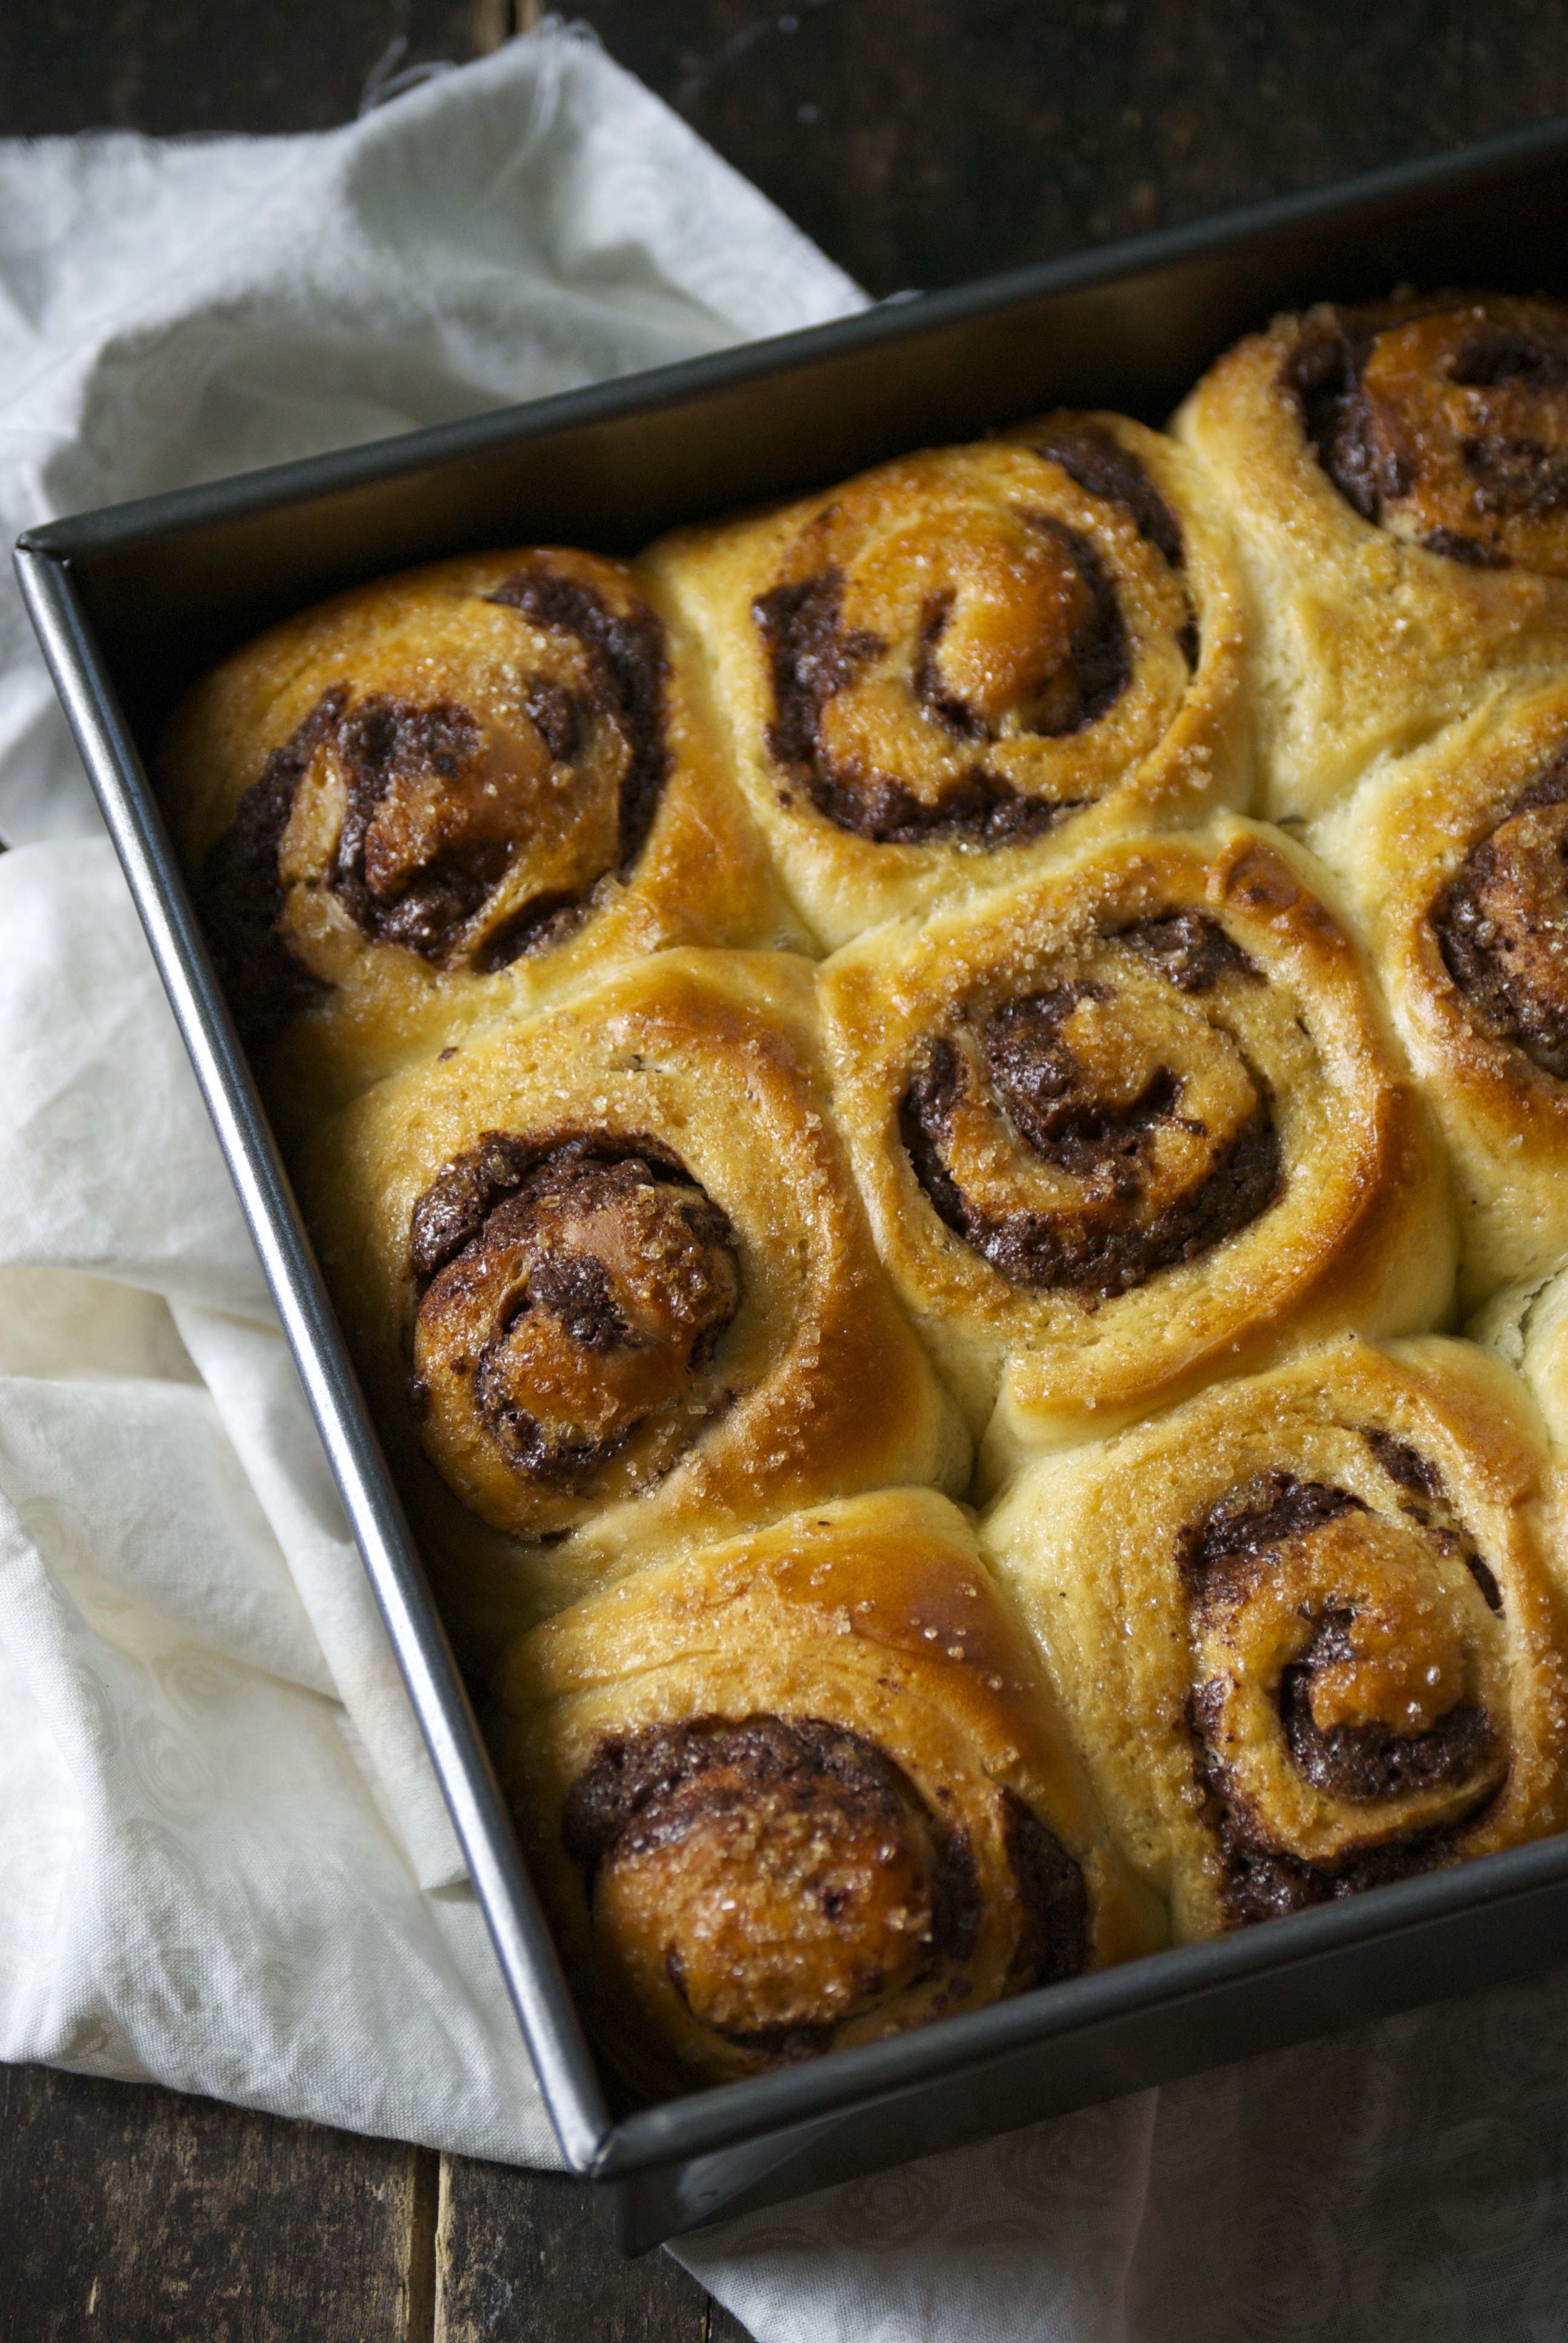
When the rolls have risen slightly, remove the plastic wrap and mix the remaining egg with 1 teaspoon water.  Gently apply the egg wash to the rolls using a pastry brush then sprinkle with about 1 tablespoon or more of coarse sugar.  Bake for about 25 minutes, or until the tops are a deep golden brown and the center feels set. Cool on a wire rack and serve sprinkled with powdered sugar on top.

Enjoy!

Thanks for stopping by Relishing It!

Laurie


Read Full Post »

Rye Soda Bread with Dill Butter | Relishing It

I have to confess, I didn’t grow up eating soda bread.  Instead, my mother always had those huge tupperware containers filled with bread dough, covered with a white dishtowel, strategically placed near the warm registers of our farmhouse so it would rise.  But some time in my 20’s I discovered this fantastic alternative to the yeasted bread.  It doesn’t require any time at all to rise, which makes it nice for those spur of the moment meals when you would like to serve a loaf of warm bread, but just don’t have the time to mix up a batch of regular dough.  It’s easy to mix together– much like that of mixing scones.

Rye Soda Bread with Dill Butter | Relishing It

Soda bread is somewhat dense and can be made into something deliciously sweet or savory.  More common Irish soda bread is sweet and laced with raisins.  And though I love that, I gravitate towards the savory variety.  I love  combining rye and white whole wheat together in a bread.  The white whole wheat gives it a lighter texture, and the rye has a remarkable flavor.  It is a simple, hearty bread that is waiting to be smothered with a delicious spread.

Rye Soda Bread with Dill Butter | Relishing It

For this batch, I decided to use dill butter.  For some reason, it doesn’t seem fashionable to love dill anymore.  I’m not sure why, but all the other herbs are getting the attention lately.  I’m still in the dill camp, though, and always will be.  There is something so fresh and bright about it’s scent and flavor.  I pair it with shallots, garlic, and lemon zest for this compound butter and it is truly amazing.  Simple delicious food– the way it should be.  For something even more delectable, make your own homemade cultured butter!

Rye Soda Bread with Dill Butter | Relishing It

St. Patrick’s Day is just around the corner and I think this soda bread would be a lovely addition to your meal.  Double the recipe for the butter and you can use it on your boiled potatoes!  You still have time to gather your ingredients and start a brine if you plan to make homemade corned beef.  Bake up a batch of these fantastic mint grasshopper bars for dessert.  And of course, I hope you wash it all down with a pint of ale.  Cheers, friends!

Rye Soda Bread with Dill Butter | Relishing It

The Recipe:  Rye Soda Bread with Dill Butter

(serves 4-6)

For the Rye Bread:

1 cup rye flour (5 ounces)

1 cup white whole wheat flour (5 ounces)

1 teaspoon baking soda

1 teaspoon granulated sugar

1 teaspoon kosher salt

4 tablespoons cold, unsalted butter (grated with the large holes of a box grater, if frozen OR cut into small cubes and use a pastry blender or fork, if cold)

3/4 cup buttermilk  (3/4 cup regular milk mixed with 2 teaspoons white vinegar can be substituted if you don’t have buttermilk)

For the Dill Butter:

4 tablespoons unsalted sweet cream butter at room temperature

1 clove garlic, finely minced

1 tablespoon finely minced fresh dill

zest of one small organic lemon

1/2 tablespoon finely minced shallot

1/2 teaspoon kosher salt

1 egg mixed with 1 teaspoon water, for egg wash

1 teaspoon poppyseeds, for sprinkling on top

Preheat oven to 375°F.  Place the rack in the middle position of the oven.  Line a baking sheet with parchment paper.  Set aside.

To make the butter:  In a medium bowl combine the softened butter, garlic, dill, lemon zest, shallot and kosher salt.  Set aside to let the flavors develop.

In a large bowl, whisk together the rye flour, white whole wheat flour, baking soda, salt, and sugar.  I prefer to use frozen, grated butter.  Mix together using your hands, being careful to cover all of the butter with the flour mixture.  If using cold, cubed butter– use a pastry blender or fork to incorporate the butter into the flour.  You are looking for a result of pea-sized pieces.  Then, using a fork, mix in the buttermilk until the mixture is wet.  Using your hands, knead the dough a few times in the bowl until it is uniform.  Form the dough into a 6-inch flattened circle. Place the dough on the lined baking sheet and score it with a large “X” in the middle using a sharp knife or razor blade.  Make it about 1/2″-3/4″ deep.  Using a pastry brush, apply the egg wash and then sprinkle with poppyseeds.  Bake for about 30-32 minutes, or until it is golden brown and the center looks done.  Remove from oven and let cool on a cooling rack.  The bread will keep well for a couple days in an airtight container, but is best eaten the first day.  Enjoy!

Thanks for stopping by Relishing It!

Laurie

Read Full Post »

Homemade Tortillas | Relishing It

Well, I’ve finally solved “The Great Taco Dilemma” in our house.  You see, there’s been a long-running disagreement over which tortillas to use.  The kids like those big, floppy, mass-produced white tortillas, while I’ve always favored the smaller, more authentic corn tortillas that are so good when served at the local tacquerias.  But as my husband usually points out while grappling with a rapidly-disintegrating taco, the store-bought versions just crumble in half.  Now, I’ve had a revelation– homemade tortillas that strike that perfect balance.  Soft and pliable because they’re made with wheat, yet with the homemade feel of authentic tortillas.   I hadn’t tried making my own before because I wasn’t convinced that there could be much difference in quality.  The fact is, store-bought tortillas don’t even come close.  And you can roll them out and fry them up in about 10 minutes flat.  That is 10 minutes well spent, my friends.

Homemade Tortillas | Relishing It

Homemade Tortillas | Relishing It

Homemade Tortillas | Relishing It

Now that the tortilla situation is resolved, we’ve been enjoying the heck out of homemade tacos.  In the time it takes me to roll one dough ball out, another tortilla has completed the frying process.   It’s quick– just 30 seconds on each side.   The ones seen here are a delicious classic Americanized version.  We used this fresh tomatillo salsa and this homemade taco mix.  If you’re up for a more a little more variety, this or this recipe are fabulous options.  Whichever you end up trying, these tortillas are the perfect canvas to showcase amazing flavors.  I also love the fact that I can make these as healthy as I want.   Traditionally, tortillas are made with lard, but I like to use grass-fed butter along with organic white whole wheat flour.  Feel free to use shortening or lard and all-purpose flour, if you want.  One note about rolling the dough out– roll it as thin as you possibly can (see the photograph).  The tortillas also keep very well in the refrigerator for several days, as long as they’re in an airtight bag.  Freezing them is also a great option.  Enjoy!

Homemade Tortillas | Relishing It

Homemade Tortillas | Relishing It

Homemade Tortillas | Relishing It

The Recipe:  Homemade Tortillas

(makes 11)

9 ounces (2 cups) white whole wheat flour (all-purpose can be substituted)

1 1/4 teaspoon kosher salt

1/4 teaspoon baking powder

1/4 cup cold unsalted butter, cut into cubes (shortening or lard can be substituted)

2/3 cup warm water (not fully hot)

In a large bowl, whisk the dry ingredients together.  Cut in the butter with a pastry blender or a fork.  Mix in the warm water with a fork.  The mixture will be a shaggy mess at this point.  Knead on a lightly floured surface for 3-4 minutes, or until smooth. Adding more flour to the surface as necessary.  Roll into 1 1/2 ounce balls.  Place on parchment paper and cover with a kitchen towel for 1-2 hours.

On a lightly floured surface, roll the dough balls out until they are paper thin.  Try to maintain a circle, but it doesn’t have to be perfect.  Heat a dry cast-iron skillet on medium-high heat.  When hot, place the tortilla in the pan and cook each side for about 30 seconds, or until the tortilla begins to lightly brown in some spots.  Keep a watchful eye so it does not burn.

Meanwhile, roll out another dough ball and place in pan when the current one is done cooking.  Continue the process until all the tortillas are made.  As each tortilla is done, place and cover them in a towel lined basket to keep them warm. Enjoy!

Thanks for stopping by Relishing It today!

xo

Laurie

Read Full Post »

Homemade Sandwich Buns

Homemade Sandwich Buns | Relishing It

St. Paul was buzzing yesterday.  School started and everyone was excited as the kids headed out the door.  My sweet boy, Aanen, proudly made the walk down the street and into our nearby school, hand-in-hand with his dad.   I was both proud and sad to see him wave goodbye.  I have Aria for several more days at home, since pre-kindergarten doesn’t start until next week.  To be honest, I’ve been surprised that these first few days went off without a hitch.  All summer our kids stayed up far too late, and slept in until 9 a.m. every morning.  But the change in schedule didn’t seem to affect them too much, and we haven’t skipped a beat.

Homemade Sandwich Buns | Relishing It

The other big news in my world is that one of my dearest friends, Angharad, is moving to the UK.  Yesterday Aria and I had a chance to say our goodbyes to her at lunch.  She and her husband are moving to London, and while I’m happy and excited for them, I’m more than a bit sad.  I will miss this girl tremendously.  I’m already plotting how to save money for a visit to England.  Best of luck to the both Dan and Angharad as they settle in on their new life overseas.

Homemade Sandwich Buns | Relishing It

Alright, on to talking about food.  I’ve been excited to share this amazing bun recipe with you all summer.  I’ve made several batches, and every time they’ve turned out perfectly.  The flavor can’t be beat.  The buttermilk gives them a subtle tang, while the butter keeps them moist (sorry to those of you that hate that word).  These are great all-purpose buns.  We’ve eaten them with pulled pork (doused with this amazing mustard sauce), burgers, and regular summer sausage.  This bun is it!  It holds up really well– it isn’t too soft, or too dense, and has a nice beautiful crust.  Best of all, it lasts for a few days (when properly re-warmed in the oven).  It really is the only bun recipe you’ll ever need.

Homemade Sandwich Buns | Relishing It

A couple thoughts on baking bread.  First of all, if you dismiss the idea of baking your own because you think it’s too difficult and not worth the trouble, reconsider.  There is virtually no work involved in these buns (or most any bread, for that matter).  Most of it is a waiting game. The results are fabulous and you will feel so happy when you pull that pan out of the oven.  Second, and I know I’ve mentioned this before, but if you invest in a scale, your baking will turn out perfectly almost every time.  Accuracy is the key to better results.  I hope you give these buns a try and enjoy them as much as we have!

Homemade Sandwich Buns | Relishing It

The Recipe:  Homemade Sandwich Buns

21 1/4 ounces (4 1/4 cups) bread flour

2 teaspoons rapid rise yeast

1 1/2 teaspoon kosher salt

3 tablespoons granulated sugar

1/4 cup (4 tablespoons) butter, cut into pieces,  at room temperature

1 1/2 cups buttermilk, heated to 100°F

1 egg, lightly beaten, at room temperature

1 egg mixed with 1 teaspoon water, for egg wash

Poppy and sesame seeds, for sprinkling, if desired

Note:  I’m giving the instructions for making these buns using a stand mixer, because I have one.  If you don’t, they buns can easily be made the old-fashioned way.  Instead of using a dough hook, just knead it with your hands/arms for several minutes.  You’ll want the dough to be smooth and silky.  You don’t want it to be too dry or too sticky.  If it is a bit dry, simply add more buttermilk.

In the bowl of a stand mixer fitted with a paddle attachment, add the flour, salt, yeast, and sugar.  Mix to combine for a few seconds.  Then add 1 egg, butter pieces, and warmed buttermilk.  Mix on low until the liquid has absorbed and the dough forms a ball.  Remove the paddle attachment and use the dough hook.  Mix on medium for about 6-8 minutes, or until a beautiful, silky ball has formed.  Then place in an oiled bowl.  Drizzle a bit of oil on the top of the dough and gently smooth it all over.  Cover the bowl with plastic wrap and place in a draft-free area.  Let rise for about 1 1/2 – 2 hours, or until doubled in size.

When the dough has properly risen, divide the dough into 12  3-ounce balls (you may have a smidge of dough leftover).  Work the balls into proper bun shapes, placing the seam side down.  Place them on a 12 x 15 baking sheet (or use two smaller ones) that has been lined with parchment paper.  Spray olive oil on top of the buns and cover with plastic wrap for 20 minutes.  Then, with the plastic wrap still on the buns,  gently press down on each bun with your fingers to flatten it a bit.  Otherwise you will end up with a round dinner roll (which can be great, but not for sandwiches).  Let rise again for another 1- 1 1/2 hours, or until they are big enough for your liking.

Meanwhile, preheat the oven to 400°F.  When the buns have adequately risen, use a pastry brush to apply the egg wash.  Sprinkle with sesame or poppy seeds.  Bake for about 15 – 20 minutes, or until the tops of the buns are a deep, golden brown.  Enjoy immediately or keep for days in an airtight container.  Re-warm in a 350°F oven for a couple minutes before eating.

Source:  Adapted from Brown-Eyed Baker.

Thanks for stopping by Relishing It!

xo

Laurie

Read Full Post »

Apple Challah via Relishing It

Despite the frigid weather, we survived this week’s arctic blast here in Minnesota.  And while I managed to get out-and-about a couple of times, much of the long weekend was spent tidying up the house and pre-Spring cleaning.  By January our home is so cluttered with Christmas toys, winter gear, and heaping piles of kindergarten projects that it’s almost unbearable.  So we bought more toy shelves (I really need to have a garage sale this Spring), organized the important school work, and re-arranged a few rooms.  And somehow, once everything was in order, it felt like we’d uncovered two new rooms.  Now I can finally think clearly again!

Apples for Apple Challah via Relishing It

Diced apples for Apple Challah via Relishing It

Aside from the re-organization and playing countless games of Munchkin and Memory with the little ones, I also managed to squeeze in a little baking.  It was a nice way to help warm the house when the windchill dropped to -30°F.  This apple challah turned out perfectly.  One of my favorite things to play around with in the kitchen is bread made with yeast.  I’m fascinated by how yeast grows and changes, creating such interesting flavor.  Baking bread takes patience and planning, but not a lot of work.  And the aroma of freshly baked bread, alone, is worth the small effort.

Challah dough stuffed with apples via Relishing It

Challah stuffed with apples via Relishing It

Apple Challah ready to bake via Relishing It

If you have reservations about working with yeast, just relax and start with something simple.  This apple challah is a nice entry point.  You basically shove everything into a pan and bake it up.  But the results are a magical, tender, rustic-looking bread.  This one isn’t overly sweet– it’s amazing flavors come from the apples, honey, and cinnamon.  One of my favorite characteristics of this challah is the nice ‘crunch’ provided by sprinkling turbinado sugar on top.  The crust is best on the day it’s baked, since it tends to soften over time in a sealed container.  Even so, it keeps well for several days, and the inside stays soft and moist.  Enjoy it drizzled with a bit of honey and a nice cup of hot coffee.

Apple Challah via Relishing It

Apple Challah via Relishing It

The Recipe:  Apple Challah

For the Dough:

4 cups (20 ounces) unbleached all-purpose flour  (see note)

1 1/2 teaspoons kosher salt

6 tablespoons canola oil

2 large eggs, at room temperature

1/4 cup honey

1 package instant yeast  (2 1/4 teaspoons)

1/2 cup luke-warm water (between 100-110°F)

For the Filling:

3 smallish apples, diced into 3/4-inch chunks with the skin on

1 teaspoon cinnamon

3 tablespoons granulated sugar

For the Glaze:

1 large egg beaten with 1 teaspoon water

Turbinado sugar for sprinkling

Note: The recipe from King Arthur called for 4 cups of flour.  I generally assume that 1 cup of all-purpose flour weighs 5 ounces.  So, I added 20 ounces of flour to this recipe.  King Arthur called for 4 cups of flour, but stated 17 ounces as their weight measurement.  I did feel the dough was a bit stiffer than I was accustomed to working with, but the outcome was absolutely perfect.  It was a soft and tender bread that was sublime.  I think it’s safe to say that anything between 17-20 ounces would work here, though I haven’t tried the 17 ounce version first-hand.  Can you tell that I love my scale? 

In a bowl of a stand mixer (the recipe can also be done by hand, of course), mix the yeast, honey, and water together until it is dissolved.  Let stand for 5-10 minutes, or until it begins to get a bit foamy.

Add the remaining ingredients for the dough to the yeast mixture and slowly mix using the paddle attachment until the dough just comes together.  Remove the paddle attachment and add the dough hook.  Knead the dough for a few minutes until it is soft and smooth.  Place the dough in a slightly oiled large bowl and cover it with a dishtowel or lightly greased plastic wrap.  Allow to rise for about 2 hours, or until it has doubled in size.

Lightly grease a 9 or 10-inch springform pan or a 9-inch cake pan that is at least 2-inches deep.  Mix the apple filling ingredients together in a bowl.

Gently deflate the dough and transfer it to a lightly floured work surface.  Roll the dough out into a 8 x 10-inch rectangle.  Place the apples on the dough in two 10-inch rows near the center of the dough.  Fold each side over the row of apples closest to it.  Pushing down as you go to seal it.  Using a sharp knife, cut the dough down the center, and then across 8 times.  You should end up with 16 pieces of dough.  Hopefully the photographs will help with a visual.  Place the pieces of dough into the prepared pan so they create a single layer.  Tuck any apples that have fallen out into the mixture.

Cover the challah with a lightly greased piece of plastic wrap.  Allow to rise for about 1 1/2 hours, or until it’s about 2-inches high.

Preheat the oven to 325°F toward the end of rising time.  Brush the top of the dough with the egg wash and sprinkle heavily with turbinado sugar (or any coarse sugar).  Bake for about 55 minutes, or until the top is a beautiful golden brown.  Some of the higher pieces may get dark brown, and that’s ok.  The dough needs to bake all the way through in the middle, so be patient.  Remove challah from oven and after 5 minutes loosen the edges and transfer it to a rack.  Serve hot or cold, preferably with a drizzle of honey.  Keeps well for days in a covered container.  Enjoy!

Source:  Adapted from King Arthur Flour

Thanks so much for stopping by!  xo

Laurie

Read Full Post »

Every once in awhile an idea for a recipe pops into my head, and I can’t believe I hadn’t considered it before.  On the one hand, I get a bit disappointed in myself for missing something so obvious.  But then I think, ‘Who cares?  This is going to be incredible!’  Today’s recipe came from one of those epiphanies.  I wanted something bursting with Spring flavors, and this pea shoot and mint pesto does just that.

Pea shoots should be showing up at your local farmers market right now.  If you haven’t tasted them before, please go buy some.   These tasty little shoots are the young tendrils and leaves of the pea plant.  They’re packed with nutrients, including vitamins A and C.  And they’re wonderful on sandwiches, salads, mixed into stir fry, pureed into soups– and of course, in this pesto.

Mint and peas make a great combination– remember this carbonara?  Pea shoots taste like fresh peas, but you don’t have to go through the fuss of shelling.  Here, I blanched the pea shoots for a few seconds to brighten their color.  I added a few mint leaves, and finished it off with a squeeze of fresh lemon.  Do not leave out the lemon!  It’s fine without, but we’re looking for better than ‘fine’ with this pesto.

A couple tips on the bruschetta:  First, make sure you grill the bread.  Season it with olive oil, salt, and pepper.  It makes a huge difference.  I also recommend tearing– rather than cleanly slicing– the mozzerella.  It creates nice crevices and curves to drizzle the olive oil into.  I think it also happens to  look much more interesting.  The radishes add an additional pop of color and fresh crunch.  Aside from using this pesto on bruschetta, you can add it to pasta.  If you think it’s going to be too thick to toss with pasta, add a little more olive oil and remember to always reserve a bit of hot pasta water to get the texture you want.  Either way, I think you’ll be happy with this fresh dish.  Enjoy!

The Recipe: Bruschetta with Pea Shoot Mint Pesto and Fresh Mozzarella

Pea Shoot Mint Pesto:

1 1/2 cups packed pea shoots

2-3 tablespoons freshly grated parmesan or grana padano cheese

1/4 cup lightly toasted walnuts, chopped

1 garlic cloves

10 fresh mint leaves

1/4 cup extra-virgin olive oil

squeeze of lemon juice, to taste

sea salt and freshly cracked pepper, to taste

hot pepper flakes, to taste

For the Bruschetta:

1-2 balls of fresh mozzarella

1 -2 cloves of garlic

extra-virgin olive oil

pea shoot  mint pesto

handful of radishes, diced

Good quality rustic bread, sliced  ( I used sour dough)

To make the pesto:  Bring a medium sized saucepan filled with water to a small boil.  Prepare an ice bath, set aside.  Place the pea shoots in the hot water for 30 seconds.  Remove immediately and submerge into the ice bath.  Remove pea shoots from water and gently “wring” them out.  It’s ok if they have a bit of water on them.  Let cool.

Place the pea shoots, mint leaves, and 1 clove of garlic in a mini-food processor.  Pulse a few times, until the greens are adequately chopped.  Add the parmesan or grana padano and walnuts, pulse a few more times.  With the processor running, slowly drizzle in the olive oil.  You may need to stop the machine and scrape down the sides of the bowl.  Once the pesto is thoroughly combined, taste it.  Stir in some salt, cracked pepper, hot pepper flakes, and a squeeze or two of lemon to brighten the pesto.  Use immediately or store in the refrigerator with plastic wrap placed directly on it.

To make the Bruschetta:  Fire up your grill.  Brush olive oil on both sides.  Sprinkle with salt and pepper. Place on a hot grill and let it toast on each side until it is beautifully golden, but not burnt.  Remove from the grill and while still hot, rub a clove of garlic on one side of the toast.  Spread the pesto on that.  Rip the mozzarella, to create crevices, and place on the pesto.  Top with the chopped radishes.  Drizzle with a bit of olive oil and finish with a sprinkle of sea salt.  Enjoy!

I’m currently in North Dakota with my kids — made the long 8 hour trip to spend Mother’s Day with my Mom.  I hope all of you Moms out there have a wonderful day.  Thanks to everyone for stopping in — see you next week!

Laurie

Read Full Post »

I distinctly remember the first time I ate a piece of chocolate babka bread.  It floored me.  I had a hard time wrapping my brain around the fact that it looked so sweet– like a dessert bread– but instead had so much more flavorful depth.  Those simple swirls wrapped around chunks of bittersweet chocolate were amazing.  And though it wasn’t what I was expecting, I loved it.  I was hooked.  Since that first piece, I’ve ordered chocolate babka whenever I’ve had the opportunity.  Some have been amazing, while others just didn’t quite get it right.

For today’s recipe, I’ve found a babka that definitely gets it right.  Being able to make something at home that is just as good, if not better, than the versions I’ve tried elsewhere is one of the most satisfying things about cooking and baking.  And this babka ranks right up there with the best I’ve ever eaten.  The bread is moist and soft, and of course, not overly sweet.  I love the big chunks of chocolate and the subtle kiss of cinnamon that make every bite interesting.  In a word, it’s perfect.

This babka is not difficult to make, and I think the pictures should help you visualize each step.  As always, fancy equipment is not necessary.  Every step can be done by hand, though it’ll take a bit longer to mix and knead the dough.  The results are worth the little added effort.  This babka begs to be eaten while sipping a cup of coffee and chatting with a good friend.  I hope you make this one, you’ll be so happy you did!

The Recipe: Chocolate Babka

For the Bread:

2 1/4 teaspoons (one 1/4-ounce envelope) active dry yeast

1/4 cup granulated sugar

3/4 cup warm milk (110 degrees)

1 large egg plus one large egg yolk

3 cups (15 ounces) all-purpose flour, plus more for surface

1/2 teaspoon kosher salt

1 stick (8 tablespoons) unsalted butter at room temperature, plus more for bowl and pan

1 large egg, lightly beaten with 1 tablespoon heavy cream, for egg wash

For the Filling:

8 ounces bittersweet chocolate, coarsely chopped (1 1/4 cups)

1/2 cup granulated sugar

1 1/2 teaspoons ground cinnamon

4 tablespoons unsalted butter, at room temperature, cut into small pieces

1/4 teaspoon kosher salt

For the Crumb Topping:

1/4 cup plus 2 tablespoons confectioners’ sugar

1/4 cup all-purpose flour

3 tablespoons unsalted butter, room temperature

To make the bread: In a medium bowl, sprinkle the yeast and a pinch of sugar over the milk and let stand for about 5 minutes, or until foamy.  In another bowl, whisk together the remaining sugar, the egg and the yolk.  Whisk into the yeast mixture.  In the bowl of a stand mixer fitted with the paddle attachment, combine the flour and kosher salt.  Add the egg mixture and mix on low speed until almost fully combined, about 30 seconds.  Switch to the dough-hook attachment, and add the butter.  Mix until smooth, soft, and slightly sticky, about 9-10 minutes.  Butter a large bowl.  Turn out the dough onto a floured surface and knead a few times until smooth.  Place in bowl and cover with plastic wrap.  Let stand in a warm place until doubled in size, roughly 1- 1 1/2 hours or longer (it will depend upon how warm your house is).

Meanwhile, make the chocolate filling.  In a medium bowl, combine the chocolate chunks, sugar, cinnamon, and salt.  Cut in the butter with a fork, pastry cutter, or my favorite way, your fingers, until combined.

Once the dough has doubled in size, punch it down.  Place it on a flour work surface.  Let rest for 5 minutes and then roll it out into a 18-inch square.  Reserve a 1/2 cup of the filling and sprinkle the rest over the dough, leaving a 1-inch border.  Brush the edges with the egg wash.  Tightly roll the dough from one end to the other, like a jelly roll.  Pinch the seam to seal.  Fold in half and form a “U” shape.  Twist 2 or 3 times to “braid”.  Make sure to pinch the ends of braid together, as well.  Butter a 5-by-10-inch loaf pan, line with parchment, leaving 1-inch overhangs; then butter the parchment paper.  Place the dough in the pan and brush with egg wash.

To make the crumb topping, in a small bowl combine the confectioners’ sugar, flour, and butter.  Mix with your finger until large, moist clumps form.  Sprinkle topping along with 1/2 cup reserved chocolate filling over the cake.  It’s ok if it falls down the sides of the cake, it will bake up beautifully.

Preheat oven to 350°F.  Drape plastic wrap over the dough.  Let rise in a warm place until risen by half, about 30 minutes.

Place bread pan on a cookie sheet, in case any of the topping tumbles off while baking.  Place in the oven (center rack).  Bake rotating halfway through, until golden, about 55 minutes.  Reduce oven temperature to 325°F.  Bake until deeply golden, about 15-20 minutes more (cover with foil if top gets too dark).  Transfer pan to wire rack to cool completely before removing from pan.  Bread can be stored in an airtight container (with plastic wrap placed on cut ends) for about 3 days.

Source:  Adapted from Martha Stewart Living, 2011

Thanks for stopping by Relishing It.  I’d love to hear about some of the foods you’ve been relishing in your life lately!

Laurie

Read Full Post »

Stollen

Apparently this is the month I make treats that I’ve had in mind for years, but never gotten around to.  First it was this amazing chocolate mint cake that I thought about for a decade, now it’s a gorgeous stollen.  Hey, I’ve only lusted after this fantastic bread for 9 years.  I know many of you plan to entertain family and friends for the holidays, so put this one on your list.  It really stands out from the crowd.  This stollen is not only beautifully interesting, it’s absolutely delicious.  It’s loaded with good things like dried fruit, almonds, lemon and orange zest; and great things like…cognac!

The sweetness is very subtle, mostly coming through the dried fruits, though the icing is there just to make you want to keep coming back for another bite.  Though there’s a real heft, somehow the the bread stays so tender and almost delicate.  Don’t let the thought of dealing with yeast deter you here, either.  This bread may look or even seem a bit daunting, but it’s not.  The recipe is simple.  I used a stand mixer, though the entire recipe can be made in a large bowl with a wooden spoon.  It’ll take a little muscle power, but not much.  One of the reasons this bread turns out so brilliantly is due to not overworking the dough.

One final perk is that the stollen keeps well.  Of course I had a slice of it when it was still warm– because really, there was no stopping me.  It was incredible.  But here’s the thing, it was still incredible the next day and the day after that.   To store it, I simply applied plastic wrap around the cut ends and kept it in a air-tight container.  If you are busy and don’t want to deal with breakfast, this works perfectly.  Serve it along with juicy clementines and maybe even a mimosa.  Your guests will love you even more than they already do.

The Recipe:  Stollen

(makes one large wreath-shaped loaf)

5 1/2 cups unbleached all-purpose flour, sifted, plus more for work surface

6 tablespoons granulated sugar

1/2 teaspoon kosher salt

1/4 teaspoon ground mace

1/4 teaspoon freshly grated nutmeg

1 cup milk, warmed

1 1/4 sticks (10 tablespoons) unsalted butter, melted plus 2 more melted tablespoons for brushing, plus more for bowl

1 1/2 ounces (2 envelopes) active dry yeast or 1 ounce fresh cake yeast, dissolved in 1/4 cup warm water

3 large eggs, lightly beaten

1 1/4 cups currants soaked in 1/4 cup cognac or brandy

1 cup golden raisins and 1/4 cup dried cherries soaked in 1/4 cup orange juice

1 1/4 cups blanched almonds, chopped (see note)

3/4 cup dried apricots, chopped

Zest of 2 oranges

Zest of 1 lemon

1 cup confectioners’ sugar

3-4 tablespoons orange juice

Note:  To blanch almonds place them in a bowl and pour boiling water over them.  Let sit for a minute.  Then begin to “slip” the peelings off of them with your fingers.  Don’t let them sit in the water too long, or they will become soggy.  It’s best to blanch the almonds in advance, so they have time to dry before being mixed into the dough.

In two small bowls — soak the raisins and cherries with the orange juice and the currants with the cognac.  Set aside.  In a small saucepan with the heat on medium, combine the butter and milk until melted.  Set aside to cool for 5 minutes.

Sift together the flour, sugar, salt, mace, and nutmeg into the bowl of a stand mixer fitted with the paddle attachment.  With the mixer on low, add the milk and butter.  Add the yeast and eggs and mix until combined.   Detach the paddle attachment and put on the dough hook.  On top of the dough, sprinkle the currants, raisins, and cherries along with their soaking liquids.  Add the orange zest, lemon zest, apricots, and almonds.  Turn on the mixer and “knead”  until everything looks combined, roughly 2-3 minutes.  Be careful not to overwork the dough.

Turn dough out onto a lightly floured surface.  Knead by hand for a few seconds, adding more flour if the dough is too sticky.  Form a ball and place into a large buttered bowl.  Cover with plastic wrap and let rise in a warm place until doubled in size, about 1-2 hours.

Punch down the dough.  On a lightly floured surface, roll dough out into a 16 x 24 rectangle and 1/4 – inch thick.  Starting with the long side,  roll the dough tightly into a long, thin cylinder.  Carefully transfer dough to a large baking sheet lined with parchment paper.  Form a wreath shape and join the ends together by pinching with fingers to make it stick.

Using a sharp kitchen shears, make cuts along the outside of the circle, in 1- inch intervals, cutting 2/3 of the way through the dough.  Twist each segment outward, forming a wreath shape.

Preheat oven to 375°F.  Cover the dough with a clean kitchen towel and let rise for about 1 hour. The dough all not rise all that much. Brush dough with remaining 2 tablespoons of melted butter.  Bake until golden brown and crusty, about 35-45 minutes.  Place baking sheet on a wire rack to cool.

Mix the confectioners’ sugar with the orange juice.  Drizzle over the stollen.  Serve warm, if desired.  Keeps very well in an airtight container and plastic wrap snug around the cut ends.  Enjoy!

Source:  Adapted from Martha Stewart’s Holiday Baking Special Issue, 2002

Thanks for stopping by Relishing It today!

Laurie

Join me on Twitter

Read Full Post »

Just in case I haven’t been clear, I LOVE the colorful array vegetables available this time of season.  For today’s recipe, I put together one of my favorite beautiful, delicious salads.  Panzanella is an Italian salad that usually consists of soaked stale bread and tomatoes.   My version includes a greater variety of ingredients, and a little more crunch from the bread.  Now a purist may say that it isn’t panzanella, but when it tastes this good, why quibble over the name?  Panzanella it is, and it’s marvelous.

This was the first week that I finally found red peppers at the farmers’ market.  My kids and I love them as a snack.  Here I used mini sweet multi-colored peppers.  Cute and tasty!  Since fresh cucumbers and red onions are plentiful now, I added those as well.  For the cheese, I used (surprise!) ricotta salata.  Yes, it’s my go-to addition, but the creamy texture and saltiness work perfectly in so many dishes.  It seems I’m always poking around for another piece of it with every bite.   The ricotta salata also makes this salad a bit more substantial– we ate it as a light meal rather than a starter.

Of course the star of the salad is the crusty bread and red wine vinaigrette.  I like to tear my bread rather than cut it– more dressing seems to get into the crevices.   I could eat the bread and dressing alone, which I guess that’s the point of the salad— it’s nice to get some healthy vegetables in there, too.  When assembling the salad try to keep most of the vegetables relatively the same size.  I love this combination of flavors– it’s one of my favorite things to eat during the summer.  It makes a nice, light meal that I find myself eating pretty much every day for lunch.

The Recipe:  Panzanella

(The measurements are vague — make as big of a salad as you want.  You will have plenty of dressing.)

2 large cucumbers, chopped

2 cups mini multi-colored peppers, chopped  (or 1 red and 1 yellow bell pepper, chopped)

6 Roma tomatoes, chopped

3 mini – red onions, thinly sliced  (or 1 small red onion)

handful of fresh garden lettuce, torn

12-15 basil leaves, whole

1/3 cup cubed ricotta salata cheese  (feta can be substituted)

1 baguette, torn into bite-sized pieces

2 tablespoons extra-virgin olive oil

salt and pepper

1 teaspoon fresh thyme, chopped  (or 1/2 teaspoon dried)

Red Wine Vinaigrette

1/4 cup red wine vinegar

1/2 cup extra-virgin olive oil

1 clove garlic, minced

1 teaspoon Dijon mustard

1/2 teaspoon fresh thyme, chopped

kosher salt and freshly cracked pepper to taste

To Toast the Bread:  Preheat oven to 375°F.  Toss the torn bread with 2 tablespoons olive oil,  1 teaspoon fresh thyme, salt and pepper.  Put onto a baking sheet and bake until the bread chunks are golden brown and have a nice crunch to them — about 10-15 minutes.  Remove from oven and set aside.

To Make the Vinaigrette:  In a medium-sized bowl, mix the vinegar, garlic, 1/2 teaspoon thyme, and mustard.  Using a whisk, slowly add the extra-virgin olive oil, whisking all the while.  Add salt and pepper to taste.  Set aside.

To Assemble the Salad:  In a large salad bowl, add the garden lettuce, cucumbers, peppers, tomatoes, ricotta salata cheese, red onion, basil, and toasted bread.  Pour some of the dressing onto the salad.  Toss.  Let sit for a few minutes before eating so the dressing has a chance to soak into the bread a bit.  Add more dressing, salt, and pepper, if necessary.  Enjoy!

I hope you are enjoying your summer produce as much as we are.  This is a beautiful time of year!  Have a great weekend.  Take Care.

Laurie

Follow me on Twitter

Read Full Post »

%d bloggers like this: