Feeds:
Posts
Comments

Posts Tagged ‘cake’

Perfect Pumpkin Bars with Maple Cream Cheese Frosting | Relishing It
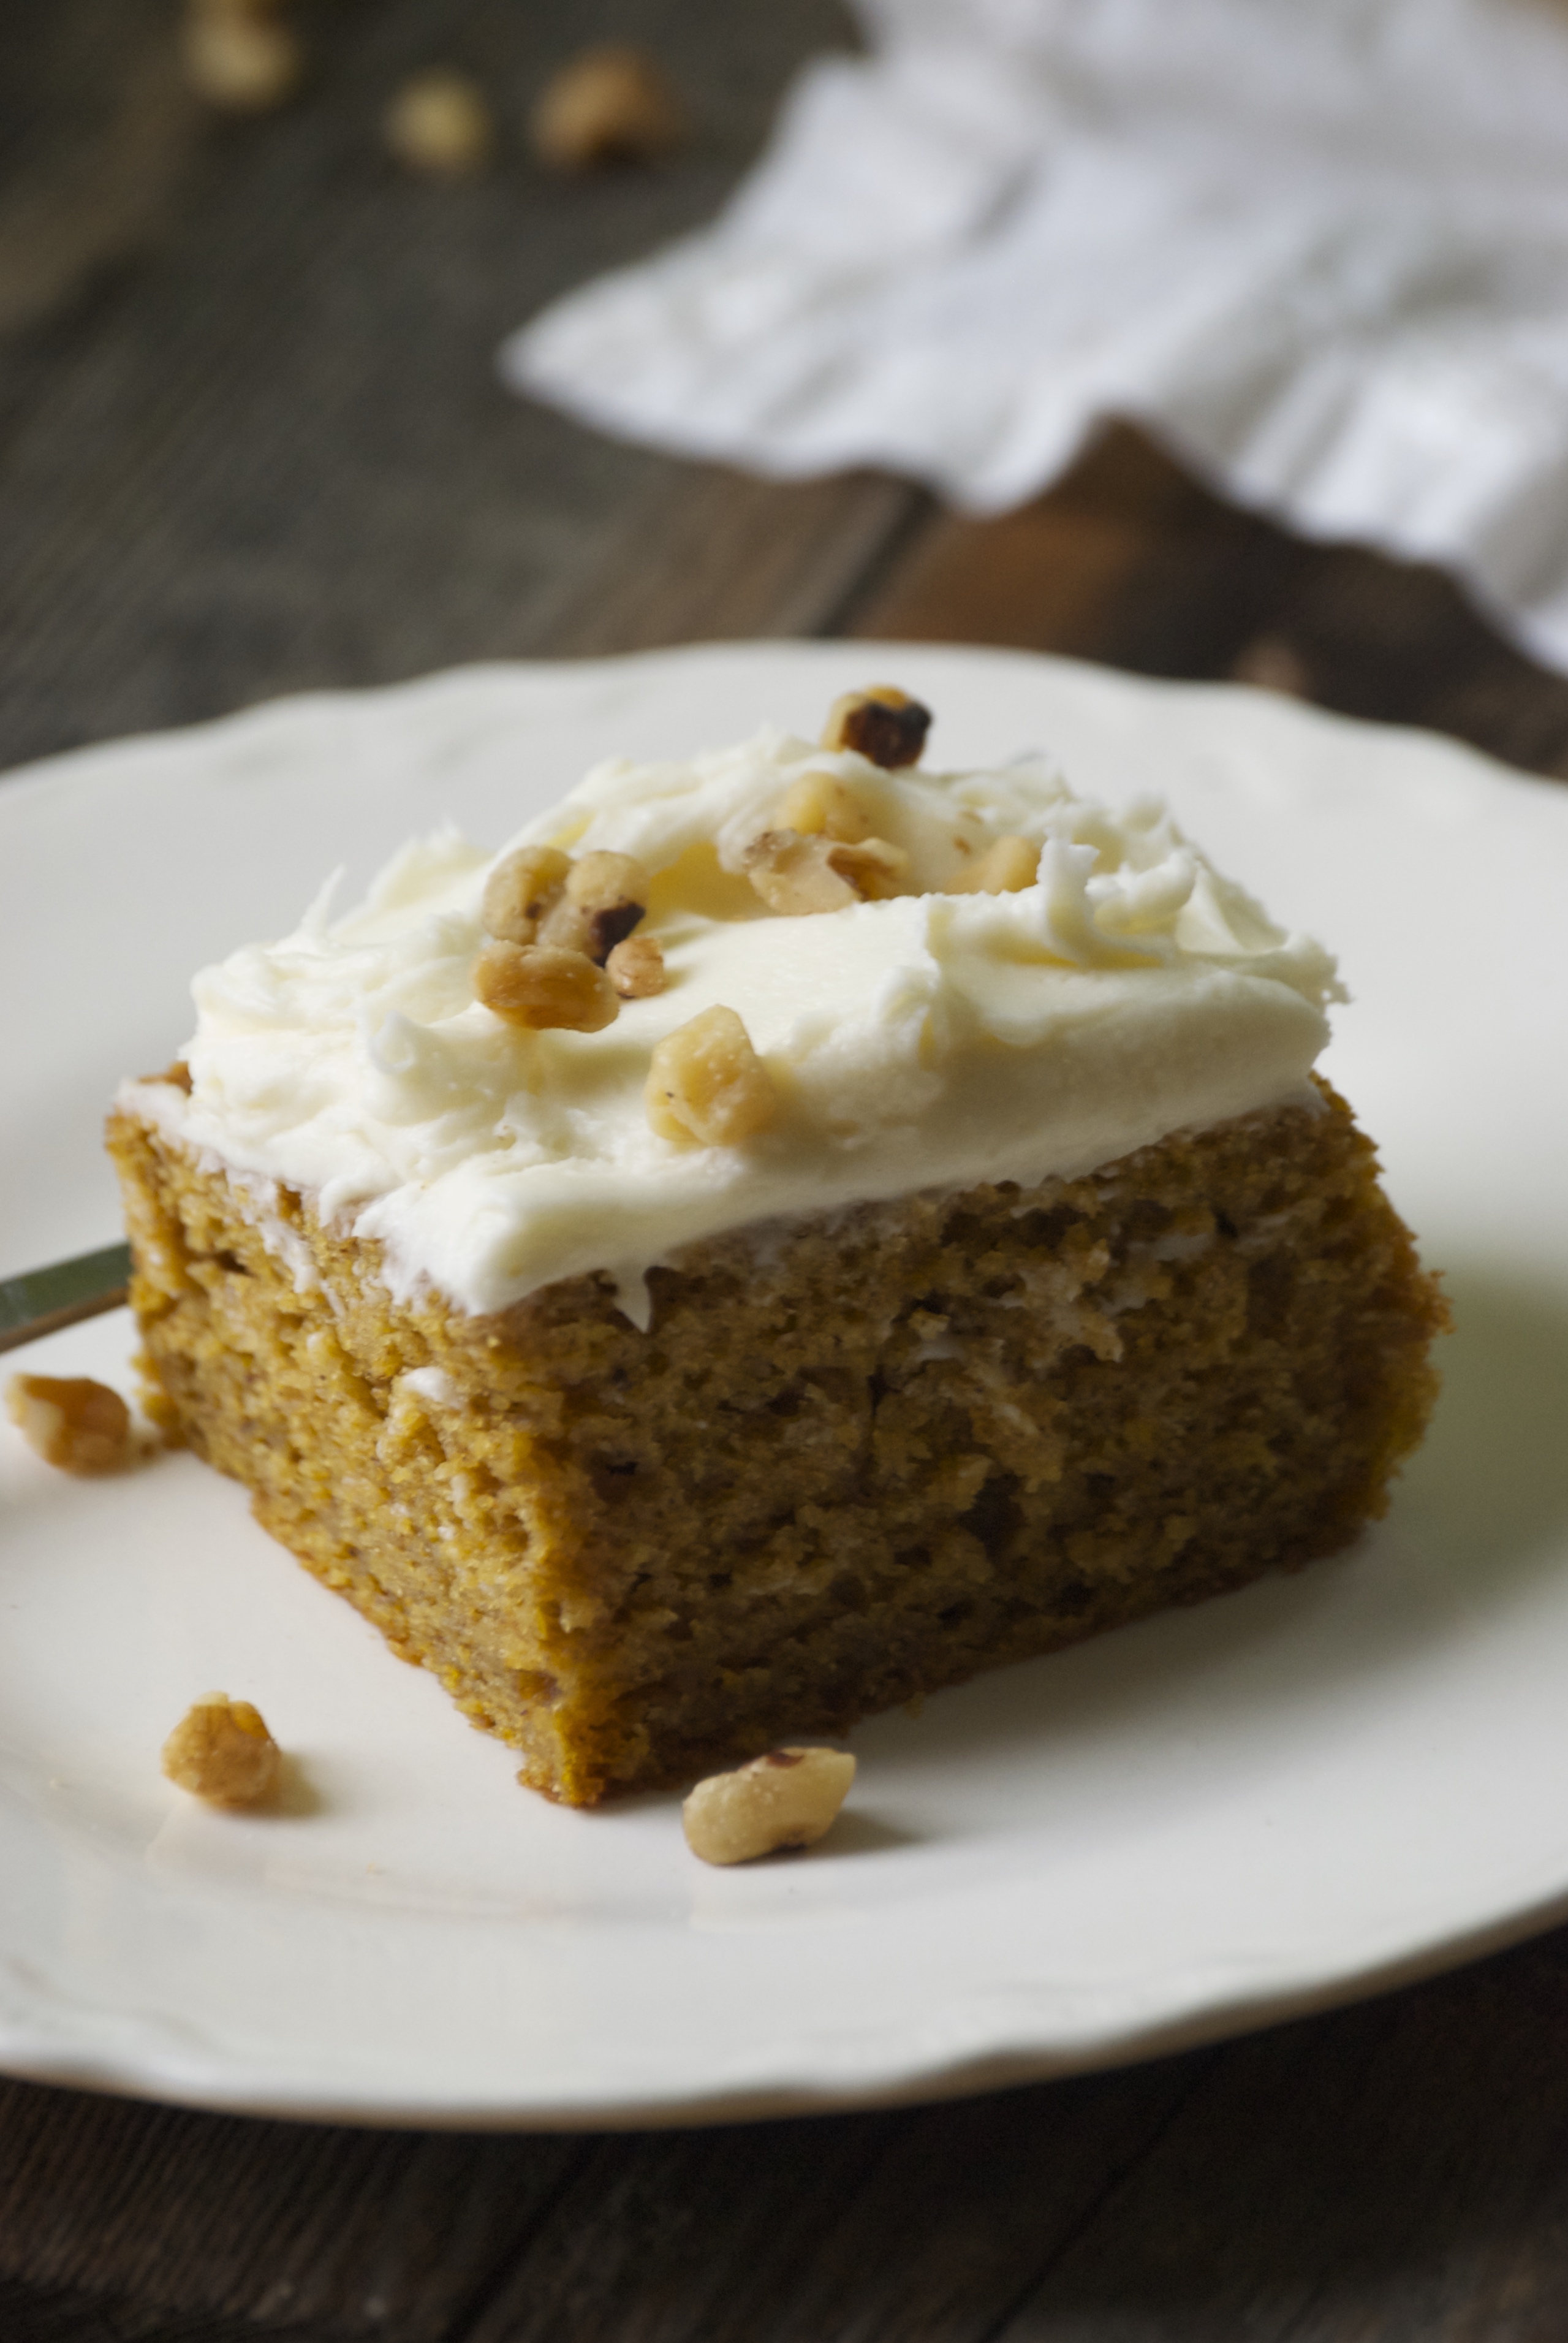
I’ll admit it, one of the main reasons I’m writing this post is so next year, when I’m craving a perfect pumpkin bar, I’ll know exactly where to look.  But that doesn’t mean they’re not for you, too.  They make an excellent dessert alternative for Thanksgiving.  I like pumpkin bars that are thick– I have no time for those weak, thin and flimsy ones. I suppose one could even say that this is more a pumpkin cake, but the fact that I swoop into the pan and eat this treat with my hands, makes me comfortable with the bar title.

Perfect Pumpkin Bars with Maple Cream Cheese Frosting | Relishing It

Perfect Pumpkin Bars with Maple Cream Cheese Frosting | Relishing ItOne of things that makes these bars stand out is the use of virgin coconut oil.  I try to swap out vegetable or canola oil whenever I can.  I find the smell and taste of those to be somewhat off-putting.  And aside from the better flavor, coconut oil is much healthier.  Both the coconut oil and the pumpkin make these bars stay moist for days and days.  The maple cream cheese frosting is the perfect way to top them.

Perfect Pumpkin Bars with Maple Cream Cheese Frosting | Relishing It

Perfect Pumpkin Bars with Maple Cream Cheese Frosting | Relishing It

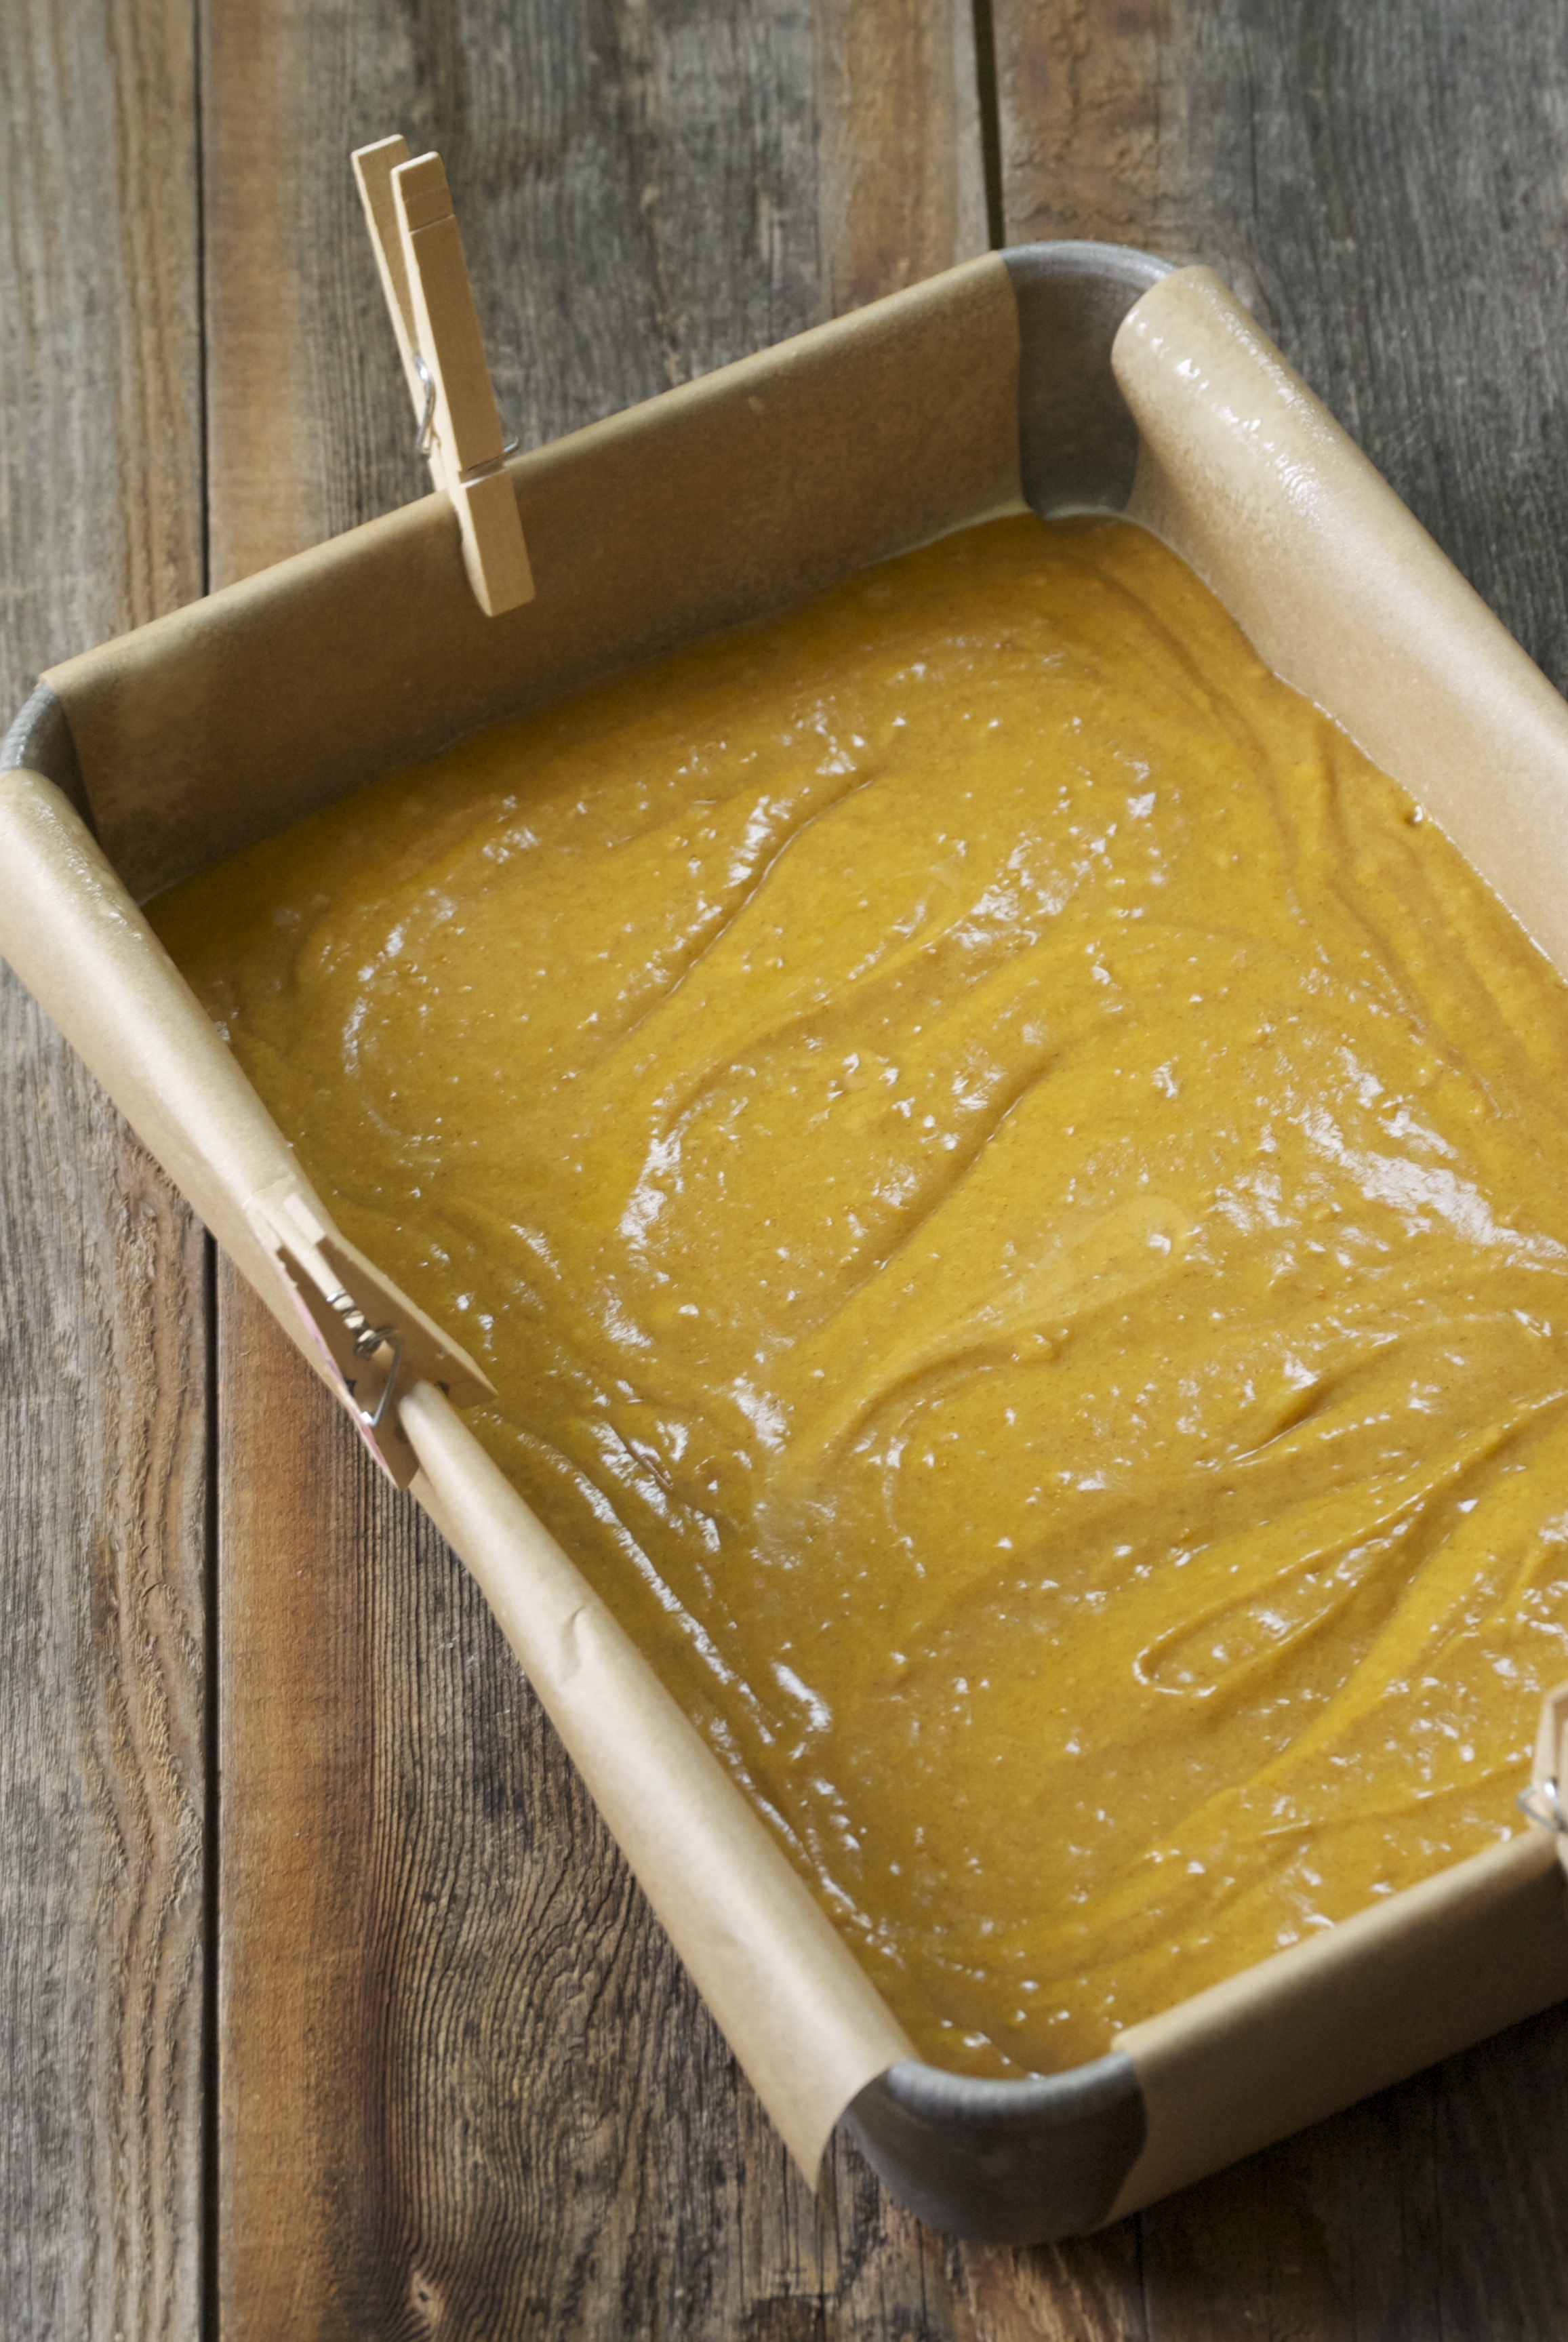
These bars would be fantastic on your Thanksgiving table for those guests who aren’t into pie so much.  They can be left in a regular cake pan, or to fancy things up a bit, put them on a festive platter.  Using parchment paper in the pan makes them really easy to lift out.  However you decide to serve them, I know your friends and family are going to love them.  Enjoy!

Perfect Pumpkin Bars with Maple Cream Cheese Frosting | Relishing It

The Recipe: Perfect Pumpkin Bars with Maple Cream Cheese Frosting

(makes a 9 x 13 pan)

2 cups (9 ounces) all-purpose flour

2 teaspoons baking powder

1 teaspoon baking soda

1 teaspoon kosher salt

1 1/2 tablespoons ground cinnamon

1/2 teaspoon ground cloves

1/2 teaspoon freshly grated nutmeg

1/2 teaspoon ground ginger

1 cup granulated sugar

1/2 cup packed light brown sugar

1 cup coconut oil, melted, then cooled a bit

4 eggs, room temperature

1 15- ounce can plain pumpkin purée

1 teaspoon vanilla

For the Frosting:

3 cups confectioners sugar (about 12 ounces), sifted

8 ounce package of cream cheese (full fat)

1/2 stick unsalted butter, at room temperature

1 teaspoon salt

2 tablespoons real maple syrup

toasted walnuts, for garnish

Preheat oven to 350°F.  Line 9 x 13 cake pan with parchment paper (let enough hang over the edges to be able to grasp and lift the cake out with) and coat with non-stick cooking spray (if wanting to remove from pan in one large piece) or just grease pan with coconut oil, butter, or spray.

In a medium-sized bowl, whisk together the flour, baking powder, baking soda, salt, cinnamon, cloves, nutmeg, and ginger.  Set aside.

In a bowl of a stand mixer (or using a regular bowl and wooden spoon) fitted with the paddle attachment, mix the coconut oil and sugars together until blended well.  Add the eggs and vanilla and mix until somewhat creamy, 3 minutes or so.  Then add the pumpkin puree and blend until uniform.

Sprinkle the dry ingredients on top of the wet and use a spatula to fold everything until moistened, (this will prevent a big cloud of flour from landing on your countertop), then using the paddle attachment again mix until just combined.  Do not over mix.  Bake for 35 minutes or until a cake tester comes out clean.

While the cake is cooling, make the frosting.  Using the paddle attachment of a stand mixer (or a hand mixer, or wooden spoon) mix all of the ingredients together, except the confectioners sugar, until smooth and creamy. Then add the sifted confectioners sugar and mix until smooth.

Remove cake from pan once it has cooled, if desired.  Or frost it in the pan. Sprinkle with toasted walnuts, if you like.  Keeps well for days covered at room temperature.  Enjoy!

Thanks for stopping by Relishing It!

Laurie


Read Full Post »

Orange and Olive Oil Cake

Pretty much every time I walked into my Grandma Jesch’s home as a child, there was a newly-baked cake waiting for me.  And I stopped by to visit at least every other day.  I guess that’s likely the source of my infatuation with cake.  I love them.  I love every kind of cake.  I love big decadent cakes with billowing frosting.  And tarts loaded with pastry cream and topped with ripe summer berries, make me swoon.  But sometimes…sometimes I want a simple cake.  A snacking cake.  Like the ones my Grandma Jesch made.

This orange and olive oil cake is the perfect snacking cake.  It’s interesting and delicious, without being too glamorous.  The olive oil lets you know it’s in there, though it’s subtle.  It adds a slightly floral flavor that works wonderfully with the brightness of the orange zest.  The cake stays moist with the help of the olive oil and the yogurt; and in my experience, it’s better after sitting for a few hours or even overnight.  Be warned though, the modesty of this cake may deceive you.  Since it doesn’t have the pomp of a fancy chocolate layer cake, you won’t think of it as dessert.  Your guard will be down.  You’ll wander into the kitchen several times over the course of the afternoon, and suddenly, half of the cake will be gone.  Not that that happened to me.  And I certainly wouldn’t tell you if it did…

The Recipe:  Orange and Olive Oil Cake

3 cups all-purpose flour

1 tablespoon baking powder

1 teaspoon kosher salt

4 large eggs, separated

2 cups granulated sugar

1 cup plain yogurt

3/4 cup good-quality extra-virgin olive oil  (preferably something fruity, if possible)

zest of 3 oranges

1 1/2 teaspoons vanilla extract

confectioners’ sugar, for dusting

Preheat the oven to 350°F.  Place rack in the center of oven.  Generously spray the inside of a 10-inch Bundt pan with a nonstick cooking spray; or butter it well, flour it, and tap out any excess.

In a large bowl, whisk together the flour, baking powder, and salt.  Set aside.

In the bowl of a stand mixer fitted with the paddle attachment, beat the egg yolks until they are pale and light; slowly pour in the sugar until it is completely incorporated.  Add the yogurt and olive oil and mix until thoroughly combined.  Add the orange zest and vanilla, mix until just incorporated.

Add the flour mixture to the wet ingredients in two parts, beating after each addition until just combined (it should only take 10 seconds).  Scrape down the bowl and beat again for 5 seconds.

In another large bowl, beat the egg whites until stiff peaks form.  Scoop 1 cup of the egg whites into the batter.  Use a rubber spatula to gently fold them in.  After about 30 seconds of folding, add the remaining egg whites and gently fold until they are almost completely combined.  Do not rush this process.

Pour the batter into the prepared pan and bake for 40-50 minute, rotating the pan half way through the baking time, or bake until a toothpick inserted into the center comes out clean.  Transfer the pan to a wire rack to cool for 10-15 minutes.  Gently loosen the sides of the cake from the pan (an offset spatula works well) and turn out onto a rack to cool completely.  Dust with confectioners’ sugar right before serving.  This cake stores well at room temperature for about 3 days in a tightly covered container.  Enjoy!

Source: Adapted from Baked Explorations

Thanks for stopping by today!

Laurie

Join me on Twitter

Read Full Post »

How does one measure patience?  As the mother of small children, mine (and to be fair, theirs) is tested daily.  But that’s not really what I’m talking about today.  I’m talking more about the ability to delay gratification, or to be patient enough to wait until the time for something is right.  Heck, maybe I’m not talking about that at all, but the point is, I’ve been patiently waiting to make this cake for a very long time.  I’ve  drooled over admired this recipe for a decade.  Seriously.  I’ve always known I was going to make it, and this year I finally decided the timing was right.  No more delayed gratification here– that’s the sort of patience I’m talking about.

So was it worth a 10-year wait?  Absolutely.  This beautiful cake is a stunner.  Not only does it look spectacular, it’s loaded with deep, rich chocolate flavor throughout.  The cake and glaze are primarily dark chocolate, while the center boasts creamy milk chocolate to vary the flavors.  It also perfectly combines refreshing mint– chocolate’s soul-mate during the holiday season.  The layering of the flavors is marvelous.  This decadent cake is the perfect ending to your holiday meal, so don’t wait a decade to make it.

The Recipe: Triple Chocolate and Peppermint Cake

(Serves 12)

Filling:

8 ounces good quality milk chocolate, finely chopped

1/2 cup whipping cream

1 tablespoon light corn syrup

1 teaspoon peppermint extract

Cake:

1 cup sifted unbleached all-purpose flour

1/3 cup unsweetened cocoa powder

1 teaspoon kosher salt

1/4 teaspoon baking powder

1/4 teaspoon baking soda

3/4 cup (1 1/2 sticks) unsalted butter, room temperature

1 cup granulated sugar

1/3 cup (packed) dark brown sugar

2 teaspoons vanilla extract

3 large eggs,  room temperature

1/2 cup buttermilk

1 1/2 cup semi-sweet chocolate chips, chopped or miniature chocolate chips

Chocolate Glaze:

8 ounces bittersweet or semisweet good quality chocolate, finely chopped

1/2 cup (1 stick) unsalted butter, cut into pieces

1 tablespoon light corn syrup

1 teaspoon peppermint extract

chopped peppermint candies for garnish

To make the Filling:  Place chocolate in a medium bowl.  Bring cream and corn syrup to a simmer in a small saucepan.  Pour over the chocolate; add extract.  Let sit for one minute.  Whisk until smooth.  Let mixture sit at room temperature while cake is baking and cooling.

To make the Cake:  Position rack in the middle of oven.  Preheat to 350°F.  Prepare a 9-inch cake pan with 2-inch sides by buttering, lining with parchment paper, buttering again, and dusting with flour.  Tap out excess flour.  Whisk the flour, cocoa powder, salt, baking powder, and baking soda together in a medium bowl.   Set aside.  In a stand mixer, fitted with the paddle attachment, beat the butter until light and fluffy.  Gradually beat in both sugars, then vanilla.  Add the eggs one at a time, beating well after each addition.  Be sure to scrape down the sides of the bowl, as needed.  Beat in the dry ingredients alternately with buttermilk in 2 additions each.  Mix in the chocolate chips with a rubber spatula.

Transfer batter to prepared pan.  Bake cake until tester inserted into center comes out clean, about 45- 50 minutes.  Be sure not to over bake.  Cool cake in pan for 5 minutes.  Turn out onto a rack.  Remove parchment paper.  Cool completely.

Using a stand mixer fitted with the whisk attachment, beat the filling until fluffy and lightened in color, about 1 minute.  Using a serrated knife, cut the cake horizontally in half.  Place 1 layer, cut side up, on rack set over baking sheet.  Spread filling over.  Top with second later, cut side down.  Chill for 20 minutes.

Meanwhile, prepare glaze:  Stir chocolate, butter, and corn syrup in heavy small saucepan over low heat until melted.  Mix in extract.  Cool glaze until just lukewarm but still pourable, stirring occasionally, about 20 minutes.

Pour 1/2 cup glaze over center of cake.  Spread over top and sides of cake.  Chill for 15 minutes.  Pour remaining glaze over the center of cake, then spread quickly over the tops and sides.  Sprinkle with peppermint candies.  Serve after the glaze has set and the cake is at room temperature.  Store at room temperature under a cake dome.

Source: Adapted from Bon Appetit Magazine, December 2001

Thanks so much for stopping by today!

Laurie

Join me on Twitter

Read Full Post »

Though chocolate is my favorite sweet, around this time of the year I love to bake with those warm, delicious holiday spices.  You know the ones I’m talking about– cinnamon, cloves, ginger, allspice, and nutmeg.  Along with their unique flavors, I love their warm, comforting aroma wafting through the house.   It wakes me up from the cold-weather coma that sets in in December and January.  Ok, that might be a bit dramatic, but I’m still trying to grapple with the fact that Winter is here.   This week Aria and I did our best to fight cold outside by staying in the kitchen to bake gingerbread with cinnamon icing.  It was perfect.

The flavor of this dessert is exactly what I was looking for– the rich molasses and spices are sublime.  If you really like ginger, you can grate it and combine it with the minced crystallized form instead of using the ground variety.  If you do so, you’ll want about three tablespoons of each.  Another nice thing about this gingerbread recipe is that is works equally well in regular regular cake form or in mini-bundts, like I chose to do.  They are the perfect make ahead sweet snack, and they keep well for several days in an airtight container.  The moist, tender texture alone is a nice change of pace from all the holiday cookies that come flooding in over the next couple of weeks.  If you really want the full experience, make a hot chai latte and curl up on the couch with one of these.  It makes watching the falling snow and wind-whipped trees so much better.

The Recipe:  Gingerbread with Cinnamon Icing

(Makes 24 mini-bundts)

2 1/4 cups sifted (9 ounces) unbleached, all-purpose flour

1/2 teaspoon baking soda

1/2 teaspoon kosher salt

2 1/2 teaspoons ground ginger

1 teaspoon ground cinnamon

1/2 teaspoon ground cloves

1/2 teaspoon freshly grated nutmeg

1/2 teaspoon ground allspice

1 teaspoon Dutch-processed cocoa

8 tablespoons (1 stick) unsalted butter, melted and cooled to room temperature

1/2 cup molasses

3/4 cup (5 1/4 ounces) granulated sugar

1/2 cup buttermilk  (can be made by mixing 1 1/2 teaspoons white vinegar into 1/2 cup milk — let sit for 10 minutes)

1/2 cup milk

1 large egg

Cinnamon Icing

1 1/2 cups powdered sugar

1 teaspoon cinnamon

2-3 tablespoons milk (you may need a bit more or less)

Preheat oven to 350°F.  Position an oven rack to the middle.  If making mini-bundts, spray them with cooking spray or butter them.   An 11 x 7-inch pan or a 9-inch square pan can also be used; butter the bottom and sides and dust with flour, tapping out the excess.

Whisk together the flour, baking soda, salt, ginger, cinnamon, cloves, nutmeg, allspice, and cocoa in a medium bowl.  Set aside.

Using a stand mixer fitted with a paddle attachment, beat the butter, molasses, sugar, buttermilk, milk, and egg on low speed.  Add the dry ingredients and beat on medium until smooth and thick, about 1 minute.  Be sure to scrape down the sides of the bowl as needed.  As with all cakes, do not overmix.   Pour batter into selected pan.

Bake until the top springs back when lightly touched and the edges have pulled away from the sides of the pan, 12-13 minutes for the mini bundts and about 40 minutes for the 11 x 7-inch pan.  Remove mini-bundts from pan immediately and cool on racks.

To make the icing: mix the powdered sugar and cinnamon together.  Slowly add the milk, a little at a time, until you get the desired constancy you want.  You will want it so you can easily dip each mini-bundt into the bowl.  Let icing harden before serving.  Enjoy!

Source:  Adapted from The New Best Recipes Cookbook

Thanks for stopping by!

Laurie

Join me on Twitter

Read Full Post »

Thanksgiving is just a week away, but fear not, I’m here to help with your holiday dessert decisions.  This Brown Butter Pumpkin Layer Cake is the answer– trust me.  You already know that we’re a cake-crazy family (just take a look under the recipe section if you need proof), but this is one of our all-time favorites.  I’ve already made it several times this year– most recently for my husband’s birthday a week ago.  It’s beautiful, tastes as good as it looks, and screams ‘celebration’.  Why fall back on the old standards of pumpkin or apple pie, when you can end your Thanksgiving meal with this stunner?

The key component in this cake is brown butter.  I’m of the opinion that it makes everything better.  Brown butter has a complex, nutty, almost caramel-like flavor.  Here, you’ll find it in both the cake and the frosting.  It adds those wonderful, layered flavors that set this cake apart from a typical pumpkin dessert.  And then there’s the nuts.  I’ve topped this cake with a mountain of pecans, pepitas, and ginger– all enveloped by melted brown sugar.  Sublime.  If you don’t want  as many nuts on your cake (what’s wrong with you?), you can half the amounts and sprinkle them in a circle design on top.  I like the grandness of  the big pile on top, plus they’re an addictive snack that you’ll munch on as you assemble this beauty.

I’ve always made this cake with a homemade pumpkin puree.  Aside from the freshness of doing it this way, it’s rewarding to do something with all of those pumpkins that have been decorating the house.  If you have too many things on your plate (yes, I realize that’s a poor pun), feel free to use canned pumpkin puree.  As always, try to use organic and make sure it contains only pureed pumpkin.  Make this cake, and you’ll impress your guests– I promise.

The Recipe: Brown Butter Pumpkin Layer Cake

For the Puree

1 medium-large Sugar Pie pumpkin, cut in half and seeded  (large enough to yield 1 1/2 cups of puree)

For the Cake

6 ounces (3/4 cup) unsalted butter; plus more for pans

9 ounces (2 cups) unbleached all-purpose flour; plus more for pans

1 1/2 teaspoon baking soda

1 1/2 teaspoon ground cinnamon

1 teaspoon ground ginger

1 1/2 teaspoon kosher salt

1/4 teaspoon ground cloves

1 1/2 cups granulated sugar

2/3 cup firmly packed light brown sugar

2 large eggs, at room temperature

1/3 cup buttermilk  (Note: to make your own add 1 teaspoon white vinegar to 1/3 cup milk and let stand for 10 minutes)

For the Topping:

3 tablespoons unsalted butter

1 1/3 cups pecans halves

1 cup roasted and salted pepitas (raw and unsalted will work, too — just toast them a bit more with the pecans)

4 tablespoons firmly packed light brown sugar

3/4 teaspoon kosher salt

3 tablespoons chopped crystallized ginger

For the Frosting

4 ounces (1/2 cup) unsalted butter

8 ounces cream cheese, at room temperature

1/4 cup firmly packed light brown sugar

5 ounces (1 1/4 cups) confectioners’ sugar

To make the Pumpkin Puree:  Preheat oven to 350°F.  Position racks in the center of oven.  Place pumpkin in a baking dish covered with lid or aluminum foil and bake for about 40 minutes, or until tender when pierced with a fork.  Let cool.  Scoop pumpkin flesh into a food processor and puree until smooth.  You will need 1 1/2 cups of puree for the cake.  Refrigerate or freeze any leftovers.

Preheat oven to 350°F.  Position rack in the center of the oven.  Prepare two 9-inch round cake pans by buttering them liberally, lining with parchment paper, buttering once again, and flouring the pans.  Make sure to tap out any excess flour.

To make the Cake: Melt the butter in a heavy-bottomed 1-quart saucepan over medium heat.  Swirl the butter occasionally until the butter turns a nutty golden-brown, about 4 minutes.  Pour into a small bowl and let stand until cool but not set, about 15 minutes.

In a medium bowl, whisk the flour, baking soda, cinnamon, ginger, salt, and cloves.  In a large bowl, whisk 1  1/2 cups of the pumpkin puree with the granulated sugar, brown sugar, eggs, and buttermilk until blended well.  Using a rubber spatula, fold in the flour mixture until just combined.  Gently whisk in the brown butter until fully incorporated.  Divide the batter evenly between the prepared pans.

Bake the cakes until the a tester inserted in the center comes out clean, about 25-30 minutes.  Let the cakes cool in pans for 10 minutes.  Turn the cakes out onto racks, remove parchment paper, and cool completely.

Make the Topping: Melt the butter in a large 12-inch skillet.  Add the pecans and cook until they brown slightly, about 2 minutes.  Sprinkle in the brown sugar, pepitas, and salt and stir until the sugar melts and the nuts are glazed, about 2 minutes.  Stir in the ginger.  Remove from heat and let cool in skillet.

To make the Frosting: Melt the butter in a heavy-bottomed 1-quart saucepan over medium heat.  Swirl the butter occasionally until the butter turns a nutty golden-brown, about 4 minutes.  Pout into a small bowl and let stand until all of the brown solids settle to the bottom of the bowl, about 5 minutes.  Carefully transfer bowl to freezer and chill until just firm, about 18 minutes.  Using a spoon, carefully scrape the butter from bowl, leaving behind the brown solid bits.  Discard the brown bits.

Using a stand mixer fitted with the whisk attachment, beat the butter, cream cheese, and brown sugar on medium-high speed until light in color and the brown sugar has dissolved, about 2 minutes.  Gradually beat in the confectioners’ sugar and continue to beat until light and fluffy, about 1-2 more minutes.

To assemble the Cake: Place one layer of cake on a cake plate.  Spread 1/2 cup of frosting on it.  Sprinkle 3/4 cup (scant) of the nut mixture (rough chop this small amount, so it stays in the cake better) over the frosting and top with another layer of cake.  Frost the top and sides of cake and place remaining nut mixture on the top.  Serve immediately or refrigerate.  Serve at room temperature.  Will keep well for a few days.  Enjoy!

Source:  Adapted from Fine Cooking Magazine, Oct/Nov 2010

Thanks so much for stopping by today!

Laurie

Read Full Post »

Chocolate Zucchini Cake

This is the cake that conjures up childhood memories every time I make it.  The original recipe is nestled in one of those tattered  ‘Hometown Cookbooks’ that was a staple for those of us who grew up in the rural Midwest.   My Mom made this cake while I was growing up, as did half the residents in my tiny town.  But my specific memory of this cake takes me to the farm of my childhood best friend several miles down a gravel road east of Regent.  Most everytime I shared a meal with Allison at her family home, her mother would make chocolate zucchini cake.  I loved it.

While I loved the recipe as written, I’ve made several changes that add more wholesome ingredients like whole grains, reduce the sugar, and intensify the chocolate flavor.  I tested the changes on my Dad (also a chocolate fanatic), who thought it was perfect.  My Mom, on the other hand, thought it may be too chocolate-y.  I took this as a good sign since there’s no such thing as too much chocolate, and she’s not crazy about it like my Dad and me.   This is a delightful, versitile everyday cake.  It’s well- suited for coffee, ice cream, a cold glass of milk, and friends. It’s very moist due to the zucchini, has nice texture because of the nuts, and the rich chocolate  flavor is impressive.  It’s a comfort dessert, or maybe that’s just me, thinking about my hometown.

Speaking of my hometown, I figure this is as good a place as any to give you a glimpse at western North Dakota.  On our recent trip over Labor Day, Radd and I took the kids down some of the old country backroads– including the short-cut between my hometown of Regent and Radd’s hometown of Bowman, 60 miles away.  We drove that road (below) nearly every weekend to see each other 20 years ago.  While it wasn’t that impressive to our two and four year olds, it sure brought on the nostalgia.  Enjoy the pictures– and the cake!

The Recipe: Chocolate Zucchini Cake

1/2 cup butter

1/2 cup extra-virgin olive oil (canola or vegetable oil can also be used)

1 cup granulated sugar

1/2 cup brown sugar

2 eggs, at room temperature

1/2 cup milk (2%)

1 1/4 cup all-purpose flour ( I prefer King Arthur or Bob’s Red Mill Flours)

1 cup white whole wheat flour (substitute all-purpose, if you don’t have this)

1/2 cup Dutch-process cocoa, plus more to coat pan

1 teaspoon espresso powder

1 teaspoon vanilla

1 teaspoon baking soda

1 teaspoon kosher salt

2 cups coarsely grated zucchini (about 1 large)

1 cup chopped walnuts, toasted

1 cup chocolate chips (Ghirardelli 60% cacao are my favorite)

Preheat oven to 350°F.  Generously butter a 9 x 13 -inch cake pan, then sprinkle with cocoa powder.  Tap off any excess.  In a small skillet toast the walnuts over medium heat, until they become fragrant, about 4-5 minutes.  Making sure to stir them during that time.

In a medium-sized bowl, sift together the flours, cocoa powder, salt, baking soda, and espresso powder, set aside.  In a liquid measuring cup mix the milk and vanilla together, set aside.

 In a stand mixer fitted with a paddle attachment, cream the butter, oil, and sugars until light and fluffy, about 5-6 minutes.  Add the eggs one at a time and beat well.  Alternate adding the flour mixture and the milk mixture.  Starting  and ending with the flour.  Be sure to scrape the bowl down when necessary and make sure not to over-mix the batter.

Remove paddle attachment and gently fold the zucchini into the batter with a rubber spatula.  Pour into the cake pan and spread flat.  Top with toasted walnuts and chocolate chips.  Bake for about 35-45 minutes.  A cake tester should come out with a few dry crumbs clinging to it.  This cake keeps extremely well.  I think it’s almost better served the day after it is made.  Make sure to enjoy it with a big scoop of vanilla ice cream.

Source:  Inspired by recipes in cookbooks from my hometown of Regent, North Dakota.

Thanks for stopping by today — hope you all have a lovely weekend!
Laurie

Follow me on Twitter!

Read Full Post »

First, a warning:  this is an overly-enthusiastic blog post today because…IT IS MY BIRTHDAY!  That’s right, I still get REALLY excited about my birthday.  Even though I’m clinging to my mid-thirties, like a child I still get giddy whenever August 26th rolls around.  I look forward to the phone calls with my family and friends.  I wait for the e-mails, cards, and Facebook wishes.  I love it all.

Now a second warning:  I’m going to get a bit sentimental.  The truth is, I still love my birthday so much because I look back on my life thus far, and forward to another wonderful year.  I’m so fortunate to be married to my wonderful husband, and I have two beautiful children.  I had the benefit of growing up in a loving family and then marry into another.  Thanks for having me, Mom and Dad.  Here’s to many more great years!

So what about the food?  Rather than make a birthday cake, I decided to go with one of my all-time favorites.  This carrot cake is easily one of the best I’ve ever eaten.  After giving my neighbors a sample, they agreed that this is as good as carrot cake gets.  It has the perfect amount of nuts– they provide just enough texture and flavor without overwhelming the dessert.  It has no raisins, which, to be honest, I don’t really miss.  The cake is dense, as you’d expect, but not heavy– in short, it’s perfect.  The two secrets to this cake are oranges and limes.  Freshly-squeezed orange juice and a little zest really add a fragrant punch, while the icing– laced with lime juice and zest– make it unforgettable.

The Recipe: Carrot Cake with Lime Mascarpone Icing

For the Cake:

1 1/4 cups unsalted butter, softened

2 cups light brown sugar

5 large free-range or organic eggs, separated

zest and juice of 1 orange

1 1/2 cups of self-rising flour, sifted

1 heaping teaspoon baking powder

1 cup ground almonds

4 ounces / 1 cup chopped walnuts, toasted, plus more for topping the cake

1 heaping teaspoon ground cinnamon

1/4 teaspoon ground cloves

a pinch of freshly ground nutmeg

1/2 teaspoon ground ginger

10 ounces/ 3 cups organic carrots, peeled and coarsely grated

pinch of kosher salt

For the Lime Mascarpone Icing:

4 ounces mascarpone cheese

8 ounces full-fat cream cheese

1 cup confectioners’ sugar, sifted

zest and juice of 1 lime

Preheat oven to 350°F.  Grease and line with parchment paper a 9 – inch square or round cake pan.  (Note:  I used mini-loaf pans and yielded 6).  Beat the butter and sugar together by hand or using a stand mixer until pale and fluffy.  Beat in the egg yolks one at a time and add the orange zest and juice.  Gently stir in the sifted flour and baking powder, and add the ground almonds, walnuts, spices and the grated carrots.  Mix together well.

In a separate bowl, whisk the egg whites with a pinch of salt until stiff, then gently fold them into the cake mix.  Scoop the batter into the prepared cake pan and bake for about 50 minutes (less if using the mini-loaf pans) until golden and risen.  To check cake using a toothpick, insert into cake for 5 seconds — it’s done when it comes out clean.  If it feels sticky, bake a bit longer.  Let cake cool in pan for 10 minutes.  Turn out onto a cooling rack and let cool completely.

To make the icing: mix all of the ingredients except the lime juice together.  Carefully add 1 teaspoon at a time.  Making sure the icing doesn’t get too thin.  Spread generously on the cake and top with walnuts.  Enjoy!

Source:  Adapted from Jamie Oliver’s Cook With Jamie Cookbook

Thanks again for stopping by Relishing It today.  I hope you all have a wonderful weekend — I know I will.

Laurie

Follow me on Twitter

Read Full Post »

This summer my son, Aanen, declared that peaches are his favorite fruit.  Given the quality of the organic peaches from our co-op this year, he may be right– they’ve been perfectly ripe, juicy, and delicious.  We’ve eaten so many in the last month– and not just for snacks.   Turns out they’re perfect for baking (surprise!) as well.

I’ve made this cake twice in the last couple of weeks– and if the judgment of my family and neighbors is any measure– it’s fantastic.  More than one person has mentioined that it’s one of the best cakes I’ve made.  I agree, and it’s all about the peaches.  This cake is adapted from a fellow Minnesota Food Blogger and friend, Zoe Francois.  I’ve mentioned her before, though you may know Zoe from her well-known cookbook Artisan Bread In Five Minute A Day.  She is an top-notch pastry chef who always has wonderful ideas on her blog, Zoe Bakes.

A few words about what makes this cake stand out.  First, the sauce is unforgettable.  The peaches, butter, and brown sugar meld together to create an amazing flavor.  The addition of three tablespoons of whiskey adds additional complexity.  Both times I’ve made it I’ve wanted to keep licking the spoon.  Second, the flavors of the sauce combine with the caramel-like addition of browned butter in the cake.  I’ve found that the toasty, nutty, carmel flavors of the browned butter make most any dish better.  Here, it really acts as the framework– a subtle backdrop that accentuates the the peach, brown sugar, and whisky perfectly.  Finally, I decided to toast and add millet, a whole grain, for a little bit of texture.  As with most any grain, the toasting adds additional ‘toasty’ flavors.  Here, it also provides a nice little crunch that makes this cake unique.  If you don’t have access to millet, don’t worry.  It’s not a necessity.

The Recipe:  Upside-Down Peach and Cardamom Cake

Peaches:

2 tablespoons unsalted butter

3/4 cup brown sugar

pinch of kosher salt

1 teaspoon vanilla extract

1/4 teaspoon ground cardamom

3 tablespoons whiskey (substitute orange juice, if you don’t cook with alcohol)

1 pound peaches (about 2 1/2 large) Cut into slices, peelings can be left on.  (Firm peaches will work well here, as they won’t break down as much)

Cake:

4 ounces (8 tablespoons unsalted butter)

1 cup  (5 ounces) all-purpose flour

1 teaspoon baking powder

1 teaspoon cinnamon

1/4 teaspoon ground cardamom

1/2 teaspoon kosher salt

3/4 cup brown sugar

2 eggs at room temperature  (To do this quickly:  place eggs in a dish of warm water for roughly 10 minutes)

1 teaspoon vanilla extract

1/3 cup buttermilk  (To make your own: mix 1 teaspoon white vinegar into 1/3 cup milk — let sit for 10 minutes)

1/3 Millet, toasted

To toast the Millet:  Place millet into a small frying pan over medium heat, toast until golden and fragrant.  Being careful not to burn.  Remove from heat and set aside.

To brown the butter for the cake:  Place butter into a small saucepan over low heat.   Cook the butter until it is a beautiful caramel color and smells toasted, making sure to stir all the while. Being careful not to burn.  There will be dark brown bits in the pan.  Remove from heat and strain.  Set aside to cool slightly.

To make the peaches: In a large skillet cook together the butter, brown sugar, salt, cardamom, vanilla, whiskey, and peaches.  Cook them on low heat until the juice is as thick as maple syrup.  I ended up removing the peaches so they didn’t fall apart and cooked the juices down a bit more.

Place the peaches and juice into a 8-inch round or square cake pan. (And if you’re a little bit neurotic like myself, you can make a pattern with the peaches while carefully trying not to burn your fingertips.) I also made it in a 9-inch cake pan and it turned out fine, if that’s all you have.  The cake will not be as thick, but still delicious.  (Note: Both times I made the cake, I didn’t butter the pan and it came out easily, but if you’re hesitant — feel free to butter away!)

Preheat oven to 350°F.

To make the cake batter:   In a medium bowl, whisk together the flour, baking powder, cinnamon, cardamom, and salt. Set aside.   Using a paddle attachment, on an electric mixer  (a hand mixer will also work), beat together the browned butter that has cooled a bit, brown sugar, and vanilla.  Add the eggs one at a time, making sure to scrape down the sides of the bowl after each one.    Alternate adding the flour mixture with the buttermilk, starting and ending with the flour mixture.   Finally, fold in the toasted millet with a spatula.

Place the batter evenly over the peaches and spread it out smoothly.  Bake for 30-35 minutes or until the cake is set and a tester comes out clean.  Let sit until the pan is cool enough to handle and invert onto a serving platter.  I prefer to let the cake cool completely before serving.  This cake begs to be served with a scoop of vanilla ice cream along side of it.  Enjoy!

Source:  Adapted from Zoe Francois at Zoe Bakes

As always, thanks for stopping by Relishing It today.  This little blog has become  such an amazing place for me to connect with new friends and still keep in touch with old ones.  I am so happy to share it with all of you.

Laurie

Follow me on Twitter!

Read Full Post »

I live in Minnesota, where the maple trees are now being tapped.  Yes, its a bit of poetic dreaming, but this makes me long for a little country home with my very own maple trees, big red barn, and sprawling garden.  I conveniently ignore the “back-breaking labor” part of that dream.  While I don’t get to live the bucolic life here in the middle of the city, I’m fortunate enough to have access to the local, delicious maple syrup from nearby (not to mention a few fantastic farmers markets).

I love maple syrup, though this wasn’t always true.  The fact is, for most of my childhood I’d never had the real thing.  I detested the overly-thick, sugary mess that most restaurants labled “maple syrup.”  At home, we usually had a berry syrup, as getting real maple in rural North Dakota wasn’t an option at the time.  Once I finally had a taste, I was hooked.  I couldn’t believe that it was nothing like the gloppy corn syrup-based knock-offs I had been exposed to.  It was thin– delicate almost– and just sweet enough.

A friend recently told me about a fantastic cake recipe by David Lebovitz— one of my favorite accomplished chefs.  This maple walnut pear cake is perfect for this time of year.  It’s one of those desserts that’s simple to throw together and toss into the oven, yet the result is so much more than an ordinary cake.  The flavor-combination is beautiful.  The maple syrup, walnut, and pear build off of one another, while the cinnamon binds them all together.  This is a moist cake that gets better with each passing day.  I think I even prefer it on the second day when the glaze really gets a chance to soak in.  But seriously,who’s going to wait that long for a piece?  Try it– you’ll love it.  And for goodness sakes, don’t forget the whipped cream!

The Recipe: Maple Walnut Pear Cake 

Topping:

1/3 cup maple syrup

1/4 cup packed light or dark brown sugar

1/2 cup walnuts, toasted and coarsely chopped

3 ripe Bosc pears (I used D’Anjou and they worked fine), peeled, quartered, cored, and cut lengthwise into 1/4-inch slices

Cake:

1 1/2 cups all-purpose flour

1 teaspoon baking powder

2 teaspoons ground cinnamon

1/2 teaspoon salt

1/2 cup unsalted butter, at room temperature

1/2 cup granulated sugar

1/4 cup packed light brown sugar

1/2 teaspoon vanilla extract

2 eggs, at room temperature

1/2 cup whole milk, at room temperature

Directions:

Preheat the oven to 350°F.

Make the topping:  Combine the maple syrup and 1/4 cup dark or light brown sugar in a 9-inch cake pan or a cast-iron skillet.  Set the pan directly over the heat on the stovetop until it begins to bubble; simmer gently for 1 minute, stirring often.  Remove pan from heat.

Sprinkle walnuts evenly over maple mixture in the pan, then arrange the pear slices over the walnuts.  A pinwheel pattern works perfectly.

Make the cake:  In a small bowl, whisk together the dry ingredients (flour, baking powder, cinnamon, salt).  In a stand mixer fitted with a paddle attachment or by hand, beat together the butter, granulated sugar, and 1/4 cup light brown sugar on medium speed until light and fluffy, about 3 to 5 minutes.  Add the vanilla and eggs, one at a time, beating until each is incorporated.  Gradually mix in half of the flour mixture, then stir in the milk, then add the remaining flour mixture.  Mix just until combined.

Scrape the batter over the pears in the pan and carefully smooth into an even layer.  Bake for about 50 minutes, or until a tester inserted into the middle of the cake comes out clean.  Cool 15 minutes in the pan.

Run a knife around the sides of the cake to loosen it from the pan.  Invert a serving plate, or cake stand, over the pan, and carefully invert cake onto it.  Gently lift the pan off of the cake and arrange any walnuts that may have gone astray.

(Note:  Apples can easily be substituted for the pears in this cake.)

Source:  David Lebovitz’s: Ready for Dessert

One last note…Food Bloggers across the country are uniting on May 14 to help fight childhood hunger.  In Minneapolis/St. Paul the bake sale will be held at 920 East Lake St. Mpls, MN 55407 — in the Midtown Global Market.  The hours of the sale are 11:00am-4:00 pm.  I hope you come out and support this important cause.

Hope you are all well and enjoying a bit of spring!  As always, I appreciate your comments!

Thanks for stopping by,

Laurie

Follow me on Twitter!

Read Full Post »

I bought a new pan– a mini-bundt pan, and I love it.  I’ve recently found myself coming up with excuses to bake more, just so I can see those tiny, adorable cakes.  As my husband has mentioned (after listening to me justify making another little bundt-shaped treat) , the line between a hobby and mental illness can be a thin one.  Who cares when the results are fabulous?  I love these orange and vanilla-scented bundt cakes.  They’re incredibly flavorful, and just small enough to justify eating more than one.

For this recipe, do not cheat and use anything other than freshly-squeezed orange juice.  Trust me, you won’t get the concentrated flavor that these cakes can deserve from a bottle or from a frozen can.  I love it when a cake recipe delivers a potent, layered, flavor.  Here, the orange zest in the cake batter is the first wonderful layer.  Next, there’s the glaze with its freshly-squeezed orange juice that also moistens the cake.  Finally, there’s the fantastic icing.  These three layers really combine for a powerful citrus punch.  Here’s the thing though, the cake flavors aren’t limited solely to orange citrus.  This cake also offers strong vanilla notes.  If you’ve baked with vanilla beans before, you know that they are not subtle.  They give you big flavor.  Together, the vanilla and orange citrus pair beautifully in this cake–or cakes, if you want to break out the mini-bundt pan.

The Recipe: Orange and Vanilla Scented Bundt Cake

( Makes 1 bundt cake or 26 mini-bundt cakes)

Cake

3 cups unbleached all purpose flour

3/4 teaspoon salt

1/2 teaspoon baking soda

1 2/3 cups sugar

1 tablespoon finely grated orange peel

1 vanilla bean, split lengthwise  (2 teaspoons vanilla can be substituted, if in a pinch)

3/4 cup (1 1/2 sticks) unsalted butter, room temperature

3 large eggs

2/3 cup freshly squeezed orange juice

2/3 cup buttermilk  (To make your own buttermilk — 2/3 cup regular milk with 2 teaspoons white vinegar mixed in.     Let sit for 10 minutes).

Glaze

1/2 cup freshly squeezed orange juice

2 tablespoons sugar

2 tablespoons (1/4 stick) unsalted butter

Icing

2/3 cup powdered sugar

4 teaspoons (roughly) freshly squeezed orange juice

For the Cake:

Position rack in center of oven and preheat to 350° F.  Butter and flour 12-15 cup Bundt pan.  Whisk flour, salt, and baking soda in medium bowl to blend.  Using electric mixer, beat sugar and orange peel in large bowl at low speed to release essential oils from peel.  Scrape seeds from vanilla bean into sugar mixture and beat to blend well.  Add butter and beat until light.  Add eggs one at a time, beating well after each addition.  Mix in orange juice (mixture will look curdled).  Stir in flour mixture, then buttermilk.  Transfer batter to prepared pan; smooth top.  Bake cake until tester inserted near center comes out clean, about 50 minutes.  (Note: if using mini bundt pans — fill them 3/4 full and bake between 12-15 minutes. A toothpick inserted should come out clean.)

For the Glaze:

Meanwhile, boil orange juice, sugar, and butter in heavy small saucepan over medium heat until reduced to 1/2 cup, swirling pan occasionally, about 5 minutes.

Cool cake in pan for 10 minutes ( less for mini-bundts).  Using small sharp knife, cut around the sides and center tube of pan to loosen cake.  Turn cake out onto rack and brush with glaze.  Cool completely.

For the icing:

Place sugar in small bowl.  Mix in orange juice, 1 teaspoon at a time, until thick pourable consistency forms.  Drizzle icing over cake.  Let stand until icing sets.  (Note: I felt there wasn’t enough icing to top all of the mini-bundts, so I double the icing ingredients.  The recipe already reflects the change). Enjoy with a relaxing cup of coffee or tea.

Source: Bon Appetit Desserts

I hope you all enjoy this cake as much as we did!  Have a great day and see you soon!

Laurie


Read Full Post »

%d bloggers like this: