Feeds:
Posts
Comments

Posts Tagged ‘chocolate’

Healthy Chocolate Zucchini Muffins | Relishing It

As you know I sent my little girl off to Pre-Kindergarten on Monday– and she is absolutely loving it.  I sometimes like to bake treats for their lunch boxes, or for an after-school sweet when they get home.  I distinctly recall getting off the school bus as a kid and walking into the house to the smell of something wonderful that my mom had made during the day.  She’d have batches of cookies ready, or even racks (yes, racks) of pies on the counter.  And she always timed it out so they were ready when my brother and I walked through the door.  However… I’m a little hesitant to bake such delights using all of that sugar on a daily– or even weekly– basis.  Don’t get me wrong, my kids get their share of sugar, but it’s nice to be able to put something a little healthier, something more substantial, into their little growing bodies.

Healthy Chocolate Zucchini Muffins | Relishing It

Healthy Chocolate Zucchini Muffins | Relishing It

Healthy Chocolate Zucchini Muffins | Relishing It

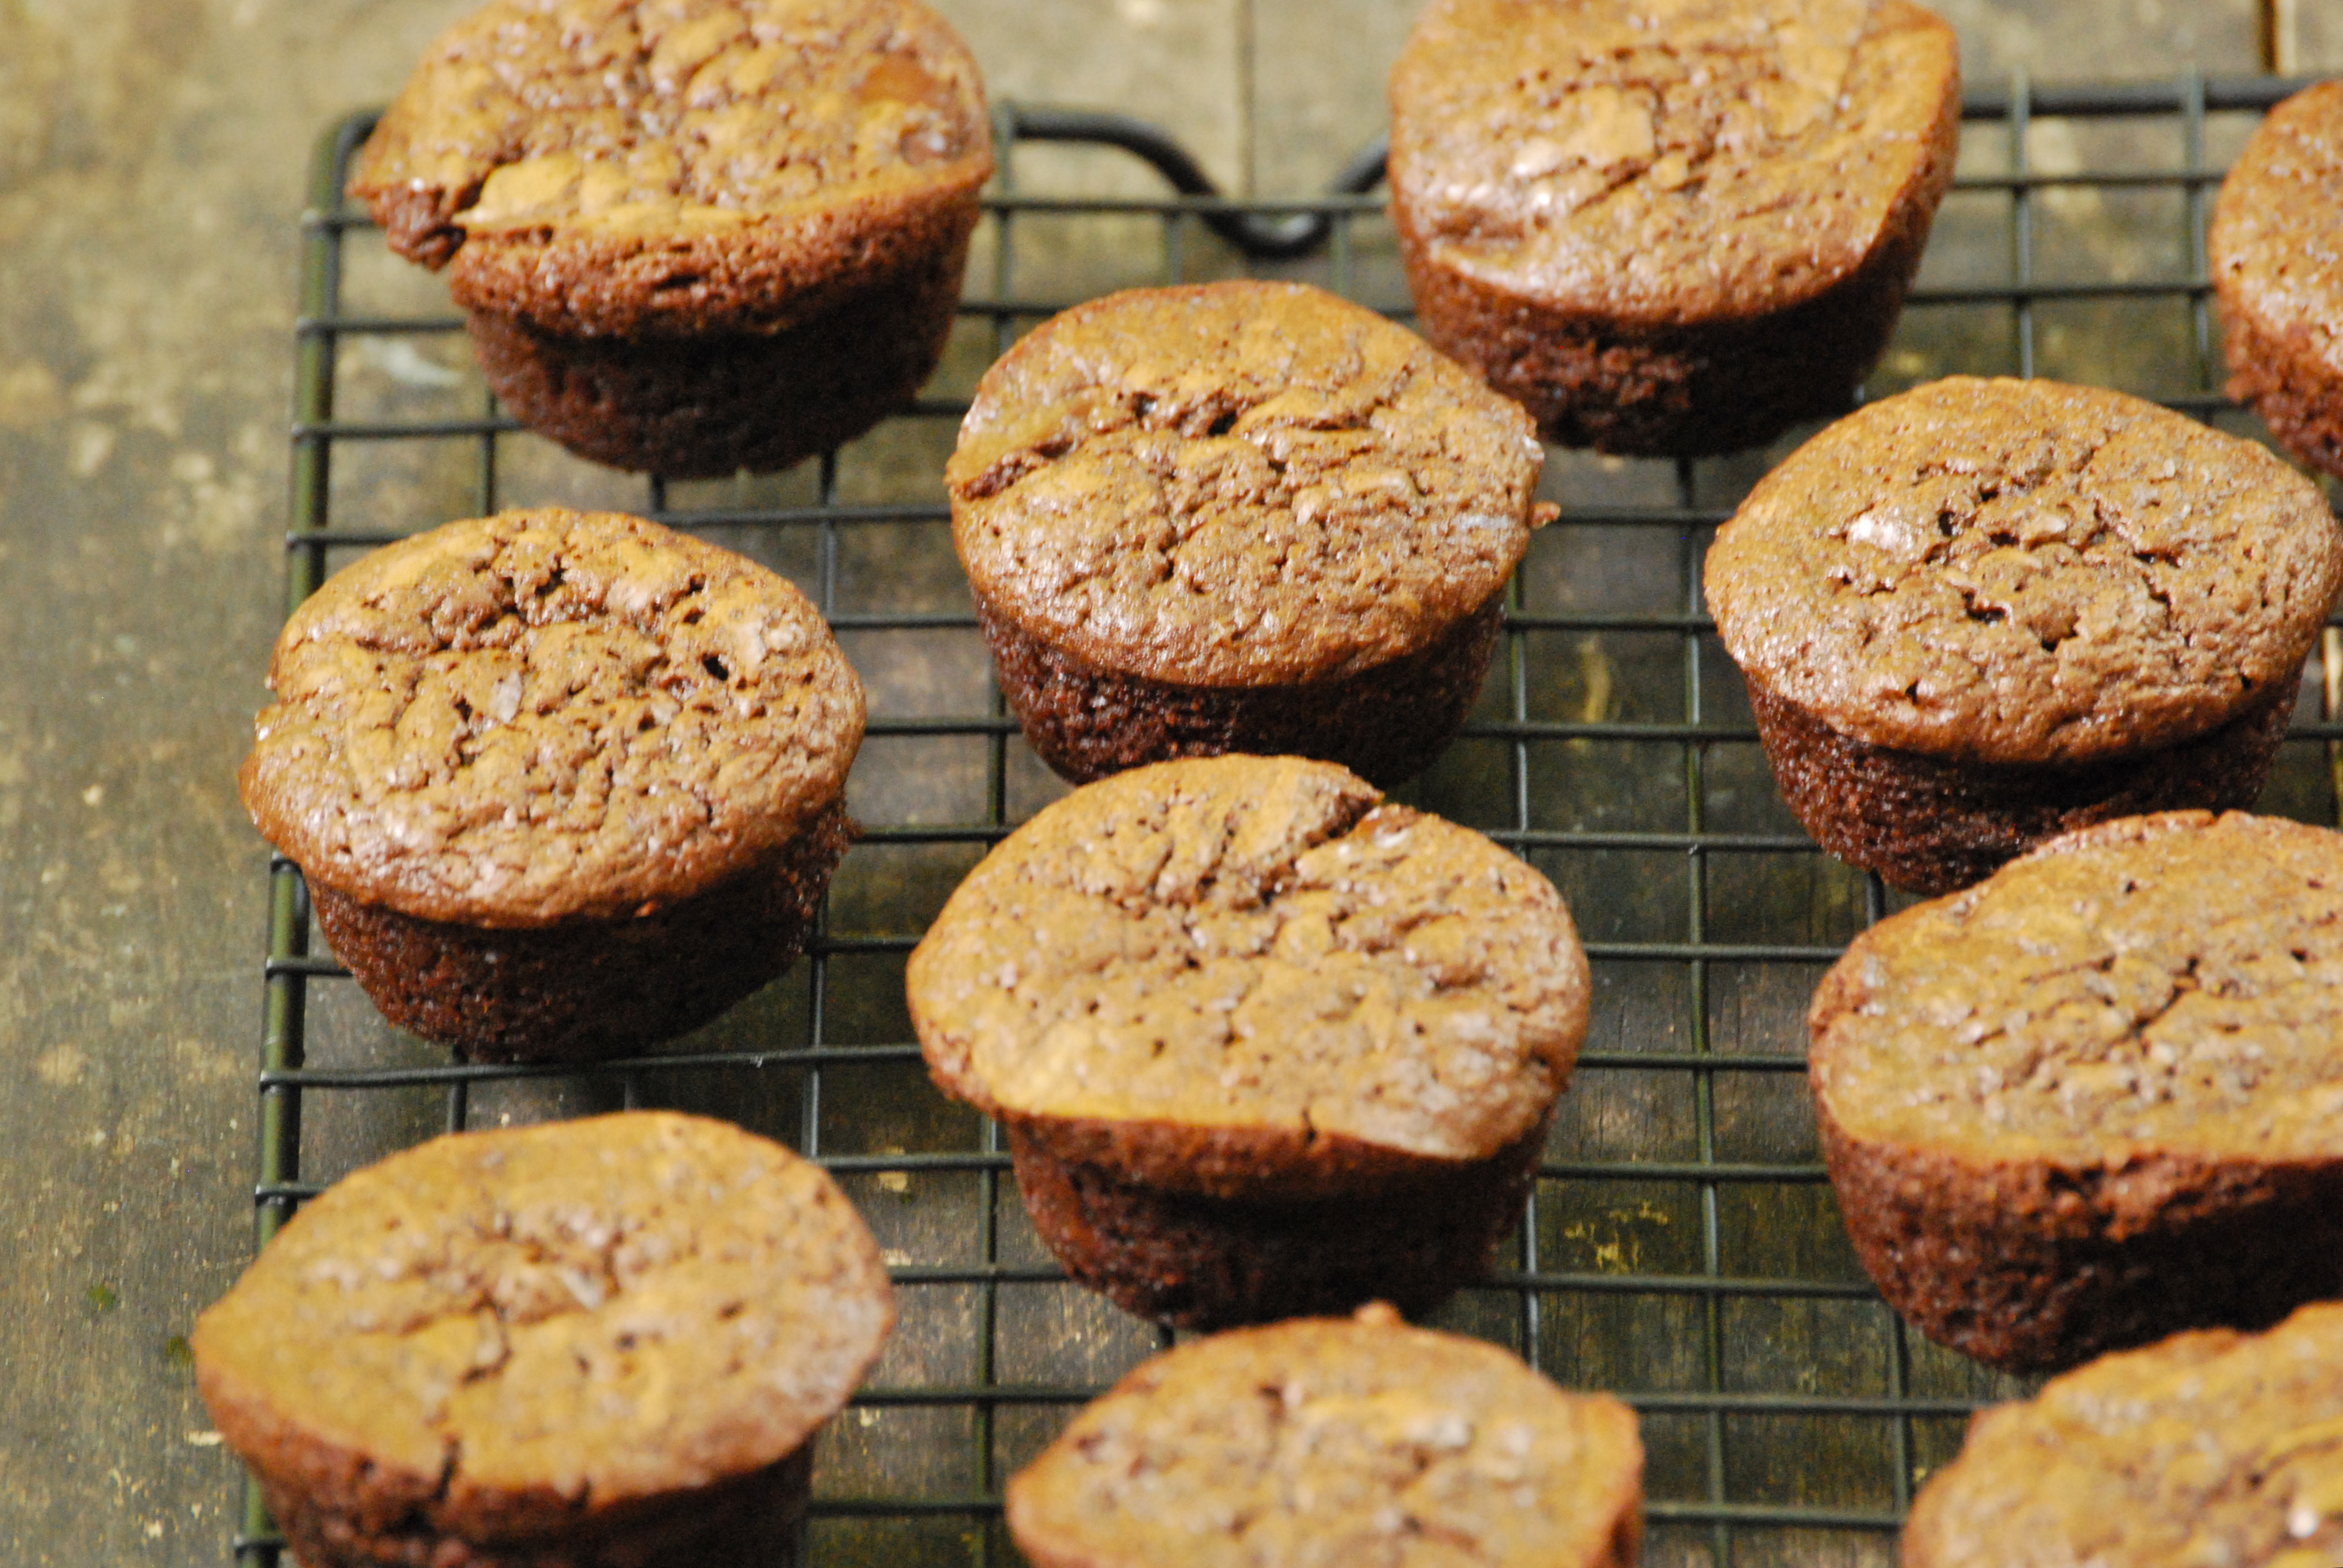
I was able to create a healthy muffin recipe that was made with whole grains, healthy coconut oil, and no processed sugar (alright, there are chocolate chips, but they’re optional…kind of.  You’ll want them in there).  These muffins are also loaded with vegetables, and your kids will be none the wiser!  What more could one want?  They are perfectly chocolate-y, but not overly sweet.  They stay very moist– quite like a small cake.  I really have no guilt about giving this treat to my kids, or eating it myself for that matter.  I hope you like them as much as we do!

Healthy Chocolate Zucchini Muffins | Relishing It

Healthy Chocolate Zucchini Muffins | Relishing It

The Recipe:  Healthy Chocolate Zucchini Muffins

(makes 12)

1 cup white whole wheat flour (whole wheat pastry flour works, too)

1/2 cup unsweetened cocoa powder

1/2 teaspoon kosher salt

1 teaspoon baking soda

1 teaspoon baking powder

1/2 cup virgin coconut oil (warmed to the liquid state, but not hot)

1/2 cup honey

2 eggs, at room temperature

1 teaspoon vanilla

1 1/2 cups coarsely grated zucchini (about 1 medium)

3/4 cup chocolate chips (Ghirardelli 60 % Cacao Bittersweet are the best, in my opinion)

Note:  The coarsely grated zucchini is definitely visible in these muffins, which is how I prefer them.  If you don’t fancy that, simply grate the zucchini finer.

Preheat the oven to 350°F.  Spray or butter a 12-cup muffin tin.  Set aside.

In a large bowl, sift, then whisk together the flour, salt, baking powder, baking soda, and cocoa.   Toss the chocolate chips into the mixture. Set aside.

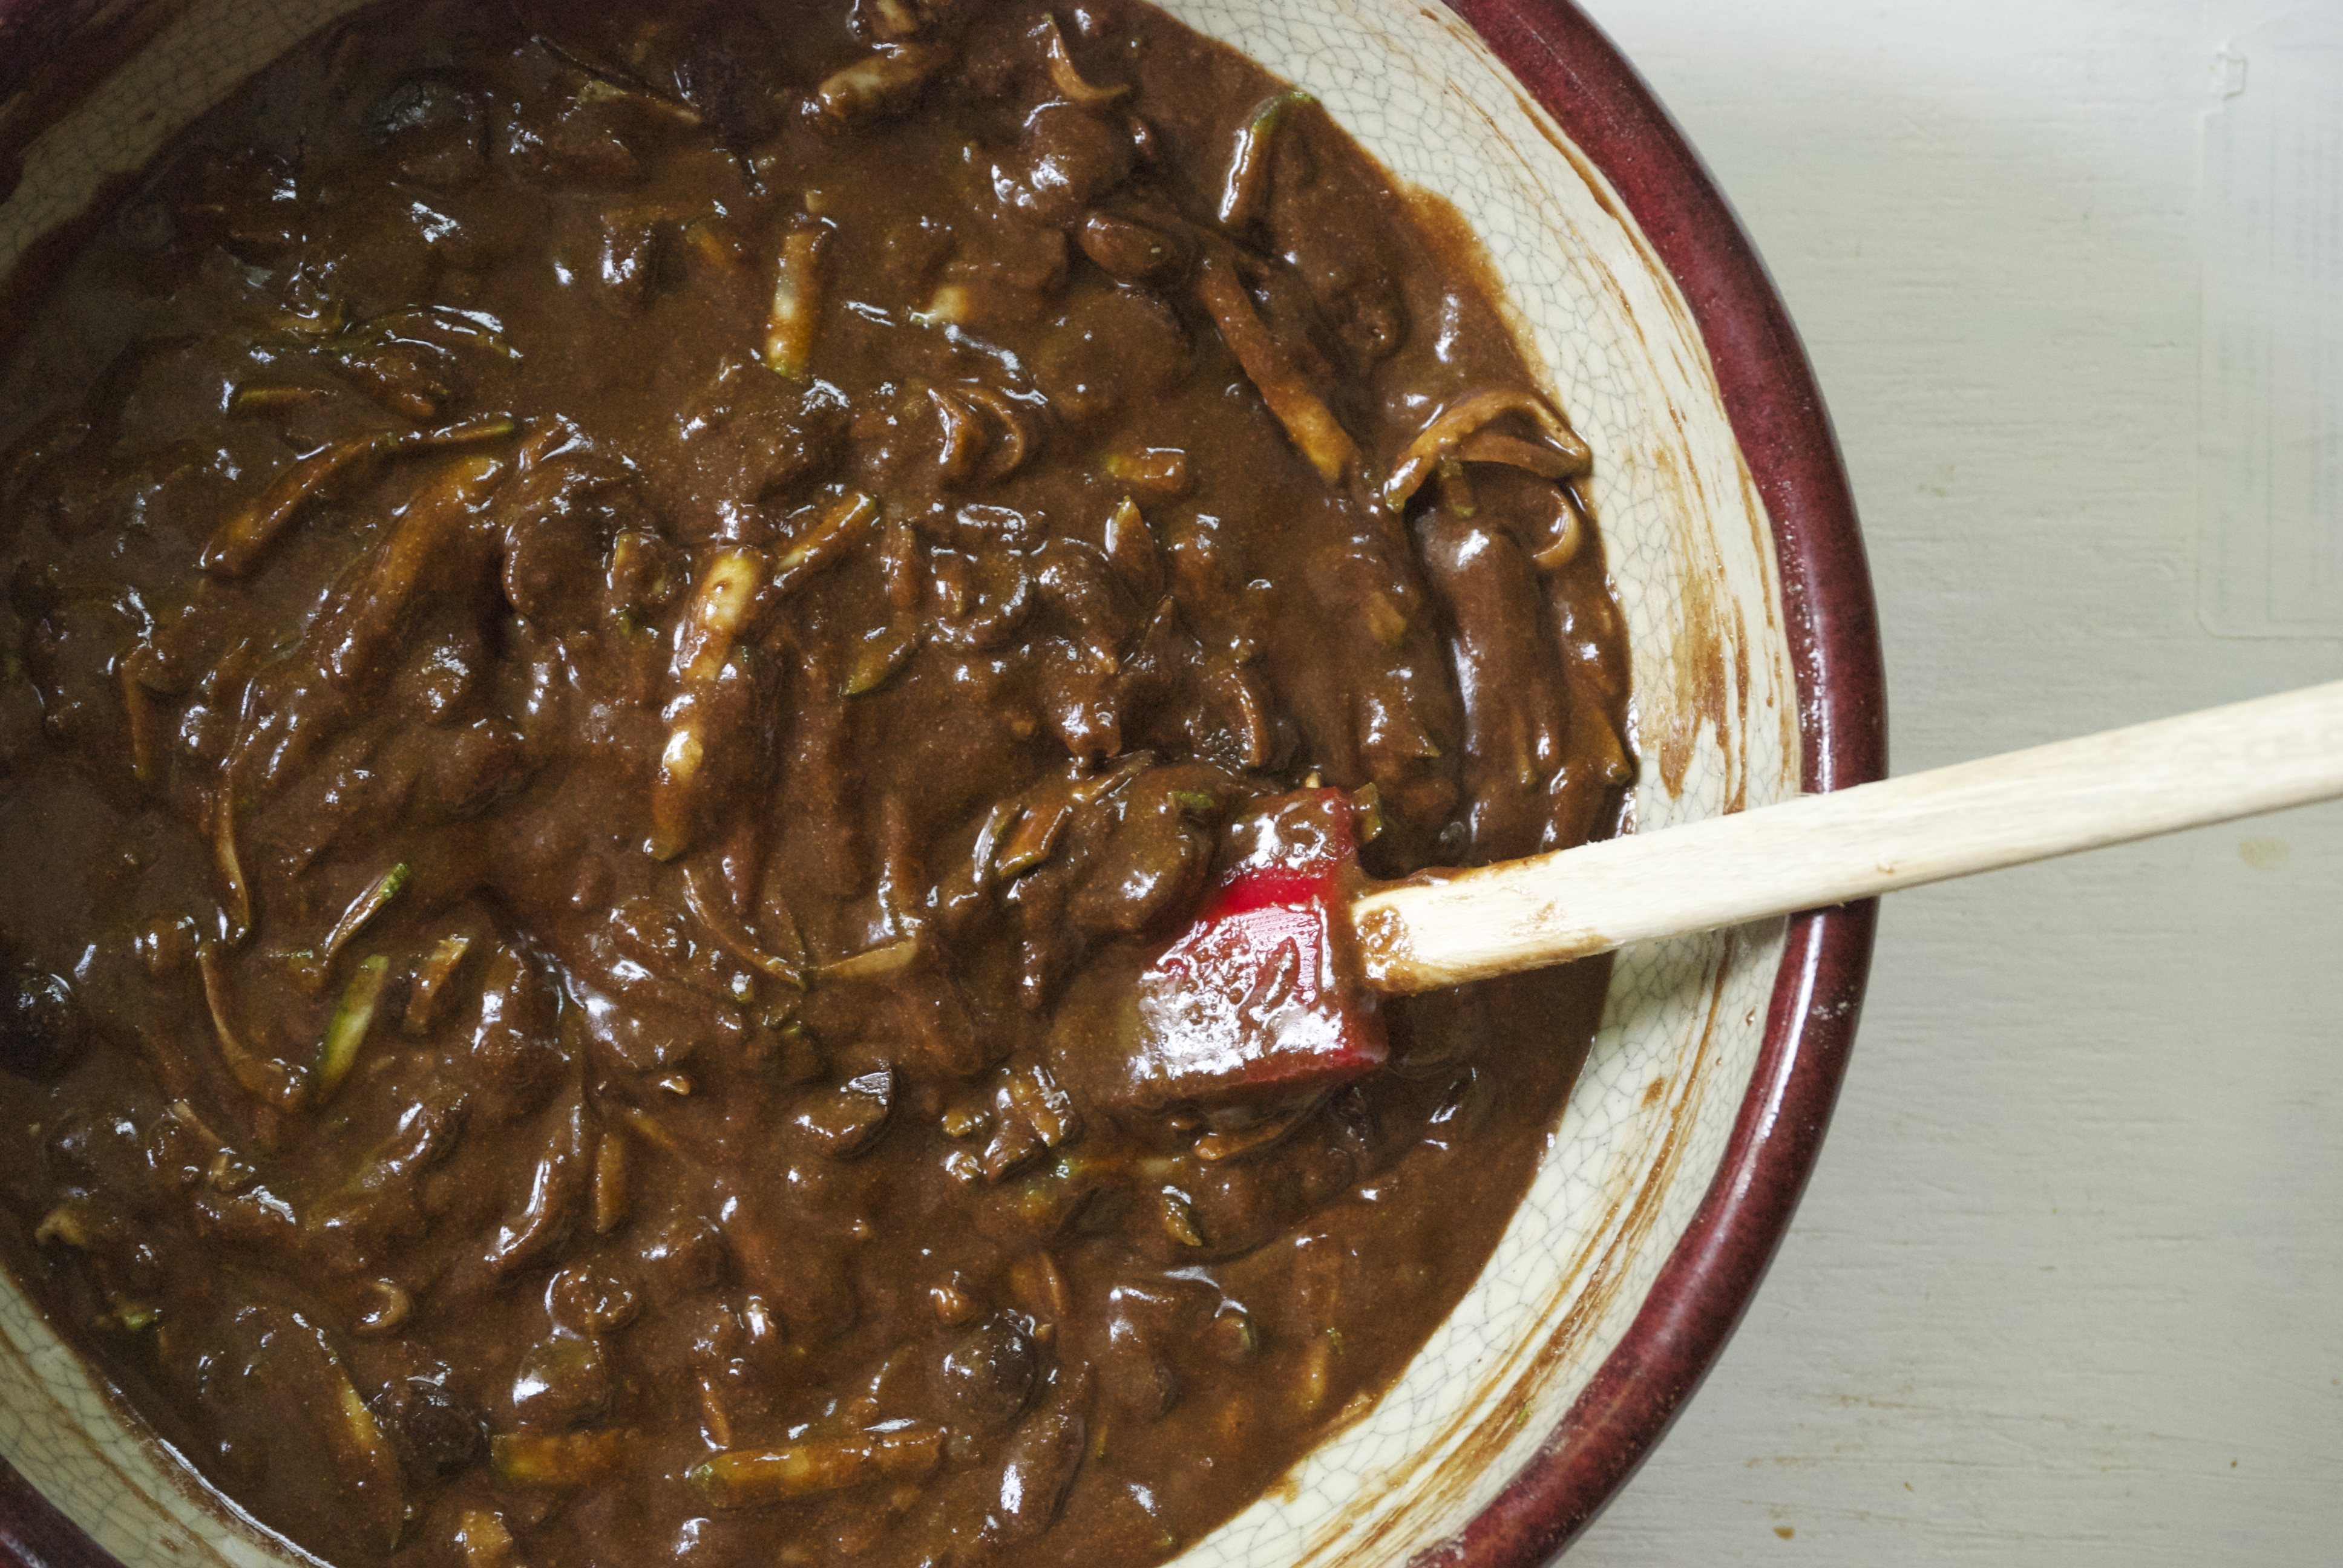
In another large bowl, thoroughly mix the honey, coconut oil, vanilla, and eggs together until uniform.  Add the zucchini and mix until evenly coated.

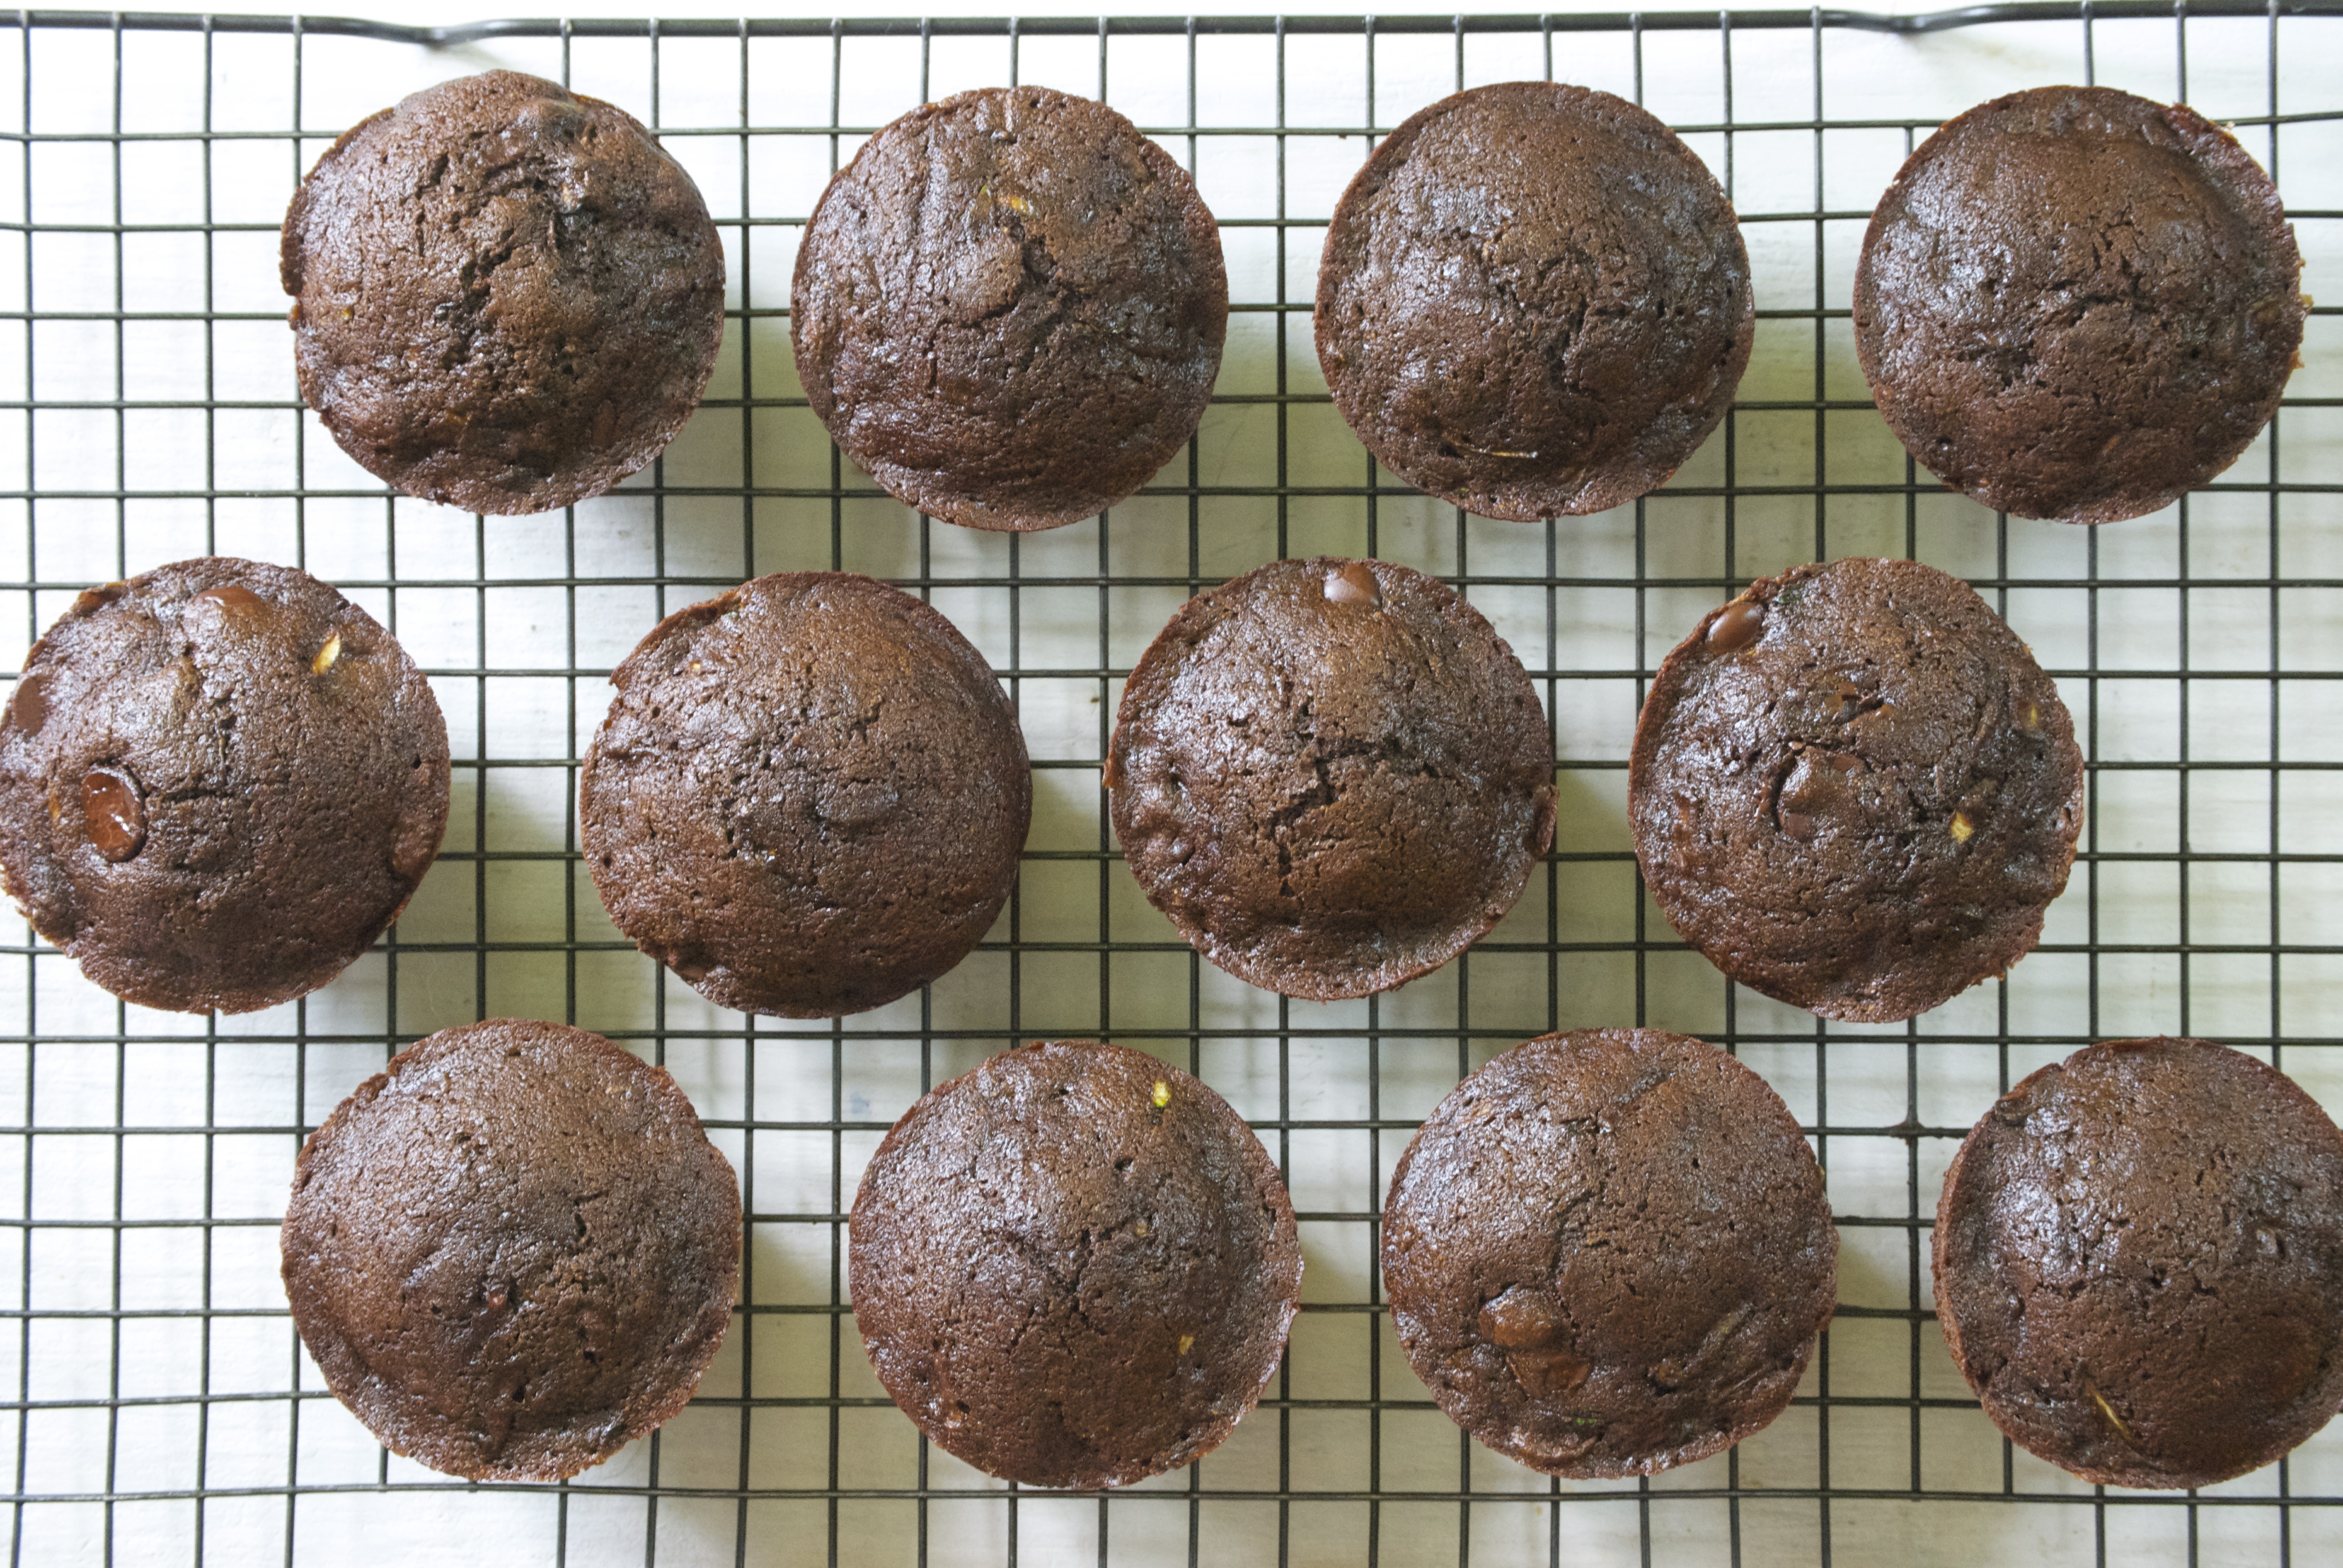
Combine the two bowls together, mix until everything is wet.  Do not over mix. Evenly distribute the batter–1/4 cup per muffin is about right.  Bake for about 18 minutes, or until a tester inserted into a muffin comes out clean.  Remove from oven and let cool for about 3 – 5 minutes before removing from the pan.  Keeps well for days in an airtight container.  Enjoy!

Thanks for stopping by Relishing It!

Laurie

Read Full Post »

Fudge Brownies with Chocolate Malted Buttercream via Relishing It

What should you make for the special people in your life for Valentine’s Day?  I’ve been waiting to answer that question for awhile now.  These cute little brownies are the perfect sweet treats for your loved ones.  I love brownies when I need a chocolate fix.   These, from an earlier post, are always a hit.  They have a perfect balance of chocolate-y chewiness.  And these are fabulous when I’m in the mood for something a little out of the ordinary. But the fudge brownie bites with chocolate malted buttercream that you see here are perfect for turning brownies into an indulgent dessert for Valentine’s Day.  The chocolate malted buttercream is spectacular.

DSC_0851

DSC_0859

To be honest, I’m not exactly sure how many batches of these I made this summer.  They’ve become a favorite in our house.  And in the mini-muffin pan, they’re transformed into perfect bite-sized treats.  The brownie is more chewy than cake-like, which is how I prefer them.  The stirred-in chocolate chips add a nice pool of chocolate throughout .  Yes, they’re delicious on their own, but the malted-milk buttercream frosting makes these mini-desserts.

Fudge Brownies with Chocolate Malted Buttercream via Relishing It

Fudge Brownies with Chocolate Malted Buttercream via Relishing It

I’ll be baking up another batch of these sweets for our Valentine’s Day this year.  We’ve had a tradition for years– even before our little ones were born– of making a nice meal, opening a bottle of wine, and enjoying a candlelight dinner at home.  Now that we have kids, I always look forward to making a meal with them.  In the past we’ve had a nice pasta dish, such as this one.  Heart shaped pizzas would be fun, too.  Though, I’ve been in the mood for seafood lately, so this is also an option.  Whatever we choose to make, I know it will be fun.  Have a lovely Valentine’s Day!

Fudge Brownies with Chocolate Malted Buttercream via Relishing It

The Recipe:  Fudge Brownies with Chocolate Malted Buttercream

(makes an 8×8 square pan or 24 mini-brownie bites)

For the Fudge Brownies:

3/4 cup (3 3/4 ounces) all-purpose flour

1 teaspoon baking powder

3/4 teaspoon kosher salt

1/4 teaspoon espresso powder

1/2 cup butter

3 ounces unsweetened chocolate, chopped

1/2 cup packed brown sugar

1/2 cup granulated sugar

2 large eggs, at room temperature

1 large egg yolk, at room temperature

1 teaspoon vanilla extract

1/2 cup semi-sweet chocolate chips (preferably Ghiradelli’s 60% cacao)

For the Chocolate Malted Buttercream: 

(Note: double this buttercream recipe if you enjoy your brownie bites loaded with frosting, such as in the photos.  If you prefer a normal amount, one batch will be fine)

6 tablespoons unsalted butter, at room temperature

1/4 cup unsweetened cocoa powder

1/2 teaspoon kosher salt

1 1/4 – 1 1/2 cups powdered sugar, sifted

1 tablespoon milk

1/2 teaspoon vanilla extract

1/4 cup heavy cream

3 tablespoons malted milk powder

Preheat the oven to 350°F and place the rack in the middle of the oven.  Prepare either an 8×8-inch square pan or a mini-muffin pan with either butter/flour, or a shot of cooking spray with the flour in it.  Set aside.

To make the brownies:  In a medium sized bowl, whisk together the flour, salt, and baking powder.  Set aside.  In a large bowl, melt the butter and chopped chocolate in a microwave for 25 seconds (or you place the bowl of chocolate/butter over a saucepan of steaming water).  Stir and repeat until the chocolate is melted.  Whisk in the brown and granulated sugars, and espresso powder.  Then, mix in the eggs, egg yolk, and vanilla.  When it is uniform, fold in the flour mixture, being careful not to over mix.  Fold in the chocolate chips.  Bake for 25-30 minutes for the 8×8-inch pan or 14-16 minutes for the mini-muffin pan.  A tester inserted should come out clean and the tops of them should be slightly cracked with a bit of color around the edges.  Cool in 8×8-inch pan completely.  Remove the mini-brownies once they have cooled in the pan for about 3 minutes.  Let cool completely before frosting.

To make the frosting:  Mix together the cream and malted milk powder.  Set aside.  In a bowl of a stand mixer fitted with the paddle attachment (a hand mixer or your muscles will work, too), cream together the butter, cocoa powder, and salt for about 3 minutes on medium speed.  As always, scrape down the sides of the mixer, as necessary.  Add about 1 1/4 cups of powdered sugar and mix on low to combine.  Add the milk and vanilla and mix.  Slowly add the cream/malted milk mixture while mixing on medium speed.  Mix until it is the consistency you like, add more powdered sugar, if necessary.

Spread frosting onto cooled brownies.  They will keep well for days covered with aluminum foil or in an airtight container.  Enjoy!

Source:  Adapted from Joy Wilson’s Joy the Baker Cookbook

Thanks for stopping by Relishing It today!

Laurie

Read Full Post »

I distinctly remember the first time I ate a piece of chocolate babka bread.  It floored me.  I had a hard time wrapping my brain around the fact that it looked so sweet– like a dessert bread– but instead had so much more flavorful depth.  Those simple swirls wrapped around chunks of bittersweet chocolate were amazing.  And though it wasn’t what I was expecting, I loved it.  I was hooked.  Since that first piece, I’ve ordered chocolate babka whenever I’ve had the opportunity.  Some have been amazing, while others just didn’t quite get it right.

For today’s recipe, I’ve found a babka that definitely gets it right.  Being able to make something at home that is just as good, if not better, than the versions I’ve tried elsewhere is one of the most satisfying things about cooking and baking.  And this babka ranks right up there with the best I’ve ever eaten.  The bread is moist and soft, and of course, not overly sweet.  I love the big chunks of chocolate and the subtle kiss of cinnamon that make every bite interesting.  In a word, it’s perfect.

This babka is not difficult to make, and I think the pictures should help you visualize each step.  As always, fancy equipment is not necessary.  Every step can be done by hand, though it’ll take a bit longer to mix and knead the dough.  The results are worth the little added effort.  This babka begs to be eaten while sipping a cup of coffee and chatting with a good friend.  I hope you make this one, you’ll be so happy you did!

The Recipe: Chocolate Babka

For the Bread:

2 1/4 teaspoons (one 1/4-ounce envelope) active dry yeast

1/4 cup granulated sugar

3/4 cup warm milk (110 degrees)

1 large egg plus one large egg yolk

3 cups (15 ounces) all-purpose flour, plus more for surface

1/2 teaspoon kosher salt

1 stick (8 tablespoons) unsalted butter at room temperature, plus more for bowl and pan

1 large egg, lightly beaten with 1 tablespoon heavy cream, for egg wash

For the Filling:

8 ounces bittersweet chocolate, coarsely chopped (1 1/4 cups)

1/2 cup granulated sugar

1 1/2 teaspoons ground cinnamon

4 tablespoons unsalted butter, at room temperature, cut into small pieces

1/4 teaspoon kosher salt

For the Crumb Topping:

1/4 cup plus 2 tablespoons confectioners’ sugar

1/4 cup all-purpose flour

3 tablespoons unsalted butter, room temperature

To make the bread: In a medium bowl, sprinkle the yeast and a pinch of sugar over the milk and let stand for about 5 minutes, or until foamy.  In another bowl, whisk together the remaining sugar, the egg and the yolk.  Whisk into the yeast mixture.  In the bowl of a stand mixer fitted with the paddle attachment, combine the flour and kosher salt.  Add the egg mixture and mix on low speed until almost fully combined, about 30 seconds.  Switch to the dough-hook attachment, and add the butter.  Mix until smooth, soft, and slightly sticky, about 9-10 minutes.  Butter a large bowl.  Turn out the dough onto a floured surface and knead a few times until smooth.  Place in bowl and cover with plastic wrap.  Let stand in a warm place until doubled in size, roughly 1- 1 1/2 hours or longer (it will depend upon how warm your house is).

Meanwhile, make the chocolate filling.  In a medium bowl, combine the chocolate chunks, sugar, cinnamon, and salt.  Cut in the butter with a fork, pastry cutter, or my favorite way, your fingers, until combined.

Once the dough has doubled in size, punch it down.  Place it on a flour work surface.  Let rest for 5 minutes and then roll it out into a 18-inch square.  Reserve a 1/2 cup of the filling and sprinkle the rest over the dough, leaving a 1-inch border.  Brush the edges with the egg wash.  Tightly roll the dough from one end to the other, like a jelly roll.  Pinch the seam to seal.  Fold in half and form a “U” shape.  Twist 2 or 3 times to “braid”.  Make sure to pinch the ends of braid together, as well.  Butter a 5-by-10-inch loaf pan, line with parchment, leaving 1-inch overhangs; then butter the parchment paper.  Place the dough in the pan and brush with egg wash.

To make the crumb topping, in a small bowl combine the confectioners’ sugar, flour, and butter.  Mix with your finger until large, moist clumps form.  Sprinkle topping along with 1/2 cup reserved chocolate filling over the cake.  It’s ok if it falls down the sides of the cake, it will bake up beautifully.

Preheat oven to 350°F.  Drape plastic wrap over the dough.  Let rise in a warm place until risen by half, about 30 minutes.

Place bread pan on a cookie sheet, in case any of the topping tumbles off while baking.  Place in the oven (center rack).  Bake rotating halfway through, until golden, about 55 minutes.  Reduce oven temperature to 325°F.  Bake until deeply golden, about 15-20 minutes more (cover with foil if top gets too dark).  Transfer pan to wire rack to cool completely before removing from pan.  Bread can be stored in an airtight container (with plastic wrap placed on cut ends) for about 3 days.

Source:  Adapted from Martha Stewart Living, 2011

Thanks for stopping by Relishing It.  I’d love to hear about some of the foods you’ve been relishing in your life lately!

Laurie

Read Full Post »

Where to begin?  My goodness, I love these babies!  I had been craving a proper chocolate cupcake with a salted caramel frosting for a long time.  I knew where I could probably buy one, but sometimes I get a little ticked at the steep price tag for just a “bite” of cake– especially when my kids beg for (and usually get) them every week.  I got to thinking, and decided to try to make them myself.  I combined several recipes, and came up with cupcakes that are even better than I imagined.

I used my favorite chocolate cupcake recipe, but made it with coconut oil.  The cake is moist and dense.  I’ve become addicted to coconut oil lately (I’ve even made a coconut oil body butter–but more on that another time).  These cupcakes have a nice, subtle coconut flavor that blends perfectly with the chocolate and caramel.  Now my goal was to use a healthier fat– which worked– though I’m not sure the ‘healthiness’ mattered, since I piled a mound of buttercream on top.  Oh well, they are cupcakes, after all.

Now, let’s talk about the salted caramel.  Salt and caramel are such a heavenly combination.  So perfect.  You will not use all of the caramel, which is a good thing.  Just keep it in your refrigerator, and use later poured over ice cream.  Or drizzle it over a brownie.  Or just enjoy it by the spoonful (or maybe that’s just me).

And you know that deliciously thick and rich frosting that makes those specialty shop cupcakes so good?  Yeah, that’s this stuff.  It not just a buttercream, it’s meringue buttercream.   Big difference.  This one uses egg whites, but don’t worry, they’re perfectly safe because they’ve been carefully cooked.  They whip up beautifully and become a silky treasure when mixed with the butter.  Add that liquid gold salted caramel, and you’ve just made one of the most delicious frostings possible.

The Recipe: Chocolate Cupcakes with Salted Caramel Meringue Buttercream

(Makes 16-18 frosted cupcakes)

Salted Caramel:

1 cup granulated sugar

2 tablespoons light corn syrup

1/2 cup heavy cream

1 1/4 teaspoon fleur de del (regular sea salt or even kosher will also work)

1/4 cup sour cream

To make the caramel: In a medium saucepan, combine the sugar and corn syrup along with 1/4 cup water.   Gently stir them together, being careful not to splash the sides of the pan.  Cook over high heat until an instant-read thermometer reads 350°F, or until the mixture is a dark amber in color, about 6-8 minutes.  Keep a watchful eye on it, as it can turn from a golden amber color to burnt very quickly.  Remove from heat and slowly add the cream (be careful, it will bubble), and then add the fleur de sel.  Whisk in the sour cream.  Set aside to cool to room temperature.  Or refrigerate if making ahead of time, then bring to room temperature before mixing into the buttercream.

Chocolate Cupcakes:

1/2 cup natural unsweetened cocoa powder

2 ounces high-quality semi-sweet chocolate (60% cacao works great), chopped

1/2 cup strong, very hot coffee

1/2 cup sour cream

1 cup unbleached cake flour

3/4 teaspoon baking soda

3/4 teaspoon kosher salt

2/3 cup (packed) dark brown sugar

1/2 cup virgin coconut oil

1/2 cup granulated sugar

2 large eggs, room temperature

1 teaspoon vanilla extract

 For the CupcakesPreheat oven to 350°F.  Line 16-18 standard (1/3 cup) muffin cups with paper liners.  Combine cocoa powder and chocolate in medium bowl.  Pour 1/2 cup hot coffee over; whisk until smooth.  Whisk in sour cream.
Whisk flour, baking soda, and salt in another medium bowl to blend.  Using a stand mixer, beat brown sugar, coconut oil, granulated sugar, eggs, and vanilla in large bowl until light and creamy, about 2 minutes.  Beat in flour mixture, alternating with chocolate mixture in 2 additions. Careful not to over-mix.  Divide batter among paper liners.

Bake until tester inserted into center comes out with some crumbs attached, about 16-18 minutes.  Cool in pans for about 10 minutes.  Transfer cupcakes to cooling racks and cool completely.

Salted Caramel Meringue Buttercream:

4 large (1/2 cup) egg whites

1 cup sugar

pinch of kosher salt

3/4 pound (3 sticks) unsalted butter, at room temperature, cut into 1-inch chunks

1/3 cup salted caramel

To make the meringue buttercream:  Put the egg whites, sugar and salt into a medium-sized heatproof mixing bowl over a pan of simmering water, and whisk gently and continuously until the egg whites reach 140°F.  The eggs whites will be hot and the sugar will be dissolved, about 3-4 minutes.

Remove from the heat and pour into a bowl of a very clean stand mixer.   Using the whip attachment, whip mixture on high until thick and cooled, about 5 minutes.  (Make sure the meringue is cooled to room temperature before adding the butter, or  the butter will melt and will not make a proper frosting).  With the mixer running, slowly add the butter to the meringue, one chunk at a time.  Beat until the buttercream is smooth and spreadable, scraping down the sides of the bowl, as needed.  With the machine still running, slowly add the salted caramel and beat until well blended, about 2 minutes.

Troubleshooting:  If for some reason your buttercream is too soft (perhaps your meringue wasn’t cooled enough), stir the buttercream over ice water; then beat with a machine until smooth and spreadable.  Sometimes buttercream separates – it will look like scrambled eggs.  If this happens, briefly immerse the bottom of the mixing bowl into some hot tap water, then beat again until the buttercream is smooth and spreadable.

To Assemble the Cupcakes:

After the caramel and cupcakes have cooled to room temperature, using a small knife carefully cut out a 1/2-inch circle midway down in the center of the cupcakes.  Fill the hole with the salted caramel just to the surface.  Place the salted caramel meringue buttercream into a large pastry bag and top each cupcake with a swirl of it — be generous!   Frosted cupcakes should be eaten as soon as possible, but will hold their shape for a couple hours.  Unfrosted cupcakes can be stored in an airtight container for a few days.  Leftover caramel should be treated as gold, because it is that delicious.  Store in jar and refrigerate — it makes a wonderful topping for ice cream.  Enjoy!

Sources:  Chocolate Cupcakes adapted from this recipe.  Salted Caramel adapted from Baked Explorations.  Meringue Buttercream adapted from How to Bake.

Thanks for stopping by Relishing It today — hope you enjoy these cupcakes!

Laurie

Join me on Twitter

Read Full Post »

As a mother of two little ones, a few years back I embarked on a quest to find the perfect chocolate pudding recipe.  It started because my kids would see those plastic individually-sealed “pudding cups” while grocery shopping.  They begged and pleaded  until I just couldn’t take it anymore, so I broke down and bought them once in awhile.  The thing is, I knew that I could make something that tasted so much better and was less-heavily processed.  Let’s be honest, chocolate pudding isn’t exactly a health food, but I feel better knowing I have control over the ingredient list.  And it’s not like kids are going to stop begging for it.  This is the recipe that I found– and it’s marvelous.

This chocolate pudding is decadent.  It has a deep, rich, cocoa flavor.  So rich, in fact, that I’ve scaled back the amount of chocolate on occasion just to make sure it’s exactly what my kids are looking for.  You may want to do the same, though note that now I generally make it as listed in the recipe.  It’s a good thing Aanen and Aria inherited my out-of-control zeal for chocolate.  The texture is beautifully silky.  It’s substantial, though not overly heavy because it’s based on milk, rather than cream.  And it’s not just for the kids.  This pudding’s flavor is profound enough to make it a versatile all-around dessert.  It’s perfect for a lovely weeknight, or even a more upscale weekend dinner party.


Whatever occassion you decide to make it for, know that in my opinion it’s much better served cold.  My kids– quite clearly– agree.  As you can imagine, our evenings get rushed from time to time.  On a few of those occasions, we grew impatient waiting for the pudding to cool.  I served it warm, and it went…nowhere.  I know, I know.  Some of you probably like warm pudding.  But if you know your family prefers it cold, make sure you give yourself plenty of time to allow it to chill.

The Recipe: Perfect Chocolate Pudding

(Makes about 6 ramekins)

1/4 cup cornstarch

1/3 cup granulated sugar

1/2 teaspoon kosher salt

3 cups whole milk

6 ounces good quality semi-sweet chocolate, coarsely chopped

1 teaspoon vanilla extract

Combine the cornstarch, sugar, and salt, in the top of a double boiler.  Slowly whisk in the milk making sure to incorporate all of the dry ingredients.  Place over gently simmering water, stirring occasionally and scraping down the bottom and sides.  Use a whisk, if any lumps should begin to form.  After 15 to 20 minutes, when the mixture should begin to thicken and coat the back of a wooden spoon, add the chocolate.  Continue to stir until the pudding is smooth and thick, about 2-4 minutes.  Remove from heat and add the vanilla.

Strain through a fine mesh strainer.  Or skip this step if you feel that it is smooth enough to your liking.  Ladle pudding into individual ramekins and place plastic wrap against the surface.  Refrigerate for at least 30 minutes, though the longer the better, in my opinion.  Skip the plastic wrap, if you prefer to have “skin” on the top of  your pudding.  Serve with freshly whipped cream and a big ol’ smile!  Enjoy.

Source: Adapted from the Smitten Kitchen

Thanks for dropping by today!

Laurie

Join me on Twitter

Read Full Post »

I intended to get this to-die-for cookie recipe to you earlier this week, but I’ve been (more than) a bit under the weather with a cold.  In any case, you still have a time to whip out a batch of these little treats.  Trust me here– they will not be passed over on the cookie platter.  The inspiration for these double-dark chocolate thumbprint cookies is chocolate mousse.  Is there anything better than chocolate mousse?  Anything?  I’ve tried to capture how light and airy they are in this picture of the batter.

The cookies crisp-up around the edges, yet stay soft and tender in the middle.  They’re almost like biting into a little pillow of chocolate.  And of course I’m a sucker for ganache, so these little gems are right in my wheel house.  My family and friends love these cookies, and I think you will too.

I’ll be on the road for the next few days, since we’re packing up the presents and the kids and traveling back to North Dakota to be with our families for the holidays.  I’m so excited!  Even the prospect of facing a nine-hour drive each way with a three and five-year-old can’t dampen my spirit– at least not yet.  The weather looks good, with no blizzards in the forecast.  Fingers crossed.   Happy holidays to all of you!

The Recipe:  Double-Dark Chocolate Thumbprints

(Yields about 2 1/2 dozen)

For the cookies:

6 ounces (1 1/2 cups) unbleached all-purpose flour

1 teaspoon kosher salt

1/2 teaspoon baking powder

1/4 teaspoon baking soda

4 ounces (1/2 cup) unsalted butter, softened

1 1/3 cups granulated sugar

1 1/2 ounces (1/2 cup) natural, unsweetened cocoa powder

3 large eggs, room temperature

1 teaspoon vanilla extract

3 ounces bittersweet chocolate, melted and cooled slightly

Sea salt, for sprinkling

For the chocolate filling:

3 ounces bittersweet chocolate, coarsely chopped, (1/2 cup)

2 ounces (4 tablespoons) unsalted butter, cut into 3 pieces

Position rack in the center of the oven and preheat to 350°F.  Line cookie sheet with parchment paper.  In a medium bowl, whisk the flour, salt, baking powder, and baking soda.  Set aside.

In a stand mixer fitted with the paddle attachment, beat the butter, sugar, and cocoa powder on medium speed until well blended, about 2 minutes.  Scrape down the sides of the bowl.  Add the eggs one at a time, mixing until blended after each addition, about 30 seconds, add the vanilla along with the last egg.  Continue mixing on medium speed until well blended, about 1 minute.  Add the cooled, melted chocolate and mix until just blended, about 30 seconds.  Add the flour mixture and mix on low speed until well blended, about 1 minute.

Using a mini-scoop, drop the dough onto the prepared cookie sheet.  Do not flatten.  Bake until the cookies are puffed and the tops are cracked and look dry, 10-11 minutes.  Remove from oven and immediately make a small, deep well in the center of each of them using the end of a thick handled spoon or the back of a measuring spoon.  Sprinkle with sea salt while they are warm.  Let sit on cookie sheet for a couple of minutes, then transfer to a cooling rack.

Meanwhile,  melt the chocolate and butter in the microwave.  Stir every 20 seconds until melted and smooth.  Let cool and thicken a bit.

When cookies are somewhat cool, fill them with the chocolate filling using a teaspoon.  If the filling becomes too thick, just microwave it for a few seconds longer.  The chocolate will completely set in the cookies within an hour.  They keep well in an airtight container for days.  Enjoy!

Source:  Adapted from Fine Cooking Dec/Jan 2011

Thanks for stopping by Relishing It today!  I hope you all have a wonderful holiday filled with much happiness.  See you next week.

Laurie

Join me on Twitter

Read Full Post »

How does one measure patience?  As the mother of small children, mine (and to be fair, theirs) is tested daily.  But that’s not really what I’m talking about today.  I’m talking more about the ability to delay gratification, or to be patient enough to wait until the time for something is right.  Heck, maybe I’m not talking about that at all, but the point is, I’ve been patiently waiting to make this cake for a very long time.  I’ve  drooled over admired this recipe for a decade.  Seriously.  I’ve always known I was going to make it, and this year I finally decided the timing was right.  No more delayed gratification here– that’s the sort of patience I’m talking about.

So was it worth a 10-year wait?  Absolutely.  This beautiful cake is a stunner.  Not only does it look spectacular, it’s loaded with deep, rich chocolate flavor throughout.  The cake and glaze are primarily dark chocolate, while the center boasts creamy milk chocolate to vary the flavors.  It also perfectly combines refreshing mint– chocolate’s soul-mate during the holiday season.  The layering of the flavors is marvelous.  This decadent cake is the perfect ending to your holiday meal, so don’t wait a decade to make it.

The Recipe: Triple Chocolate and Peppermint Cake

(Serves 12)

Filling:

8 ounces good quality milk chocolate, finely chopped

1/2 cup whipping cream

1 tablespoon light corn syrup

1 teaspoon peppermint extract

Cake:

1 cup sifted unbleached all-purpose flour

1/3 cup unsweetened cocoa powder

1 teaspoon kosher salt

1/4 teaspoon baking powder

1/4 teaspoon baking soda

3/4 cup (1 1/2 sticks) unsalted butter, room temperature

1 cup granulated sugar

1/3 cup (packed) dark brown sugar

2 teaspoons vanilla extract

3 large eggs,  room temperature

1/2 cup buttermilk

1 1/2 cup semi-sweet chocolate chips, chopped or miniature chocolate chips

Chocolate Glaze:

8 ounces bittersweet or semisweet good quality chocolate, finely chopped

1/2 cup (1 stick) unsalted butter, cut into pieces

1 tablespoon light corn syrup

1 teaspoon peppermint extract

chopped peppermint candies for garnish

To make the Filling:  Place chocolate in a medium bowl.  Bring cream and corn syrup to a simmer in a small saucepan.  Pour over the chocolate; add extract.  Let sit for one minute.  Whisk until smooth.  Let mixture sit at room temperature while cake is baking and cooling.

To make the Cake:  Position rack in the middle of oven.  Preheat to 350°F.  Prepare a 9-inch cake pan with 2-inch sides by buttering, lining with parchment paper, buttering again, and dusting with flour.  Tap out excess flour.  Whisk the flour, cocoa powder, salt, baking powder, and baking soda together in a medium bowl.   Set aside.  In a stand mixer, fitted with the paddle attachment, beat the butter until light and fluffy.  Gradually beat in both sugars, then vanilla.  Add the eggs one at a time, beating well after each addition.  Be sure to scrape down the sides of the bowl, as needed.  Beat in the dry ingredients alternately with buttermilk in 2 additions each.  Mix in the chocolate chips with a rubber spatula.

Transfer batter to prepared pan.  Bake cake until tester inserted into center comes out clean, about 45- 50 minutes.  Be sure not to over bake.  Cool cake in pan for 5 minutes.  Turn out onto a rack.  Remove parchment paper.  Cool completely.

Using a stand mixer fitted with the whisk attachment, beat the filling until fluffy and lightened in color, about 1 minute.  Using a serrated knife, cut the cake horizontally in half.  Place 1 layer, cut side up, on rack set over baking sheet.  Spread filling over.  Top with second later, cut side down.  Chill for 20 minutes.

Meanwhile, prepare glaze:  Stir chocolate, butter, and corn syrup in heavy small saucepan over low heat until melted.  Mix in extract.  Cool glaze until just lukewarm but still pourable, stirring occasionally, about 20 minutes.

Pour 1/2 cup glaze over center of cake.  Spread over top and sides of cake.  Chill for 15 minutes.  Pour remaining glaze over the center of cake, then spread quickly over the tops and sides.  Sprinkle with peppermint candies.  Serve after the glaze has set and the cake is at room temperature.  Store at room temperature under a cake dome.

Source: Adapted from Bon Appetit Magazine, December 2001

Thanks so much for stopping by today!

Laurie

Join me on Twitter

Read Full Post »

I’ve finally gotten around to baking a pie for Relishing It.  (I don’t believe this galette and these hand pies count.)  I’m not sure how it worked out that this Chocolate Pecan beauty is my first pie here– especially since (confession time) I generally don’t much care for pecan pie.  I figure this has something to do with my insatiable sweet tooth.  If a typical pecan pie were the only choice, then yes I’d eat it, but it would never be my first choice.  How’s that for a ringing endorsement?  Come to think of it it, maybe that’s how to convince you to make this dessert as well.  Even though I’m not a pecan pie fan, this is one of the best pies I’ve EVER tasted.

So what convinced me to make a pecan pie?  Two words: bourbon and chocolate.  I love desserts that layer typically sweet ingredients with the subtle flavors of a good spirit.  Here, combining oaked smokey bourbon with the sweetness of chocolate and earthy nuts is perfect.  The flavors are just so interesting that I kept wanting another bite.  The crust is almost croissant-like, yet really holds up well to the liquid filling.   This ended up being one of those rare pies that was perfect.  Perfect texture, perfect flavor combinations.  Just perfect.  Enjoy it with a cup of coffee or a shot of bourbon– both pair nicely.  And save a spot at your Thanksgiving table for this dessert (and this one)– I will be making both.

The Recipe:  Bourbon-Chocolate Pecan Pie

For the Pie Dough:

7 1/2 ounces (1 2/3 cups) all-purpose flour

2 tablespoons granulated sugar

1 teaspoon kosher salt

6 ounces (3/4 cup) cold unsalted butter, cut into small cubes

5 to 7 tablespoons ice water

For the Bourbon-Chocolate Filling:

8 large egg yolks

1 teaspoon vanilla extract

4 ounces (1/2 cup) unsalted butter, cut into 4 pieces

2/3 cup light brown sugar

1/2 cup light corn syrup

1/2 cup heavy cream

3 tablespoons bourbon (Maker’s Mark or Knob Creek are good choices)

3/4 teaspoon kosher salt

1 1/2 cups pecan halves, toasted, cooled, and coarsely chopped

4 ounces chopped bittersweet chocolate  (Ghirardelli 60% cacao works well)

To make the pie dough: Place the flour, sugar, and salt in a food processor and pulse to combine.  Add the cold butter and pulse for 8-12 one-second pulses, or until the butter is roughly the size of corn kernels.   Drizzle 5 tablespoons of ice water over the  flour mixture and pulse until the mixture becomes moist and crumbly, another 4-6 pulses.  It should hold together when squeezed in your hand.  If it doesn’t, add another tablespoon or two of water and test again.   Turn the dough out onto a work surface and form a disk shape.  Wrap the dough in plastic wrap and refrigerate for at least an hour or up to two days.  Dough can be frozen for up to 1 month, defrost in the fridge overnight before using.

To Make the Crust:  Let the dough sit at rom temperature to soften slightly.  It should be firm, but not rock hard, 5-20 minutes (depending upon how long it was refrigerated).  I find that I prefer to roll pie crust on a piece of parchment paper to be the best method for me.  I lightly flour my rolling pin. If you prefer to roll it on the counter-top, just be sure to use as little of flour as possible.  As too much flour makes for very tough pie crusts.  When rolling the dough on the parchment paper, use a rolling pin and roll from the center outward.  You want your dough to get to be about 13-inches wide and about 1/8-inch thick.  Flip the dough into a 9-inch pie plate (Pyrex worked great).  Gently peel the parchment paper away.  Make sure that the dough is pressed firmly against the pie-plate.  Tuck the extra over-hang underneath to build up the edge of the crust.  Gently make it as uniform as you can.  I used every bit of dough for the pie and didn’t have to cut any away.  Crimp the edge of the crust with your fingers.  With the tines of a fork, prick the crust all over.  Chill for up to 1 hour in the refrigerator, or 30 minutes in the freezer.

To Bake the Crust: Position a rack in the center of an oven.  Preheat it to 425°F.  Line the piecrust with aluminum foil and fill it with dried beans or pie weights.  Bake for 15 minutes.  Remove the foil and weights.  Reduce the oven temperature to 375°F and continue baking until the bottom looks dry and the edges are golden,  About 10-12 minutes more.  Cool on a rack while you prepare the filling.  Reduce the oven temperature to 325°F and place a large rimmed baking sheet on the oven rack.

To Make the Filling:  Place the egg yolks in a medium bowl set on a kitchen towel and add the vanilla.  Combine the sugar, butter, corn syrup, cream, bourbon, and salt in a 1-quart saucepan.  Heat over medium heat just until the butter is melted and the mixture is hot, but not boiling, 3-5 minutes.  This is key — whisking vigorously and constantly, very slowly pour the hot sugar mixture into the yolks, this will keep the yolks from curdling.  Strain through a fine strainer set over a 1-quart measuring cup.

Spread the pecans evenly over the piecrust.  Sprinkle the chopped chocolate evenly over the pecans.  Slowly and in a spiral pattern pour the  filling over the pecans/chocolate.  Doing it slowly and in this pattern will prevent the nuts/chocolate from moving too much.  Place the pie onto the baking sheet and bake until the pie is slightly firm to the touch and the filling doesn’t wobble when nudged, 35-40 minutes.  Let cool for at the very least 1 hour before serving.  However,  I enjoy the pie the most hours or a day after it’s been baked and has a chance to properly set.  It keeps well and can be made a day ahead of time.  Store it at room temperature and cover with a tea towel.  Enjoy!

Source:  Adapted from Fine Cooking Magazine, Oct/Nov 2011

So happy you stopped by today — it’s always a pleasure!

Laurie

Join me on Twitter!

Read Full Post »

If you’ve spent even a small amount of time here, you know that I love cookbooks.  Even on hectic days when my two little ones run me ragged, I try to find time to clear my head with a warm cup of coffee and a few peaceful moments paging through recipes.  So what makes a cookbook ‘good’?  Well, rather than listing page after page of instruction, for me the best cookbooks are like settling in and sharing ideas with a comforting friend.  They have stories wrapped around a theme, emotions that tie the dishes to the author’s life and loved ones, and– obviously– brilliant food.  I want to know the recipes are part of the author’s life, that they’re important enough that she needs to share them.  I want to make them become part of my family’s traditions and story, because that’s really what eating together is about– shared experiences.

One of my favorite cookbook authors is Melissa Clark.  Along with her popular column for the New York Times (A Good Appetite), she has authored or co-authored dozens of fantastic works.  Her cookbook “In the Kitchen with a Good Appetite” gives you a flavor of her journey to where, and who she is today.  I’ve waxed about her creativity in the kitchen and her way with words in this past post.  Today’s recipe, these decadent brownies, comes from her new book, “Cook This Now”.  In a word, both the brownies and the book are brilliant.  In her latest collection, she shares experiences of her life as both a mother and a wife centered around meals for family and friends.  The book’s format mirrors the seasons– which is how I try to cook.  The individual recipes are varied, creative, and mouth-watering.  I decided to make these brownies first, to share with a friend on his birthday– he loves chocolate and coconut.

I love the coconut/chocolate pairing, and in this recipe they really work together brilliantly.  This is not a normal, cake-like brownie.  Instead, it has a moist fudge-y density and texture that delivers a huge chocolate punch.  And the two layers of coconut add nice subtlety.  The first coconut layer (on top) crisps up beautifully.  The second (baked into the brownies) provides nice textural contrast to the brownie itself.   A sprinkle of fleur de sel on top makes them perfect.   Enjoy them with coffee while reading a good cookbook, or share them with a friend.

The Recipe: Coconut Fudge Brownies

1/3 cup Dutch process cocoa

1/2 cup plus 2 tablespoons boiling water

2 ounces unsweetened chocolate, finely chopped

4 tablespoons unsalted butter, melted

1/2 cup plus 2 tablespoons coconut oil (butter may be substituted, if necessary)

2 large eggs

2 large egg yolks

2 teaspoons vanilla

2 1/2 cup sugar

1 3/4 cup unbleached all-purpose flour

1/2 teaspoon kosher salt

3 ounces bittersweet chocolate, cut into 1/2-inch pieces

2 cups sweetened shredded coconut  (do not substitute unsweetened, as it will be too dry for the brownies)

Fleur de sel, for sprinkling (kosher salt may be substituted)

Pre-heat oven to 350°F.  Butter a 9 x 13-inch baking pan.

In a large mixing bowl, whisk the cocoa powder, unsweetened chocolate, and boiling water together until smooth.   Whisk in the the melted butter and coconut oil.  Don’t be alarmed if the mixture looks curdled.  Add the eggs, egg yolks, and vanilla, and whisk until combined.  Whisk in the sugar until fully incorporated.  Add the flour and salt and gently fold with a spatula until just combined.  Fold in the bittersweet chocolate pieces.

Pour half of the batter into the prepared pan and smooth in out.  Sprinkle 1 cup of coconut on top of it.  Spread the remaining batter on top of  the coconut.  Sprinkle the remaining cup of coconut on top of that.  Dust with a bit of fleur de sel and bake until a tester inserted into the center of the brownie is just set and shiny, 30-35 minutes.  If you test with a toothpick, it may seem wet, which is fine.   It will solidify as it cools.  It is better to under- bake these brownies, than to over-bake them.  Cool completely before cutting into squares. Enjoy!

Source: Adapted from Melissa Clark’s Cook This Now Cookbook

Thanks for stopping by today!

Laurie

Follow me on Twitter

Read Full Post »

Chocolate Zucchini Cake

This is the cake that conjures up childhood memories every time I make it.  The original recipe is nestled in one of those tattered  ‘Hometown Cookbooks’ that was a staple for those of us who grew up in the rural Midwest.   My Mom made this cake while I was growing up, as did half the residents in my tiny town.  But my specific memory of this cake takes me to the farm of my childhood best friend several miles down a gravel road east of Regent.  Most everytime I shared a meal with Allison at her family home, her mother would make chocolate zucchini cake.  I loved it.

While I loved the recipe as written, I’ve made several changes that add more wholesome ingredients like whole grains, reduce the sugar, and intensify the chocolate flavor.  I tested the changes on my Dad (also a chocolate fanatic), who thought it was perfect.  My Mom, on the other hand, thought it may be too chocolate-y.  I took this as a good sign since there’s no such thing as too much chocolate, and she’s not crazy about it like my Dad and me.   This is a delightful, versitile everyday cake.  It’s well- suited for coffee, ice cream, a cold glass of milk, and friends. It’s very moist due to the zucchini, has nice texture because of the nuts, and the rich chocolate  flavor is impressive.  It’s a comfort dessert, or maybe that’s just me, thinking about my hometown.

Speaking of my hometown, I figure this is as good a place as any to give you a glimpse at western North Dakota.  On our recent trip over Labor Day, Radd and I took the kids down some of the old country backroads– including the short-cut between my hometown of Regent and Radd’s hometown of Bowman, 60 miles away.  We drove that road (below) nearly every weekend to see each other 20 years ago.  While it wasn’t that impressive to our two and four year olds, it sure brought on the nostalgia.  Enjoy the pictures– and the cake!

The Recipe: Chocolate Zucchini Cake

1/2 cup butter

1/2 cup extra-virgin olive oil (canola or vegetable oil can also be used)

1 cup granulated sugar

1/2 cup brown sugar

2 eggs, at room temperature

1/2 cup milk (2%)

1 1/4 cup all-purpose flour ( I prefer King Arthur or Bob’s Red Mill Flours)

1 cup white whole wheat flour (substitute all-purpose, if you don’t have this)

1/2 cup Dutch-process cocoa, plus more to coat pan

1 teaspoon espresso powder

1 teaspoon vanilla

1 teaspoon baking soda

1 teaspoon kosher salt

2 cups coarsely grated zucchini (about 1 large)

1 cup chopped walnuts, toasted

1 cup chocolate chips (Ghirardelli 60% cacao are my favorite)

Preheat oven to 350°F.  Generously butter a 9 x 13 -inch cake pan, then sprinkle with cocoa powder.  Tap off any excess.  In a small skillet toast the walnuts over medium heat, until they become fragrant, about 4-5 minutes.  Making sure to stir them during that time.

In a medium-sized bowl, sift together the flours, cocoa powder, salt, baking soda, and espresso powder, set aside.  In a liquid measuring cup mix the milk and vanilla together, set aside.

 In a stand mixer fitted with a paddle attachment, cream the butter, oil, and sugars until light and fluffy, about 5-6 minutes.  Add the eggs one at a time and beat well.  Alternate adding the flour mixture and the milk mixture.  Starting  and ending with the flour.  Be sure to scrape the bowl down when necessary and make sure not to over-mix the batter.

Remove paddle attachment and gently fold the zucchini into the batter with a rubber spatula.  Pour into the cake pan and spread flat.  Top with toasted walnuts and chocolate chips.  Bake for about 35-45 minutes.  A cake tester should come out with a few dry crumbs clinging to it.  This cake keeps extremely well.  I think it’s almost better served the day after it is made.  Make sure to enjoy it with a big scoop of vanilla ice cream.

Source:  Inspired by recipes in cookbooks from my hometown of Regent, North Dakota.

Thanks for stopping by today — hope you all have a lovely weekend!
Laurie

Follow me on Twitter!

Read Full Post »

Older Posts »

%d bloggers like this: