Feeds:
Posts
Comments

Posts Tagged ‘cream cheese’

Spice-Marinated Feta with Simple Fougasse via Relishing It

It’s that time of the year when we start to have people over for light spur-of-the-moment gatherings again.  Here in Minnesota, we slough-off the heavy jackets, start working in our yards, and finally get an opportuntity to visit with our neighbors after the long winter.  Yes, I’ve been banging the drum about how much I enjoy the colder months, but I also get excited to invite guests over to our backyard for drinks and appetizers once the weather warms.  Today’s recipe is a tasty combination of marinated cheeses and fougasse.  It’s perfect to serve with a cocktail or two while you’re visiting with friends.

Spice-Marinated Feta and Simple Fougasse via Relishing It

Spice-Marinated Feta with Simple Fougasse via Relishing It

Spice-Marinated Feta with Simple Fougasse via Relishing It

Spice-Marinated Feta with Simple Fougasse via Relishing It

It may look a little fussy to make, but I assure you, it’s simple.  All it takes is combining cheeses and marinating them in olive oil with some spices.  The result is a beautifully flavored cheese that is wonderful when paired with some bread and olives.  The longer it marinates, the more flavorful it becomes.  I pressed mine into a glass square food storage container, since I wanted square bites.  But when chilling the cheese initially, you can also roll it into a log form and then cut it into pieces right before marinating.  It can last in your refrigerator for about two weeks.  I chose feta, but if feta isn’t your deal, try goat cheese, ricotta salata, or even a sharp blue cheese.  If you choose to use something a bit softer, such as goat, you can omit the cream cheese and just increase the total amount to 12 ounces.  You get the idea.  You have a fair amount of leeway with the spices.  If you prefer the flavor of other combinations, give them a try.

Simple Fougasse via Relishing it

Spice-Marinated Feta with Simple Fougasse via Relishing It

Simple Fougasse via Relishing It

The bread is called fougasse.  This one is simple and may be a bit more crispy than traditional fougasse– which is fine with me.  I used the recipe from my favorite pizza crust (genius, right?), because I often have a bit leftover.  I’ve found that the longer the dough stays in the fridge, the more developed the flavor becomes.  I usually try to use it within two weeks, which timing-wise works out perfectly with the cheese.  Sit in the sunshine with your friends and neighbors and enjoy these fantastic nibbles.  Cheers!

Spice-Marinated Feta with Simple Fougasse via Relishing It

The Recipe:  Spice-Marinated Feta and Simple Fougasse

Spice -Marinated Feta:

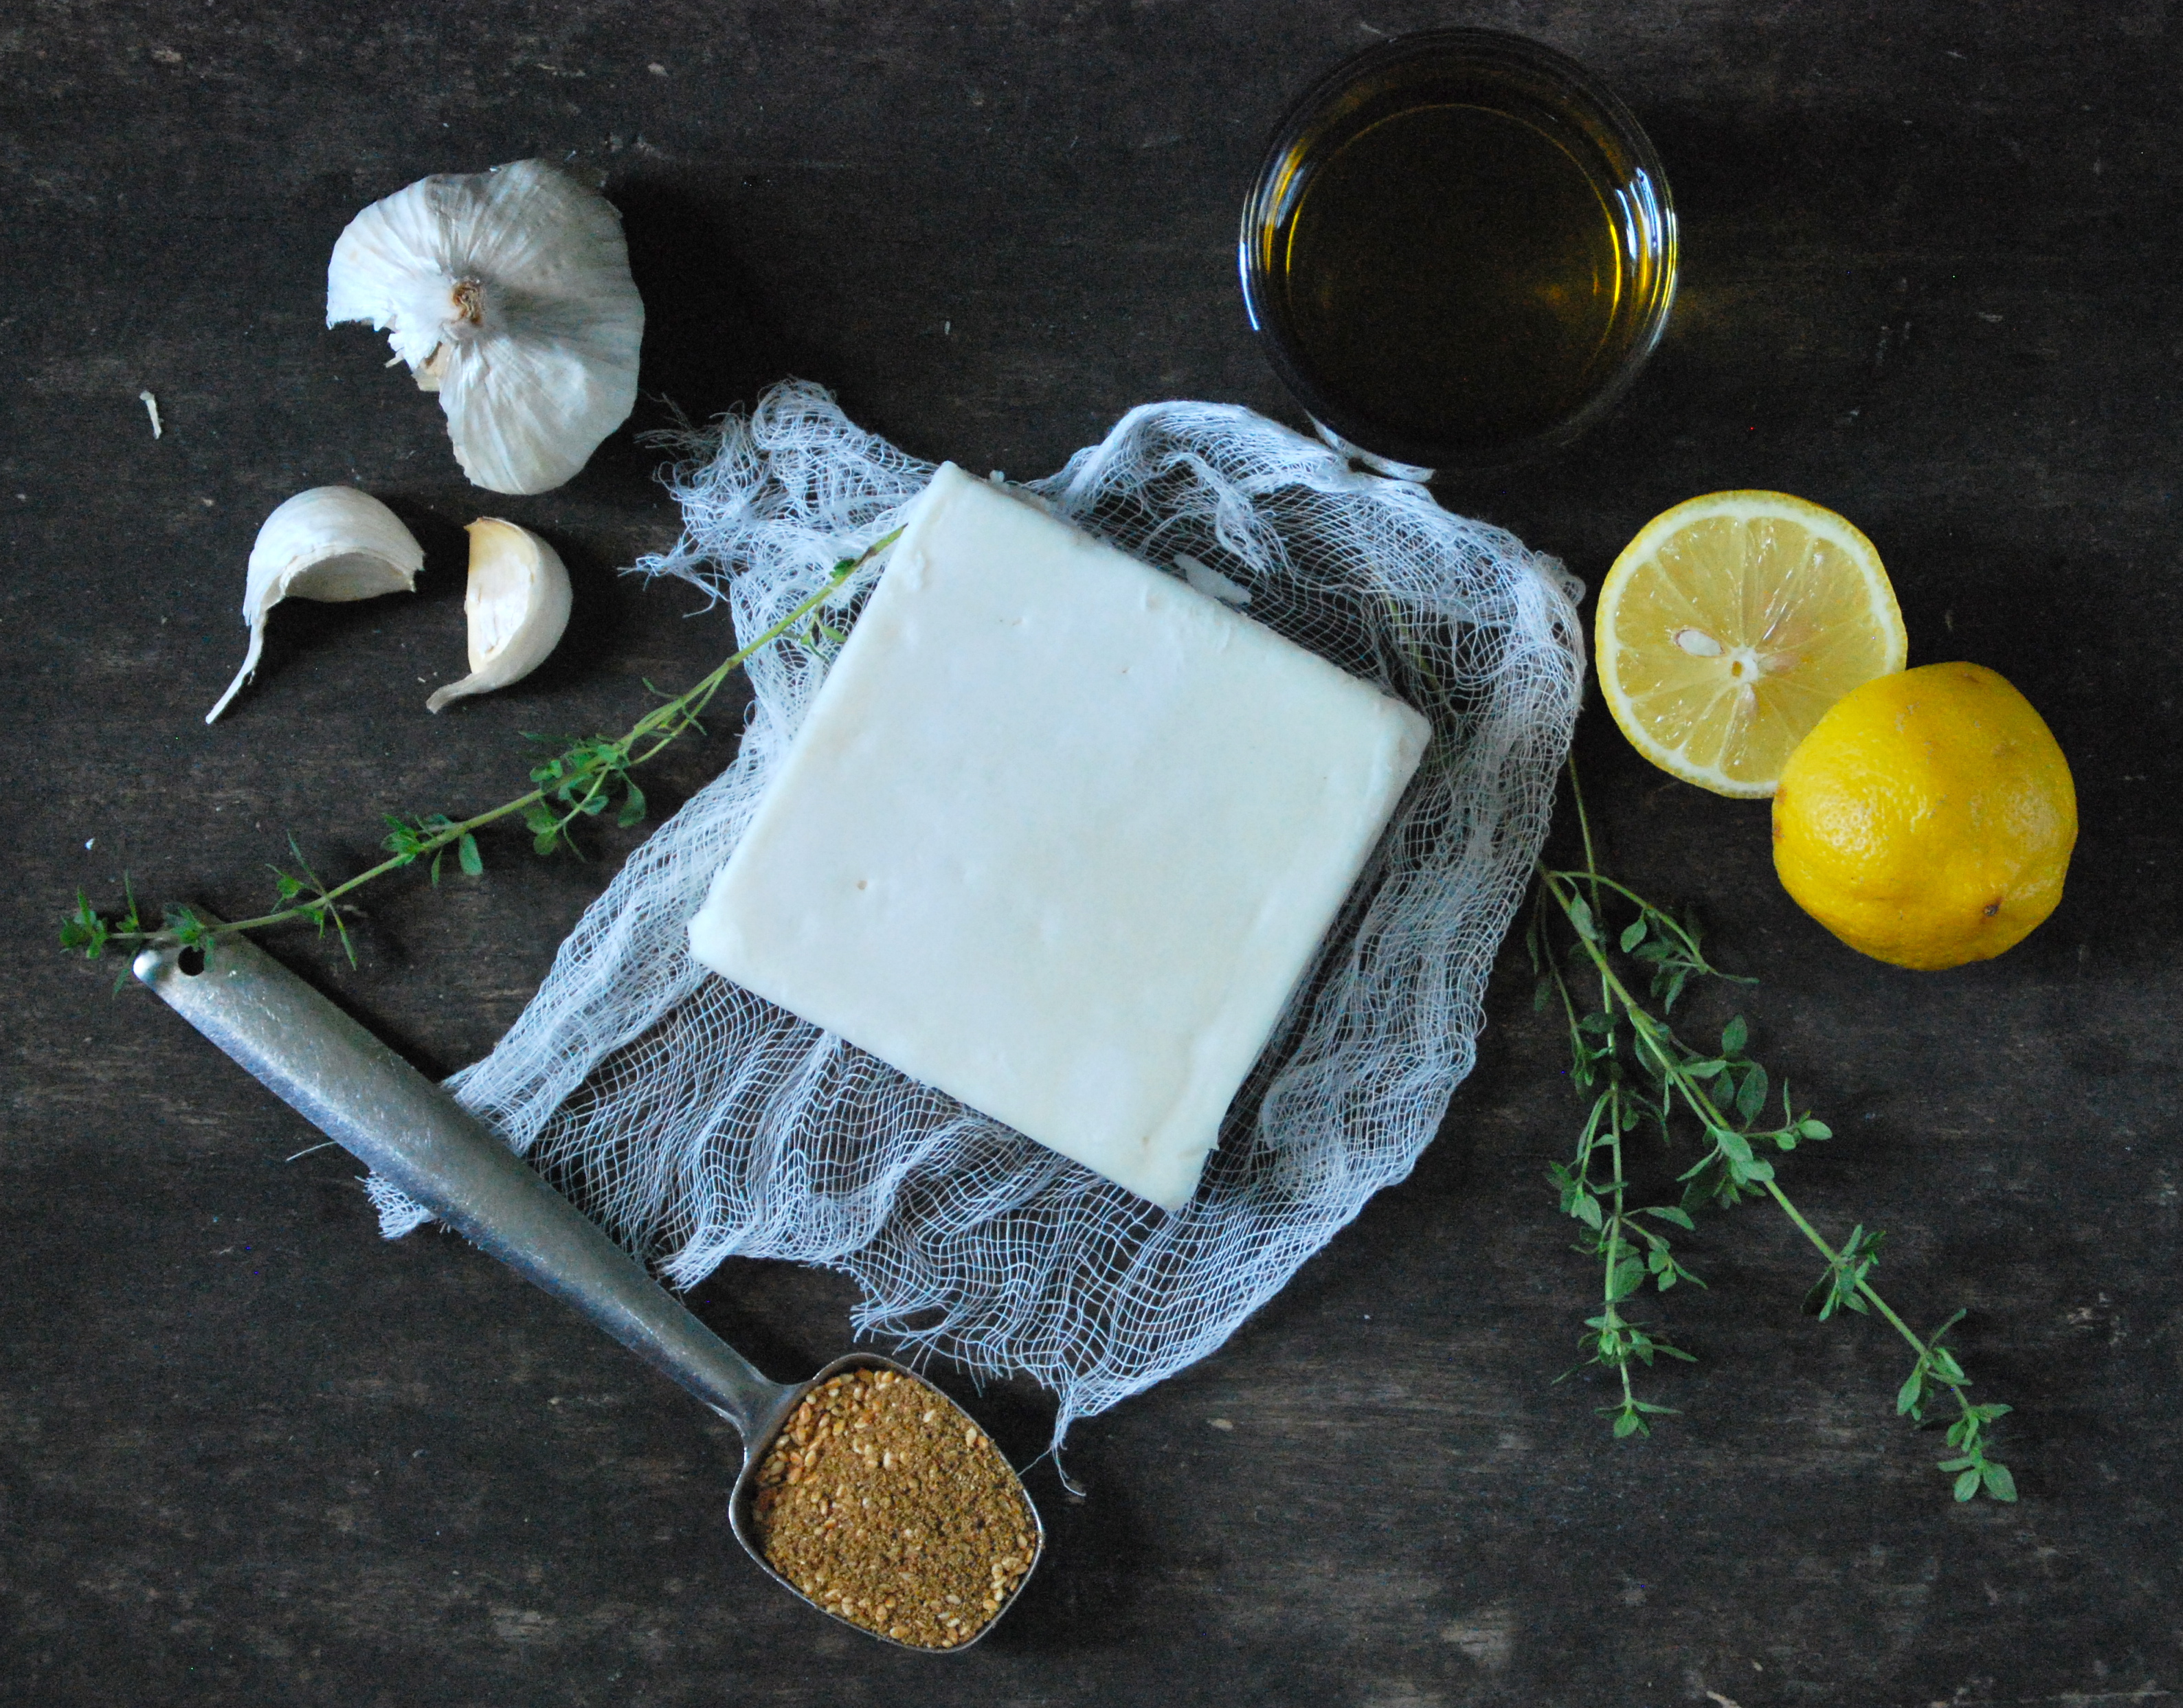
7-8 ounces feta cheese (see note)

4 ounces cream cheese

zest of a medium organic lemon

3 garlic cloves, smashed

1 teaspoon sesame seeds, toasted

1 teaspoon cumin

1 teaspoon coriander

1 cup extra-virgin olive oil (California Olive Ranch is my go-to olive oil)

4-5 sprigs of fresh thyme

Simple Fougasse:

This pizza crust recipe, or use your favorite

Extra-virgin olive oil, for brushing

1 teaspoon cumin

1 teaspoon sesame seeds, toasted

1 teaspoon coriander

(Note:  As I mentioned previously, you can choose to substitute a different cheese for the feta.  Ricotta salata, blue, or goat are good choices.  If using something soft already, such as goat, omit the cream cheese and increase the total amount of cheese to 12 ounces.)

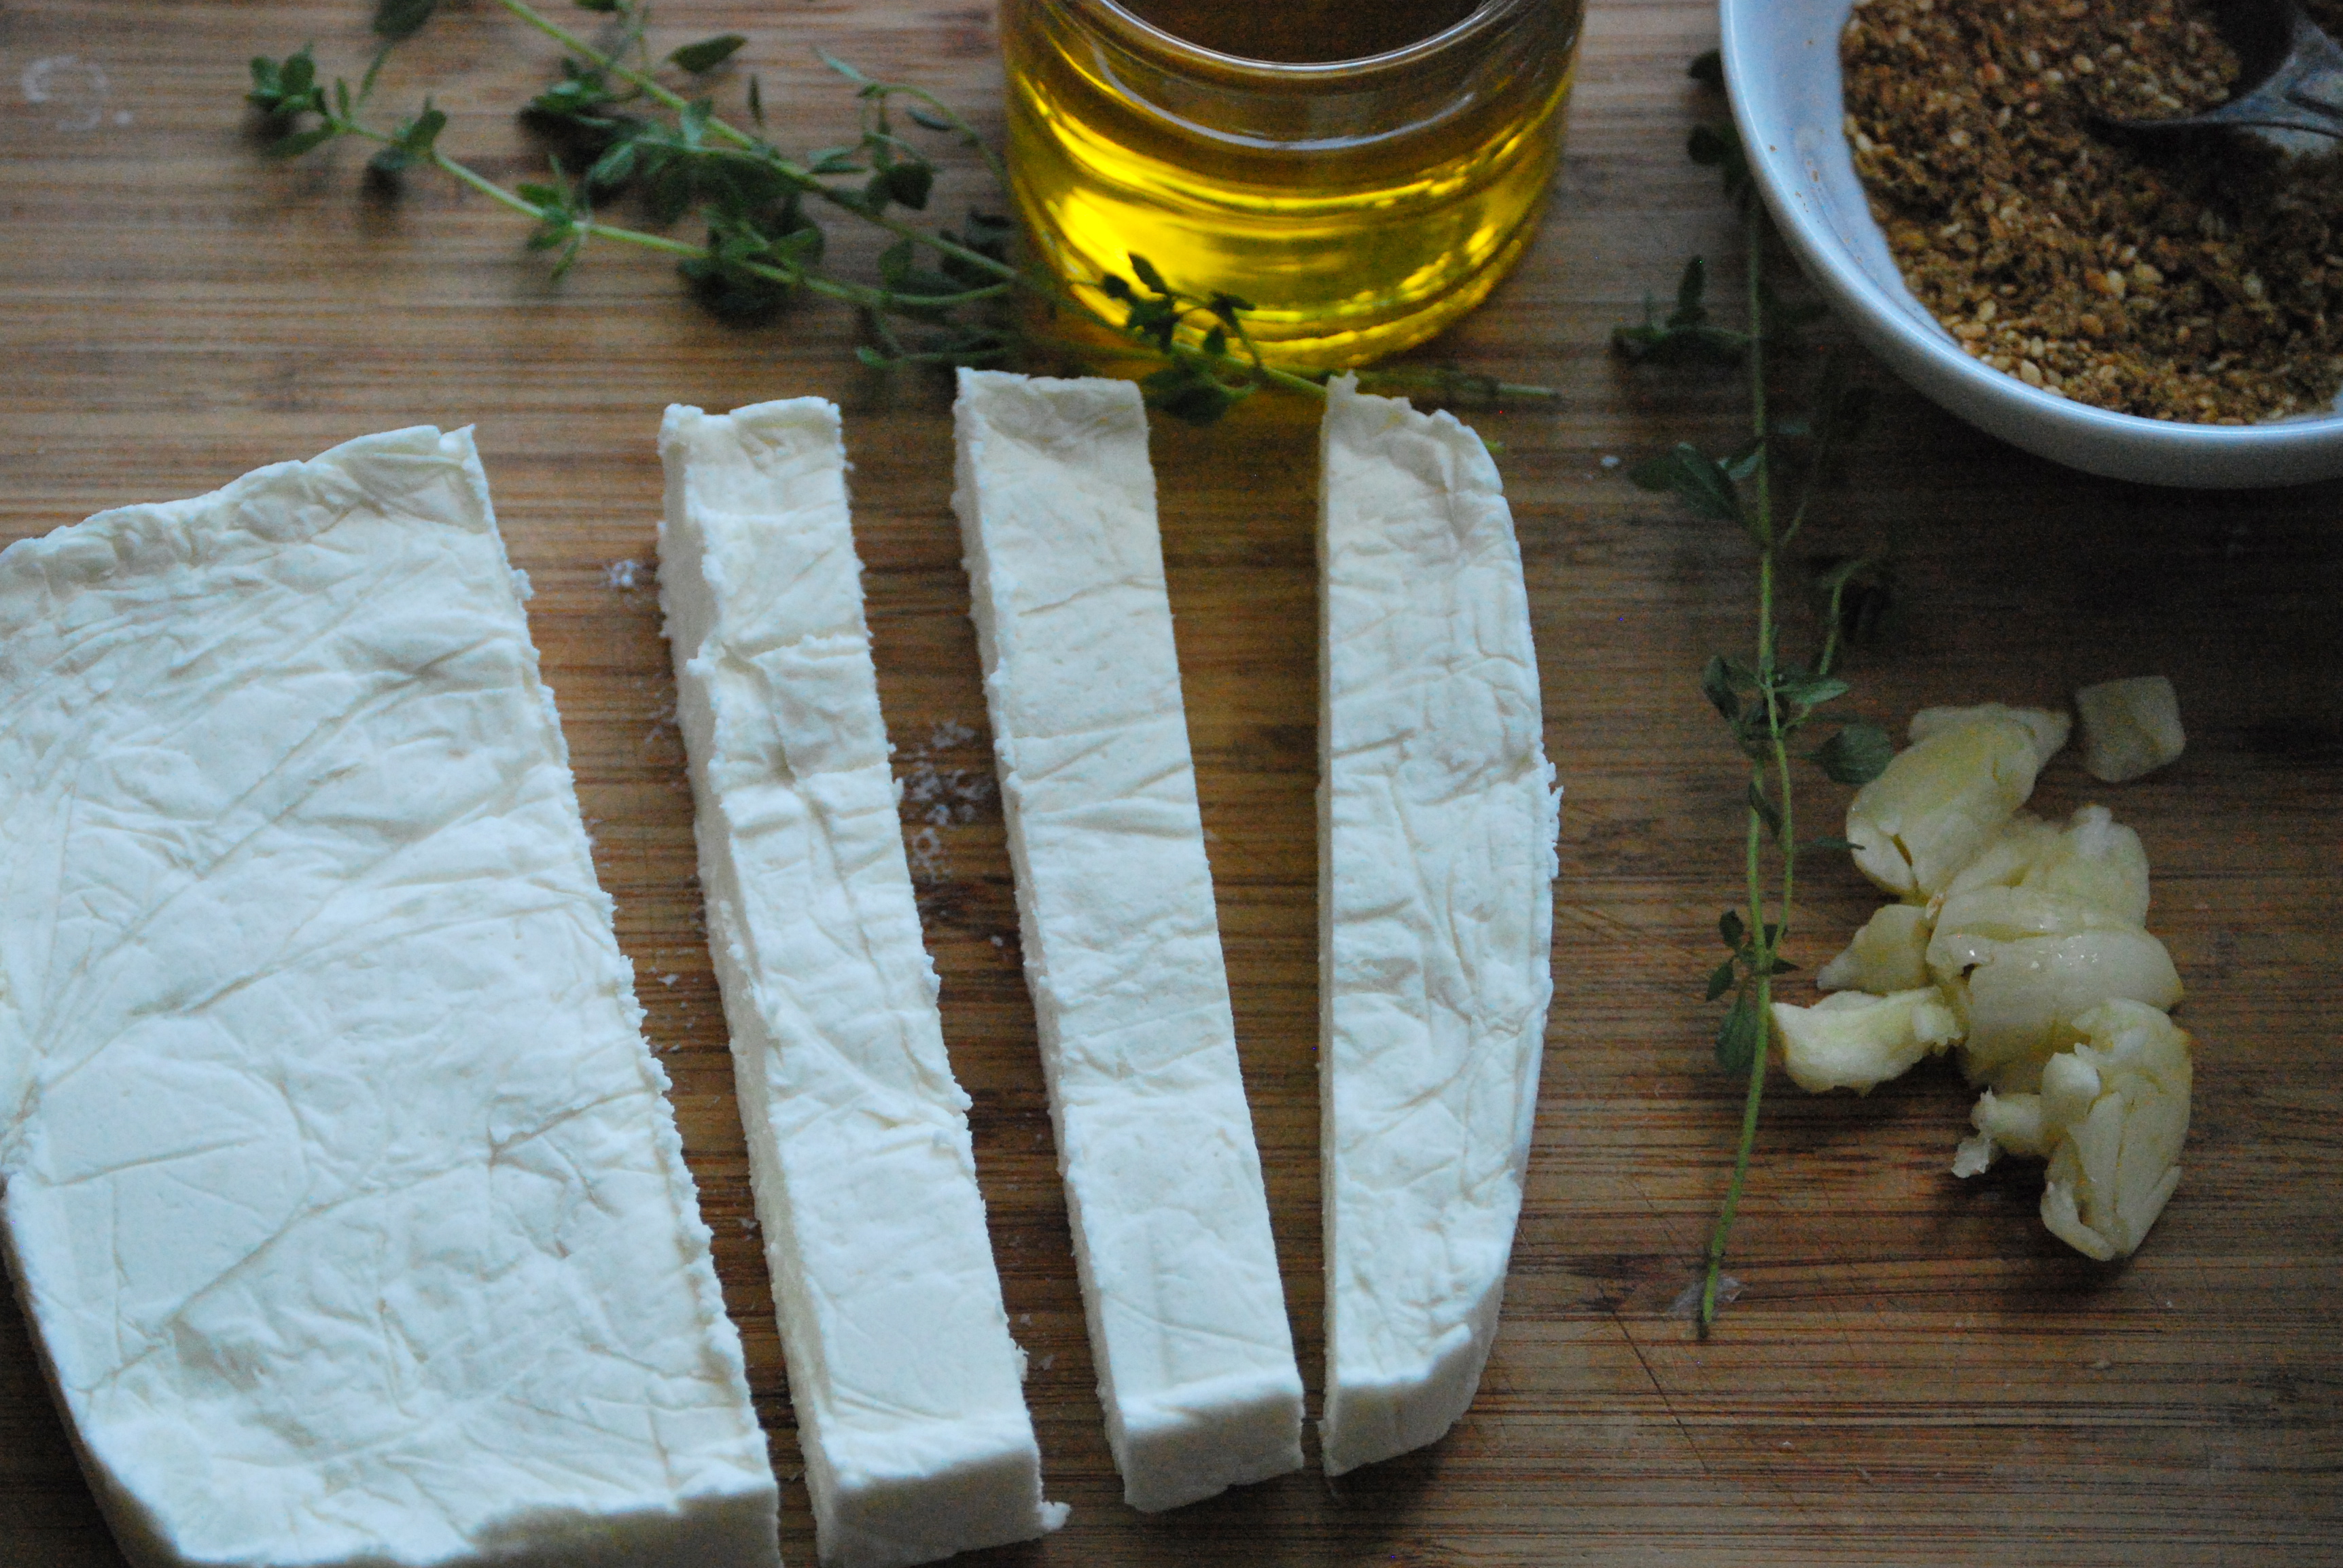
To make the cheese:  Using a food processor, (or a bowl and wooden spoon) combine the feta and cream cheese until somewhat smooth.  It’s ok to have some chunks of feta.  Line a container that will hold the amount of cheese you have with plastic wrap.  I used a square food storage container (or place it on parchment paper and roll it into a tight log).  Fold the plastic wrap over the cheese so that it is entirely covered and gently push down– you want the cheese to become firm.  Find something to weight it down a bit (I actually ended up using some of my kids’ building blocks– they fit perfectly).  Then place a plate on top of that.  The goal is to compress the cheese as much as possible.  Place everything into the refrigerator for at least an hour to firm it up.

Remove the cheese from the container by gently lifting out the plastic wrap.  Cut it into bit-sized squares.  Place the cheese into a glass jar and top with the lemon zest, garlic, spices, herbs, and finally the olive oil.  Gently swirl the mixture around to make sure everything get coated.  If all of your cheese isn’t fully covered, add a bit more olive oil.  Cover and place into the refrigerator and let marinate for about three days and up to two weeks.

To make the Simple Fougasse:  Pre-heat your oven to 500°F.  Place a baking stone in it and let it heat for about 1/2 hour.  Sprinkle a work surface with semolina or all-purpose flour (semolina will not stick to the bread as much when baked).  Roll out a piece of the dough so that the size can fit on your stone.  Cut about 4 slits on each side into it with a sharp knife (see photo).  You may need to tug at the slits a bit, so they become a bit larger and more oval.   Sprinkle more flour on the back of a baking sheet or a pizza wheel.  Gently pick up the dough and place it on the sheet.  Make sure you are able to move it around freely, if not, add more flour underneath it– you want the dough to easily glide off the pan and onto the stone.  Brush olive oil onto the dough, then sprinkle with the spices.  Starting in the back of the stone, quickly and confidently glide the dough onto the stone from the pan.  Bake for just a few minutes (maybe 10, but it really depends on your oven– so keep a watchful eye) or until the bread looks to be a deep golden brown.  Remove from oven.  Enjoy with the spice-marinated feta cheese and some delicious olives!

Source:  Spice-Marinated Feta adapted from Mark Bittman’s How to Cook Everything Vegetarian

Thanks so much for stopping by today– have a wonderful weekend!  xo

Laurie

Read Full Post »

I guess I’m a liar.  I promised you greens and healthy fare this week, and instead I’m delivering cream and sugar.  I am the worst.  But it is nearly Summer after all, so why not get a little excited for homemade ice cream?  While strolling through a neighborhood garage sale a few weeks back I stumbled across a Krups ice cream maker.  For me, this was like striking gold.  Cool, creamy, delicoius gold.  You see, I’ve been wanting an ice cream maker for some time.  I had a chance to use a friend’s a few times and fell in love with the whole process.  So I gave the ice cream maker a home in my kitchen, and began to dream up flavor combinations.  The one criteria was that I wanted to make something that I couldn’t easily find in a grocery store.  I wanted something unique enough to be worth the effort.

Now to be honest, this peach cheesecake version wasn’t exactly what I had in mind.  In fact, it wasn’t even on the list.  This was just going to be a test-run using what I had on hand.  I always have cream cheese, and I knew there were gingersnaps in the pantry.  And there on my counter, were three lonely peaches.  You know the type– they were too hard to eat the first day, we forgot about them on day two, and by day three they were…past their prime, shall we say.  Like I said, this was going to be a test-run.

Well it turns out that my little cobbled-together recipe is dreamy.  The ice cream has a lovely, subtle, peach flavor.  If you want a more powerful fruit flavor, you’ll need to add another peach.  I wasn’t sure the cream cheese was going to work, since it wasn’t going to be perfectly smooth, but it ended up being my favorite addition.  There are wonderful little tidbits of cream cheese speckled throughout the peach and vanilla custard that give this a real cheesecake flavor.  The gingersnaps bring their little crunch for additional texture, and the flavor really marries well with the peach.  As with pretty much all of my recipes, I used the best organic ingredients I could find.  Hope you enjoy the ice cream– and eat a few vegetables before you indulge.

The Recipe:  Peach Cheesecake Ice Cream

(Makes a bit more than 1 quart)

2 cups heavy cream

1 cup 2% milk

5 egg yolks

1 vanilla bean

3 peaches, puréed to yield 2/3 cup

squeeze of lemon

1/2 cup granulated sugar

1/4 cup brown sugar, not overly packed

4 ounces cream cheese, at room temperature, and softened/mashed with a fork

1/2 cup chopped ginger snaps

kosher salt, to taste

To make the custard:  Add 1 cup of the cream, milk, brown sugar, granulated sugar, a healthy pinch of kosher salt, and the vanilla bean to a medium sized saucepan over medium-high heat.  Make sure to split the vanilla bean and scrape out the seeds with a sharp knife.  Add both the seeds and the pod to the saucepan.  Stir frequently to help dissolve the sugars.  Cook for about 3-4 minutes, or until tiny bubbles form around the pan.  Turn off the heat and let the mixture infuse for 1 hour.

In the meantime, peel and quarter the peaches.  Place them in a steamer basket in a medium saucepan over medium-high heat.  Let them steam until they are soft, about 2-3 minutes.  Place them in a small mini-processor with a squeeze of lemon.  Blend until smooth.  Let cool.

When the hour is nearly over, prepare an ice bath by placing a large bowl with ice and water in it, then place a medium -sized bowl into that one.  Pour the remaining cup of cream into the bowl so it becomes very cold.  This will help the custard cool more quickly.

Re-warm the cream mixture until tiny bubbles begin to form around the edge.  Remove from heat.  In a steady stream, pour half of the warm mixture into a bowl containing the egg yolks to temper them, whisking them the entire time.  Then pour that mixture back into the saucepan and cook over low heat.  Stir constantly and scrape the bottom with a wooden spoon or rubber spatula.  Cook until the mixture thickens slightly , coats the back of a utensil, and can hold a line drawn through it with a finger, about 4-8 minutes.  A thermometer will read 175°-180°F.  Do not let the mixture boil or it will curdle.

With a mesh strainer positioned over the bowl of cream in the ice bath, pour the hot mixture into it.  Stir the mixture until it cools to  70°F.  Add the peach purée and the softened cream cheese to the bowl. Use a whisk to mostly incorporate the cream cheese.  Some small bits that remain are perfect.  Then put the mixture into the refrigerator for 4 hours to cool.  Now it’s ready for your ice cream maker.  Follow the manufacturer’s instructions.  Mix the crushed gingersnaps into the churned ice cream.  Put into the freezer to fully set.  This ice cream is best if let to warm a few minutes before serving.  Enjoy!

Source:  Adapted from David Lebovitz’s The Perfect Scoop and Melissa Clark’s Cook This Now

Thanks for stopping by!

Laurie

Read Full Post »

Yeah, you read correctly.  I’ve decided to class this place up with a chip dip recipe that has a swear word in the title.  We’re talking very sophisticated gourmet fare here.  Alright, this post isn’t exactly champagne and gougéres, but in the right environment there’s no better snack than Kick-Ass Dip.  Why is it called ‘Kick-Ass’?  Well, because it’s that damn good.  This is one of those recipes that somehow emerged, fully-formed, from our college years.  We’ve been making it for years– from Super Bowl gatherings to our pre-children New Year’s Eve parties.  And this dip is always a huge hit.  Always.  I’m not going to try to convince you that this is, in any way, healthy.  But take a look at the ingredient list.  It’s not as bad as you might think.  And anyway, once in awhile you just need salty chips and dip.

The combination of flavors here is genius.  The spiced sausage and silky cream cheese are wonderful.  There are also those tomatoes with the nice kick of green chilies, and my favorite part of the dip– the corn kernels.  They’re slightly sweet, and stay just firm enough to add nice texture.  And it’s all brought together by fresh, brilliant cilantro.  Open a cold beer, pull the chips close, and enjoy.   If you plan on getting together with friends for the Super Bowl, or any other event where you park it in front of the television, get this dip simmering in your crockpot.  You’ll end up passing the recipe on to others, because it really does kick ass.

The Recipe:  Kick-Ass Dip

2  – 8 ounce packages of cream cheese

1 pound ground mild breakfast sausage

1 pound ground spicy breakfast sausage

2 – 10 ounce cans of Original Ro-Tel tomatoes with green chilies (do not drain)

2 cups frozen corn

1/4 cup chopped fresh cilantro

In a large skillet over medium heat, brown the breakfast sausage until cooked through.  Drain the grease.  In a large crockpot, combine the cream cheese and tomatoes.  If your crockpot has a removable stone,  I usually microwave the tomatoes and cream cheese for about 3-5 minutes, until it has melted.  Stirring occasionally.  If it doesn’t have a removable stone, just continue with the recipe.  Add the breakfast sausage, corn, and cilantro to the crockpot.  Cook on high until the mixture is very hot and bubbly, about 1 hour,  stirring often (and trying to snitch very little — good luck with that).  Reduce heat to low and enjoy with loads of chips and many friends!

Hope you all have a wonderful and fun-filled weekend!

Laurie

Join me on Twitter!

Read Full Post »

Thanksgiving is just a week away, but fear not, I’m here to help with your holiday dessert decisions.  This Brown Butter Pumpkin Layer Cake is the answer– trust me.  You already know that we’re a cake-crazy family (just take a look under the recipe section if you need proof), but this is one of our all-time favorites.  I’ve already made it several times this year– most recently for my husband’s birthday a week ago.  It’s beautiful, tastes as good as it looks, and screams ‘celebration’.  Why fall back on the old standards of pumpkin or apple pie, when you can end your Thanksgiving meal with this stunner?

The key component in this cake is brown butter.  I’m of the opinion that it makes everything better.  Brown butter has a complex, nutty, almost caramel-like flavor.  Here, you’ll find it in both the cake and the frosting.  It adds those wonderful, layered flavors that set this cake apart from a typical pumpkin dessert.  And then there’s the nuts.  I’ve topped this cake with a mountain of pecans, pepitas, and ginger– all enveloped by melted brown sugar.  Sublime.  If you don’t want  as many nuts on your cake (what’s wrong with you?), you can half the amounts and sprinkle them in a circle design on top.  I like the grandness of  the big pile on top, plus they’re an addictive snack that you’ll munch on as you assemble this beauty.

I’ve always made this cake with a homemade pumpkin puree.  Aside from the freshness of doing it this way, it’s rewarding to do something with all of those pumpkins that have been decorating the house.  If you have too many things on your plate (yes, I realize that’s a poor pun), feel free to use canned pumpkin puree.  As always, try to use organic and make sure it contains only pureed pumpkin.  Make this cake, and you’ll impress your guests– I promise.

The Recipe: Brown Butter Pumpkin Layer Cake

For the Puree

1 medium-large Sugar Pie pumpkin, cut in half and seeded  (large enough to yield 1 1/2 cups of puree)

For the Cake

6 ounces (3/4 cup) unsalted butter; plus more for pans

9 ounces (2 cups) unbleached all-purpose flour; plus more for pans

1 1/2 teaspoon baking soda

1 1/2 teaspoon ground cinnamon

1 teaspoon ground ginger

1 1/2 teaspoon kosher salt

1/4 teaspoon ground cloves

1 1/2 cups granulated sugar

2/3 cup firmly packed light brown sugar

2 large eggs, at room temperature

1/3 cup buttermilk  (Note: to make your own add 1 teaspoon white vinegar to 1/3 cup milk and let stand for 10 minutes)

For the Topping:

3 tablespoons unsalted butter

1 1/3 cups pecans halves

1 cup roasted and salted pepitas (raw and unsalted will work, too — just toast them a bit more with the pecans)

4 tablespoons firmly packed light brown sugar

3/4 teaspoon kosher salt

3 tablespoons chopped crystallized ginger

For the Frosting

4 ounces (1/2 cup) unsalted butter

8 ounces cream cheese, at room temperature

1/4 cup firmly packed light brown sugar

5 ounces (1 1/4 cups) confectioners’ sugar

To make the Pumpkin Puree:  Preheat oven to 350°F.  Position racks in the center of oven.  Place pumpkin in a baking dish covered with lid or aluminum foil and bake for about 40 minutes, or until tender when pierced with a fork.  Let cool.  Scoop pumpkin flesh into a food processor and puree until smooth.  You will need 1 1/2 cups of puree for the cake.  Refrigerate or freeze any leftovers.

Preheat oven to 350°F.  Position rack in the center of the oven.  Prepare two 9-inch round cake pans by buttering them liberally, lining with parchment paper, buttering once again, and flouring the pans.  Make sure to tap out any excess flour.

To make the Cake: Melt the butter in a heavy-bottomed 1-quart saucepan over medium heat.  Swirl the butter occasionally until the butter turns a nutty golden-brown, about 4 minutes.  Pour into a small bowl and let stand until cool but not set, about 15 minutes.

In a medium bowl, whisk the flour, baking soda, cinnamon, ginger, salt, and cloves.  In a large bowl, whisk 1  1/2 cups of the pumpkin puree with the granulated sugar, brown sugar, eggs, and buttermilk until blended well.  Using a rubber spatula, fold in the flour mixture until just combined.  Gently whisk in the brown butter until fully incorporated.  Divide the batter evenly between the prepared pans.

Bake the cakes until the a tester inserted in the center comes out clean, about 25-30 minutes.  Let the cakes cool in pans for 10 minutes.  Turn the cakes out onto racks, remove parchment paper, and cool completely.

Make the Topping: Melt the butter in a large 12-inch skillet.  Add the pecans and cook until they brown slightly, about 2 minutes.  Sprinkle in the brown sugar, pepitas, and salt and stir until the sugar melts and the nuts are glazed, about 2 minutes.  Stir in the ginger.  Remove from heat and let cool in skillet.

To make the Frosting: Melt the butter in a heavy-bottomed 1-quart saucepan over medium heat.  Swirl the butter occasionally until the butter turns a nutty golden-brown, about 4 minutes.  Pout into a small bowl and let stand until all of the brown solids settle to the bottom of the bowl, about 5 minutes.  Carefully transfer bowl to freezer and chill until just firm, about 18 minutes.  Using a spoon, carefully scrape the butter from bowl, leaving behind the brown solid bits.  Discard the brown bits.

Using a stand mixer fitted with the whisk attachment, beat the butter, cream cheese, and brown sugar on medium-high speed until light in color and the brown sugar has dissolved, about 2 minutes.  Gradually beat in the confectioners’ sugar and continue to beat until light and fluffy, about 1-2 more minutes.

To assemble the Cake: Place one layer of cake on a cake plate.  Spread 1/2 cup of frosting on it.  Sprinkle 3/4 cup (scant) of the nut mixture (rough chop this small amount, so it stays in the cake better) over the frosting and top with another layer of cake.  Frost the top and sides of cake and place remaining nut mixture on the top.  Serve immediately or refrigerate.  Serve at room temperature.  Will keep well for a few days.  Enjoy!

Source:  Adapted from Fine Cooking Magazine, Oct/Nov 2010

Thanks so much for stopping by today!

Laurie

Read Full Post »

First, a warning:  this is an overly-enthusiastic blog post today because…IT IS MY BIRTHDAY!  That’s right, I still get REALLY excited about my birthday.  Even though I’m clinging to my mid-thirties, like a child I still get giddy whenever August 26th rolls around.  I look forward to the phone calls with my family and friends.  I wait for the e-mails, cards, and Facebook wishes.  I love it all.

Now a second warning:  I’m going to get a bit sentimental.  The truth is, I still love my birthday so much because I look back on my life thus far, and forward to another wonderful year.  I’m so fortunate to be married to my wonderful husband, and I have two beautiful children.  I had the benefit of growing up in a loving family and then marry into another.  Thanks for having me, Mom and Dad.  Here’s to many more great years!

So what about the food?  Rather than make a birthday cake, I decided to go with one of my all-time favorites.  This carrot cake is easily one of the best I’ve ever eaten.  After giving my neighbors a sample, they agreed that this is as good as carrot cake gets.  It has the perfect amount of nuts– they provide just enough texture and flavor without overwhelming the dessert.  It has no raisins, which, to be honest, I don’t really miss.  The cake is dense, as you’d expect, but not heavy– in short, it’s perfect.  The two secrets to this cake are oranges and limes.  Freshly-squeezed orange juice and a little zest really add a fragrant punch, while the icing– laced with lime juice and zest– make it unforgettable.

The Recipe: Carrot Cake with Lime Mascarpone Icing

For the Cake:

1 1/4 cups unsalted butter, softened

2 cups light brown sugar

5 large free-range or organic eggs, separated

zest and juice of 1 orange

1 1/2 cups of self-rising flour, sifted

1 heaping teaspoon baking powder

1 cup ground almonds

4 ounces / 1 cup chopped walnuts, toasted, plus more for topping the cake

1 heaping teaspoon ground cinnamon

1/4 teaspoon ground cloves

a pinch of freshly ground nutmeg

1/2 teaspoon ground ginger

10 ounces/ 3 cups organic carrots, peeled and coarsely grated

pinch of kosher salt

For the Lime Mascarpone Icing:

4 ounces mascarpone cheese

8 ounces full-fat cream cheese

1 cup confectioners’ sugar, sifted

zest and juice of 1 lime

Preheat oven to 350°F.  Grease and line with parchment paper a 9 – inch square or round cake pan.  (Note:  I used mini-loaf pans and yielded 6).  Beat the butter and sugar together by hand or using a stand mixer until pale and fluffy.  Beat in the egg yolks one at a time and add the orange zest and juice.  Gently stir in the sifted flour and baking powder, and add the ground almonds, walnuts, spices and the grated carrots.  Mix together well.

In a separate bowl, whisk the egg whites with a pinch of salt until stiff, then gently fold them into the cake mix.  Scoop the batter into the prepared cake pan and bake for about 50 minutes (less if using the mini-loaf pans) until golden and risen.  To check cake using a toothpick, insert into cake for 5 seconds — it’s done when it comes out clean.  If it feels sticky, bake a bit longer.  Let cake cool in pan for 10 minutes.  Turn out onto a cooling rack and let cool completely.

To make the icing: mix all of the ingredients except the lime juice together.  Carefully add 1 teaspoon at a time.  Making sure the icing doesn’t get too thin.  Spread generously on the cake and top with walnuts.  Enjoy!

Source:  Adapted from Jamie Oliver’s Cook With Jamie Cookbook

Thanks again for stopping by Relishing It today.  I hope you all have a wonderful weekend — I know I will.

Laurie

Follow me on Twitter

Read Full Post »

Happy Spring to all!  It was such a lovely Monday in St. Paul.  The snow is melting and I can actually smell the “earthiness” as everything thaws.  Hopefully we’ve seen the last of the weekly snowfall that has blanketed the Upper Midwest for months.  (Ha!  After I posted this it started snowing and continued through the night.  Did I just curse us with another foot of snow?– Ed.)

I’ve had an amazing week– not earth-shattering, but exciting in my little world.  I finally committed to a MN Food Bloggers event.  It took place at Corner Table in Minneapolis.  Forty food bloggers were guests to Chef Scott Pampuch in his beautiful “farm to table” restaurant.  Scott is a chef with big ideas.  He’s taking things beyond supporting local, sustainable food in the running of his business.  Along with offering cooking and teaching classes, he’s also the founder of “tour de farm“.  This concept has people travel to local farms to get involved in and enjoy farm-to-table food production and preparation.  He recently launched a new “Farm and Table CSK (community-supported kitchen) Box”, as well.  It’s similar to a CSA (community-supported agriculture), but contains various meats, sides, mirepoix, and stocks.  The idea is basically to help you get local farm raised meat to your table.  It’s a nice addition to your CSA box or farmers’ market produce.

I loved being surrounded by so many amazing people who are not only involved in food blogging, but who also share my philosophy on food production and preparation.  It really helped validate what I’m trying to do through this site.  I’m looking forward to many more get-togethers with these kind, supportive foodies.  (I’m also looking forward to more flutes of Brut Cava).  A special thanks goes out to Stephanie Meyer for organizing the event.

Now to the topic at hand.  Killer Chocolate Cupcakes.  Why Killer?  Because it sounds better than the ol’  “Devil’s Food”, which is what they originally started as.  Then I tweaked them a little a lot.  The result is honestly “killer”.  They’re that good.  My husband says they might be the best cupcakes he’s ever eaten, and we did a cupcake tour of nearly every bakery in the Twin Cities this past summer.  How about that!  They combine the ideal amount of chocolate with a rich cream-cheese frosting.  They are made with cake flour– rather than all-purpose flour– which gives them a soft, tender texture.  That’s not to say that they’re not good, solid cupcakes.  These little numbers are still dense enough to compliment the thick, heavenly frosting.  Hope you enjoy them!

The Recipe: Killer Chocolate Cupcakes with Cream Cheese Frosting

Cupcakes:

1/2 cup natural unsweetened cocoa powder

2 ounces high-quality semi-sweet chocolate (60% cacao works great), chopped

1/2 cup strong, very hot coffee

1/2 cup sour cream

1 cup cake flour

3/4 teaspoon baking soda

3/4 teaspoon kosher salt

2/3 cup (packed) dark brown sugar

1/2 cup vegetable or corn oil

1/2 cup granulated sugar

2 large eggs, room temperature

1 teaspoon vanilla extract

Frosting:

1  –  8 ounce package cream cheese, room temperature

8 tablespoons (1 stick) unsalted butter, room temperature

1 cup confectioners’ sugar, sifted

1 teaspoon vanilla

For the Cupcakes: Preheat oven to 350°.  Line 16-18 standard (1/3 cup) muffin cups with paper liners.  Spray with non-stick spray. Combine cocoa powder and chocolate in medium bowl.  Pour 1/2 cup hot coffee over; whisk until smooth.  Whisk in sour cream.

Whisk flour, baking soda, and salt in another medium bowl to blend.  Using electric mixer, beat brown sugar, oil, granulated sugar, eggs, and vanilla in large bowl until light and creamy, about 2 minutes.  Beat in flour mixture, alternating with chocolate mixture in 2 additions. Careful not to over-mix.  Divide batter among paper liners.

Bake until tester inserted into center comes out with some crumbs attached, about 16-18 minutes.  Cool in pans for about 10 minutes.  Transfer cupcakes to cooling racks and cool completely.

For the frosting:  Combine cream cheese and butter in a bowl for an electric mixer.  Beat on high until light and fluffy, a couple of minutes.  Add the sifted confectioners’ sugar and vanilla and beat on low at first, then increase to high.  When frosting is light and airy — it is ready to put on top of the cupcakes.  Of course, sprinkles add a lovely touch!

Source for cupcakes:  Adapted from Bon Appetit Desserts Cookbook

One more thought– thank you all for the wonderful and supportive comments last week.  I appreciated each and every one of them, and would love to hear if any of you made the tart.  Have a fantastic week!

Laurie

Read Full Post »

%d bloggers like this: