Feeds:
Posts
Comments

Posts Tagged ‘Spread’

Homemade Cultured Butter via Relishing It

The first time I made homemade butter I was eight years old.  I distinctly recall sitting in a circle with my classmates in Mrs. Peterson’s second-grade class.  We passed around a quart jar filled with fresh cream from a fourth-grade girl’s family dairy farm.  Each student shook the jar to exhaustion, and then passed it to the next.  Hand-to-hand, that jar moved around the circle until it suddenly transformed.  Mrs. Peterson spread a bit of that golden butter onto a saltine cracker for each of us to try.  It was amazing!

Homemade Cultured Butter via Relishing it

Homemade Cultured Butter via Relishing It

I still make homemade butter, though not nearly as often as I should.  And every time I do, I’m reminded of that first experience, and how incredibly simple it is.  You can either shake it in a jar, like I did that first time, but if you have a stand mixer you’ll find it’s even easier.  Really good store-bought butter is expensive, so it’s nice to be able to make my own.  My version is an organic, grass-fed cow, European-style (meaning it has a higher fat/less water content than traditional American butter).  It’s also cultured, which means it has a bit of a tangy flavor.  I add a little whole milk yogurt to the cream to achieve this.  You can control the level of  tanginess by varying how long you leave the mixture out at room temperature.  It’s that simple.

Homemade Cultured Butter via Relishing It

Homemade Cultured Butter via Relishing it

As always, use the best possible ingredients you can find.  Cream that hasn’t been ultra-pasteurized will give you the best result.  Though, if you don’t have access to such ingredients, give it a try anyway.  In Minnesota, my favorite cream comes from the Cedar Summit Farm.  Their products are organic, delicious, and they are the only 100 % grass-fed dairy in the state.  You may remember that I grew up on a small dairy farm, so I have a bit of a soft spot for a good one.  These guys are the real deal.

Homemade Cultured Butter via Relishing It

Homemade Cultured Butter via Relishing It

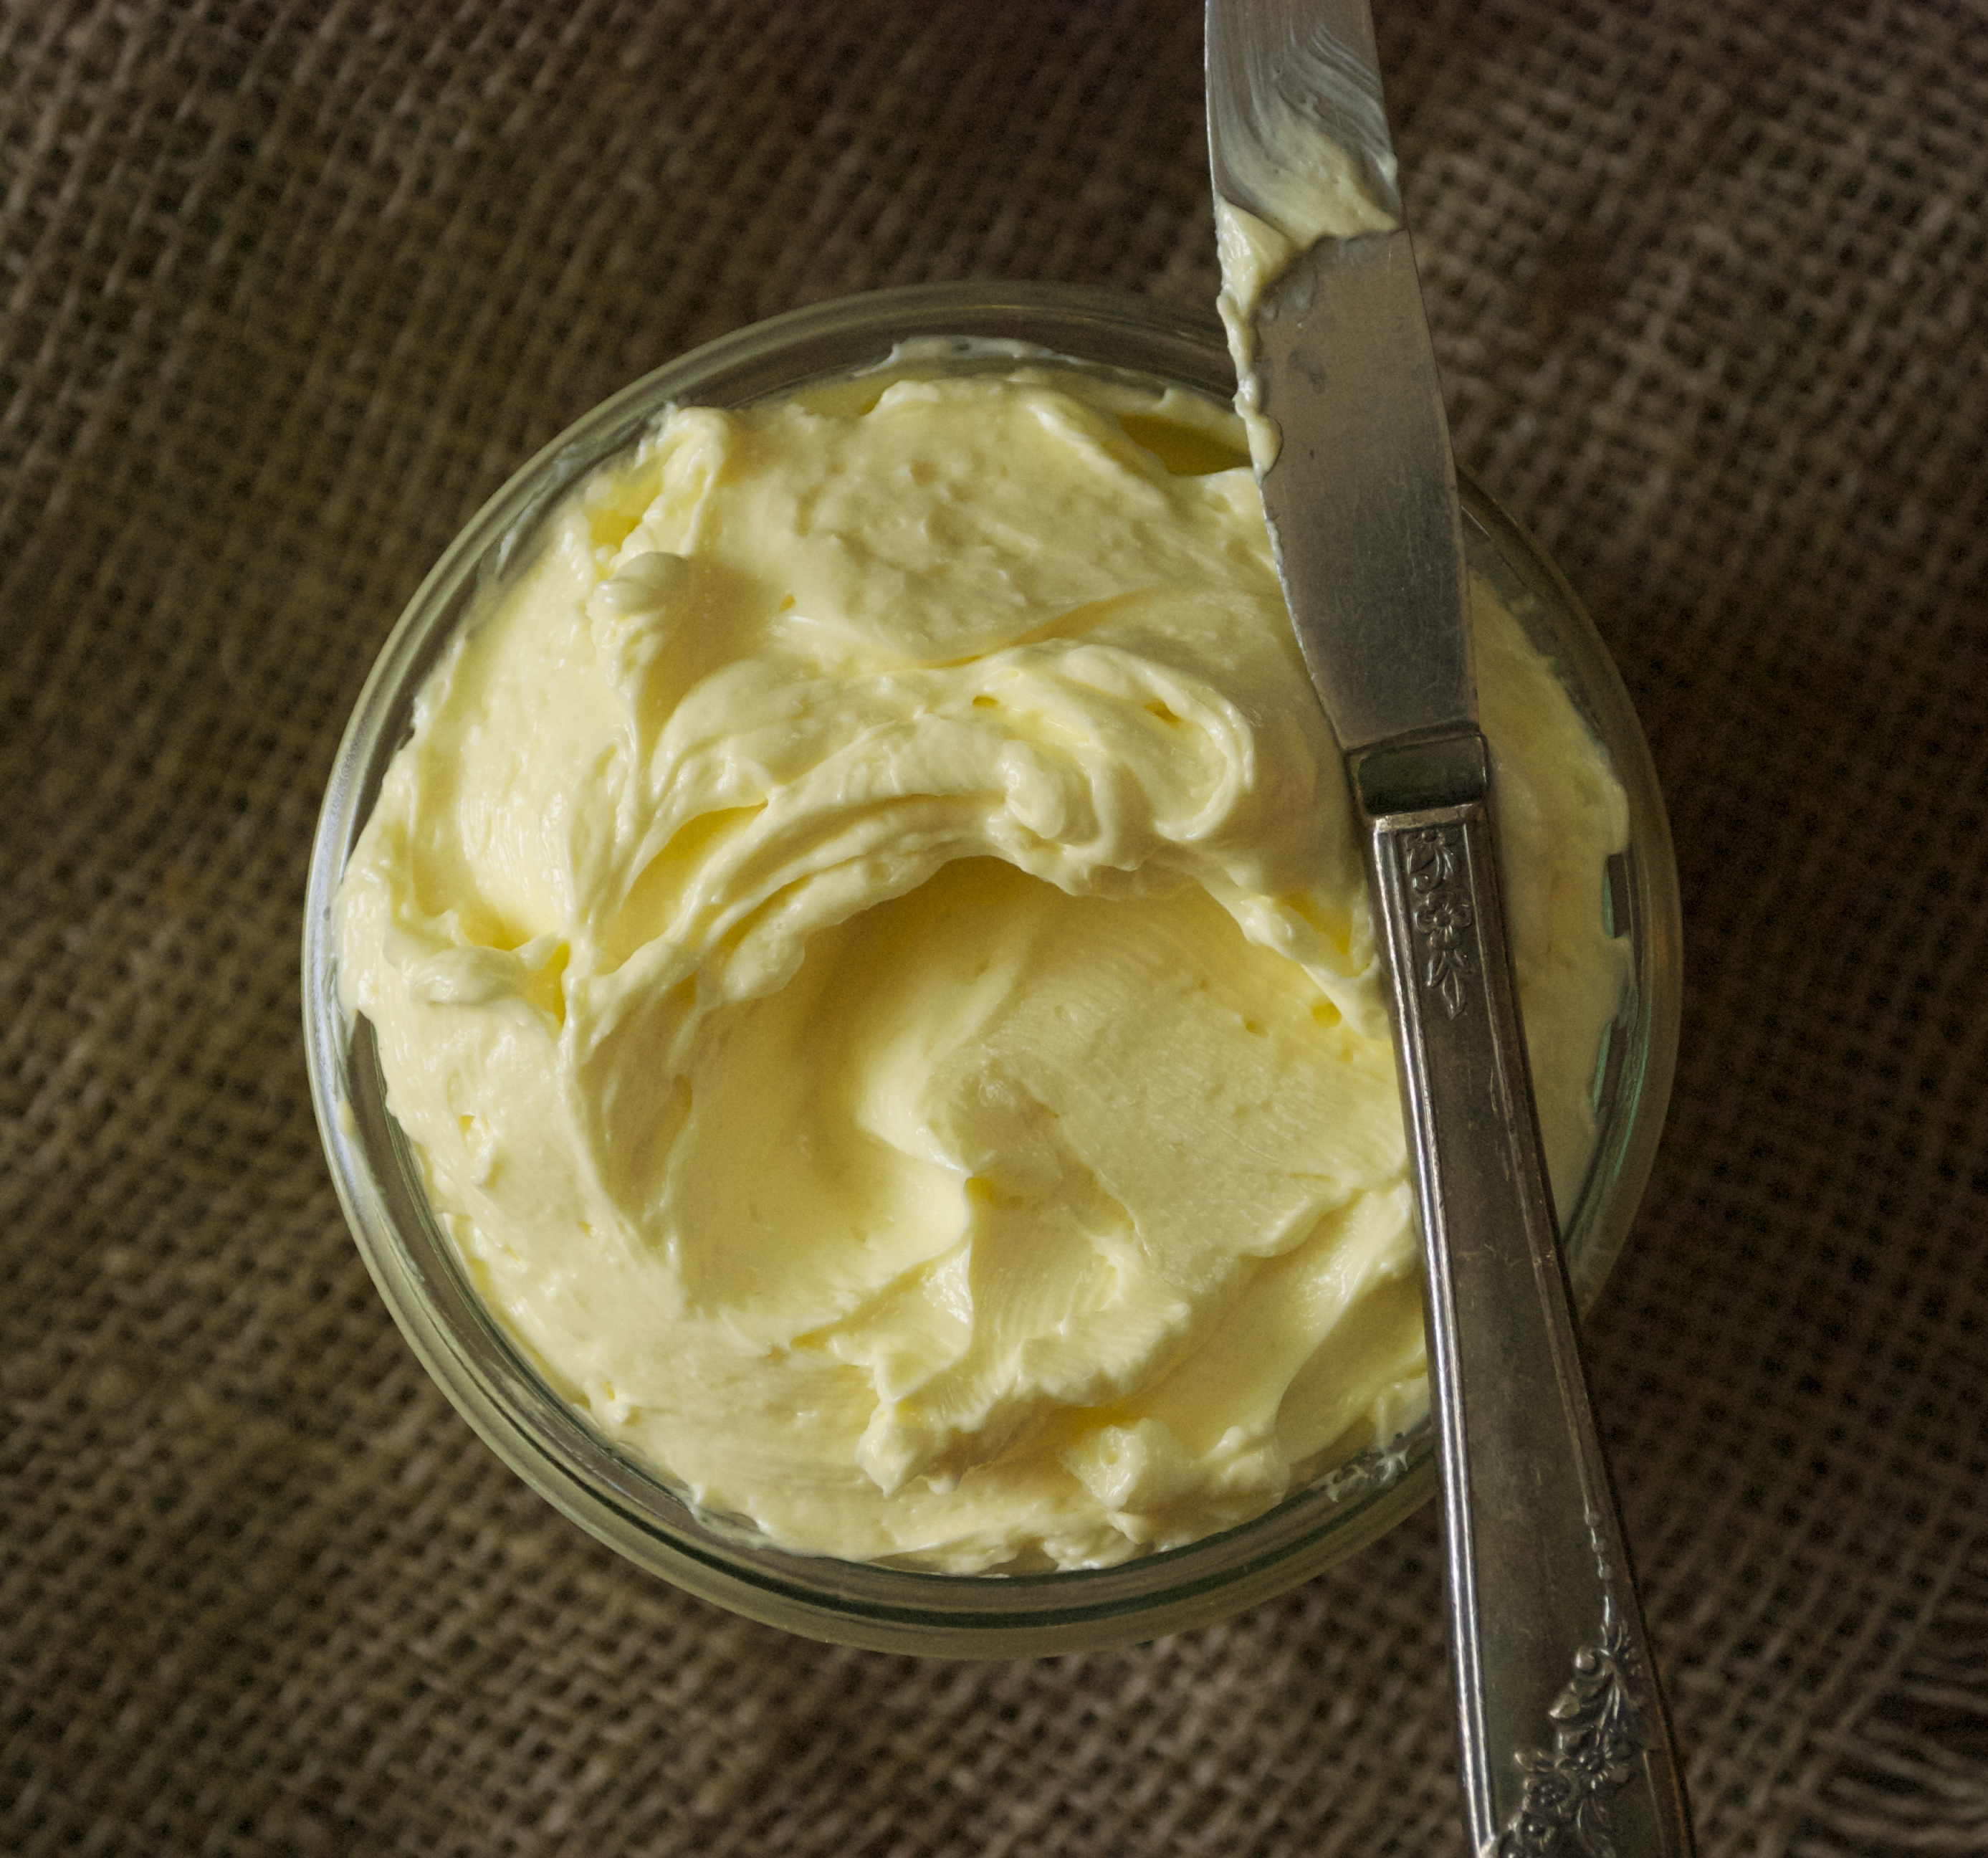
I prefer my cultured butter with a bit of sea salt.  Remember that your butter will last longer in the refrigerator with salt in it– it acts as a preservative.  Since the water content in this butter differs from regular varieties, it might be a good idea to not bake with it.  Instead, spread it on bread or fresh corn-on-the-cob and enjoy it’s unique, robust flavor.  I recently bought a flat of strawberries and made some jam.  It was absolutely heavenly swiping my piece of bread with butter and then spreading the strawberry jam on top.  Pure bliss.  Enjoy your butter making experience!

Homemade Cultured Butter via Relishing it

The Recipe:  Homemade Cultured Butter

1 pint good quality heavy cream, preferably organic and not ultra-pasteurized

2 tablespoons whole milk organic yogurt

1/2 teaspoon good sea salt, plus more to taste

In a large bowl, whisk the ingredients together and cover with a towel.  Let sit at room temperature until your desired level of tanginess is present, about 2 hours or longer.  When it tastes the way you prefer, pour the mixture into a stand mixer fitted with a paddle attachment, (or into a quart jar with a lid).  Turn the mixer on low.  Then wait and watch for a few minutes until the mixture first becomes somewhat fluffy and homogenous, and then starts to separate.  The buttermilk will separate from the cream.  Carefully pour that buttermilk into a container and save it.  It will be amazing used in your favorite pancake recipe.  Next, pour 1/2 cup of ice cold water into the butter and continue to mix.  Pour out the water and discard as it becomes cloudy.  Continue to do this until no buttermilk remains in the butter.  The whole process takes about 10-15 minutes.  Taste the butter and smooth out with a rubber spatula, add more sea salt, if desired.  The more salt in it, the longer it will keep in your refrigerator.  Enjoy!

Thanks for stopping by Relishing It!  Have a great weekend!

Laurie

Read Full Post »

Smashed Summer Pea Spread via Relishing It

I’ve mentioned here more than once that as the weather warms, I try to prepare more simple, fresh foods.  This spread is a perfect example.  I love peas.  Their slightly sweet flavor, that beautiful pop of color– they make every dish better.  When they start to become available at the local farmers markets, we eat them by the pound.  But– and here’s some real talk now– they rarely make it into a recipe.  By the time we’re done shelling them, they have been mostly eaten raw.  And if not, they’re a stand-alone side for our summer meals.  Here, I wanted to keep things simple, yet incorporate peas as the star ingredient.

Smashed Summer Pea Spread via Relishing It

Smashed Summer Pea Spread via Relishing It

For this dish I’ve added a few simple ingredients and a different style of preparation in order to turn ordinary peas into a delicious and healthy appetizer.  Sun-dried tomatoes, garlic, mint, and a bit of anchovy really work with the subtle flavor of peas. Don’t be scared of the anchovy– it adds depth, a bit of saltiness, but doesn’t taste fishy.  Add a few other nibbles, and you’ve got yourself a meal.  Make them with your freshly shelled peas, if you have them, or just rely on a bag of frozen organic ones from the freezer.  It just takes a few minutes from start to finish to get this delicious spread on the table.

Smashed Summer Pea Spread via Relishing It

Smashed Summer Pea Spread via Relishing It

My favorite way to serve this spread is on a grilled baguette brushed with olive oil and sprinkled with sea salt and black pepper.  It is heavenly.   And if you’re worried about the bread, no problem.  I also serve it along with other vegetables, including radishes and endive.  It’s brilliant.  As for the endive, if you’re not familiar with it, you should become so.  It’s a wonderful vegetable that is fantastic served with spreads– the shape makes it easy to fill.  It tastes great, and is a wonderful option if you are gluten-free or just trying not to consume as much wheat.  These smashed summer peas are a delicious healthy option for your 4th of July celebration (for my American friends) this weekend.   It’s easy to get caught up in the moment and over-indulge on chips, burgers, and all other sorts of less-healthy foods in the midst of celebrating.  With this on your table, you don’t have to worry about it.  Hope you enjoy!

Smashed Summer Pea Spread via Relishing It

Smashed Summer Pea Spread via Relishing It

The Recipe: Smashed Summer Pea Spread

10 ounces fresh or frozen organic peas (If using fresh, blanch for a minute or so.  If using frozen, just thaw)

2 garlic cloves, finely minced

3 large sun-dried tomatoes, minced

1-2 anchovies, finely minced

1/2 – 1 teaspoon kosher salt

juice of 1/4 small lemon

2 tablespoons extra virgin olive oil

4 large mint leaves, finely minced

In a medium-sized bowl, add the peas, garlic, anchovies, sun-dried tomatoes, lemon, salt, olive oil, and mint.  Using a potato masher or fork, smash the ingredients together.   The final texture is up to you.  I like it to be a little bit creamy, with definite chunks of ingredients within it.  Taste and re-season, if necessary.  Serve it with endive, radishes, and grilled bread.  Enjoy!

I hope you all have a wonderful and safe 4th of July!

Cheers!

Laurie

Read Full Post »

Homemade Harissa via Relishing It

If you’ve spent much time reading food blogs or magazines, you probably know what harissa is, but for those of you that don’t (Hi Dad!), let me fill you in.  Harissa is a North African condiment made mostly from peppers and spices.  And it is amazing.  Like a punch-of-flavor-to-your-tongue amazing.  It’s often found on Moroccan tagines, but I’ve found so many more day-to-day uses for it.  I love to slather it on sandwiches.  Try it on this meatloaf with a bit of mayonnaise and some hot peppers.  Heavenly.  It’s also fantastic on an egg sandwich where the yolk is still a bit oozy.  Crunchy salads, or paired with carrots– harissa transforms an ordinary meal into something divine.

Homemade Harissa via Relishing It

Lemon for Homemade Harissa via Relishing It

Homemade Harissa via Relishing It

Homemade Harissa via Relishing It

If you’ve been visiting Relishing It for awhile, or taken a stroll through the ‘menu’ section, you know that I love to make my own condiments.  It’s not difficult, and to be honest, they just taste better than those bottled versions that are mass manufactured and sit on the shelf for months.  This mustard, ketchup, and red curry paste are a few of my favorites.  Harissa isn’t quite so common, but there really are a ton of recipes out there, and they are all a bit different.  Some use tomatoes, some don’t.  Some use fresh herbs, others stick with dried spices.  For this harissa, I was looking for something a bit smokey, but not too spicey.  I also wanted it to have a fresh, herb flavor.  If you want more of a kick, you can simply add more cayenne pepper or choose a hotter variety of dried peppers for the base.  One nice thing about this recipe is that you can easily manipulate it to suit your own tastes.  For my  part, I think this one turned out perfectly, so I won’t be changing a thing.  Top your Harissa with a bit of olive oil to store in the refrigerator for an extended period of time, it should last a few months this way.  But…it won’t.  You’ll eat it up in no time.  It’s that good.  Hope you enjoy!

Homemade Harissa via Relishing It

Cheddar and Stout Meatloaf via Relishing It

The Ultimate Meatloaf Sandwich with Homemade Harissa via Relishing It

The Recipe:  Homemade Harissa

(Makes about 1 cup)

5 dried Ancho chile peppers

5 dried Guajillo chile peppers

3 cloves garlic, chopped

1 teaspoon cumin seed, toasted and ground with a mortar and pestle (or use the flat side of a large knife to smash them)

1 teaspoon coriander seed, toasted and ground with a mortar and pestle

2 teaspoons fresh lemon juice

2 tablespoons fresh parsley, chopped

2 tablespoons fresh cilantro, chopped

pinch of ground cayenne pepper, more to taste

3 tablespoons extra virgin olive oil

3 tablespoons champagne vinegar (white or red wine vinegar will also work)

1 tablespoon tomato paste

sea salt, cracked black pepper, to taste

3 tablespoons soaking liquid, or more, if needed

Place the dried peppers into a medium sized bowl.  Pour enough boiling water over them so they are covered.  Place a small plate on top of them to keep them submerged.  Cover the entire bowl with another larger plate, to keep the heat in.  Let sit for 1 hour.

When the peppers are soft, begin by reserving some of the soaking liquid.  Remove the peppers from the water.  Remove the stem and carefully dump out the seeds.  Place the peppers and the remaining ingredients into a food processor.  Process for a few minutes until completely smooth.  Taste.  Adjust seasonings and thickness, if necessary.  Store in a jar with a lid in the refrigerator.  Cover with a layer of olive oil, if intending to keep for an extended period of time (several months).  I don’t cover mine with olive oil, but I generally use it within a few weeks.  Enjoy the heck out of this!

Thanks for stopping by today, friends! xo

Laurie

Read Full Post »

%d bloggers like this: