Feeds:
Posts
Comments

Posts Tagged ‘Appetizer’

Smashed Summer Pea Spread via Relishing It

I’ve mentioned here more than once that as the weather warms, I try to prepare more simple, fresh foods.  This spread is a perfect example.  I love peas.  Their slightly sweet flavor, that beautiful pop of color– they make every dish better.  When they start to become available at the local farmers markets, we eat them by the pound.  But– and here’s some real talk now– they rarely make it into a recipe.  By the time we’re done shelling them, they have been mostly eaten raw.  And if not, they’re a stand-alone side for our summer meals.  Here, I wanted to keep things simple, yet incorporate peas as the star ingredient.

Smashed Summer Pea Spread via Relishing It

Smashed Summer Pea Spread via Relishing It

For this dish I’ve added a few simple ingredients and a different style of preparation in order to turn ordinary peas into a delicious and healthy appetizer.  Sun-dried tomatoes, garlic, mint, and a bit of anchovy really work with the subtle flavor of peas. Don’t be scared of the anchovy– it adds depth, a bit of saltiness, but doesn’t taste fishy.  Add a few other nibbles, and you’ve got yourself a meal.  Make them with your freshly shelled peas, if you have them, or just rely on a bag of frozen organic ones from the freezer.  It just takes a few minutes from start to finish to get this delicious spread on the table.

Smashed Summer Pea Spread via Relishing It

Smashed Summer Pea Spread via Relishing It

My favorite way to serve this spread is on a grilled baguette brushed with olive oil and sprinkled with sea salt and black pepper.  It is heavenly.   And if you’re worried about the bread, no problem.  I also serve it along with other vegetables, including radishes and endive.  It’s brilliant.  As for the endive, if you’re not familiar with it, you should become so.  It’s a wonderful vegetable that is fantastic served with spreads– the shape makes it easy to fill.  It tastes great, and is a wonderful option if you are gluten-free or just trying not to consume as much wheat.  These smashed summer peas are a delicious healthy option for your 4th of July celebration (for my American friends) this weekend.   It’s easy to get caught up in the moment and over-indulge on chips, burgers, and all other sorts of less-healthy foods in the midst of celebrating.  With this on your table, you don’t have to worry about it.  Hope you enjoy!

Smashed Summer Pea Spread via Relishing It

Smashed Summer Pea Spread via Relishing It

The Recipe: Smashed Summer Pea Spread

10 ounces fresh or frozen organic peas (If using fresh, blanch for a minute or so.  If using frozen, just thaw)

2 garlic cloves, finely minced

3 large sun-dried tomatoes, minced

1-2 anchovies, finely minced

1/2 – 1 teaspoon kosher salt

juice of 1/4 small lemon

2 tablespoons extra virgin olive oil

4 large mint leaves, finely minced

In a medium-sized bowl, add the peas, garlic, anchovies, sun-dried tomatoes, lemon, salt, olive oil, and mint.  Using a potato masher or fork, smash the ingredients together.   The final texture is up to you.  I like it to be a little bit creamy, with definite chunks of ingredients within it.  Taste and re-season, if necessary.  Serve it with endive, radishes, and grilled bread.  Enjoy!

I hope you all have a wonderful and safe 4th of July!

Cheers!

Laurie

Read Full Post »

Spice-Marinated Feta with Simple Fougasse via Relishing It

It’s that time of the year when we start to have people over for light spur-of-the-moment gatherings again.  Here in Minnesota, we slough-off the heavy jackets, start working in our yards, and finally get an opportuntity to visit with our neighbors after the long winter.  Yes, I’ve been banging the drum about how much I enjoy the colder months, but I also get excited to invite guests over to our backyard for drinks and appetizers once the weather warms.  Today’s recipe is a tasty combination of marinated cheeses and fougasse.  It’s perfect to serve with a cocktail or two while you’re visiting with friends.

Spice-Marinated Feta and Simple Fougasse via Relishing It

Spice-Marinated Feta with Simple Fougasse via Relishing It

Spice-Marinated Feta with Simple Fougasse via Relishing It

Spice-Marinated Feta with Simple Fougasse via Relishing It

It may look a little fussy to make, but I assure you, it’s simple.  All it takes is combining cheeses and marinating them in olive oil with some spices.  The result is a beautifully flavored cheese that is wonderful when paired with some bread and olives.  The longer it marinates, the more flavorful it becomes.  I pressed mine into a glass square food storage container, since I wanted square bites.  But when chilling the cheese initially, you can also roll it into a log form and then cut it into pieces right before marinating.  It can last in your refrigerator for about two weeks.  I chose feta, but if feta isn’t your deal, try goat cheese, ricotta salata, or even a sharp blue cheese.  If you choose to use something a bit softer, such as goat, you can omit the cream cheese and just increase the total amount to 12 ounces.  You get the idea.  You have a fair amount of leeway with the spices.  If you prefer the flavor of other combinations, give them a try.

Simple Fougasse via Relishing it

Spice-Marinated Feta with Simple Fougasse via Relishing It

Simple Fougasse via Relishing It

The bread is called fougasse.  This one is simple and may be a bit more crispy than traditional fougasse– which is fine with me.  I used the recipe from my favorite pizza crust (genius, right?), because I often have a bit leftover.  I’ve found that the longer the dough stays in the fridge, the more developed the flavor becomes.  I usually try to use it within two weeks, which timing-wise works out perfectly with the cheese.  Sit in the sunshine with your friends and neighbors and enjoy these fantastic nibbles.  Cheers!

Spice-Marinated Feta with Simple Fougasse via Relishing It

The Recipe:  Spice-Marinated Feta and Simple Fougasse

Spice -Marinated Feta:

7-8 ounces feta cheese (see note)

4 ounces cream cheese

zest of a medium organic lemon

3 garlic cloves, smashed

1 teaspoon sesame seeds, toasted

1 teaspoon cumin

1 teaspoon coriander

1 cup extra-virgin olive oil (California Olive Ranch is my go-to olive oil)

4-5 sprigs of fresh thyme

Simple Fougasse:

This pizza crust recipe, or use your favorite

Extra-virgin olive oil, for brushing

1 teaspoon cumin

1 teaspoon sesame seeds, toasted

1 teaspoon coriander

(Note:  As I mentioned previously, you can choose to substitute a different cheese for the feta.  Ricotta salata, blue, or goat are good choices.  If using something soft already, such as goat, omit the cream cheese and increase the total amount of cheese to 12 ounces.)

To make the cheese:  Using a food processor, (or a bowl and wooden spoon) combine the feta and cream cheese until somewhat smooth.  It’s ok to have some chunks of feta.  Line a container that will hold the amount of cheese you have with plastic wrap.  I used a square food storage container (or place it on parchment paper and roll it into a tight log).  Fold the plastic wrap over the cheese so that it is entirely covered and gently push down– you want the cheese to become firm.  Find something to weight it down a bit (I actually ended up using some of my kids’ building blocks– they fit perfectly).  Then place a plate on top of that.  The goal is to compress the cheese as much as possible.  Place everything into the refrigerator for at least an hour to firm it up.

Remove the cheese from the container by gently lifting out the plastic wrap.  Cut it into bit-sized squares.  Place the cheese into a glass jar and top with the lemon zest, garlic, spices, herbs, and finally the olive oil.  Gently swirl the mixture around to make sure everything get coated.  If all of your cheese isn’t fully covered, add a bit more olive oil.  Cover and place into the refrigerator and let marinate for about three days and up to two weeks.

To make the Simple Fougasse:  Pre-heat your oven to 500°F.  Place a baking stone in it and let it heat for about 1/2 hour.  Sprinkle a work surface with semolina or all-purpose flour (semolina will not stick to the bread as much when baked).  Roll out a piece of the dough so that the size can fit on your stone.  Cut about 4 slits on each side into it with a sharp knife (see photo).  You may need to tug at the slits a bit, so they become a bit larger and more oval.   Sprinkle more flour on the back of a baking sheet or a pizza wheel.  Gently pick up the dough and place it on the sheet.  Make sure you are able to move it around freely, if not, add more flour underneath it– you want the dough to easily glide off the pan and onto the stone.  Brush olive oil onto the dough, then sprinkle with the spices.  Starting in the back of the stone, quickly and confidently glide the dough onto the stone from the pan.  Bake for just a few minutes (maybe 10, but it really depends on your oven– so keep a watchful eye) or until the bread looks to be a deep golden brown.  Remove from oven.  Enjoy with the spice-marinated feta cheese and some delicious olives!

Source:  Spice-Marinated Feta adapted from Mark Bittman’s How to Cook Everything Vegetarian

Thanks so much for stopping by today– have a wonderful weekend!  xo

Laurie

Read Full Post »

Asian-Inspired Meatballs via Relishing It

Now we come to it.  The day when snacks and appetizers take center stage alongside over-hyped commercials and two football teams that I can’t– for the life of me– name.  That’s right, Superbowl Sunday is just a few days away!  Now my husband will tell you that the ‘Big Game’ on Sunday is actually Liverpool against Manchester City, but then again, he’s a soccer nut.  Even so, we’ll be hunkered down on the couch on Sunday night eating a variety of tasty appetizers.  If you haven’t planned out your Superbowl menu, I have a few ideas for you.  First, take a look at this incredible dip.  If you make it once, you’ll make it every year.  I promise.  And these pickled eggs are the perfect snack for beers with friends.  If you make them today, they just might be ready in time for the game.  This chili will please a crowd, and so will this one.

Asian Meatball Ingredients

But if you’re in the mood for something a little more exotic, give these fantastic Asian-inspired Meatballs a try.  I found this recipe on Ali Ebright’s blog, Gimme Some Oven.  While you’re waiting for the next commercial break on Sunday night, go on-line and check out her site.  It’s lovely.  I tweaked this particular recipe to suit my taste.

Asian-Inspired Meatballs via Relishing It

We generally eat these meatballs as a meal alongside brown rice or quinoa, served with a salad, but they would make a fantastic appetizer, as well!  The meatballs are packed with fresh, bright flavors from the garlic, ginger, and scallions.  But the real show-stopper is the Asian sauce.  It is amazing!  It’s slightly sweet, but also has a nice tang to it.  Fresh ginger makes everything better, right?  Hope you enjoy them as much as we have.  And whatever you decide to eat this weekend– have a great time surrounded by fun people.

Asian-Inspired Meatballs via Relishing It

The Recipe:  Asian-Inspired Meatballs

(makes 35-37 small)

For the Meatballs:

2 pounds ground beef or pork

2 teaspoons sesame oil

1 heaping tablespoon finely grated fresh ginger

2 eggs, lightly beaten

4 garlic cloves, minced

1 teaspoon kosher salt

1/2 cup breadcrumbs (preferably Panko)

1/2 cup finely chopped scallions (about 3 large)

For the Asian Sauce:

2/3 cup hoisin sauce

1/4 cup rice vinegar

2 garlic cloves, minced

2 tablespoons soy sauce

1 teaspoon sesame oil

1 teaspoon finely grated fresh ginger

Garnish with extra sliced scallions, sesame seeds, and sriracha sauce

Preheat the oven to 400°F.  Line a large 12 x 17 baking sheet with parchment paper.  Set aside.

In a large bowl, lightly combine all of the ingredients for the meatballs together using your hands.  Be careful not to over mix, as that will lead to tough meatballs.   Use a 1 1/2 tablespoon scoop (or you can eyeball it) to form the balls.  Place them on the prepared pan and bake for about 17-19 minutes, they will turn a nice golden brown color  along the edges when done.

Meanwhile, in a small bowl, combine all of the ingredients for the asian sauce.  When the meatballs are done, you can either serve them alongside the sauce as a dip, or you can gently coat the meatballs in the sauce and serve them that way.  I like to warm the sauce up beforehand.  Serve the meatballs with sliced scallions, sesame seeds, and a bit of sriracha for an extra kick.  Enjoy!

Source:  Adapted from Ali at Gimme Some Oven

Thanks for stopping by today!  Hope you all have a great weekend.  xo

Laurie

Read Full Post »

Every once in awhile an idea for a recipe pops into my head, and I can’t believe I hadn’t considered it before.  On the one hand, I get a bit disappointed in myself for missing something so obvious.  But then I think, ‘Who cares?  This is going to be incredible!’  Today’s recipe came from one of those epiphanies.  I wanted something bursting with Spring flavors, and this pea shoot and mint pesto does just that.

Pea shoots should be showing up at your local farmers market right now.  If you haven’t tasted them before, please go buy some.   These tasty little shoots are the young tendrils and leaves of the pea plant.  They’re packed with nutrients, including vitamins A and C.  And they’re wonderful on sandwiches, salads, mixed into stir fry, pureed into soups– and of course, in this pesto.

Mint and peas make a great combination– remember this carbonara?  Pea shoots taste like fresh peas, but you don’t have to go through the fuss of shelling.  Here, I blanched the pea shoots for a few seconds to brighten their color.  I added a few mint leaves, and finished it off with a squeeze of fresh lemon.  Do not leave out the lemon!  It’s fine without, but we’re looking for better than ‘fine’ with this pesto.

A couple tips on the bruschetta:  First, make sure you grill the bread.  Season it with olive oil, salt, and pepper.  It makes a huge difference.  I also recommend tearing– rather than cleanly slicing– the mozzerella.  It creates nice crevices and curves to drizzle the olive oil into.  I think it also happens to  look much more interesting.  The radishes add an additional pop of color and fresh crunch.  Aside from using this pesto on bruschetta, you can add it to pasta.  If you think it’s going to be too thick to toss with pasta, add a little more olive oil and remember to always reserve a bit of hot pasta water to get the texture you want.  Either way, I think you’ll be happy with this fresh dish.  Enjoy!

The Recipe: Bruschetta with Pea Shoot Mint Pesto and Fresh Mozzarella

Pea Shoot Mint Pesto:

1 1/2 cups packed pea shoots

2-3 tablespoons freshly grated parmesan or grana padano cheese

1/4 cup lightly toasted walnuts, chopped

1 garlic cloves

10 fresh mint leaves

1/4 cup extra-virgin olive oil

squeeze of lemon juice, to taste

sea salt and freshly cracked pepper, to taste

hot pepper flakes, to taste

For the Bruschetta:

1-2 balls of fresh mozzarella

1 -2 cloves of garlic

extra-virgin olive oil

pea shoot  mint pesto

handful of radishes, diced

Good quality rustic bread, sliced  ( I used sour dough)

To make the pesto:  Bring a medium sized saucepan filled with water to a small boil.  Prepare an ice bath, set aside.  Place the pea shoots in the hot water for 30 seconds.  Remove immediately and submerge into the ice bath.  Remove pea shoots from water and gently “wring” them out.  It’s ok if they have a bit of water on them.  Let cool.

Place the pea shoots, mint leaves, and 1 clove of garlic in a mini-food processor.  Pulse a few times, until the greens are adequately chopped.  Add the parmesan or grana padano and walnuts, pulse a few more times.  With the processor running, slowly drizzle in the olive oil.  You may need to stop the machine and scrape down the sides of the bowl.  Once the pesto is thoroughly combined, taste it.  Stir in some salt, cracked pepper, hot pepper flakes, and a squeeze or two of lemon to brighten the pesto.  Use immediately or store in the refrigerator with plastic wrap placed directly on it.

To make the Bruschetta:  Fire up your grill.  Brush olive oil on both sides.  Sprinkle with salt and pepper. Place on a hot grill and let it toast on each side until it is beautifully golden, but not burnt.  Remove from the grill and while still hot, rub a clove of garlic on one side of the toast.  Spread the pesto on that.  Rip the mozzarella, to create crevices, and place on the pesto.  Top with the chopped radishes.  Drizzle with a bit of olive oil and finish with a sprinkle of sea salt.  Enjoy!

I’m currently in North Dakota with my kids — made the long 8 hour trip to spend Mother’s Day with my Mom.  I hope all of you Moms out there have a wonderful day.  Thanks to everyone for stopping in — see you next week!

Laurie

Read Full Post »

Yeah, you read correctly.  I’ve decided to class this place up with a chip dip recipe that has a swear word in the title.  We’re talking very sophisticated gourmet fare here.  Alright, this post isn’t exactly champagne and gougéres, but in the right environment there’s no better snack than Kick-Ass Dip.  Why is it called ‘Kick-Ass’?  Well, because it’s that damn good.  This is one of those recipes that somehow emerged, fully-formed, from our college years.  We’ve been making it for years– from Super Bowl gatherings to our pre-children New Year’s Eve parties.  And this dip is always a huge hit.  Always.  I’m not going to try to convince you that this is, in any way, healthy.  But take a look at the ingredient list.  It’s not as bad as you might think.  And anyway, once in awhile you just need salty chips and dip.

The combination of flavors here is genius.  The spiced sausage and silky cream cheese are wonderful.  There are also those tomatoes with the nice kick of green chilies, and my favorite part of the dip– the corn kernels.  They’re slightly sweet, and stay just firm enough to add nice texture.  And it’s all brought together by fresh, brilliant cilantro.  Open a cold beer, pull the chips close, and enjoy.   If you plan on getting together with friends for the Super Bowl, or any other event where you park it in front of the television, get this dip simmering in your crockpot.  You’ll end up passing the recipe on to others, because it really does kick ass.

The Recipe:  Kick-Ass Dip

2  – 8 ounce packages of cream cheese

1 pound ground mild breakfast sausage

1 pound ground spicy breakfast sausage

2 – 10 ounce cans of Original Ro-Tel tomatoes with green chilies (do not drain)

2 cups frozen corn

1/4 cup chopped fresh cilantro

In a large skillet over medium heat, brown the breakfast sausage until cooked through.  Drain the grease.  In a large crockpot, combine the cream cheese and tomatoes.  If your crockpot has a removable stone,  I usually microwave the tomatoes and cream cheese for about 3-5 minutes, until it has melted.  Stirring occasionally.  If it doesn’t have a removable stone, just continue with the recipe.  Add the breakfast sausage, corn, and cilantro to the crockpot.  Cook on high until the mixture is very hot and bubbly, about 1 hour,  stirring often (and trying to snitch very little — good luck with that).  Reduce heat to low and enjoy with loads of chips and many friends!

Hope you all have a wonderful and fun-filled weekend!

Laurie

Join me on Twitter!

Read Full Post »

Gougères

New Years Eve!  It’s that time of year when I get ready to open a bottle of champagne, nuzzle into a warm blanket with my hubby by the  fireplace, and watch people on television shiver in Times Square.  What?  Alright, I admit that we used to go out and tear it up, but for the last several years I’ve preferred the comfort of home and family to fighting the crowds and weather.  Now that doesn’t mean I don’t enjoy a few nice glasses of bubbly and good food on New Year’s Eve.  Honestly, if I could only choose one alcoholic beverage for the rest of my life, I would choose champagne EVERY TIME.  And every time I drink it, I make these incredible little gougères.

Gougères are little rich, perfect French pastries.  And since they’re French, they’re loaded with butter and cheese.  Basically they are  savory cream puffs.  They are crusty and golden on the outside and tender and eggy on the inside.  Pairing food with wine can be challenging, but matching these gougères with champagne is a no-brainer.  The cheese lends a wonderful saltiness, and the buttery richness of the pastry works so well with a good sparkler.  I’m telling you, the combination is divine.  If you can’t get your hands on a gruyere cheese, a nicely aged white cheddar is a good substitute.

As an added bonus, making them is almost fool-proof.  And it doesn’t take very long from start-to-finish to be nibbling on these little morsels.  Even better, you can make them ahead of time if you’re entertaining.  After the dough is made, drop them by a tablespoon onto a parchment paper lined cookie sheet– no need to space them far apart– and freeze.  Once they are frozen, throw them all into a freezer bag and keep until you’re ready to bake.  Use them directly from the freezer, no need to thaw.  They will require a bit longer to bake this way, but they’re very convenient.  These are wonderful to keep on hand if you happen to want to have a glass at night with your spouse, after your children go to sleep (ahem).

The Recipe: Gougères

(makes about 2 1/2 dozen)

1 stick (8 tablespoons) unsalted butter

1/2 cup whole milk

1/2 cup water

3/4 teaspoon kosher salt

1 cup all-purpose flour

5 larges eggs, at room temperature

1 1/2 cups (6 ounces) coarsely shredded gruyere cheese

Preheat oven to 425°F.  Line a large baking sheet with parchment paper.

In a medium saucepan over high heat, bring the butter, milk, water, and salt to a rapid boil.  Once it is boiling, add the flour all at once and vigorously stir the mixture with a wooden spoon. Lower heat to medium-low.  It should form a ball quite quickly.  Once the ball has formed, continue to “dry out” the mixture for another minute over the heat.  A slight crust should have formed on the bottom of the pan.  Remove dough from heat and let cool for a couple of minutes.

Add the dough to a bowl of a stand mixture fitted with a paddle attachment (or use a wooden spoon).  Begin to add the eggs one by one, being sure to fully incorporate each egg before adding another.  The dough will look as though it has separated, but rest assured that after the last egg is added, it will come together.  Lastly, mix in the shredded cheese.

Using a tablespoon, drop the dough onto the lined baking sheet.  Leaving about 2 inches between each of them.  Bake for about 15 minutes, or until the gougers are firm, beautiful golden brown, and have a wonderful smell to them.  If making them from the freezer, you will need to bake them a bit longer.  Enjoy these beauties warm or at room temperature and most definitely with a glass of champagne.

Source:  Adapted from Dorie Greenspan’s Around My French Table

Thanks for stopping by today — may you all have a safe and wonderful New Year’s!

Laurie

Join me on Twitter

Read Full Post »

Hello everyone!   Summer finally arrived in the Upper Midwest, and boy, did it show up with a vengeance!  Those living nearby probably don’t want to hear more about just how miserable the weather is, but for those of you in distant lands, the heat index has been flirting with 120 degrees here all week.  I’m seriously starting to look forward to a nice winter snow storm…which will probably be only a few months away.  Ahhh… Minnesota.

So where have I been, you ask?  Well, we’ve had a busy July.  As you know, I took the kids to North Dakota to visit family.  We had such a great time seeing everyone.   Shortly after we got back, we took our first trip to the world-famous Wisconsin Dells.  It was so much fun, and so cheesy (Wisconsin pun intended).  Waterslides, go-cart racing, food, a tour down the river on some sort of World War II vehicle.  Our kids are still talking about the trip.  They want to go back right away.

Now that you’ve had the family update, let’s talk food again.  Wow!  Do I have some exciting things to share with you!  Let’s start today with this gorgeous heirloom tomato galette.  You know I love fresh tomatoes, but are you aware that I’m that slightly-crazy person who refuses to buy one all winter long?  More than any other vegetable (cucumbers are a close second), tomatoes purchased out of season and shipped in simply do not taste the same.  Not even close.  Thankfully, they’re  in-season now, so you can expect to see several more tomato-based dishes in the coming weeks.

This show-stopper of a tart is the perfect way to feature the pure flavor of ripe tomatoes.  I’ve been waiting to make this recipe for awhile– not only because it looks incredible– but because it’s the creation of chef/owner Naomi Pomeroy from the fabulous restaurant Beast in Portland, OR.  Last October, Radd and I vacationed in the Pacific Northwest and stumbled into Beast– a communal-style locavore paradise.  We shared a table and company with six strangers.  The food was divine, and it was easily one of the best dining experiences I’ve ever had.  When I saw that this tart came from Beast, I knew I had to make it.

So how is it?  Better than you can imagine.  When I showed Radd, he thought it looked great, but he wasn’t exactly fired-up to try it.  After his third piece, he said it was one of the best things he’s eaten in a long, long time.  The crust is so delicate and flakey.  The manchego cheese adds a creaminess that perfectly compliments the acidity of the tomatoes.  Finally, the olive oil and herbs provide subtle complexity– the flavor really goes on and on.  It’s delicious warm, but even better at room temperature.  If you make only one savory dish from my blog over the next couple of weeks, it should be this one.  It’s that good.

The Recipe:  Heirloom Tomato Tart

Makes one 12-inch tart

Serves 4 to 6

For the Galette

1 cup all-purpose flour; plus more for work surface

1/2 teaspoon course salt; plus more for tomatoes

1 teaspoon baking powder

1 teaspoon chopped fresh thyme or rosemary for the dough, plus more for on top of the galette

1 stick (8 tablespoons), unsalted butter, chilled and cut into 1/2 – inch pieces

1/2 cup sour cream (full fat), chilled

1 pint tomatoes  (a combination of heirloom cherry tomatoes and other tomatoes, cut in half or sliced if large)

1/3 pound manchego cheese, or other semi-hard sheep’s milk cheese

1 egg white,  for an egg wash

For the Garnish (Optional)

1 bunch microgreens (arugala microgreens worked well)

Extra-virgin olive oil

Red-wine vinegar

Coarse salt

To make the dough: Combine the flour, salt, baking powder,  and 1 teaspoon of minced herbs in a food processor and pulse a few times to mix.  Then add the butter and pulse until the butter is just incorporated into the dry ingredients, making sure not to over-mix.  Some of the butter may be the size of a pea, which is fine.  This can also be done by hand if you don’t have a food processor.  Mix in the sour cream, being careful, once again, not to over-mix.  Turn the entire mixture out onto a cutting board and gently push it together into a ball.  Wrap it tightly with plastic wrap and refrigerate for 2 hours.

To make the filling: Put the tomatoes in a colander and sprinkle generously with coarse salt.  Lay the tomatoes on several sheets of paper towel to drain (dried tomatoes will make a crisp tart).

In the meantime: Heat the oven to 425°F.  Lay out a sheet of parchment paper that will fit onto your baking sheet.  Dust it with flour, as well as your rolling pin, and roll the dough out to a 12-inch circle about 1/8 – inch thick.   Leaving a  3 -inch border, scatter the cheese on the top of the dough, then arrange the tomatoes evenly over the cheese.  Sprinkle with a bit more thyme and rosemary.  Fold the edges of the dough over the tomatoes, making pleats as you fold and leaving the center of the tart open.  Make sure there are no holes in the dough; pinch the dough together if one appears.  Whisk the egg white and apply to the tart dough with a pastry brush or paper towel.  Transfer the tart with parchment paper still underneath to a baking sheet.

Bake the galette until golden brown, 30 -40 minutes.  Let cool on rack.

While the galette cools, lightly dress the microgreens with the olive oil, vinegar and salt.  Drizzle the top of the galette with olive oil and sprinkle it with course salt.  Slice the galette and serve with microgreens, of desired.    Enjoy!

Source:  Adapted from Harvest to Heat Cookbook via Naomi Pomeroy from Beast in Portland, OR

Thanks for visiting Relishing It today!  Hope you are all enjoying your summer.  See you soon.

Laurie

Follow me on Twitter

Read Full Post »

I made the long drive across the entire state of North Dakota to my home town yesterday.  It was me, my four-year-old and my two-year-old…in a car…for 8 1/2 hours.  I made the same drive last Summer, also without Radd (who’ll be joining us later this week), and was so proud of myself for having arrived with my little kids and sanity intact that you’d have thought I split the atom.  Fortunately it went well again this year, though was about as fun as you’d expect.  


Since I’m heading back to my roots this week, I thought I’d share a little treasure from my childhood–pickled eggs.  It seems a bit odd to follow up French-style recipes for clafoutis and galettes with ‘pickles-in-a-jar’, but there’s something to be said for comfort food.  I grew up with jars of these treats sitting on our counter.  While pouring over childhood pictures recently, I noticed that there was an egg jar in the background in so many photos.  My Mom made the best pickled eggs– we absolutely loved ’em.

In continuing with my food philosophy, I use high-quality eggs in all of my baking and cooking.  I’m talking about eggs that come from a farm where the chickens roam freely and peck at nutritious food– not the cheap, supermarket eggs that sell for $1 a dozen, as these generally come from perpetually-caged chickens that have never seen daylight.  Yes, organic/cage-free eggs are a bit more expensive, but compared to your other proteins (meat) they are affordable.  Free-range cage-free eggs are not only a great source of protein, but they provide healthy Omega-3’s.  They’re also relatively low in calories.

Through the years, my brother and I have made adjustments to our Mom’s pickled-egg recipe.  We’ve been on a quest to improve upon ‘the best’ by making it a bit spicier.  This is my latest version. Now if you don’t fancy spicy food– you can skip the chili peppers and the red pepper flakes.  My family prefers to eat these eggs with a basket of pretzels, a few drops of Chalupa (or a Louisiana-style) sauce, and a nice cold beer.  Perfect.

The Recipe:  Pickled Eggs

Roughly 2 dozen eggs, hard boiled

1 liter white vinegar

1 jar hot chili peppers and the juice (Mezzetta is my favorite brand for these)

1 white onion, thickly sliced

1 bulb garlic, cloves peeled and left whole

1 teaspoon pickling spice

1 tablespoon peppercorns

To boil the eggs:  Gently place the eggs in a 4 quart sauce pan.  Cover with cold water.  Let cook over medium heat until water begins to boil.  Boil for 1 minute only.  Cover and remove from heat immediately.  Set a timer for 12 minutes.  After that, pour out the hot water and run cold water over the eggs to stop the cooking process.  Let cool completely before peeling.  (Note: older eggs peel more easily than fresh ones)

Once your eggs are cool and peeled, start layering your ingredients into your jar.  This doesn’t have to be precise.  Once the eggs, onions, garlic, hot chili pepper and their juice, peppercorns, and pickling spice are in the jar — you can add the white vinegar.  Make sure you have enough liquid to cover the eggs.  These eggs will start to taste “pickled” in about 3 days, and will keep getting better and hotter the longer they sit.  They can be stored, tightly sealed on your counter.  Enjoy!

Read Full Post »

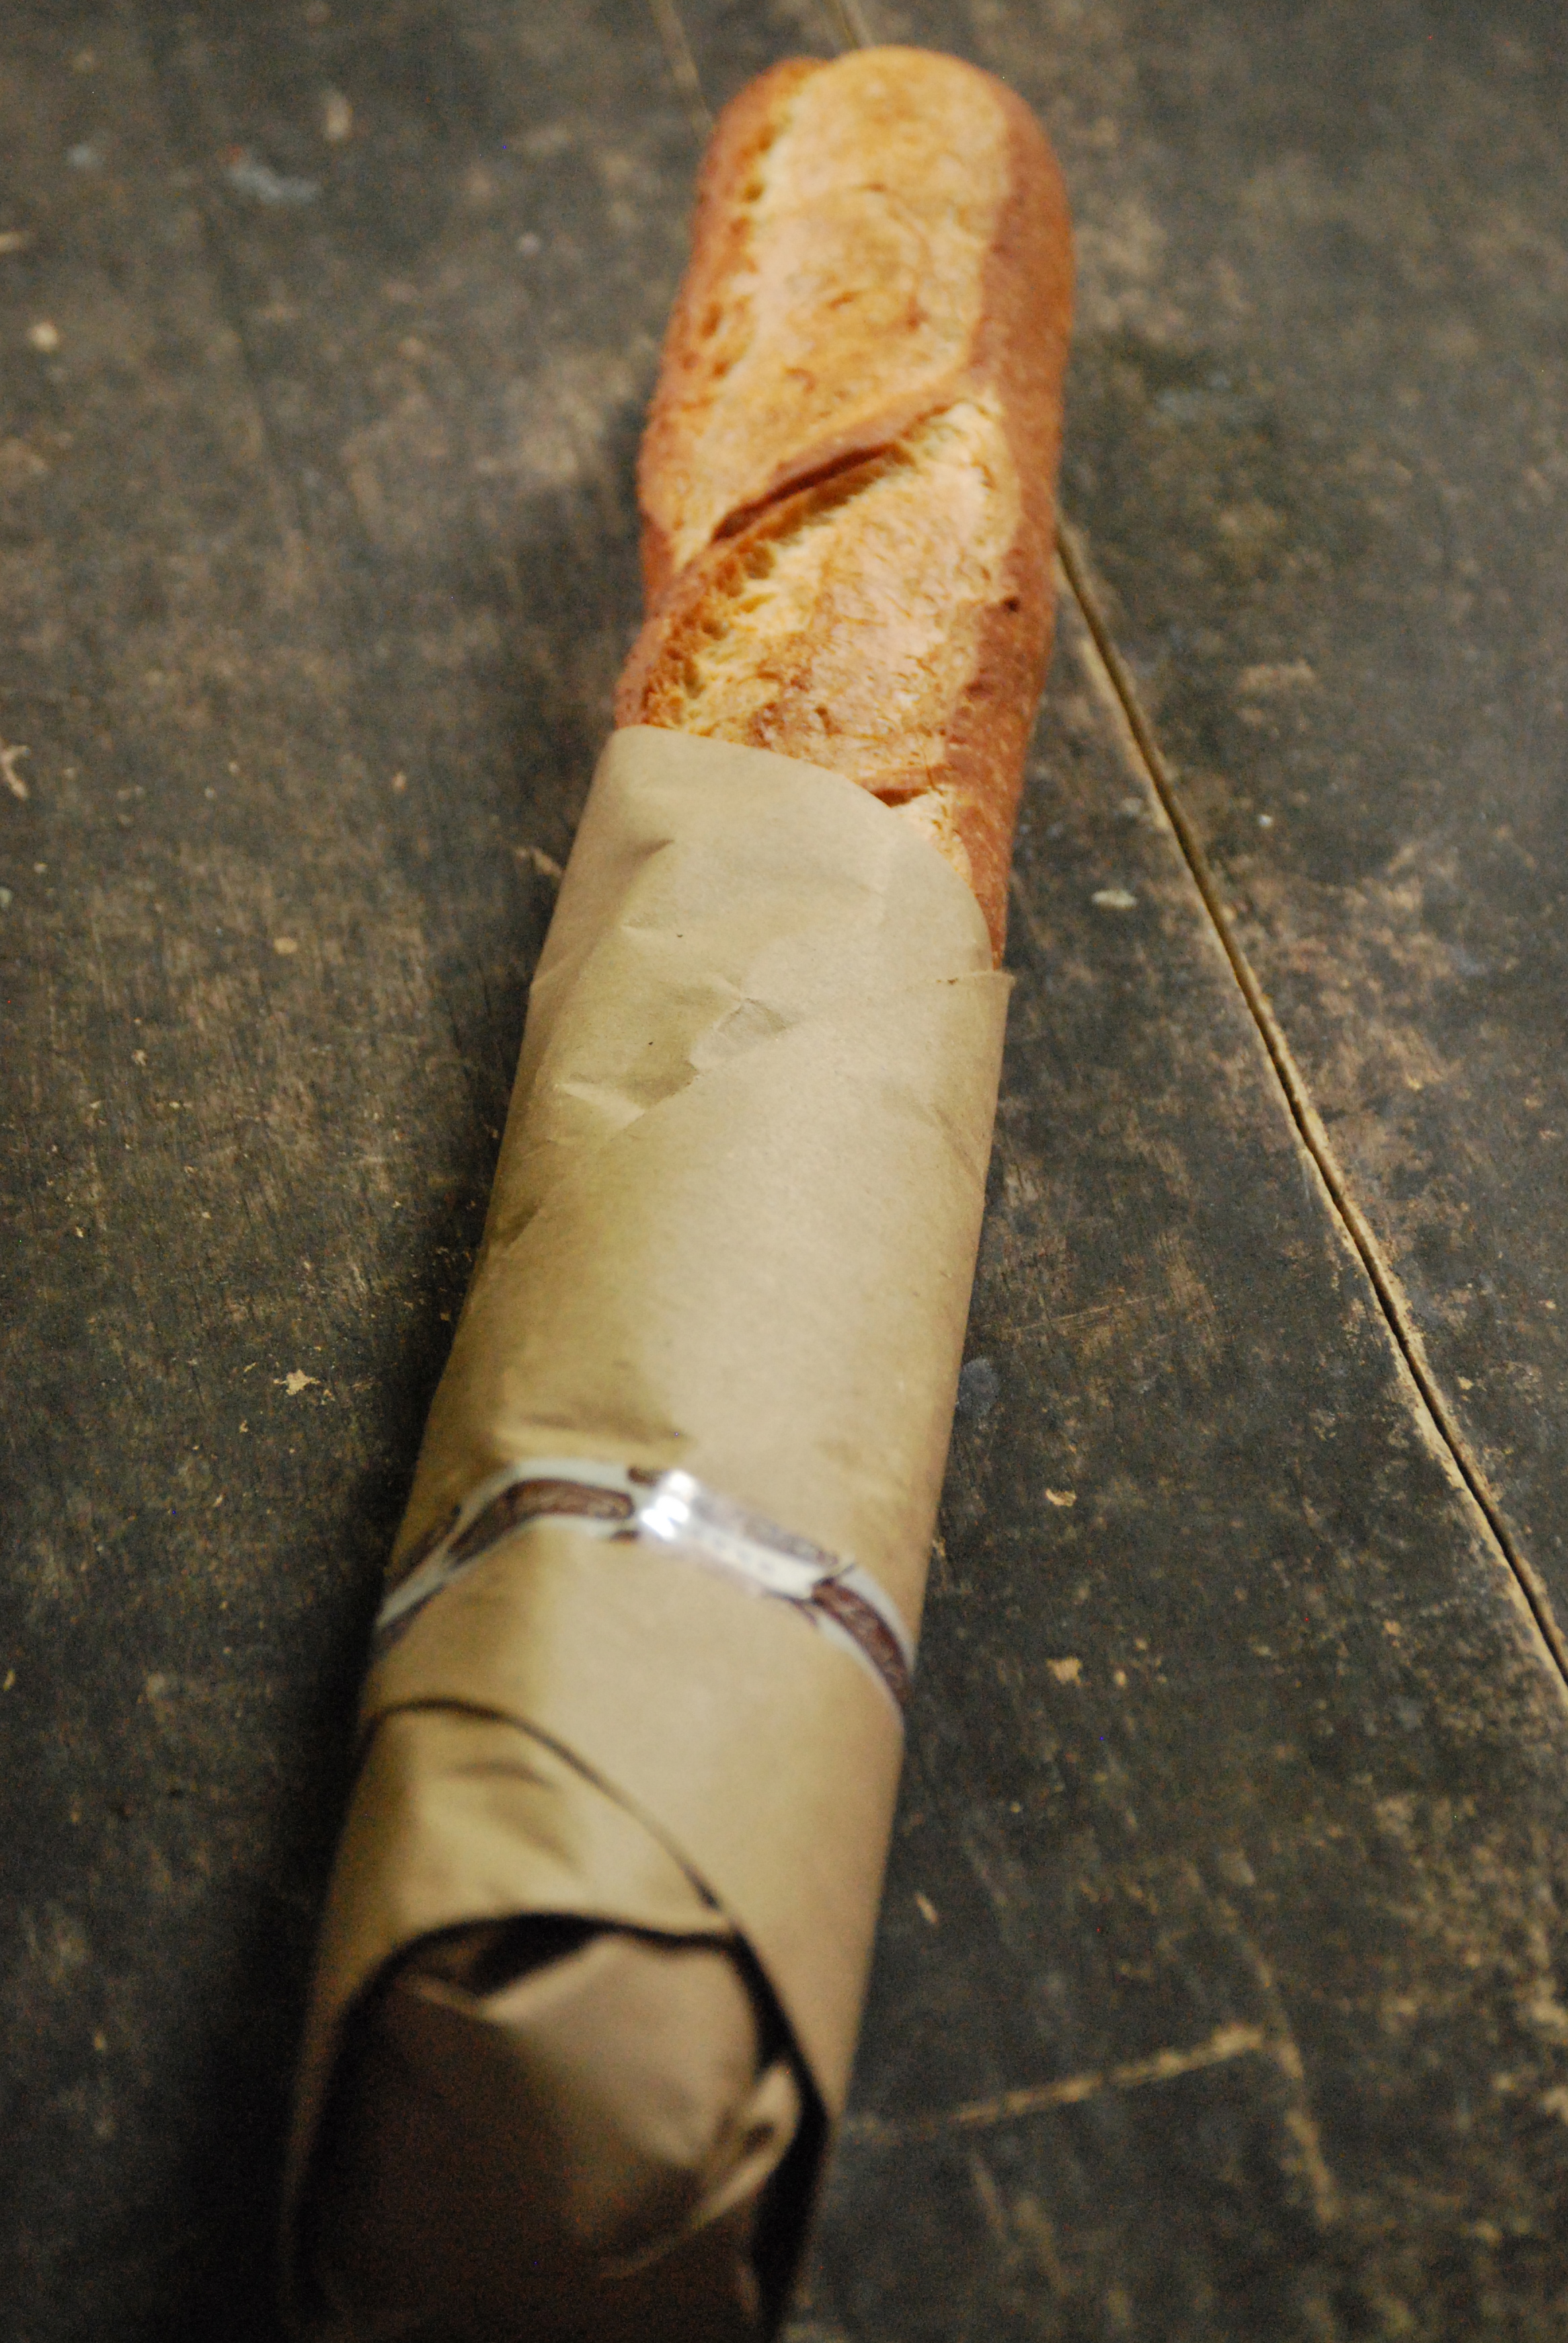
For this post I decided to make crostini from start-to-finish… not just a variety of toppings, but the whole bread-baking process.  Yes, it’s easier to simply find a wonderful crusty bread from a nearby bakery (and I often do this), but there’s something therapeutic about baking bread.  While it takes more patience and planning, in the end I found it to be so much more satisfying.  The smell of fresh bread throughout my house alone convinced me to do this more often.  Just look at this loaf!

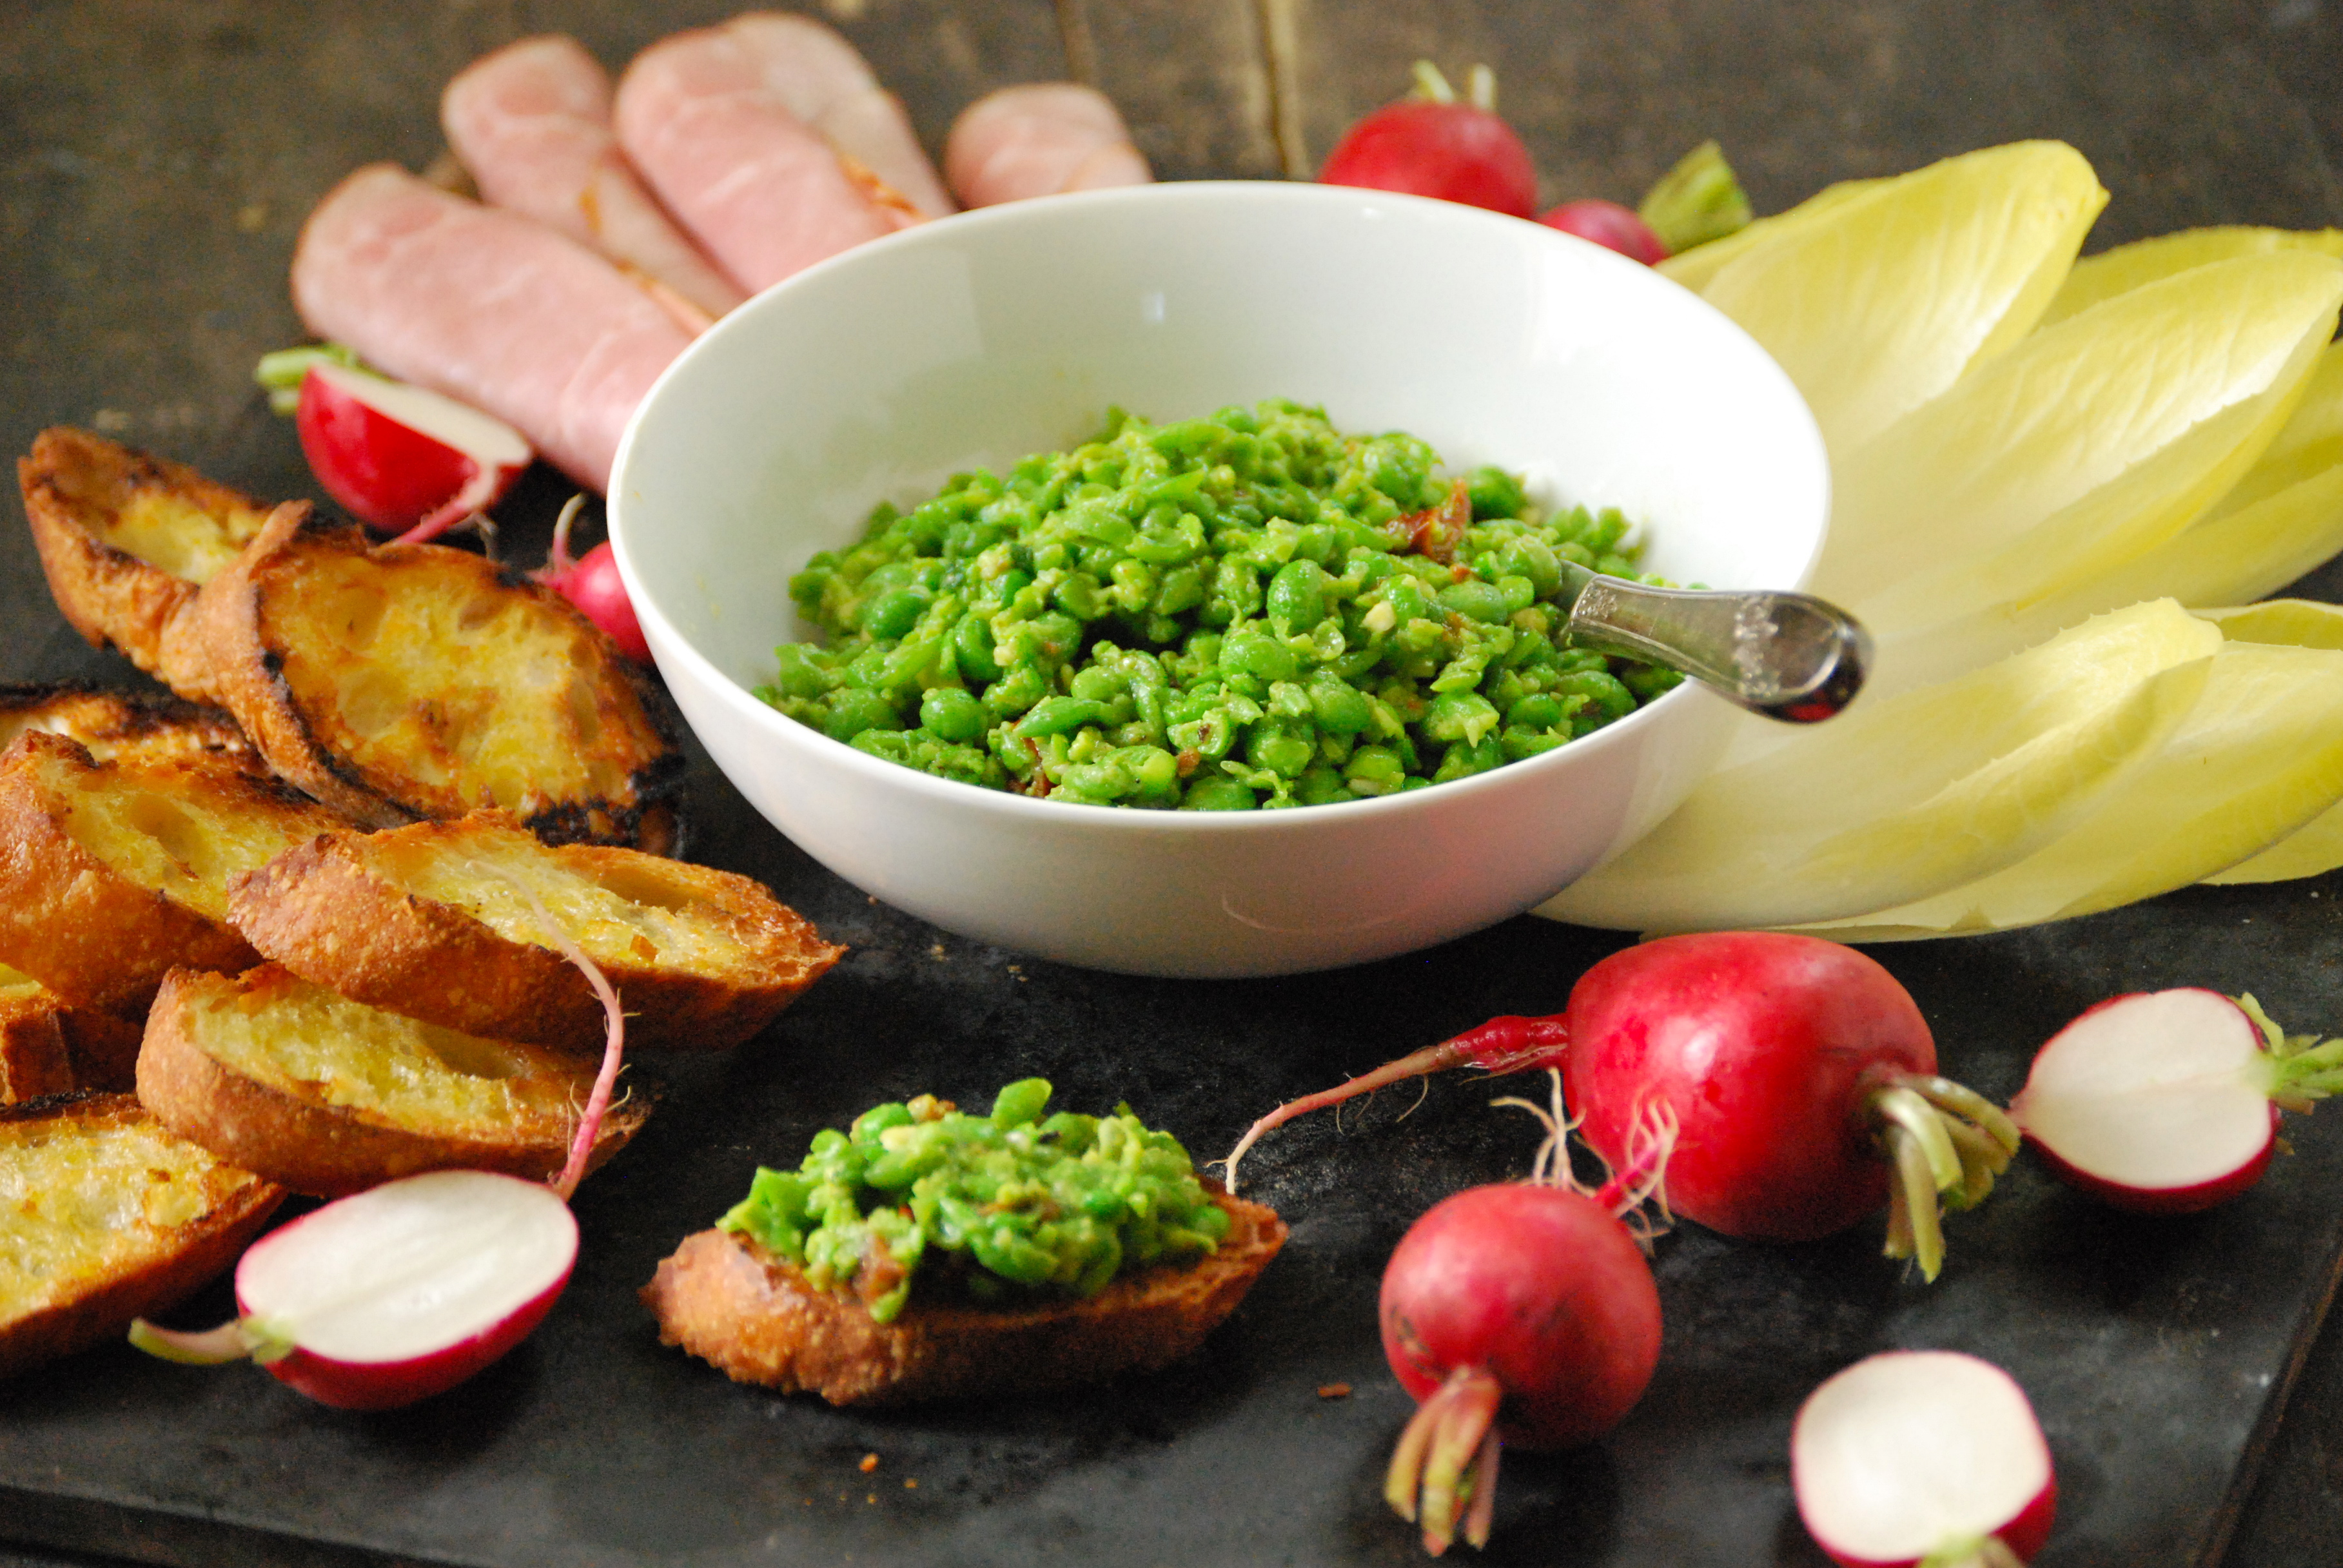
The bread I chose for this appetizer is crusty on the outside, but has a soft-yet-firm interior.  It keeps well, which means you can bake it long ahead of time if you’re hosting a party and need to get other things prepared.  To turn it into crostini, I grilled the bread and added two fresh, colorful, and oh-so-tasty toppings.  For the first, I was so happy to be able to use garlic, basil, and a batch of the first tomatoes of the season from our farmers’ market.  This is the first fresh-tomato post of the Summer– it will not be the last.

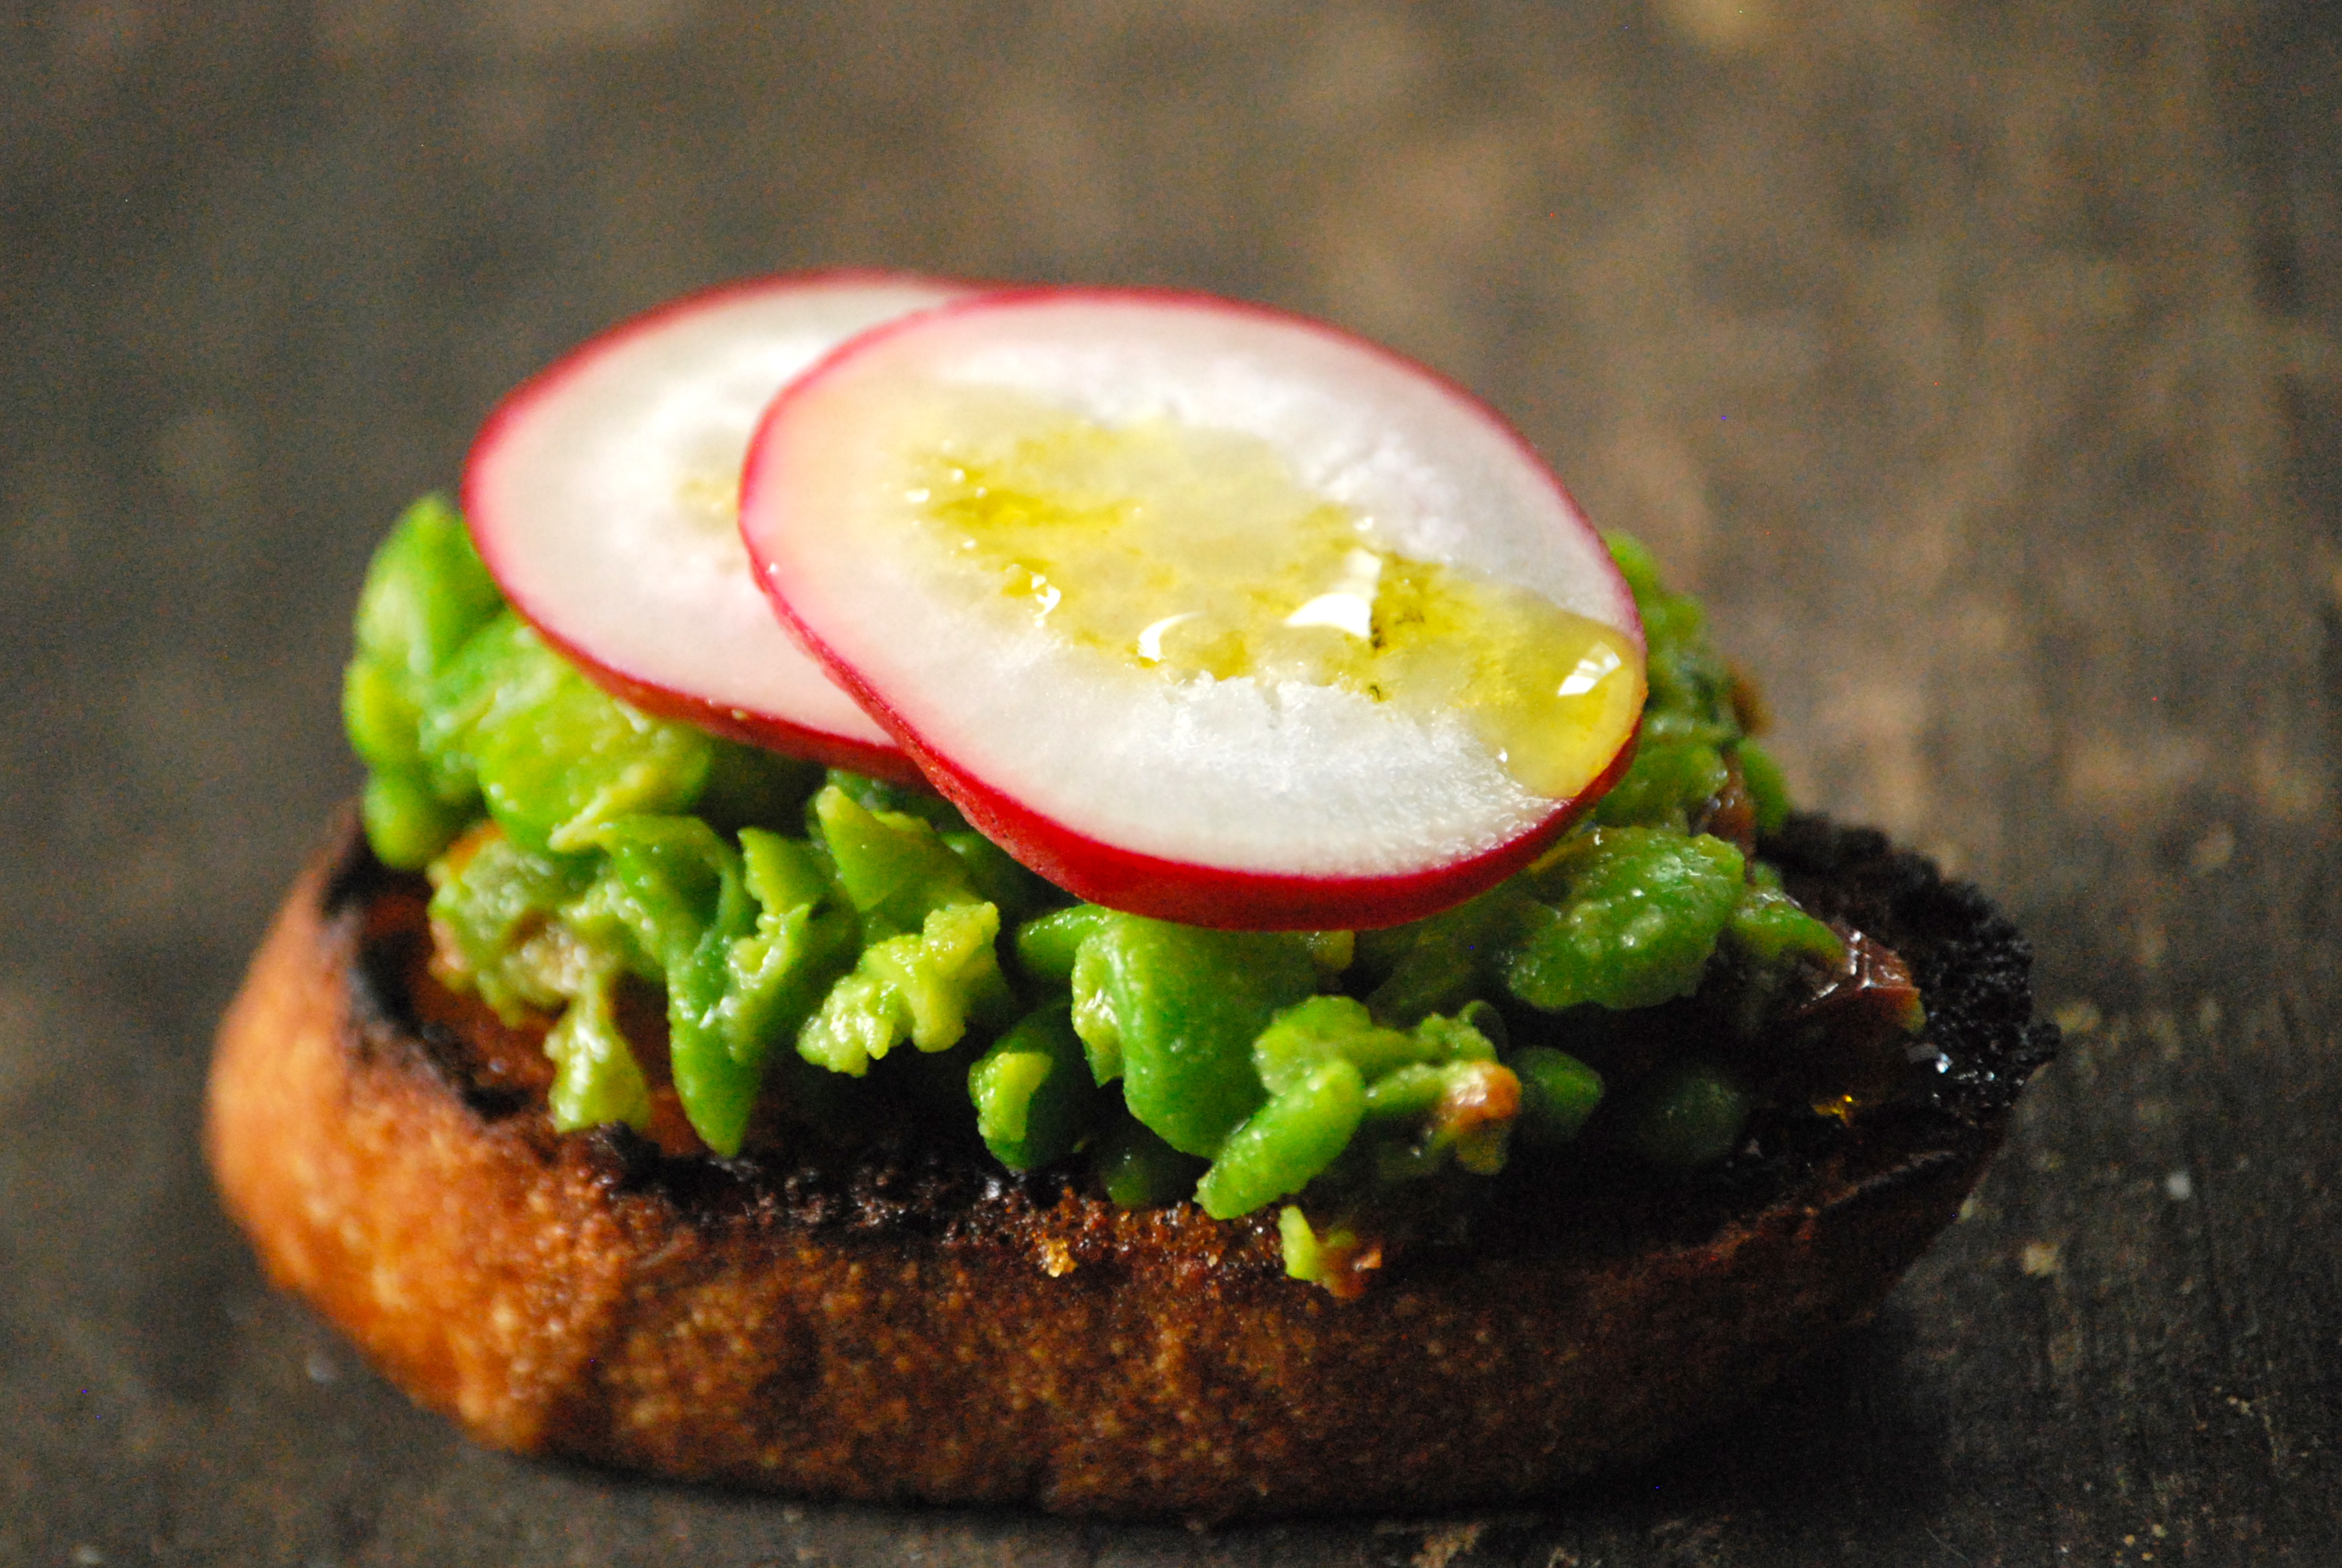
For the second, I threw together a simple herbed-ricotta topping with thinly-sliced radishes.  I love ricotta cheese, and unabashedly admit that I often scoop and eat spoonfuls while standing in front of the open-door refrigerator.  If you can find one locally, buy it.  Mixing in the fresh herbs gives it a nice flavor-burst.

The Recipe:  An Honest Loaf

1 tablespoon active dry yeast

2 cups lukewarm water (110-115°F)

2 cups unbleached bread flour

1/2  cup whole wheat flour

1/2  cup semolina, plus extra for dusting

2 teaspoons salt

Put the yeast and water into a large mixing bowl.  Stir in 1 cup of the bread flour to make a batter.  The mixture will begin to bubble, letting you know that the yeast is working.  Let the mixture sit at room temperature for about an hour, until it is frothy and has risen in the bowl.

Add the white flour, whole wheat flour, semolina, and salt to the starter and stir well.  When the dough is gathered, but still shaggy, turn it out onto a floured counter and knead it for a couple of minutes, dusting with flour if necessary; the dough should remain somewhat sticky.

Put the dough in a mixing bowl, cover with plastic wrap, and refrigerate overnight.  The dough will rise a bit in the bowl.

The next day, remove the dough from the bowl and punch it down to get the air out.  Knead the dough again for a few minutes, and form it into a smooth ball.

Select a linen-lined basket or low, wide bowl large enough to contain the dough when it doubles in size.  Place a linen napkin in a bowl, if that’s what you’re using.  I used a regular flour-sack towel and my bamboo salad bowl and that worked just fine.  Make sure to dust linen or napkin heavily with white flour before you add the dough.  Set the dough ball in the basket or bowl, dust the top with semolina, and cover loosely with plastic wrap.  Let the dough rise at a cool room temperature for 2 to 3 hours, or until doubled in size.  The longer and cooler the rise, the better the texture of the bread will be.

Preheat oven to 450°F – make sure it’s thoroughly preheated!  I am a true believer in a oven thermometer.  If you don’t have one — pick one up.  They’re cheap.  Sprinkle baking sheet with semolina.  Ease the dough onto the baking sheet by carefully inverting the basket or bowl over the sheet.  This part was tricky.  Remove the basket or napkin.  The top of the dough will have a light coating of flour.  Sprinkle on a bit more.

With a sharp, thin knife or razor blade, quickly slash a large  “X” in the middle of the dough, about 1/2 – inch deep.  Immediately put the pan into the hot oven and bake for 15 minutes.  The loaf will puff dramatically and the crust will have begun to form.

Turn down the oven to 400°F and bake for 45 minutes more, or until the bread is dark and crusty.  Remove the bread from the oven and put onto a cooling rack.  Wait until the bread has cooled completely before cutting.  In fact, this bread gets better the longer you wait to cut into it, unlike a baguette.  It will be even better the following day.

Source:  Adapted from David Tanis’ Heart of the Artichoke and Other Kitchen Journeys

The Recipe: Crostini with Tomatoes, Garlic, and Basil & Fresh Mozzarella  and  Herbed Ricotta with Radishes


Tomatoes, Garlic, and Basil Topping:

2 large farmer’s market tomatoes, diced

3-4 cloves minced garlic

7-8  fresh basil leaves, chopped

1 “glug” of red wine vinegar (about 1 tablespoon)

1 “glug” of good extra-virgin olive oil (about 1 tablespoon)

sprinkle of red pepper flakes (as much as you can handle)

kosher salt to taste  (make sure you don’t under-salt this — salt really brings out the flavor of tomatoes)

Mix all of the ingredients in a bowl.  Let sit  at room temperature for a 1/2 hour or so. The flavors will combine wonderfully.  Re-season, if necessary.


Herbed Ricotta

1 cup fresh ricotta cheese (buy some that is made locally, if possible.  The flavor is usually superior)

3 cloves of garlic, minced

2 scallions, finely chopped

Handful of mixed herbs, finely chopped — I used, mint, basil, chervil, parsley, chives and dill.  Use whatever you happen to have.  You should end up with about 1/2 cup finely chopped herbs.

Kosher salt and cracked black pepper, to taste.

Mix all of the ingredients together in a bowl and let sit for about 20 minutes.  Add more salt and pepper, if necessary.

Pre-heat the grill.  Slice the loaf of bread.  Brush with olive oil on each side  and top with a sprinkle of salt.  Grill for just a few minutes on each side, until you get the color you like.  Top with a slice of fresh mozzarella and the tomato, garlic, and basil topping.  The bread will soak up the juice wonderfully.  Top another piece of crostini with the herbed ricotta and a few thinly sliced radishes.  Enjoy with a lovely cocktail, of course!

Thanks again for stopping by Relishing It today!  As always, I enjoy reading  your comments.  Let me know if you’ve been busy in the kitchen with any of these recipes.  Have a great weekend.

Laurie

Follow me on Twitter!

Read Full Post »

%d bloggers like this: