Feeds:
Posts
Comments

Archive for April, 2013

Simple Carrot Salad with Harissa and Cilantro via Relishing It

Spring has finally arrived in Minnesota!  And by Spring, I mean it officially reached 80 degrees here yesterday.  Last night we grilled for the first time this season, and it was wonderful.  My husband is one of those guys that would be happy eating cereal for dinner several nights a week if I let him, yet he considers the grilling of a steak a sacred process.  He’s a master, and the New York strip that he grilled-up last night was heavenly.  I mean this now, I’d put it up against any fancy restaurant’s offering.  Anyway, I know we’ll be doing a lot more grilling now that the weather has turned, so I came up with this carrot salad that is a fantastic side dish.  It’s also perfect if you’re in the mood for a light lunch.

Simple Carrot Salad with Harissa and Cilantro via Relishing It

Simple Carrot Salad with Harissa and Cilantro via Relishing It

Simple Carrot Salad with Harissa and Cilantro via Relishing It

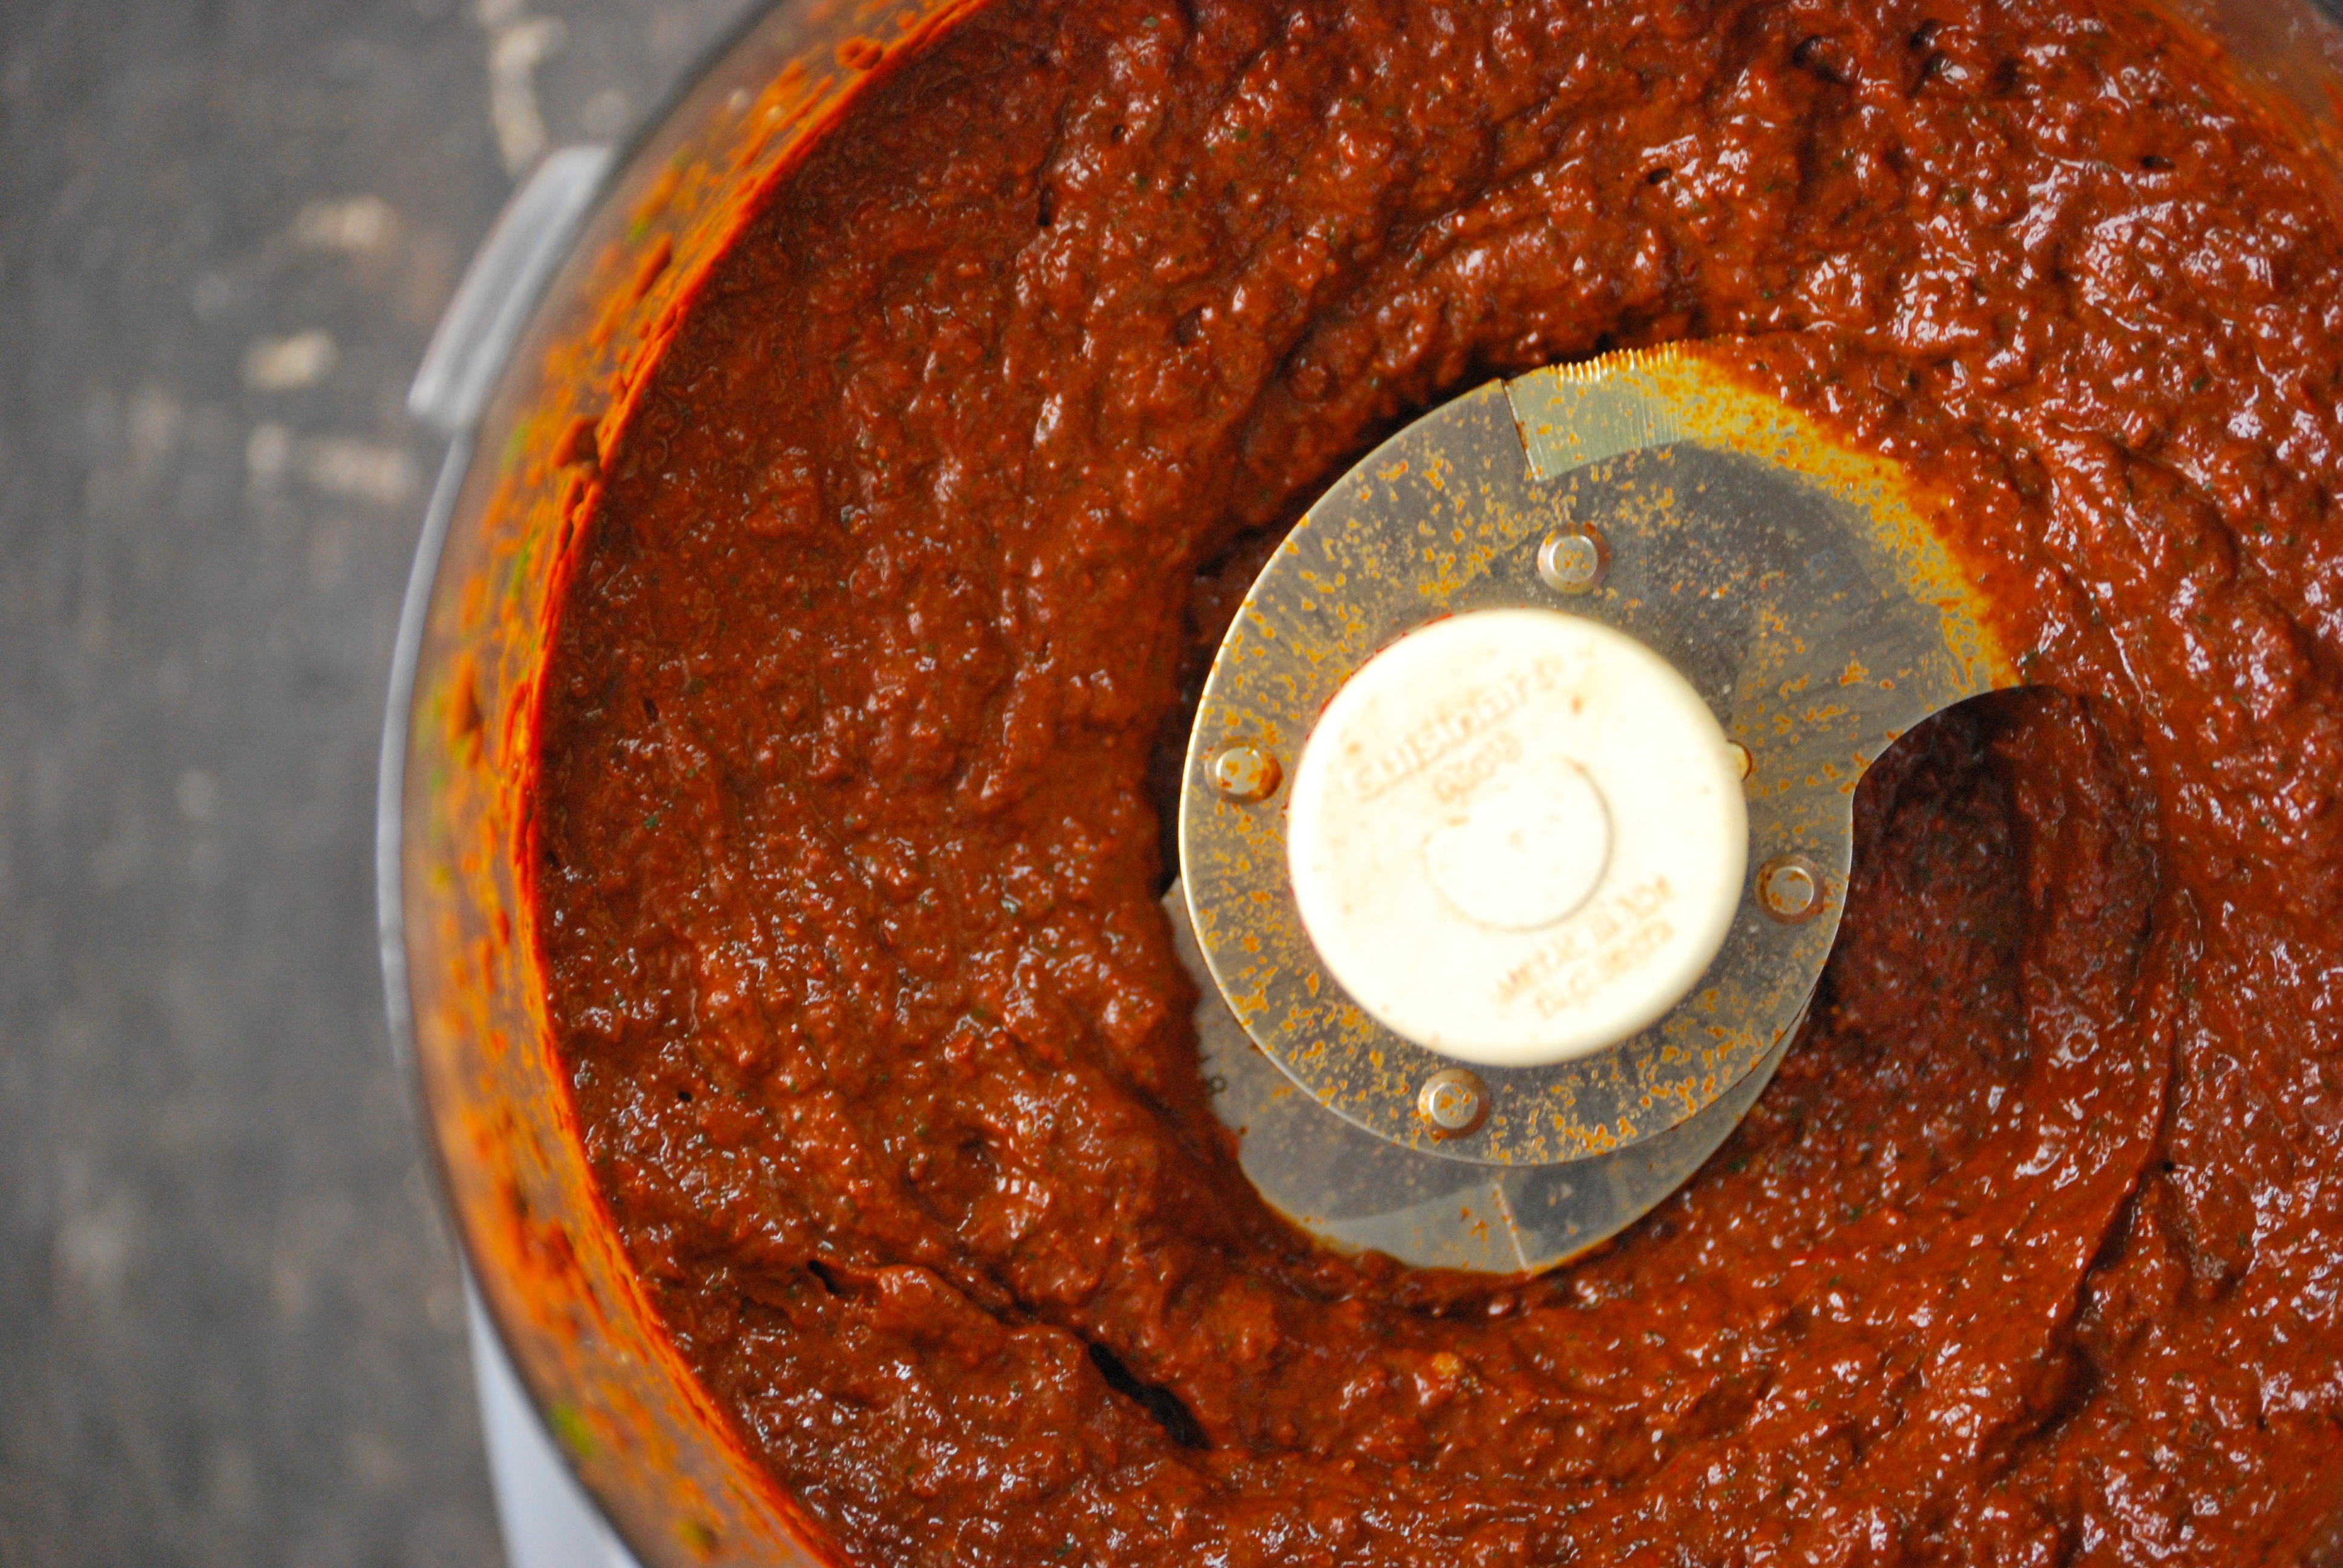
It seems as though carrots are often just an afterthought in most dishes.  Need a little color in some soup, throw a carrot in!  (Well, except in this soup– one of my favorites– where they’re the star.)  I happen to love carrots.  They have that nice slightly-sweet flavor, a wonderful crunch, and amazing longevity.  In this salad they take center stage.  The flavors are bright, yet there is a nice, complex, smokiness to give it depth.  Remember a couple of weeks ago when I made that homemade Harissa?  It is brilliant combined with these ingredients.  The ricotta salata cheese lends a bit of saltiness to this dish.  If you can’t find ricotta salata, feta is a good substitute.  Personally, I prefer ricotta salata for most salads, because its subtlety allows the other flavors to be more pronounced.  And the creaminess is a welcome addition to most any salad.  The cilantro and lime add that little zing of acidity that compliments the harissa and carrots wonderfully.  If your Harissa is a little on the thick side, feel free to thin it out with a few drops of water or olive oil.  Don’t overdo it though, since there is a squeeze of lime juice at the end that loosens everything up.

Simple Carrot Salad with Harissa and Cilantro via Relishing It

The Recipe:  Simple Carrot Salad with Harissa and Cilantro

(serves 1)

2 carrots, peeled, then thinly sliced with a vegetable peeler

1/2 cup long ribbons of red cabbage

handful of cilantro

1 tablespoon Homemade Harissa or store bought

lime wedges

2 tablespoons of crumbled ricotta salata cheese

sea salt, to taste

This is more of an idea, than a recipe.  Make as much or as little as you want.  This amount will serve one beautifully.  Cut the carrot anyway that you want, though I prefer long beautiful ribbons made by using a vegetable peeler.  They’re just so pretty that way!  Toss all of the ingredients, except the ricotta salata and lime into a large bowl.  Using tongs, gently incorporate the Harissa onto the vegetables.  Add more if you like.  If your Harissa is a bit on the thick side, add a bit of water or olive oil to thin it out.  Plate your salad and top with crumbled ricotta salata cheese and a couple squeezes of lime juice.  Add a sprinkle of salt, if necessary.  Enjoy!

Have a lovely week and thanks for stopping by Relishing it!

xo

Laurie

Read Full Post »

Momofuku's Cornflake Chocolate Chip Marshmallow Cookies via Relishing It

I’m sitting at my desk drinking this super-healthy green smoothie while staring at photos of cookies stuffed with marshmallows.  True story.  Seems a bit ridiculous, doesn’t it?  To be honest, I’ve been a little hesitant to post this recipe because I like to think that you stop by Relishing It for a little delicious, healthy food inspiration.  And here I am sharing a full-sugar, zero-whole grains cookie recipe with marshmallows.  Now I usually try to limit those bad-for-you ingredients in my sweet treats– like in this favorite.  But for today’s recipe I couldn’t bring myself to change a thing.  Behold these little masterpieces, in all their unhealthy glory!

Cornflake Crunch via Relishing It

Momofuku's Cornflake Chocolate Chips Marshmallow Cookies via Relishing It

Why try to make something more healthy when it contains marshmallows?  There really wasn’t much of a point.  And for these cookies, the marshmallows are the star.  They melt into a wonderful caramel-like puddle within the cookie.  The cornflake mixture is also important here.  It adds a noticeable crunch.  So how good are they?  They’re freaking amazing.  I’m serious.  Just really, unbelievably good.  Make sure you don’t eat them all in one sitting.   They are an indulgence, after all.

Momofuku's Cornflake Chocolate Chip Marshmallow Cookies via Relishing It

Momofuku's Cornflake Chocolate Chip Marshmallow Cookies via Relishing It

So, there you have it– an amazing cookie recipe that you can wow your friends and children with.  On a side note, they are perfect to freeze and pop into the oven whenever you want to bake up a couple.   The cookies spread quite a lot, so be sure to not overcrowd your pan.   The photo I have above shows them on the pan heading into the freezer.  I did not bake them that way– it would have been disastrous!  I’m not sure when I’ll get to New York so I can visit the real Momofuku Milk Bar, but until then, I’m glad I can enjoy– in moderation– these beauties at home.

Momofuku's Cornflake Chocolate Chip Marshmallow Cookies via Relishing It

The Recipe:  Momofuku’s Cornflake Chocolate Chip Marshmallow Cookies

For the Cornflake Crunch:

5 cups cornflakes

1/2 cup milk powder

3 tablespoons granulated sugar

1 teaspoon kosher salt

9 tablespoons unsalted butter, melted

For the Cookies:

2 sticks unsalted butter

1 1/4 cup granulated sugar

2/3 cup light brown sugar, packed

1 egg, at room temperature

1 teaspoon vanilla

1 1/2 cups unbleached all-purpose flour (7 1/2 ounces)

1/2 teaspoon baking powder

1/2 teaspoon baking soda

1 1/2 teaspoon kosher salt

3 cups Cornflake Crunch

2/3 cup chocolate chips

1 1/4 cup mini marshmallows

To make the Cornflake Crunch:  Preheat oven to 275°F.  In a medium bowl, add the cornflakes (use your hands to crush them to about a quarter of their size), milk powder, sugar, and salt.  Toss together.  Pour the butter over the mixture and gently mix it together.  Spread the mixture onto a parchment lined cookie sheet.  Bake for about 20 minutes.  They will be toasted and smell wonderful when done.  Remove from oven and let cool.  Store extras in an airtight container.

In a medium-sized bowl, whisk the flour, baking powder, baking soda, and salt together.  Set aside.  In a small bowl, gently mix the egg and vanilla together.  Set aside.

In a bowl of a stand mixer (or use a hand mixer) fitted with the paddle attachment, cream the butter, brown sugar, and granulated sugar on medium-high speed for about 3 minutes.  Add the egg mixture, and continue to beat for about 6-7 minutes.  Scraping down the bowl, as necessary.

Add the flour mixture and mix until just combined, being careful not to over-mix. Fold in the marshmallows, chocolate chips, and cornflake crunch using a rubber spatula.

Form into cookies using a 1/3 measuring cup.  Flatten the tops a bit, with your fingers.  Place on a large parchment lined cookie sheet and refrigerate or freeze  for at least one hour before baking.  Place extras in a large plastic bag and leave in the freezer until ready to use.  Do not thaw before baking.

When ready to bake the cookies, preheat oven to 375°F.  Line a large cookie sheet with parchment paper. Place the chilled or frozen cookies at least 4 inches apart from each other (they spread quite a bit).  Bake for about 18 minutes or until they are puffed and the edges are a deep golden brown.  More or less time depending upon if using chilled or frozen dough.  Be attentive!  Remove from oven and let cool for a couple of minutes on the cookie sheet before placing on a cooling rack.  Store in an airtight container for a few days.  Enjoy!

Source:  Adapted from Christina Tosi’s Momofuku’s Milk Bar

Thanks for stopping by Relishing It!

Laurie

Read Full Post »

Cajun Red Beans and Brown Rice via Relishing ItWhile it is “technically” Spring, as I write this we’re in a winter storm warning here in Minnesota.  Yup, a quick glance out the kitchen window and all I see is a white, wind-blown blur.  So I guess it’s no surprise that my thoughts are still with warm, comfort foods.  I’m not really complaining though.  It’ll end eventually, to be followed by those dreaded days marked by 90 degree temperatures and shirt-drenching humidity.  Gross.  So, I really am quite happy nuzzling into a blanket while the snow falls.  Please stop throwing tomatoes at me.

Cajun Red Beans and Brown Rice via Relishing It

Cajun Red Beans and Brown Rice via Relishing It

These cajun red beans and brown rice are just the sort of warm, comfort food that I’m talking about.  They’re not fancy, but they’re loaded with flavor and are just different enough to add a little variety to your nightly meal routine.  They’re made from healthy, whole foods and thickened naturally from the starch in the beans.  The cajun flavor is delightful, though not too spicy.  The heat level can be adjusted by adding more cayenne pepper. Ham works perfectly in this dish, and not a lot is needed. It gives it a nice, smokey flavor– though, you can easily make this meal with andouille sausage or without any meat at all for a vegetarian option.  You may need to adjust the seasonings a bit, namely the salt, as the pork tends to add a decent amount of that.  I love making a big batch of these beans and sending the leftovers with my husband throughout the week.  Enjoy!

Cajun Red Beans and Brown Rice via Relishing It

The Recipe:  Cajun Red Beans and Brown Rice

2 cups red beans, soaked overnight with salt (or do the quick-soak method)

olive oil

1 medium onion, chopped

4 garlic cloves, chopped

1 green pepper, chopped

1 stalk of celery, diced

2 dried bay leaves

3 1/2 teaspoons sweet paprika

2 teaspoons fresh thyme, minced

1/4 teaspoon cayenne pepper, or more to taste

3 cups chicken broth

6 cups water

2 cups of cubed cooked ham (andouille sausage is a good substitute)

cracked black pepper, to taste

red wine vinegar

Diced green onion, cooked brown rice, and hot sauce for serving

Quick-soak method:  Place the beans in a large saucepan.  Add enough water and a large pinch of salt to cover the beans by about an inch.  Bring to a boil for 1 minute.  Remove from heat and leave covered for about 2 hours.  Proceed with the recipe at this point. 

In a large Dutch oven, heat a couple tablespoons of olive oil and sauté the green pepper, onion, celery, and garlic for a couple of minutes until tender.  Add the paprika, black pepper, cayenne pepper, bay leaves, and thyme and cook for about 1 minute.  Add the chicken broth, water, red beans, and cubed ham.  Bring to a boil, then reduce heat and cover.  Let simmer for about 1 hour.  Check along the way, turn the heat up a bit, if the beans are not softening.  The dish will be done when the beans are very tender and the sauce has thickened.  Finish with a splash of red wine vinegar.  Season with salt, if necessary, though the ham usually supplies enough.  Serve over hot brown rice and a generous sprinkling of green onions.  Enjoy!

Source:  Adapted from Cooks Illustrated Magazine

Hope you all have a fantastic weekend.  See you next week!

Laurie

Read Full Post »

Homemade Harissa via Relishing It

If you’ve spent much time reading food blogs or magazines, you probably know what harissa is, but for those of you that don’t (Hi Dad!), let me fill you in.  Harissa is a North African condiment made mostly from peppers and spices.  And it is amazing.  Like a punch-of-flavor-to-your-tongue amazing.  It’s often found on Moroccan tagines, but I’ve found so many more day-to-day uses for it.  I love to slather it on sandwiches.  Try it on this meatloaf with a bit of mayonnaise and some hot peppers.  Heavenly.  It’s also fantastic on an egg sandwich where the yolk is still a bit oozy.  Crunchy salads, or paired with carrots– harissa transforms an ordinary meal into something divine.

Homemade Harissa via Relishing It

Lemon for Homemade Harissa via Relishing It

Homemade Harissa via Relishing It

Homemade Harissa via Relishing It

If you’ve been visiting Relishing It for awhile, or taken a stroll through the ‘menu’ section, you know that I love to make my own condiments.  It’s not difficult, and to be honest, they just taste better than those bottled versions that are mass manufactured and sit on the shelf for months.  This mustard, ketchup, and red curry paste are a few of my favorites.  Harissa isn’t quite so common, but there really are a ton of recipes out there, and they are all a bit different.  Some use tomatoes, some don’t.  Some use fresh herbs, others stick with dried spices.  For this harissa, I was looking for something a bit smokey, but not too spicey.  I also wanted it to have a fresh, herb flavor.  If you want more of a kick, you can simply add more cayenne pepper or choose a hotter variety of dried peppers for the base.  One nice thing about this recipe is that you can easily manipulate it to suit your own tastes.  For my  part, I think this one turned out perfectly, so I won’t be changing a thing.  Top your Harissa with a bit of olive oil to store in the refrigerator for an extended period of time, it should last a few months this way.  But…it won’t.  You’ll eat it up in no time.  It’s that good.  Hope you enjoy!

Homemade Harissa via Relishing It

Cheddar and Stout Meatloaf via Relishing It

The Ultimate Meatloaf Sandwich with Homemade Harissa via Relishing It

The Recipe:  Homemade Harissa

(Makes about 1 cup)

5 dried Ancho chile peppers

5 dried Guajillo chile peppers

3 cloves garlic, chopped

1 teaspoon cumin seed, toasted and ground with a mortar and pestle (or use the flat side of a large knife to smash them)

1 teaspoon coriander seed, toasted and ground with a mortar and pestle

2 teaspoons fresh lemon juice

2 tablespoons fresh parsley, chopped

2 tablespoons fresh cilantro, chopped

pinch of ground cayenne pepper, more to taste

3 tablespoons extra virgin olive oil

3 tablespoons champagne vinegar (white or red wine vinegar will also work)

1 tablespoon tomato paste

sea salt, cracked black pepper, to taste

3 tablespoons soaking liquid, or more, if needed

Place the dried peppers into a medium sized bowl.  Pour enough boiling water over them so they are covered.  Place a small plate on top of them to keep them submerged.  Cover the entire bowl with another larger plate, to keep the heat in.  Let sit for 1 hour.

When the peppers are soft, begin by reserving some of the soaking liquid.  Remove the peppers from the water.  Remove the stem and carefully dump out the seeds.  Place the peppers and the remaining ingredients into a food processor.  Process for a few minutes until completely smooth.  Taste.  Adjust seasonings and thickness, if necessary.  Store in a jar with a lid in the refrigerator.  Cover with a layer of olive oil, if intending to keep for an extended period of time (several months).  I don’t cover mine with olive oil, but I generally use it within a few weeks.  Enjoy the heck out of this!

Thanks for stopping by today, friends! xo

Laurie

Read Full Post »

Lamb Tagine via Relishing It

I woke up to the welcoming rumble of thunder this morning.  Now that may not seem too interesting, but with a quick glance out the window, I saw heavy snowflakes falling everywhere and blanketing the ground.  Thunder and snow– brilliant!  I know I may be the last person in Minnesota (aside from my husband) who isn’t quite ready to let Winter go yet.  Yes, I know it has been a long season this year, but the prospect of one last snowstorm made for a lovely start to my day.  And this has to be the last one of the year right?  Right?

Moroccan Lamb Tagine via Relishing It

This lovely dish will keep you warm while you wait for the snow to melt.  It’s a delicious Moroccan lamb tagine, which is technically a “Spring” dish.  So, even if you’re not able to frolick in the fresh Minnesota snow, you can enjoy this delightful meal.  What is a tagine?  It’s a North African “stew” that is simmered in a special pot.  The pot itself is called a tagine.  It’s an interesting vessel with a conical lid which allows for less steam loss.  Less steam loss means you don’t have to add as much liquid in the first place, which concentrates the flavors.   The stew itself consists of a meat, paired with fruits and nuts.

Moroccan Lamb Tagine via Relishing It

As it turns out, you don’t actually have to use a tagine.  I don’t have one, so I turned to my trusty Dutch oven with it’s tight fitting lid.  It worked wonderfully.  We’ve made this tagine several times, and it’s become a favorite in our house. Lamb pairs beautifully with dried fruits.   It’s full of dried plums, cilantro, turmeric, and pearl onions.  The dried plums disintegrate to form a splendid, slightly sweet sauce that coats the lamb perfectly.  The pearl onions add a nice contrast.  The dish can be served with whole wheat couscous or even quinoa and topped with chopped almonds for a bit of crunch.  Add more cilantro or fresh mint  for a burst of freshness.  Traditionally preserved lemons or Harissa (recipe coming soon!) can be served along side, so feel free to experiment.  One pound of lamb feeds our family of four perfectly, since this is a rich dish– you don’t need a pile on your plate.  We serve it with a nice salad or a vegetable on the side.   However, if you have more people, or are wanting leftovers (highly encouraged), feel free to double the recipe.  Enjoy!

Moroccan Lamb Tagine via Relishing It

The Recipe:  Lamb Tagine

(Serves 3-4 people)

olive oil

1 medium white onion, chopped

1 pound lamb stew meat, cubed

10 saffron threads (optional) broken with a mortar and pestle or with your fingertips   *See note

2 tablespoons honey

1 3/4 – 2 cups beef broth, or more

1/2 teaspoon ground tumeric

1-inch piece of whole cinnamon or 1/4 teaspoon ground

pinch of nutmeg or mace

3/4 cup dried plums (prunes)

1/3 cup chopped cilantro

15 frozen (or fresh) pearl onions

fresh mint or more chopped cilantro,  and chopped toasted almonds to garnish

Note: Saffron is a wonderful spice that is used often in Moroccan dishes.  However, it is quite expensive.  This tagine is delicious with or without it–so, you decide.

If you are fortunate enough to have a real tagine, of course use that for this dish.  If you don’t have one, a Dutch oven with a tight fitting lid is a wonderful alternative.

Preheat oven to 375°F.

Heat a couple tablespoons of olive oil in a Dutch oven.  Always use a paper towel to pat your meat dry  before browning it– you will get a wonderful color this way.  Season the lamb with a sprinkle of sea salt and cracked black pepper.  Brown your meat in two batches, so the pan does not get overcrowded.   Make sure to let the meat develop a nice dark color.   Add more olive oil, as needed.

Remove the meat from the pan.  Add a bit more olive oil to the pan, (and even a splash of beef broth, if there is a lot of color on the bottom) and brown the chopped onion.  Scrape up all of the brown bits, as they have a ton of flavor.  After a few minutes, add the lamb, turmeric, cinnamon, nutmeg, saffron, cilantro, prunes, and honey.  Saute for 30 seconds, then add the beef broth.  Cover and bring to a boil.  Remove from heat and place in the oven for about 50 minutes.  Check during the baking time to see if you need to add more broth.  The consistency is your choice, so add as much or as little as you want.  It will thicken near the end.  When it seems done, add the pearl onions and return to oven so they heat through, about 5 minutes.  Garnish with chopped cilantro or mint and chopped almonds.  It’s delicious served with whole wheat couscous or even quinoa.  Enjoy!

Source:  Adapted from Fine Cooking Magazine’s Special Soups & Stews Issue 2010

Thanks for stopping by Relishing It.  Hope you all have a wonderful weekend!

Laurie

Read Full Post »

Blueberry Coffe Cake via Relishing It

Hello, friends!  I hope you all had a wonderful weekend.  Since we had no prior obligations, we were able do whatever we wanted on Saturday and Sunday.  First up was a visit to one of our favorite summer spots,  Minnehaha Falls.  This beautiful little park in Minneapolis is full of trails, waterfalls, bike paths, and best of all, Sea Salt Eatery.  I really don’t complain much about living in Minnesota, but if I have one gripe (no, not the weather), it’s that we’re so far from the ocean and all of that amazing seafood.  Sea Salt eases the pain a bit.  They offer amazing, fresh seafood.  Stopping in for the ridiculously tasty fish tacos and a catfish po’boy was a great start to the weekend.  It’s the little things like this that make me happy.

Blueberries

Aside from fish tacos, we also ate plenty of this amazing blueberry coffee cake.  I baked this up the night before so we could enjoy the relaxing morning at home while the kids played in the living room.  Coffee cake is one of my favorite things– this one is gorgeous, and so is this one.  Today’s blueberry version is one of my son’s very favorite things that I bake.  He loves it.  The beautiful thing about this cake is that it is just as brilliant with fresh blueberries as it is with frozen.  Which makes it perfect to eat throughout the winter.  When organic frozen blueberries are on sale, I generally stock up for smoothies and this cake.  And blueberry season is just around the corner (thankfully) so, fresh ones aren’t far off!

Blueberry Coffee Cake via Relishing It

As usual, I’ve swapped out the all-purpose flour in this recipe for a whole grain version.  It works well here.  It gives the cake a bit more substance. The lemon zest brings a bit more life to the blueberries and the addition of walnuts to the crumb topping supplies a nice bit of texture to each bite.  I will warn you to keep a close eye on this cake near the end of the baking time.  Be careful not to over-bake it, as it will be a bit more dry than it should be.  When a toothpick inserted into the center comes out crumb-free– it’s done.  It keeps well for days covered with aluminum foil and sitting at room temperature.  Hope this coffee cake becomes a family favorite in your house, too!

Blueberry Coffee Cake via Relishing It

The Recipe:  Blueberry Coffee Cake

(Makes an 8×8 cake)

For the Crumbs:

1/3 cup (1 1/2 ounces) white whole wheat flour

1/4 cup sugar

1/3 cup packed brown sugar

pinch of kosher salt

1/2 cup toasted walnut halves, chopped

5 tablespoons room temperature butter

For the Cake:

2 cups and 2 teaspoons white whole wheat flour (10 ounces)

2 teaspoons baking powder

1/2 teaspoon baking soda

1/2 teaspoon kosher salt

1/4 teaspoon ground cinnamon

pinch of freshly grated nutmeg

2/3 cup sugar

zest of 2 small organic lemons, or 1 large

6 tablespoons room temperature butter

2 large eggs, at room temperature  (*see note)

1 teaspoon vanilla

1/2 cup buttermilk  (*see note)

2 cups fresh or frozen organic blueberries (do not thaw)

Note:  It’s important to use room temperature eggs in baked goods.  Eggs at room temperature add more volume to your finished product.  Place your eggs in a bowl of warm water for about 10-15 minutes, they will then be room temperature and ready to use.  Don’t have any buttermilk?  No worries.  Don’t just add regular milk as a substitute, as the baking soda in the cake will only be activated with an acid, therefore leaving you with a flat cake.  To make a 1/2 cup of buttermilk add 1 1/2 teaspoons white vinegar to 1/2 cup of milk.  Stir and let it sit for about 10 minutes.  

Preheat the oven to 350°F.  Prepare a square 8×8 pan with butter.

To make the crumbs:  In a small bowl, combine the flour, sugar, brown sugar, and salt with a whisk.  Using a fork, mash in the butter.  When it is mostly uniform, gently mix in the walnuts.  Put into the refrigerator until ready to use.

Prepare the blueberries by putting them into a medium bowl and gently tossing them with 2 teaspoons of the flour.  Set aside.

To make the cake: In a medium bowl, whisk together the remaining 2 cups of flour, baking powder, baking soda, kosher salt, cinnamon, and nutmeg.  Set aside.  In a bowl of a stand mixer, combine the sugar and lemon zest by rubbing it together with your fingers.  When it is fragrant and combined, add the butter and beat together with the sugar using the paddle attachment for about 3 minutes on medium speed,  or until it is light and pale in color.  Add the eggs one at a time, beating for about 1 minutes after each one.  Then add the vanilla extract.  The batter may look curdled at this point and that’s ok — it will smooth out.  Reduce the mixer speed to low and add the flour mixture and buttermilk alternately in two additions.  Starting and ending with the flour.  Be careful not to over mix.  Gently fold in the blueberries using a rubber spatula.

Pour the batter into the prepared pan and smooth out with a rubber spatula.  Add the crumb mixture to the top.  Gently pat the mixture into the batter.  Bake for 55-65 minutes, or until a toothpick inserted into the center comes out clean.  Let cool.  Keeps well for days at room temperature covered with aluminum foil.  Enjoy!

Source:  Adapted from Dorie Greenspan’s Baking: From My Home To Yours

Thanks for stopping by Relishing It!

Laurie

Read Full Post »