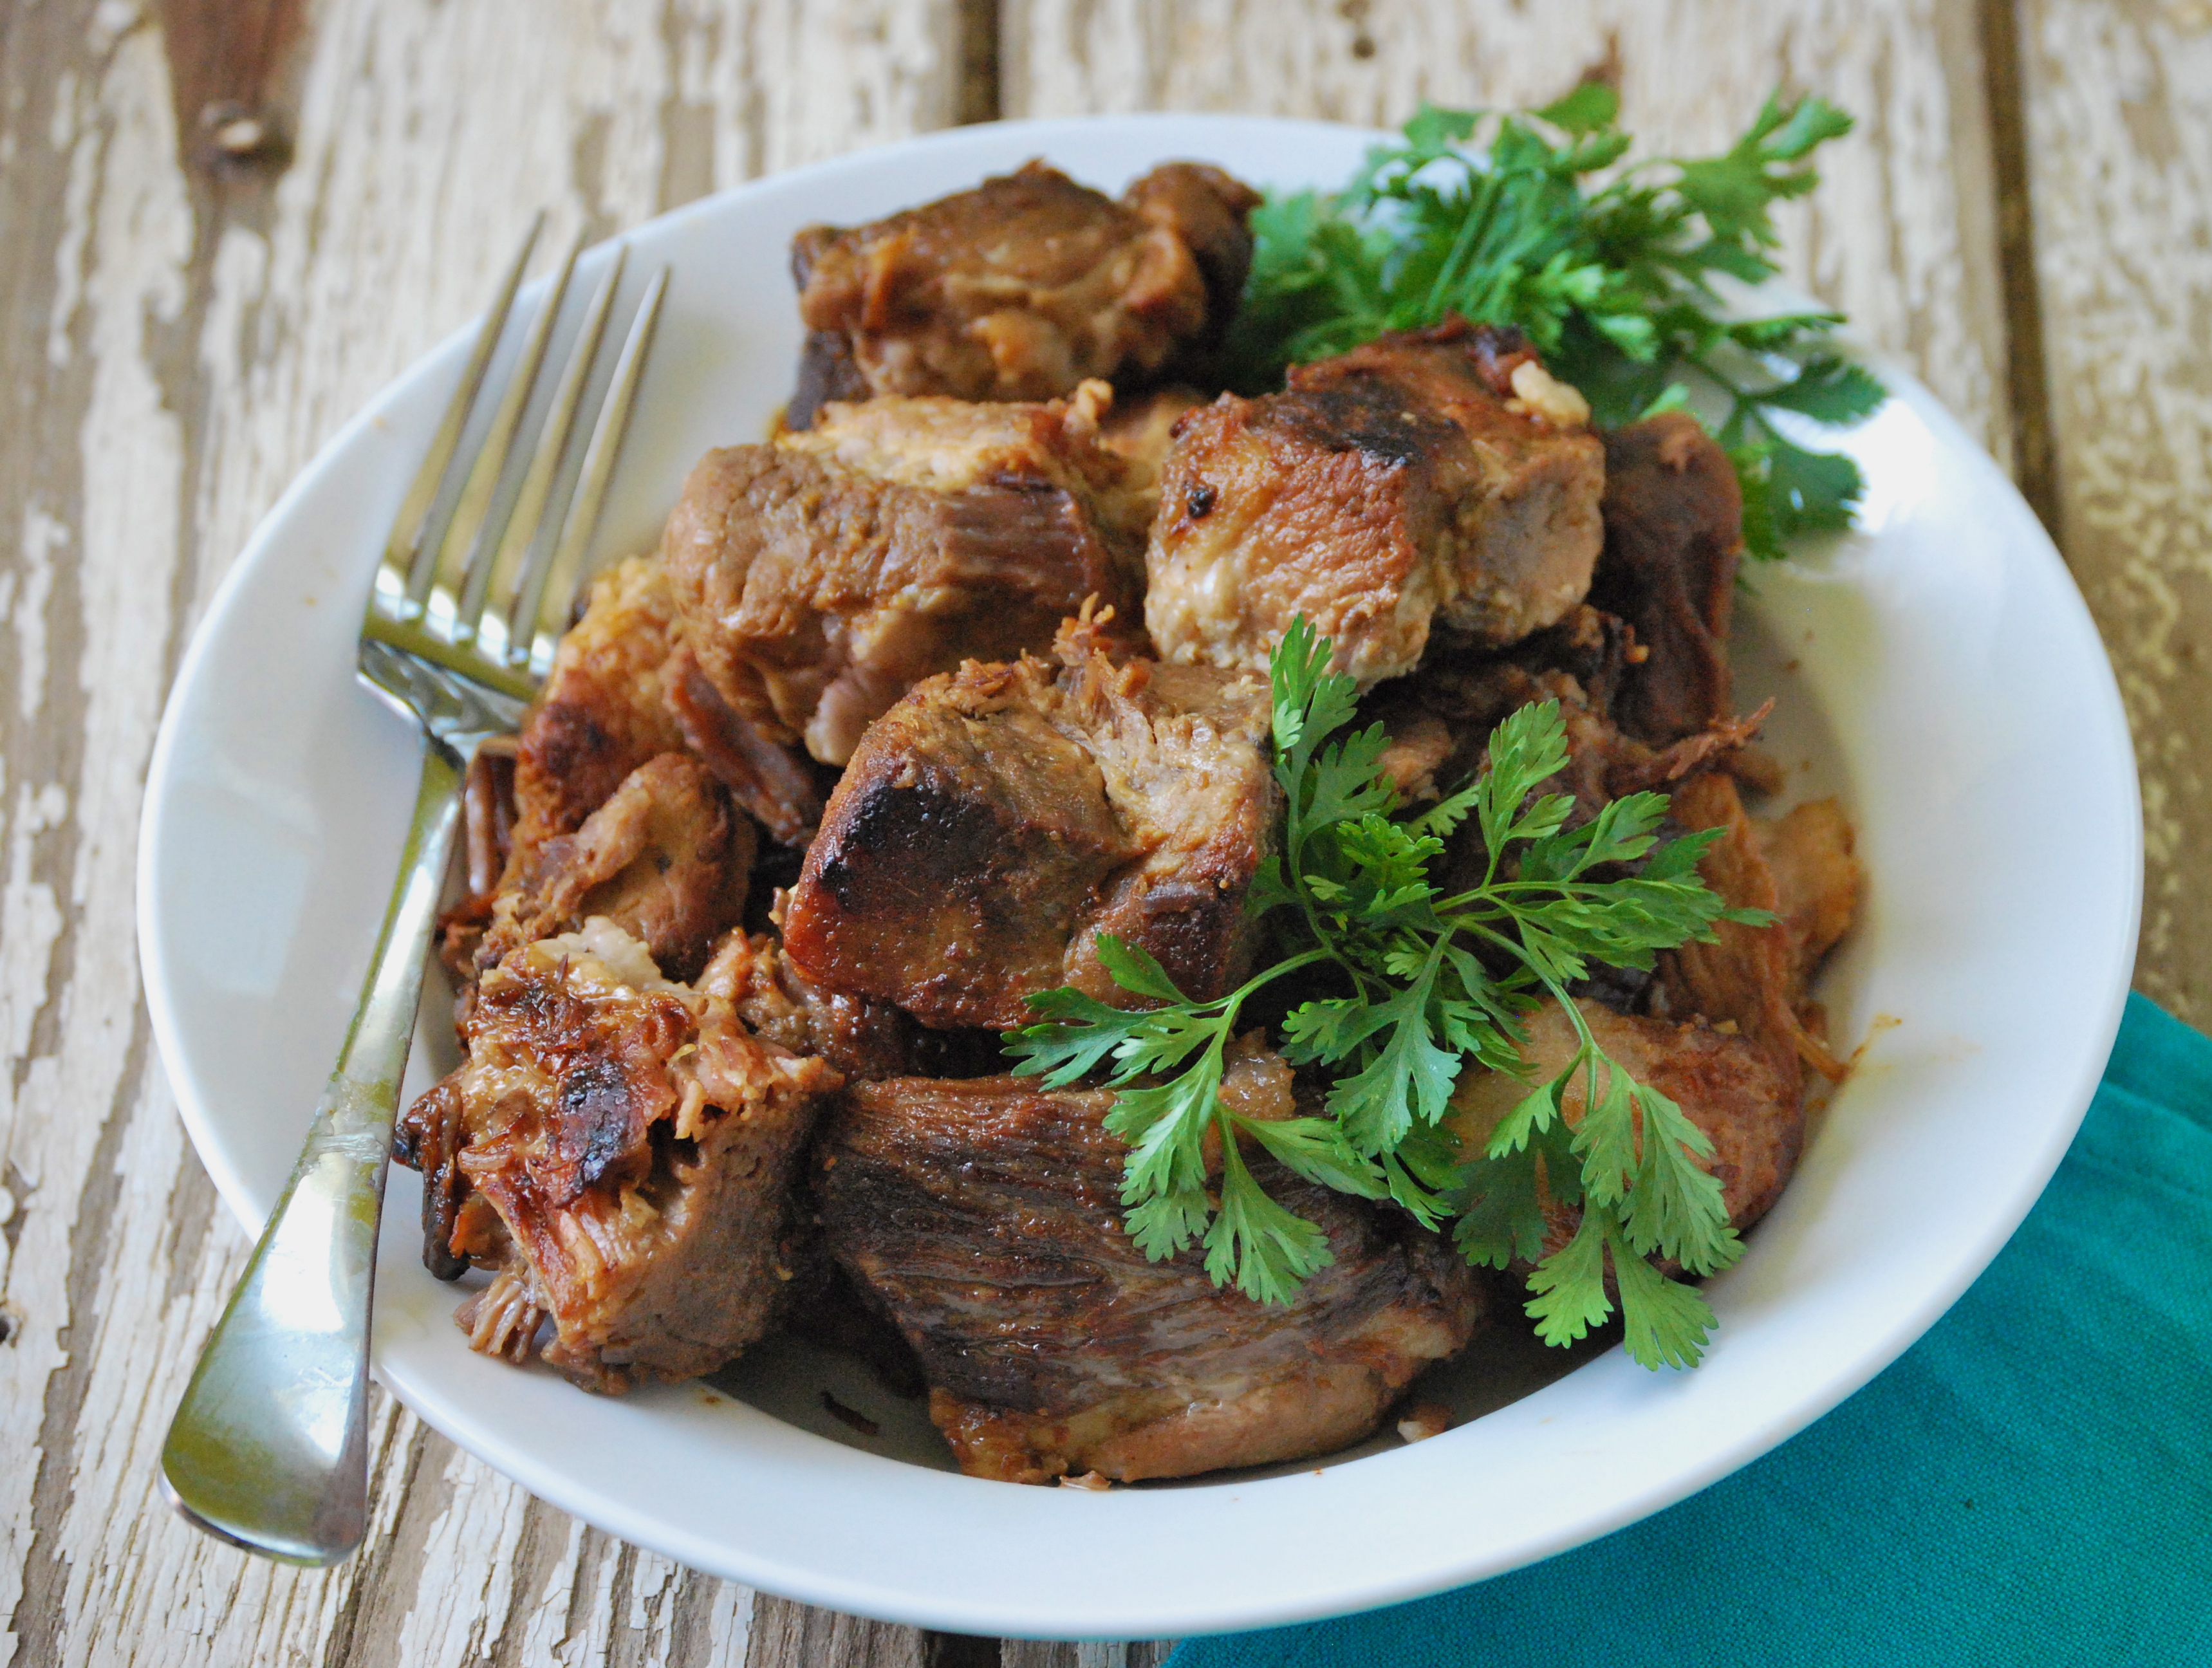
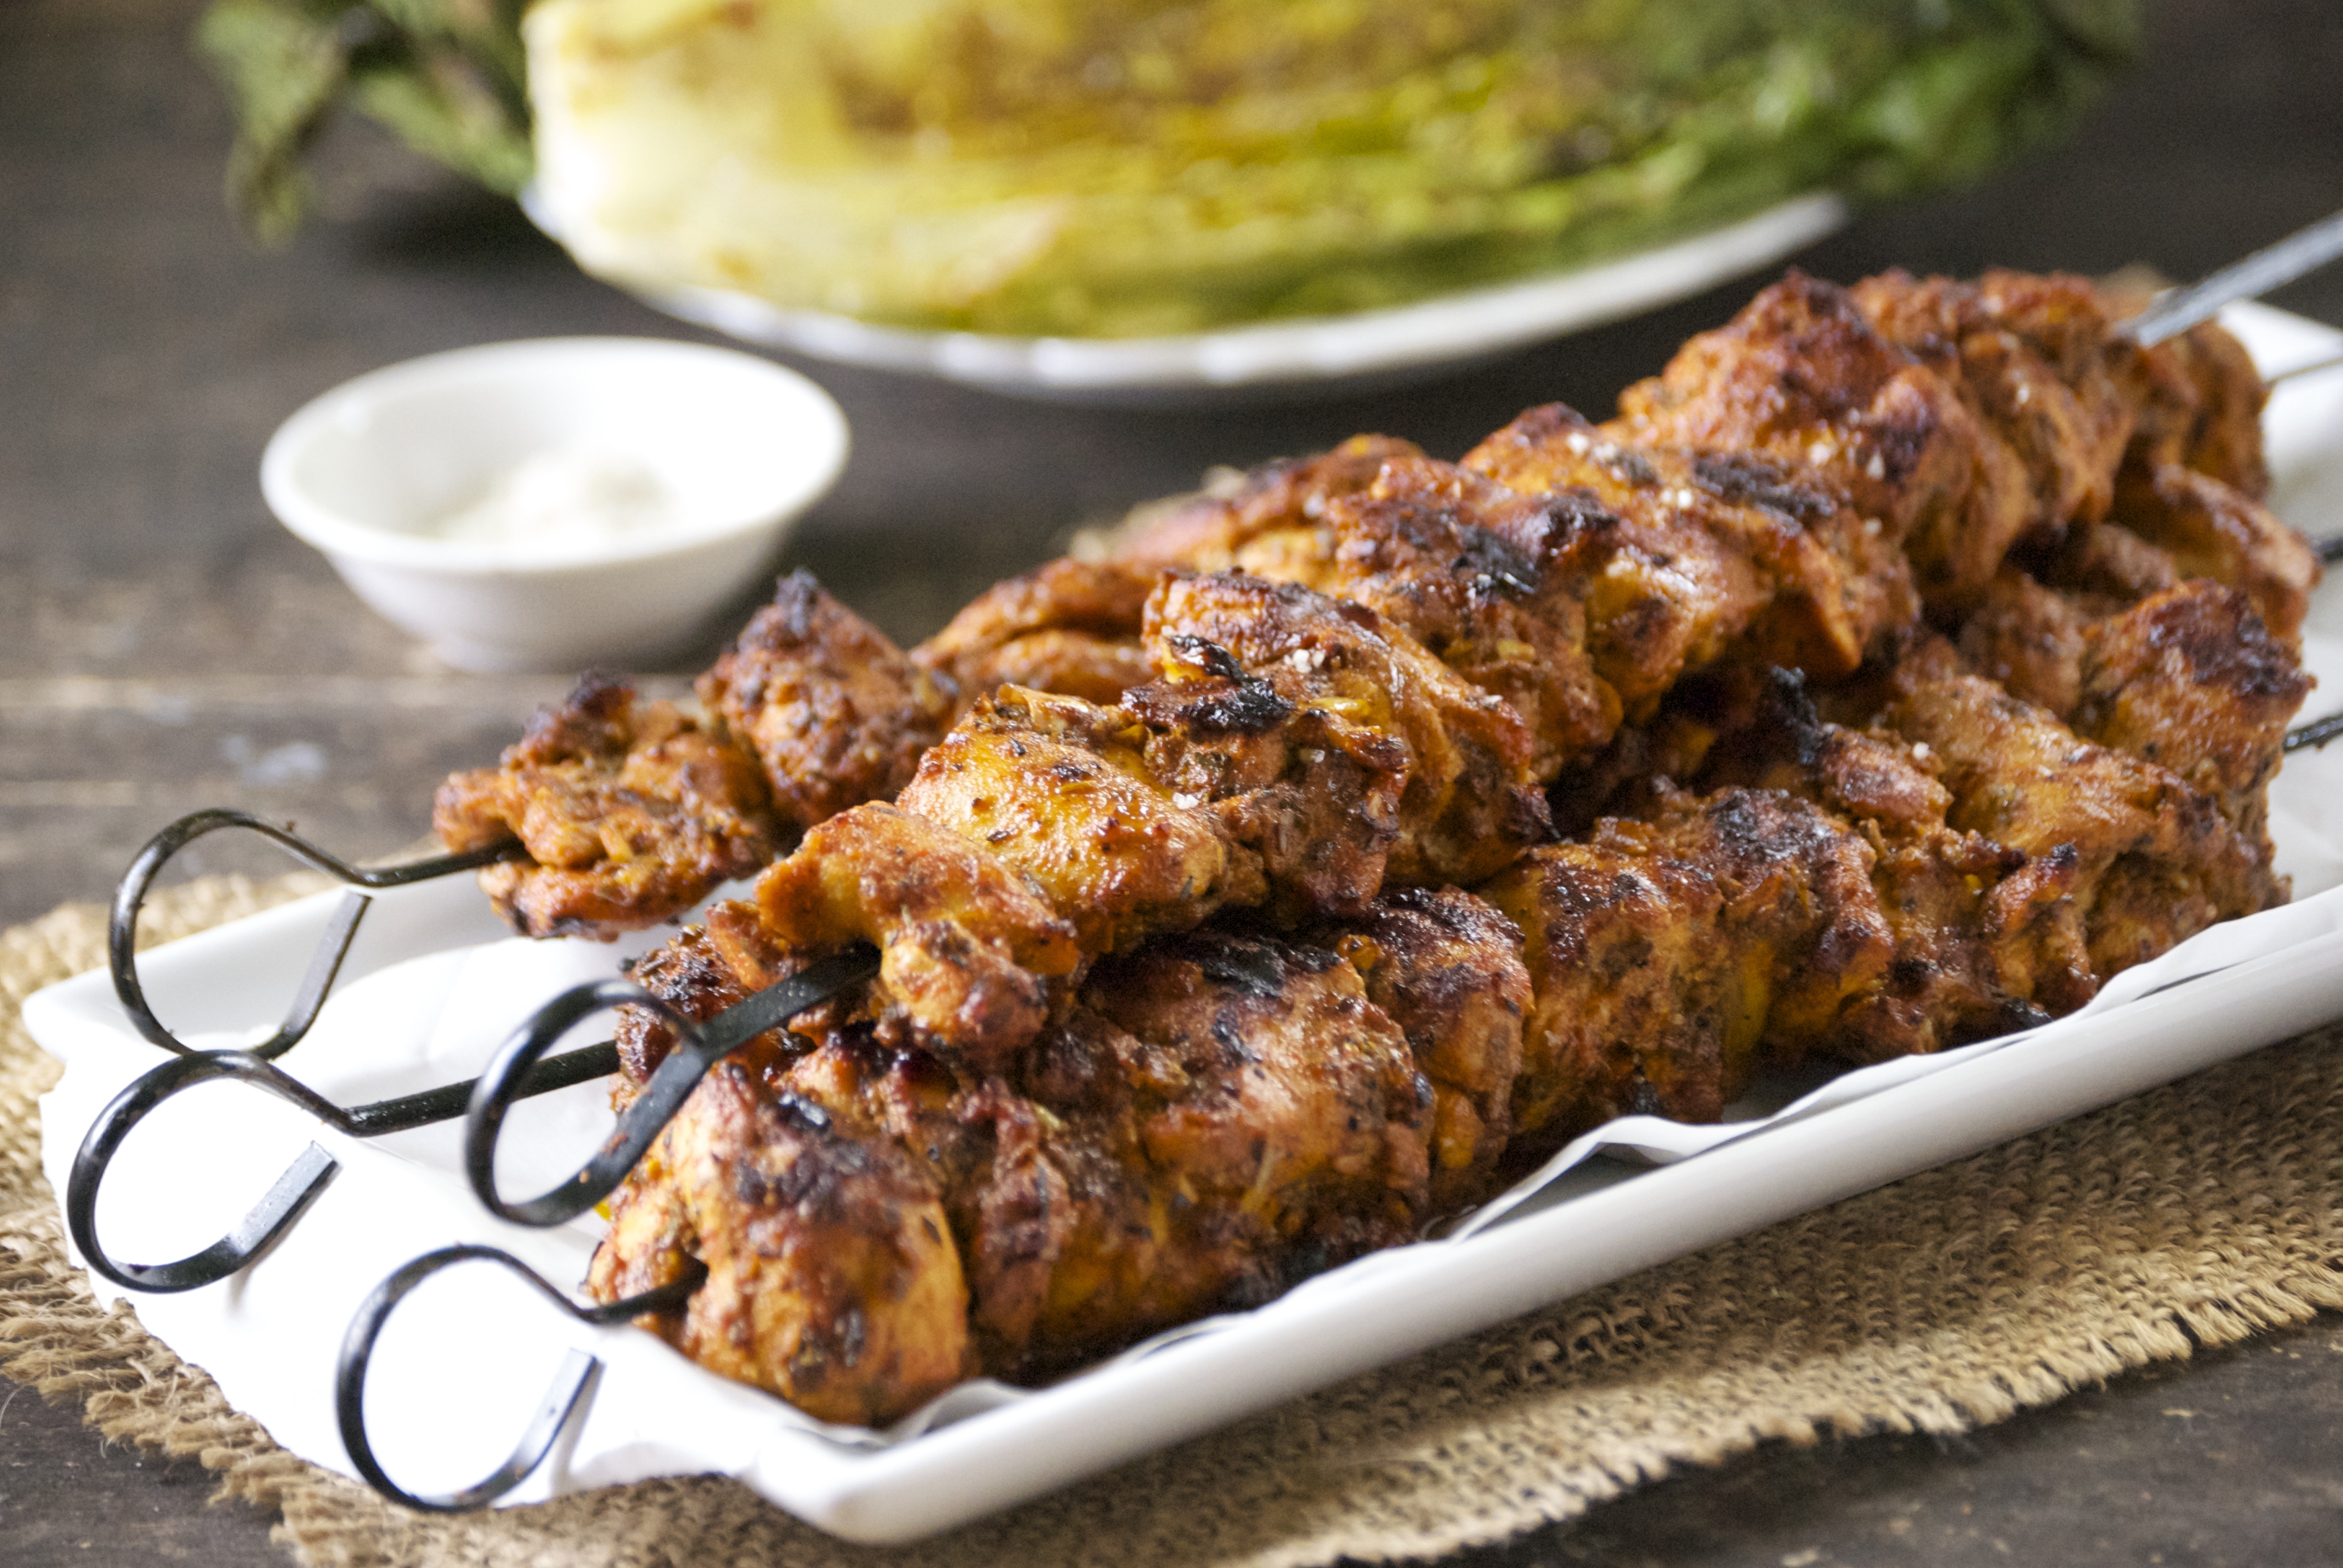
Pincho Moruno. That’s a fancy title, no? Don’t be intimidated– this incredible dish is basically a kabob-like stick made of meat. And since it’s grilling season, these spiced chicken thighs are a perfect addition to your barbecue rotation. The recipe comes from this beautiful book by Jeffrey Weiss. It’s titled Charcutería: The Soul of Spain and it is a stunning, mouthwatering read. Jeffery is a professional chef with fifteen years under his belt. He is one of only a few Americans to win the ICEX culinary scholarship that allowed him to live in Spain and learn its regional cuisines, as well as to cook with some of Spain’s top chefs. From that experience comes this amazing cookbook.

After paging through it, I immediately knew what I wanted to make. I couldn’t stop thinking about the Pincho Moruno. I love to make kabobs in summer. Sometimes I marinate the meat, sometimes I don’t. This recipe includes a marinade so delicious you’ll want to make it over and over again. At first glance, you may think there are too many steps and the list of ingredients is too lengthy. But trust me, the steps are relatively quick– basically mixing dry spices together. And all of the spices listed were ones I already had in my spice cabinet. In fact, the only thing I didn’t have for this recipe was the chicken thighs– I’m guessing you’ll have most everything, too.

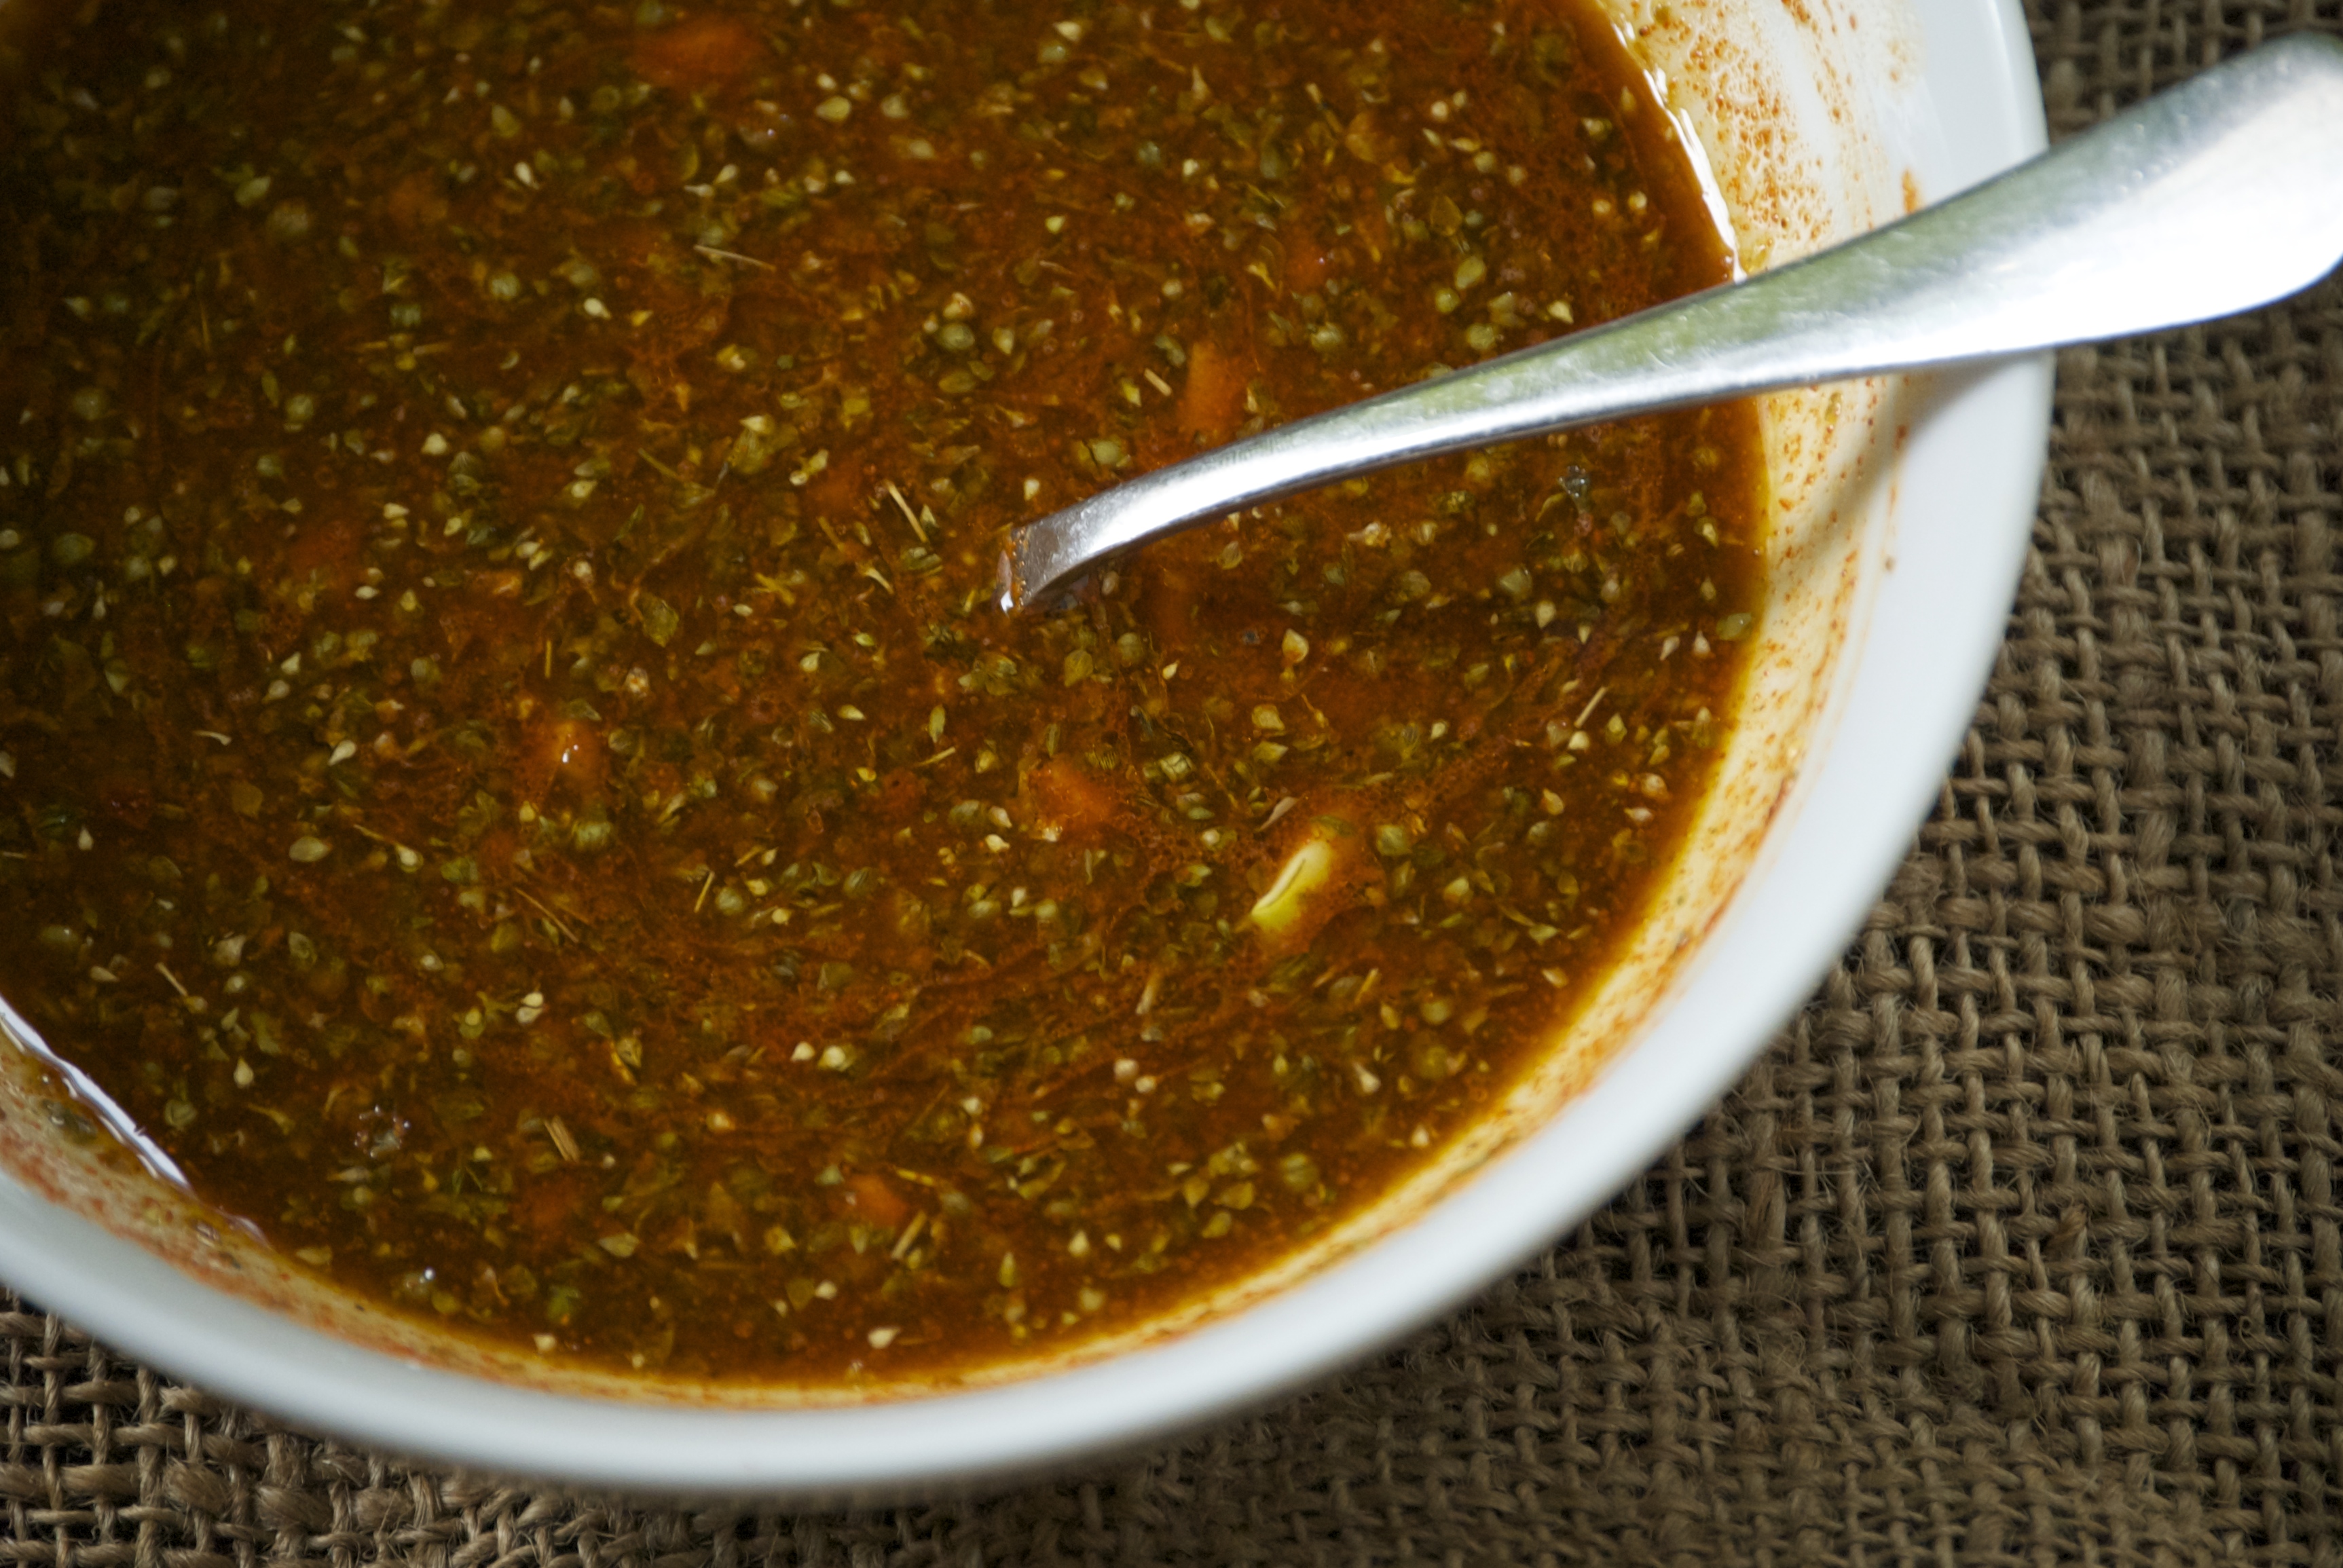
The adobo sauce is the real star here. I’ve always been a fan of adobo, but this was my first foray into making a homemade version. It was far easier than I anticipated, and the flavor is, well, incredible. The spices paired with the sherry vinegar, garlic, and olive oil are perfection. You’ll want to invite friends over to show this one off– trust me.

The Recipe: Pincho Moruno (Adobo Marinated Chicken Kabobs)
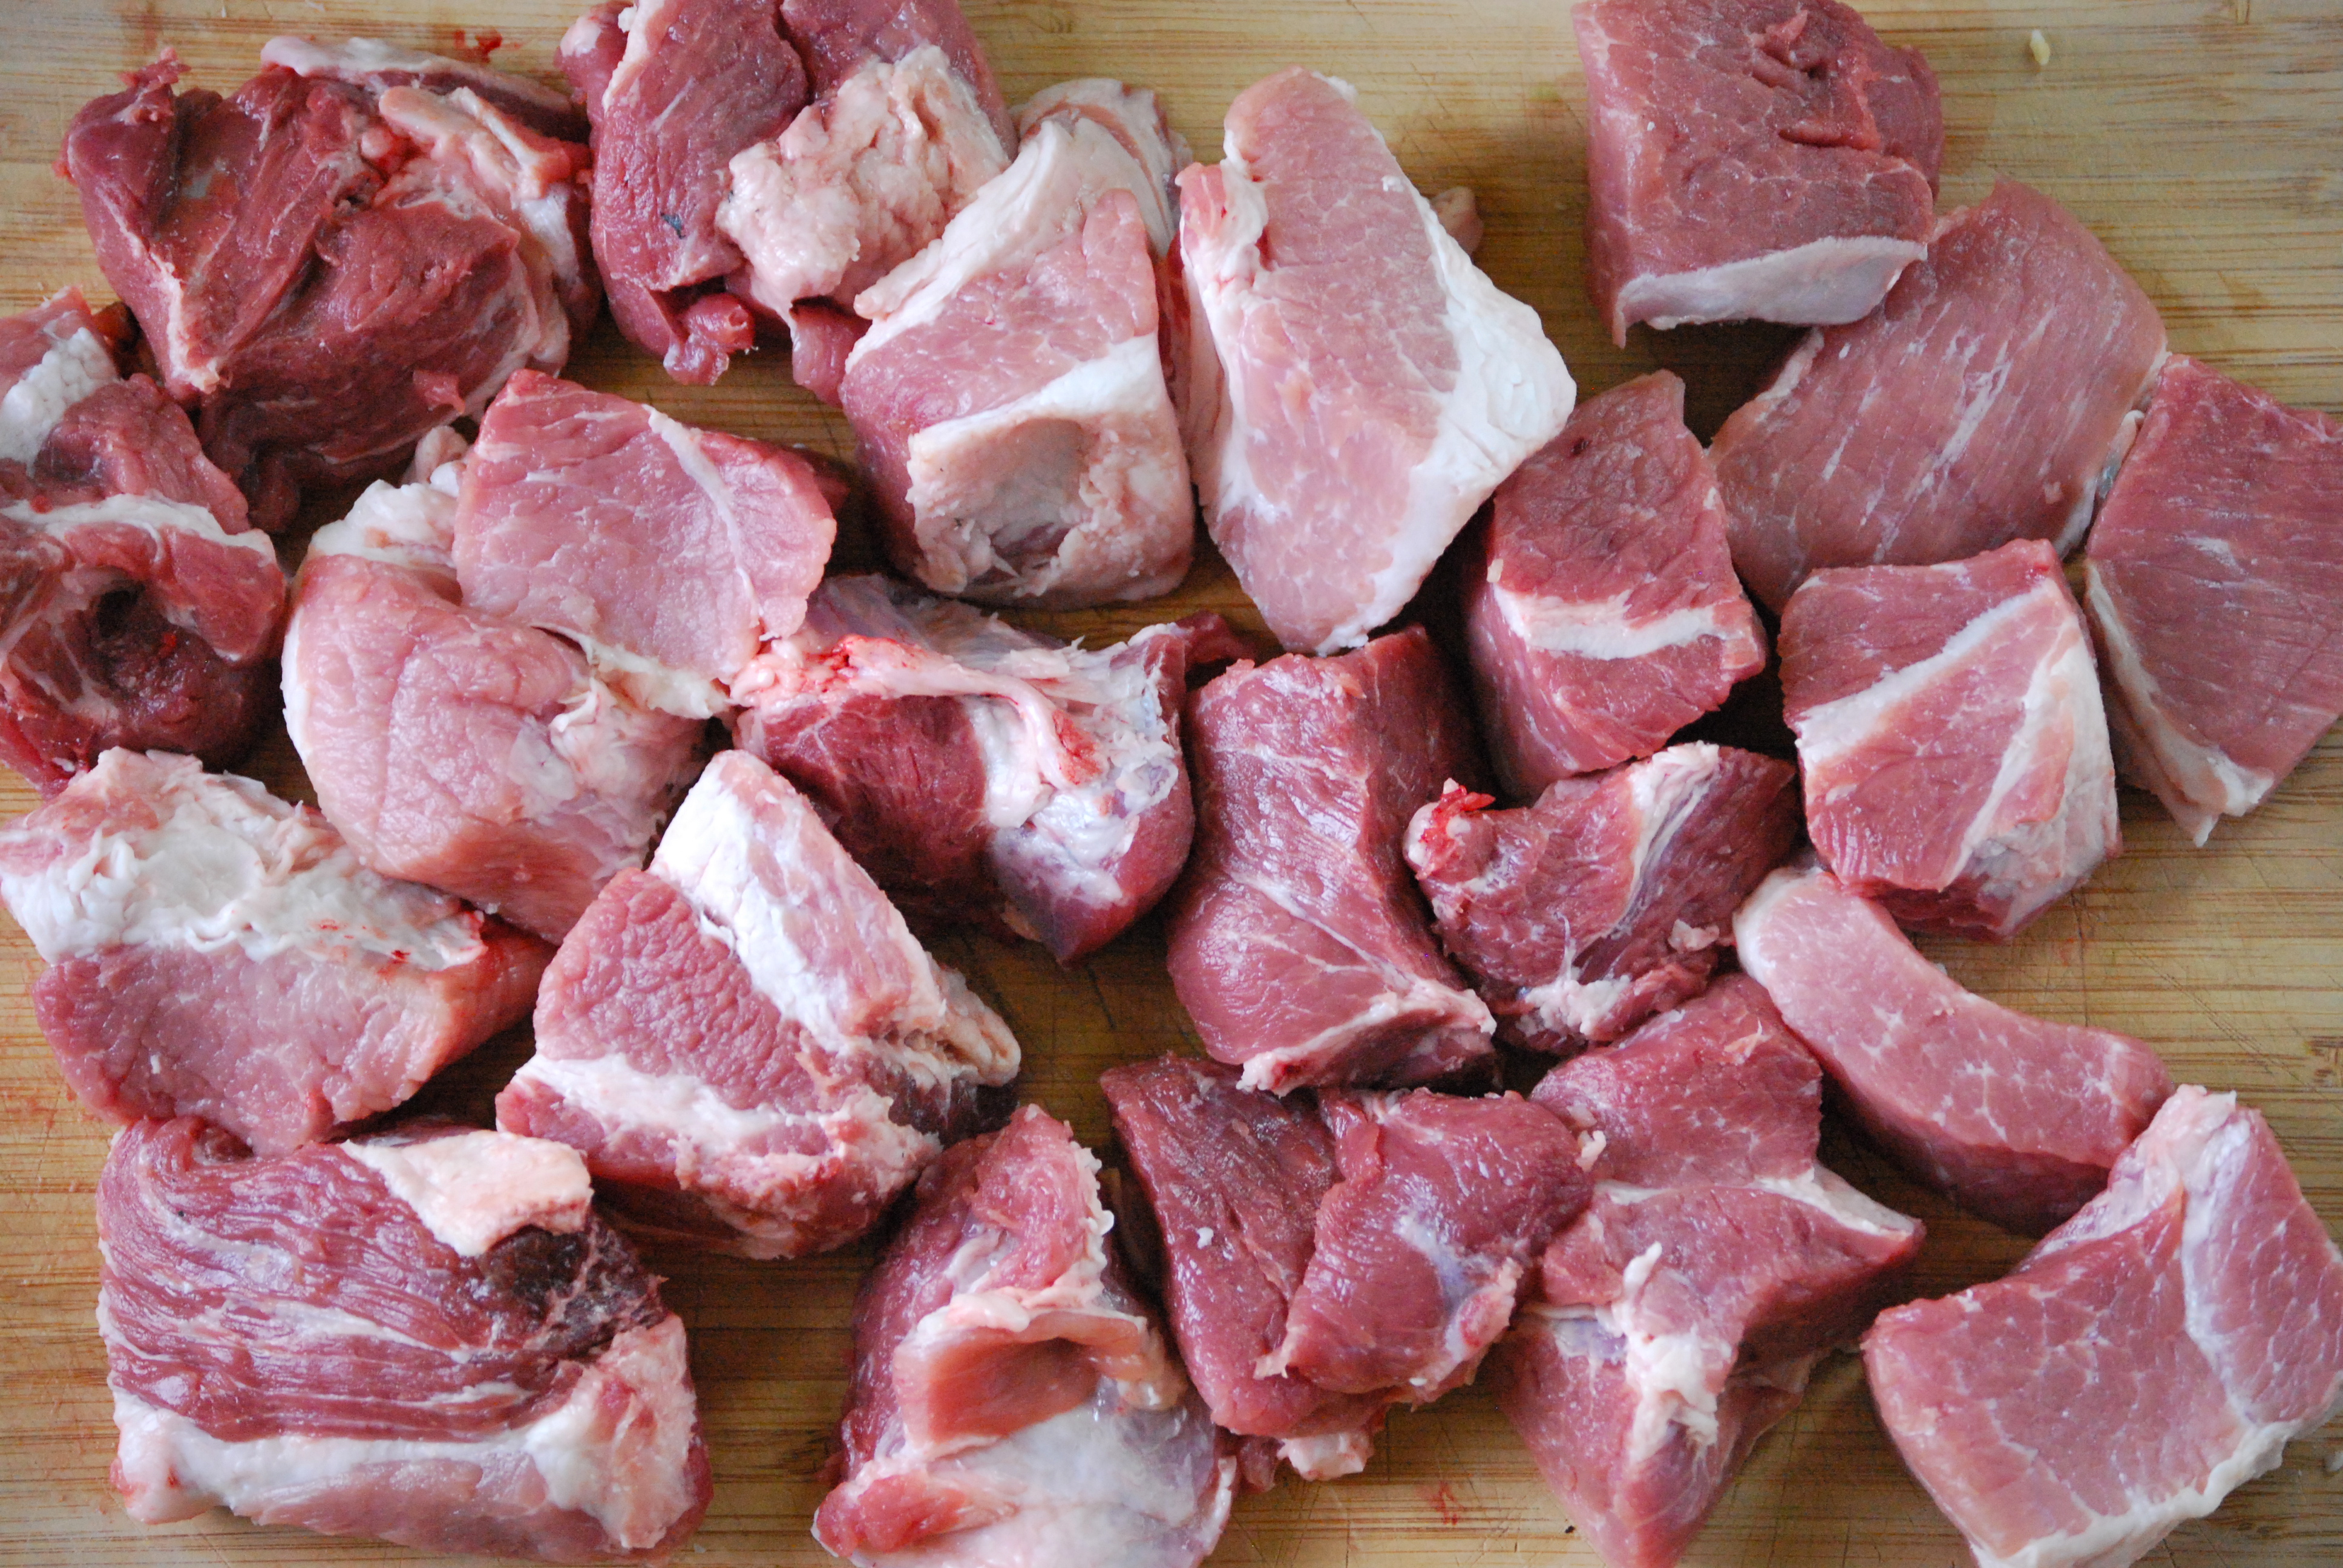
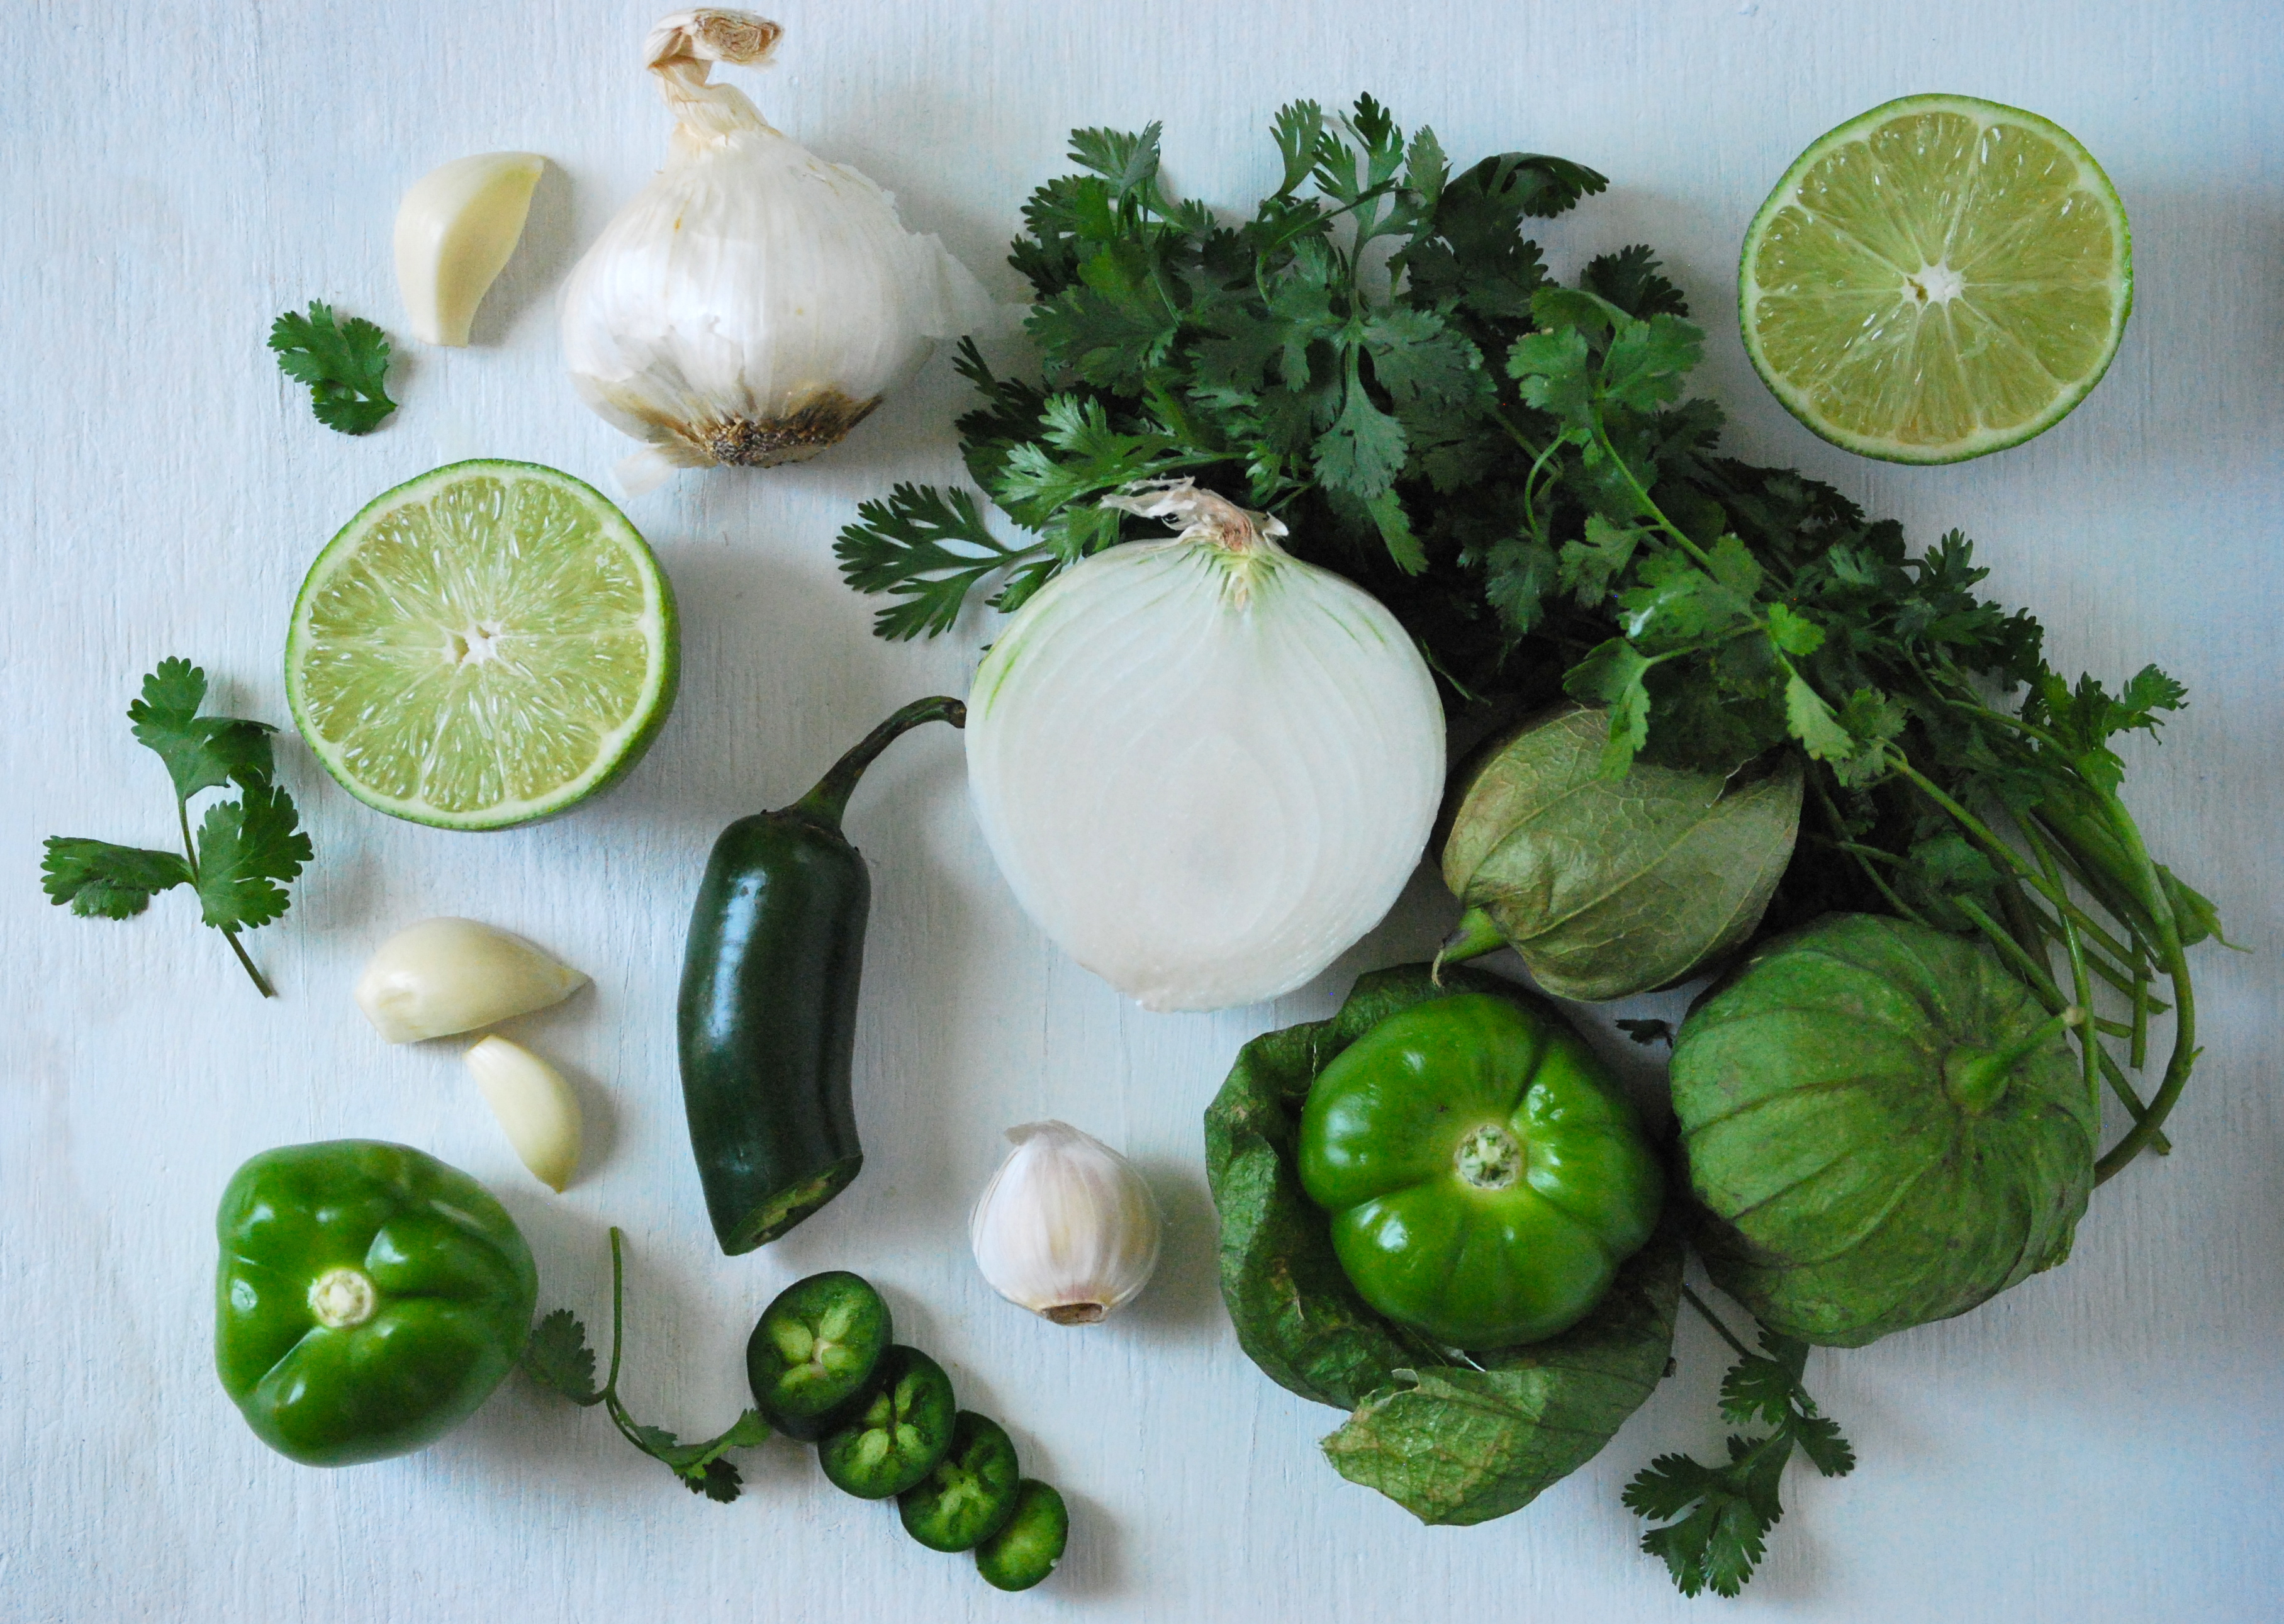
About 2 pounds of boneless, skinless chicken thighs, cut into bite-sized pieces (pork tenderloin, lamb shoulder, pork belly, chicken or beef hearts are also options)
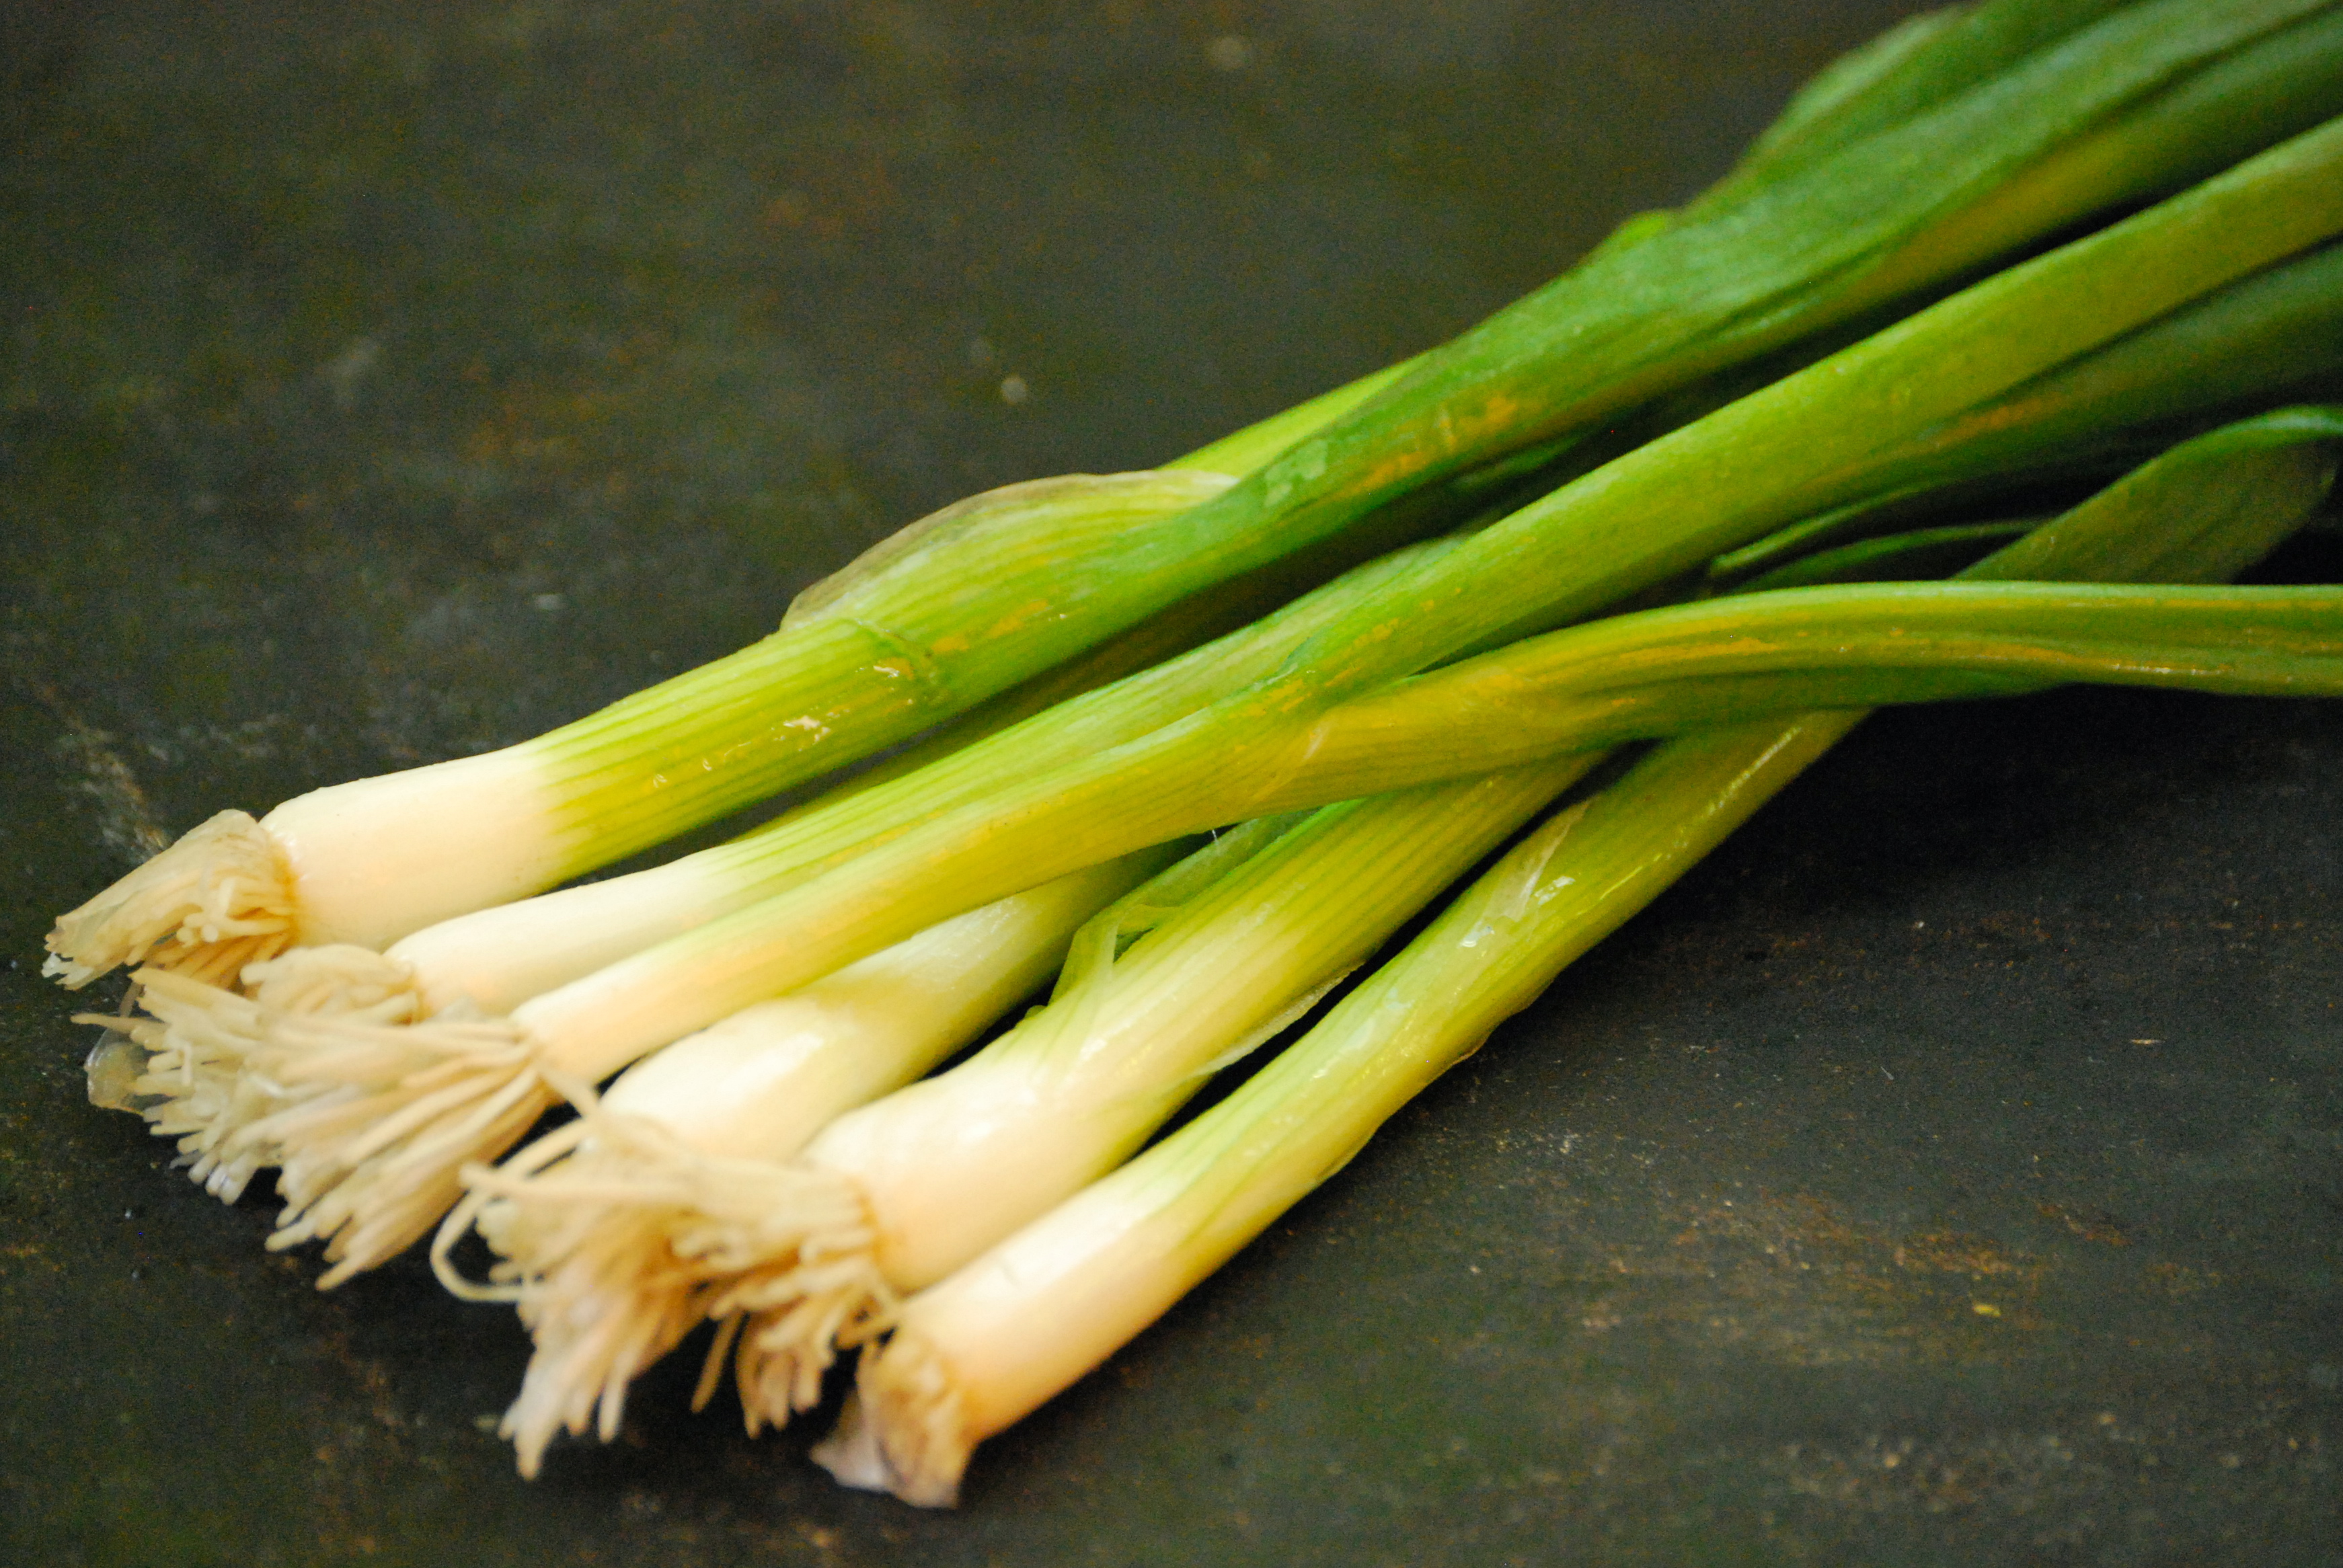
1 medium yellow onion, julienned
1/4 cup extra-virgin olive oil
2 tablespoons sherry vinegar
kosher salt, to taste
1 recipe Basic Adobo
4 tablespoons Moruno Spice
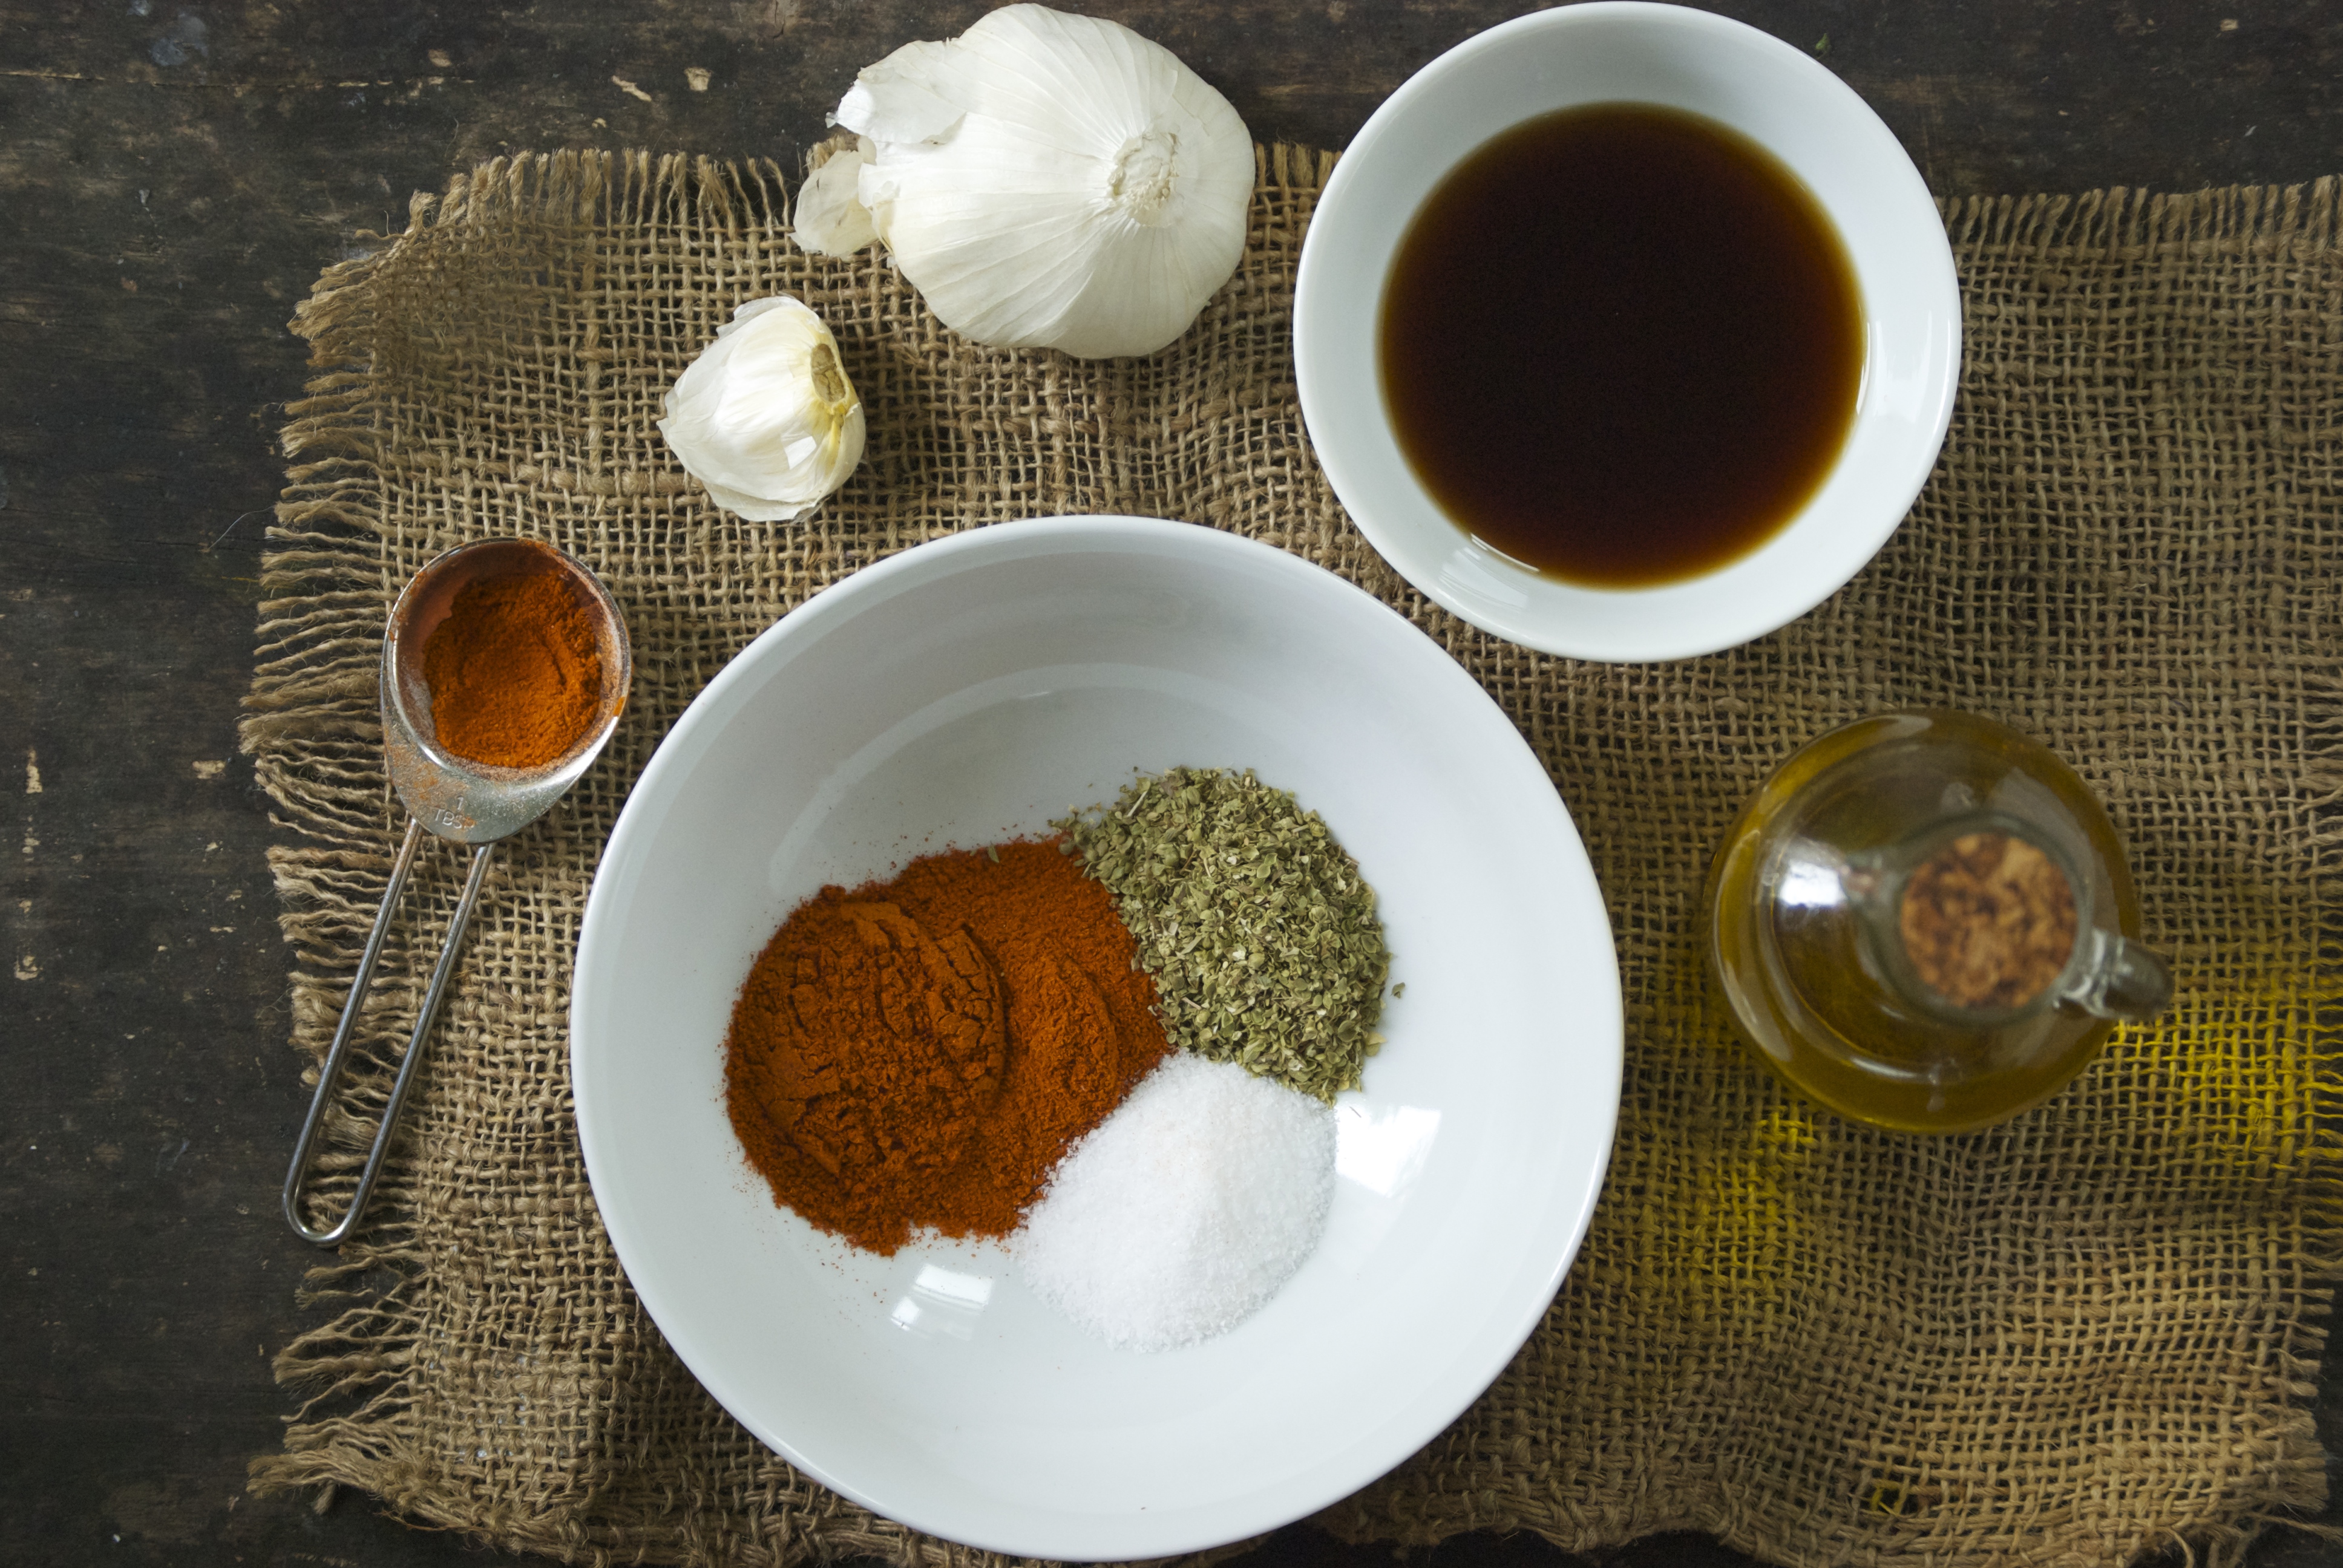
Basic Adobo:
5 cloves garlic, crushed
1 tablespoon kosher salt
1 tablespoon dried oregano
2 tablespoons pimentón dulce (sweet paprika)
1/4 cup extra-virgin olive oil
1/4 cup sherry vinegar
1/4 cup water
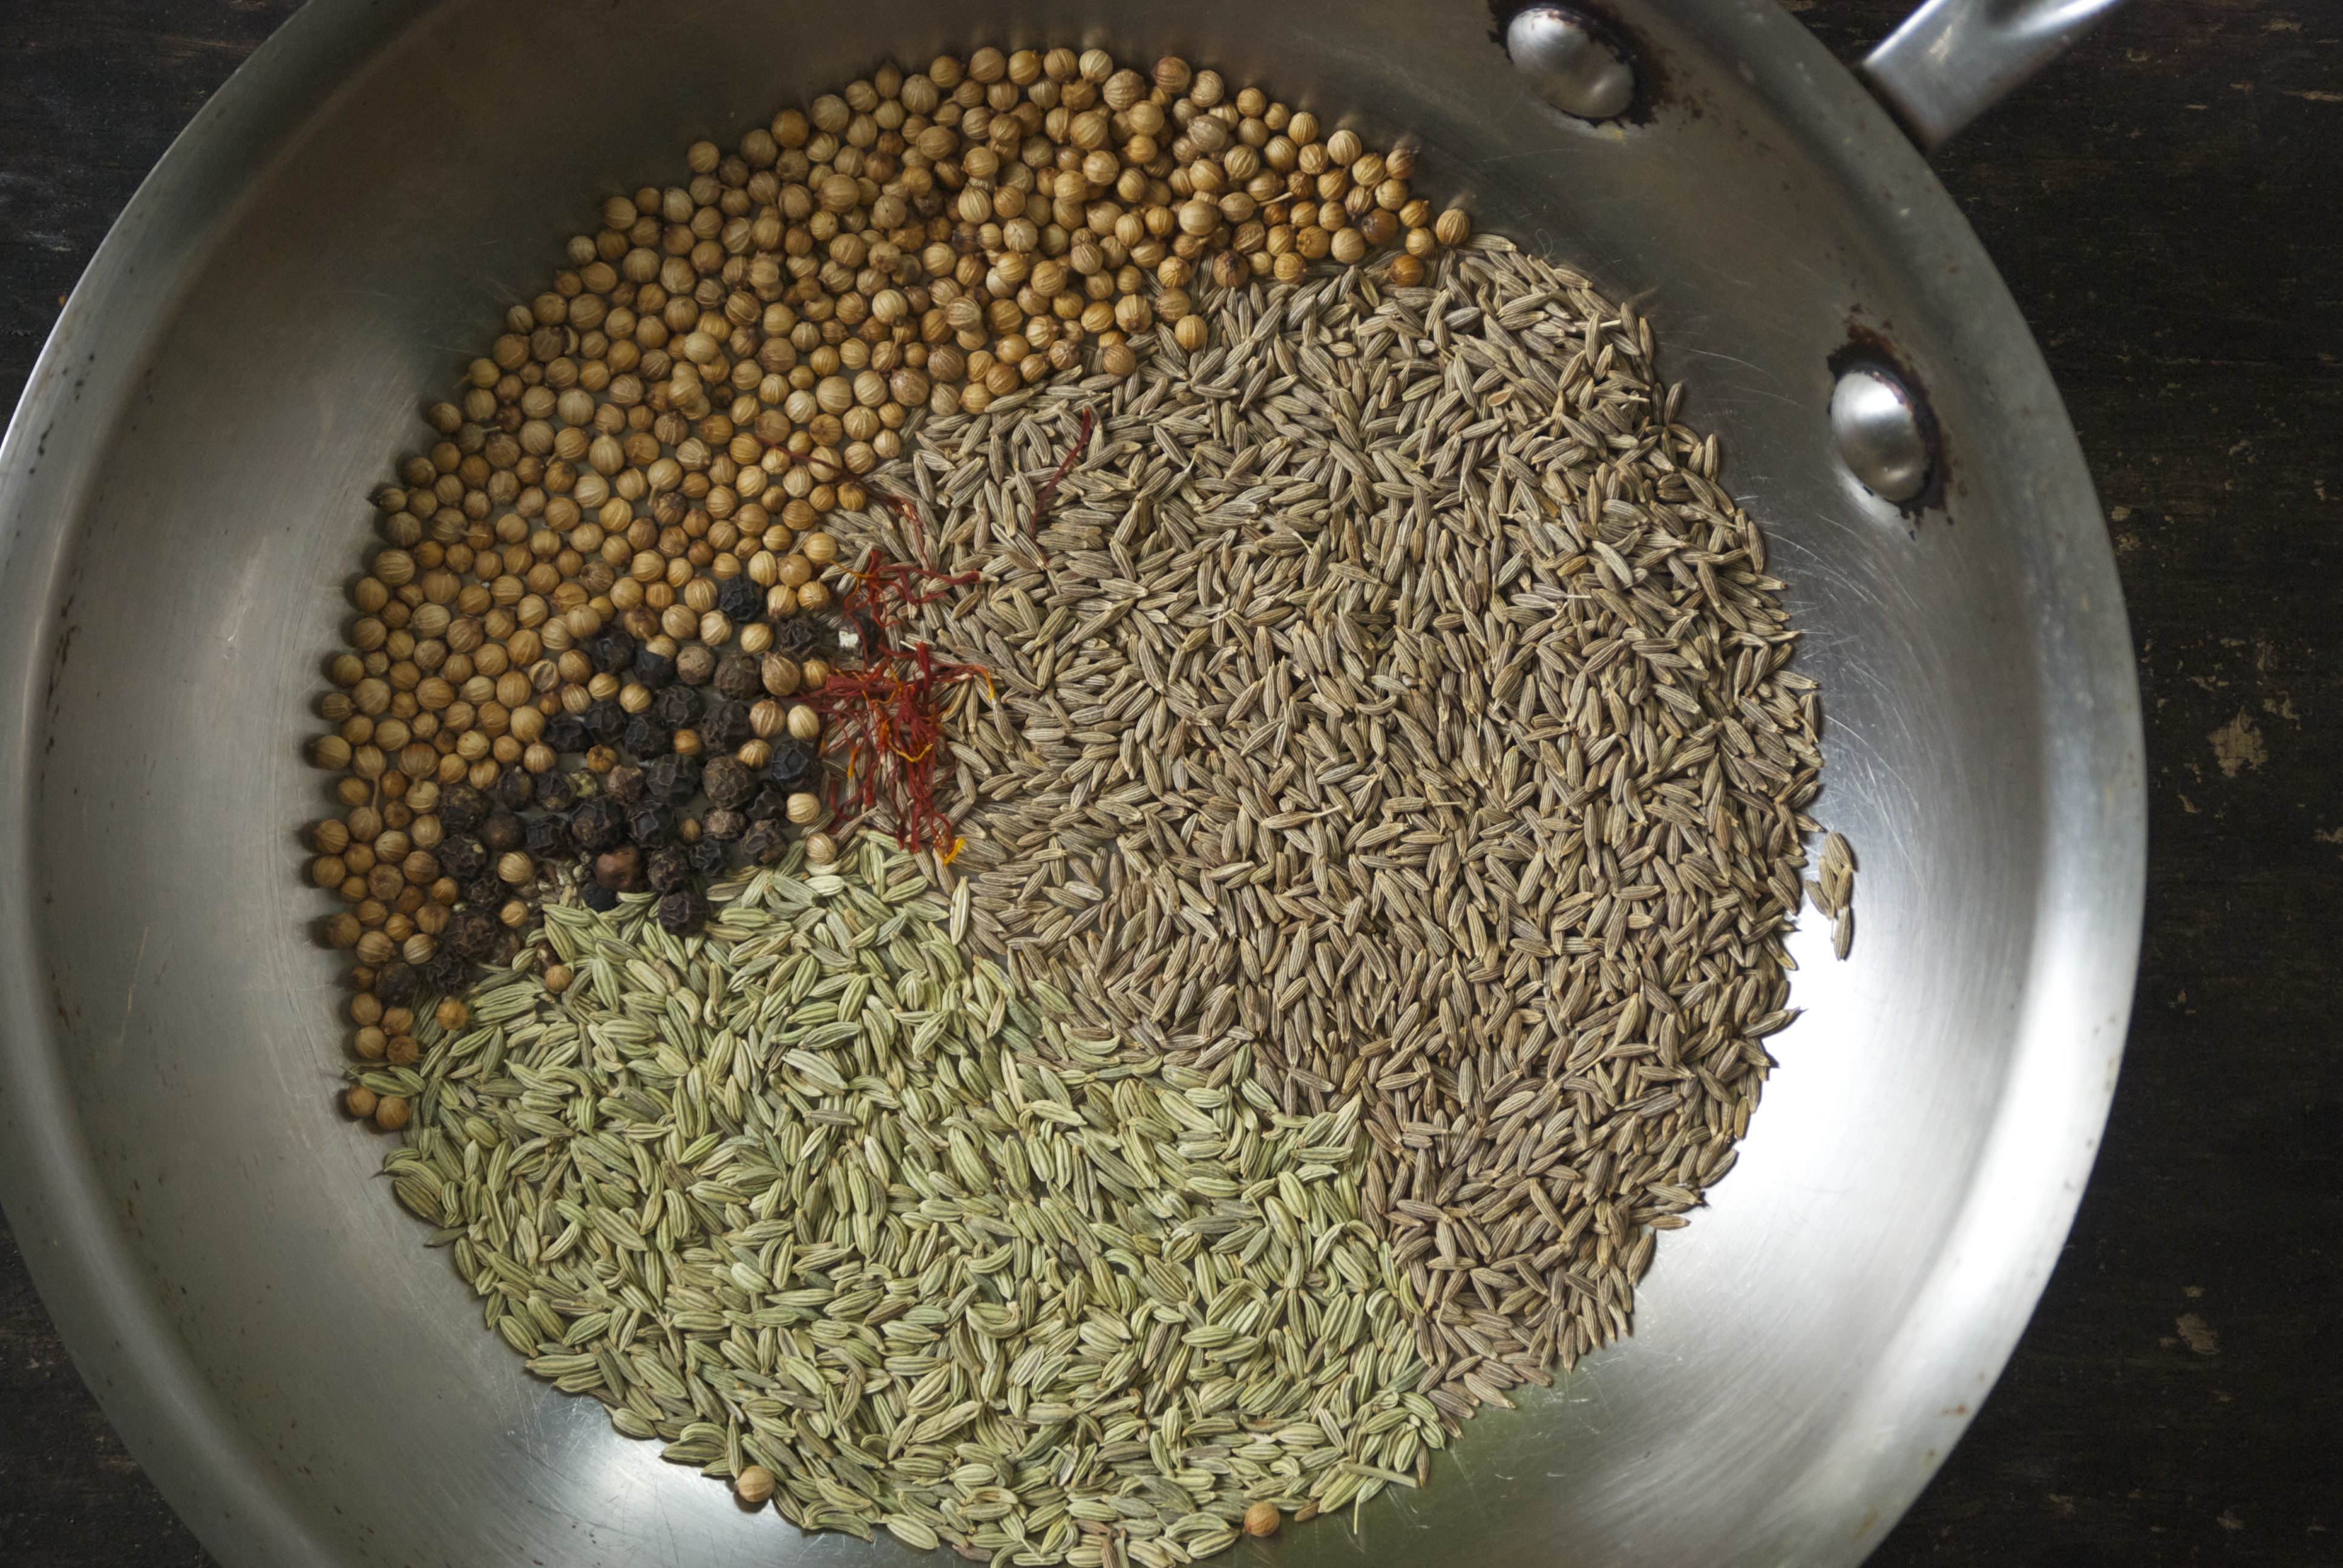
Moruno Spice:
2 tablespoons cumin seeds
1 tablespoon coriander seeds
1 tablespoon fennel seeds
1 tablespoon black peppercorns
pinch of saffron threads
1 tablespoon dried oregano
1 tablespoon dried thyme
1 tablespoon pimentón dulce (sweet paprika)
1 tablespoon freshly ground black pepper
1 1/2 teaspoons ground turmeric
Begin by making the Basic Adobo. In a food processor, or by hand, mix all of the ingredients together until it forms a bright red paste. Use immediately, or store in the refrigerator for up to 7 days.
Next, mix together the Moruno Spice. In a small dry skillet toast the cumin, coriander, and fennel seeds; peppercorns; and saffron threads for about 2-3 minutes, or until fragrant and toasted. Use a mortar and pestle or spice mill to grind the spices into a fine powder. Transfer to a small mixing bowl, and add the oregano, thyme, pimentón dulce, black pepper, and turmeric. Stir and set aside. (Note: This mixture will make a bit more than you will need for this recipe. Leftovers can be stored in an airtight container for up to 6 months.)
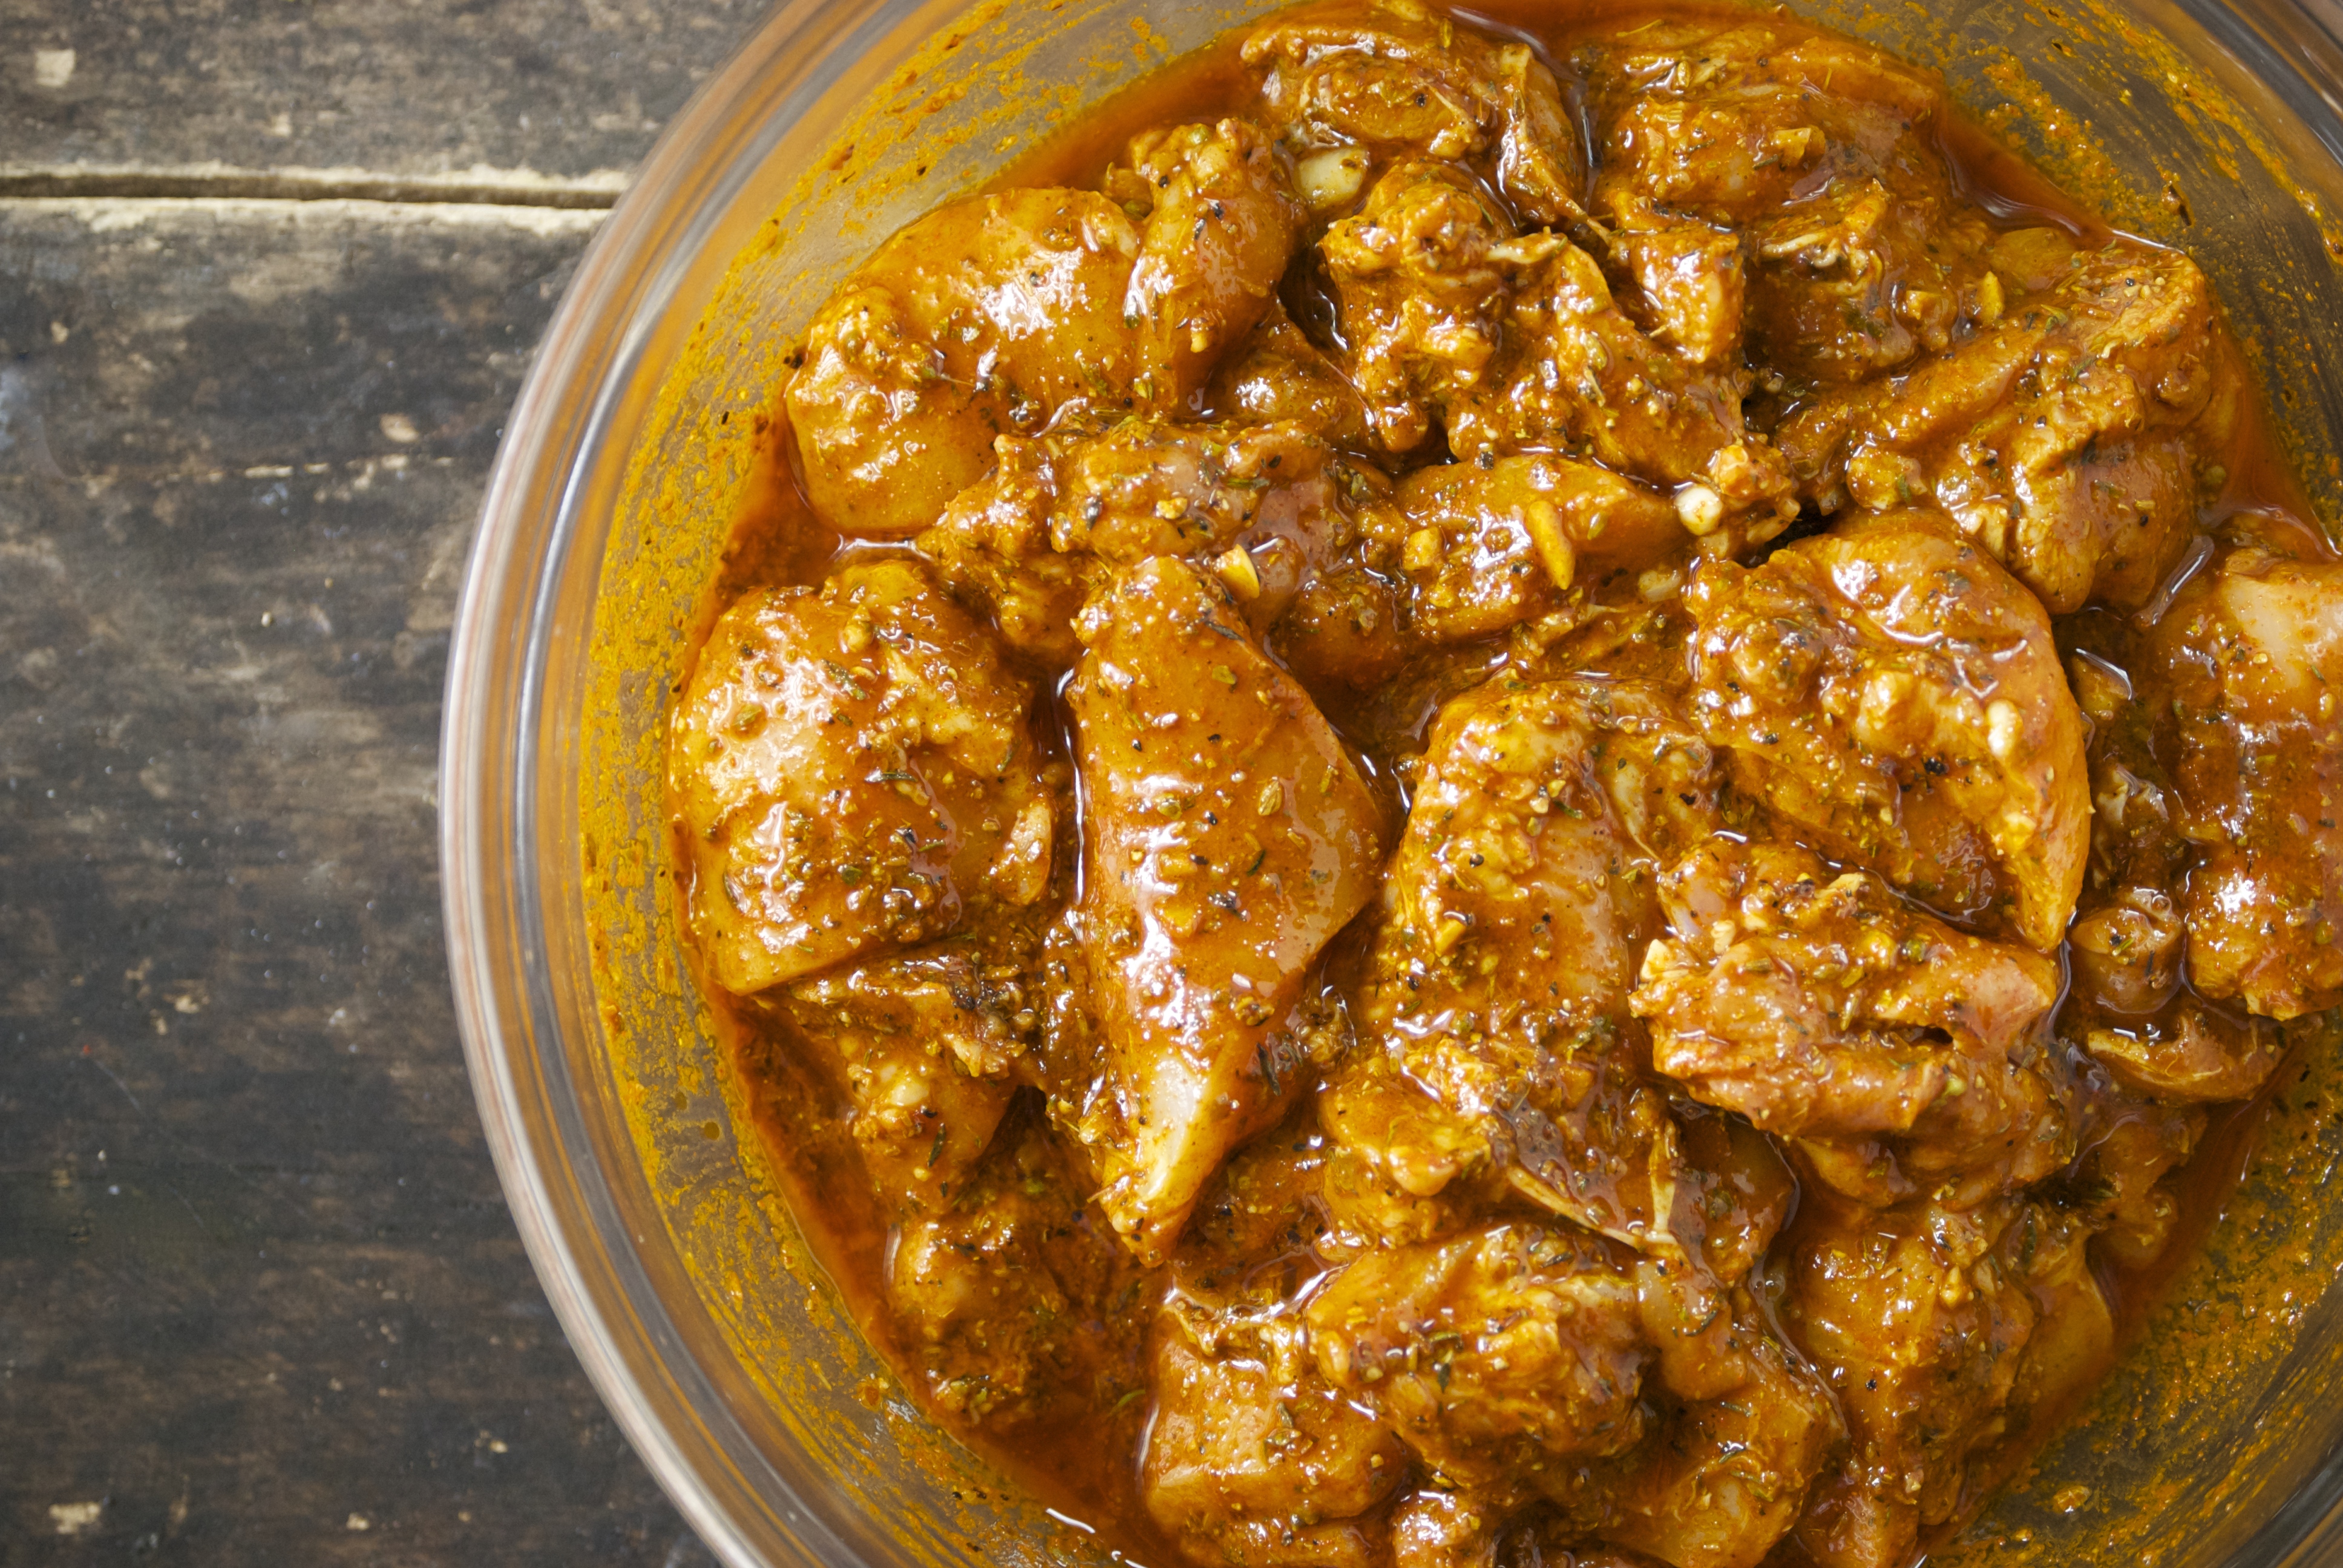
In a large bowl, combine the Basic Adobo, 4 tablespoons of Moruno Spice, olive oil, sherry vinegar, and yellow onion together. Season with salt to your taste. Add the chicken and mix to coat evenly. Cover and refrigerate between 4-24 hours. Slip the chicken onto skewers when ready to grill. If using wooden skewers, remember to soak them in water for 20 minutes beforehand. Sprinkle with salt and pepper and cook to your desired doneness. Enjoy!
Recipe adapted from Jeffrey Weiss’ Charcuteria: The Soul of Spain
Thanks for visiting Relishing It today!
Laurie