Feeds:
Posts
Comments

Posts Tagged ‘Cabbage’

Healthy Stuffed Cabbage Roll Soup | Relishing It

It’s early November and the first winter storm of the season just rolled through Minnesota.  I generally try to have a positive tone when I share my thoughts here, but this… sucks.  No time to acclimate to lower temperatures over a few weeks, no light dusting of snow that melts away in the sun.  Nope.  Winter is here and I’m not ready for it yet.  Thankfully, we got the leaves raked (barely) and taken to the compost pile, the summer furniture is tucked away in the shed, and my small garden has been cut down.  But still, this is ridiculous.  Last winter was grueling, to say the least.  I want more crunchy leaves on the sidewalks and more bonfires with our neighbors.  I want more outdoor runs without the worry of slipping on ice. I realize that I’m going to have to wait months for these simple pleasures again.  And I will wait patiently and enjoy them all-the-more when they arrive.  There.  Now I’m feeling a little bit better.

Healthy Stuffed Cabbage Roll Soup | Relishing It

Healthy Stuffed Cabbage Roll Soup | Relishing It

For now, I will pour myself into doing the things that I love to keep my mind off of the frigid temperatures.  Today it’s warm soup and fresh bread.  This stuffed cabbage roll soup is a favorite in our house.  It has all the wonderful flavors and textures of stuffed cabbage rolls with less work.  It’s hearty and filling– total comfort food.  But, it’s also healthy.  Like, really healthy.  It’s loaded with whole foods–grass-fed beef, fresh cabbage, canned tomatoes, brown rice, and zingy fermented sauerkraut.  I love to eat cabbage year-round– it’s an underrated vegetable, in my opinion.  Not only is it good for you, it has a long refrigerator life.  This is much more than a soup– almost a stew.  Feel free to add more broth or tomatoes if you like it a little less thick.  I think it’s perfect as is, but especially fantastic with a dollop of sour cream or plain yogurt on top and a sprinkle of fresh dill or parsley.  I hope you give it a try.  Enjoy!

Healthy Stuffed Cabbage Roll Soup | Relishing It

Healthy Stuffed Cabbage Roll Soup | Relishing It

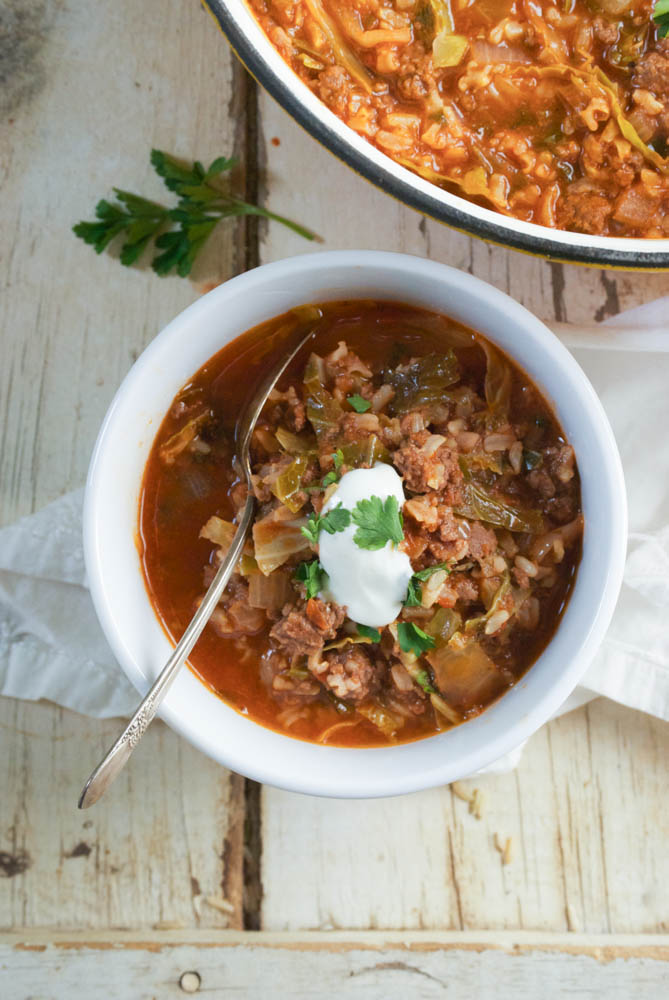
The Recipe: Healthy Stuffed Cabbage Roll Soup

(serves 4)

1 pound grass-fed ground beef

3/4 cup dry long grain brown rice

1 small white or yellow onion, diced

2 garlic cloves, minced

2 teaspoons kosher salt, plus more if needed

cracked black pepper

1 quart chicken broth, preferably homemade

2 cups crushed canned tomatoes (or a 15 ounce can–Muir Glen Organic is great)

2 cups homemade tomato sauce (or a 15 ounce can — again, go with Muir Glen)

3 cups, thinly shredded cabbage ( I used 1 somewhat smallish one)

1 teaspoon fresh thyme

1 bay leaf

1/4 cup packed chopped fresh parsley

2 cups homemade sauerkraut or store-boughten, preferably fermented

sour cream or yogurt, dill or parsley for garnish

Begin by rinsing the brown rice.  Then add it along with 1 1/2 cups of cold water and a pinch of salt to a large sauce pan.  Bring to a boil, then cover and reduce heat to a simmer and cook until the rice is tender and the water has been absorbed, about 40 minutes.  Keep a watchful eye or you may burn the rice.  You can always add more water and drain any extra, if you’re worried about that happening.

In a large Dutch oven over medium-high heat, brown the ground beef.  Drain the grease, if there is any and add the onion and garlic to the pan along with 2 teaspoons of kosher salt and some cracked black pepper.  Cook the ground beef/onion mixture for just a few minutes, stirring occasionally, until the onion softens a bit.

Add the crushed tomatoes, tomato sauce, chicken broth, chopped cabbage, cooked brown rice, fresh thyme, and bay leaf to the Dutch oven.  Cook for about 30-40 minutes over low-medium heat, or until the cabbage has wilted and is tender.  Add the sauerkraut and freshly chopped parsley and cook for another 5 minutes, or until the sauerkraut has warmed.  Remove bay leaf before serving.  Top with sour cream or plain yogurt and fresh dill or parsley.  Leftovers may become somewhat thick from the rice absorbing more liquid– it can be thinned out with more tomatoes or broth.

Thanks for stopping by Relishing It!

Laurie


Read Full Post »

Easy Homemade Sauerkraut | Relishing It

I grew up in a small town in western North Dakota settled way-back-when mostly by German immigrants. Not surprisingly, sauerkraut has always been a part of my family’s meals. My grandmothers, aunts, and my mom have always made their own.  I can’t tell you how many times in my childhood I had to trudge down the stairs to the cool basement to retreive another jar of kraut from the shelves packed with canned goods. It was always there– an endless supply. I loved sauerkraut as a kid, and still do. I’m that person who orders it on pizza any chance I get.  My favorite way to eat it is simply really cold, in a bowl.  I like my sauerkraut to have a lot of crunch to it.

Easy Homemade Sauerkraut | Relishing It

I don’t exactly make my sauerkraut the same way the rest of my family does.  My version tastes the same– I’ve nailed down the technique that gives that deliciously tangy and crunchy sauerkraut.  But, I don’t can my batches. There are so many good, healthy things happening when you ferment food, that I just can’t bring myself to ruin those benefits by heating it up too much. Instead, I make small batches and let it ferment for a few weeks at room temperature, and then refrigerate.  If you’re not familiar with fermentation and the health benefits, be sure to look into it.

Easy Homemade Sauerkraut | Relishing It

I’ve made saurkraut in a traditional crock in th past, which though seemingly fun, didn’t give me the results I was looking for. I loved the idea of the crock sitting out and fermenting for all to smell and see, but there was no crunch when it was all said and done. I’ll find another use for that crock, though.

Easy Homemade Sauerkraut | Relishing It

Easy Homemade Sauerkraut | Relishing It

I’ve found that my sauerkraut turns out precisely how I want it when I pack it into mason jars and let it ferment on the counter for a couple of weeks.  It becomes deliciously tangy and stays crisp and crunchy.  Every few days in the beginning of the fermentation process, I’ll open the jar to release some of the gas.  It doesn’t take long for the cabbage to take on that tell-tale sauerkraut scent.  The first time or two that you do this, there will be quite a lot of bubbles and fizzing action.  Exciting! After about 2-3 weeks of sitting out at room temperature, I test it out and when it’s the perfect tanginess– I put it in the refrigerator, ready to eat. Then I start another batch, and the process just rolls along. I always have fresh sauerkraut to use in my favorite dishes, such as this Rustic Potato, Sauerkraut, and Beef Galette.  Or mix it into this beautiful Ham, Bean, and Sauerkraut Soup by Fresh Tart.   I hope you give this a try.  It’s ridiculously easy and the rewards are fantastic.

Easy Homemade Sauerkraut | Relishing It

The Recipe:  Easy Homemade Sauerkraut

(makes about 2 quarts)

5 pounds of fresh cabbage, cored and sliced into ribbons (not too thick, not too thin).  Reserve a couple of the large outer leaves to use later.

3 tablespoons kosher or sea salt  (nothing with chemicals, please)

2 sterilized mason jars with lids  (preferably regular mouth jars– the “shoulders” on the sides will keep the cabbage pressed down and submerged in the liquid better)

I’ve  found that if I slice my cabbage too thin, it doesn’t have the crunch that I’m looking for.  Too thick, and it’s awkward to chew.  Using a chef’s knife works the best for me.  Slice it into not-too-thin, but not-too-thick ribbons (use your best judgement and refer to the photos).

Place the sliced cabbage in a huge bowl and sprinkle with salt.  Use a masher, if you have one,  to mix the salt and cabbage together.  Bruising the cabbage a bit with the masher with soften the cabbage up and release some of the water from it.  Inevitably, I turn to my hands and massage the cabbage and salt together.  Let it sit for about an hour, or so.   Keep massaging it a couple of times throughout that hour, or place a plate directly on top of the cabbage and something heavy on the plate to weigh it down.  The pressure will release the water faster.  There should be a pool of liquid that has formed.  Pack it into the mason jars and push down– the liquid should come above the cabbage.  Next, fold the extra cabbage leaf and place on top of the cabbage.  This will push your cabbage down so it remains in the liquid to ferment.  Put the cover on the jar and wait.  After a day or two, open the jar and let the gas out.  There will be a lot of bubbles and fizzing action.  This is good!  It’s beginning to ferment.  Check it again every couple of days.  Occasionally, mold may form on top of the cabbage.  This is fine and normal.   Just scoop it out and continue to ferment.  I’ve found that mold occurs more often when using the crock method, as opposed to mason jars.

 After about 2-3 weeks (depending upon how tangy you like your sauerkraut), remove the cabbage leaf and place the jar in the refrigerator to use.  I’m not exactly sure how long it will last in the refrigerator, as we always use ours before it’s even a question.  It should be fine for a few weeks, possibly a couple months.  Enjoy!

Thanks for stopping by Relishing It!

Laurie

Read Full Post »

So how much Halloween candy have you been sneaking this week?  Me?  Far too much.  Though I love how worked-up my little ones get about trick-or-treating, when I take stock of how much candy I have eaten I feel more than a little guilt.  That’s why there’s no better time to eat a nice, light dinner of…dried beans and cabbage.  I know, I know.  It doesn’t sound too tantalizing, but take a look at this dish.  It’s so satisfying.  I love cooking with dried beans.  If I can convince you of anything (aside from the benefits of eating organic, local, and unprocessed foods), its to use more dried beans in meals.  They’re inexpensive, and their taste and texture is so much more appealing than canned versions.  The only drawback is that using them requires just a bit of planning.  But even this isn’t difficult, as cooked beans can be stored in the freezer and thawed for whenever you need them.

Cabbage is another of those ‘lost’ ingredients that often goes unappreciated.  I love it’s versatility– it works in salads, soups, and main dishes.  Cabbage has that nice crunch when you want it, or you can rely on it for a softer, underlying texture.  And that mellow, slightly sweet flavor works well is so many dishes.  For this meal, I’ve also turned to the amazing smoky, saltiness of bacon, though it’s not necessary.  The flavorful beans and cabbage are powerful enough to stand up on their own here.  I make it both ways, depending upon my mood.  This is a simple, healthy, and most importantly, delicious dish.  Make it this week– it’ll become one of your everyday light meals, too.

The Recipe:  Cabbage, White Beans, and Bacon

(serves 4)

2 tablespoons extra-virgin olive oil

2 smallish yellow potatoes, unpeeled, cut into cubes

1/2 medium onion, diced

2 cups cooked and cooled white beans (roughly 1 cup dry)  OR 1 15-ounce can, rinsed and drained

3 cups finely shredded green cabbage

1 garlic clove

1/2 pound bacon, cooked and crumbled  (use more or less to your liking)

freshly grated parmesan or grana padano cheese, for sprinkling

sea salt and cracked pepper, to taste

In a large skillet, cook the bacon over medium heat until your desired crispiness.  Remove from pan.  Crumble when cool.  Begin to cook the potatoes next.  For more flavor, cook them in the bacon grease — or for a healthier version, drain the grease and add the olive oil.  Season potatoes with salt and pepper and cook over medium-high heat.  Cover and cook until the potatoes are cooked all the way through, 5-8 minutes.  Be sure to stir a couple of times, so all sides become golden brown.

Next, stir in the onion, garlic, and beans.  Try to cook each side of the beans, so they brown a bit, as well.  When the beans have developed some color and are a bit crispy, stir in the cabbage and cook for another minute, or until the cabbage begins to wilt a bit.  Stir in the bacon.  Season with salt and pepper, if necessary.  Sprinkle with a bit of cheese.  Enjoy!

Source:  Adapted from Heidi Swanson’s Super Natural Every Day

Hope you all have a fun Halloween evening — my kiddos are super excited to go trick-or-treating!  Thanks for stopping by today.

Laurie

Follow me in Twitter

Read Full Post »

%d bloggers like this: