Feeds:
Posts
Comments

Posts Tagged ‘Vegetables’

Buffalo Cauliflower with Blue Cheese | Relishing It

Cauliflower has always been a favorite vegetable in our house.  When my kids were infants I used to make homemade baby food, and puréed cauliflower was always at the top of their favorites list.  It still is, though now– obviously– they prefer it in the crunchy form.  I pack it into their lunches everyday.  And it’s not just my kids that love this wonderful vegetable.  I never tire of it because there are so many different ways to enjoy it.  The version I’m sharing with you today is so simple that I feel a little silly even giving a “recipe” for it.  But, I also realize that sometimes a food blogger’s responsibility is more than sharing multi-step recipes.  So here, I guess my goal is just want to you crave something so badly that you have to make it.

Buffalo Cauliflower with Blue Cheese | Relishing It

Buffalo Cauliflower with Blue Cheese | Relishing It

Buffalo Cauliflower with Blue Cheese | Relishing It

Buffalo Cauliflower with Blue Cheese | Relishing It

If you like buffalo sauce (and who doesn’t?), you’re going to want to make this.  And if you like blue cheese, it’s a guarantee.  Personally, I can’t get enough buffalo sauce.  And that actually goes for most hot sauces.  I’m an addict pure and simple.  I’m not ashamed.  Last time I checked, we had six different hot sauces in the refrigerator.  And while, I love to make my own salsas and hot sauces, I haven’t actually taken the plunge and tried making my own buffalo sauce.  Maybe I’ll give it a whirl this summer, but for now your favorite bottled version will work wonderfully.  It is so addictive drizzled onto perfectly roasted cauliflower with pockets of melted blue cheese here and there.  This is the perfect afternoon snack when you want big flavor, but you still want to stay on the healthy side.  Devouring a huge head of cauliflower can’t be wrong.  Am I right?  You’ll see when you give it a try.  Enjoy!

Buffalo Cauliflower with Blue Cheese | Relishing It

The Recipe: Buffalo Cauliflower with Blue Cheese

1 large head of cauliflower, broken into small florets

olive oil

kosher salt

bufflalo sauce ( I love Frank’s Buffalo Sauce)

crumbled blue cheese

celery sticks, for serving

Preheat oven to 400°F.  Line a large baking sheet with parchment paper.  Toss the cauliflower florets with a drizzle of olive oil and a sprinkle of salt.  Roast until a deep golden color begins to develop, flipping once to brown all sides.  When the cauliflower is tender enough for your liking (much will depend upon how big the pieces are), about 25 minutes or so, remove from the oven.  Toss with buffalo sauce using a utensil to coat all sides, then sprinkle with a bit of blue cheese.  Return to oven for a couple of minutes until the blue cheese has melted.  Remove from oven and serve with celery sticks.  Enjoy!

Thanks for stopping by Relishing It!

Laurie

Read Full Post »

Roasted Brussel Sprouts, Mushrooms, and Beef with Horseradish Cream Sauce | Relishing It

Today’s recipe is a simple little dish that my my husband and I both love.  You’ll note that I didn’t say my kids love it, because…well they’re kids, and I guess they just don’t yet appreciate brussel sprouts and horseradish   I, on the other hand, love brussel sprouts and I’m always trying to put them into new dishes.  I enjoy them raw, such as in this salad that I still make often.  But I also love to roast them to add a little complexity to their flavor.  Roasted Brussel sprouts alone can be a meal or a hearty side, but adding leftover braised beef and crimini mushrooms takes them from “boring vegetable” status in my husbands eyes to “that was an amazing meal”.  Topping the entire dish with a delicious horseradish cream sauce made it perfect.

Roasted Brussel Sprouts, Mushrooms, and Beef with Horseradish Cream Sauce | Relishing It

Roasted Brussel Sprouts, Mushrooms, and Beef with Horseradish Cream Sauce | Relishing It

Roasted Brussel Sprouts, Mushrooms, and Beef with Horseradish Cream Sauce | Relishing ItAs a kid, my grandpa used to grow horseradish in his massive garden. He’d process it into a creamy version and my parents and grandparents would slather it on the homemade sausage. Like my kids, at the time I didn’t appreciate the horseradish… or the sausage, for that matter. The horseradish was strong– it had “bite” to it, as my grandpa would always say.  I’m sure you’ve all made a beef roast and wanted to create something new with the leftovers.  Well, this is a nice quick option.  No leftover beef on hand?  No problem– it will still be amazing without it. This meal only takes about 15-20 minutes to make and it’s so satisfying.  Top it with a drizzle of the horseradish cream sauce and a few chopped hazelnuts (trust me on this) for crunch.  It’s a perfect weeknight dinner and you can feel good about the fact that you’re eating healthy, whole foods.  Enjoy!

Roasted Brussel Sprouts, Mushrooms, and Beef with Horseradish Cream Sauce | Relishing It

Roasted Brussel Sprouts, Mushroom, and Beef with Horseradish Cream Sauce | Relishing It

The Recipe: Roasted Brussel Sprouts, Mushrooms, and Beef with Horseradish Cream Sauce

brussel sprouts, halved (or quartered if very large)

crimini mushrooms, halved

leftover braised beef, preferably grass-fed

hazelnuts, coarsely chopped

olive oil

kosher salt and cracked pepper

For the Horseradish Cream Sauce:

1/4 cup sour cream

2 tablespoons creamy, prepared horseradish

2 tablespoons whole milk (any kind will work)

1 tablespoon apple cider vinegar  ( I use Bragg’s organic raw)

1 tablespoon finely minced shallot or red onion

1 tablespoon finely minced fresh chives

1 garlic clove, finely minced

kosher salt and cracked pepper

You’ll notice that I didn’t give amounts for the main ingredients.  Amounts aren’t really needed in this recipe, make as much or as little as you want.  One pound of brussel sprouts will generally feed about four people.  Add as much mushrooms and beef as you like.

To make the Horseradish Cream Sauce: add all of the ingredients to a medium-sized bowl and mix with a spoon.  Taste and properly season with salt and pepper.  Set aside.

Preheat the oven to 400°F.  On a large rimmed baking sheet, toss the halved brussel sprouts with 1-2 tablespoons of olive oil and a sprinkle of salt and pepper.  Roast for about 10-15 minutes, flipping once.  You want a nice golden brown color to appear on the brussels. When they are nearly done and have nice color, add the mushrooms and beef to the pan and roast for a few more minutes until they are heated through and the mushrooms begin to shrink in size. Remove from pan.  Place onto a serving dish and top with the horseradish cream sauce immediately (so it can warm slightly) and hazelnuts.  Enjoy!

Thanks for stopping by Relishing It!

Laurie


Read Full Post »

Fresh Corn Salsa | Relishing It

I’ll get to the corn salsa in a minute– but first I want to talk about beer!  Admittedly, I’ve been drinking too darn much beer this summer.  Not at one time– nothing like that.  But this summer, more than any other, it’s just been so easy to sit outside with Radd in the evening and visit over a beer or two.  I suppose it’s partly to do with our mild weather– not too hot, not too humid.  It has been perfect, which is excellent for my happiness.  And while I probably don’t need those calories at the end of the day, instead of stressing, I’ve decided to embrace it.

Fresh Corn Salsa | Relishing It

Fresh Corn Salsa | Relishing It

So what have I been sipping on?  Mostly farmhouse ales and saisons.  Two that I love are Saison Dupont and a local farmhouse ale from Liftbridge called Farm Girl.  Speaking of local beer, I’ve also been enjoying a few others like Bent Paddle’s Paddle Break Blonde and Steel Toe’s Size 7 IPA.  Now before this post turns into an essay on local beer, let me just say this– our craft beer scene here in Minnesota is just incredible right now.  So many wonderful breweries and taprooms, and I’ve been testing them out like it’s my job.  I’m owning it, I don’t mind saying.  A few other great summer favorites (not local) are Leffe Blonde and Pyramid’s Apricot Ale.  There, that’s my beer confession.

Fresh Corn Salsa | Relishing It

So what goes smashingly well with summer beer?  Yup– chips and fresh corn salsa.  I love salsa of any variety– tomato, tomatillo… but, there’s something about fresh corn salsa that wins the salsa competition for me.  I would choose corn every time.  It’s fresh, slightly sweet, spicy, and loaded with that citrusy lime/cilantro flavor.  Not to mention, it is simple to make– so simple that it’s somewhat silly to even give a recipe.  But, I think the same can be said for most summer fare– fresh and simple and that’s just fine.  So, get out your chefs knife and start cutting up that corn.  Then pour yourself a glass of cold beer and soak up some summer fun.  Cheers!

Fresh Corn Salsa | Relishing It

The Recipe: Fresh Corn Salsa

6-8 ears of fresh corn, cut

1 large red onion, diced

1 bunch fresh cilantro, finely chopped

2 jalapeños, chopped (remove seeds/ribs if heat is a factor)

2 cloves garlic, finely minced

juice of one lime

kosher salt

In a medium-sized bowl mix all of the ingredients.  Add more lime juice to taste.  Season appropriately with salt.  You may need more salt than you are used to — corn needs a bit to bring out its wonderful flavor.  Let flavors meld for a bit before serving.  Store leftovers covered in the refrigerator.  Enjoy!

Fresh Corn Salsa | Relishing It

Thanks for stopping by Relishing It!

Laurie

Read Full Post »


Curried Corn and Zucchini Fritters + Cilantro Mint Chutney | Relishing It

I realized this week that there is only one month left of my children’s summer vacation.  It was a punch to the stomach.   Only one month left to get out there and drink in the summer, to make memories.  They are 7 and 5, and for anyone that has or has had children of these ages, you probably understand why I feel that these ages are perfect.  They love to be around Radd and me, yet are independent enough to do things on their own.  All the hassles of tiny babes and toddlers are gone and we’re left to enjoy these perfectly sweet, intelligent, and hilarious tiny human beings.  Leaving the house is easy.  I remember when it used to be such a production:  diaper bags, extra clothes, baby food (in a cooler), etc.  Life is so effortless right now and I want to bottle this up and keep it forever.  Because it won’t be long before they’ll pick hanging out with their friends over being with us.  I know change is on the horizon and I can’t stop it.  I hate change– have I ever mentioned that before?  I do. It’s just how I am wired.

Curried Corn and Zucchini Fritters + Cilantro Mint Chutney | Relishing It

Curried Corn and Zucchini Fritters + Cilantro Mint Chutney | Relishing It

But not only is school break about to end, I’m grappling with the realization that I have one month left of my thirties.  A big (gulp) birthday is just around the corner.   I wish I could be one of those people that welcomed it, but again, I hate change.  So instead, I’m working on trying to embrace it as well as trying to enjoy the heck out of this next month.  We’ll be doing the things I love– just more of them.

Curried Corn and Zucchini Fritters + Cilantro Mint Chutney | Relishing It

Wait.  This is a food blog, right?  Okay, enough of the existential wrangling.  One of the things I’ll also be doing is tinkering in my kitchen, as I always do.  Recently, I made these fantastic corn and zucchini fritters.  If I’m being honest, I needed an acceptable way to eat the cilantro-mint chutney without simply drinking it and I figured a corn and zucchini fritter with an Indian flare would be perfect.  Indeed it was.  Eating a ton of vegetables that have been formed into a patty and crisped-up in olive oil is always a good idea.  These fritters are somewhat fragile, meaning you can’t pick them up with your hands.  I didn’t want to over-do the amount of flour that was in them.  They’re more of a “hash brown” texture.  And they are absolutely perfect with the cilantro-mint chutney.  I like to add some heat to mine with a jalapeño.  They are simple to make and come together rather quickly, which makes them perfect for a weeknight meal.  They are a wonderful meal on their own, or serve them alongside something else as a side.  Either way, I know you’re going to love them.

Curried Corn and Zucchini Fritters + Cilantro Mint Chutney | Relishing It

The Recipe: Curried Corn and Zucchini Fritters + Cilantro Mint Chutney

(makes 9 3-inch patties)

For the Corn and Zucchini Fritters:

2 ears of fresh sweet corn, cut off the cob

1 pound zucchini, coarsely grated

2 garlic cloves, minced

2 tablespoons all-purpose flour (GF flour can be substituted)

1/2 teaspoon sweet curry powder (this is subtle, use more for more of a punch)

1 teaspoon kosher salt, divided

freshly ground pepper

1 egg, lightly beaten

olive oil, for frying

For the Cilantro Mint Chutney:

1/2 cup cilantro, slightly packed

1/2 cup fresh mint, slightly packed

3-4 tablespoons plain yogurt

2 garlic cloves, minced

1 teaspoon freshly minced ginger

squeeze of lime

pinch of sugar

kosher salt to taste

minced jalapeño to taste (I used 1/4 of a large one)

To make the Cilantro Mint Chutney:  combine all of the ingredients in a food processor.  Blend until smooth.  Season properly with sugar, salt, and lime.  Set aside so the flavors can combine.

In a colander placed over a medium-sized bowl, combine the grated zucchini with 1/2 teaspoon kosher salt.  Let sit for 10 minutes.  Then gently squeeze the liquid from the zucchini with your hands. You want the zucchini to be as dry as possible, so it will crisp when fried.

In a medium-sized bowl, using your hands, gently combine the zucchini, corn, garlic, flour, curry powder, remaining 1/2 teaspoon of salt, and pepper together.  Making sure to evenly coat the vegetables with the flour.  Then add the egg and mix again using your hands until everything is evenly moistened.

Add 2 tablespoons of olive oil to a hot skillet–cast-iron worked well.  Form 3-inch patties that are about 1/2-inch thick with the zucchini mixture and gently place them in the skillet. Fry as many as will fit into the pan at a time.  Fry on medium-high heat until the underside is a deep golden brown, then flip.  Repeat until all of the mixture is gone.  Be sure to add more olive oil into the pan each time.  The fritters are best eaten immediately.  Top with the chutney and enjoy!

Thanks for stopping by Relishing It!

Laurie


Read Full Post »

Roasted Tomatoes with Garlic and Herbs | Relishing It

The tomatoes have finally arrived here in Minnesota!  Yes, that sentence deserves an exclamation point.  It’s always a long wait for me throughout the year for these babies.  I love tomatoes, but the sad store-bought versions just won’t do.  So, I can or freeze as much as I can to make it through the winter, then patiently wait for them to appear at the farmers markets the next summer.  Every year I somehow trick myself into thinking that they should appear earlier than they really do.  Tomatoes need time and lots of sun.  I have a few plants in my yard again this year that are coming along nicely, but the bulk of my preserving comes from the farmers markets, where I can buy bushel upon bushel of these little red gems.

Roasted Tomatoes with Garlic and Herbs | Relishing It

I’ve mentioned here before that I love to can salsa.  I’ll be makes lots of batches of this recipe in the coming weeks.  I also can plain tomatoes, and a couple different versions of tomato sauce.  The version I’m sharing today is not a canned one–so, you can exhale now.  It’s actually my favorite tomato sauce and I preserve it by freezing it.  Super easy and ridiculously delicious.  I love to can, as it’s a great way to preserve and we happen to have a large storage room in the basement, so it works well for our family.  But, in all honesty, I love the taste of this un-canned sauce even more.  The flavors are spot-on and lemon juice (which is used in canning to keep the ph levels safe) is not needed.  I use roma tomatoes here (they are wonderful for sauces) as they have a lower water content.

Roasted Tomatoes with Garlic and Herbs | Relishing It


Roasting tomatoes is one of my favorite ways to eat them.  Something magical happens when that tomato caramelizes a bit. The flavor intensifies and I simply can’t stop popping them into my mouth.  I love to pair them with some delicious cheese and crusty bread.  Simple summer meals are the best.  When we’ve eaten our fill, I put the rest of the tomatoes, garlic, and herbs into the food processor and give it a few pulses until it become this thick, fragrant tomato sauce that can be used in so many ways.  At this point, I freeze the sauce, unless I want to use it in the next day or so.  Freeze it in whatever you like– freezer bags or vacuum seal it in a special bag (freeze first, then vacuum seal it closed) are both methods that work well.  I use this sauce all winter long and it is always a sad day when I pull the last one from the freezer.  I hope you give this version a try.  Enjoy!

Roasted Tomatoes with Garlic and Herbs | Relishing It

The Recipe: Roasted Tomatoes with Garlic and Herbs

Roma tomatoes, cut in half (as many as will fit on 1-2 baking sheets–depending upon how many you want to roast)

1 bulb of garlic, peeled and cloves separated (per baking sheet)

handful of freshly chopped herbs: basil, thyme, oregano, parsley (per baking sheet)

olive oil

kosher salt and fresh black pepper

Preheat oven to 375°F.  Line 1-2 large rimmed baking sheets with parchment paper (depending upon how many tomatoes you want to roast).  Fit the tomatoes snuggly, cut-side up, in a single-layer onto the pan, they will decrease in size as they cook.  Drizzle with olive oil.  Sprinkle with the chopped herbs, garlic, salt, and pepper.  Roast for about 40-50 minutes (if using two pans, rotate them half-way through).  Then increase temperature to 400°F and roast for at least another 10 minutes to caramelize the tomatoes, sometimes a bit longer.  Check the bottom of them for a dark caramel color.  Remove from oven when done.  If wanting to make sauce, place all of the roasted ingredients into a food processor, juices too (or by hand).  Pulse for a few times until mixed.  Place in freezer bags or bags that can be vacuum sealed (freeze first, then seal), or any other container you want to store them in.  Enjoy throughout the winter!

Thanks for stopping by Relishing It!

Laurie


Read Full Post »

Zucchini Cauliflower Summer Gratin | Relishing It

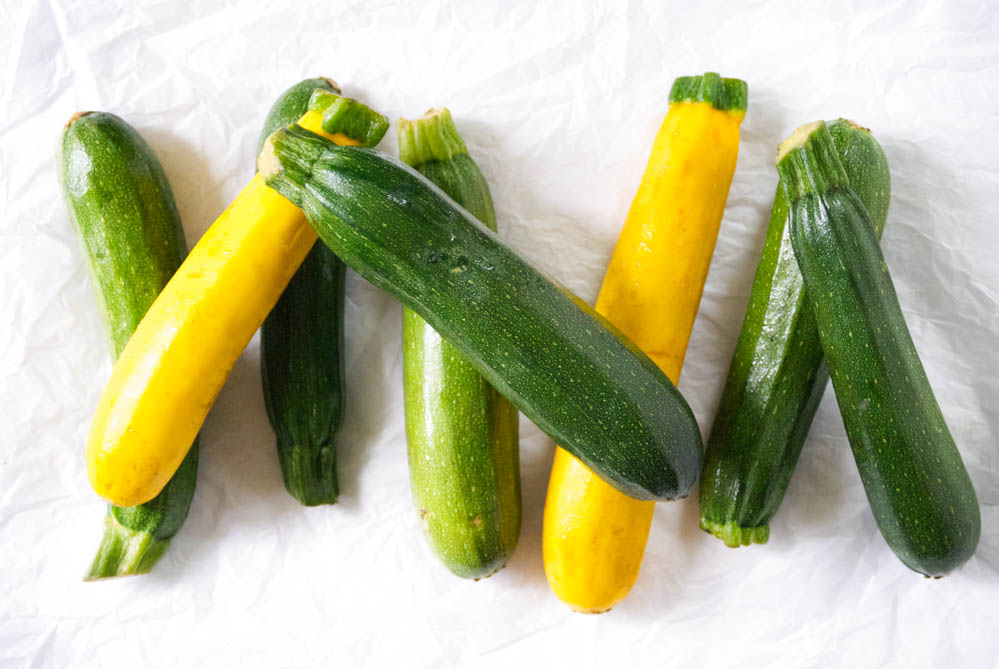
Zucchini is not my favorite vegetable.  There, how’s that for an opening statement?  It truly isn’t, or wasn’t, rather.  It’s not that I really disliked zucchini, but in the past, if given the choice, I generally chose other ingredients to work with.  I thought of it as bland and lacking “personality.”  As it turns out, I’ve really come around to enjoying this wonderfully subtle vegetable.  It just took a little coaxing from a very good, very talented friend.

Zucchini Cauliflower Summer Gratin | Relishing it

Zucchini Cauliflower Summer Gratin | Relishing It

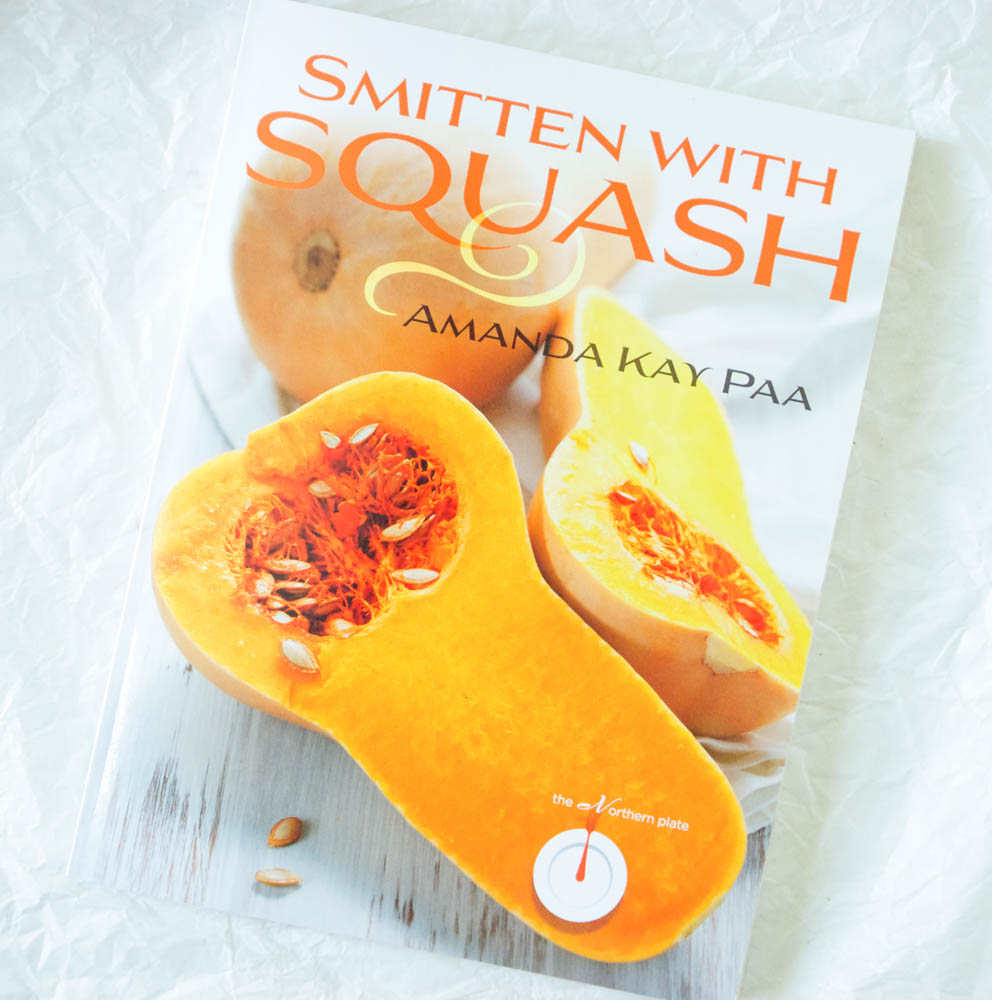
My friend, Amanda Paa, from HeartBeet Kitchen, has just published her very first cookbook, “Smitten with Squash”, dedicated entirely to that vegetable.  I first met Amanda a few years ago at a mutual food-blogger friend’s cabin.  I loved her ever-present smile and her calm demeanor.  She was chopping vegetables endlessly in the kitchen and more than happy to be doing so.  To say this girl is lovely doesn’t do her justice.  We both belong to the group Fortify (a local food group), so we continued to run into each other at events.  We eventually discovered that we live just a few blocks from one another.  We frequent the same restaurants, coffee shops, and farmers markets, and we never ever tire of talking about food together.  We’ve become wonderful friends and I couldn’t be happier to share a recipe from her new cookbook with you!

Zucchini Cauliflower Summer Gratin | Relishing It

Zucchini Cauliflower Summer Gratin | Relishing It

Zucchini Cauliflower Summer Gratin | Relishing It

It’s fun to have the inside scoop on someone’s book-writing journey.  In some small way, it made me feel like I was part of it.  She worked so hard and spent much of her winter huddled-up writing.  The result is this wonderful book full of recipes for both summer and winter squash.  Sweet or savory, she’s covered it all and then some. If you’re looking for inspiration for this particular vegetable, this is the cookbook you need.

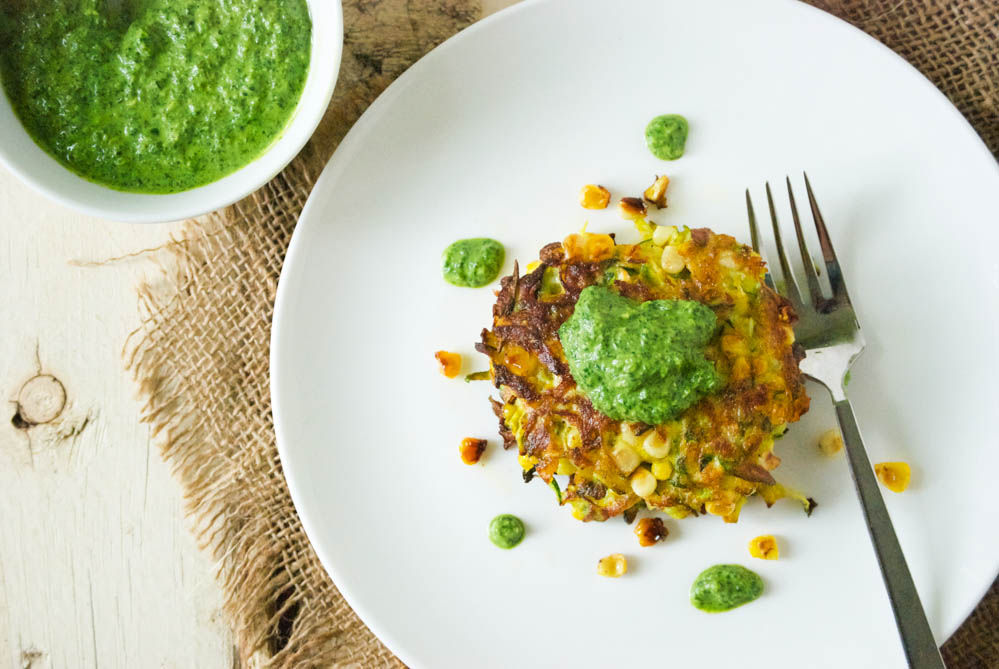
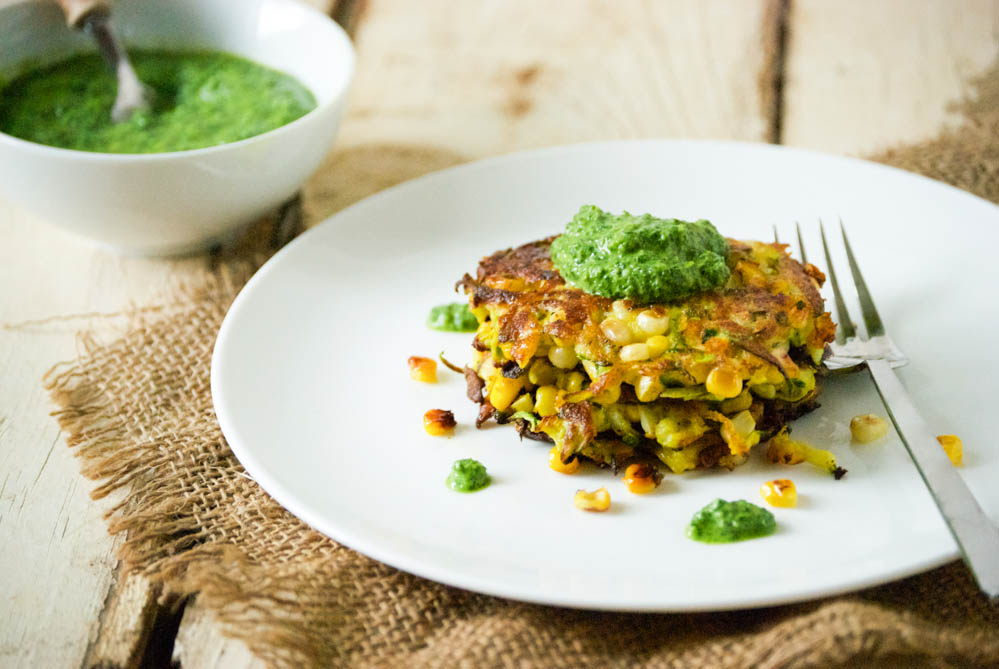
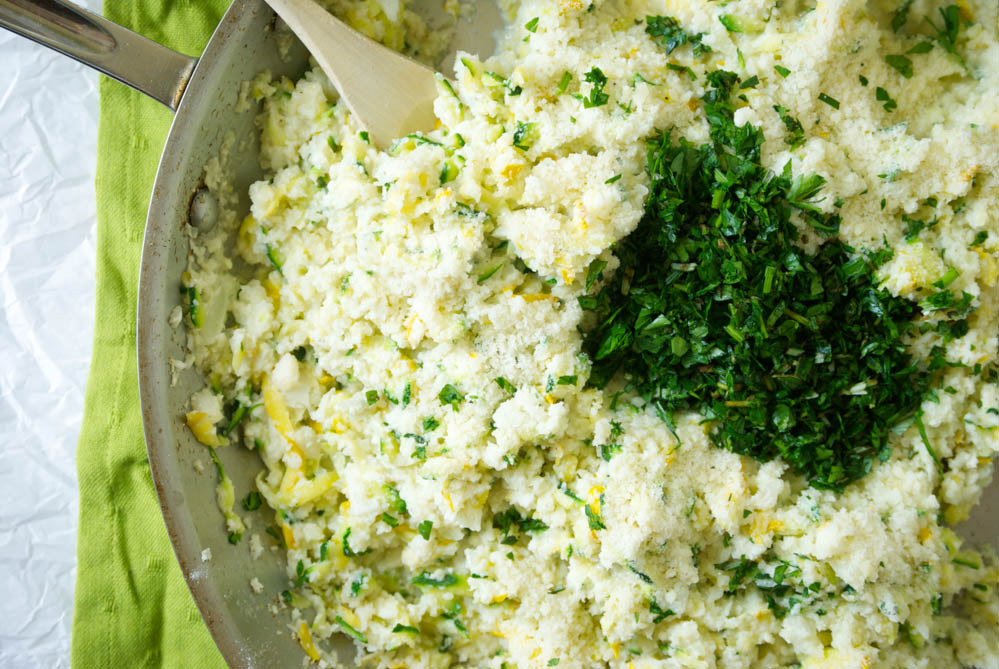
During her creative process, I had the opportunity test a few of her recipes.  This wonderful zucchini cauliflower gratin is a heaping dish of chopped vegetables seasoned with herbs and parmesan cheese. There is just enough cream in it to give it a proper gratin feel, but the added milk keeps it from being too heavy.  And every single bite is laced with just enough rosemary to keep you wanting another.  Lastly, the parmesan crust on the top adds a little cheesiness, with a nice contrast in texture.  I pile this gratin high on my plate with no regrets.  It’s perfect paired with a grilled meat and a glass of wine.  Not to mention my kids and husband all love it, too.

Zucchini Cauliflower Summer Gratin | Relishing It

Zucchini Cauliflower Summer Gratin | Relishing It

I’m giving away a copy of Amanda’s book to one lucky reader (only in the US– sorry)!  You want this book, you really do.  She gets so creative with this vegetable– you’ll want to cook through the entire thing.  Even if you aren’t the winner, I would encourage you to order it from Amazon or Barnes and Noble— you won’t be disappointed.  To enter, follow the instructions on the Rafflecopter link below.  Good Luck!

Zucchini Cauliflower Summer Gratin | Relishing It And to you, Amanda– I am so happy to call you a friend.  You are one of the most selfless and giving people I’ve met.  Congratulations on your beautiful book– I’m truly excited to see what comes next for you.

Enter Giveaway Here — a Rafflecopter giveaway

Update: The winner is Carolsue Anderson!  Thanks to all who entered.

The Recipe: Zucchini Cauliflower Summer Gratin

(serves 4)

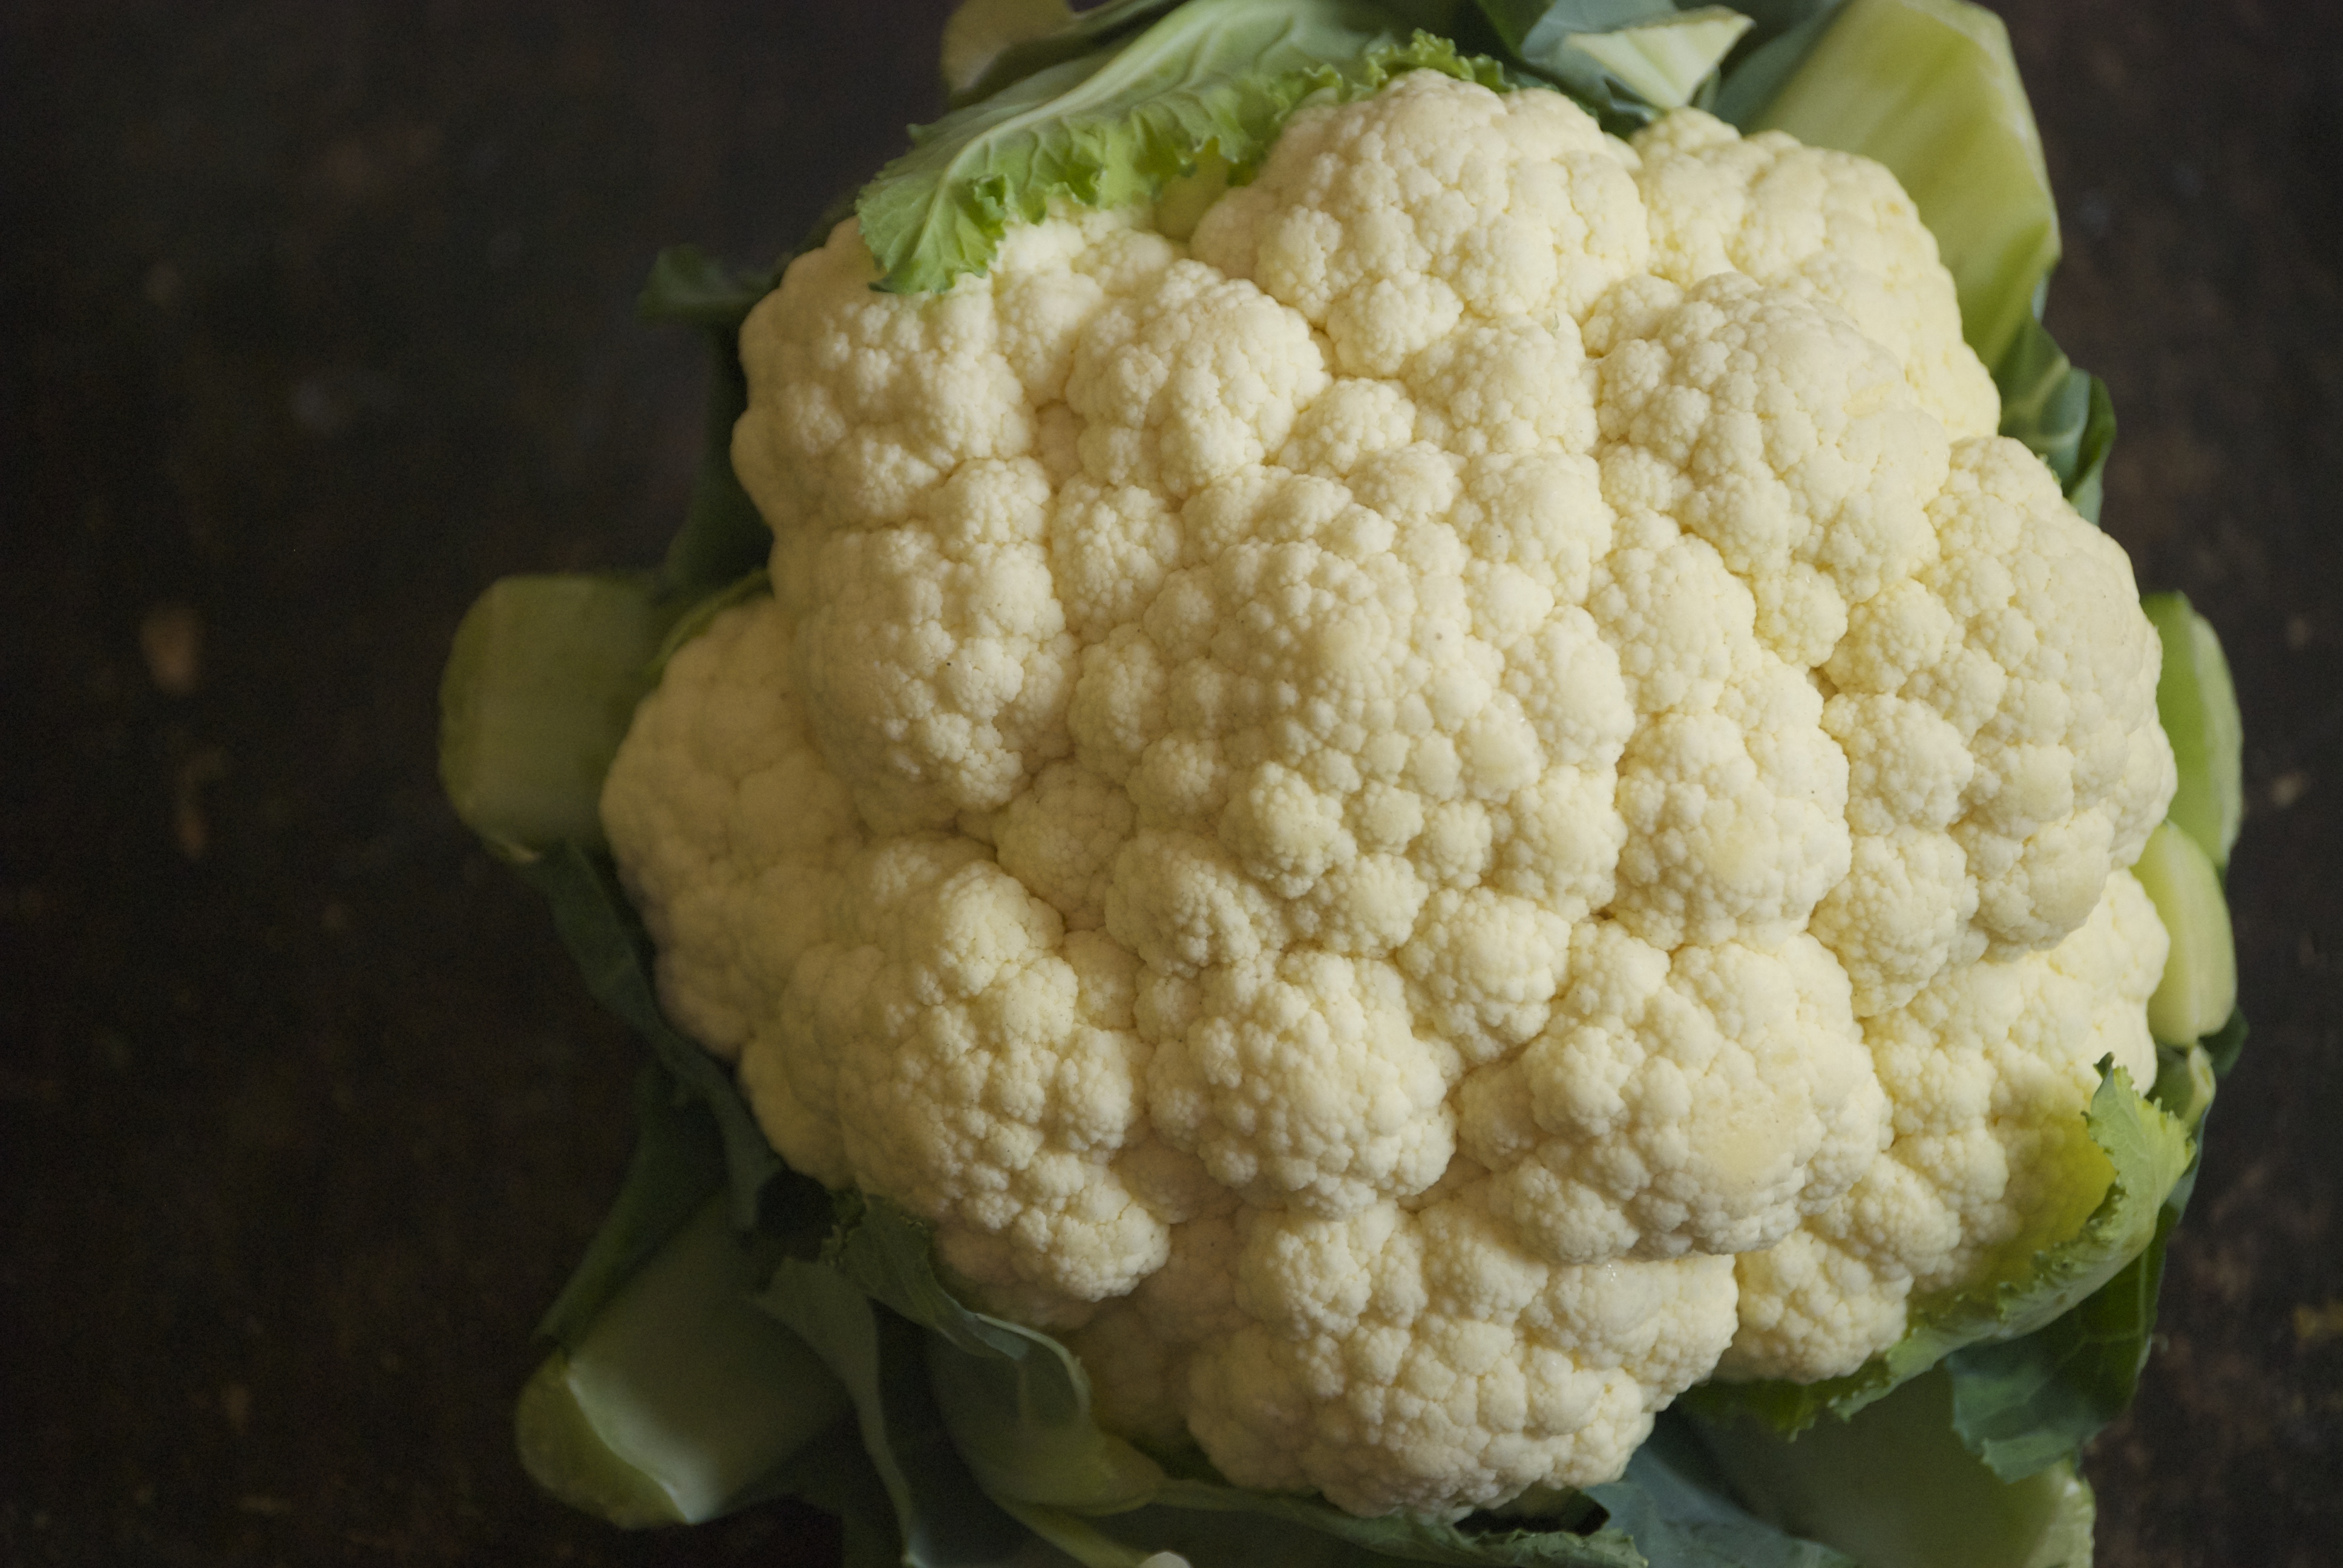
1 large head cauliflower

kosher salt

1 1/4 pounds zucchini, coarsely grated

2 tablespoons olive oil

3/4 cup chopped onion

2 garlic cloves, minced

1/2 teaspoon finely ground black pepper

2 tablespoons all-purpose flour (or gluten-free all-purpose flour)

1/4 cup milk

1/3 cup heavy cream

2/3 cup grated parmesan, divided (or more!)

1 tablespoon chopped fresh rosemary

3 tablespoons chopped fresh parsley

Prepare the cauliflower by removing the core and breaking the rest up into smaller pieces.  Then, using a food processor (or a sharp knife), pulse the cauliflower until they are tiny pieces that resemble rice grains.  Be care that the mixture doesn’t get mushy.  You may have to do this in batches.  You should yield about 3 1/2 cups.

Preheat oven to 375°F.  Lightly coat a shallow baking dish with olive oil and set aside. Stir 1 teaspoon salt and grated zucchini together, then place colander set over a bowl to drain.  In a large skillet, heat olive oil over medium-high heat, add onions and a big pinch of salt, and cook stirring, until softened, about 4-5 minutes.   Meanwhile, squeeze handfuls of zucchini over a bowl to catch the juices, removing most of the water from the zucchini, yielding 2/3 cup shreds.

When the onion is softened, reduce heat to medium and stir in the cauliflower, garlic, zucchini, 1/2 teaspoon kosher salt, and pepper.  Cook for about 7-8 minutes, until the vegetables are softened.  Sprinkle flour over the mixture and stir to combine.  Gradually stir in reserved zucchini water, milk, and cream, maintaining heat at medium so dairy does not curdle.  Cook for 2-3 minutes so liquid absorbs slightly. Remove from heat.  Stir in 1/3 cup parmesan, rosemary, and parsley.  Pour into prepared dish and bake for 20 minutes.  Remove from oven and top with remaining cheese (or more, if you like).  Return to the oven for another 10 or so minutes until gratin is brown and bubbly.  Sometimes I put the gratin under the broiler to brown up a bit faster for the final minute or two.  Enjoy!

Check out these other great blogs for more recipes from “Smitten with Squash”.  If you happen to live in the Twin Cities, be sure to stop by Solo Vino in St. Paul from 5:00-7:30 this evening for Amanda’s first book signing– I’ll be there, too!

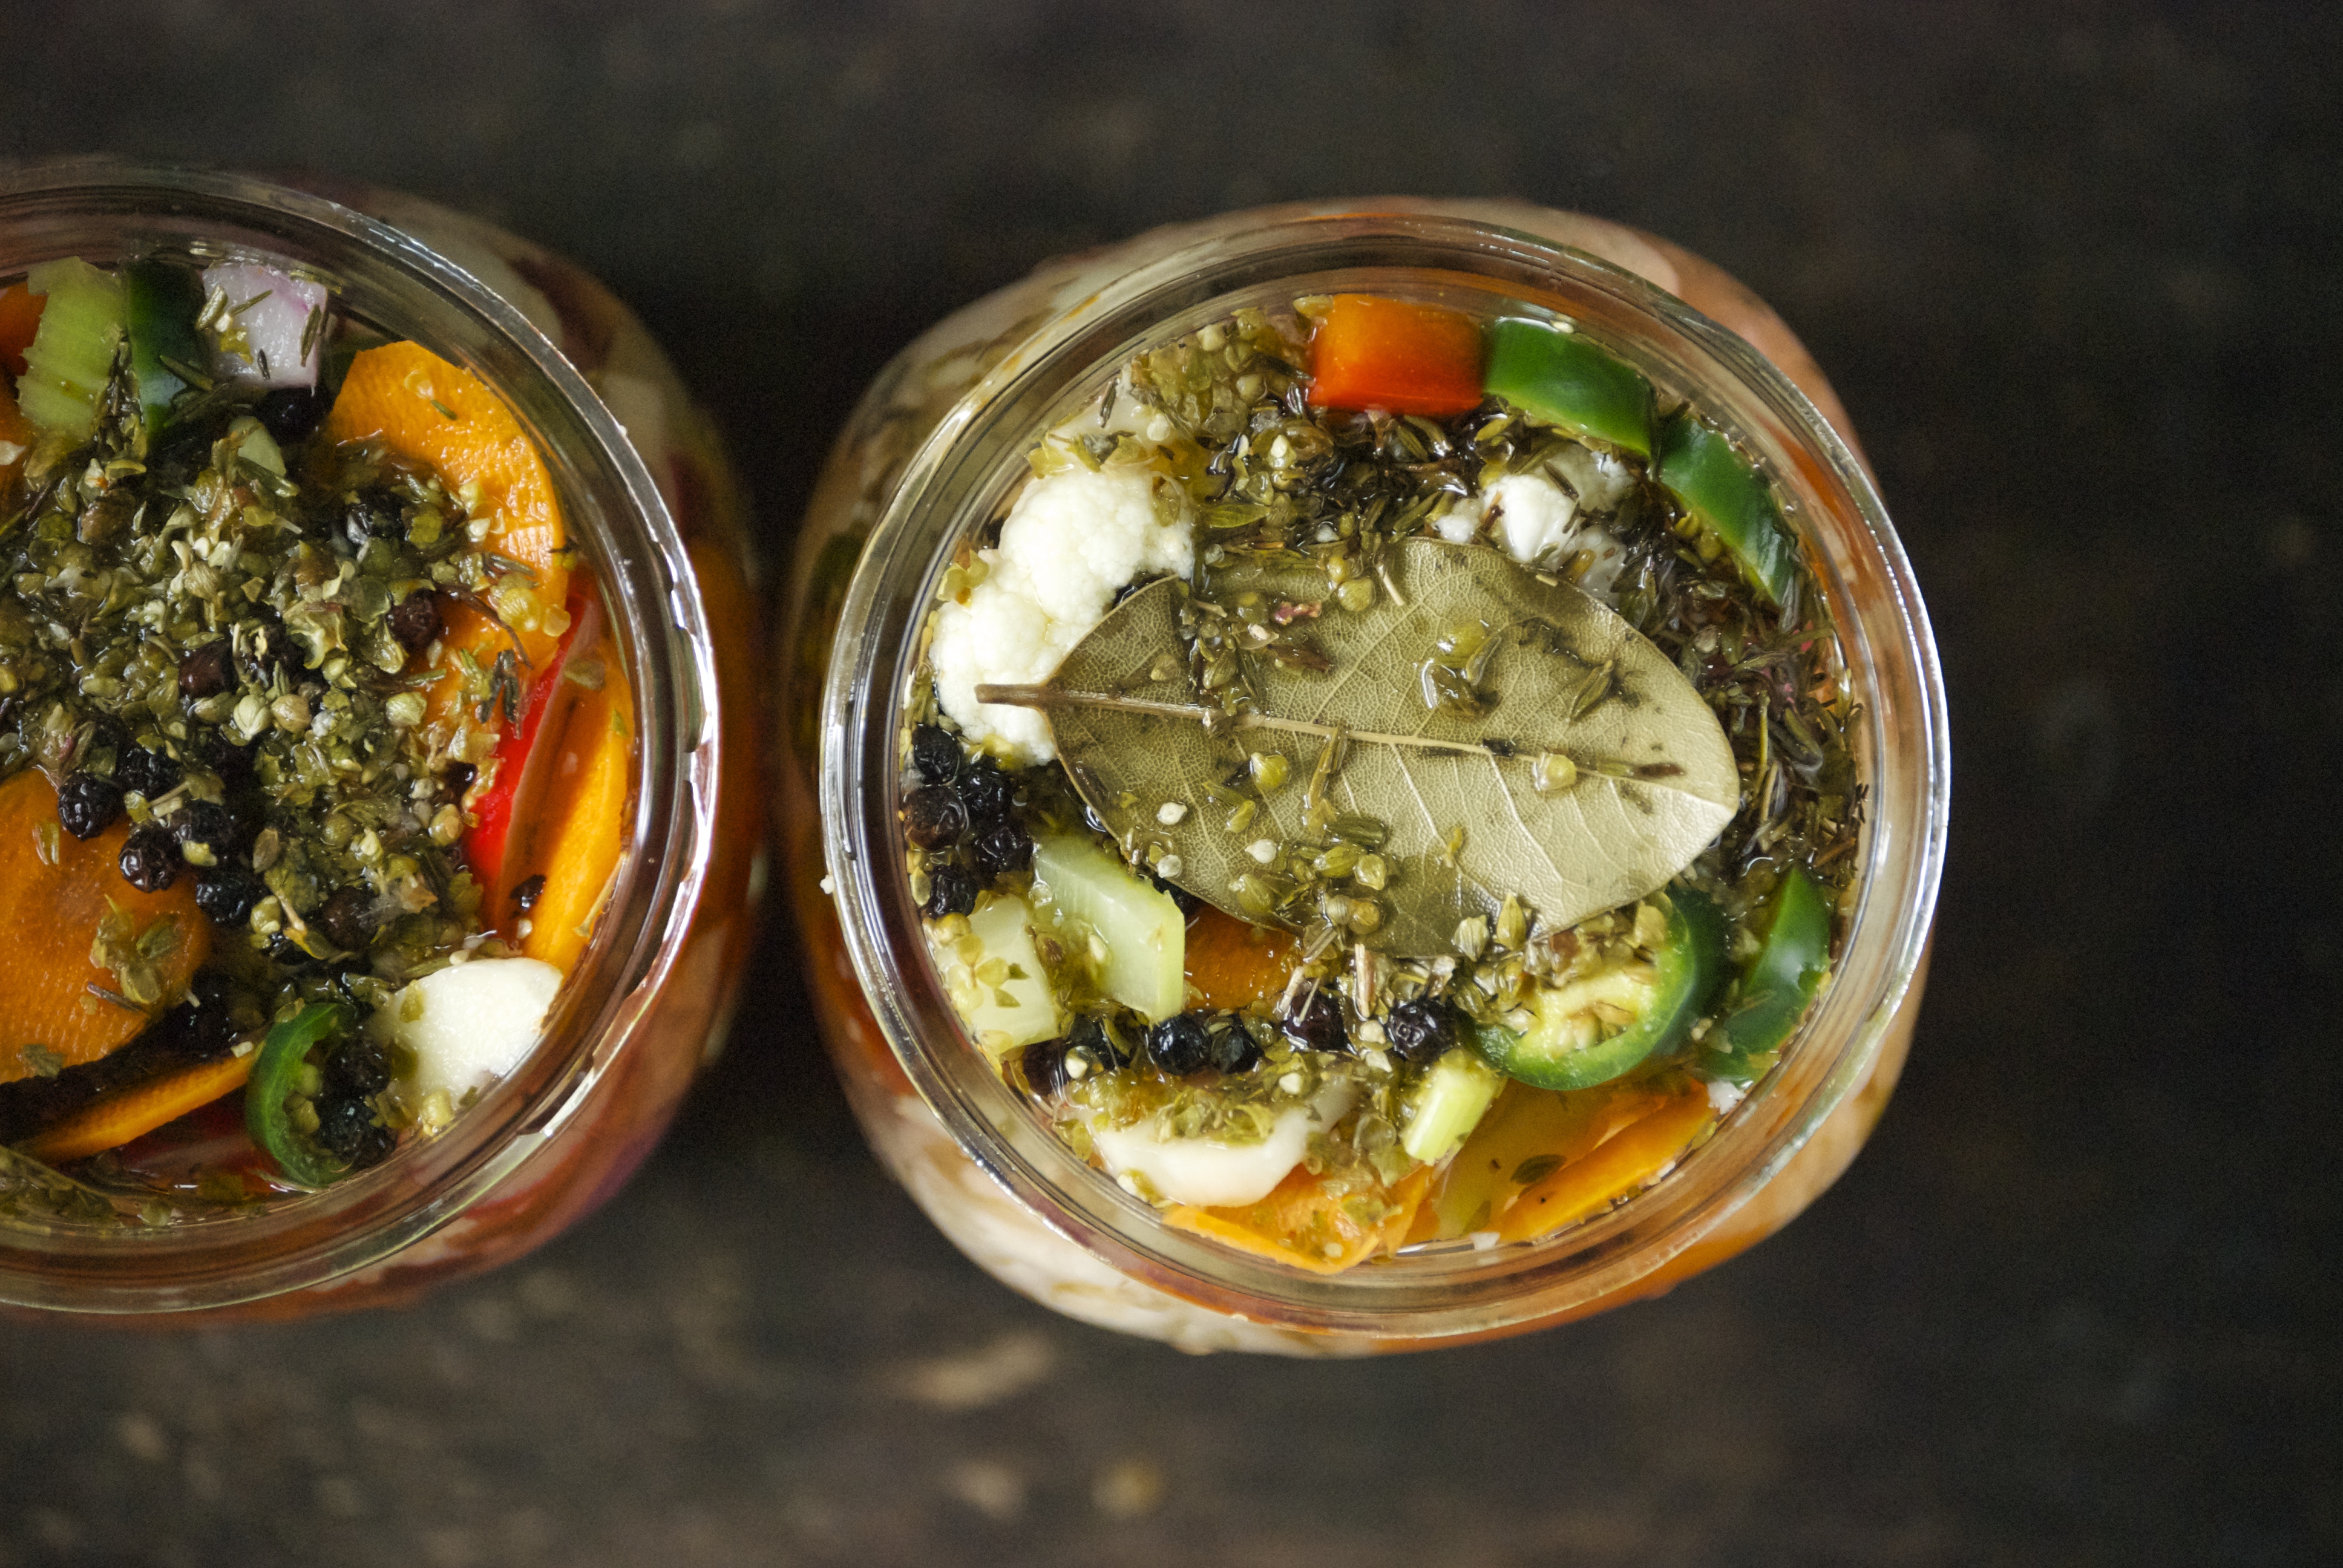
A Farmgirl’s Dabbles — Bumper Crop Spicy Squash Pickles

Fresh Tart — Chimichurri Chicken and Vegetable Kabobs

Robin Writes — Garam Masala Dusted Pattypans & Crispy Chickpeas with Tahini Sauce

Dolly and Oatmeal — Banana and Oat Streusel Summer Squash Muffins

Healthy Green Kitchen — Cherry Tomato and Summer Squash Cobbler with Rosemary Biscuits

Thanks for stopping by Relishing It!

Laurie


Read Full Post »

Giardiniera | Relishing It

When I first started writing here on Relishing It more than three years ago, figuring out what to make and blog about was… a process… and sometimes a struggle.  Back then my focus was on making things that I thought you would want to see, which it turn, would bring you back here more often.  It wasn’t really about web traffic or anything like that– I guess it was more about validation.  Knowing that people were seeing what I could do.

I used to bake a lot more here.  Baking posts always get the ‘oohhs’ and ‘aahs’.  I also used to pour through cookbooks and magazines to discover that impressive dish that would be “blog-worthy”.  To be honest, it was a bit stressful, and more than a bit exhausting at times.  Fast forward to the present, and I’m much more comfortable with my posts.  I feel like I’m more true to myself and my interests– which is really why I started this blog in the first place.  It wasn’t to try to make money, or to show off complex recipes that I would make only once.  I really started Relishing It to build up a recipe index that reflects who I am, and to chronicle my relationship with food.  I go back to previous posts to reference recipes so often. Many are my absolute favorites, with a smidge of randoms and experiments while I was trying to figure this whole thing out.

I still do bake, but not as much.  It can appear more impressive, but it’s also more exacting, time consuming, and from a health perspective, just not very sustainable.  Now, I focus much more on food that I’m interested in , and that my family regularly eats.   Mostly-healthy, nutritious food that I can feel good about eating.  I still enjoy learning new techniques, I think I love to tinker in the kitchen now more than ever.  Blogging has been wonderful for that.  Where was I going with all of this? Well, I guess the point is, I no longer have to seek out things to blog about– the process is just so much more organic now. For awhile now, I’ve been just making things that make me happy, and that has made blogging so much easier.

Giardiniera | Relishing It

Giardiniera | Relishing it

Now that sumer is here, I’m eating a ton of vegetables.  And not just boring run-of-the-mill-broccoli-as-a-side-dish vegetables.  I love pickled vegetables, and with this recipe I hope that you will too.  It takes almost no time to make and tastes so much better than those store-bought versions.  Grab whatever vegetables you have, chop them up, add a few dried herbs, make a super-quick brine, throw it all in a jar, and put them in the fridge.  There you have it– you just made yourself giardiniera.  It’s wonderful on sandwiches (roast beef, in particular!), salads, or straight from the jar.  Once you taste this– you’ll be making it every week, it’s that easy, and it really is a perfect snack.  Many recipes have lots of sugar (not my deal) and some have olive oil mixed in.  I’m a little frugal with my olive oil, and don’t feel like it is necessary.  For me, this is a perfect balance  of vegetables, vinegar, and sugar (just a smidge to temper the vinegar).  Add spicy peppers, if you want.  Or don’t.  As I always say– make it yours!  I truly love this version and I hope you do, too.  Give them a try!

Giardiniera | Relishing It

Giardiniera | Relishing It

The Recipe: Giardiniera

(Makes 2 quarts)

* Chop a variety of your favorite vegetables to fit snuggly into 2 quart jars

The above mix contains:

1/2 head cauliflower, chopped into small florets

3-4 large carrots, peeled and cut into coins

2 celery stalks, chopped

6-7 large radishes, sliced

1/2 red onion, diced

1 red pepper, diced

4-5 garlic cloves, sliced

4 serrano peppers, sliced

2 teaspoons dried oregano

1 teaspoon dried thyme

2 teaspoons whole black peppercorns

For the Brine:

3 cups white vinegar

1 cup water

3 tablespoons granulated sugar

1 tablespoon kosher salt

2 dried bay leaves

Divide the chopped vegetables evenly between 2 sterilized quart jars.  Pack them in there!  Divide the oregano, thyme, and peppercorns between the two jars, as well.  Bring the brine ingredients to a boil– this infuses the bay leaves and dissolves the salt and sugar.  Remove from heat, then place one bay leaf in each jar.  Pour the brine into each of the jars while it is hot.  This will soften the vegetables just a bit.  Let cool at room temperature.  Place a lid on them, give a shake and refrigerate.  Contents will be fully ready within a day.  If you’re impatient, you may even try them sooner. Enjoy!

Thanks for stopping by Relishing It!  Hope you all have a wonderful weekend!

Laurie


Read Full Post »

Peanuty Cold Soba Noodle Salad | Relishing It

I love taking a favorite meal of mine and tweaking it just a bit to create something entirely different.  Equally as delicious, just in a different way.  That’s what I’ve done here with this recipe.  I can’t even count how many times I’ve made this slaw.   I basically suggest it to everyone who asks me for a warm-weather meal idea and they end up loving it.  It’s one of the high points of being a “food blogger”– finding out that one of your favorites has become a favorite of so many other people.

Peanuty Cold Soba Noodle Salad | Relishing It

Peanuty Cold Soba Noodle Salad | Relishing It

Peanuty Cold Soba Noodle Salad | Relishing It

Peanuty Cold Soba Noodle Salad | Relishing It

Sometimes, I want something more filling than just slaw, or more to the point– something hearty to chomp on.  Adding soba noodles to the mix was the perfect solution here, and I love that it’s still accompanied by a ton of vegetables.  The heat is going to crank up here this week, so peanuty cold soba noodles will be on my menu again.  You should make it, too.  Use whatever vegetables you have on hand, it certainly doesn’t have to be this exact combination.  You may find that you need a bit more soy sauce or salt in the sauce when adding soba noodles to the mix.  I re-season after it’s been mixed, so not to overdo it with the salt.  A squeeze of fresh lime is essential when serving.  Hope you enjoy!  And stay cool.

Peanuty Cold Soba Noodle Salad | Relishing It


The Recipe: Peanuty Cold Soba Noodle Salad

(serves 2-3)

Follow this Healthy Asian Peanut Slaw recipe (this time I used broccoli, carrots, red cabbage, cilantro, and radishes)

With Additions Of:

1 bunch soba noodles cooked according to directions, then rinsed with cold water (reserve a bit of cooking water)

scallions, for garnish

black sesame seeds, for garnish

limes

Follow the directions to make the Healthy Asian Peanut Slaw.  Combine the vegetables, sauce, and cold soba noodles together using tongs.  Loosen with a bit of cooking water, if need be.  Taste.  Adjust seasonings, if needed.  I often add a bit more soy or salt when adding soba noodles to the mix.  Squeeze lime juice onto the final mixture and top with peanuts, scallions, cilantro, and black sesame seeds.  Enjoy!

Thanks for stopping by Relishing it!

Laurie


Read Full Post »

Spring Potato Salad with Ramps and Radishes | Relishing It

Finally.  Warm weather is finally here in Minnesota!  I know parts of the country have been having ridiculous heat waves recently, but we’ve been waiting (not-so-very) patiently for the weather to get nice here.  Yesterday  it finally did, and it was glorious!  It’s remarkable to see the change in attitude and manners once decent weather shows up.  Everyone– and I mean everyone– is just so much happier and more pleasant.  It’ll be another story once the high heat and humidity eventually find their way here.

Spring Potato Salad with Ramps and Radishes | Relishing It

Spring Potato Salad with Ramps and Radishes | Relishing It

I did my best yesterday to blind people with my extremely white Minnesota legs.  Not that this is any different than later in the summer.  I basically vary between stark white and just very pale.  Years ago I wished I had more color, but now I’m fine with my lack of sun-induced color, so I’ll continue to lather on the sunscreen.

Spring Potato Salad with Ramps and Radishes | Relishing It

Spring Potato Salad with Ramps and Radishes | Relishing It

Where was I going with all of this?  Oh yeah… summer, heat, shorts….potato salad!  Grilling last night was a no-brainer, so I made a bowl of one of my favorite summer potato salads to kick off the season.  In this version, I’ve accompanied the potatoes with spring ramps, radishes, celery, and parsley.  Ramps are fabulous, but are around for such a short time, scallions replace them when they are no longer available.  A delicate dressing of lemon, olive oil, garlic, and anchovies is poured on the warm yellow potatoes to really saturate them with flavor.  The crunchy vegetables are added later, once the potatoes have cooled a bit, then the remaining dressing is added.  This potato salad gets better and better the longer it sits.  And it’s perfect for picnics since it doesn’t contain any dairy.  I hope you give it a try!

Spring Potato Salad with Ramps and Radishes | Relishing It

The Recipe: Spring Potato Salad with Ramps and Radishes

3 pounds yellow potatoes, cut into bite sized pieces

1 bunch radishes, chopped

1 bunch ramps or scallions, chopped

handful of fresh parsley, chopped

2-3 stalks of celery, chopped

For the Dressing:

2 garlic cloves, finely chopped

2 teaspoons Dijon mustard

juice of 2 lemons (about 5 tablespoons)

3-4 small anchovies, smashed into a paste

1/2 cup good quality olive oil  (California Olive Ranch gets my vote)

salt and fresh cracked pepper

good crunchy sea salt to finish

Place a steamer in a large saucepan.  Add a bit of water to the bottom.  Add the potatoes and steam until potatoes are nearly done.  Turn off the burner and keep the cover on for an additional 10-15 minutes to ensure the potatoes are fully cooked.  This technique keeps the potatoes from being loaded with water, which sometimes happens when boiled, and from being over-cooked which can lead to mushiness.  Check them after 10 minutes, and if they’re tender, remove the lid.

Meanwhile, make the dressing.  In a medium bowl, add the garlic, anchovies, Dijon, lemon juice, and pinch of salt and pepper.  Whisk.  Then slowly add the olive oil, whisking the entire time.  Adjust seasonings, if necessary.  Remember that potatoes require a bit of salt to let their flavor shine through.  However, the anchovies will supply a lot of that saltiness, so I generally wait to make a final judgment about adding more salt until the potato salad has been refrigerated and the flavors have had a chance to meld together.

When the potatoes are done steaming, add them to a large bowl and pour about 2/3 of the dressing over them while they are hot.  Use a rubber spatula to gently fold the potatoes and dressing together.  Let sit until mostly cool, then add the vegetables and the remainder of the dressing.  Fold everything together, cover with plastic wrap, and refrigerate for a couple of hours.  When ready to serve, let it come to room temperature– the flavors are brighter when they are not completely cold.   Sprinkle with a crunchy sea salt before serving.  Enjoy!

Thanks for stopping by Relishing It!

Laurie

Read Full Post »

Curry-Scented Cauliflower with Golden Raisins | Relishing It

We joined a CSA recently!  For a vegetable-obsessed girl like me, this is big news.  So much so that I want to tell everyone I interact with…but that would be a bit weird, so I’ll just tell you.  I’m already anxious for June to roll around– for that first box to arrive, full of vegetables grown for my family by people that I know.   To be honest, we haven’t been CSA members for a couple of years now.  I know, I know.  You see, the previous CSA that we belonged to didn’t quite meet my family’s needs.  We ended up spending a ton of money every week to supplement the offering.  This year we dove back in, and decided to go with Bossy Acres.  The fabulous ladies that run this CSA are heavily involved in the Twin Cities food community.  I had heard remarkable things about their CSA from several friends.  And then, once I had a chance to talk with the owners about the excitement and passion that they put into their work, it made me realize that I wanted my family to be part of it.  And I am so darn excited!  Did I already mention that?

Curry-Scented Cauliflower with Golden Raisins | Relishing It

Curry-Scented Cauliflower with Golden Raisins | Relishing It

Alright, now that I’m done with my mini celebration it’s on to today’s post.  Even though this is THE NEVER-ENDING WINTER here in Minnesota, I’ve moved on to think about lighter, quicker fare.  Spring has to arrive eventually, right?  It’s just a matter of time before the farmers’ markets are loaded with fresh vegetables, and I’ll also be getting my first CSA delivery.  Waiting is hard.  I want strawberries and tomatoes now.  But until then, I’ll enjoy this gorgeous cauliflower.Curry-Scented Cauliflower with Golden Raisins | Relishing It

I love how hearty cauliflower is.  It’s reliable and always a good option in the Summer or Winter.  Out-of-season tomatoes and cucumbers can’t claim that.  I enjoy this side dish (though I eat it as a main course) when the cauliflower is roasted just a bit. Not entirely soft, but not raw either.  Once it’s done, I like to toss it immediately with red onion and golden raisins on the hot roasting pan.  It warms them through and takes the edge off the onion.  Infusing the spices in warmed olive oil is a great way to maximize the flavor.  This is a subtle dish.  It’s not swimming in a sauce or loaded with flavors that punch you in the face.  And it comes together in a matter of minutes.  The golden raisins are key– the slight sweetness that they add is crucial here.  Hope you enjoy!

Curry-Scented Cauliflower with Golden Raisins | Relishing It

The Recipe:  Curry-Scented Cauliflower with Golden Raisins

(serves 2-4)

1 large head of organic cauliflower, broken into small bite-sized pieces

1 small red onion, thinly sliced

1/3 cup organic golden raisins

handful of fresh cilantro

2 tablespoons extra-virgin olive oil, plus more for roasting

1 teaspoon hot curry powder  ( I love Penzys’ version)

1/2 teaspoon ground turmeric

1/2 teaspoon ground cumin

pinch of kosher salt to taste

lime wedges, for serving

Preheat an oven to 400°F.  Toss the cauliflower pieces with a drizzle of olive oil and place on a baking sheet. Roast for 15-20 minutes, or until the cauliflower has browned slightly but isn’t completely soft.  Remove from oven and immediately toss the sliced red onion and golden raisins on the hot pan with the cauliflower.

Meanwhile, prepare the curry-scented olive oil by placing 2 tablespoons of olive into a small skillet.  Mix the curry powder, turmeric, and cumin into the oil and heat on medium for about 1-2 minutes, or until the oil becomes warm and fragrant.  Make sure to stir it.  Remove from heat and pour over the vegetables.  Toss with cilantro.  Season with salt, if necessary.  Serve with a squeeze of lime.  Enjoy!

Thanks for stopping by Relishing It!

Laurie


Read Full Post »

Older Posts »

%d bloggers like this: