Feeds:
Posts
Comments

Posts Tagged ‘Ricotta Cheese’

Skillet Pizza on the Stovetop with Ramps, Mushrooms, and Smoked Mozzarella | Relishing It

When the weather changes, I find that my methods for cooking change, as well.  I’ve mentioned before that we live in an old Victorian house (110 years old to be exact).  We do not have central air, so we make-do with our window units.  When it’s a scorcher of a day, I generally avoid using the oven because the air conditioners just can’t keep up.  And this happens often during our Minnesota summers.  Honestly, sometimes it’s even too hot for me to stand next to a grill outside.  I’m painting quite a lovely picture of the hot mess that is me during the summer, aren’t I?  I’m not a fan of the heat, but I try to cope.

Skillet Pizza on the Stovetop with Ramps, Mushrooms, and Smoked Mozzarella | Relishing It

Skillet Pizza on the Stovetop with Ramps, Mushrooms, and Smoked Mozzarella | Relishing It

Skillet Pizza on the Stovetop with Ramps, Mushrooms, and Smoked Mozzarella | Relishing It

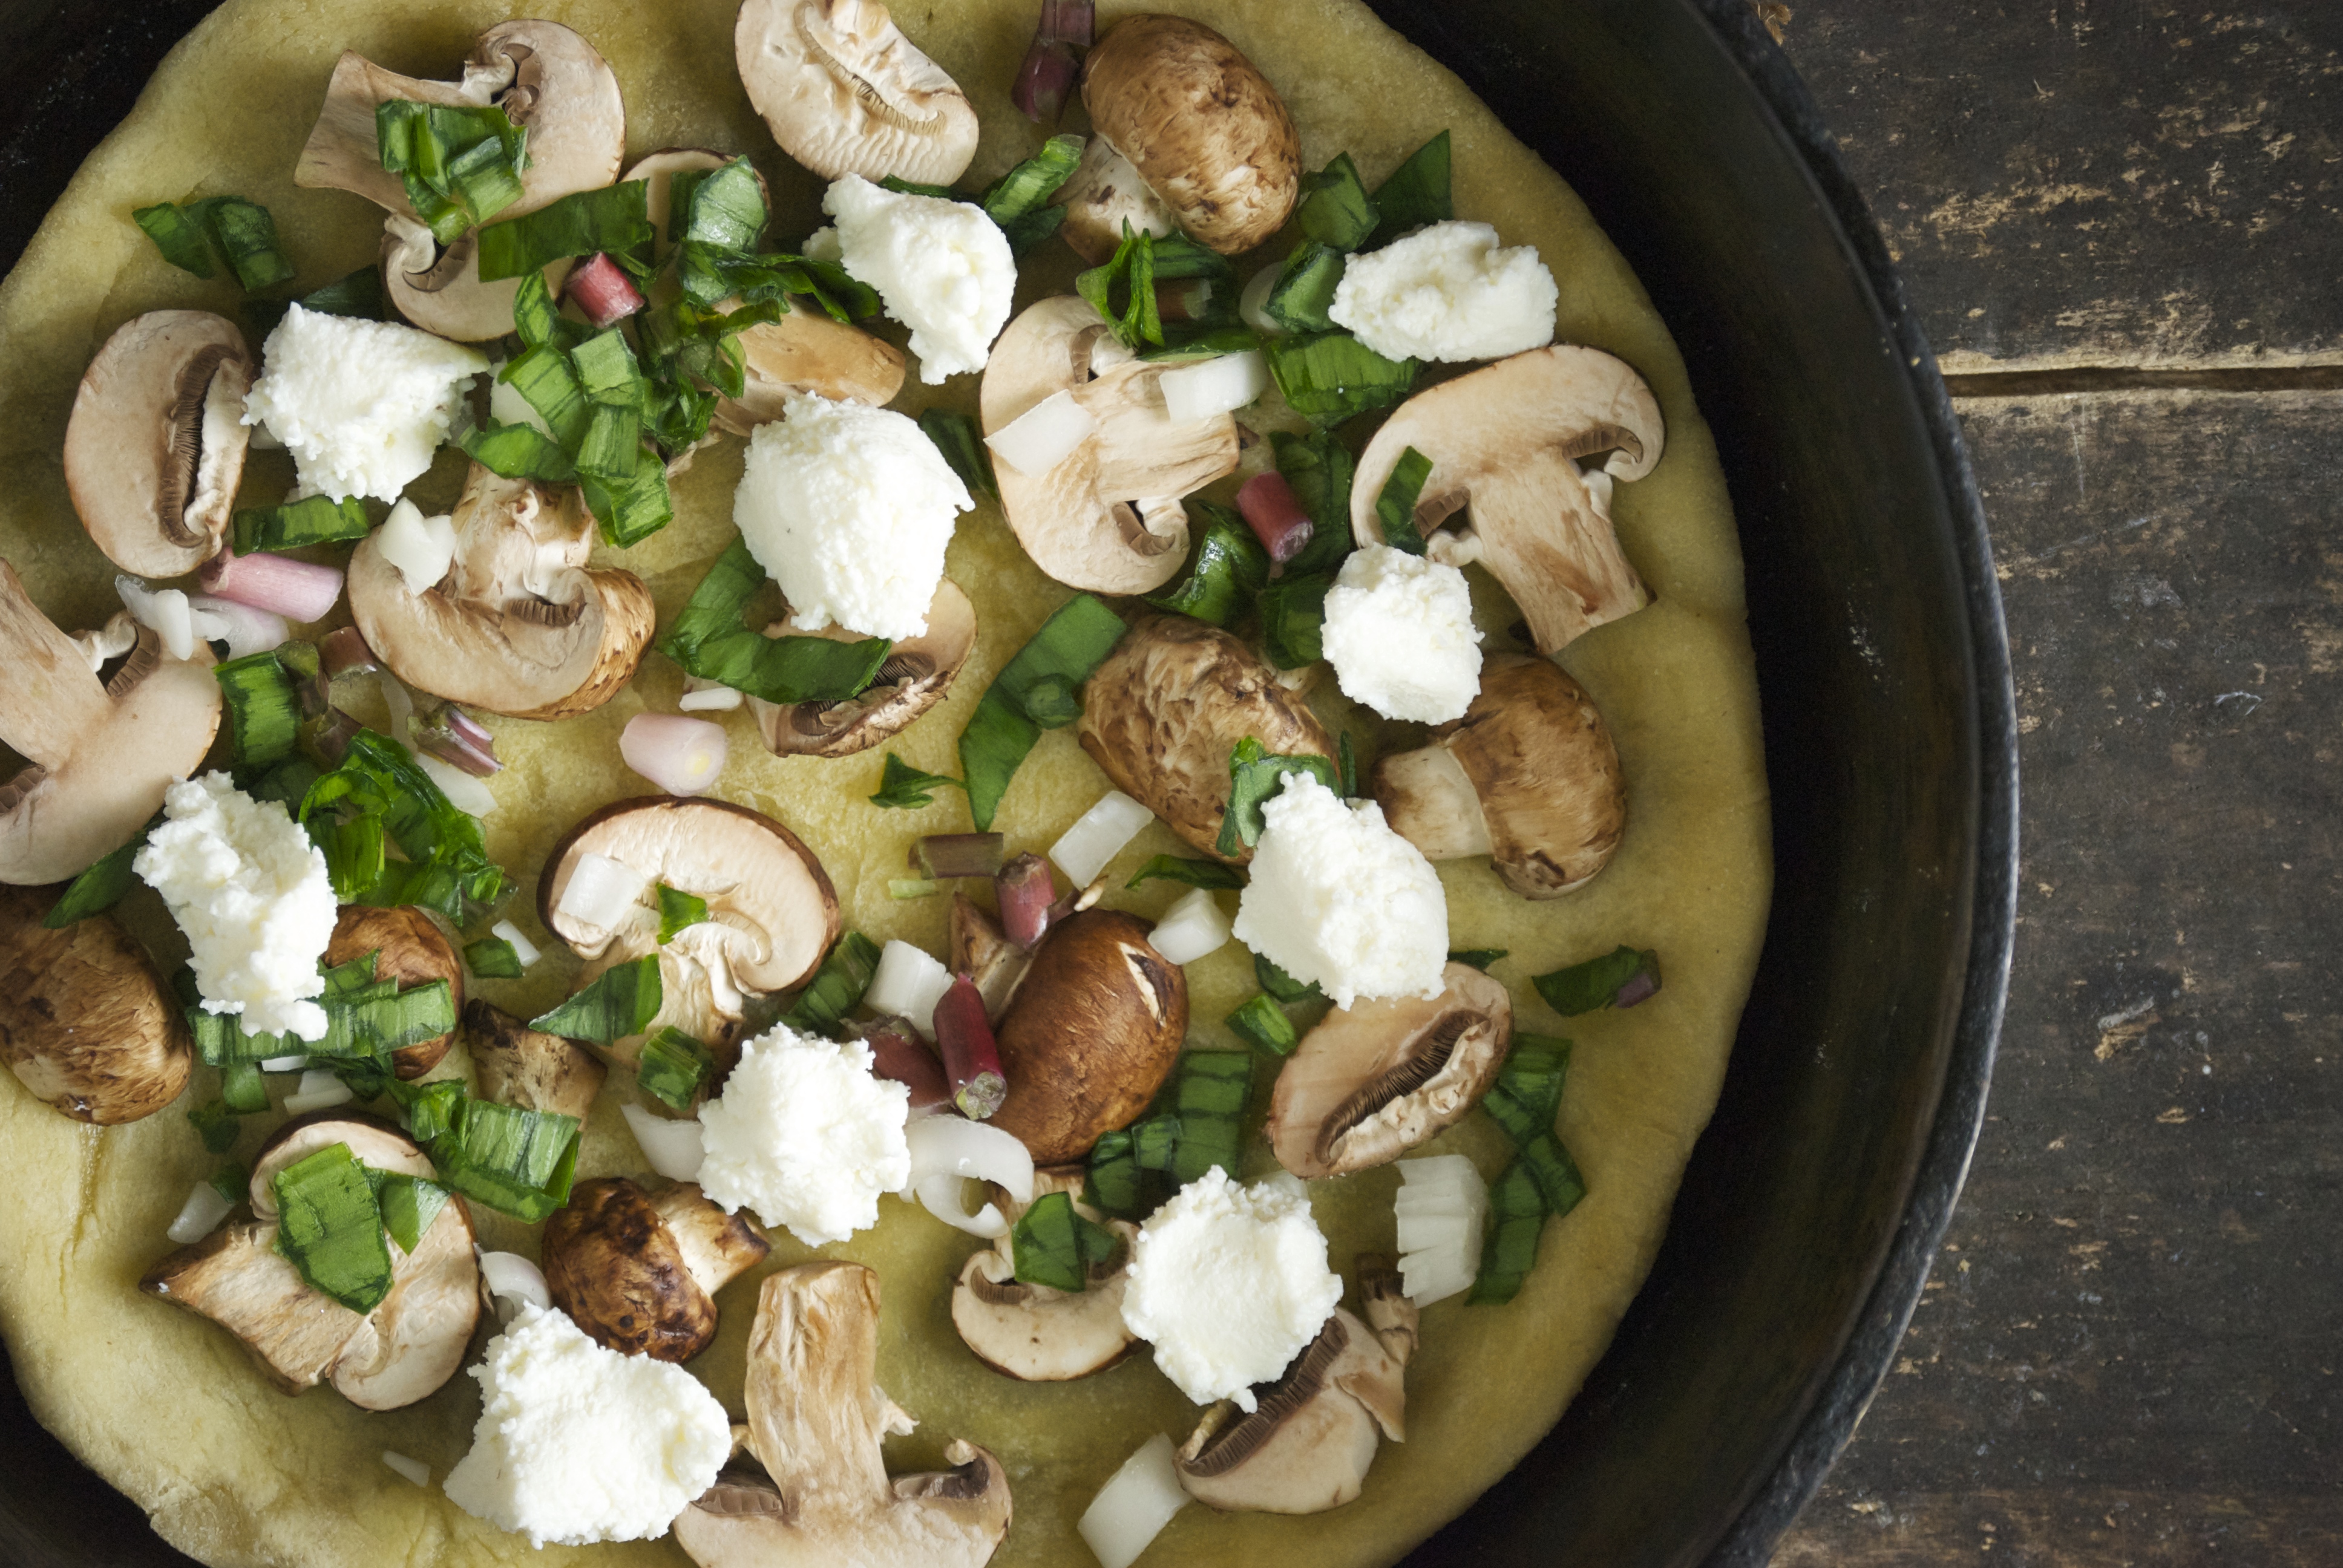
I love summer pizza, but since I’m unwilling to endure the added heat of firing up my pizza stone– at 500°F for thirty plus minutes– I turn to this skillet method.  A pizza loaded with fresh herbs, fresh mozzarella and all of those fresh tomatoes is my thing.   I used ramps, mushrooms, ricotta, and smoked mozzarella for this version, but you can use whatever you prefer.  If you can get your hands on some morel mushrooms, please do that and think of me when you eat it.  Please.  I’m very particular about my pizza crust.  If it’s not perfect, it’s not worth my time.  I like a nice crunch on the outside, tender on the inside (NOT doughy), and a lovely deep flavor throughout.  Over the years of making homemade pizza I learned something about myself– the longer the pizza dough hangs out it my fridge, the more I like it.  So, I never make pizza dough the day I want to eat it, and rarely even the day before.  I make it a few days prior and the flavor develops beautifully.  The texture is spot on, as well.  It’s loaded with air pockets from the yeast.

Skillet Pizza on the Stovetop with Ramps, Mushrooms, and Smoked Mozzarella | Relishing It

Skillet Pizza on the Stovetop with Ramps, Mushrooms, and Smoked Mozzarella | Relishing It

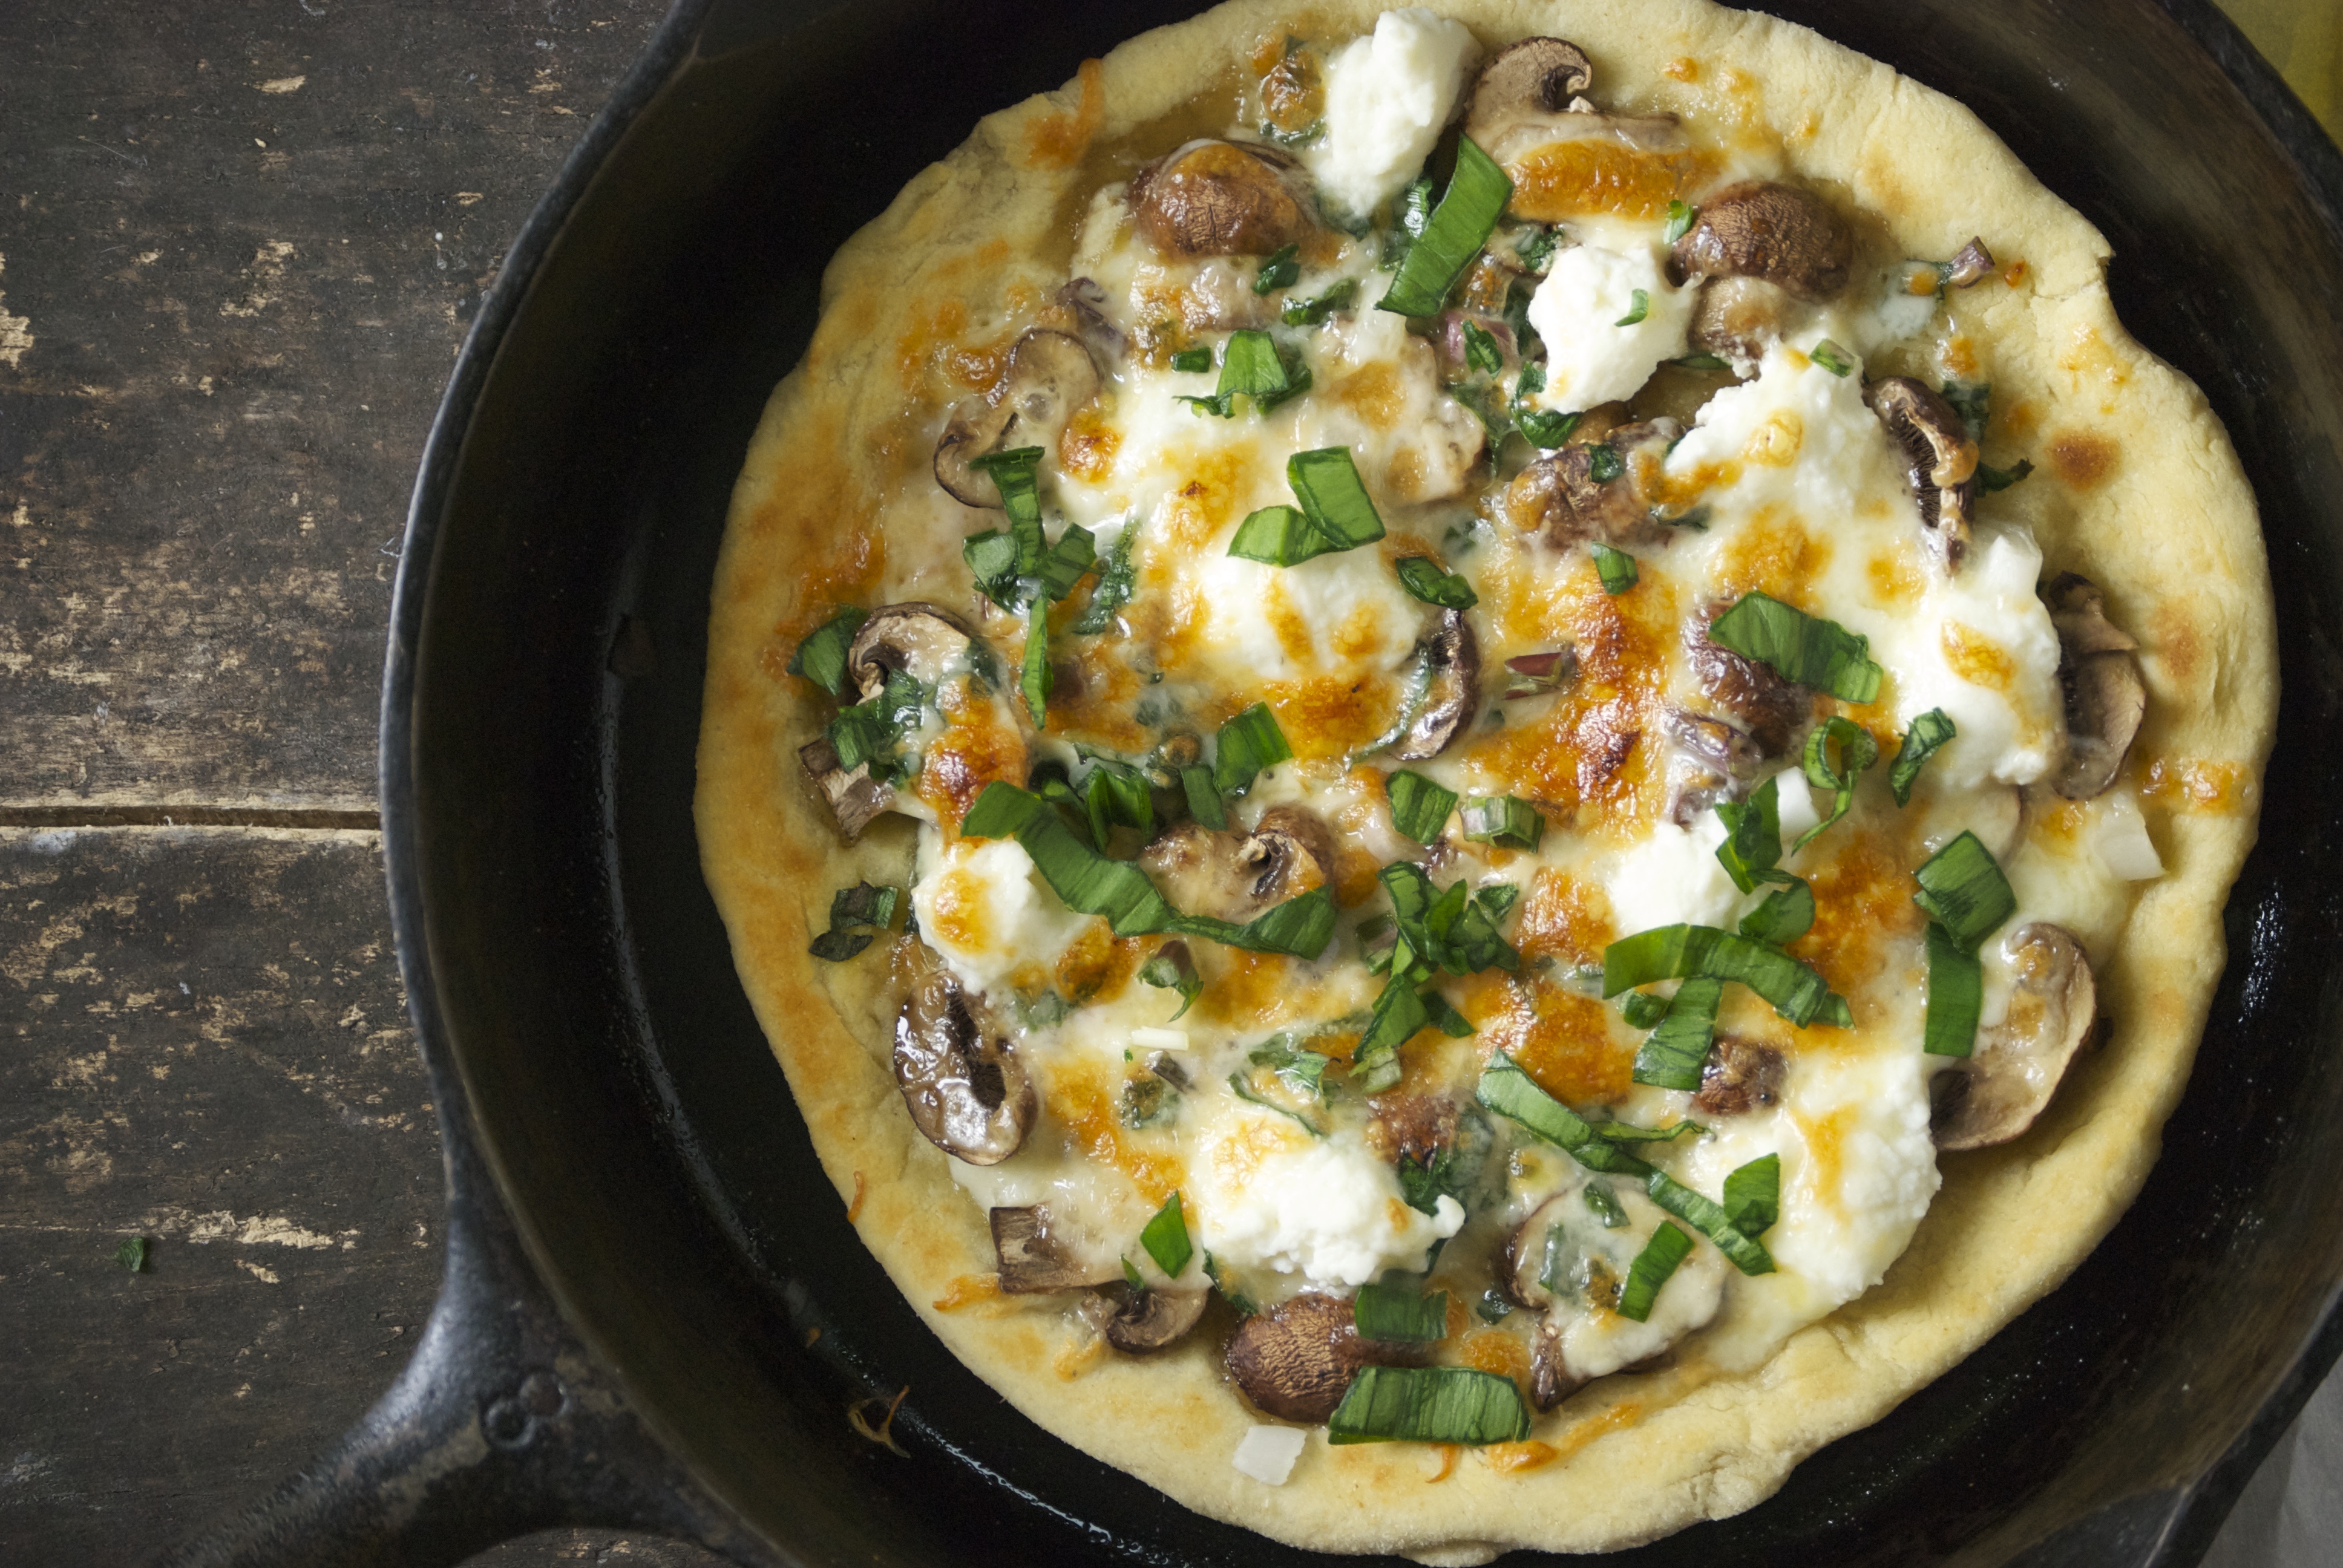
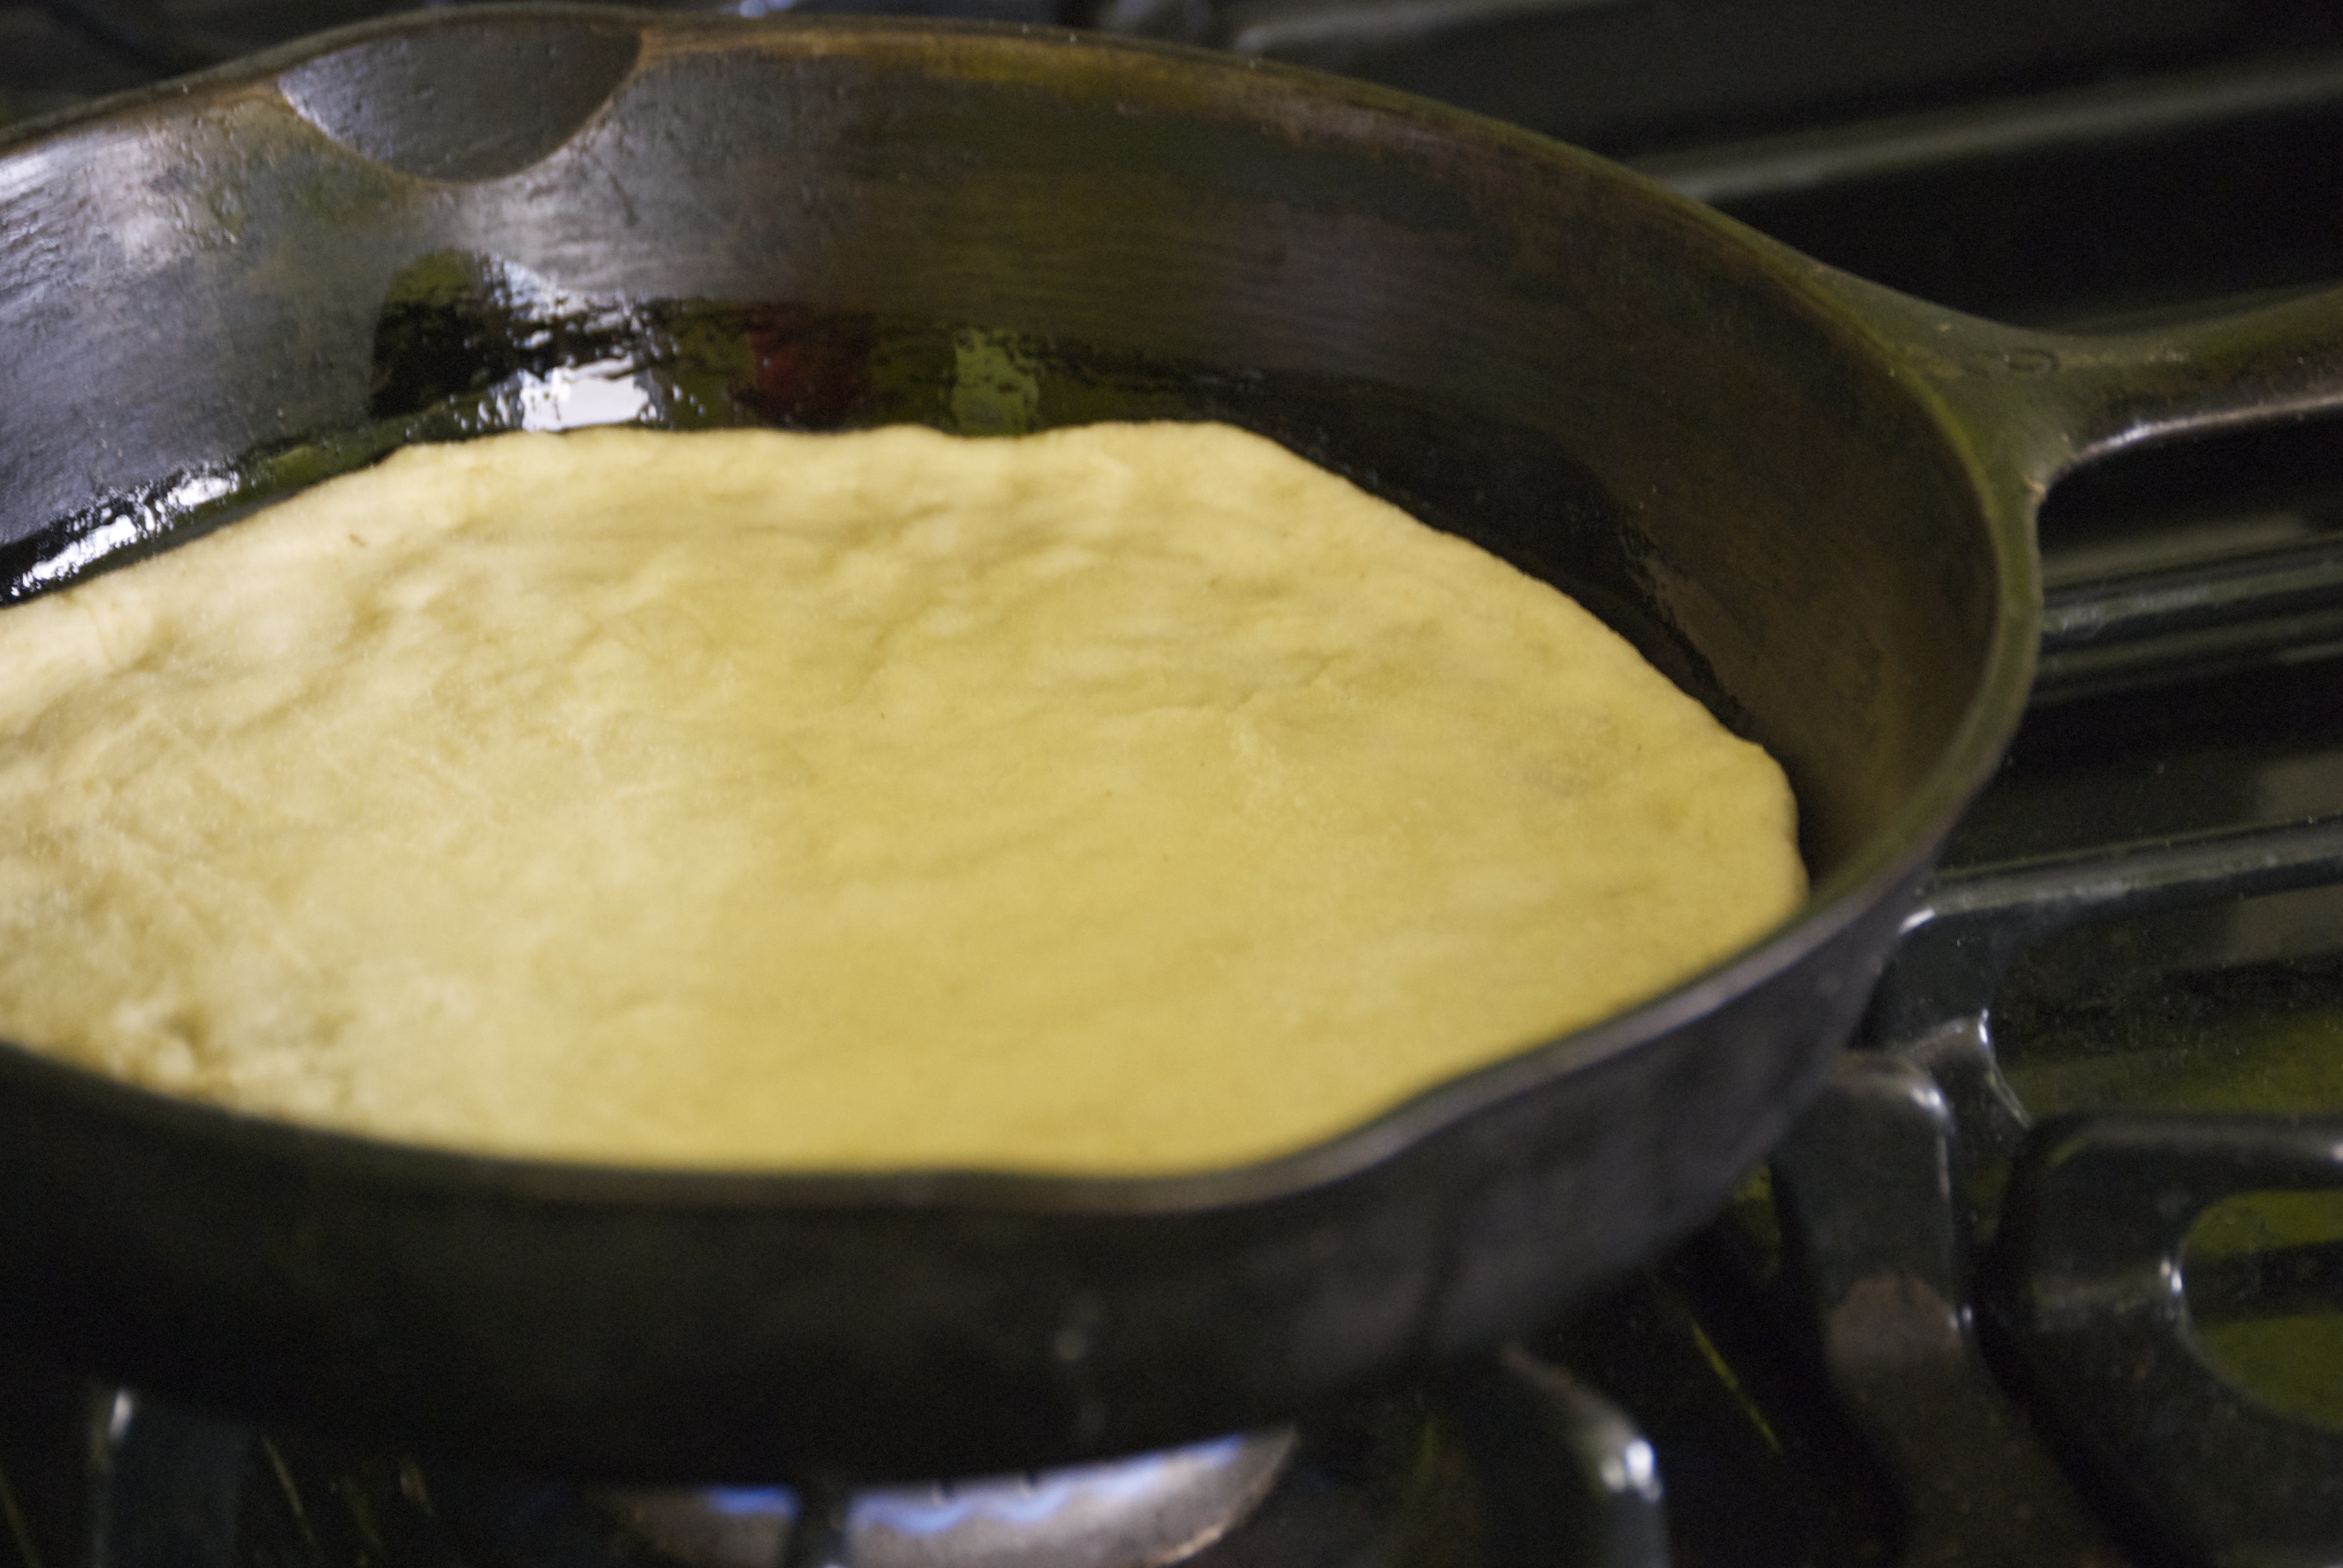
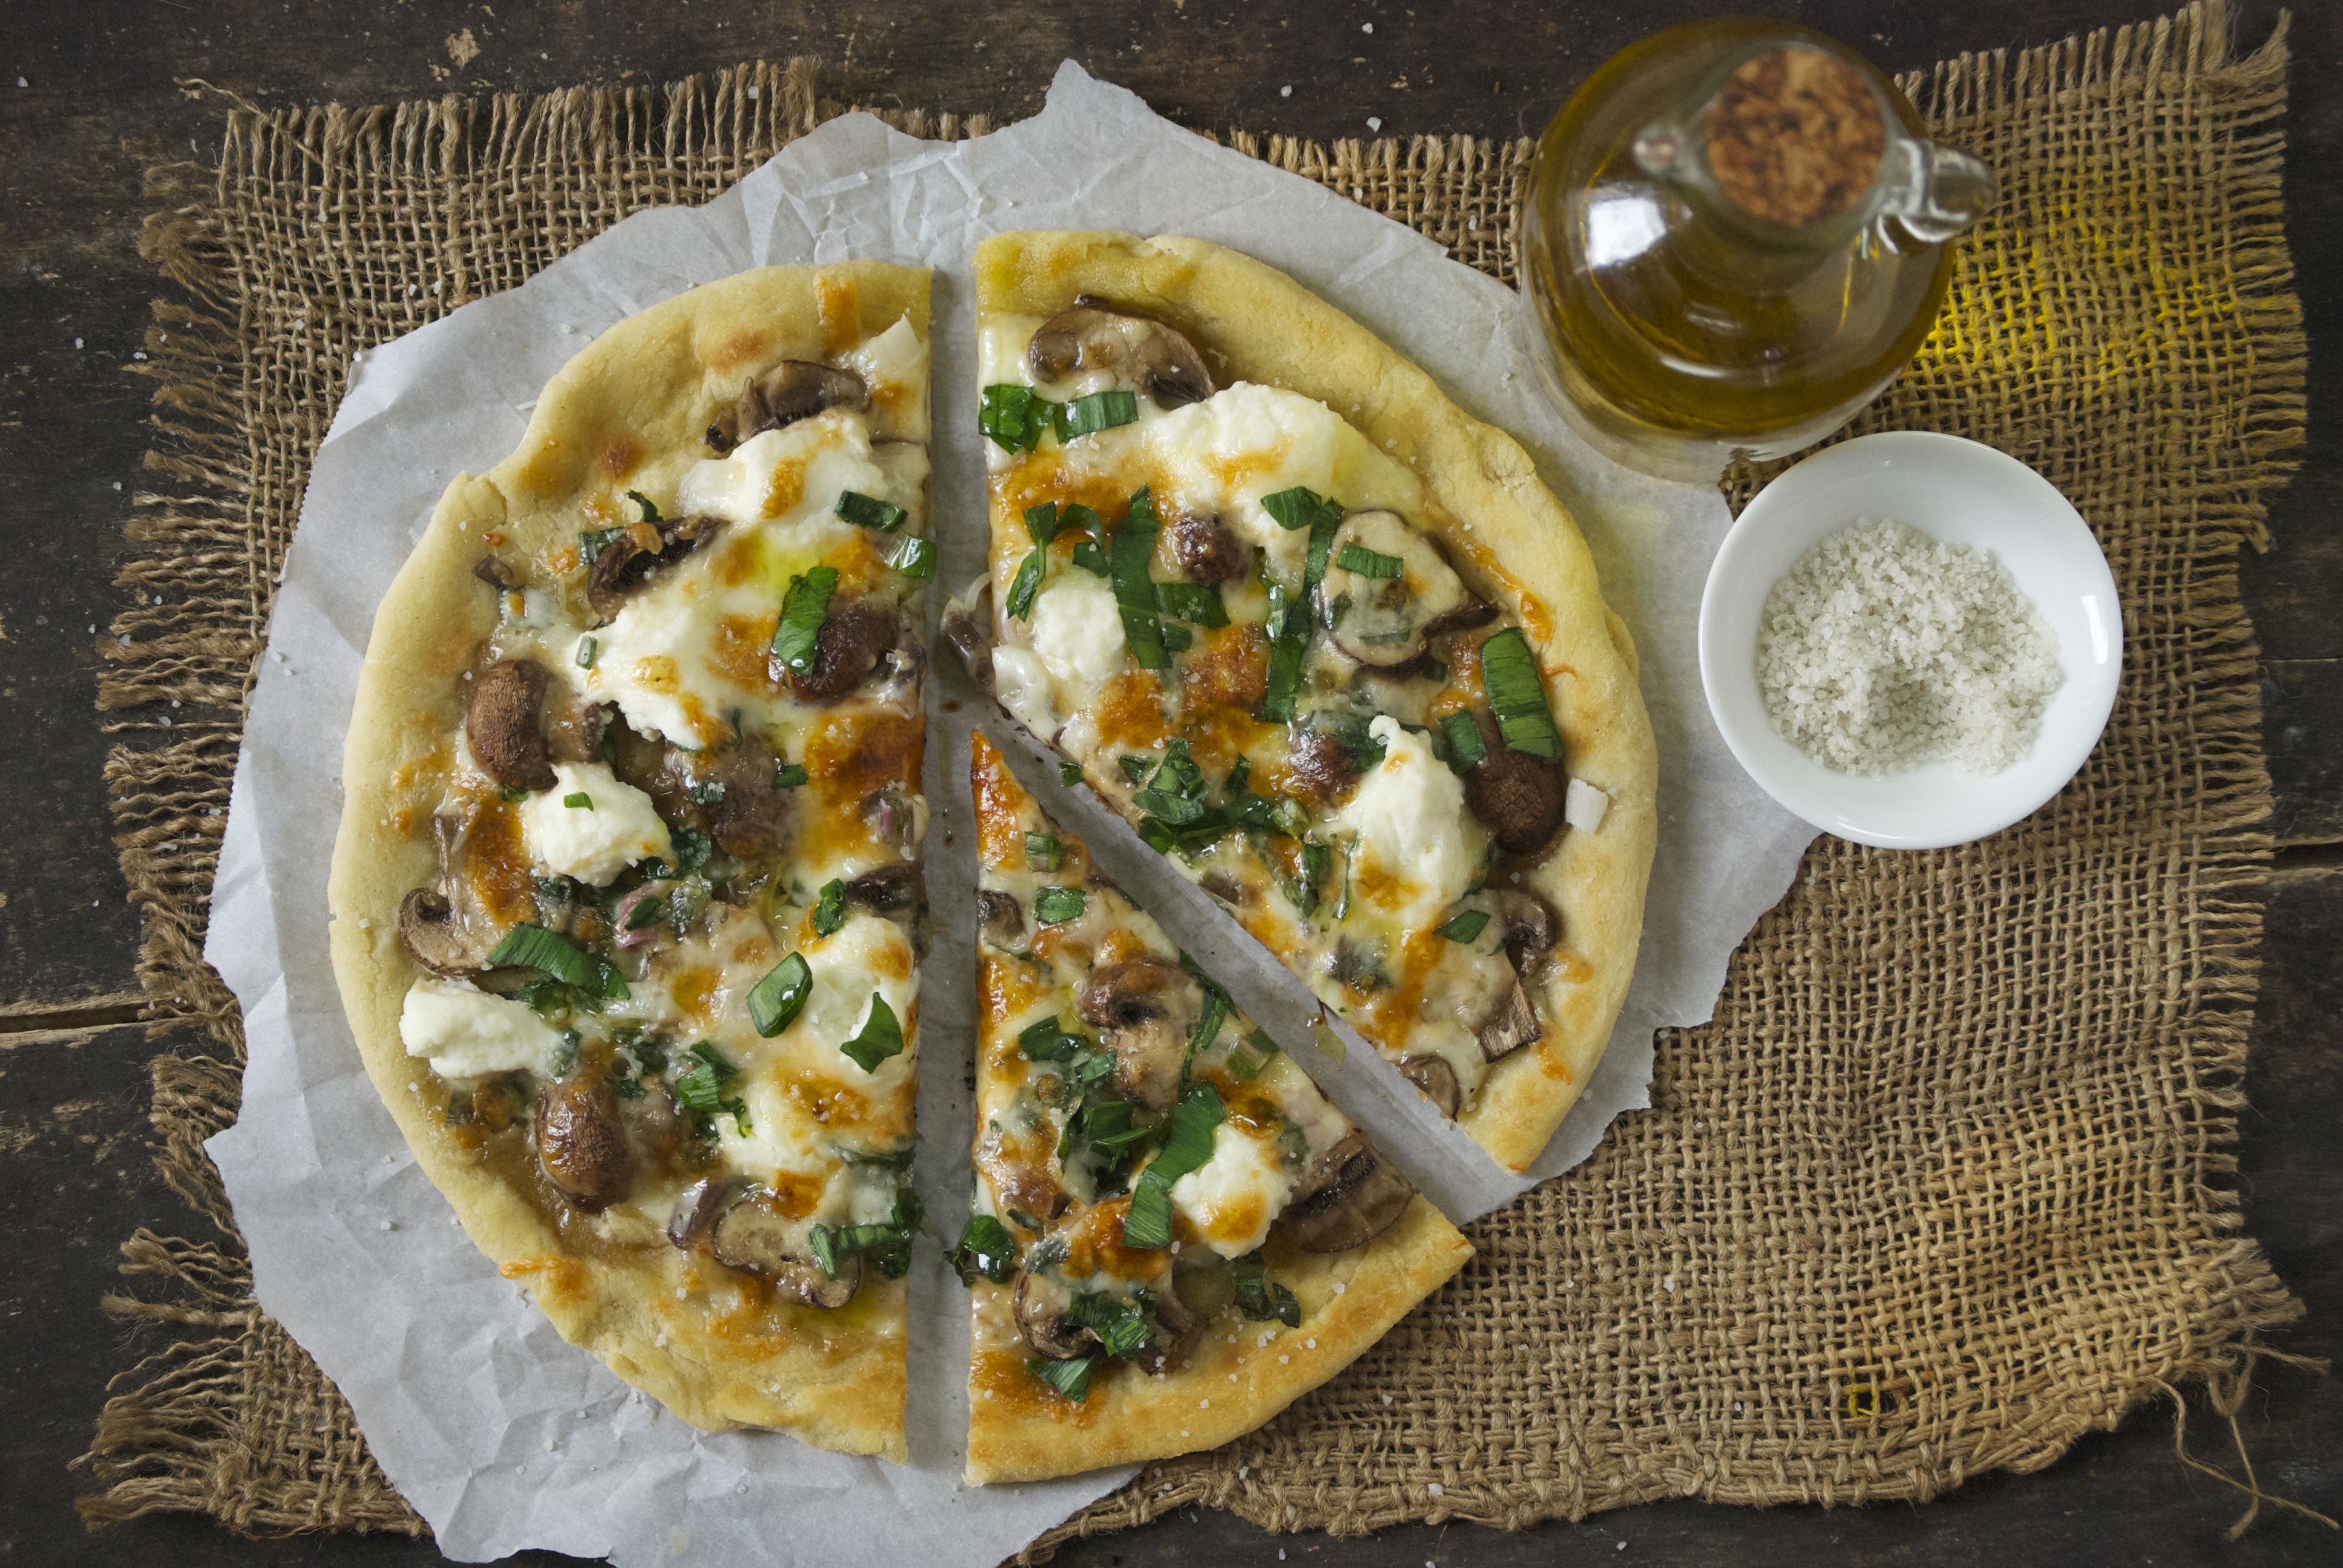
Using a cast-iron skillet works wonderfully for making pizza.  Use whatever size you have.  I have an old 10-inch.  Coat it with olive oil and let it heat up.  Then place the rolled-out dough in it.  Let it cook just a bit until it has a light golden color.  Add more olive oil, if necessary and flip it over.  Add the toppings and cover with a lid.  Cook over medium-high heat until the bottom of the crust is the color that you desire.  I like mine a little on the dark side.  When you get there, place the skillet (no lid) directly under the broiler for a few minutes to darken up the cheese (this will go quickly). Watch carefully, as broilers tend to be finicky.  You may even need to move the pan around for even browning.   Remove when pizza is a deep golden brown.  The entire process takes no time at all and you’re left with a delicious pizza that has an incredible crust.  Speaking of the crust– I jump back and forth from using two favorite recipes.  This one, which I’ve previously blogged about and the one I’m sharing today.  They are both fantastic.  Whichever one you choose,  just try to make it a few days in advance– it really does make a difference.  I like the crust recipe I’m sharing today because it fits wonderfully into a gallon-sized ice cream bucket and because it’s ridiculously easy to mix up.  Dump, stir, done.  You may not use the whole thing in one sitting, but you can either use it within two weeks, or even freeze it in plastic bags.  Enjoy the pizza!

Skillet Pizza on the Stovetop with Ramps, Mushrooms, and Smoked Mozzarella | Relishing It

The Recipe: Skillet Pizza on the Stovetop with Ramps, Mushrooms, and Smoked Mozzarella

(serves 1-2)

Pizza Dough 

(makes enough dough for 3-4 12-inch pizzas and will keep for 2 weeks in the refrigerator)

1 1/2 cups plus 4 teaspoons  (about 355 grams) water heated to 100°F

1/2 tablespoon granulated yeast

3/4 tablespoon kosher salt

3 tablespoons extra-virgin olive oil

3 3/4 cups (540 grams) all-purpose flour

Skillet Pizza:

(using a 10-inch cast-iron skillet)

3 ounces pizza dough

2 ounces smoked mozzarella, grated

1-2 ramps (or scallions) chopped

6 crimini mushrooms, thickly sliced (or Morels!)

a few dollops of ricotta cheese

1 garlic clove, thinly sliced

extra-virgin olive oil

Begin a few days in advance by preparing the pizza dough.  In a gallon-sized ice cream bucket (or anything of that size that has a non-airtight lid) add the heated water, yeast, salt, and olive oil.  Use a Danish dough hook or a wooden spoon to mix everything together.  Then add the flour and give it a really good stir using the hook to really incorporate everything.  You’ll want all of the flour to be wet.  The mixture will look shaggy.  Cover with the lid (I use a nail to poke a tiny hole in the top of mine (this lets the gases escape when it’s refrigerated).  Let it rise at room temperature for two hours.  Do not ever punch this dough down.  Technically, the dough could be used at this point.  But, this particular dough works better when cold.  And tastes a whole lot better after a night or two in the refrigerator.

When ready to make a skillet pizza, remove some dough from the refrigerator and let it warm up for a few minutes, as it is easier to work with.  Dust some flour on the counter and a bit on the dough (don’t be shy with the flour).  Form a ball.  Roll it out to the size of your skillet (if it doesn’t roll easily, just let it rest for a few minutes). Coat the skillet with a bit of olive oil and heat it over medium-high heat.  Shake off any excess flour from the pizza dough and place it in the skillet.  Cook for 1-2 minutes, then flip it, adding more olive oil if necessary.  The olive oil gives the crust a nice crunch to it.  Immediately place the sliced garlic clove, a heavy drizzle of olive oil, ramps, ricotta cheese, mushroom, and smoked mozzarella on top of the pizza.  Cover with a lid (to help it melt) and cook for about 5 more minutes, or until the crust is a deep golden brown.  Then remove it from the stove and place it directly under the broiler (no lid) for a few minutes until the cheese is your desired color.  Move the pan around, if necessary.  Remove from the oven, drizzle with olive oil and a sprinkle of good sea salt.  Enjoy!

Pizza Dough adapted from Artisan Pizza and Flatbread in Five Minutes a Day

Thanks for stopping by Relishing It!

Laurie


Read Full Post »

Whole Grain Lemon Ricotta Pancakes via Relishing It

Mother’s Day is less than a week away, so I thought I’d give you a breakfast recipe to help you treat that special lady right this Sunday.  These pancakes are the perfect “something special” to show your mom, grandma, or wife just how much they mean to you.  And if you make sure to clean up once everything is made, she’ll appreciate it all the more.

Whole Grain Lemon Ricotta Pancakes via Relishing It

Lemon ricotta pancakes are one of our favorite Spring breakfast dishes.  The flavors here combine to give a fresh twist on the old pancake routine.  As usual, I’ve tossed in a few tricks from my “make things more healthy” repetoire.  Using white whole wheat flour not only makes these more healthy, but it adds a bit more substance than you’ll find in a typical lemon ricotta pancake, which tends to be feather-light.  I’ve also used coconut oil throughout the recipe– both in the pancakes, as well as for the frying oil.  The coconut flavor pairs beautifully with the lemon here.  Just a quick side note, I love coconut oil.  Absolutely love it.  I try to use it as a substitute whenever the dish allows.   I used just a touch of honey as the sweetener in these pancakes,  since I don’t like them overly sweet.  Add a bit more, if you like.  Or top them with a lovely fruit purée.  The ricotta gives them a wonderful, creamy texture, and the lemon– well it’s simply fabulous.

Whole Grain Lemon Ricotta Pancakes via Relishing it

I’m lucky enough to have two beautiful women in my life that I get to honor on Mother’s Day– my Mom and my Mother-in-Law. Both are strong, compassionate, women who have helped guide and nurture me and my family.  They’re incredible grandmothers to my children, and that means the world to me.  (I love you both!)  I’ll be traveling to North Dakota later this week with my kiddos to celebrate with my Mom– so I’ll be back here at Relishing It next week. I hope all of you Moms have a great, sun-filled day surrounded by your loved ones!

Whole Grain Lemon Ricotta Pancakes via Relishing It

The Recipe:  Whole Grain Lemon Ricotta Pancakes

2 cups white whole wheat flour

2 teaspoons baking powder

1/2 teaspoon kosher salt

Juice and zest of 3 smallish lemons

2 tablespoons virgin coconut oil, melted

3/4 cup ricotta cheese

1 teaspoon vanilla

2 tablespoons honey, or more to taste

1 1/4 – 1 1/2 cup milk

2 eggs

virgin coconut oil, for frying

In a large bowl, whisk together the flour, baking powder, and salt.  In another bowl, combine the coconut oil, lemon juice/zest, ricotta cheese, honey, eggs, vanilla, and 1 1/4 cup milk.  Pour the liquid ingredients into the dry ingredient and combine them using a wooden spoon.  Add a bit more milk, if necessary.  Be careful not to over mix.  Let the batter rest for a few minutes.

Heat some coconut oil in a large skillet.  When it is hot enough, ladle batter into the pan– make the pancakes as big, or as small as you like.  When they begin to get speckled with “holes”, it’s time to flip them over.  Repeat the procedure, adding more coconut oil to the pan each time.  Serve with your favorite pancake toppings.  Enjoy!

Thanks for stopping by Relishing It!  xo

Laurie

Read Full Post »

Vegetarian Lentil Meatballs via Relishing It

The calendar says that Spring is on the way, though the snowstorm that rolled through the Midwest over the last four days had my family looking for more warming comfort food.  I obliged, by making these meatless “meatballs.”  Yes, I realize calling something that has no meat in it a meatball is a bit ridiculous, but it sounds more generally appealling that “lentilballs.”  And to be honest, it gives you a better idea of what to expect.  I kid you not, these lentil meatballs have the same taste, texture, and appearance of traditional meatballs.

Brown Lentils via Relishing It

Lentil Meatball Ingredients via Relishing It

Not to belabor the point of how much this version tastes like a traditional meatball, but my husband– a complete carnivore and self-described ‘bean-hater’– devours them.  They’re made much like a traditional meatball, except for the addition of ricotta cheese.  It really helps bind the ingredients together and provides a rich texture.  I loaded these ones up with garlic, onion, parmesan, and parsley, but another nice thing about this dish is that it can be easily modified to evoke other ethnic food flavors.  Add a little curry powder, cilantro, and ginger; or to make a Greek version, add mint and oregano, and serve it with feta and tzatziki.  We enjoyed this latest batch with my homemade canned tomato sauce from last summer for an Italian vibe.  The point is, these little numbers are versatile enough to allow you to follow your imagination.

Vegetarian Lentil Meatballs via Relishing It

Homemade Tomato Sauce via Relishing It

In our family, we generally live by the “eat meat, though not all the time” mantra. These lentil meatballs are a great alternative, whether you’re like us or eat strictly vegetarian, and you still want that meaty texture and flavor.  The fact that brown lentils are also budget-friendly is a nice bonus.  Now if you’re interested in more traditional meatballs, I’ve got those for you too.  Take a look here and here for a few of my other favorite recipes.  And these are an interesting take that makes a nearly-perfect soup.  Heck, give them all a try and let me know what you think.  Enjoy!

Vegetarian Lentil Meatballs via Relishing It

Vegetarian Lentil Meatballs via Relishing It

The Recipe:  Vegetarian Lentil Meatball

(makes 40 small meatballs)

2 cups dried brown lentils

1 bay leaf

3 teaspoons kosher salt, divided

6 garlic cloves, chopped

1/2 cup whole wheat breadcrumbs, lightly toasted

2 eggs, lightly beaten

1/2 cup chopped onion

1/3 cup chopped parsley

3/4 cup ricotta cheese (mine was part-skim)

3/4 cup grated parmesan or grana padano cheese

freshly cracked pepper

To prepare the lentils:  Rinse the lentils and put into a large saucepan with 2 cups water, bay leaf, and 1 teaspoon of kosher salt.  Bring to a boil, then reduce to a medium-low and simmer covered for about 25 minutes, or until all of the water has been absorbed into the lentils.  Turn off the burner and let the lentils sit for about 10-15 more minutes covered.  The lentils will be tender when done, but still hold their shape.  Remove the bay leaf, and place the lentils in a food processor and process for about 1 minute, or until they are broken up.  The appearance will look like that of cooked ground beef.

Preheat the oven to 400°F.  Line the largest baking sheet you have with parchment paper.  Set aside.

To make the meatballs:  In a large bowl, combine the puréed lentils, garlic, breadcrumbs, eggs, onion, parsley, ricotta, parmesan, black pepper and 2 teaspoons of salt by mixing together with your hands.  Be careful not to over mix, as with all meatball recipes. Form smallish balls using your hands or a scoop– you should yield about 40.  Place on the prepared baking sheet and bake for about 18 minutes.  They will be a nice golden brown on the top and bottom when they are finished baking.  Serve right away.  Enjoy!

Thanks so much for stopping by Relishing It today!

xo

Laurie

Read Full Post »

I’ve been known to daydream about travelling.  I do this a lot, and I’m guessing it has something to do with growing up in one of the most-rural areas of the country.  My Dad is the same way.  In our daily phone call, we often talk about where we would take a big family vacation if money were no object.  The destination-of-the-day almost always revolves around cuisine (surprise!).   It’s all in the family, I guess.  For me, the pinnacle would be Paris.  I know, I know– pick the obvious, right?  But the food!  The wine!  The history and culture!  Sadly, jetting off to France isn’t in the cards right now, so this week I’ve decided to bring a bit to my kitchen.


This dessert–that’s right, even with those greens this is a dessert– is definitely French.  You wouldn’t normally see it here in the US.  I found it in a beautiful cookbook by David Tanis, called–Heart of the Artichoke and Other Kitchen Journeys.   Tanis is the co-chef at one of the most well-known, well-respected, restaurants in the United States, Chez Panisse.    He’s been there since the 1980’s, though he spends six months at the restaurant in California, and lives the other six months in Paris.  Sounds like a good gig.  He’ll soon be leaving Chez Panisse in order to write  a column for the New York Times that I’m really looking forward to reading.  When Tanis wrote that the odd combination of ingredients in this recipe make a dessert that tastes fantastic, I figured I had to give it a try.

Though the title says it’s a tart, the texture is that of a cake– the baking powder makes it puff while baking.  This is a traditional dessert in the south of France and Italy (alright, perhaps it’s not Parisian, but it’s my daydream.)  Tanis’ recipe calls for Swiss Chard– which I really like– but I’ve been trying to figure out new ways to use use kale, so I made the substitution.  They are similar greens, and the result was excellent.  The kale was delicious, while the ricotta and warm spice added a firm texture and balanced sweetness.  The pine nuts– now these were the the star in this tart.  No substitutions here.  They add a subtle, nutty flavor and lend a nice crunch.  This unique dessert is remarkable.  It’s not savory, but subtly sweet.    Give it a try, you’ll like it.

The Recipe:  Kale and Ricotta Tart

For the Dough:

2 cups all-purpose flour

1 tablespoon baking powder

1/2 cup sugar

pinch of salt

8 tablespoons (1 stick) cold butter, cut into small pieces

1 egg, beaten with 1 tablespoon milk

Grated zest of  1/2 lemon

For the Filling:

1 large bunch of kale,  ribs discarded, chopped  (about 4 cups)

1 cup ricotta cheese (I used part-skim, but the original recipe calls for whole-milk)

2 eggs

1/4 cup sugar  (I reduced from 1/3 cup from the original recipe –it was perfectly sweet for me)

Grated zest of 1/2 lemon

1/4 teaspoon powdered ginger

1/4 teaspoon allspice

1/2 cup golden raisins, soaked in warm water until plumped

1/4 cup pine nuts, toasted

To make the dough, in the bowl of an electric mixer, fitted with the paddle attachment, mix the dry ingredients on low speed.  Add the butter and mix for about 2 minutes more, until crumbly.  Add the egg mixture and the lemon zest and mix another minute, or until you can pinch the dough together.  Turn the dough out and form 2 balls, one twice as big as the other ( use a kitchen scale, if you have one).  Chill for at least an hour.

To make the filling, bring a large pot of salted water to a boil.  Blanch the kale for 1 minute; drain well.  Let cool, and squeeze out any liquid.

Preheat the oven to 350°F.  In a small bowl, whisk together the ricotta, 1 egg, sugar, lemon zest, and spices.

Dust a pastry cloth with flour and roll out the larger dough ball into a circle 2 inches larger than the diameter of your 9- or 10-inch spring form pan.  Roll the dough onto the rolling pin, then carefully unroll it over the pan and gently press it into place, so that it comes about 2-inches up the sides of the pan.  Expect the dough to be pretty soft; if it tears, just press on a scrap to cover any holes.

Drain the raisins, mix them with the greens, and spread over the dough in the pan.  Pour the ricotta mixture over the greens and smooth out.  Sprinkle the pine nuts over the ricotta.

To make the lattice top, roll out the second piece of dough into a 1/8 -inch-thick rectangle.  Cut the dough into 3/4-inch-wide strips.  Fashion a lattice top by alternating crosswise and lengthwise strips.  Leave a gap of 3/4 inch between strips running in the same direction.

Fold the edges of the bottom crust over the ends of the lattice strips.  Whisk remaining egg in a small bowl for an egg wash.  Using a pastry brush, gently coat the tart with the egg.  Bake for 40 to 50 minutes, until the crust is golden.

Cool on a rack before serving.  Enjoy!

Source: Adapted from Heart of the Artichoke and Other Kitchen Journeys by David Tanis

Thanks for stopping by Relishing It today….as always, I appreciate hearing your feedback.

Laurie

Follow me on Twitter!

Read Full Post »

%d bloggers like this: