Feeds:
Posts
Comments

Posts Tagged ‘tart’

Rustic Rhubarb Tartlets via Relishing It

Rhubarb in January?!  No, I haven’t lost my mind, and I generally try to prepare and write about foods that are in season.  But every now and then I get tired of following the unwritten ‘rules’ of food blogging.  And since I had a few bags of rhubarb in my freezer just crying out to be made into more of these lovely tartlets, I figured why not?  So rhubarb in January it is.  Rhubarb freezes remarkably well, so there is no reason you shouldn’t be enjoying it’s unique, tart, splendor any time of the year.

Rhubarb

Rustic Rhubarb Tartlets via Relishing It

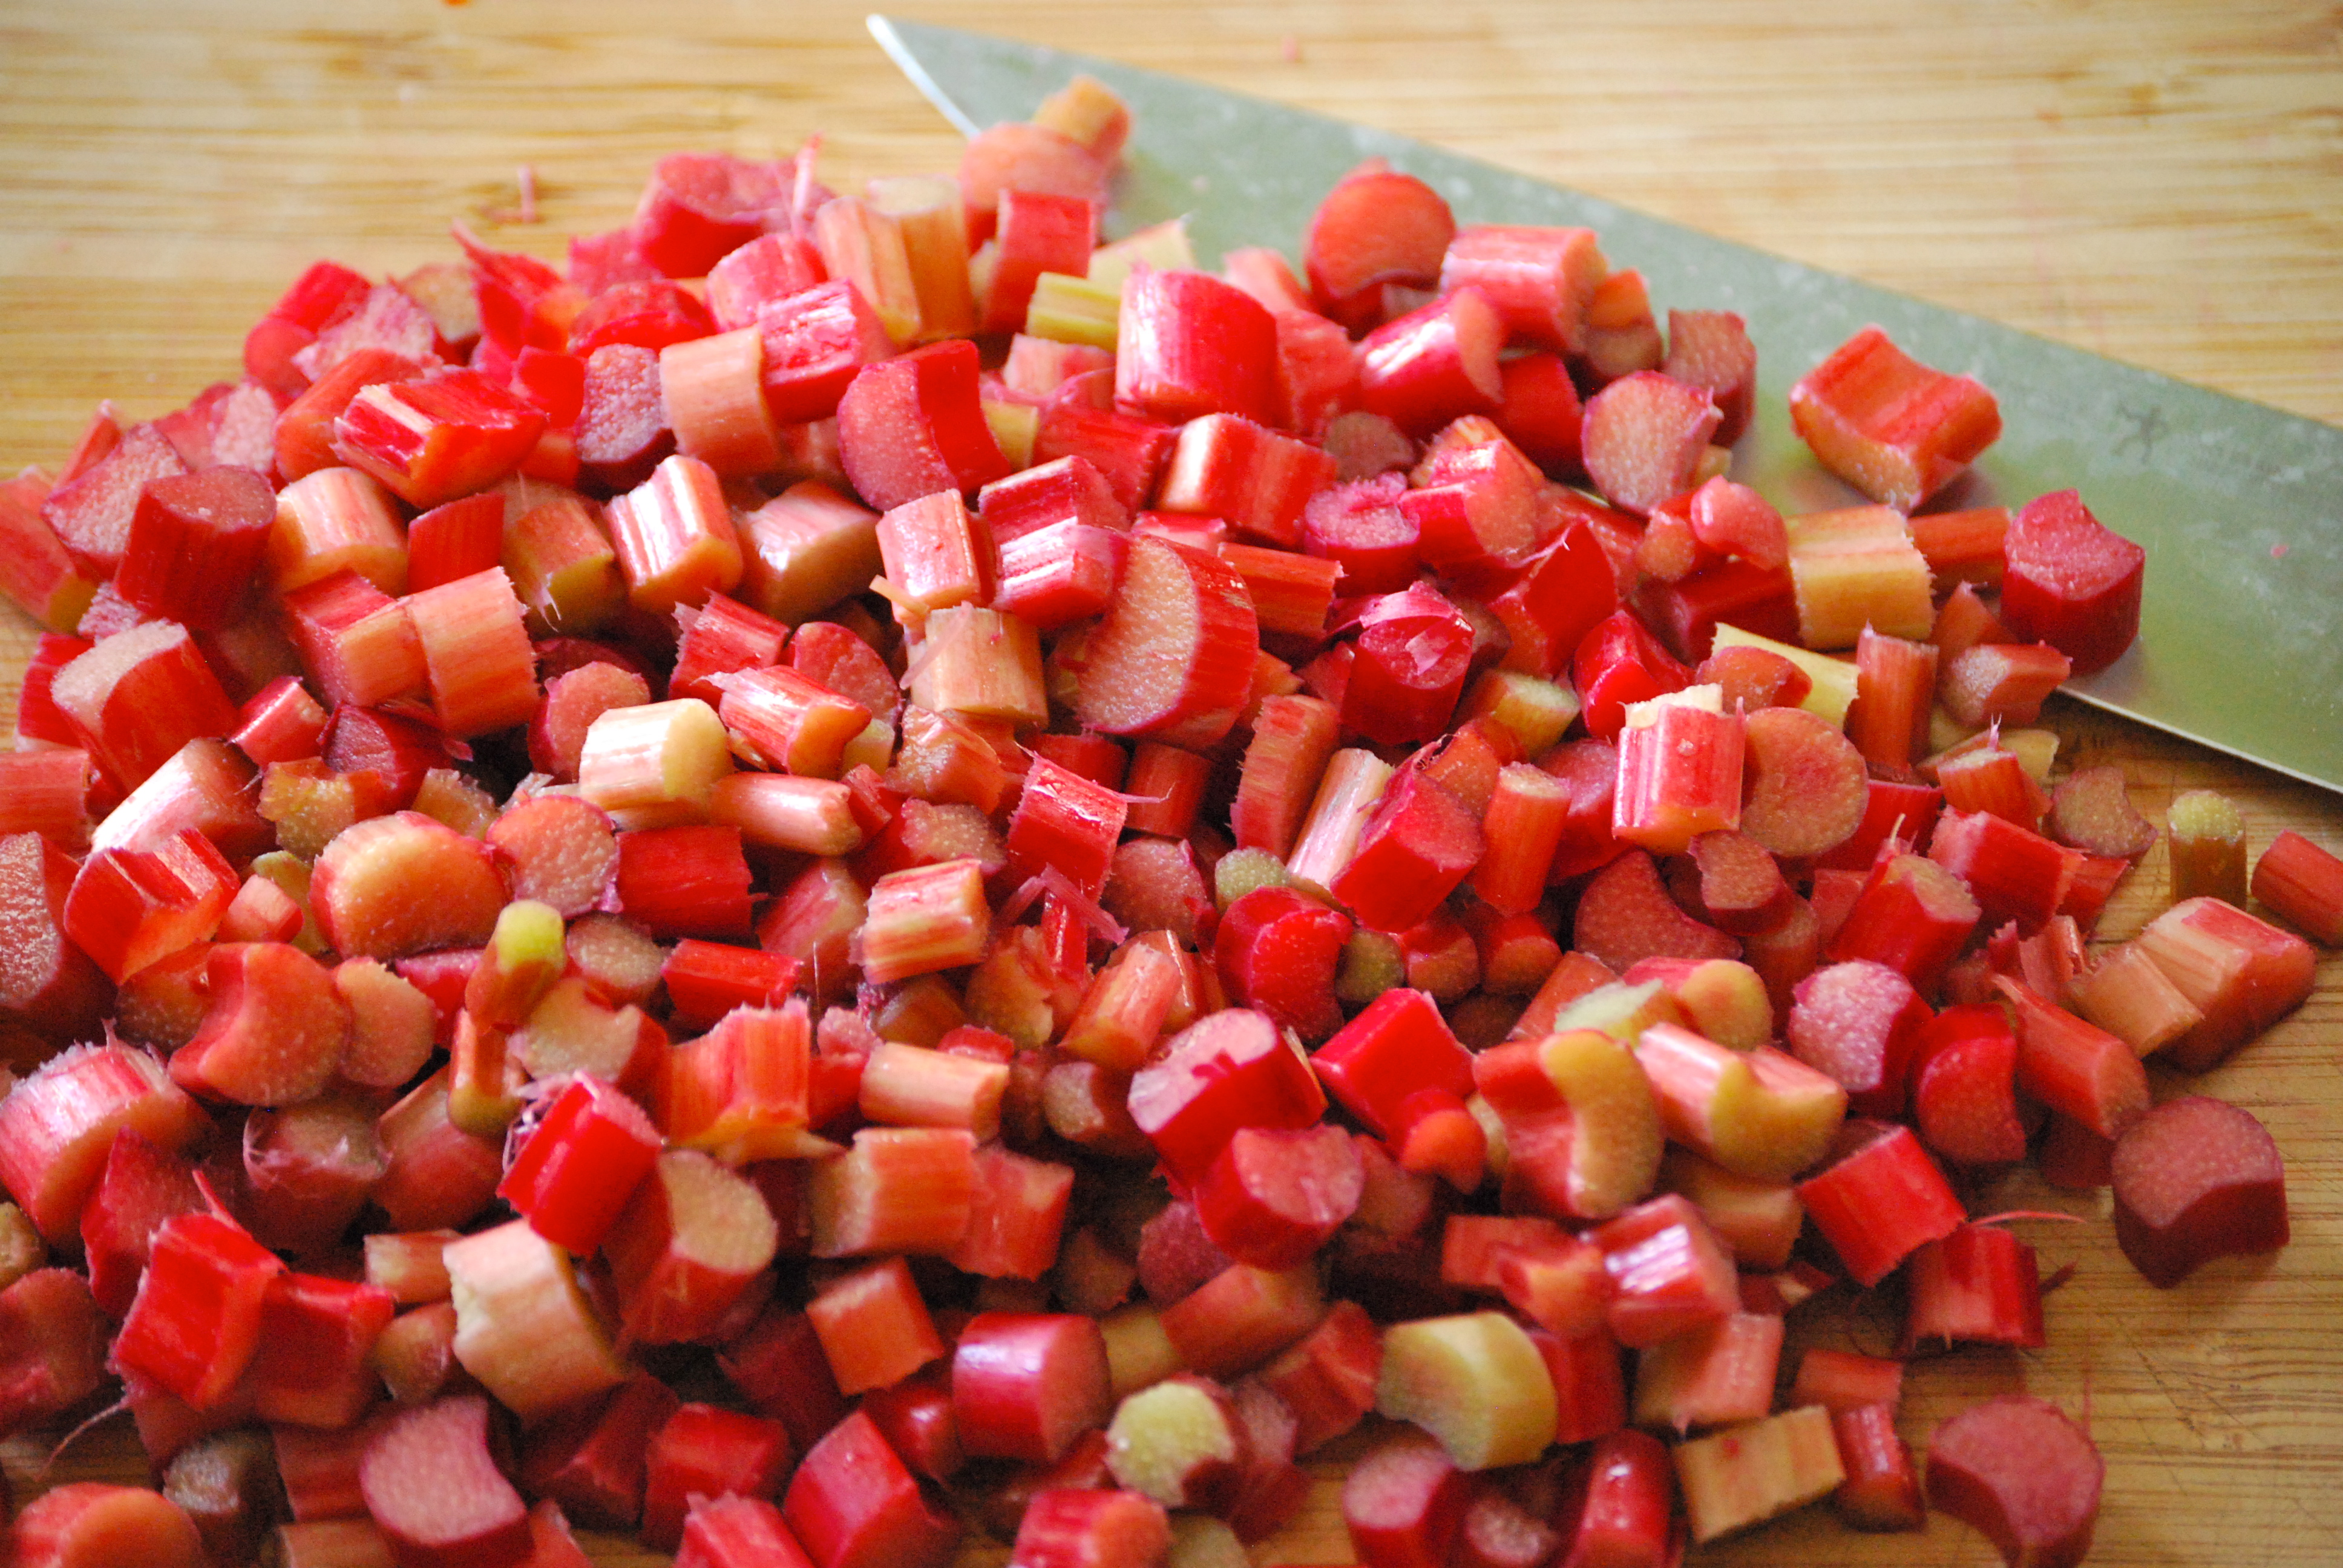
I’ve always loved rhubarb.  Especially the gorgeous, vibrant, red variety.  These tartlets are one of my favorite ways to enjoy this sometimes overlooked fruit.  Or vegetable.  Actually, it turns out rhubarb is a vegetable, but– and I’m not making this up– a court in New York ruled in 1947 that rhubarb is classified as a fruit in the U.S.  Anyway… the whole grains in the crust work impeccably well here.  One of the best ingredients in this recipe is the addition of the cornmeal.  It lends a nice toothsome bite that perfectly contrasts the soft rhubarb compote.

Rustic Rhubarb Tartlets via Relishing It

Rustic Rhubarb Tartlets via Relishing It

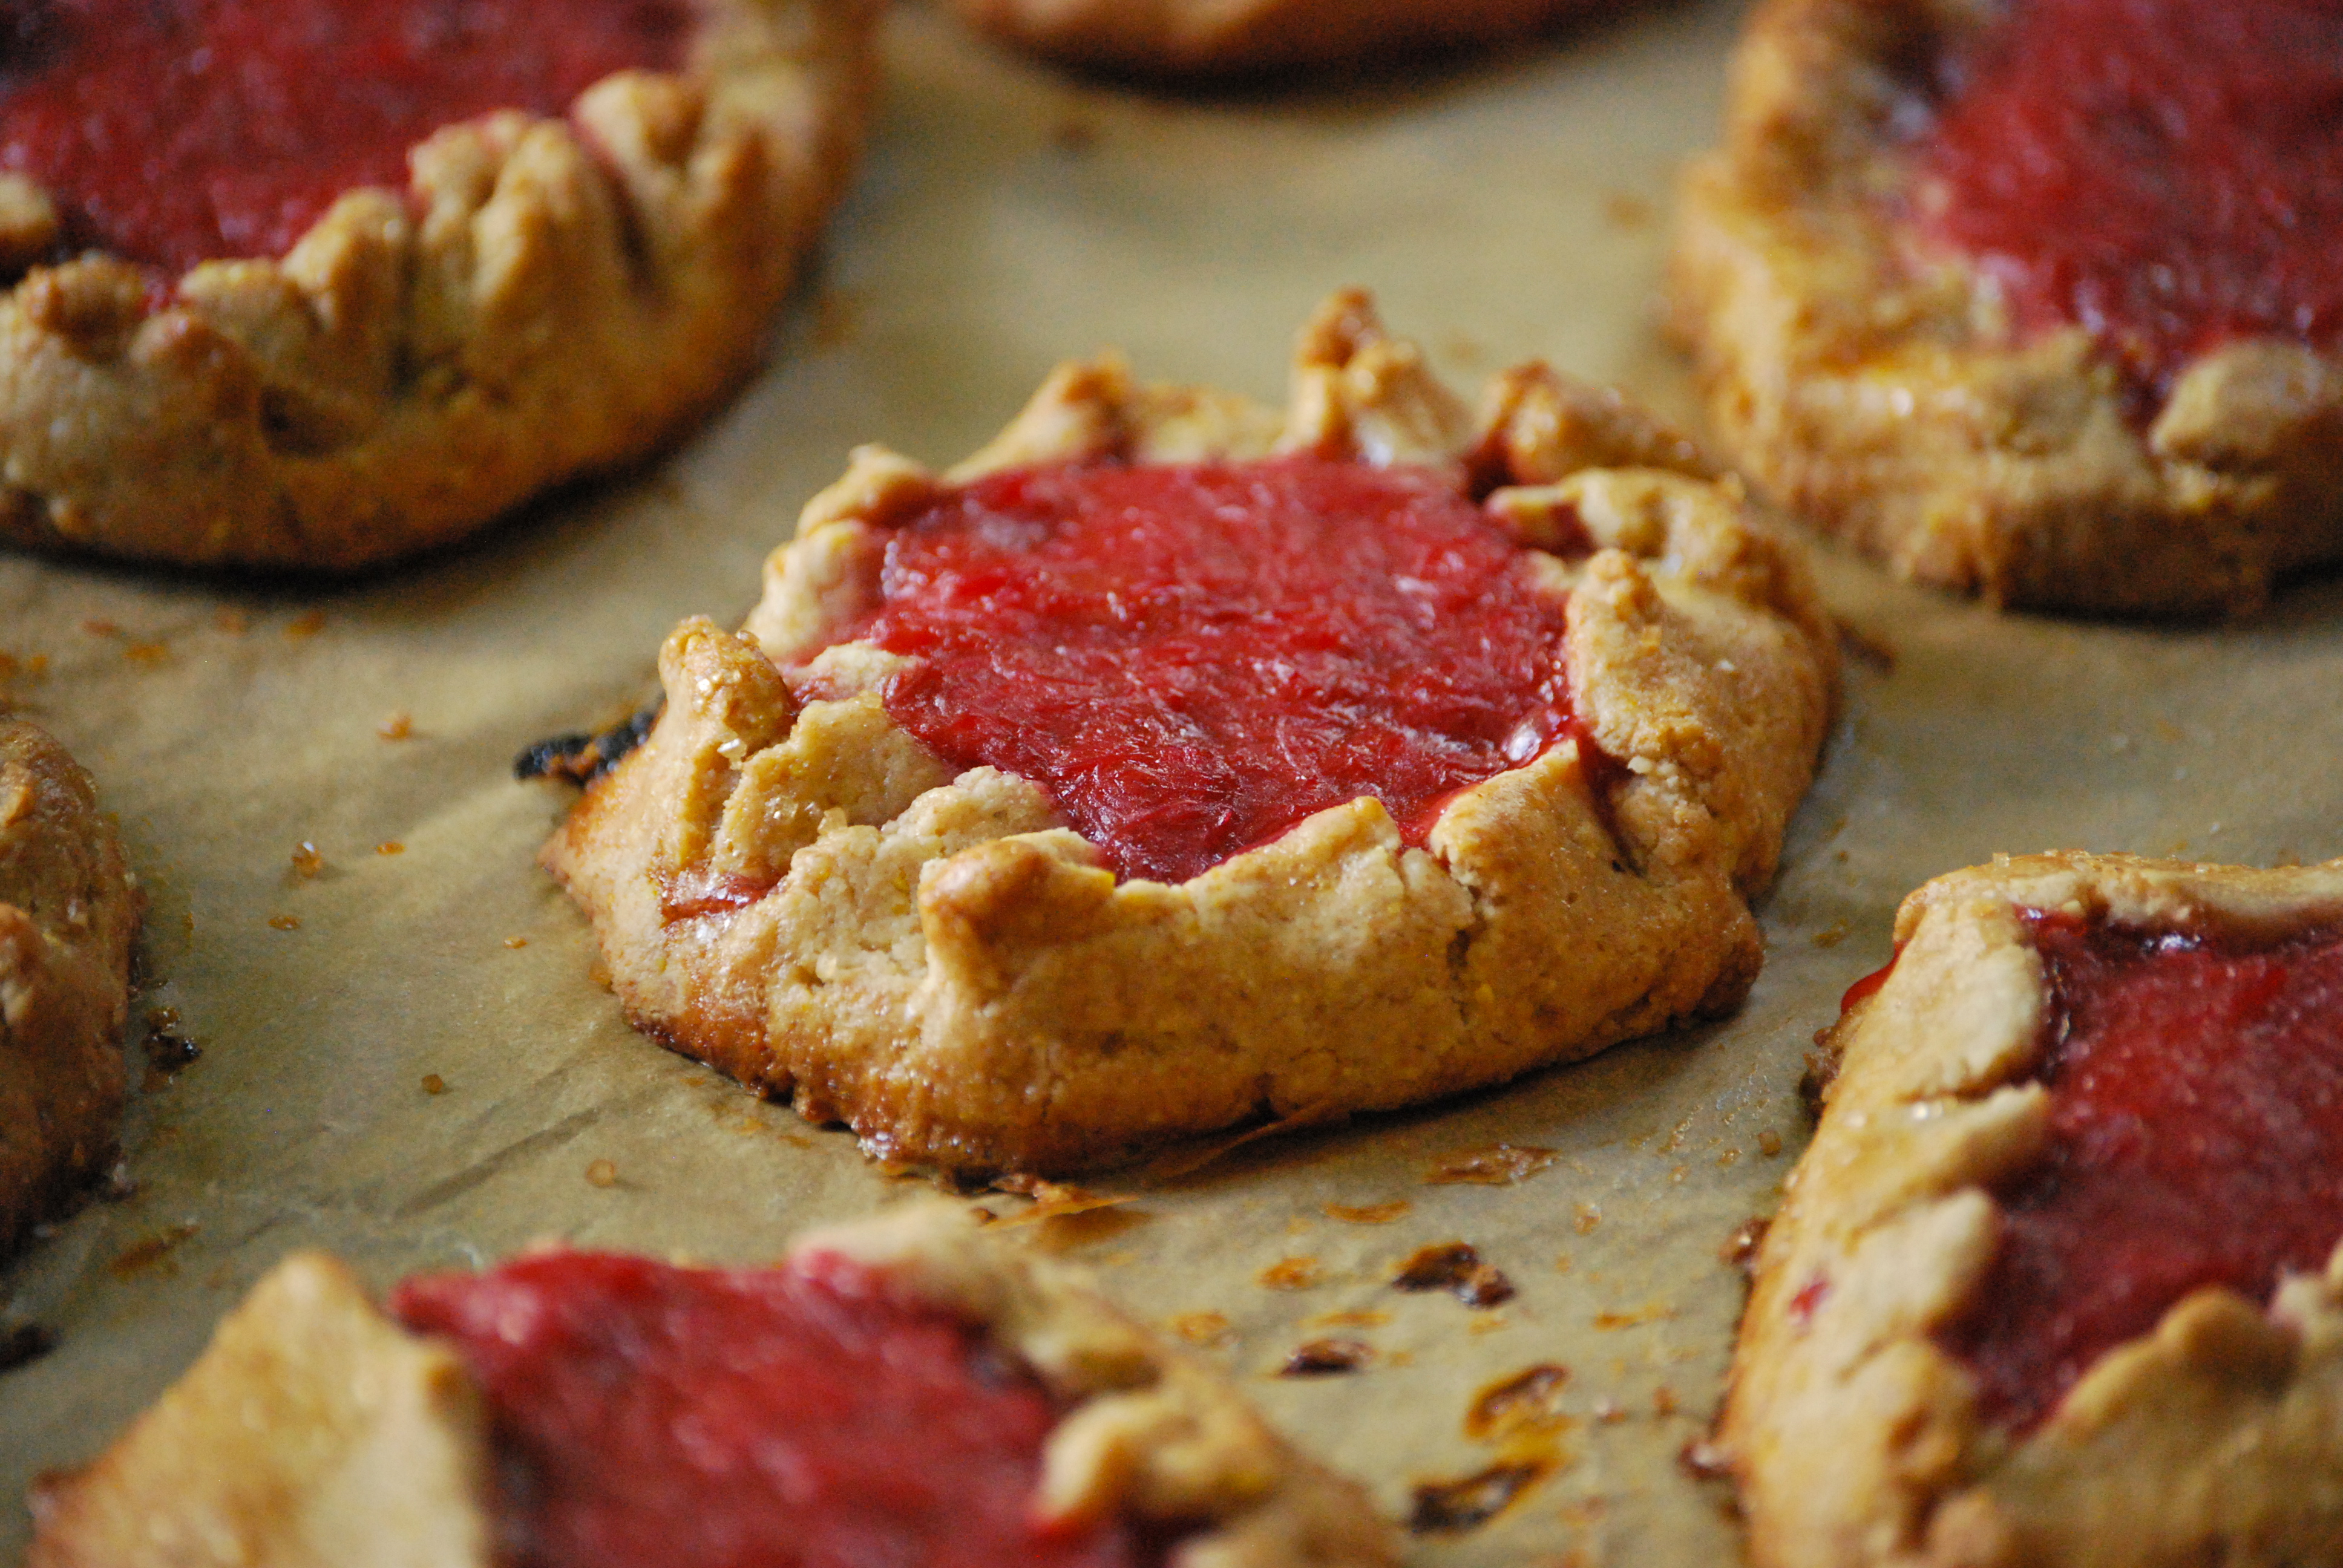
Aside from the flavors, I love the size of these tartlets.  They’re perfect little individual servings.  I’m not sure why, but I’m a sucker for most any miniaturized dessert.  There’s something so appealing about them.  I also love the rustic, ‘free-form’ look of the crust.  They have that homemade quality that just feels…genuine.  Like it was made just for you.  And since they’re ‘free-form’, there’s no wrong way to shape them.  Enjoy!

Rustic Rhubarb Tartlets via Relishing It

The Recipe:  Rustic Rhubarb Tartlets

(Makes 10 individual Tartlets)

The Rhubarb Compote:

1 pound fresh or frozen rhubarb, cut into pieces

1/2 cup brown sugar

1 teaspoon orange zest

The Pastry Dough:

1 cup unbleached all-purpose flour

1 cup whole wheat flour

1/2 cup fine cornmeal

1/4 cup granulated sugar

1 teaspoon kosher salt

1 stick cold butter, cut into small cubes

1/4 cup plus 2 tablespoons heavy cream

2 egg yolks

1 egg plus 1 teaspoon water, mixed together for an egg wash

To make the rhubarb compote:  Place the rhubarb plus brown sugar in a heavy-bottomed saucepan over medium heat.  Stir frequently.  Cook for 10-15 minutes, or until the rhubarb has softened and broken down a bit.  Remove from heat and stir in the orange zest.  Set aside.

Preheat your oven to 375°F.  Line a large baking sheet with parchment paper.

To make the pastry dough:  In a small bowl, mix the egg yolks and cream together.  Set aside. Sift the all-purpose flour, whole wheat flour, cornmeal, sugar, and kosher salt together and place into the bowl of a food processor (this recipe can easily be done by hand, too).  Next, add the butter and turn the mixer to low.  Increase to medium once the butter begins to get incorporated.  When the flour is coarse, like cornmeal, add the egg yolks/cream mixture and mix until just combined.  The dough will appear crumbly, but will hold it’s shape when squeezed together.

This dough is best when shaped right away, as it is really easy to work with.  If you need to refrigerate it for some reason, make sure to let it warm up before trying to roll it out.

Divide the dough into 10 equal pieces.   Lightly flour your work surface and roll each dough ball out to about a 5-inch circle.  Use a bench scraper, if your dough begins to stick.  Divide the rhubarb compote evenly among the circles — about 1/4 cup each.  Turn the edges of the dough up and around the compote and pinch the sides together.  The dough may split or break, but just keep pinching it together to create a seal.  Place the tartlets onto your prepared baking sheet.  Use a pastry brush and brush the dough with the egg wash.  Bake for about 35 minutes, or until the edges are a beautiful deep golden brown.  Remove from oven and cool.  These will keep well for days in a sealed container.  Enjoy with freshly whipped cream and a sprinkle of turbinado sugar!

Source:  Adapted from Good to the Grain by Kim Boyce

So glad you stopped by today ! xo

Laurie

Read Full Post »

I hope you had a lovely weekend.  Mine was fantastic, despite– or perhaps because of– the rain here in Minnesota.  I love rainy days, and we certainly needed it here in the Midwest.  Everything is finally greening up after our nearly snow-less winter.  With an eye towards the forecast, I got the family up early to head to the farmers’ market before the downpour.  It was magnificent.  I’ll try to take photographs next time to share with you.  There were pops of color everywhere!  I was able to track down our usual early spring stores– spinach, scallions, pea shoots, asparagus, eggs, radishes, and more rhubarb.

Yes, I know I wrote about rhubarb last week in this coffee cake recipe, but if you’re ready for another go, this week I’m offering up a phenomenal tart with rhubarb and cardamom.  I ate almost the entire thing the day I made it.  It’s that good.  I spotted this tart years ago on Helene’s beautiful blog, Tartlette.  Rhubarb with cardamom is one of those brilliant combinations that you really must try.  The cardamom is very subtle– a little goes a long way– but it really seems to enhance the tart flavors of the rhubarb.

I wanted to make a relatively fuss-free crust for this tart– one that doesn’t have to be rolled out, but rather just gently patted into a pan.  This one turned out perfectly.  I blind baked the crust to ensure that it was nice and firm, since there’s nothing worse than having a fabulous filling ruined by a soggy crust.  As for that filling, this one is a divine creamy custard.  It’s just a few simple ingredients, but the creme fraiche makes it spectacular.  (Honestly, I think creme fraiche makes everything spectactular).  Like a little kid, I couldn’t stop licking the spatula!  With this recipe, you will probably have leftover custard, so pour it into baking cups and bake it along-side the tart.  They’ll be little bonus desserts.  Enjoy!

The Recipe: Rhubarb and Cardamom Tart

(Makes one 9-or-10-inch round tart or a 14-x-5-inch rectangle tart)

For poaching the Rhubarb:

5 stalks rhubarb, chopped (1 1/2 cups)

squeeze of lemon juice

1/2 cup water

1 tablespoon honey

For the Custard Filling:

3 eggs, room temperature

1 cup granulated sugar

1 cup creme fraiche (full-fat sour cream would work, too)

1/4 teaspoon cardamom

sprinkle of salt

For the Crust:

1 1/4 cups white whole wheat flour

3 tablespoons granulated sugar

1/2 teaspoon cardamom

sprinkle of salt

4 tablespoons cold butter, cut into 6-8 pieces

1 egg, beaten

To poach the rhubarb: In a small saucepan, bring the 1/2 cup of water, honey, and squeeze of lemon to a boil.  Place the chopped rhubarb in the water and cook for 2 minutes.  Remove rhubarb from water and set aside.  This can be done a day in advance — just place in a covered bowl in the refrigerator.  The water from the rhubarb is full of flavor — save it if you like and be creative with it!  Cook it down to form a syrup or mix it with a cocktail.

Meanwhile, prepare the tart crust.  Preheat an oven to 350°F.  In a large glass bowl, add the flour, sugar, cardamom, and salt.  Whisk them together to combine.  Using a pastry blender or fork, cut in the  butter, until the mixture resembles breadcrumbs.  Do not let the mixture become pasty.  Stir the beaten egg into the flour mixture.  The dough should look dry and crumbly.

Press the dough evenly and gently into a buttered tart pan, using floured fingertips.  Place a piece of lightly butter parchment paper over the tart and fill with baking weights or dried beans (I use the same beans over and over).  Blind bake for about 12-15 minutes, or until the tart is golden brown.  Remove from oven and let cool.

To make the custard filling:  In a bowl of a stand mixer fitted with a paddle attachment, add the eggs, sugar, cardamom, and sprinkle of salt.  Mix for  a couple of minutes until it is pale and airy.  Add the creme fraiche and mix until well combined.

To assemble the tart:  Distribute the poached rhubarb into the prepared tart crust.  Pour the custard filling over the rhubarb — being careful to not overfill it.  You will have leftover custard filling.  If you like, butter about 4 small ramekins and fill them with the custard.  Bake along side the tart for a bonus treat.  Place the tart on a baking sheet and bake for about 25-30 minutes, or until it is a beautiful golden brown.  Remove from the oven and let cool completely.  Serve with whipped cream, if desired.  Enjoy!

Source:  Custard filling adapted from Tartlette.  Crust adapted from How to Bake

Thanks for stopping in today!
Laurie

Read Full Post »

A quick stroll through my dessert and cookie sections pretty much confirms that I have an insatiable sweet tooth.  Even so, when we go to our near-by patisserie, I choose a savory bite almost every time.  And if they’ve made a savory tartlet, my decision is easy.  Thankfully, I now have a recipe to make these little beauties at home– and this is one of the best tartlets I’ve ever had.

This wonderful, firm but flakey crust is made from olive oil rather than butter.  It lends a light floral, almost earthy, quality to the dish. Even though it is not par-baked, the crust becomes perfectly crispy on the outside, yet is still substantial enough to hold up to the liquid center.  Even after days in the refrigerator, the crust has an excellent texture.  And you know what that means– this is a great dish to make ahead of time.

The savory filling contains ramps, gouda, and goat cheese.  That’s right, it’s ramp season.  Remember last year when I was so excited and made this ramp pesto?  Well, I’m just as excited this year– and Radd is again making fun of the fact that I talk about ramps far too much.  If you don’t recall, or are unfamiliar with them, ramps are basically a wild leek.  They taste a bit like green onions combined with garlic.  If you find them, buy and enjoy them right away.  They’re not in season for long.  If you can’t find ramps, substitute green onions or leeks with a couple cloves of garlic.  It will still taste amazing.  I love the combination of ramps and goat cheese, and in this dish it really shines.  The goat cheese is soft and pillowy as you bite into the tartlet, while the gouda melts into the creamy center.  Enjoy!

The Recipe:  Ramp and Goat Cheese Tartlets

(Makes six 4-inch tarts or one 9 – 10-inch tart)

For the Savory Tart Dough:

3/4 cup all-purpose flour

1/2 cup white whole wheat flour

1/2 teaspoon kosher salt

1/2 teaspoon granulated sugar

2 large eggs, lightly beaten

1/4 cup olive oil

For the Tart Filling:

about 1  1/4 ounces goat cheese, crumbled

about 1  1/2 ounces gouda, grated

3 ramps, chopped (about 1/4 cup plus 1 tablespoon)

4 eggs

1/4 cup heavy whipping cream

kosher salt and black pepper, to taste

To make the Savory Tart Dough:  Place both flours, salt, and sugar in a food processor and pulse a few times to combine.  Add the eggs and olive oil and pulse about 10-15 times until the dough forms a ball.  Remove dough and place on a lightly floured work surface.  Knead  3-4 times, careful not to over work the dough.  Wrap in plastic wrap and place in the refrigerator for at least 1 hour.   Can be made ahead and kept in the refrigerator for up to 2 days or frozen.  The dough will defrost quickly at room temperature when you are ready to use it.

Preheat oven to 400°F.  Position rack in the center of the oven.  If making tartlets, measure out the dough into 6 equal portions, about 1  7/8 ounces each.  Roll the dough in a circle 1-inch larger than the tartlet pan or just press the dough evenly into the pans.  Distribute the goat cheese, gouda, and ramps evenly between the 6 pans.  In a small bowl, combine the eggs and cream and pour over each of the tarts, careful not to over fill them.

Place tartlets on a baking sheet and put into the oven.  Bake for about 35 minutes, or until the crust is a deep golden brown and the filling is puffed and becoming golden brown, as well.  Serve the tartlets warm or at room temperature.  They keep well for about 3 days in a covered container in the refrigerator and can be reheated in a 350°F oven.  Serve with a dollop of creme fraiche, if desired. Enjoy!

Source:  Olive Oil Crust adapted from Nick Malgieri’s How to Bake

Thanks for stopping by!

Laurie

Read Full Post »

Classic Berry Tart

So you already know that I love a good tart.  I think I’ve been open about my love of pastry cream, as well.  This week, I’ve combined both and added fresh, dazzling fruit for this fabulous Summer dessert.  Not surprisingly, my kids love pastry cream, too.  And who can blame them– it’s virtually a custard or pudding.  As for the berries, now is the time to really start using them in dishes like this– they’re fresh and full-flavored. 

Most sources recommend freezing an unbaked tart shell in the tart pan– to be baked right before you assemble the dish.  If you do this, the dough can be kept frozen for up to two months, and refrigerated up to five days.  Keep in mind, if you bake it right before serving, you must make sure the crust is completely cooled before filling with the pastry cream and berries.  On hot days like we’ve had for much of the past month, I like to actually bake the tart shell ahead of time, wrap tightly and freeze it.  It’ll last for a few days that way.  This allows me to bake at night (or early morning) when the stifling heat of the day has dropped a bit.  When I’m ready to fill it with pastry cream and berries, I take it out of the freezer and thaw– it really doesn’t take long.    Enjoy!

The Recipe:  Classic Berry Tart

2 pints of berries, use your favorites

1 9 – inch tart shell made with this Sweet Tart Dough

Lemon Pastry Cream:

2 cups whole milk

6 large egg yolks

1/2 cup sugar

1/3 cup cornstarch, sifted

1 teaspoon vanilla extract

zest of 1 lemon

3 1/2 tablespoons unsalted butter, at room temperature, cut into small pieces

Glaze:

1/3 cup blackberry jam

1 teaspoon lemon juice


To bake the crust:  Butter a 9-inch fluted tart pan with a removable bottom.  Press the dough evenly over the bottom and up the side of the pan, using all but one little piece of the dough, which you should save in the refrigerator in case the tart needs to be patched after it is baked.  Butter the shiny side of aluminum foil and press against the tart.  Freeze the crust for 30 minutes before baking.   Leave the foil on the tart and place on a baking sheet.  Bake at 375°F for 25 minutes.  Remove the foil and bake for another 8-10 minutes, or until the crust is a beautiful, deep golden brown.  If the tart has a crack and needs to be patched — apply the extra dough and bake for just two minutes.

To make the pastry cream:  Bring the milk and lemon zest to a boil in a sauce pan.

Meanwhile, in a medium heavy-bottomed saucepan, whisk the yolks together with the sugar and cornstarch.  Still whisking, slowly add about 1/2 cup of the hot milk — this will temper the yolks, so they won’t curdle.  Still whisking, slowly add the rest of the hot milk.  Put the pan over medium heat and whisk vigorously and constantly.  Make sure to get the edges of the pan, too.  Bring to a boil.  Keep at a boil for 1-2 minutes, or whenever it appears to be thick enough. Remove from heat.

Whisk in the vanilla extract.  Let sit for 5 minutes, then whisk in the bits of butter, stirring until they are completely incorporated and the pastry cream is smooth and silky.  Scrape the cream into a bowl.  You can press a piece of plastic wrap against the cream to create an airtight seal and refrigerate until cold.  Or, if you need it cooled more quickly than that, place the bowl of cream into a larger bowl filled with ice and water.  Stir the pastry cream until cold, around 20 minutes.

To make the glaze:  Bring the jam and lemon juice to a boil.  Using a pastry brush or paper towel,  dab the glaze onto the fruit.  Feel free to drizzle it onto the pastry cream, as well.  This tart is best eaten the day it is made, but leftovers can be loosely covered and refrigerated.  Enjoy!

Source:  Adapted from Dorie Greenspan’s Baking from my home to yours

Thanks for stopping by Relishing It today!  See you soon!

Laurie

Follow me on Twitter

Read Full Post »

I’ve been known to daydream about travelling.  I do this a lot, and I’m guessing it has something to do with growing up in one of the most-rural areas of the country.  My Dad is the same way.  In our daily phone call, we often talk about where we would take a big family vacation if money were no object.  The destination-of-the-day almost always revolves around cuisine (surprise!).   It’s all in the family, I guess.  For me, the pinnacle would be Paris.  I know, I know– pick the obvious, right?  But the food!  The wine!  The history and culture!  Sadly, jetting off to France isn’t in the cards right now, so this week I’ve decided to bring a bit to my kitchen.


This dessert–that’s right, even with those greens this is a dessert– is definitely French.  You wouldn’t normally see it here in the US.  I found it in a beautiful cookbook by David Tanis, called–Heart of the Artichoke and Other Kitchen Journeys.   Tanis is the co-chef at one of the most well-known, well-respected, restaurants in the United States, Chez Panisse.    He’s been there since the 1980’s, though he spends six months at the restaurant in California, and lives the other six months in Paris.  Sounds like a good gig.  He’ll soon be leaving Chez Panisse in order to write  a column for the New York Times that I’m really looking forward to reading.  When Tanis wrote that the odd combination of ingredients in this recipe make a dessert that tastes fantastic, I figured I had to give it a try.

Though the title says it’s a tart, the texture is that of a cake– the baking powder makes it puff while baking.  This is a traditional dessert in the south of France and Italy (alright, perhaps it’s not Parisian, but it’s my daydream.)  Tanis’ recipe calls for Swiss Chard– which I really like– but I’ve been trying to figure out new ways to use use kale, so I made the substitution.  They are similar greens, and the result was excellent.  The kale was delicious, while the ricotta and warm spice added a firm texture and balanced sweetness.  The pine nuts– now these were the the star in this tart.  No substitutions here.  They add a subtle, nutty flavor and lend a nice crunch.  This unique dessert is remarkable.  It’s not savory, but subtly sweet.    Give it a try, you’ll like it.

The Recipe:  Kale and Ricotta Tart

For the Dough:

2 cups all-purpose flour

1 tablespoon baking powder

1/2 cup sugar

pinch of salt

8 tablespoons (1 stick) cold butter, cut into small pieces

1 egg, beaten with 1 tablespoon milk

Grated zest of  1/2 lemon

For the Filling:

1 large bunch of kale,  ribs discarded, chopped  (about 4 cups)

1 cup ricotta cheese (I used part-skim, but the original recipe calls for whole-milk)

2 eggs

1/4 cup sugar  (I reduced from 1/3 cup from the original recipe –it was perfectly sweet for me)

Grated zest of 1/2 lemon

1/4 teaspoon powdered ginger

1/4 teaspoon allspice

1/2 cup golden raisins, soaked in warm water until plumped

1/4 cup pine nuts, toasted

To make the dough, in the bowl of an electric mixer, fitted with the paddle attachment, mix the dry ingredients on low speed.  Add the butter and mix for about 2 minutes more, until crumbly.  Add the egg mixture and the lemon zest and mix another minute, or until you can pinch the dough together.  Turn the dough out and form 2 balls, one twice as big as the other ( use a kitchen scale, if you have one).  Chill for at least an hour.

To make the filling, bring a large pot of salted water to a boil.  Blanch the kale for 1 minute; drain well.  Let cool, and squeeze out any liquid.

Preheat the oven to 350°F.  In a small bowl, whisk together the ricotta, 1 egg, sugar, lemon zest, and spices.

Dust a pastry cloth with flour and roll out the larger dough ball into a circle 2 inches larger than the diameter of your 9- or 10-inch spring form pan.  Roll the dough onto the rolling pin, then carefully unroll it over the pan and gently press it into place, so that it comes about 2-inches up the sides of the pan.  Expect the dough to be pretty soft; if it tears, just press on a scrap to cover any holes.

Drain the raisins, mix them with the greens, and spread over the dough in the pan.  Pour the ricotta mixture over the greens and smooth out.  Sprinkle the pine nuts over the ricotta.

To make the lattice top, roll out the second piece of dough into a 1/8 -inch-thick rectangle.  Cut the dough into 3/4-inch-wide strips.  Fashion a lattice top by alternating crosswise and lengthwise strips.  Leave a gap of 3/4 inch between strips running in the same direction.

Fold the edges of the bottom crust over the ends of the lattice strips.  Whisk remaining egg in a small bowl for an egg wash.  Using a pastry brush, gently coat the tart with the egg.  Bake for 40 to 50 minutes, until the crust is golden.

Cool on a rack before serving.  Enjoy!

Source: Adapted from Heart of the Artichoke and Other Kitchen Journeys by David Tanis

Thanks for stopping by Relishing It today….as always, I appreciate hearing your feedback.

Laurie

Follow me on Twitter!

Read Full Post »

I grew up on a farm in a very rural area of the country.  We had a big grove of trees right behind our house that was perfect for all sorts of adventures– not to mention a few fantastic tree forts.  As a kid, this ‘forest’ was our playground to explore– so long as we were mindful (due to constant warning) of not trampling the wild asparagus.  It grew in bunches right in the middle of the grove, and popped up in late spring.  I recall my parents (as well as my grandmother) ceremoniously harvesting the first asparagus of the year.

I don’t grow my own asparagus, though I wish I did.  Instead, I [im]patiently wait for it to show up at the local farmer’s markets each Spring.  And once it does we tend to go through an “asparagus fest” for the two weeks that its in season. I know, I know, it’s available almost year round at some grocery stores.  I’d rather not buy it unless it’s actually in season though, just as I wait for summer tomatoes and cucumbers to show up locally in July.  It’s just not worth it to buy transported asparagus in the winter– it’s not a winter vegetable, so it doesn’t taste the same.

This Asparagus and Gruyere Tart is so easy it’s almost embarassing to write a blog post about.  The ‘crust’ is made from puffed pastry.  If your not familiar with this little gem, you can either choose to make your own (which can take a little while), or you can buy it ready-made from the grocery store.  This is one of those few times where I recommend buying the pre-made product– it’s in the freezer section, and is generally high-quality and easy to work with.

When preparing the asparagus for the tart, choose medium to thick stalks.  Cut the stalk-ends off, and use a vegetable peeler to peel them about 1/2 way up the stalk.  This will ensure  that the asparagus is tender.  This vegetable pairs so beautifully with the gruyere cheese, while the ridiculously flakey puff pastry is a the perfect canvas to hold it all together. The flavor is incredible.  My husband confessed that he really wasn’t looking forward to this meal– but he ended up loving it.

The Recipe:  Asparagus and Gruyere Tart

(Serves 4)

Flour, for work surface

1 sheet frozen puff pastry  (thaw it according to package instructions)

2 cups shredded Gruyere cheese (Emmentaler or Fontina cheese would also work beautifully)

1 1/2 pounds medium or thick asparagus spears (bottoms trimmed and peeled for optimum tenderness)

1 tablespoon olive oil

Salt and freshly cracked pepper

Preheat oven to 400°F.  On a floured surface, roll the puff pastry into a 16 x 10 – inch rectangle ( I had a difficult time getting mine to 16 inches — use your best judgement).   Trim uneven edges.  Place pastry on a baking sheet.  With a sharp knife, lightly score the pastry dough 1 inch in from the edges to mark a rectangle.  Using a fork, pierce dough inside the markings at 1/2-inch intervals.  Bake until golden, about 15 minutes.

Remove pastry shell from the oven, and sprinkle with the Gruyere cheese.  Place asparagus in a single layer over the cheese, alternating ends and tips.  Brush  with oil, and season with salt and pepper.  Bake until spears are tender, 20 – 25 minutes.   Can be served warm or at room temperature.

Source: Everyday Food: Great Food Fast

Thanks for stopping by Relish It today!  Hope you’re having a great start to your week!

Laurie

Follow me on Twitter!

Read Full Post »

Classic Lemon Tart

Welcome to Relishing It!  I’ve finally taken the leap and committed to writing a weekly blog.  Obviously I love to cook and bake, but more recently I’ve come to appreciate the photography aspect of food blogs as well.  Food has always been a significant part of my life– a passion, I guess.  It’s a creative and social outlet for me and my family.

So what about me?  Well, for more detail you can check here.  In brief, I’m originally a small-town North Dakota girl, now a thirty-something mother of two who lives in St. Paul, MN.  My children keep me busy, as they’re only four and two years old.  This makes the baking/cooking/photography “interesting” during the day.  I was lucky enough to marry my high-school sweetheart (who may make a guest appearance here every once in a while).

I have fairly strong views on food, from how it’s marketed, to nutrition, to its effect on the environment.  I generally subscribe to the Bittman/Pollan food models.  I use organic, locally-sourced ingredients when possible, and usually shy away from anything overly processed.  While I’ll do my best not to preach, you’ll likely get a sense of my convictions through individual recipes and asides on these topics.

One of my closest friends was kind enough to ask me to guest blog about my culinary experiences in a Blissful Eats section every Thursday on her beautiful “Bliss“.  This has not only given me a chance to get my feet wet, but it has also given me time to think about where to begin with my own blog.  To be honest, I’ve spent a fair amount of time pondering my first recipe.  Too long.  I finally decided to go with what I was really wanting to eat today– this Classic Lemon Tart.  I have so many organic lemons right now– I’ve taken to stockpiling these babies.

I first sampled this lemon tart three years ago.  We had a dinner party and one of our friends– a fellow ‘foodie’– brought this incredible dessert.  I was stunned, and had to have the recipe immediately. I realize that writing about one’s experience of food– trying to convey it to others– is usually imperfect.  The words just can’t capture the “punch” of a really powerful flavor, or the “silkiness” of creamy filling.  So how to describe this tart?  It’s intense.  Seriously intense.  The “jolt” of lemon in every bite is incredible.  You almost question whether or not its made from some super-distilled extract, though the natural flavor of the juice and zest of the lemons reassures you that you’re eating the real thing.  And then there’s the color.  If you use farm-fresh free-range egg yolks, the natural deep yellow color will be stunning.

In the past, I’ve tended to reserve this stellar dessert for special occasions– not because it’s difficult, but because it’s a real show-stopper. It’s beautiful and light with a flaky crust, making it perfect for Spring.  On the other hand, while we still have several feet of snow on the ground, it sure made my family happy this afternoon, too.  Come to think of it, I may not wait for a holiday or dinner party to make this one any more.  Why not brighten even an ordinary, everyday?

The Recipe:  Classic Lemon Tart

Sweet Tart Pastry:

1 large egg yolk

1 tablespoon heavy cream

1/2 teaspoon vanilla extract

1 1/4 cup all-purpose flour

2/3 cup confectioners’ sugar

1/2 teaspoon kosher salt

8 tablespoons unsalted butter ( 1 stick, very cold), cut into twenty-four 3/4-inch cubes

1 tablespoon unbleached all-purpose flour for dusting

Instructions:

Whisk together the yolk, cream, and vanilla in a small bowl; set aside.  Pulse to combine 1 1/4 cups flour, sugar, and salt in bowl of food processor  fitted with steel blade.  Scatter butter pieces over flour mixture; pulse to cut butter into flour until mixture resembles course meal, about fifteen 1-second pulses.  With the machine running, add egg mixture and process until dough just comes together, about 25 seconds.  Turn dough onto sheet of plastic wrap and press into 6-inch disk.  Wrap in plastic and refrigerate at least 2 hours.

If the dough feels too firm when you’re ready to roll it out, let it stand at room temperature for a few minutes.  If, on the other hand, the dough becomes soft and sticky while rolling, don’t hesitate to re-chill it until it becomes easier to work with.  Better to re-chill than add too much flour, which will damage the delicate, crisp texture of the dough.  Bake the tart in a 9 – 9 1/2 -inch tart pan with a removable bottom and fluted sides about 1 to 1 1/8 inches high.

Unwrap dough; lightly flour large sheet of parchment paper or plastic wrap and place dough in center.  Roll out dough and line tart pan.  Freeze dough 30 minutes.

Meanwhile, adjust one oven rack to upper-middle position and other to lower-middle position; heat oven to 375 degrees.  Place chilled tart shell on a cookie sheet; press 12-inch square of foil inside tart shell and fill with metal or ceramic pie weights ( I skipped the pie weights and just placed the foil down on the tart, which worked fine, because it was chilled).  Bake on lower rack for 30 minutes, rotating halfway through baking time.  Carefully remove foil and weights by gathering edges of foil and pulling up and out.  Transfer cookie sheet with tart shell to upper rack and continue to bake until shell is golden brown, about 5 minutes longer.

The Lemon Tart:

1 fully baked warm tart shell (9 to 9 1/2 inch)

7 large egg yolks, preferably organic

2 large eggs

1 cup granulated sugar

2 tablespoons granulated sugar

2/3 cup freshly -squeezed lemon juice, preferably organic, from 4 – 5 medium lemons

1/4 cup grated lemon zest

pinch of salt

4 tablespoons unsalted butter, cut into 4 pieces

3 tablespoons heavy cream

Instructions:

Once the lemon curd ingredients have been combined, cook the curd immediately; otherwise it will have a grainy finished texture.  To prevent the curd from acquiring a metallic taste, make absolutely sure that all utensils coming into contact with it — bowls, whisk, saucepan, and strainer — are made of non-reactive stainless steel or glass.  Since the tart has a removable bottom, it is more easily maneuvered when set on a cookie sheet.  If your pre-baked tart has already cooled, place it in the oven just before you start the curd and heat until warm, about 5 minutes.

Adjust the oven rack to upper-middle position and heat oven to 375 degrees.  Place the tart pan with shell on cookie sheet.

In medium non-reactive bowl, whisk together yolks and whole eggs until combined, about 5 seconds.  Add sugar and whisk until just combined, about 5 seconds.  Add lemon juice, zest, and salt; whisk until combined, about 5 seconds.  Transfer mixture to medium non-reactive saucepan, add butter pieces, and cook over medium-low heat, stirring constantly with wooden spoon, until curd thickens to thin sauce-like consistency and registers 170 degrees on an instant-read thermometer, about 5 minutes.  Immediately pour curd through single-mesh steel strainer set over clean non-reactive bowl.  Stir in heavy cream; pour curd into warm tart shell immediately.

Bake until filling is shiny and opaque and until center 3 inches jiggle slightly when shaken, 10 to 15 minutes.  Cool on wire rack to room temperature, about 45 minutes.  Serve with freshly whipped cream.  Enjoy!

Source:  Adapted from Cook’s Illustrated

Thanks for stopping by Relishing It today– I always appreciate feedback, so please leave a comment and let me know your thoughts.  See you soon!

Laurie

Read Full Post »

%d bloggers like this: