Feeds:
Posts
Comments

Posts Tagged ‘Smoked Paprika’

Paella | Relishing It

I’ve been wanting to share this amazing recipe with you for awhile now, and since Valentine’s Day is approaching I figure it’s finally time.  I’m not sure why, but to me this is a romantic dish.  Maybe it’s the beautiful color, the seafood, the scent of saffron, or even the wine.  In any case, for me this is an ideal Valentine’s Day dinner.

Paella | Relishing It

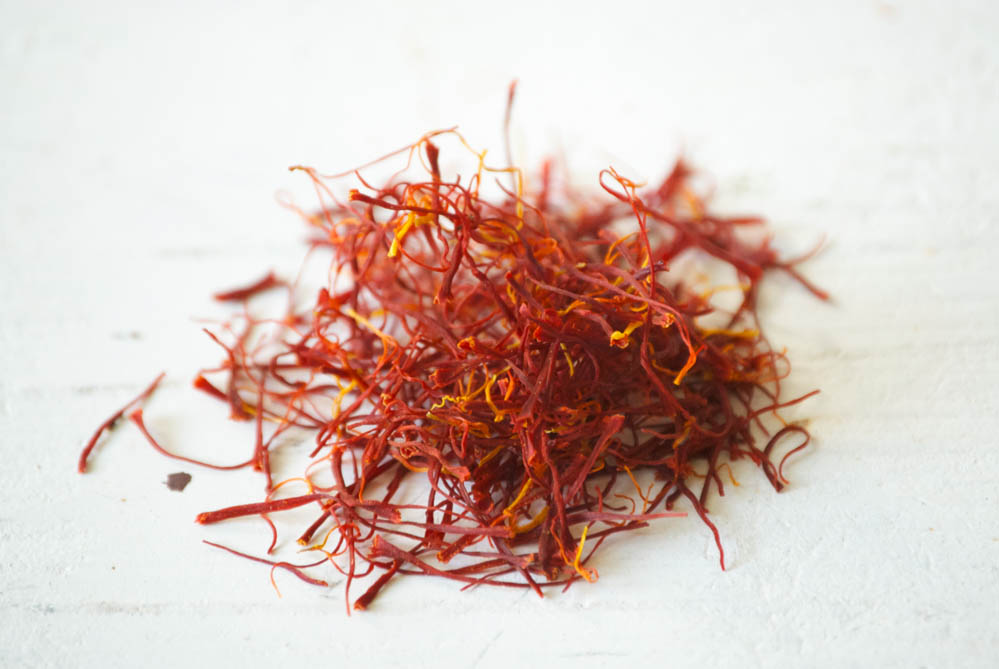
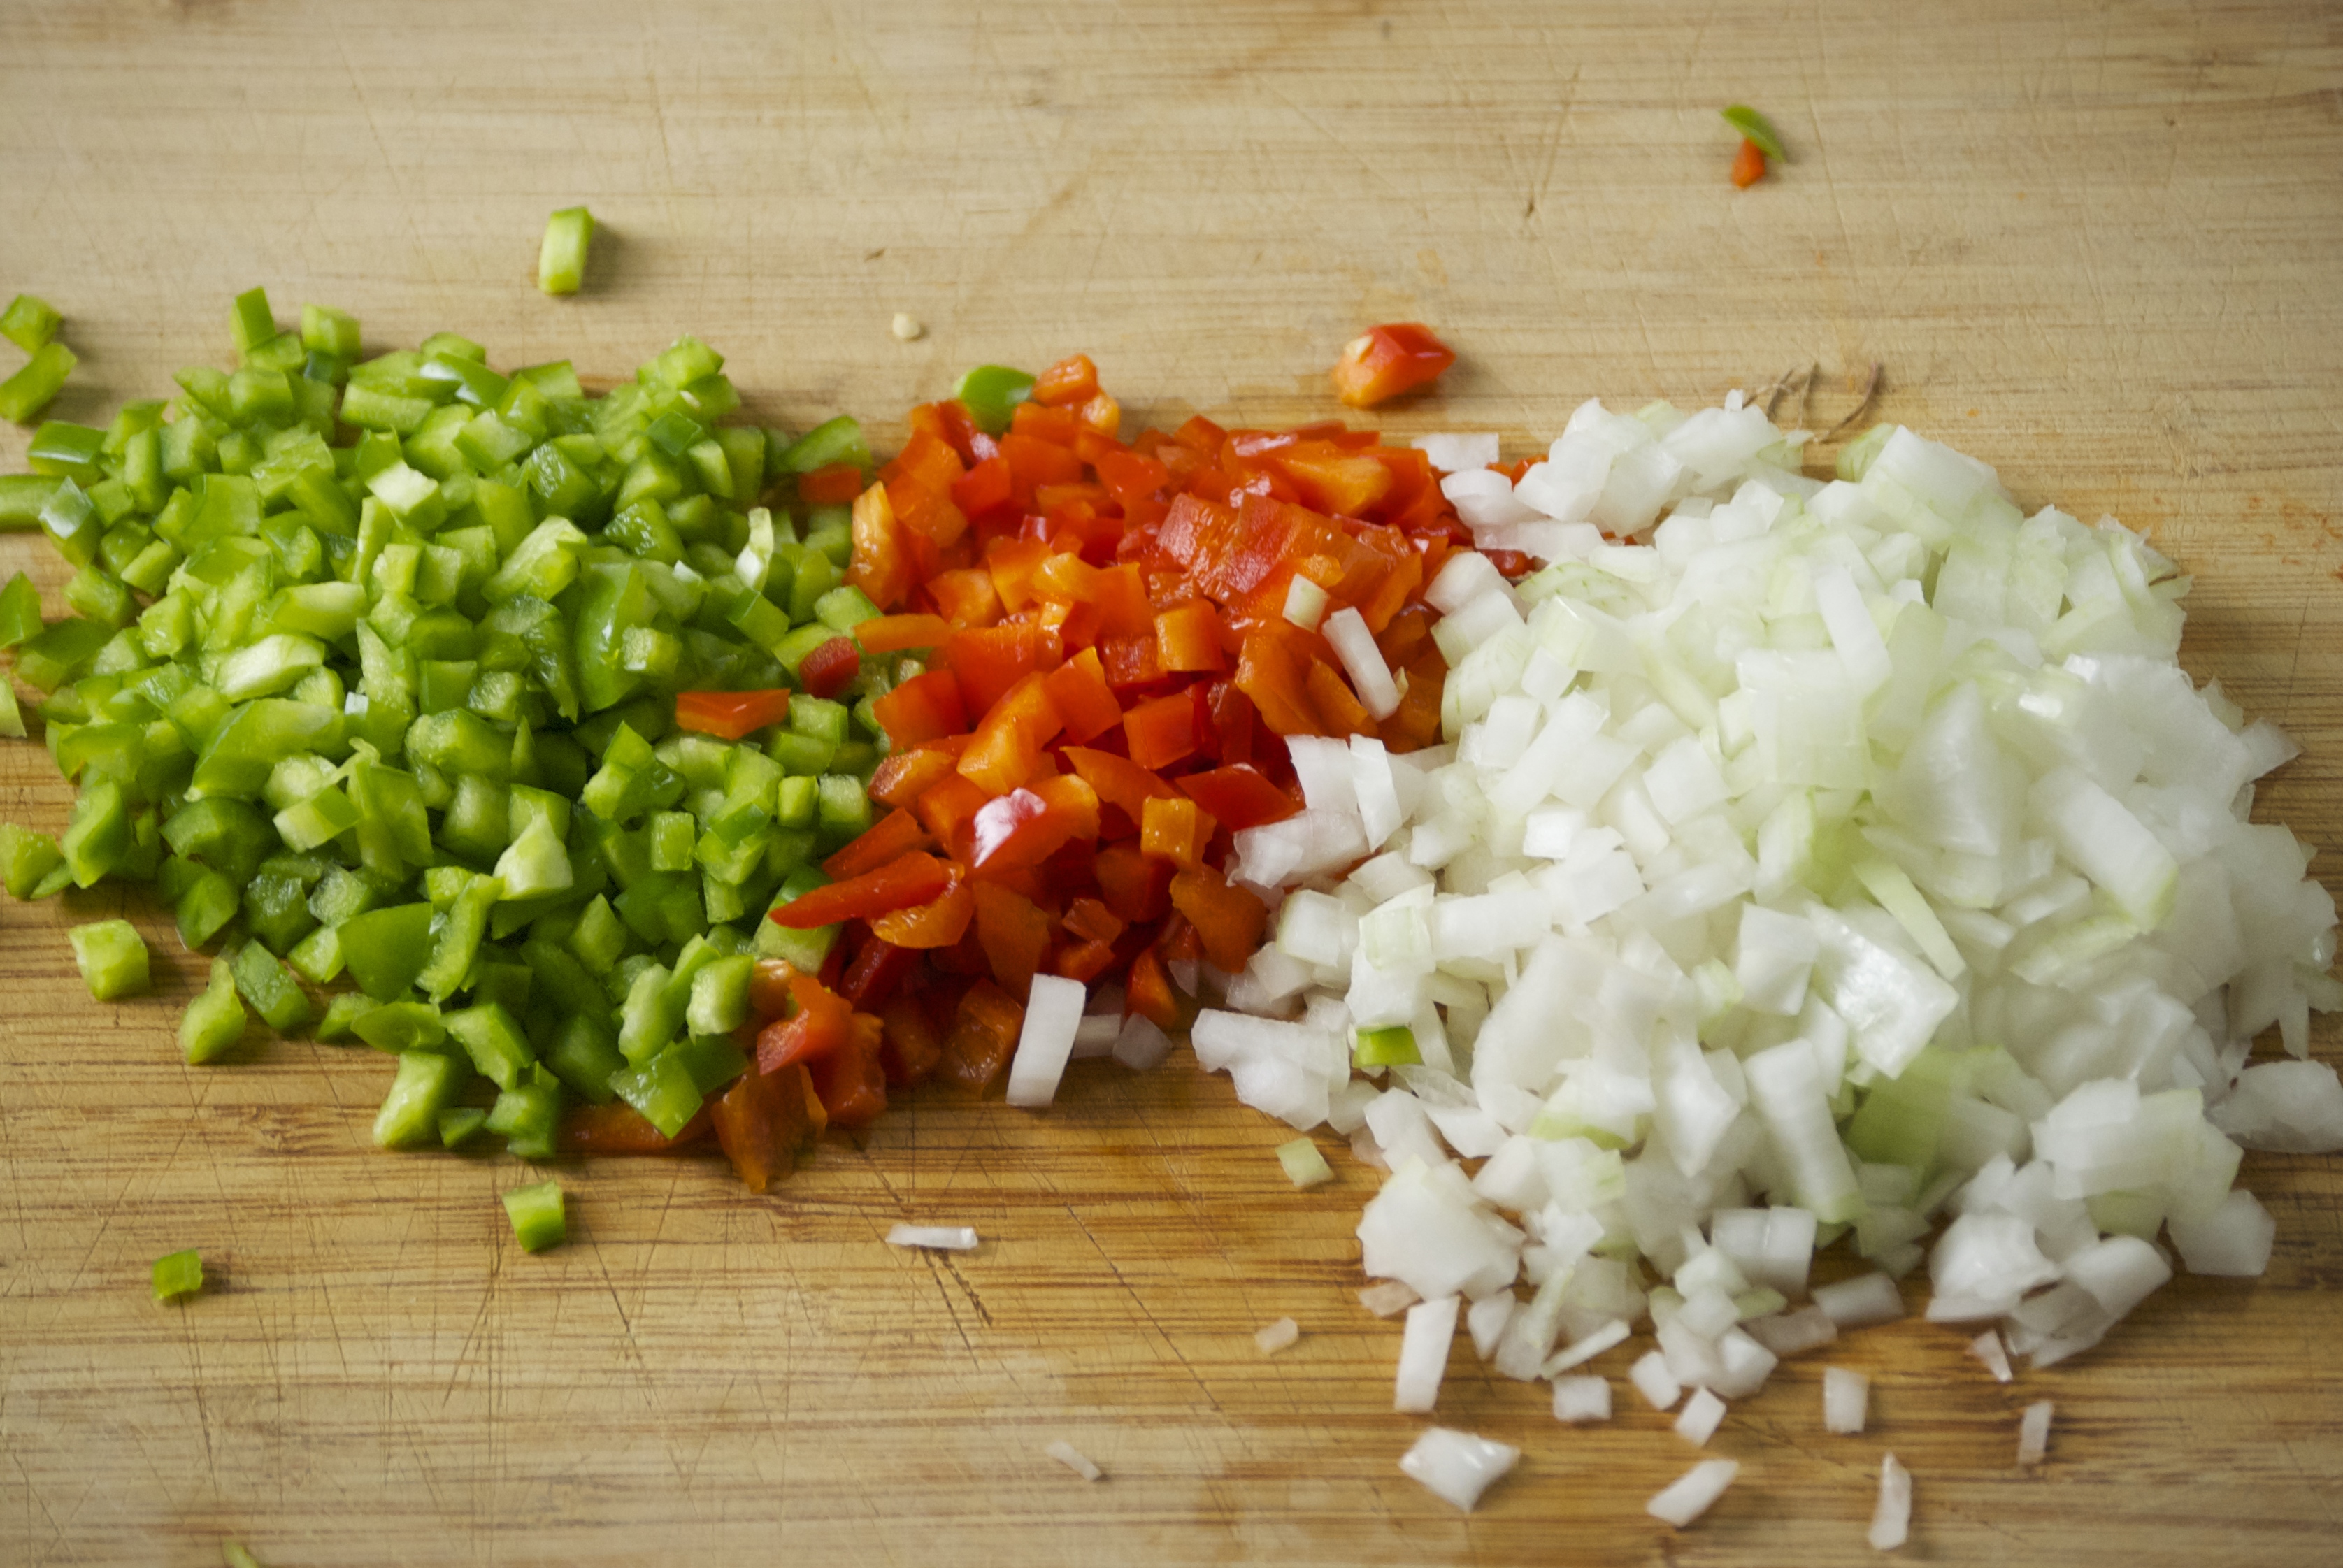
Yes, the dish looks impressive, but it’s not difficult to make.  It comes together quickly and the cooking time is relatively short.  The most labor intensive task is actually vegetable chopping.  And the flavors– my oh my, they’re unbelievable.  First, there’s the saffron.  Along with providing the beautiful red/orange hue, it adds a wonderful flavor.  Saffron is an impressive spice, but keep in mind it’s also the most expensive one out there.  With that in mind, I’ve given you the option of using between  1/2 – 1 teaspoon for this dish.  I’ve made it both ways, and it’s turned out great each time.  Just don’t skip the saffron entirely, because it makes a difference here.

Saffron for Paella | Relishing It

Spanish Chorizo for Paella | Relishing It

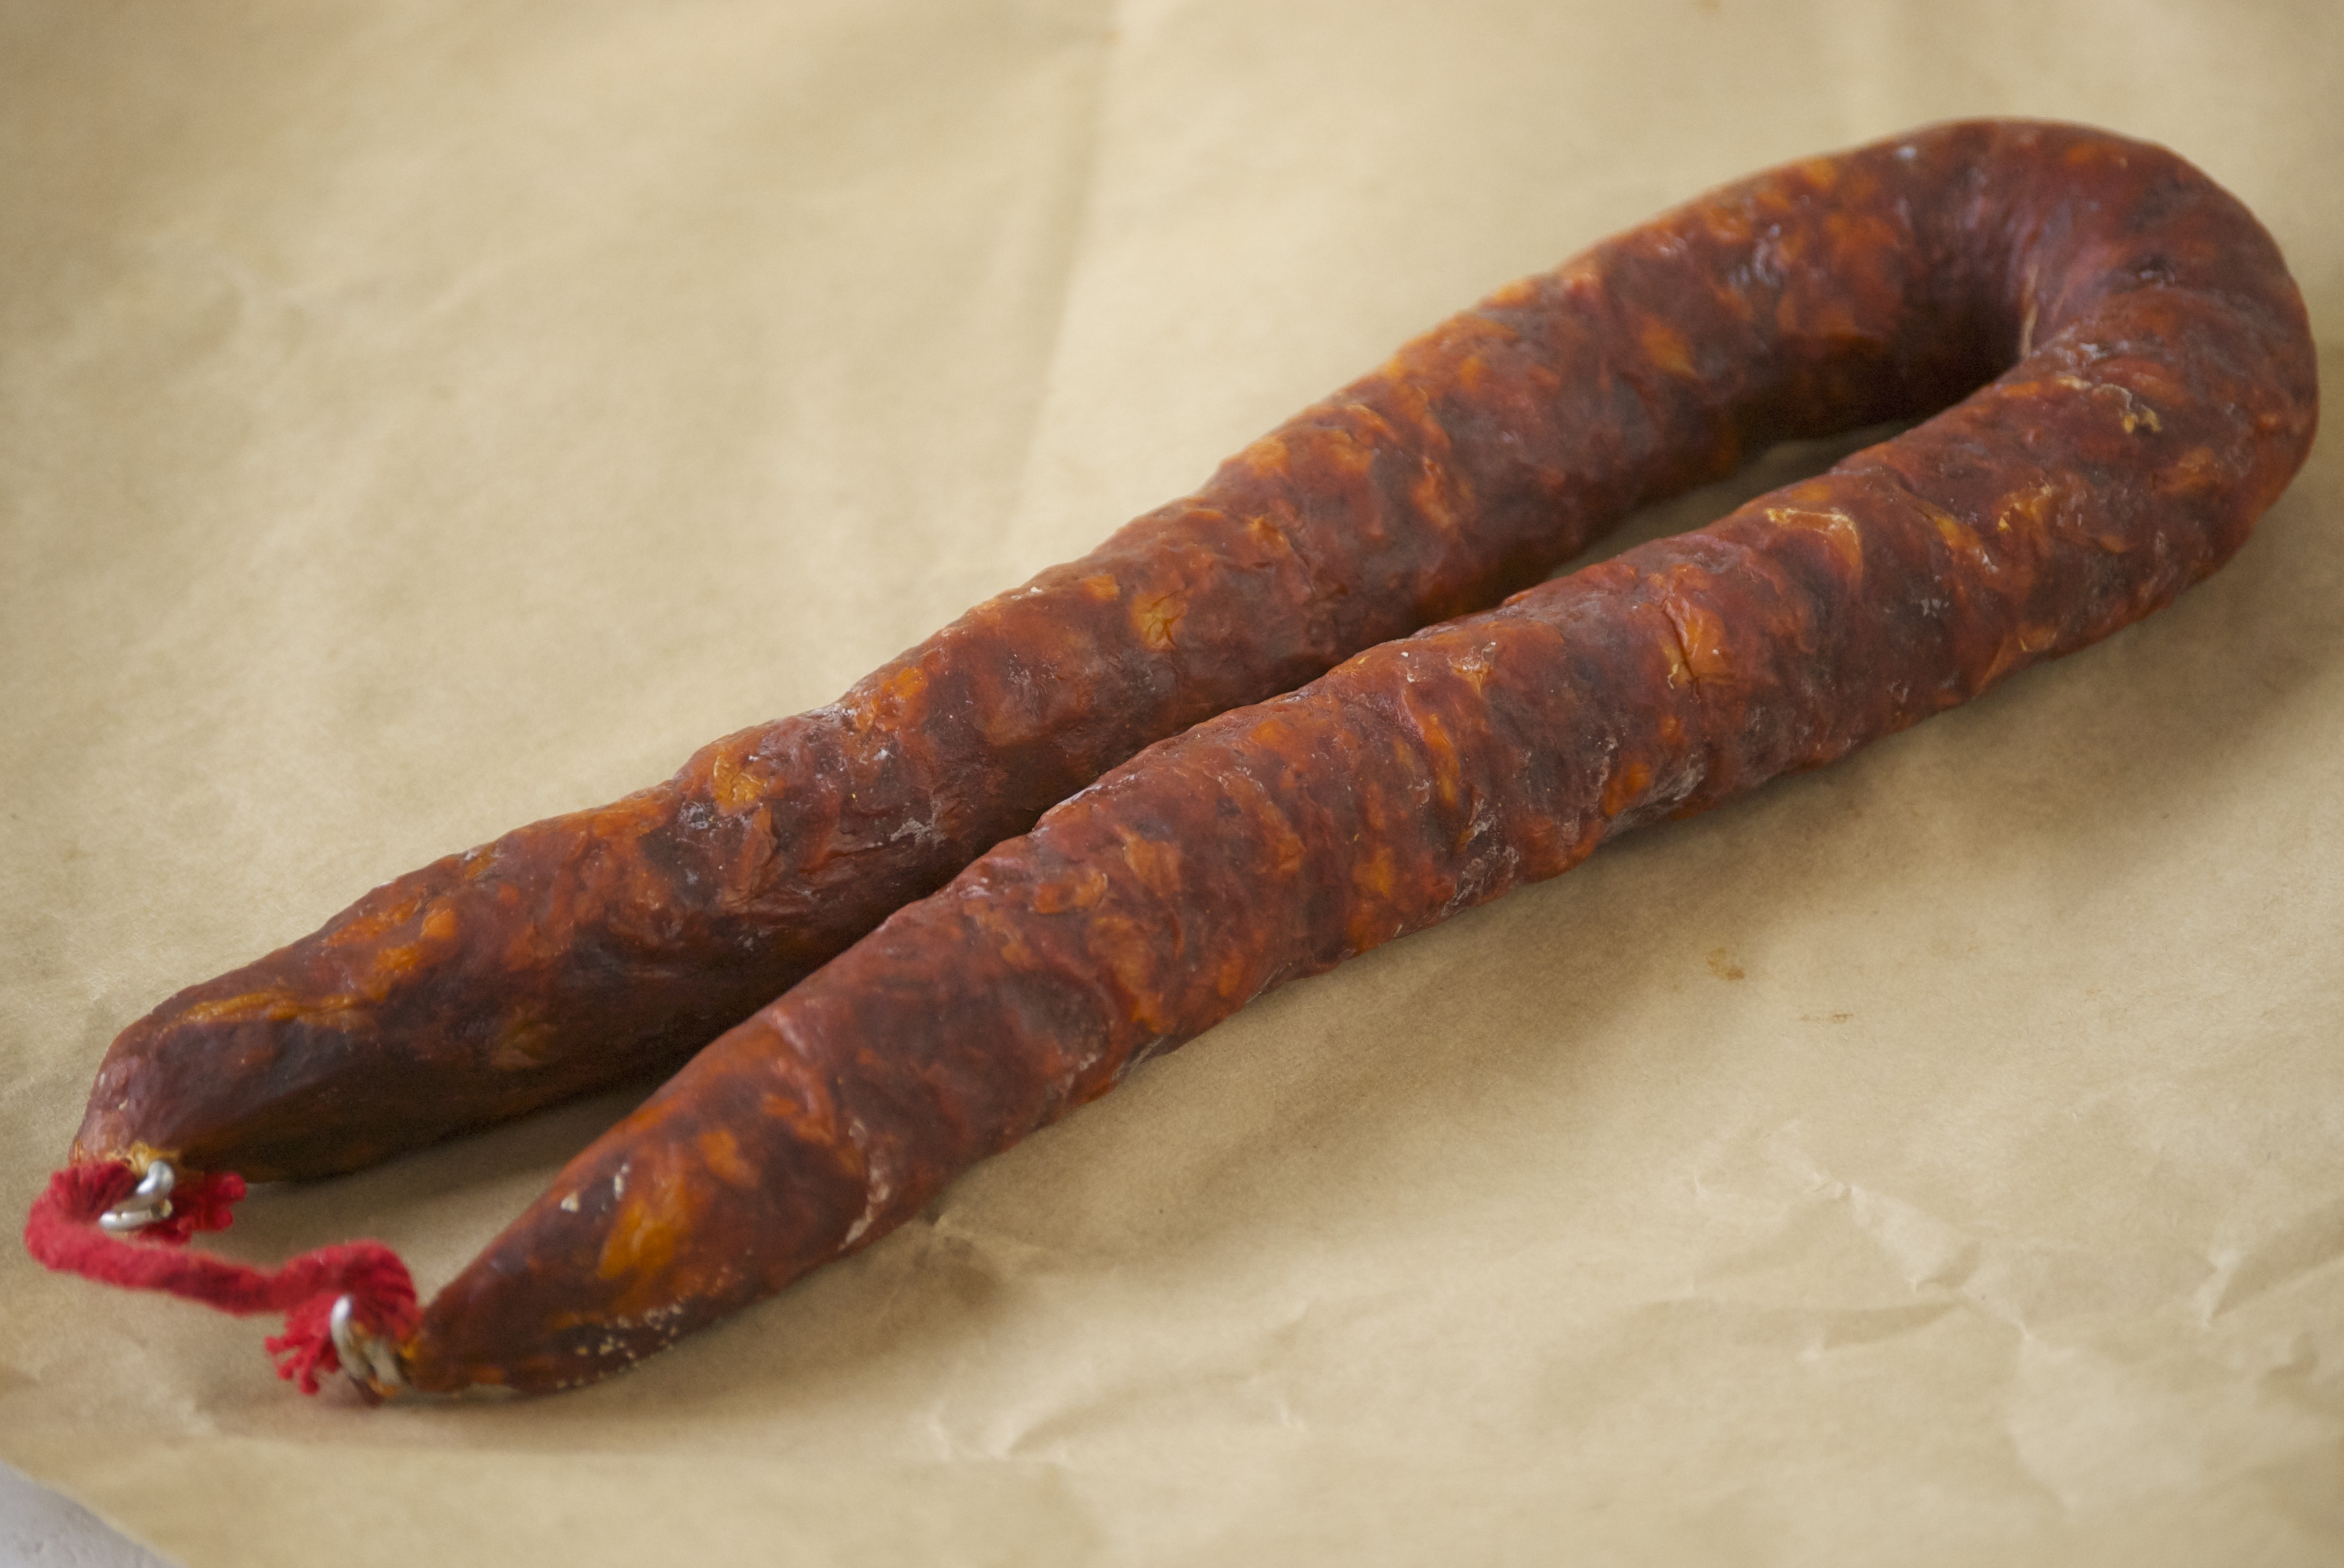
The other main star of the dish is the Spanish chorizo.  This is an aged chorizo with a delicious smokey flavor.  It can be difficult to find, but again, it’s worth the search.  I get mine at the St. Paul Cheese Shop, for those of you who live nearby.  The rice in this dish is supposed to be separated– not creamy like a risotto.  Look for a spanish rice, such as Bomba (also called Valencia) or Calasparra as they will absorb the liquid properly.  Another option is the more readily-available short-grain rice, Arborio.  For my version of paella, I use shimp, mussels, and clams.  I know chicken is often a component, but I stick with the seafood.  You can use whichever you like– you know my theory on making the dish your own.  The seafood paired with the clam juice and wine create a wonderfully intense flavor with a hint of brininess.

Paella | Relishing It

Paella | Relishing It

Seafood Paella | Relishing It

There are many different methods to cook paella.  I settled on heating the oven really hot (to 500°F) and placing a pizza stone in it.  I use a 14-inch stainless-steel skillet, so it’s nice in that it heats evenly in the oven as opposed to sitting on a small burner.  The pizza stone adds additional heat to the bottom of the pan in hopes that it will create a tasty, caramelized crust on the bottom called socarrat.  If you have a smaller 12-inch pan– feel free to cook it on the stove top.  Just be sure to move the pan around a bit for an even heat, while being diligent about not stirring it. If you do use a 12-inch pan rather than a 14-inch, you won’t be able to fit as much meat/seafood into the dish.  Use your judgment, and it’ll turn out just fine.  And of course, if you’re lucky enough to be able to cook it over an open flame outdoors, kudos to you!

Paella | Relishing It

Paella | Relishing It

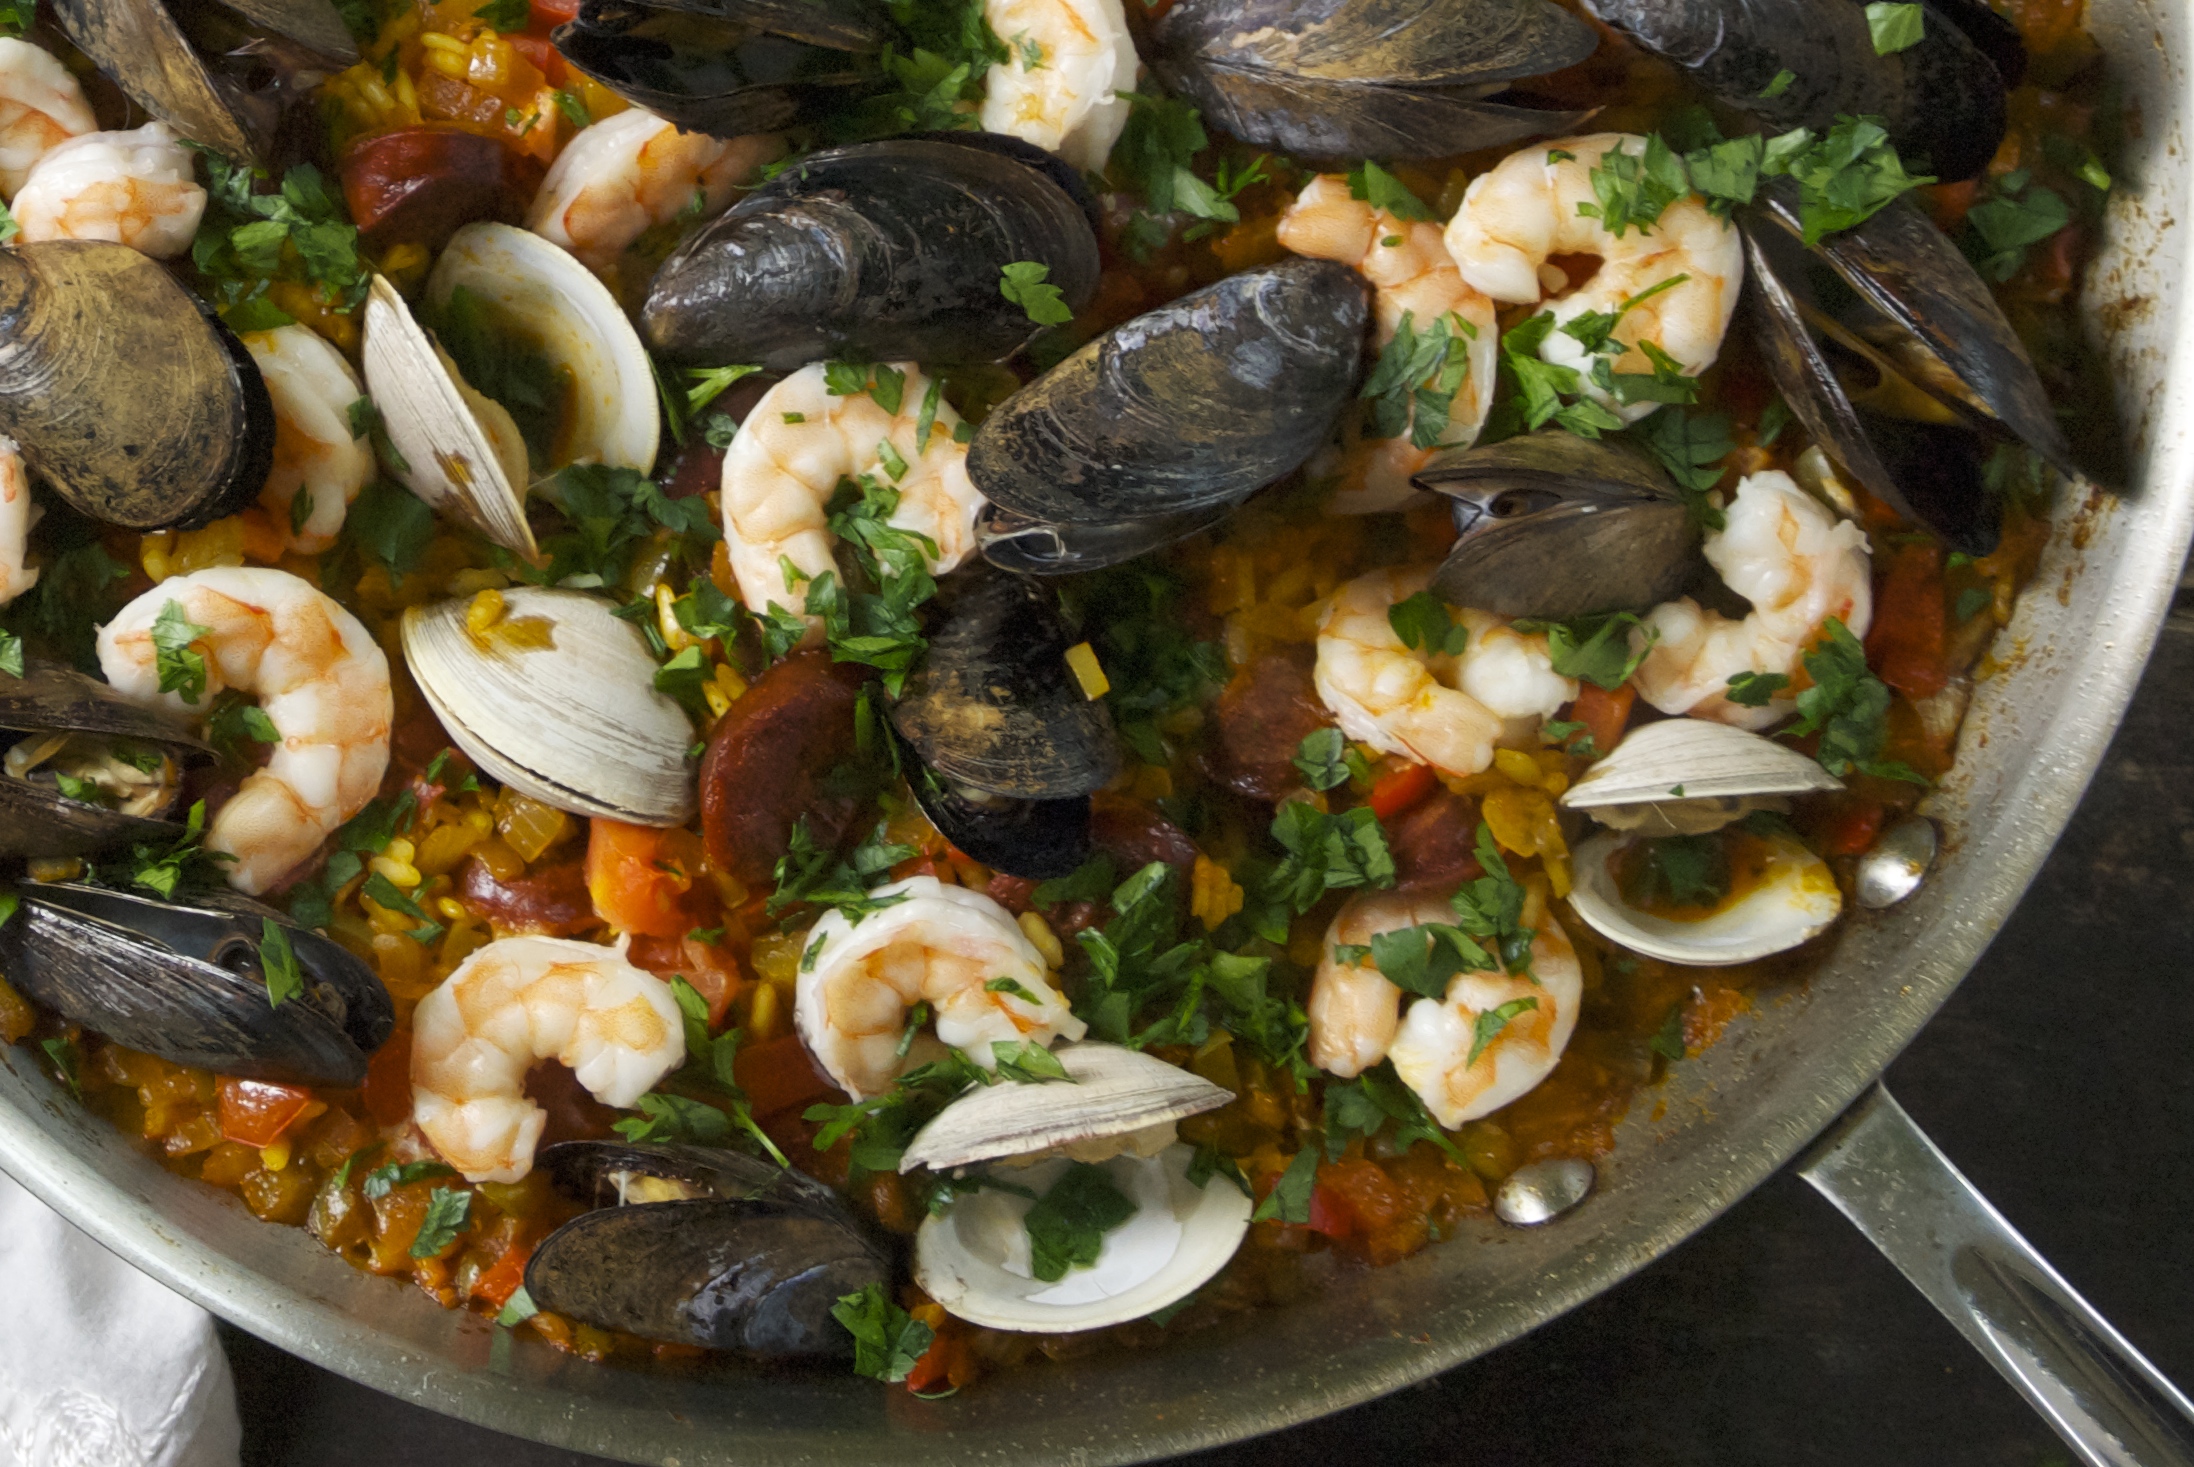
The Recipe: Seafood Paella

(serves 4)

2 tablespoons olive oil

1 red bell pepper, finely chopped

1 green bell pepper, finely chopped,

1 white onion, finely chopped

3 garlic cloves, finely chopped

1 tomato (preferably from a local greenhouse), finely chopped

2 teaspoons concentrated tomato paste

1 1/2 teaspoons smoked paprika

1 cup bottled clam juice

1 cup dry white wine, more if necessary

2 1/2 cups chicken stock (preferably homemade)

1/2- 1 teaspoon saffron (crushed using a mortar and pestle)

2 cups short grain rice–Bomba (Valencia), Calasparra, or Arborio

8 ounces (1/2 pound) spanish chorizo, cut into 1/4-inch slices

1/2 pound littleneck clams

1/2 pound mussels

1/2- 1 pound shrimp (peeled and deveined)

Lemon wedges, fresh parsley, and red pepper flakes  for garnish

Place a pizza stone into an oven and heat to 500°F for about a half hour.  Combine the chicken stock, clam juice, white wine, and saffron into a large sauce pan and bring to a high simmer.

Meanwhile, using a 14-inch skillet or a paella pan (12-inch will work, too) heat the olive oil and cook the chorizo over medium heat until some of the fat has rendered.  Remove the chorizo from the pan and add the red and green peppers, garlic, and the onions.  Sauté for a few minutes until tender.  Then add the tomato paste, spanish paprika, and the rice.  Sauté for about 1 minute.  Add the hot liquid and the chorizo to the skillet and place pan onto the pizza stone in the oven.  Do not stir after this point.  After 10 minutes, add the chopped tomatoes, mussels, and clams to the pan– crack side up.  Then, after 5 more minutes, push the shrimp into the rice and cook for about 5 more minutes.  If at any point the rice seems to be drying out too quickly, add more broth, water, or wine (go for the wine!) to the pan.  If the rice seems to be done cooking (it will only take about 20 minutes total) before the shrimp is done or the clams and mussels have opened up– just place tin foil over the entire dish to trap some of the steam.  I tend to do this when I place the shrimp into the dish. Discard any mussels and clams that ultimately never open up.  Serve with lemon wedges and fresh parsley.  Enjoy!

Thanks for stopping by today!

Laurie

Read Full Post »

Alright, I’m salivating looking at the pictures of this unbelievable mole-inspired pork shoulder (MOLE-lay).  You see,  I often blog at night before I go to bed, which means I’m just starting to get hungry.  It’s been a few days since we had this delicious meal, but now I’m thinking that I may have to make it again this weekend.  I’m not sure I’ll be able to prepare pork shoulder any other way (that might be a lie, but dang– it’s really amazing!).

I love the varied spice combination here.  Combining the cocoa and cinnamon, along with the pork works perfectly– they compliment each other so well.  We were able to enjoy two meals out of this one pork shoulder.  The first time we made shredded tacos served with chunks of avocado and lime.  Wowzer!  Then we made these fantastic savory cornmeal cakes to go with it the next night.  The cakes were perfect, they were substantial and best of all, had that nice ‘toothsome’ bite.  The flavor of the cornmeal was a nice base for the the intriguing mole flavors.

A few things to consider when you make this.  Sometimes it’s difficult to get the exact amount of meat listed for recipes.  If you can’t find a 2 1/2 pound pork shoulder, or would just like to make more (because the leftovers are fabulous) just get a bigger one.  Increase the amount of the seasonings a little, and cook it a bit longer.  It’s not a big deal at all– one of the joys of cooking is getting confident enough to make changes and substitutions as needed.  Remember, it’s just food.  Take control of it and make it your own.  Enjoy the pork shoulder on either the cornmeal cakes or as tacos.  They’re brilliant!

The Recipe: Mole-Inspired Roasted Pork Shoulder with Crackling Cornmeal Cakes

For the Mole-Inspired Pork Shoulder:

1 tablespoon chili powder

1 teaspoon smoked paprika

1/2 teaspoon natural cocoa powder

1 teaspoon dark brown sugar

1/3 teaspoon ground cumin

1/2 teaspoon ground cinnamon

1/4 teaspoon dried oregano

1/2 teaspoon granulated sugar

1 tablespoon kosher salt

2 1/2 pounds pork shoulder, (bone-in or boned are both fine), trimmed of fat

1 head of garlic, broken into cloves, peeling is optional

In a medium sized bowl, add all of the dry ingredients.  Stir with a spoon, or use your fingers like I do, until thoroughly combined.  Place pork shoulder on a plate and rub the spice mixture all over it.  Let sit at room temperature for 1 hour, or in the refrigerator for 2 – 24 hours.

Preheat oven to 275°F.  Place the pork shoulder in a Dutch oven, or a similar pan of some sort that is deep and has a lid.  (If you don’t have either, you can also wrap the pork shoulder in aluminum foil, making sure the seam is at the top, so the juices don’t seep out.  Then place in an oven-proof skillet or casserole.) Add the garlic cloves to the pan.  Place a sheet of aluminum foil over the top of the Dutch oven and then place the lid securely on it.

Roast the pork until it is very tender and falling off of the bone, about 2 hours.  When it is done, transfer to a platter and cover with foil.  Defat the juices by putting them in the freezer for 10 minutes and then spoon the fat off with a spoon.  Shred the pork with two forks and pour the juices over the top of them.

Crackling Cornmeal Cakes

(makes about ten to twelve 2-inch cakes)

1 teaspoon kosher salt

1 2/3 cups coarse cornmeal

1/3 cup all-purpose flour

2 teaspoons baking powder

1/4 teaspoon baking soda

1 cup buttermilk

2 eggs, lightly beaten

2 tablespoons melted butter, plus more for the pan

In a large bowl, whisk the dry ingredients together until combined.  Stir in the buttermilk, eggs, and melted butter.  (Add more or less buttermilk depending upon if you prefer your pancake thick or crispy.)

Heat a large skillet over medium heat and brush the surface with butter.  Pour the batter onto the pan, 2 tablespoons at a time works well.  Cook the cakes until they bubble at the surface and set and the edges on the underside are brown.  Flip them and continue to cook.  Repeat until all of the batter is gone, making sure to butter the pan each time.  Serve as soon as they are done, or keep warm, covered with tea towels in an oven warmed to 200°F.

Serve the pancakes smeared with sour cream and piled high with the mole-inspired pork shoulder.  A squirt of lime juice and a few sprigs of cilantro will complete the meal nicely.  Enjoy!

Source:  Adapted from Sally Schneider’s the Improvisational Cook

Thanks for stopping by Relishing It today!

Laurie

Read Full Post »

My favorite meal of the day?  Easy.  Breakfast.  I don’t recall if I’ve mentioned that before, but it’s worth repeating.  Going out for breakfast is– hands down–the best part of the day.  The morning is full of potential.  Full of promise.  Now my family may ridicule me and my Saturday morning “Time to get up and rock and roll!” mantra, but it’s the weekend and I’m ready to get out the door.  I have coffee shops to get to and patisseries to explore.  But–and I know I’ve mentioned this–the boys (Radd and Aanen) are incorrigible homebodies.  So Aria and I compromise on occassion.  And those weekend mornings that we stay home are pretty great too.  Especially when the breakfast is as delicious as this one.

You are looking at the amazing combination of chorizo sausage, fire-roasted tomatoes, smoked paprika, and poached eggs.  And yes, it tastes as wonderful as it looks.  I love this breakfast dish.  I love the tongue-tingling spice from the chorizo, the acidity of the fire-roasted tomatoes, the smoky complexity of the spices, and of course, those fantastic eggs.  Throw a dollop of harissa on top, and you have a show-stopper for breakfast or brunch.  This one has personality, in spades.

A few pointers on the ingredients:  if you don’t have all of the spices listed, don’t worry.  Use the ones from the recipe that you do have. However…I think you really will want to track down the smoked paprika.  It’s one of the keys to making this dish so tasty.  And, you will use it a lot more than you think in other recipes.  It’s that good.  For the meat, I used ground chorizo sausage.  I’m fortunate enough to live just a few blocks from an excellent co-op, and just a few miles from a year-round farmers’ market.  Both have vast selections of locally produced meats.  The chorizo I use is wonderfully spiced and perfectly salty.  I didn’t add one fleck of salt here.  If you can’t find ground chorizo, just use whatever type you can find.  Cut it into small pieces.  Like the smoked paprika, this dish relies on the unique flavors that it provides.

The Recipe: Chorizo and Fire-Roasted Tomato Ragout with Poached Eggs

(serves 4)

1 tablespoon olive oil

1 pound ground chorizo

1/4 of a large white onion, chopped

2 cloves of garlic, minced

1 tablespoon smoked paprika

1/4 teaspoon EACH of ground ginger, ground allspice, ground coriander, ground turmeric, and ground cinnamon

2 cans of fire-roasted tomatoes (preferably Muir Glen Organic)

6-8 large eggs (depending upon how many you want)

1/4 cup chopped cilantro

2 tablespoons harissa, optional

In a large skillet, heat the olive oil over medium heat.  Add the chorizo and cook a few minutes until cooked through; drain the grease.  Add the onion and garlic to the pan of chorizo and sauté for 2-3 more minutes until softened.

Lower the heat and add all of the spices: smoked paprika, ginger, allspice, coriander, turmeric, and cinnamon.  Let them toast for about 30 seconds.  Add the tomatoes.  Turn the heat up to medium and cook until the mixture has thickened slightly, about 5 minutes.

Gently crack the eggs on top of the mixture, cover, and cook until the whites are set, but the yolk are still soft.  Sprinkle with cilantro and a drizzle of harissa before serving.  Enjoy with some crusty bread!

Adapted from a recipe by Food Blogger/Chef Emily C. Swantner of Epicurean Odyssey  via The Food 52 Cookbook by Amanda Hesser and Merril Stubbs

Hope you all have a lovely weekend!

Laurie

Join me on Twitter

Read Full Post »

While we’re a few days closer to the holidays– and you’re probably expecting a sinfully decadent recipe– I’ve decided to shake things up a bit with this simple, wonderfully savory soup.  This winter warmer is one of my family’s favorites.  It’s modest, yet combines enough interesting flavors and textures to stand out.  For starters, can we talk about how fabulous smoked paprika is?!  I love the stuff.  And paired with the cumin in this soup, you get a real flavor explosion.  Add a little lime and cilantro, and you end up with a perfect, fresh complement to the spices.

The other key ingredient is hominy.  While I’ve been making this soup for a long time, I only recently switched from using the canned variety to dried hominy.  You’ve seen in previous posts that I always advocate using dried, rather than canned beans.  Well, I wondered if the same texture and flavor differences applied to hominy, so I had to give it a try.  Wow!  It really makes the soup that much better.  Dried hominy added a more ‘tooth-some’ (am I making up words again?) quality to the soup.  It’s firm (though not hard), and helps make the dish more substantial.  I won’t be going back to buying the canned version.

You may have to work to track down dried hominy.  I eventually found it in a local Mexican foods market.  The point is this– if you can find it, use it.  If not, the soup is still brilliant using canned hominy.  If you go the canned route, use about 3-4 cans, drained.  One thing to keep in mind, this soup will thicken more the day after it is made.  The hominy continues to soak up liquid, so you may want to add more broth on the following days if you have leftovers.  Make it– you’ll love it.  And as for those sweet recipes, I have a few up my sleeve for next week.  Have a great weekend!

The Recipe: Mexican Chicken and Hominy Soup

Serves about 6

1 tablespoon olive oil

1 green bell pepper, chopped

1/2 white onion, chopped

1 jalapeño, finely chopped

3 garlic cloves, minced

1 quart canned crushed tomatoes

2 cups shredded roasted chicken

2 cups dried hominy, soaked overnight in cold water and drained

1  1/2 quarts chicken broth

2 tablespoons ground cumin

2 teaspoon smoked paprika

kosher salt and black pepper to taste

juice of one lime

1/3 cup chopped cilantro

In a large Dutch oven over medium heat, sauté the green bell pepper, onion, garlic, and jalapeño in the olive oil until tender, about 4-5 minutes.  Add the tomatoes, hominy, chicken broth, cumin, smoked paprika, salt and pepper.  Bring to a boil and then reduce to a simmer.  Cook until the hominy becomes tender, about 30-40 minutes.  In the last 10 minutes of cooking time, add the roasted chicken.  Doing so too early will cause the chicken to fall apart.  When the soup is done, stir in the lime juice and cilantro.  Adjust seasonings, if necessary.  Serve with tortilla chips and queso fresco, if desired.  Enjoy!

Thanks for stopping by today.

Laurie

Join me on Twitter

Read Full Post »

Tomato Jam

You are looking at my latest addiction– tomato jam.  You read correctly, it’s  jam made from tomatoes.  I’ve been eating this heavenly spread on everything lately.  Now you may not have heard of tomato jam, but in food circles it seems as though everyone is talking about it.  The recipe is simple and easily adaptable into both sweet and savory versions.  To me, it’s perfection in a jar.

So how simple is it?  Just chop up the tomatoes, add a few spices, and plop everything in a kettle.  Stir.  Wait an hour, or so for it to thicken. Done.  Depending on what you add, you can make it as sweet or savory as you like.  I’ve been using both versions… a lot.  The sweet jam pairs beautifully with crusty bread and a rich cheese, like a nice white cheddar or goat cheese.  Or how about serving it on top of a beautiful round of brie, with cocktails?  The savory jam is a perfect match for eggs, bacon, or braised meat sandwiches.  And that’s just the start.  Once you taste this topping– like me, you’ll spread it on everything.

Like any other jam, you’ll want to refrigerate this one (it should be used within 2 weeks).  You can also ‘can’ the jam for later by following basic canning instructions.  That way you’ll have it available throughout the winter.  It’s a good idea to double or triple (or more) the batch if you’re going to go through the work of canning it.  It’ll need 20 minutes in a hot water bath.  I’ll certainly be canning several jars, because for the past few weeks I’ve been starting my day off with an egg and tomato jam breakfast sandwich.  And I don’t want this new-found favorite to end anytime soon.  It’s so quick and easy.  Try it, you’ll be happy you did!

The Recipes: Tomato Jam: Two Ways

Somewhat  Sweet Version:

(Makes a bit more than 1 pint)

2 pounds tomatoes, chopped  (Roma are best,  though I used regular)

3/4 cup brown sugar

1/8 teaspoon ground cloves

1/2 teaspoon ground cinnamon

1 teaspoon kosher salt

1 teaspoon ground cumin

2 tablespoons lime juice  (may substitute lemon)

1 serrano pepper, minced (or any hot pepper of choice)

1 tablespoon ginger, minced

Combine all ingredients into a large, heavy- bottomed sauce pan.  Bring to a boil.  Reduce heat and simmer, uncovered.  Make sure to stir often.  Cook for roughly 1 hour, or until it reaches your desired consistency for jam.  Remove from heat and let cool.  Place in a jar and refrigerate.

Source:  Adapted from Mark Bittman via The New York Times

Smokey, Savory Version:

(Makes 1 pint)

1 pound tomatoes , chopped

1/3 cup granulated sugar

1 teaspoon ground cumin

2 teaspoons smoked paprika

pinch of kosher salt

2 tablespoons lime juice

1 serrano pepper, minced (or any hot pepper you prefer)

Combine ingredients into a medium, heavy -bottomed sauce pan.  Bring to a boil.  Reduce heat to simmer and cook uncovered, stirring frequently.  Cook for roughly 45 minutes, or until the mixture has reached your desired jam consistency.   Remove from heat, cool, and refrigerate.

Source:  Adapted from Molly Hermann from Tastebud Tart Catering via Fresh Tart @ Minnesota Monthly Magazine

I hope you enjoy both versions of tomato jam.  Have a wonderful day and thanks for stopping by.

Laurie

Follow me on Twitter!

Read Full Post »

%d bloggers like this: