Feeds:
Posts
Comments

Archive for June, 2014

Healthy Brown Rice Noodle Salad | Relishing It

There is a lot to be excited about this week.  First, my kids come home from spending a few days in North Dakota with my Mom and Dad.  This is the second summer that they have spent time away without Radd and me.  It’s hard for me to be away from them, but to be honest, I think it’s important for kids to get to know their grandparents without parents (i.e. me)  interfering all the time.  They get to be properly spoiled and make their own memories and that’s wonderful.  There is nothing quite like the love of a grandparent.  I’m excited to see my little ones– I’ve missed them.  But, my gosh!  It’s amazing what I can accomplish with an entire day without distractions!  There’s just so much…time to get things done.

Healthy Brown Rice Noodle Salad | Relishing It

Healthy Brow Rice Noodle Salad | Relishing It

The other super exciting event this week is that our CSA (Community Supported Agriculture) starts delivery this week.  And I am thrilled!  It’s been a crazy June here in Minnesota– we’ve had record rainfalls and lots of flooding.  In fact, the farm that our CSA, Bossy Acres, resides on received almost 7-inches already this month.  Joining a CSA this year has had me feeling like a farm-girl all over again– stressing about the weather.  It’s exhilarating and terrifying.  At any rate– we’ll get our box of goodies on Thursday and I’m more that a little excited to create some meals with it.

Healthy Brown Rice Noodle Salad | Relishing It

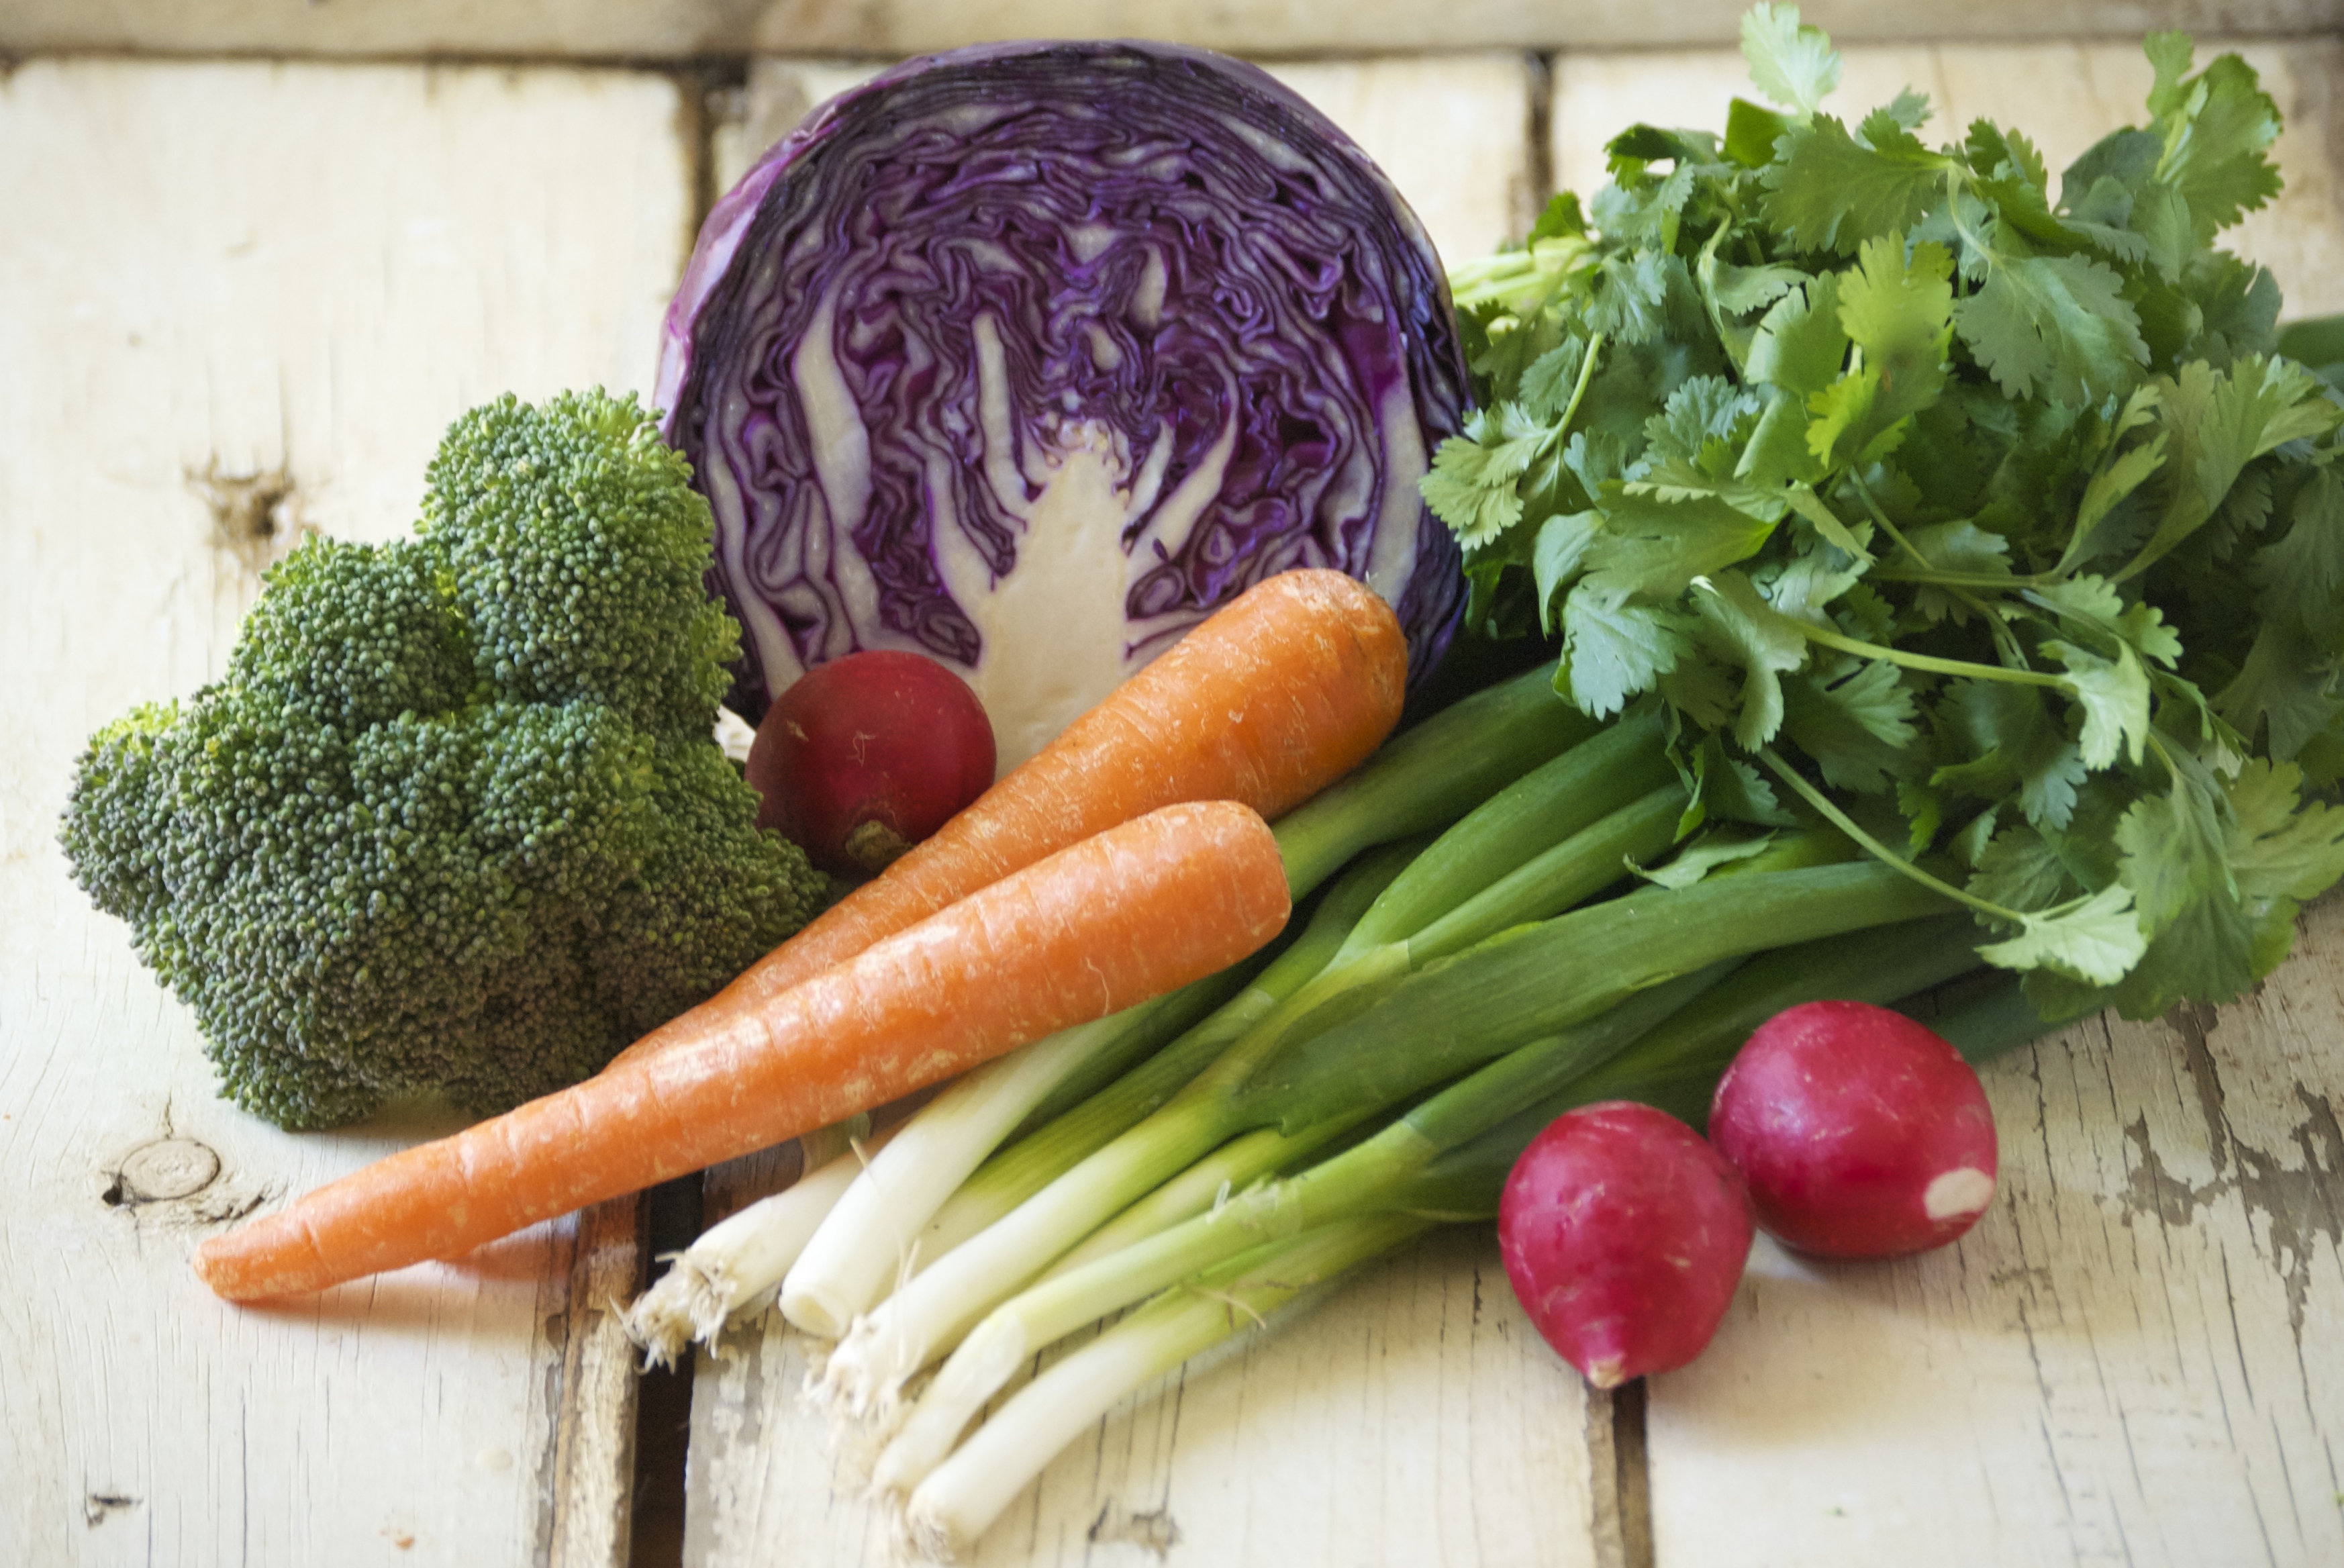
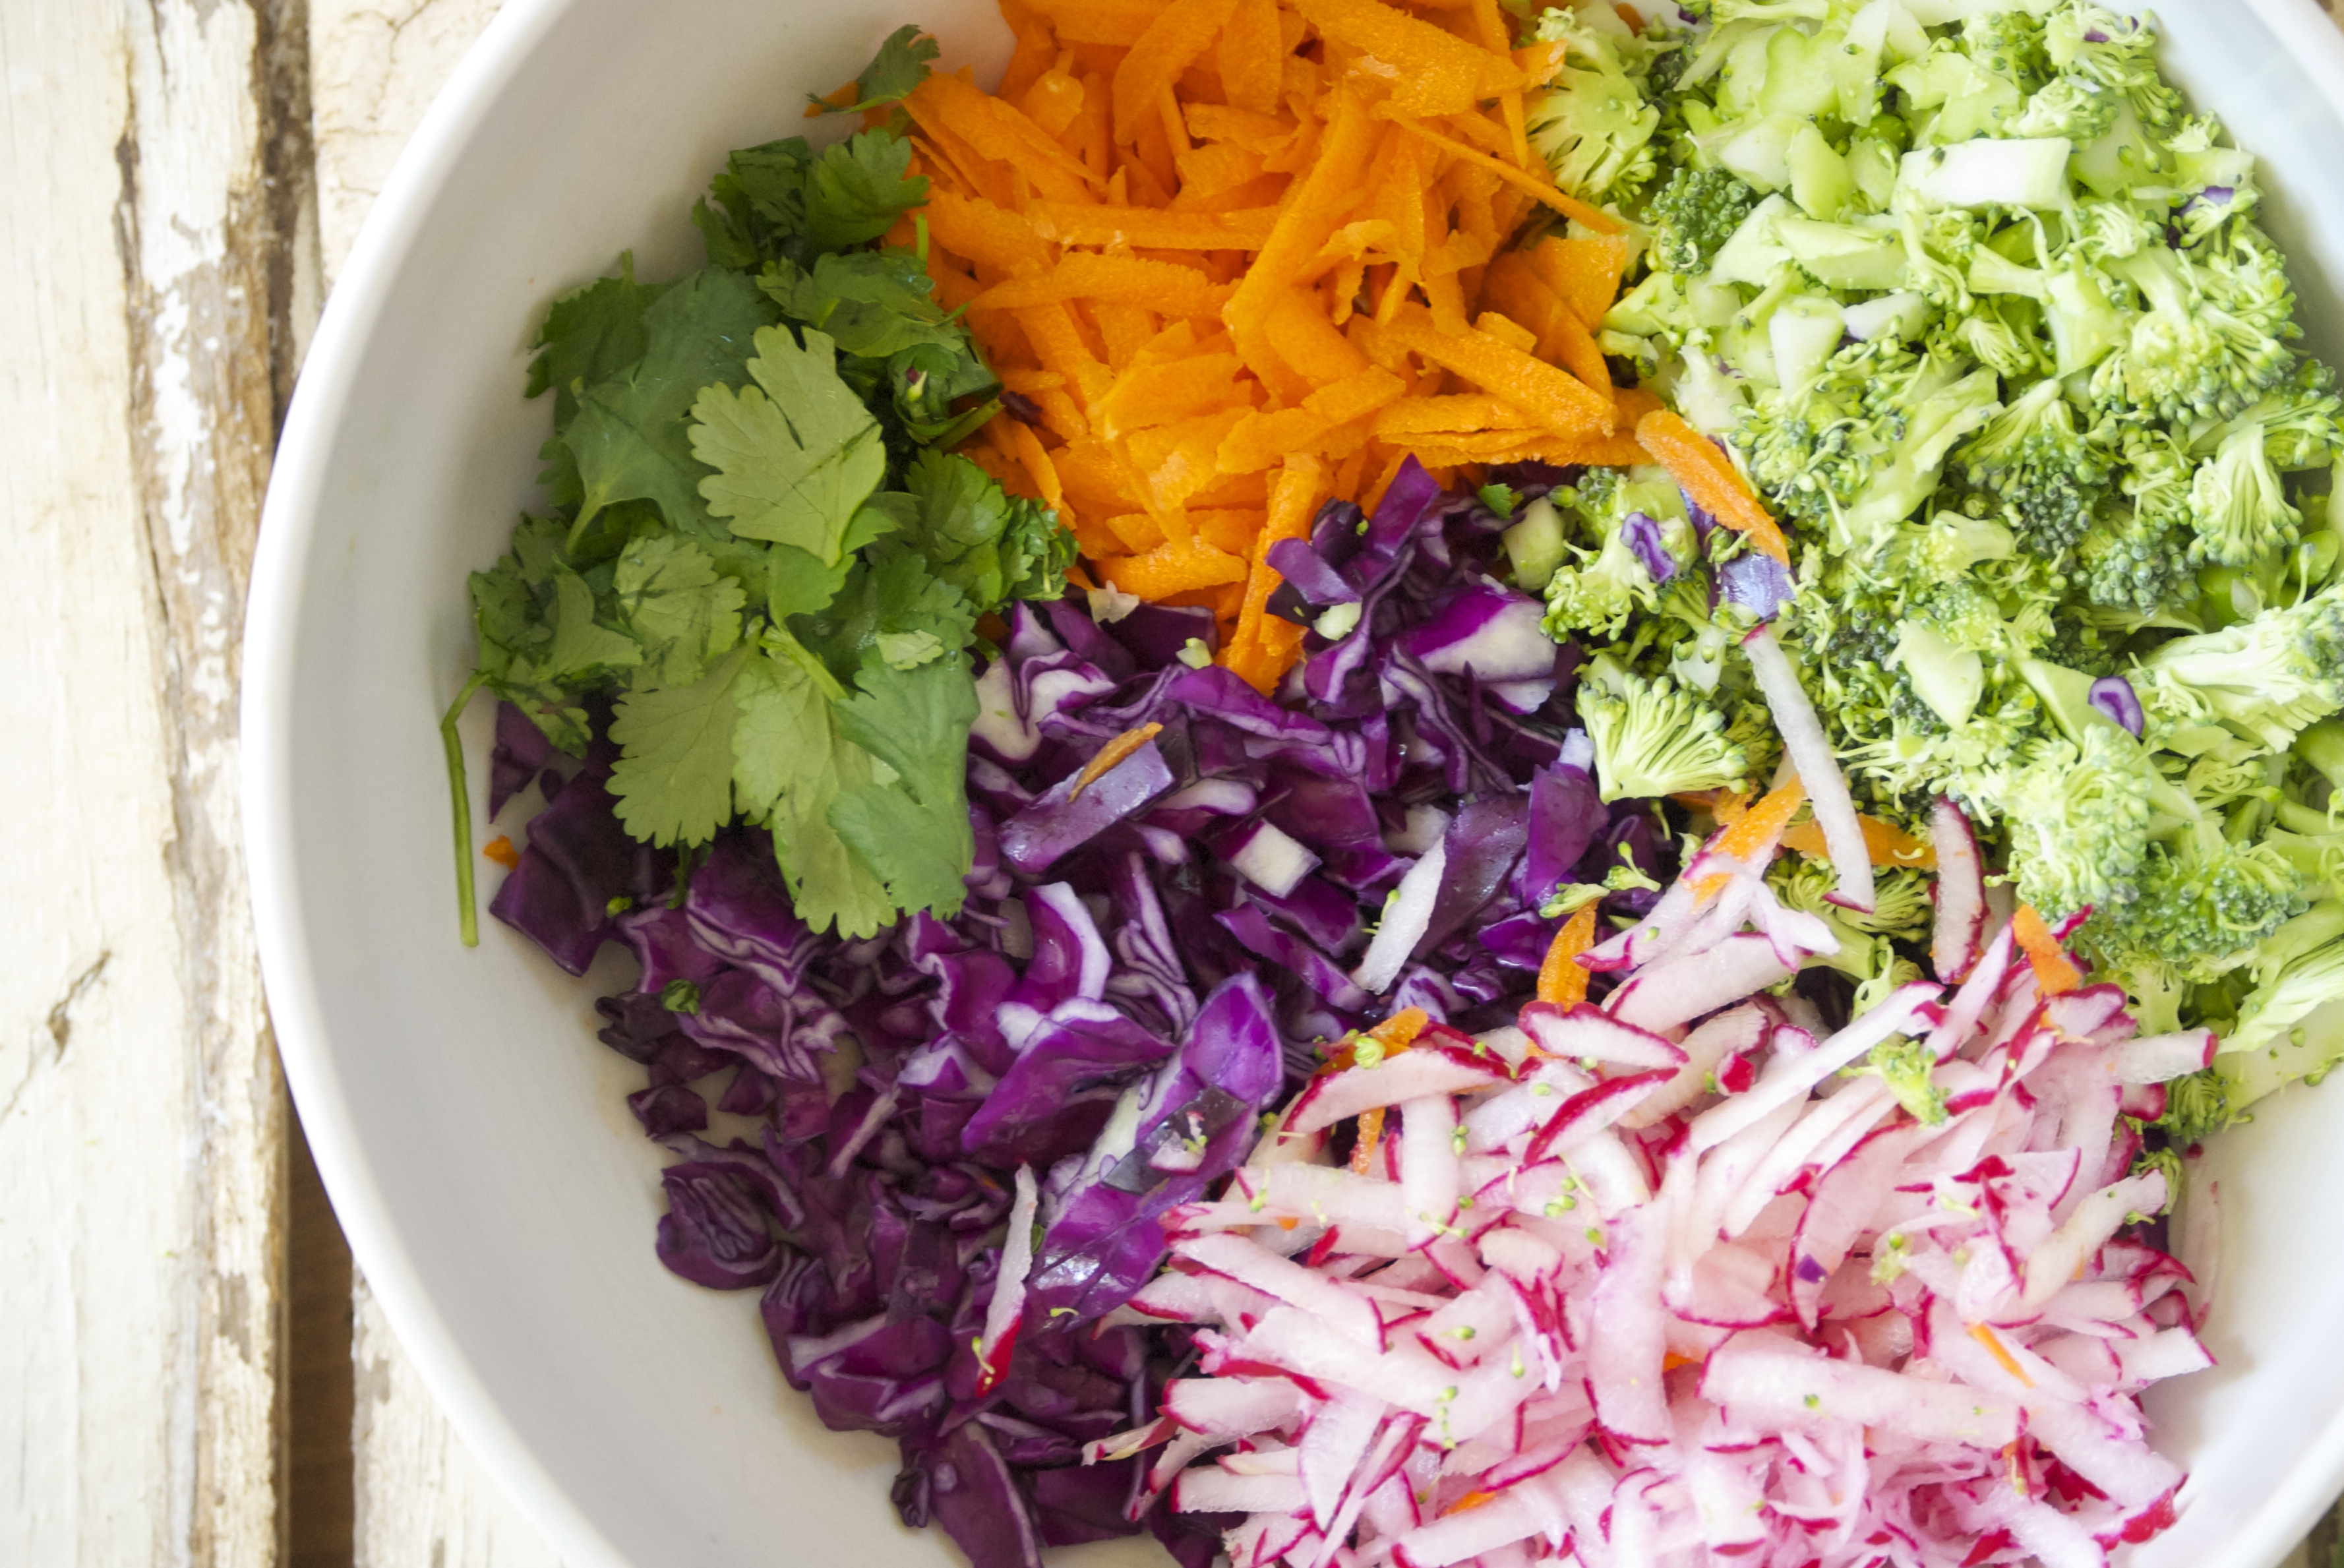
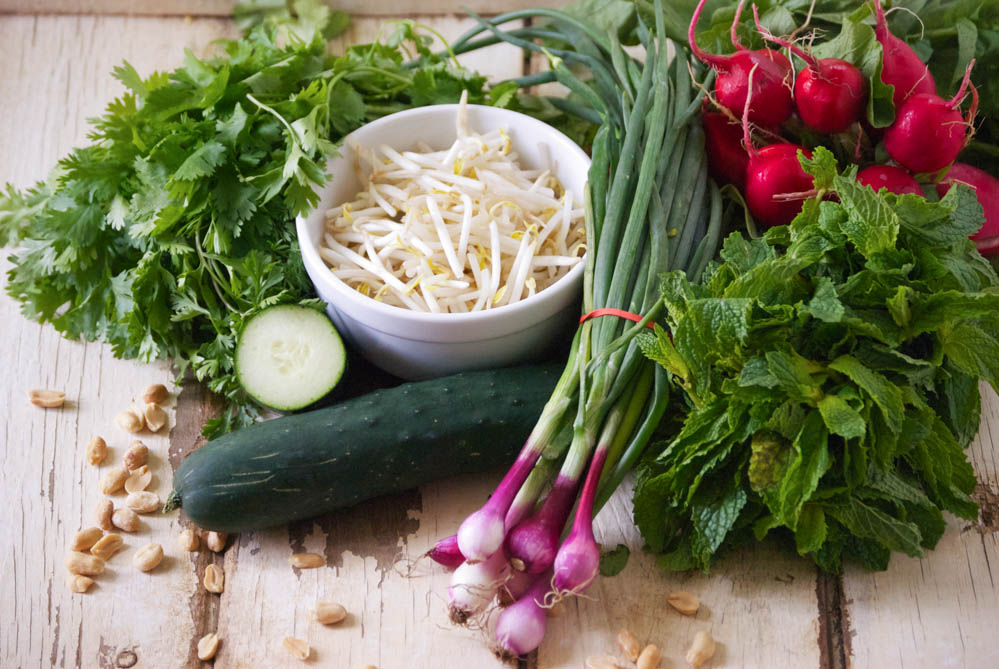
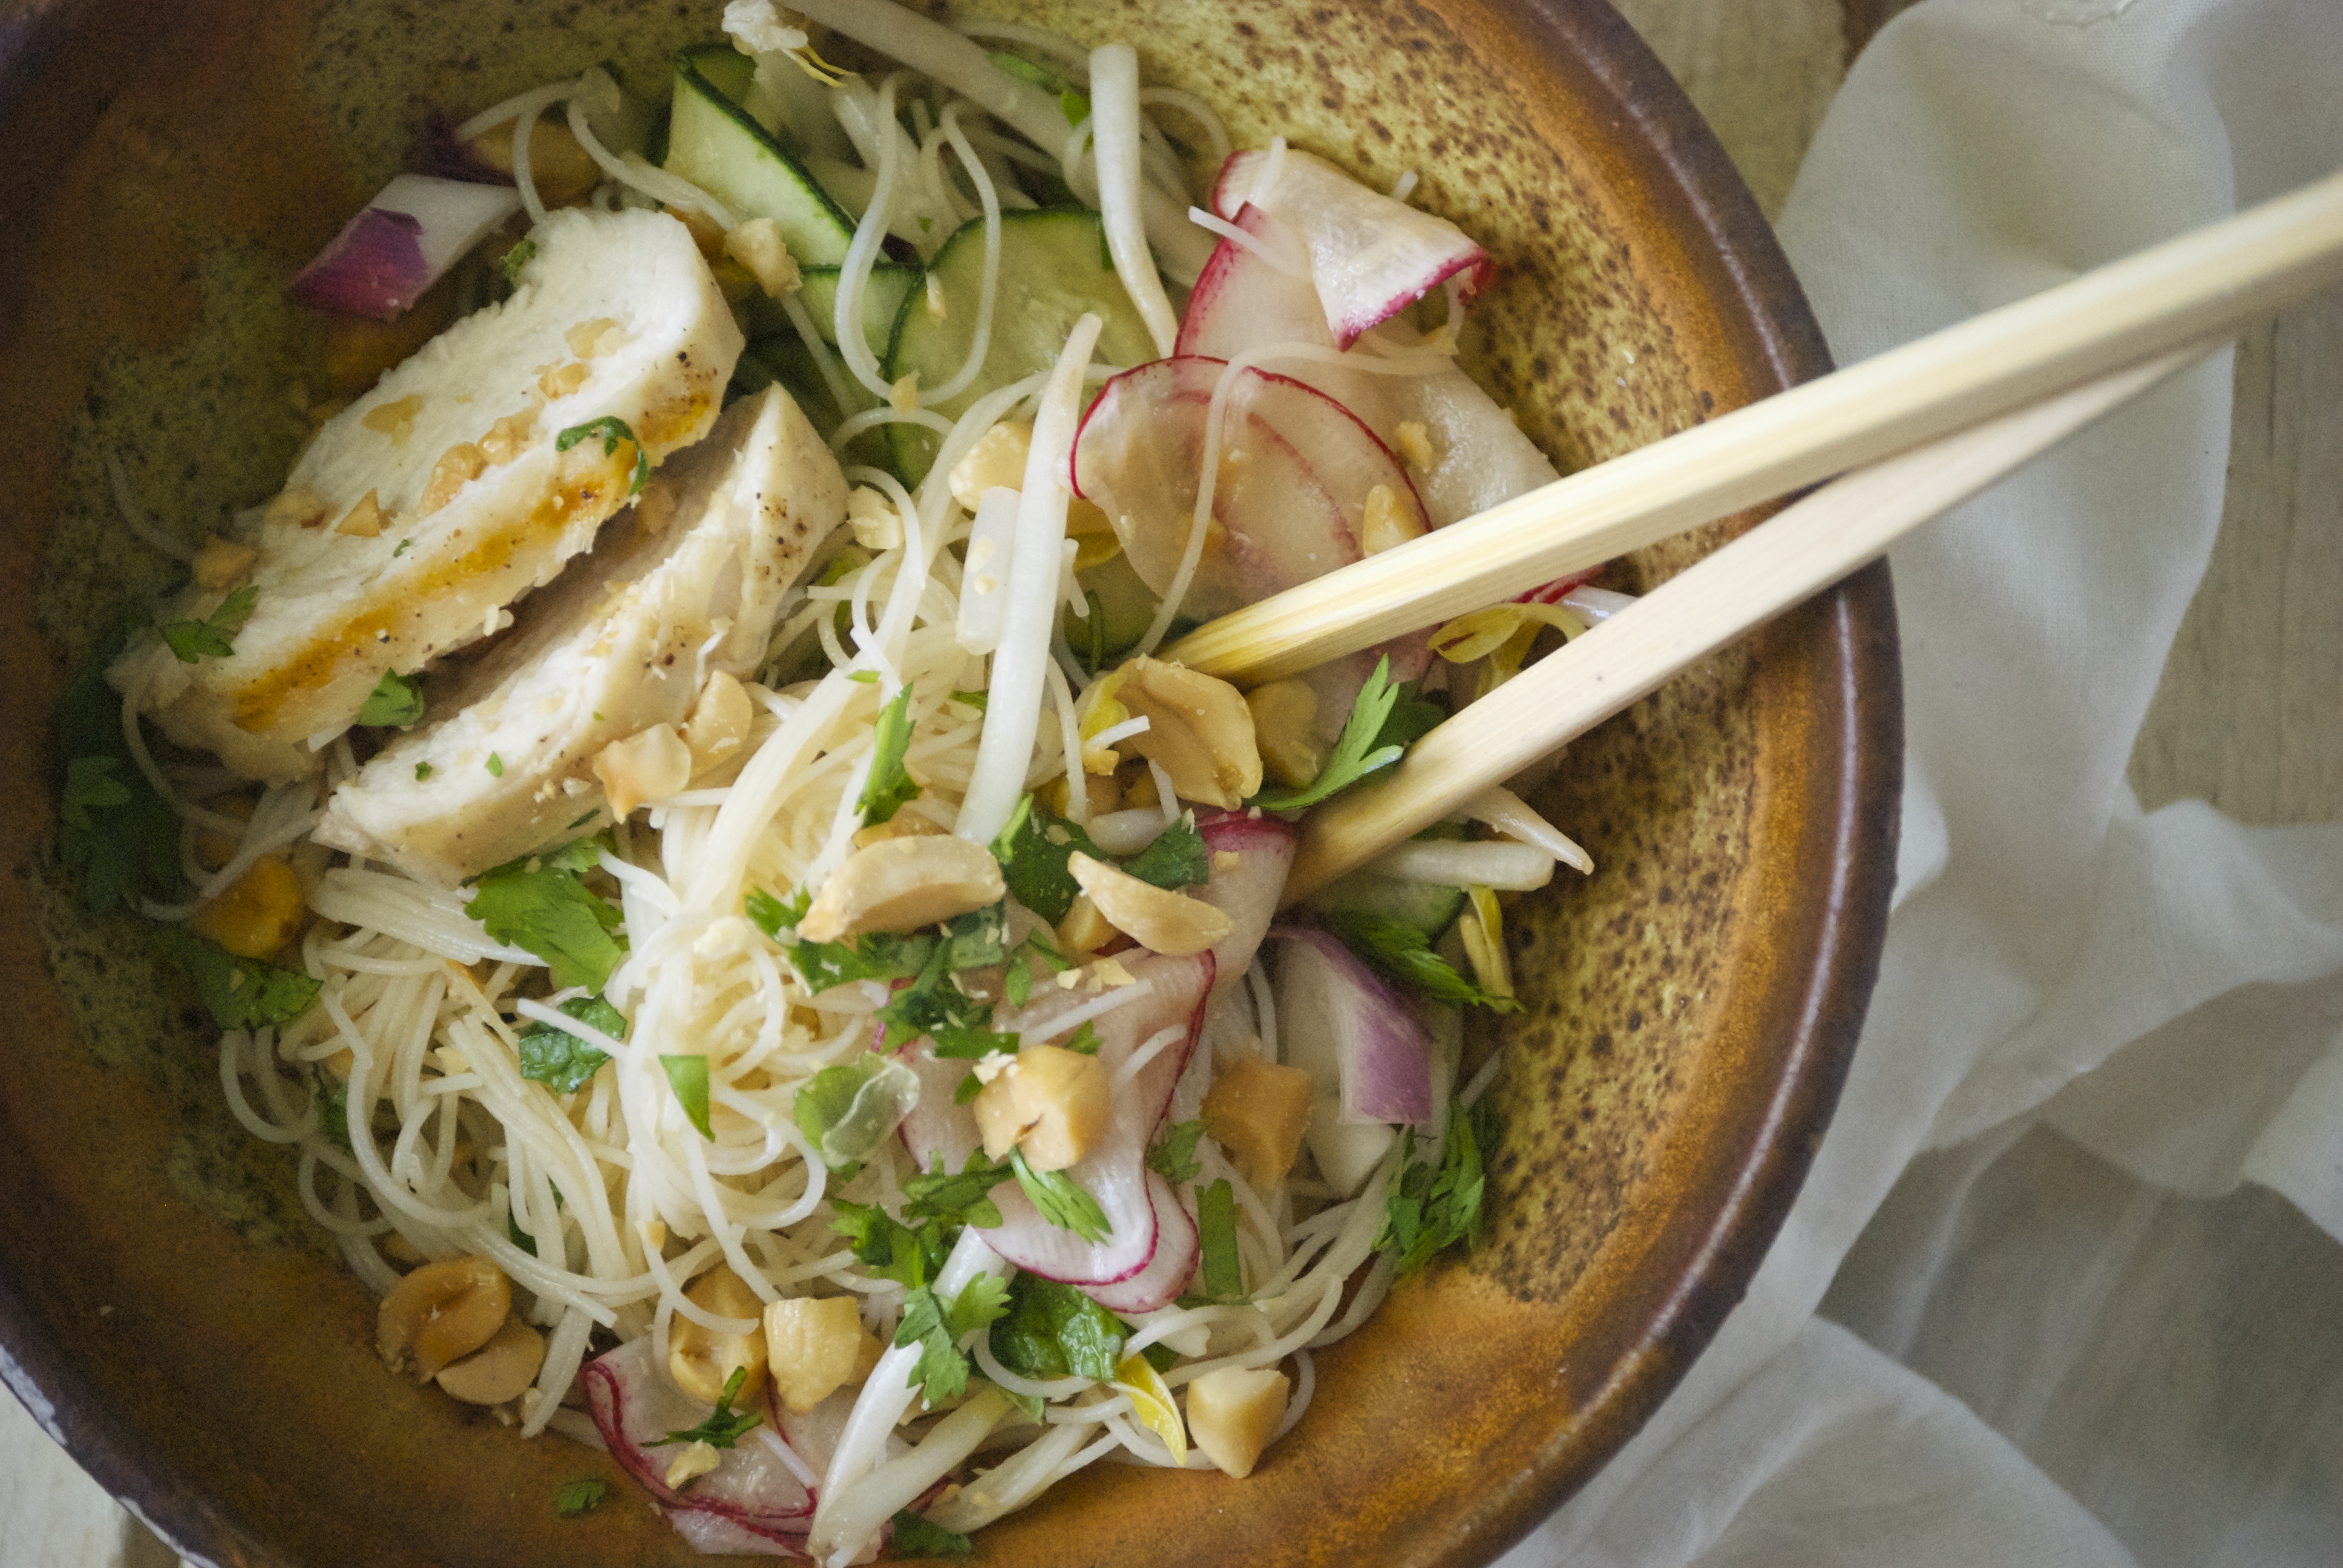
Speaking of meals, today I’m sharing a quick one that you can put on your (hopefully outdoor) table in no time flat.  I know, two noodle salads in two weeks?!  I can’t help it– I’m addicted.  This one is cold, refreshing, and basically tastes like a giant spring roll, without the fuss of that rice paper.  I loaded it with cucumbers and radishes.  I would have added grated carrots, but we were out.  The cilantro and mint make the dish in my opinion, as do the peanuts–so load it up!  Mint is one of my favorite summertime additions to cold salads.  I’ve been fortunate enough to find delicious fresh bean sprouts at our farmers market and they are brilliant in this dish.  What a refreshing crunch!  The meal can be served without a meat, of course.  If you want to make it a bit more filling– chicken, shrimp, and especially grilled pork work extremely well.  The dressing is simple and subtle.  It’s not at all “saucy”, in that it pretty much disappears into the noodles leaving you with its subtle influence.  Feel free to make a tad more if you like a bolder flavor.  I hope you are enjoying many outdoor meals this summer and that this dish finds it’s way onto your table.  Enjoy!

Healthy Brown Rice Noodle Salad | Relishing It

Healthy Brown Rice Noodle Salad | Relishing It

The Recipe: Healthy Brown Rice Noodle Salad

(serves 4)

For the Sauce:

1/4 cup rice vinegar

2 tablespoons fresh lime juice

1 tablespoon fish sauce

1 tablespoon soy sauce

1 tablespoon hoisin sauce

1 teaspoon sesame oil

1 cucumber, thinly sliced (preferably with a mandolin)

5-6 radishes, thinly sliced (using a mandolin, as well)

2 red scallions, thinly sliced

large handful of fresh bean sprouts

about 1/3 cup chopped fresh mint

about 1/3 cup chopped fresh cilantro

about 2/3 cup chopped salted peanuts

8 ounces brown rice noodles

serrano peppers, thinly sliced, optional

lime wedges, for serving

grilled chicken, shrimp, or pork– optional

In a small bowl, combine the ingredients for the sauce.  Stir and set aside.

Cook the rice noodles according to the package directions (they will only take about 3-4 minutes).  Rinse immediately with cold water.  Reserve a bit of the cooking liquid to loosen pasta, if necessary.  Separate the rice noodles with your fingers, so they are loose and airy– this is a fun process.  Get your kids involved to help!

On a large platter or bowl, add the rice noodles, vegetables, herbs, and bean sprouts.  Pour the sauce over and toss with tongs.  Top with grilled meat, if using, peanuts, and a bit more cilantro, mint, and a squeeze of lime.  I used simple grilled chicken breasts with olive oil, salt and pepper.  Sliced serrano peppers would be lovely here, alas my son doesn’t love the heat from them.  This dish is best eaten on the day it is made.  Enjoy!

Thanks for stopping by Relishing It!

Laurie


Read Full Post »

Peanuty Cold Soba Noodle Salad | Relishing It

I love taking a favorite meal of mine and tweaking it just a bit to create something entirely different.  Equally as delicious, just in a different way.  That’s what I’ve done here with this recipe.  I can’t even count how many times I’ve made this slaw.   I basically suggest it to everyone who asks me for a warm-weather meal idea and they end up loving it.  It’s one of the high points of being a “food blogger”– finding out that one of your favorites has become a favorite of so many other people.

Peanuty Cold Soba Noodle Salad | Relishing It

Peanuty Cold Soba Noodle Salad | Relishing It

Peanuty Cold Soba Noodle Salad | Relishing It

Peanuty Cold Soba Noodle Salad | Relishing It

Sometimes, I want something more filling than just slaw, or more to the point– something hearty to chomp on.  Adding soba noodles to the mix was the perfect solution here, and I love that it’s still accompanied by a ton of vegetables.  The heat is going to crank up here this week, so peanuty cold soba noodles will be on my menu again.  You should make it, too.  Use whatever vegetables you have on hand, it certainly doesn’t have to be this exact combination.  You may find that you need a bit more soy sauce or salt in the sauce when adding soba noodles to the mix.  I re-season after it’s been mixed, so not to overdo it with the salt.  A squeeze of fresh lime is essential when serving.  Hope you enjoy!  And stay cool.

Peanuty Cold Soba Noodle Salad | Relishing It


The Recipe: Peanuty Cold Soba Noodle Salad

(serves 2-3)

Follow this Healthy Asian Peanut Slaw recipe (this time I used broccoli, carrots, red cabbage, cilantro, and radishes)

With Additions Of:

1 bunch soba noodles cooked according to directions, then rinsed with cold water (reserve a bit of cooking water)

scallions, for garnish

black sesame seeds, for garnish

limes

Follow the directions to make the Healthy Asian Peanut Slaw.  Combine the vegetables, sauce, and cold soba noodles together using tongs.  Loosen with a bit of cooking water, if need be.  Taste.  Adjust seasonings, if needed.  I often add a bit more soy or salt when adding soba noodles to the mix.  Squeeze lime juice onto the final mixture and top with peanuts, scallions, cilantro, and black sesame seeds.  Enjoy!

Thanks for stopping by Relishing it!

Laurie


Read Full Post »

Rhubarb Cardamom Custard Pie | Relishing It

The last official day of school has arrived for my little ones, and I’m emotionally all over the place.  My first thought is that I cannot believe another year has slipped through my hands.  The daily hustle-and-bustle clouds how much time is passing, and suddenly the school year is over.  Aanen will be a second grader, while Aria will be a full-time kindergartender– no more half days with my little girl at home.  Ugh…  My second thought is a little less melancholy and a lot more pressing.  What on earth am I going to do to entertain these children all summer long?!  I have a few ideas circling in my head– and I’m sure we’ll have a wonderful time– but still the concern is there.  Swimming, biking, basketball, reading, exploring, and more kid-assisted baking, I’m sure.

Rhubarb Cardamom Custard Pie | Relishing It

Rhubarb Cardamom Custard Pie | Relishing It

Speaking of baking (how’s that for a transition?) the weather has been a bit cooler, so I made this pie especially for my hubby (you all remember his favorite Sour Cream Apple Pie, right?)  This pie is a variation of that masterpiece.  And though I made the pie for him, I did my fair share of helping him eat it.  I’m usually fairly disciplined when it comes to baked goods and I try not to over-indulge.  Apparently this pie was the breaking point and soon I was eating pie for breakfast, followed up with pie for a snack.  I’ll be sure to not make it again for a long time, as apparently I can’t say no to it.

Rhubarb Cardamom Custard Pie | Relishing It

Cardamom and rhubarb is one of my favorite fruit-and-spice combinations.  If you haven’t tried it, do so.  Add more cardamom for a stronger flavor, if you prefer.  I wanted it to be ever-so-subtle, as I really relish the pure taste of rhubarb and I didn’t want that to be lost.  One important factor is to serve the pie cold from the refrigerator.  It’s just so much better that way.  The crust holds up beautifully and still remains flakey and crisp.  It will last for days when covered lightly with plastic wrap.  Enjoy the heck out of this one, friends.

Rhubarb Cardamom Custard Pie | Relishing It

Rhubarb Cardamom Custard Pie | Relishing It

The Recipe: Rhubarb Cardamom Custard Pie

Use 1/2 of this All Butter Pie Crust recipe

For the Rhubarb Cardamom Custard Filling:

1 cup full-fat sour cream

1/2 cup granulated sugar

1 teaspoon kosher salt

3 tablespoons all-purpose flour

1 egg

3 cardamom pods– seeds finely ground using a mortar and pestle (outer shells discarded) or 1/4 teaspoon ground cardamom

2 cups chopped rhubarb,  cut into about 1/4-inch thick pieces

For the Crumble:

1/3 cup granulated sugar

1/3 cup all-purpose flour

1/2 teaspoon cinnamon

1/4 cup cold unsalted butter, cubed

Follow the recipe and instructions  from this recipe to prepare the pie dough.  You will only use 1/2 of the amount.

Preheat the oven to 400°F.

To Make the Crumble Topping:  In a small bowl, stir the dry ingredients together with a  fork.  Then, using that fork, cut the butter into the mixture until it’s crumbly and everything is incorporated into the butter.  Store in the refrigerator until ready to use.

To Make the Rhubarb Cardamom Custard Filling:  Beat together the first 6 ingredients in a medium-sized bowl until smooth.  Then stir in the rhubarb.  Set aside.

Shape the pie dough into a 9-inch pie plate.  Pour the rhubarb cardamom custard filling into the pie.  Bake for 15 minutes.  Then reduce heat to 350°F  and bake for another 30 minutes.  Remove pie from oven and add the crumble mixture evenly to the top of the pie.  Return to oven and increase the heat to 400°F and bake for 10 more minutes.  Remove from oven and let cool completely on a cooling rack.  Cover loosely with plastic wrap and place in the refrigerator.  This pie is best served cold and will keep for days.  Enjoy!

Thanks for stopping by Relishing It!

Laurie


Read Full Post »

Skillet Pizza on the Stovetop with Ramps, Mushrooms, and Smoked Mozzarella | Relishing It

When the weather changes, I find that my methods for cooking change, as well.  I’ve mentioned before that we live in an old Victorian house (110 years old to be exact).  We do not have central air, so we make-do with our window units.  When it’s a scorcher of a day, I generally avoid using the oven because the air conditioners just can’t keep up.  And this happens often during our Minnesota summers.  Honestly, sometimes it’s even too hot for me to stand next to a grill outside.  I’m painting quite a lovely picture of the hot mess that is me during the summer, aren’t I?  I’m not a fan of the heat, but I try to cope.

Skillet Pizza on the Stovetop with Ramps, Mushrooms, and Smoked Mozzarella | Relishing It

Skillet Pizza on the Stovetop with Ramps, Mushrooms, and Smoked Mozzarella | Relishing It

Skillet Pizza on the Stovetop with Ramps, Mushrooms, and Smoked Mozzarella | Relishing It

I love summer pizza, but since I’m unwilling to endure the added heat of firing up my pizza stone– at 500°F for thirty plus minutes– I turn to this skillet method.  A pizza loaded with fresh herbs, fresh mozzarella and all of those fresh tomatoes is my thing.   I used ramps, mushrooms, ricotta, and smoked mozzarella for this version, but you can use whatever you prefer.  If you can get your hands on some morel mushrooms, please do that and think of me when you eat it.  Please.  I’m very particular about my pizza crust.  If it’s not perfect, it’s not worth my time.  I like a nice crunch on the outside, tender on the inside (NOT doughy), and a lovely deep flavor throughout.  Over the years of making homemade pizza I learned something about myself– the longer the pizza dough hangs out it my fridge, the more I like it.  So, I never make pizza dough the day I want to eat it, and rarely even the day before.  I make it a few days prior and the flavor develops beautifully.  The texture is spot on, as well.  It’s loaded with air pockets from the yeast.

Skillet Pizza on the Stovetop with Ramps, Mushrooms, and Smoked Mozzarella | Relishing It

Skillet Pizza on the Stovetop with Ramps, Mushrooms, and Smoked Mozzarella | Relishing It

Using a cast-iron skillet works wonderfully for making pizza.  Use whatever size you have.  I have an old 10-inch.  Coat it with olive oil and let it heat up.  Then place the rolled-out dough in it.  Let it cook just a bit until it has a light golden color.  Add more olive oil, if necessary and flip it over.  Add the toppings and cover with a lid.  Cook over medium-high heat until the bottom of the crust is the color that you desire.  I like mine a little on the dark side.  When you get there, place the skillet (no lid) directly under the broiler for a few minutes to darken up the cheese (this will go quickly). Watch carefully, as broilers tend to be finicky.  You may even need to move the pan around for even browning.   Remove when pizza is a deep golden brown.  The entire process takes no time at all and you’re left with a delicious pizza that has an incredible crust.  Speaking of the crust– I jump back and forth from using two favorite recipes.  This one, which I’ve previously blogged about and the one I’m sharing today.  They are both fantastic.  Whichever one you choose,  just try to make it a few days in advance– it really does make a difference.  I like the crust recipe I’m sharing today because it fits wonderfully into a gallon-sized ice cream bucket and because it’s ridiculously easy to mix up.  Dump, stir, done.  You may not use the whole thing in one sitting, but you can either use it within two weeks, or even freeze it in plastic bags.  Enjoy the pizza!

Skillet Pizza on the Stovetop with Ramps, Mushrooms, and Smoked Mozzarella | Relishing It

The Recipe: Skillet Pizza on the Stovetop with Ramps, Mushrooms, and Smoked Mozzarella

(serves 1-2)

Pizza Dough 

(makes enough dough for 3-4 12-inch pizzas and will keep for 2 weeks in the refrigerator)

1 1/2 cups plus 4 teaspoons  (about 355 grams) water heated to 100°F

1/2 tablespoon granulated yeast

3/4 tablespoon kosher salt

3 tablespoons extra-virgin olive oil

3 3/4 cups (540 grams) all-purpose flour

Skillet Pizza:

(using a 10-inch cast-iron skillet)

3 ounces pizza dough

2 ounces smoked mozzarella, grated

1-2 ramps (or scallions) chopped

6 crimini mushrooms, thickly sliced (or Morels!)

a few dollops of ricotta cheese

1 garlic clove, thinly sliced

extra-virgin olive oil

Begin a few days in advance by preparing the pizza dough.  In a gallon-sized ice cream bucket (or anything of that size that has a non-airtight lid) add the heated water, yeast, salt, and olive oil.  Use a Danish dough hook or a wooden spoon to mix everything together.  Then add the flour and give it a really good stir using the hook to really incorporate everything.  You’ll want all of the flour to be wet.  The mixture will look shaggy.  Cover with the lid (I use a nail to poke a tiny hole in the top of mine (this lets the gases escape when it’s refrigerated).  Let it rise at room temperature for two hours.  Do not ever punch this dough down.  Technically, the dough could be used at this point.  But, this particular dough works better when cold.  And tastes a whole lot better after a night or two in the refrigerator.

When ready to make a skillet pizza, remove some dough from the refrigerator and let it warm up for a few minutes, as it is easier to work with.  Dust some flour on the counter and a bit on the dough (don’t be shy with the flour).  Form a ball.  Roll it out to the size of your skillet (if it doesn’t roll easily, just let it rest for a few minutes). Coat the skillet with a bit of olive oil and heat it over medium-high heat.  Shake off any excess flour from the pizza dough and place it in the skillet.  Cook for 1-2 minutes, then flip it, adding more olive oil if necessary.  The olive oil gives the crust a nice crunch to it.  Immediately place the sliced garlic clove, a heavy drizzle of olive oil, ramps, ricotta cheese, mushroom, and smoked mozzarella on top of the pizza.  Cover with a lid (to help it melt) and cook for about 5 more minutes, or until the crust is a deep golden brown.  Then remove it from the stove and place it directly under the broiler (no lid) for a few minutes until the cheese is your desired color.  Move the pan around, if necessary.  Remove from the oven, drizzle with olive oil and a sprinkle of good sea salt.  Enjoy!

Pizza Dough adapted from Artisan Pizza and Flatbread in Five Minutes a Day

Thanks for stopping by Relishing It!

Laurie


Read Full Post »