Feeds:
Posts
Comments

Posts Tagged ‘Spring’

Rhubarb Cardamom Custard Pie | Relishing It

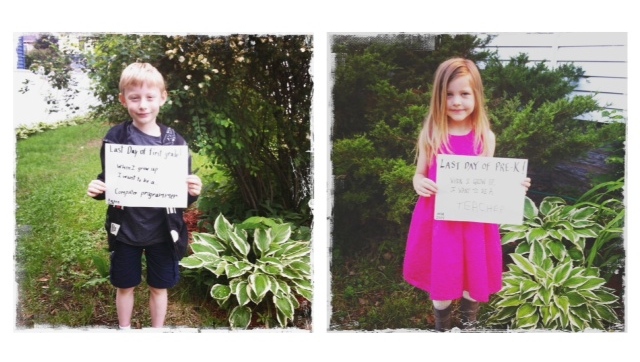
The last official day of school has arrived for my little ones, and I’m emotionally all over the place.  My first thought is that I cannot believe another year has slipped through my hands.  The daily hustle-and-bustle clouds how much time is passing, and suddenly the school year is over.  Aanen will be a second grader, while Aria will be a full-time kindergartender– no more half days with my little girl at home.  Ugh…  My second thought is a little less melancholy and a lot more pressing.  What on earth am I going to do to entertain these children all summer long?!  I have a few ideas circling in my head– and I’m sure we’ll have a wonderful time– but still the concern is there.  Swimming, biking, basketball, reading, exploring, and more kid-assisted baking, I’m sure.

Rhubarb Cardamom Custard Pie | Relishing It

Rhubarb Cardamom Custard Pie | Relishing It

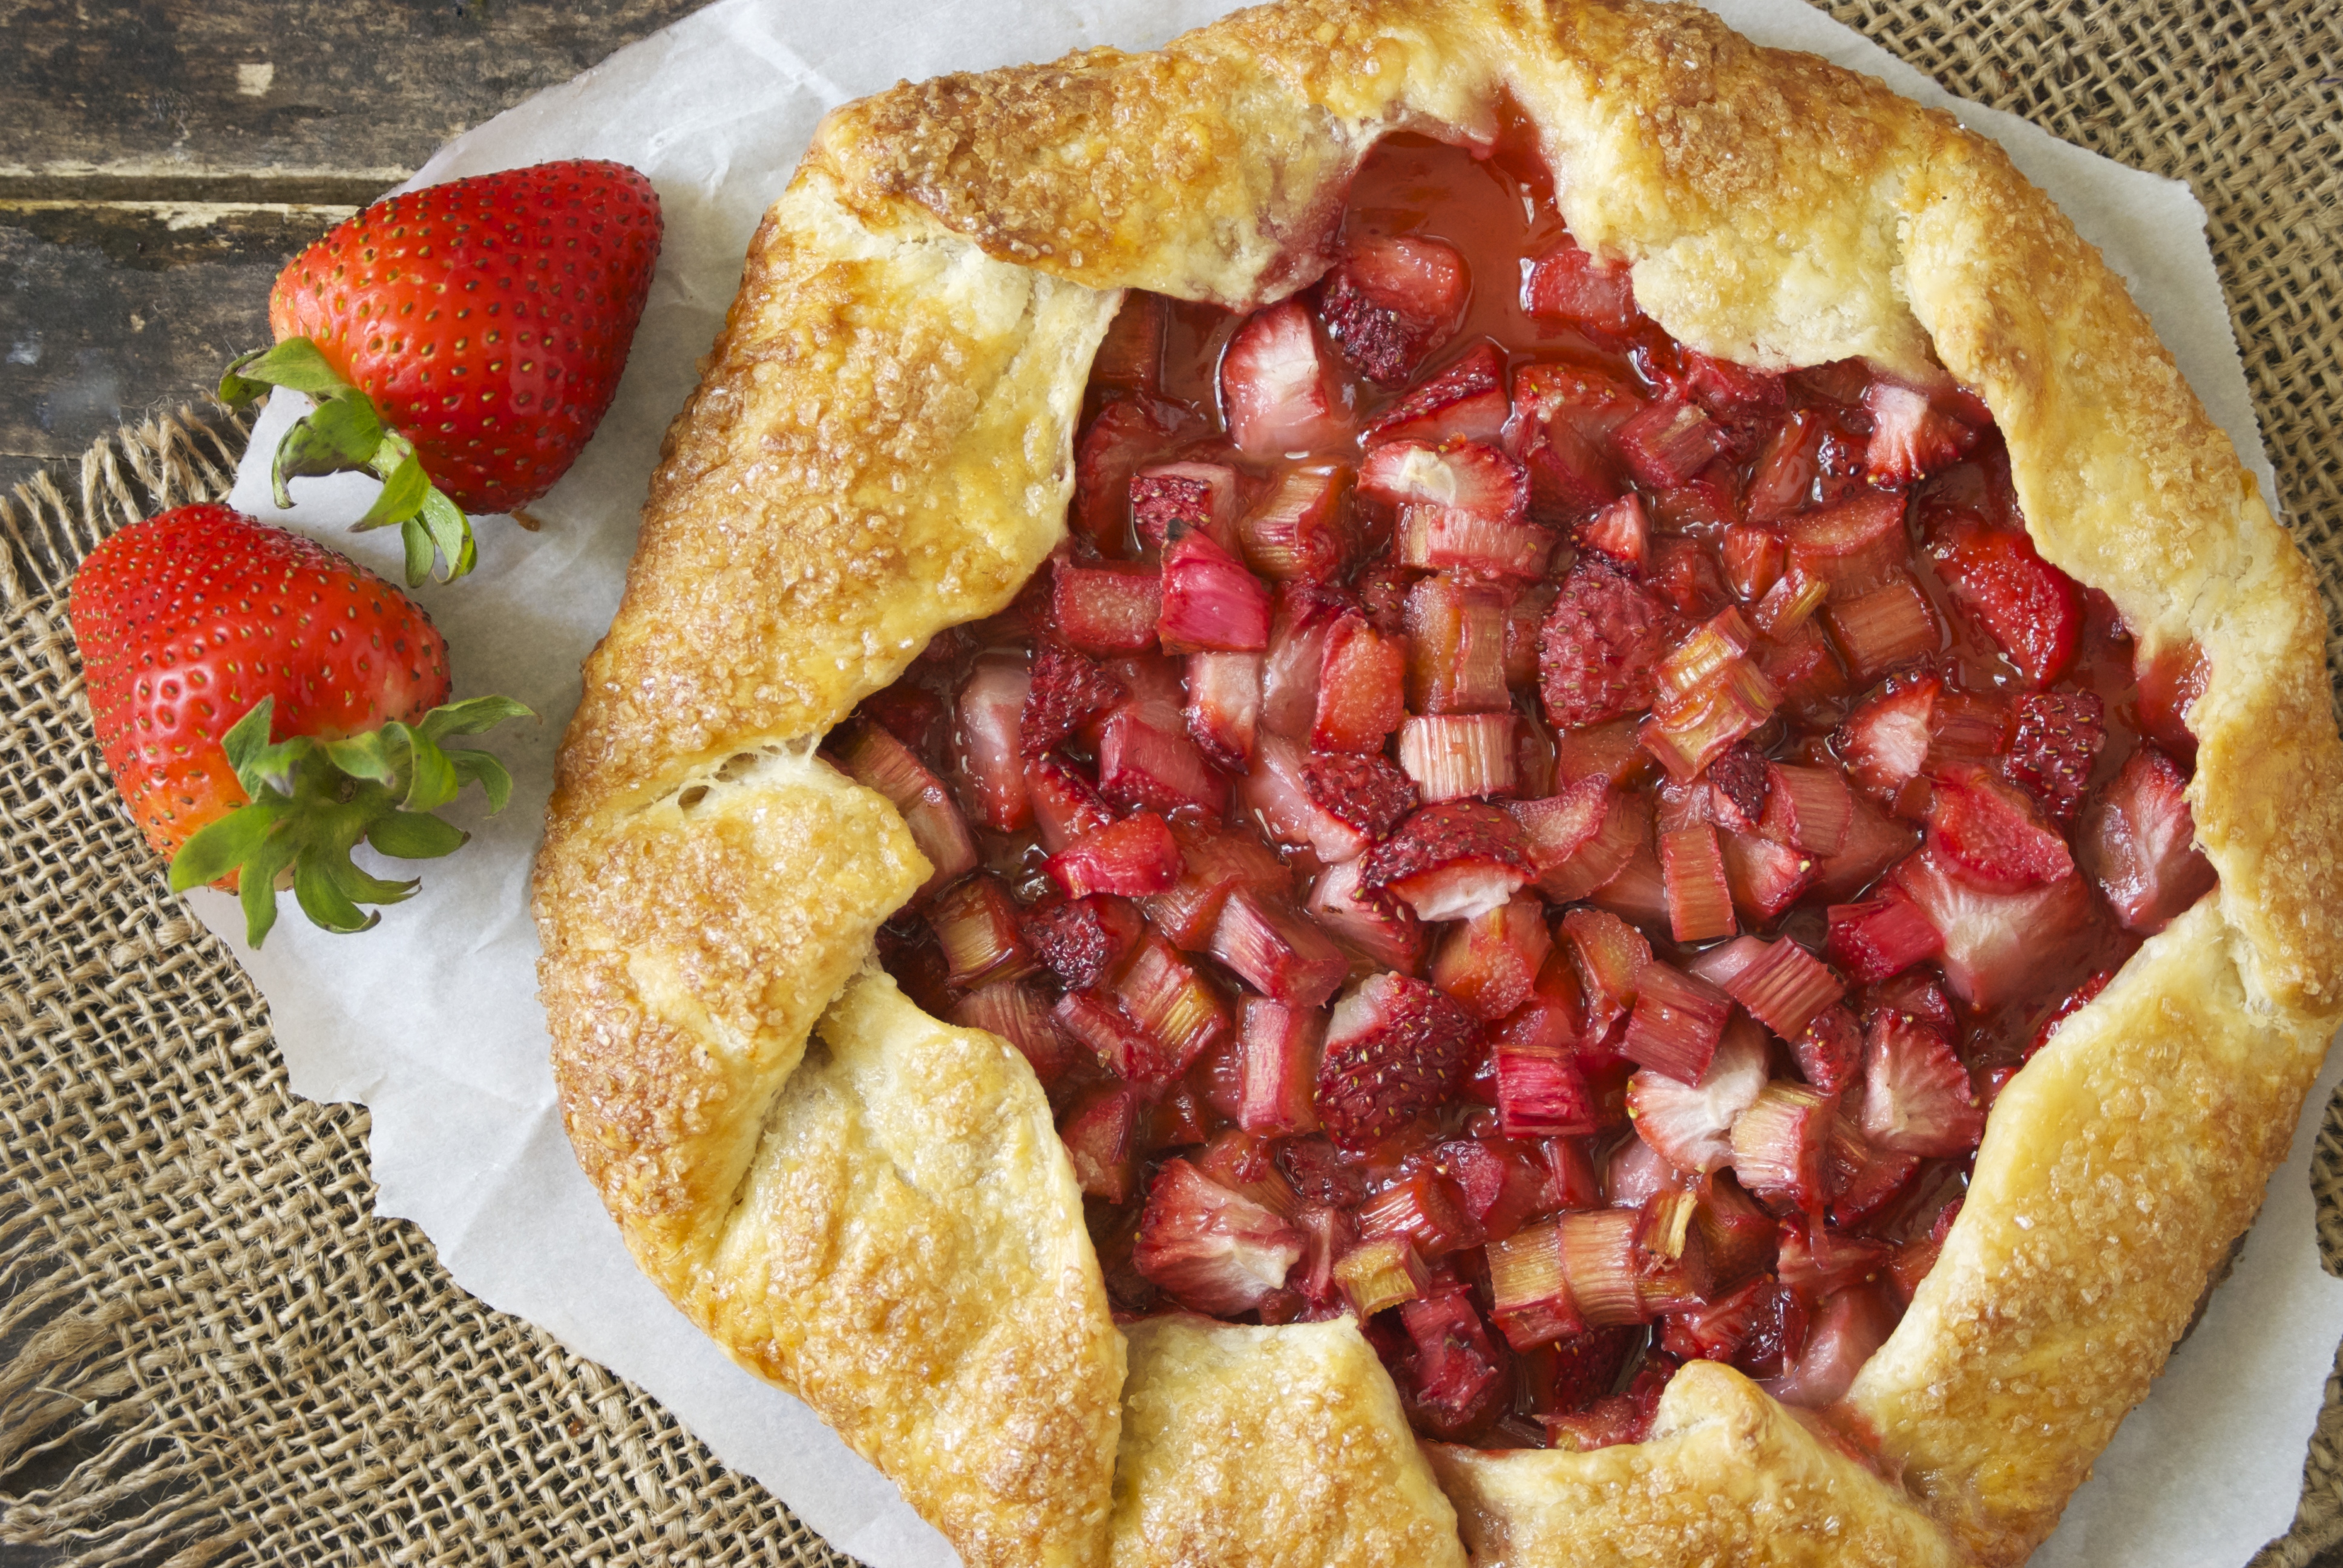
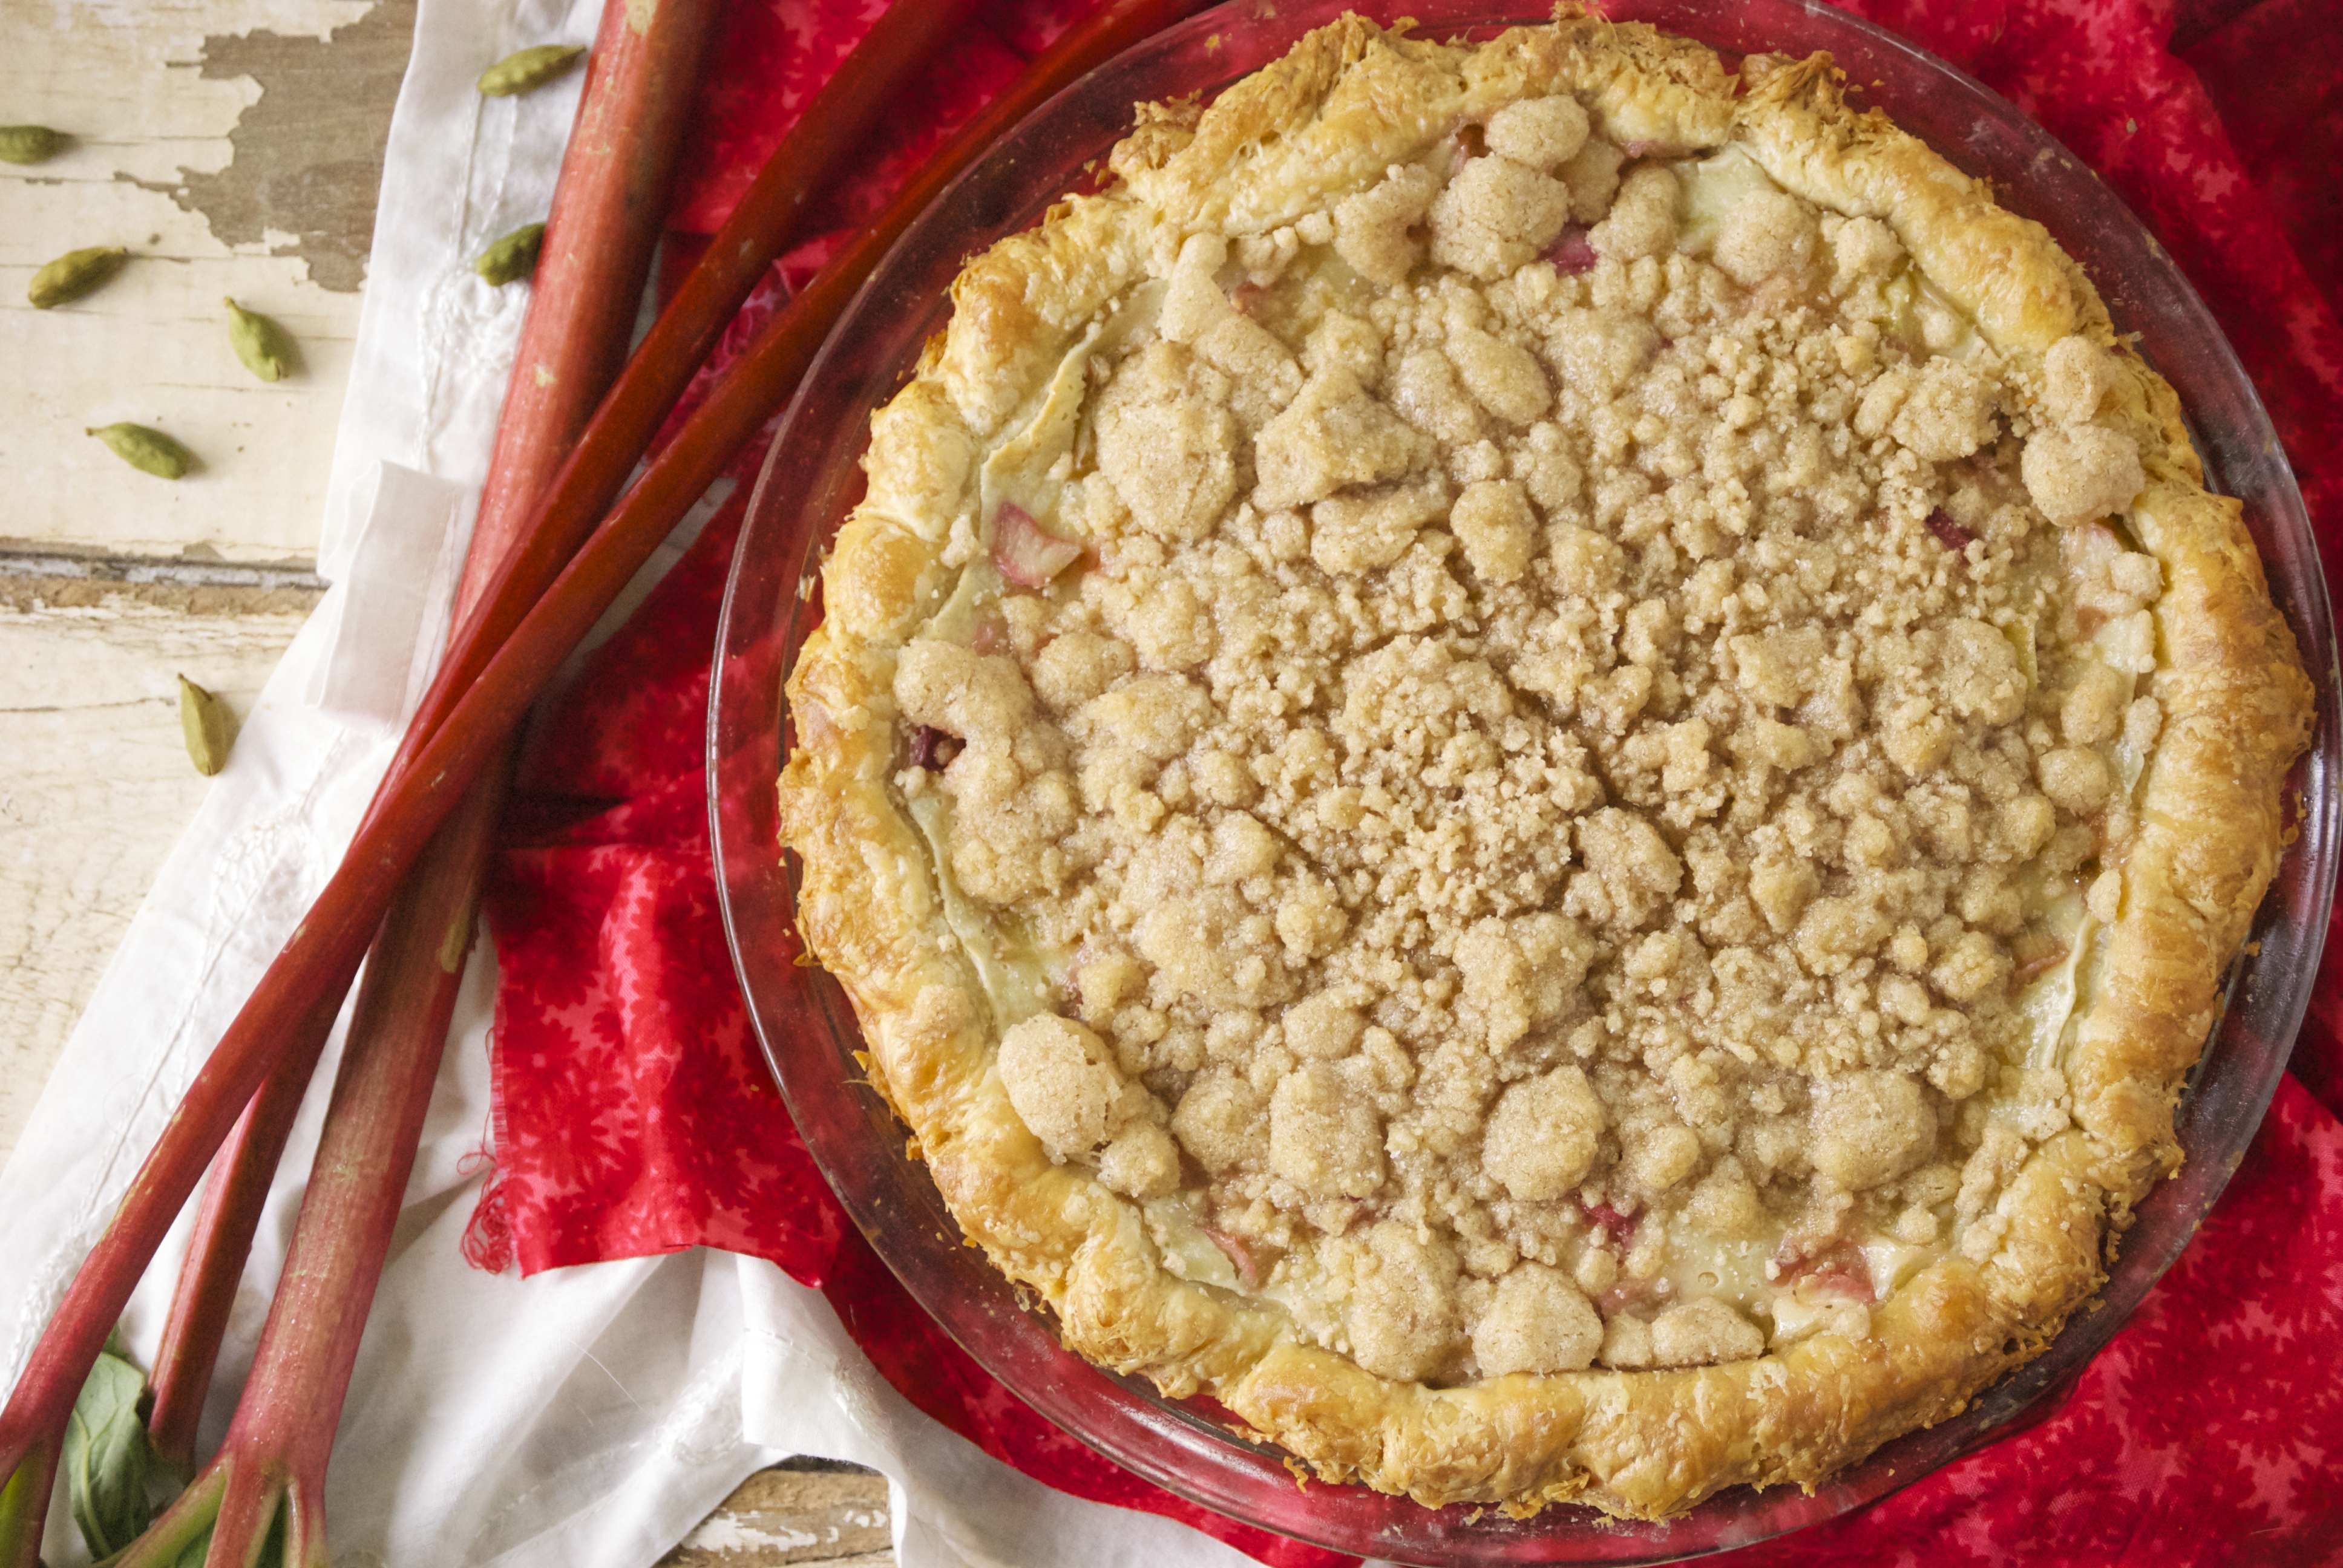
Speaking of baking (how’s that for a transition?) the weather has been a bit cooler, so I made this pie especially for my hubby (you all remember his favorite Sour Cream Apple Pie, right?)  This pie is a variation of that masterpiece.  And though I made the pie for him, I did my fair share of helping him eat it.  I’m usually fairly disciplined when it comes to baked goods and I try not to over-indulge.  Apparently this pie was the breaking point and soon I was eating pie for breakfast, followed up with pie for a snack.  I’ll be sure to not make it again for a long time, as apparently I can’t say no to it.

Rhubarb Cardamom Custard Pie | Relishing It

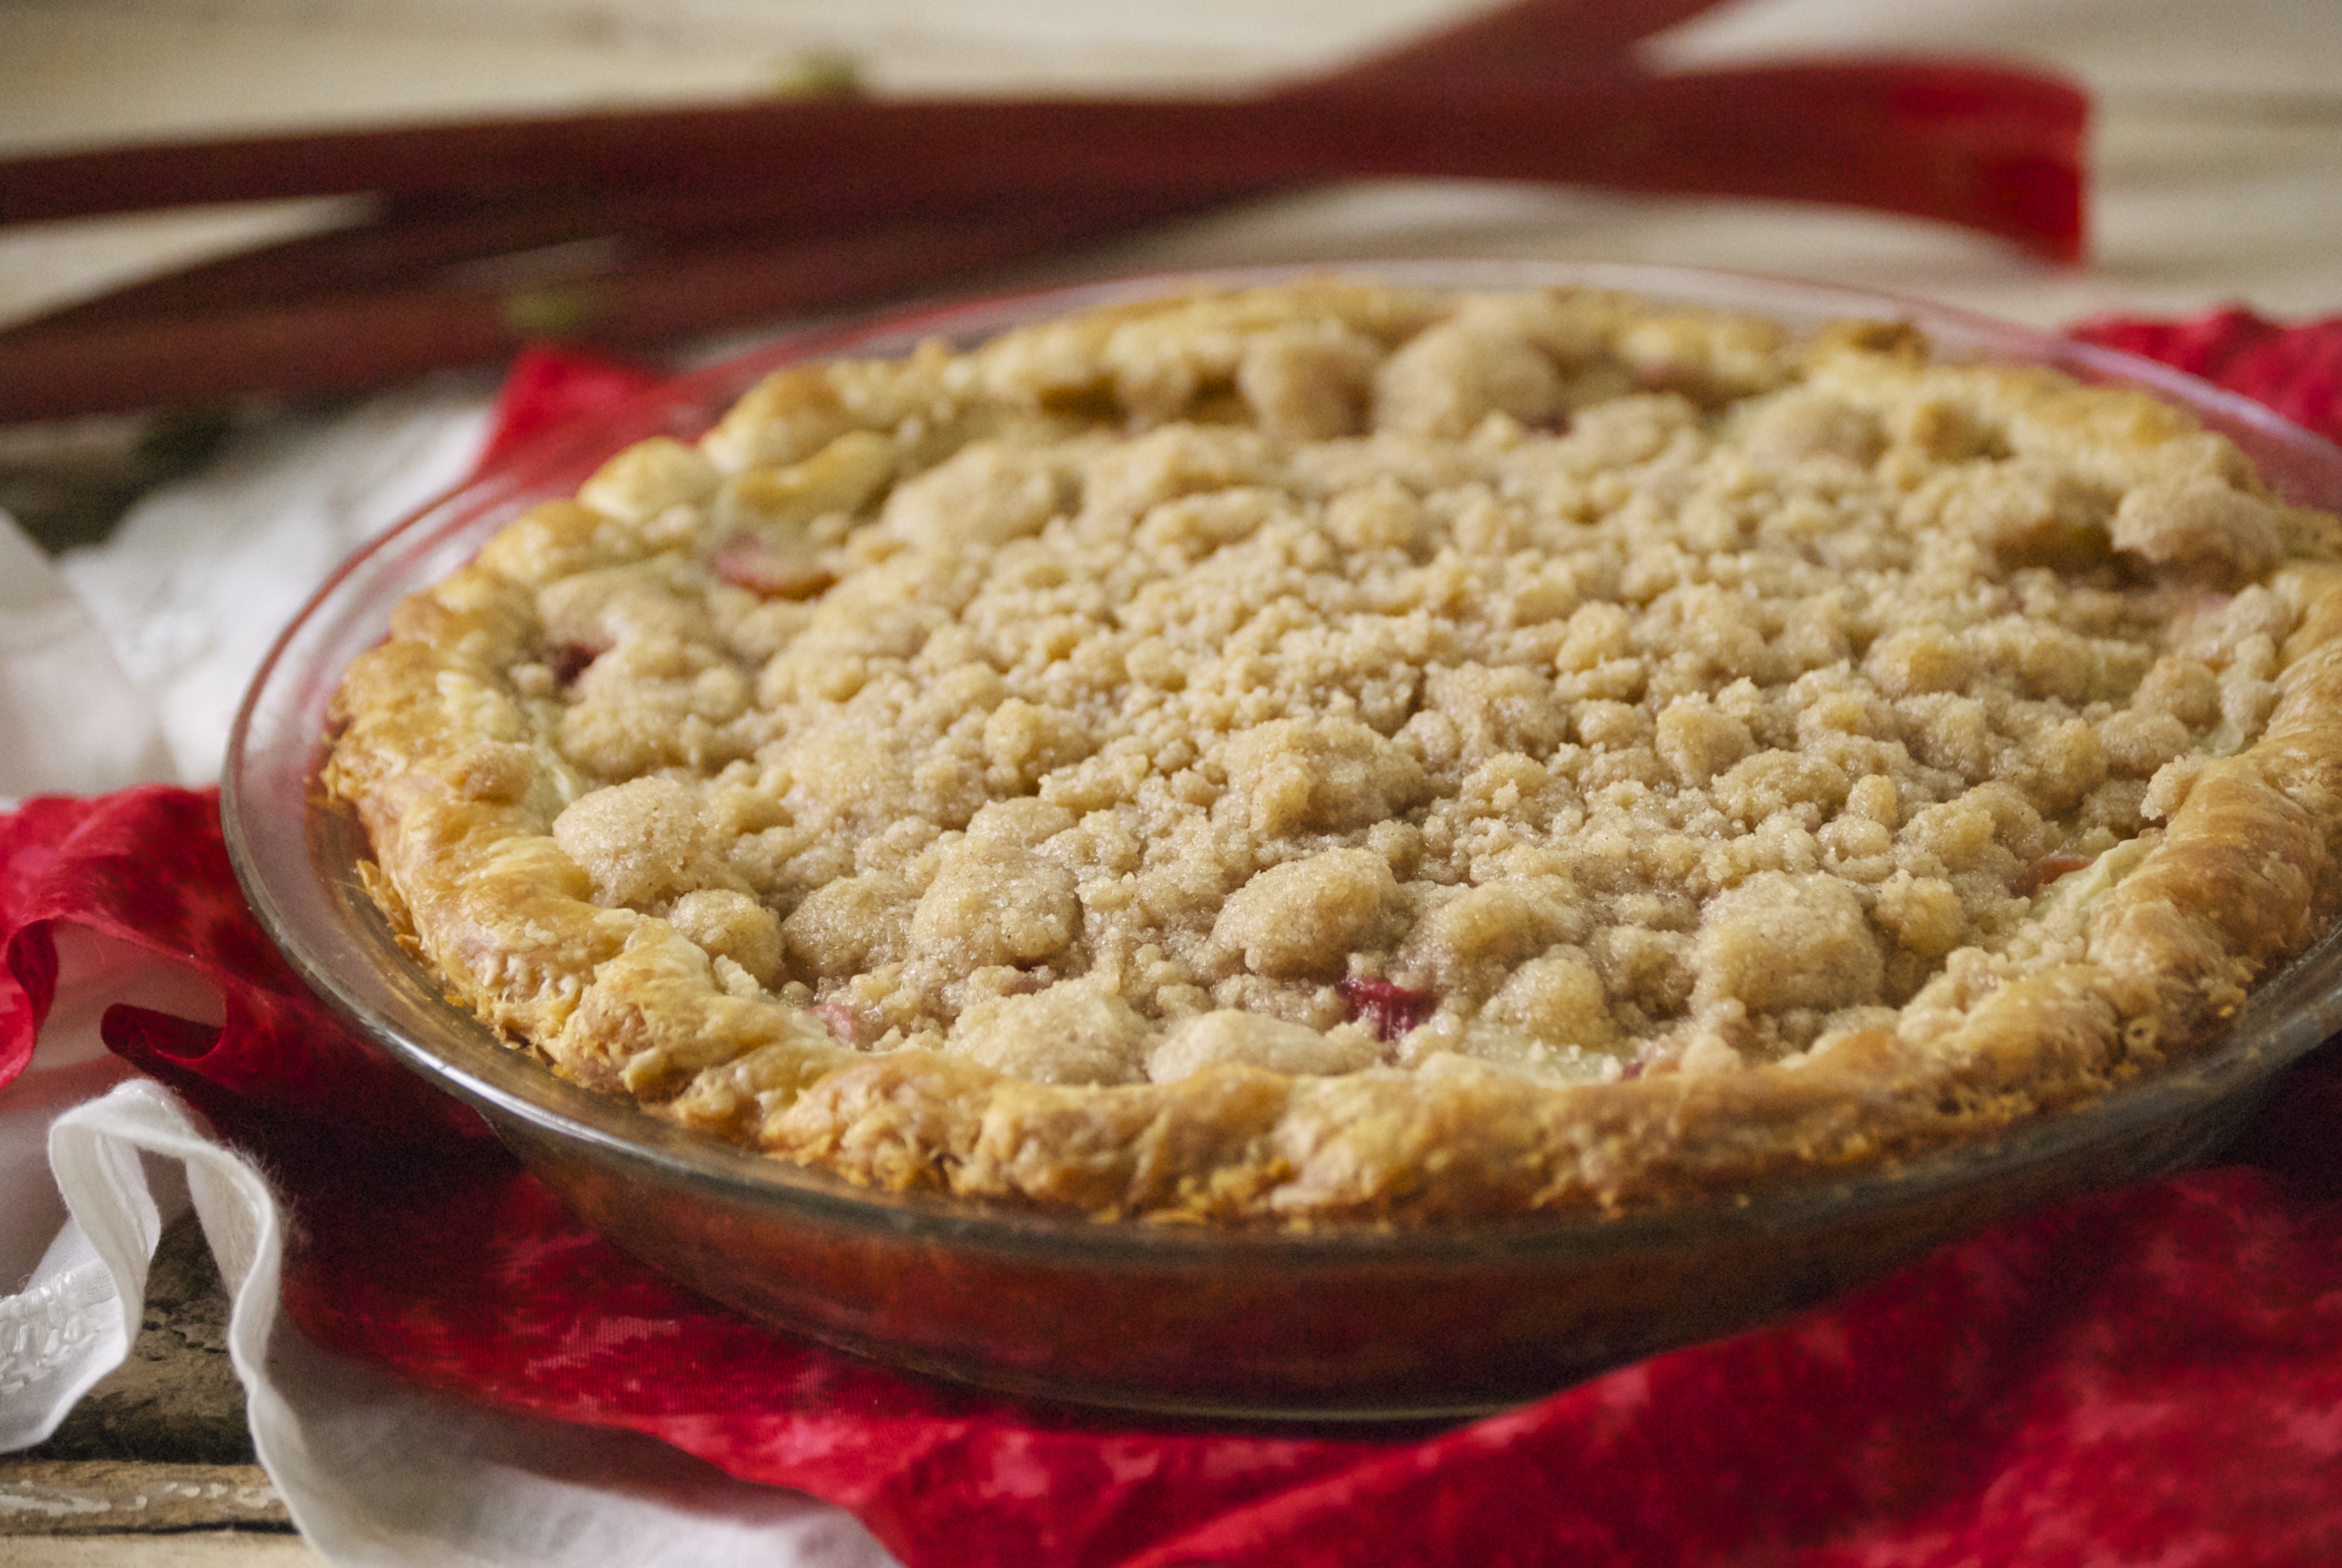
Cardamom and rhubarb is one of my favorite fruit-and-spice combinations.  If you haven’t tried it, do so.  Add more cardamom for a stronger flavor, if you prefer.  I wanted it to be ever-so-subtle, as I really relish the pure taste of rhubarb and I didn’t want that to be lost.  One important factor is to serve the pie cold from the refrigerator.  It’s just so much better that way.  The crust holds up beautifully and still remains flakey and crisp.  It will last for days when covered lightly with plastic wrap.  Enjoy the heck out of this one, friends.

Rhubarb Cardamom Custard Pie | Relishing It

Rhubarb Cardamom Custard Pie | Relishing It

The Recipe: Rhubarb Cardamom Custard Pie

Use 1/2 of this All Butter Pie Crust recipe

For the Rhubarb Cardamom Custard Filling:

1 cup full-fat sour cream

1/2 cup granulated sugar

1 teaspoon kosher salt

3 tablespoons all-purpose flour

1 egg

3 cardamom pods– seeds finely ground using a mortar and pestle (outer shells discarded) or 1/4 teaspoon ground cardamom

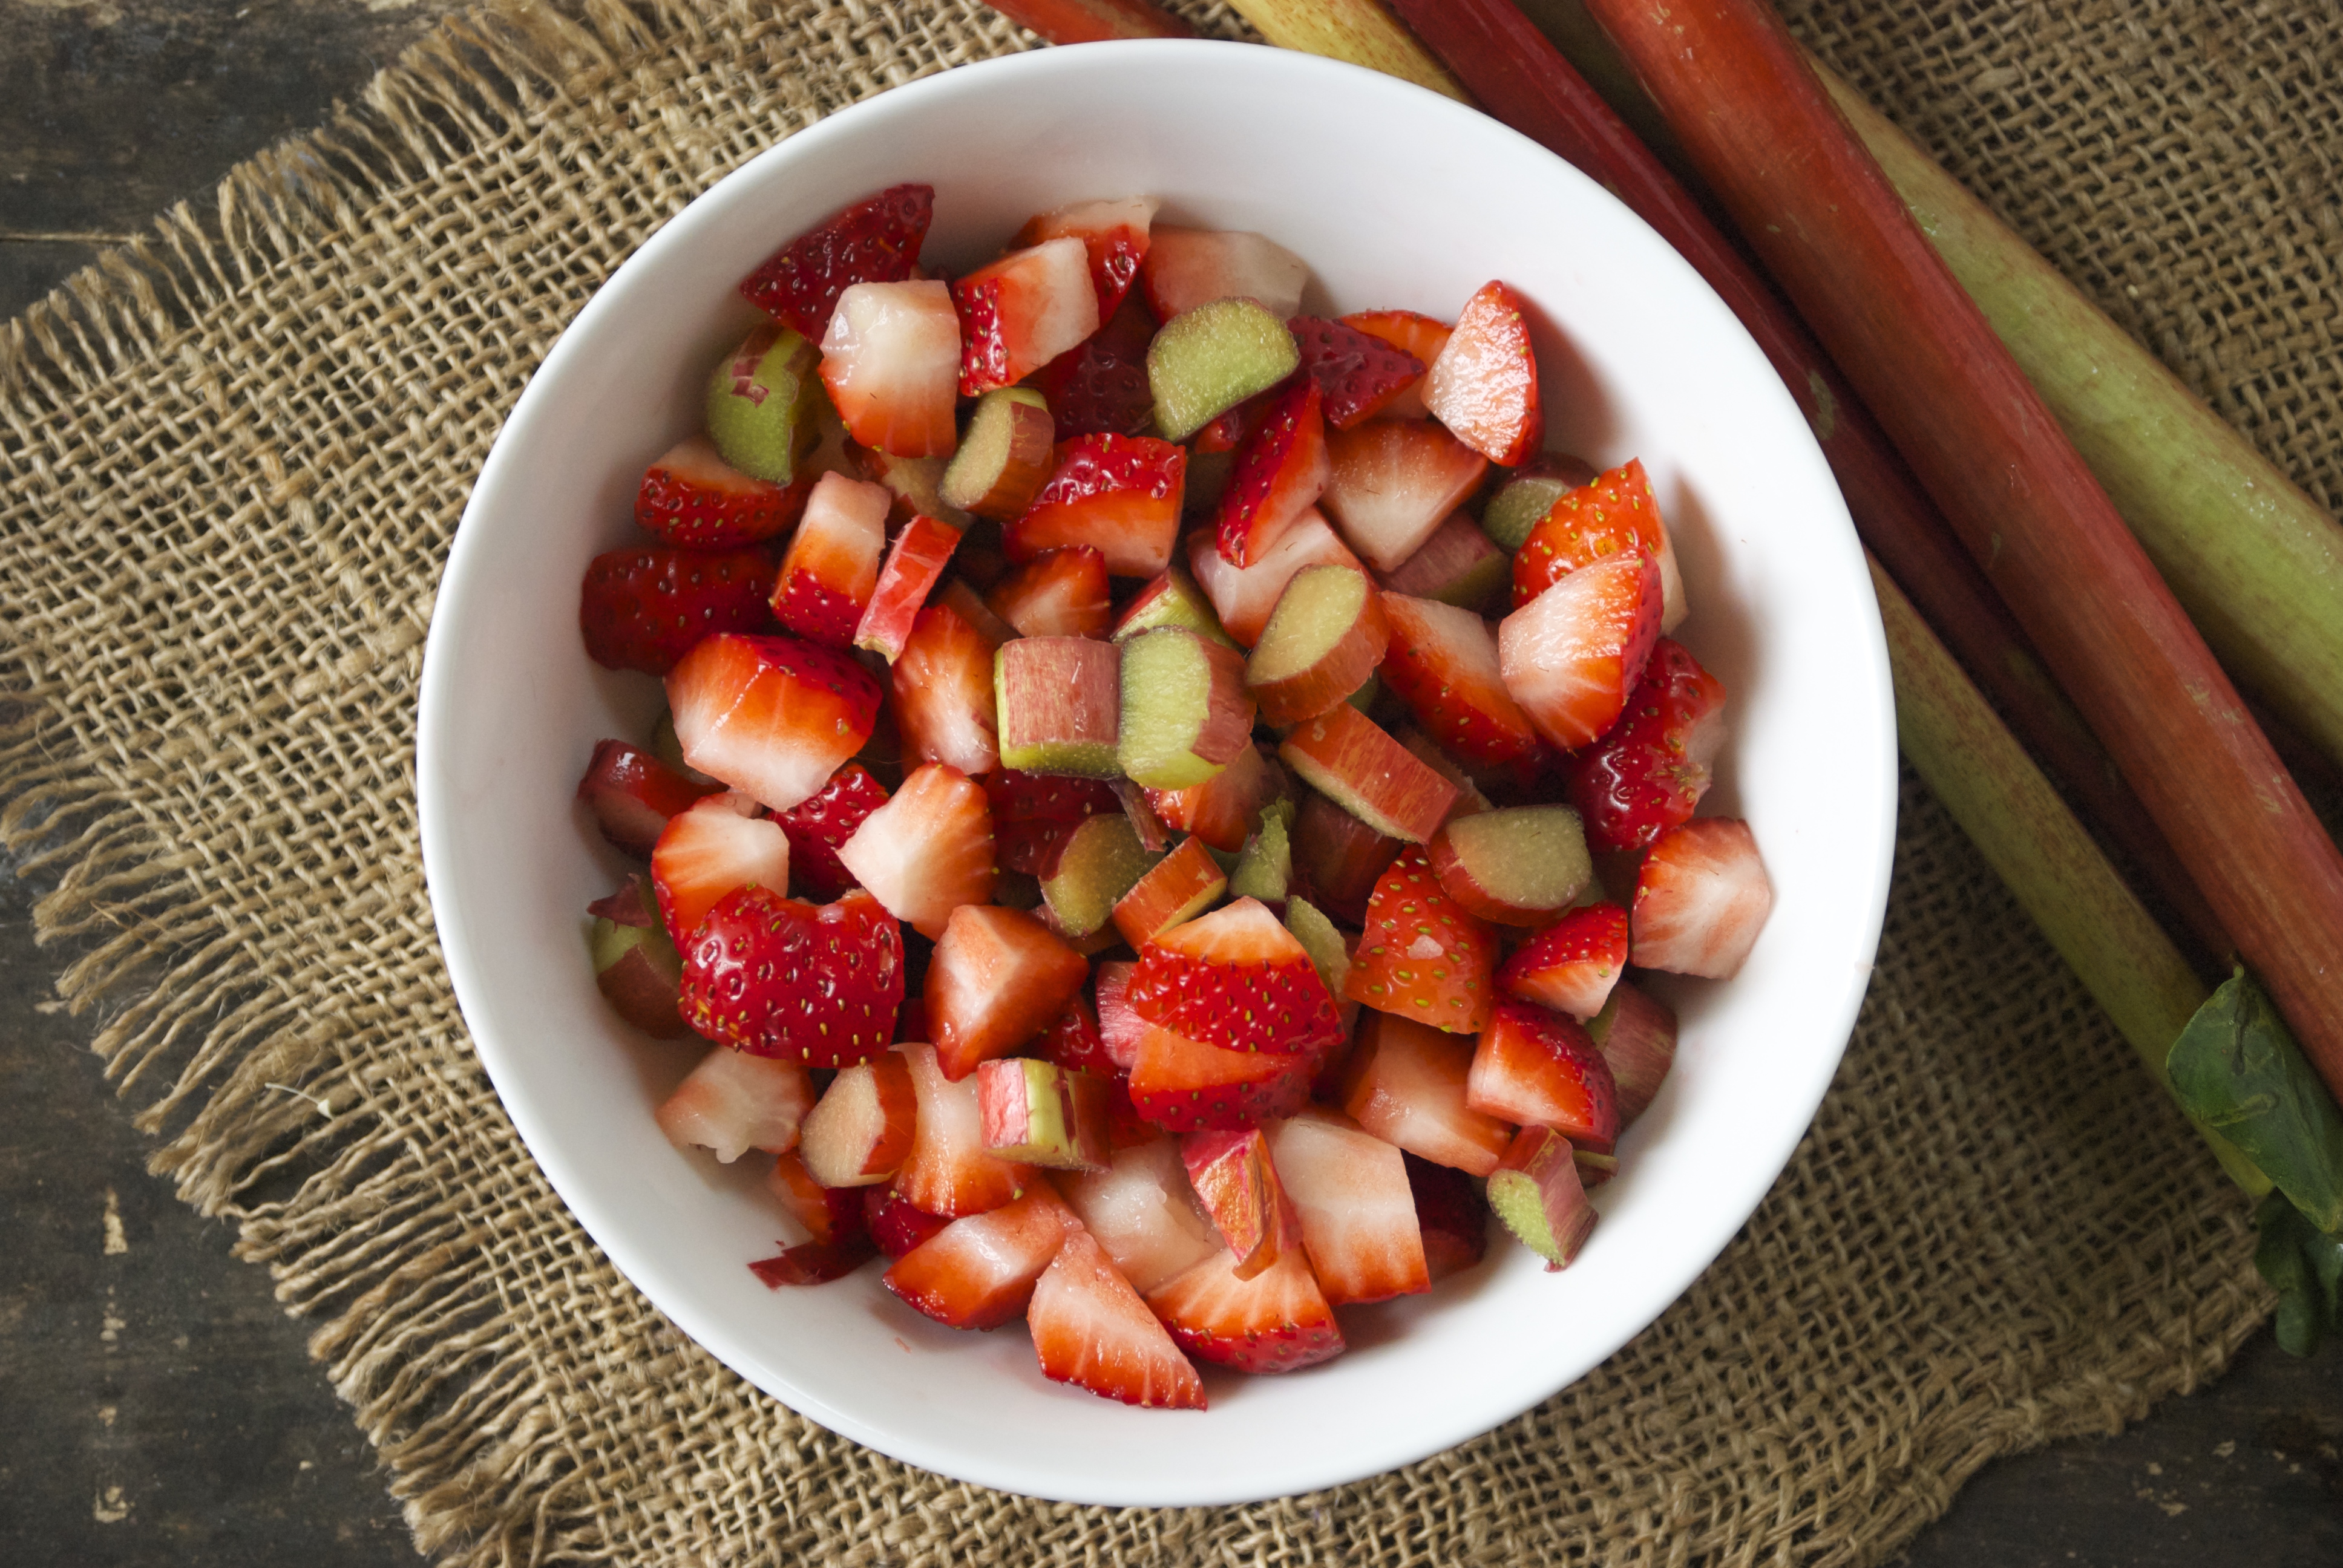
2 cups chopped rhubarb,  cut into about 1/4-inch thick pieces

For the Crumble:

1/3 cup granulated sugar

1/3 cup all-purpose flour

1/2 teaspoon cinnamon

1/4 cup cold unsalted butter, cubed

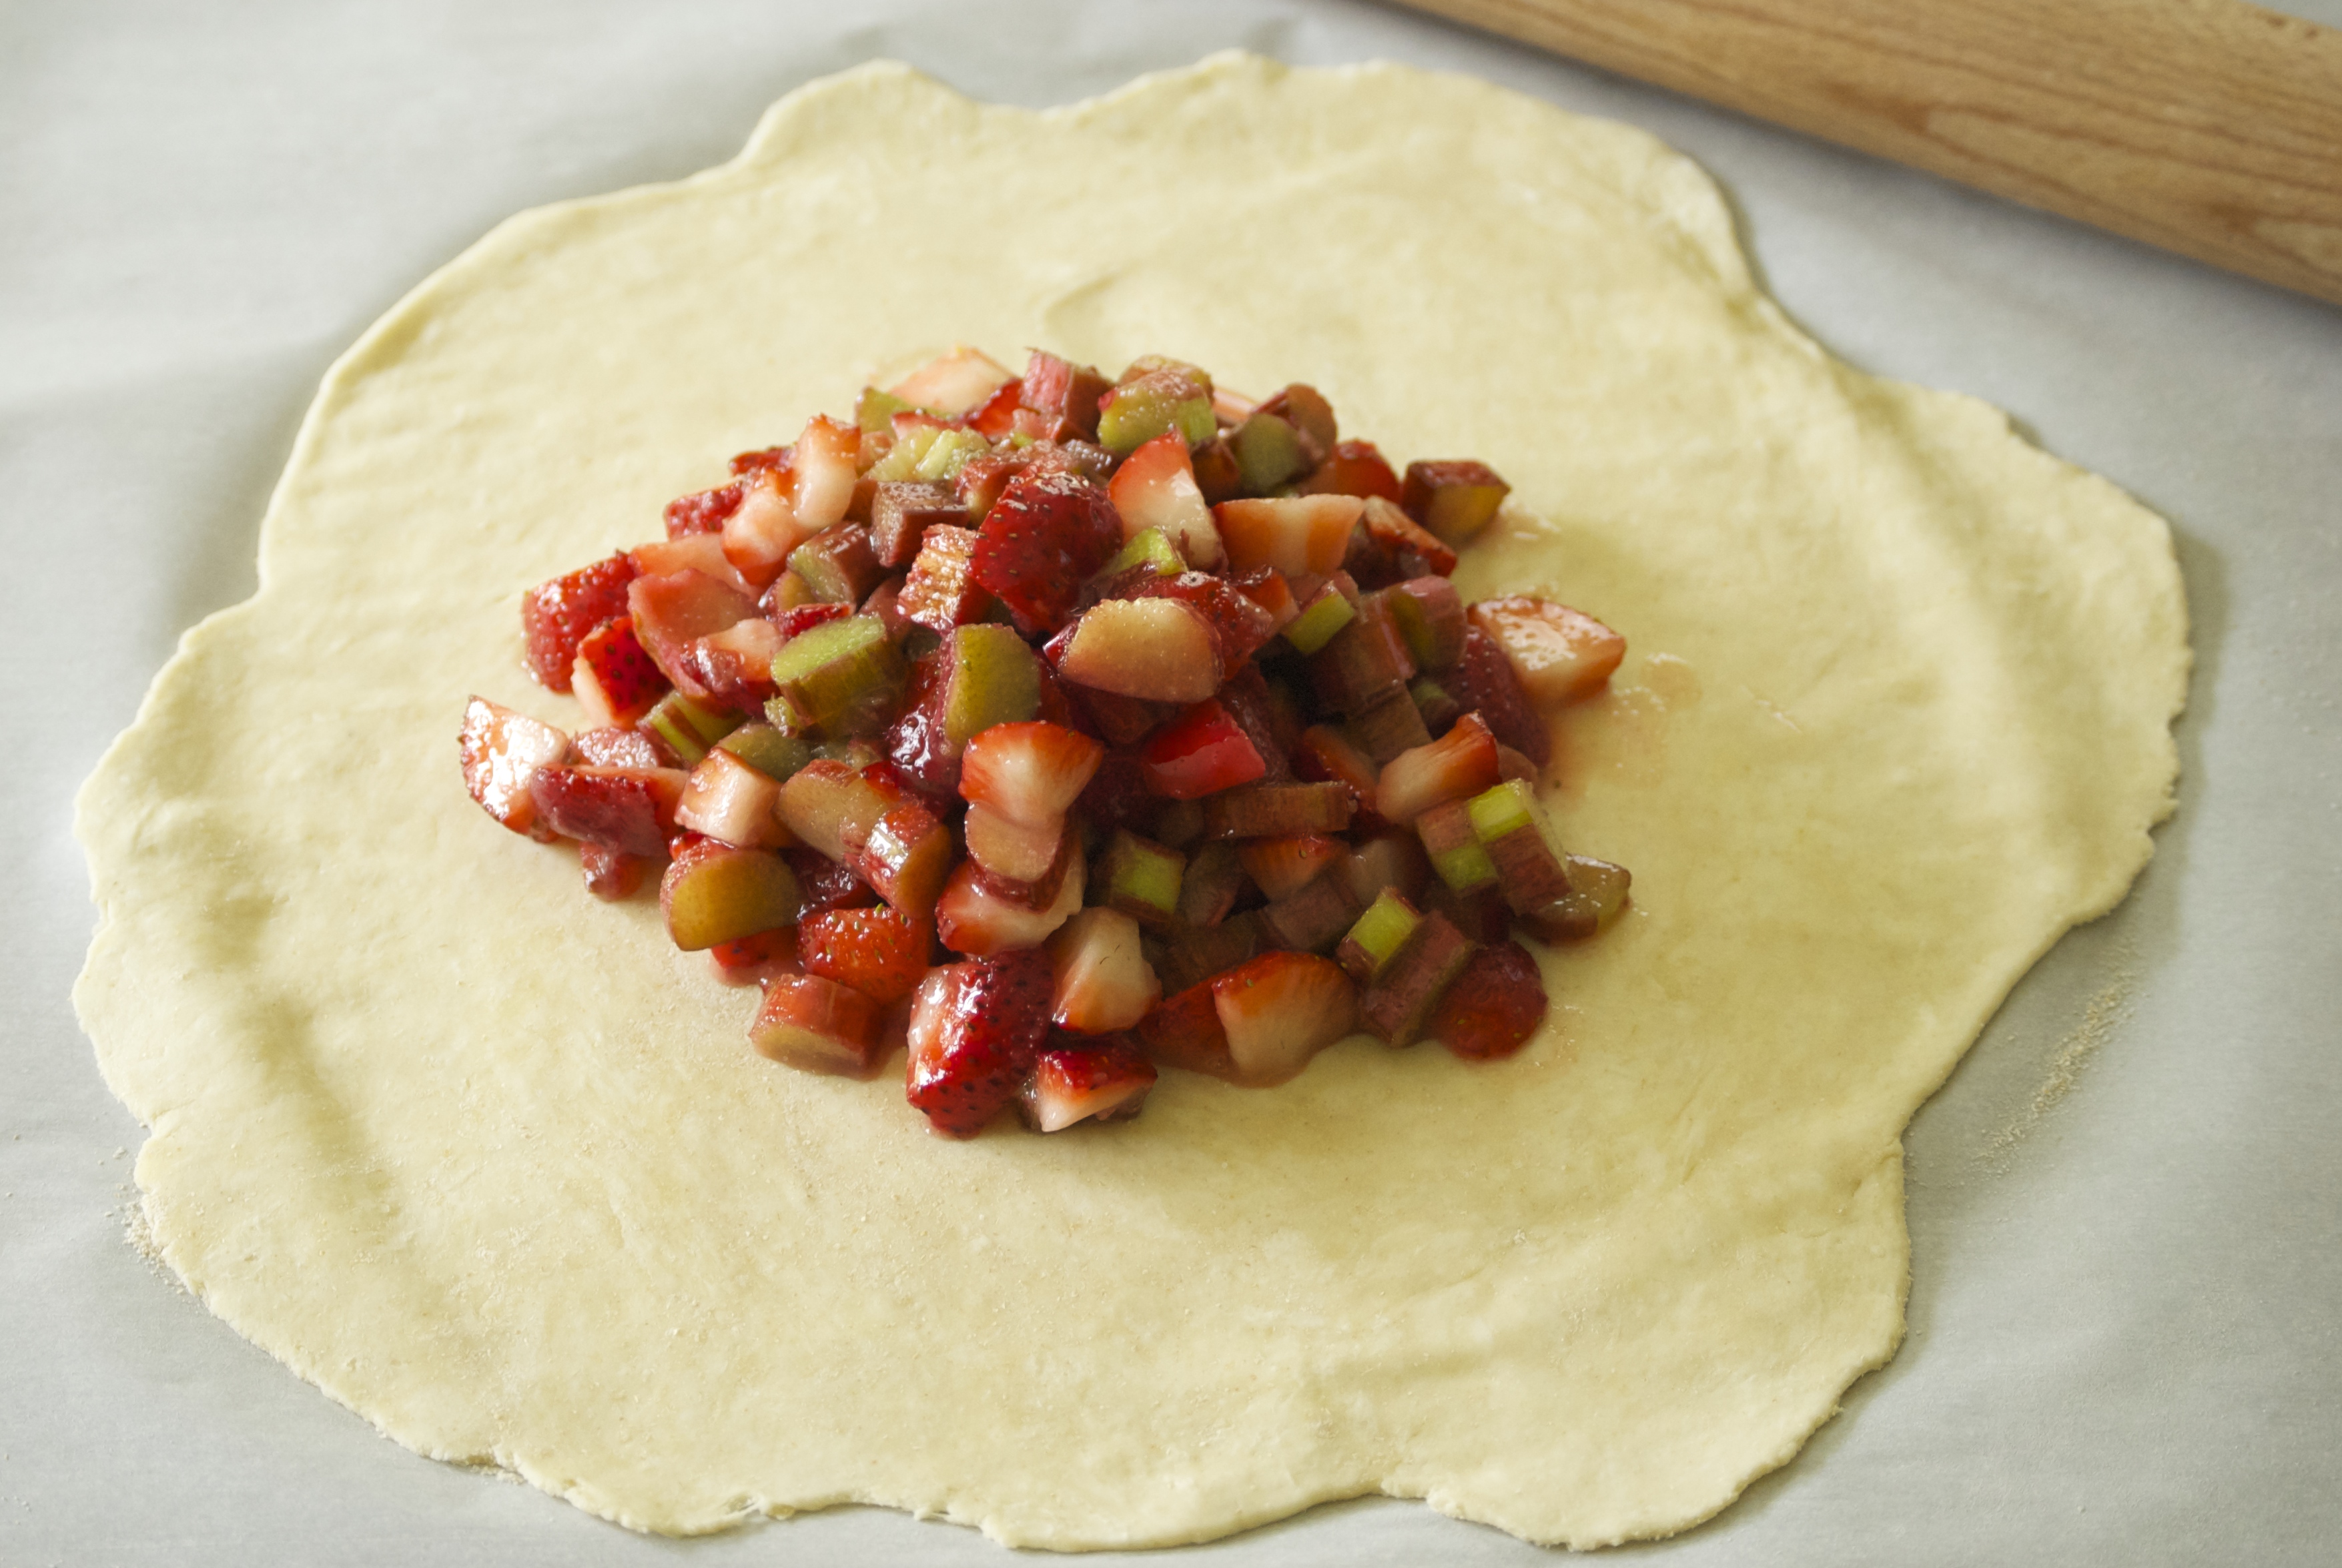
Follow the recipe and instructions  from this recipe to prepare the pie dough.  You will only use 1/2 of the amount.

Preheat the oven to 400°F.

To Make the Crumble Topping:  In a small bowl, stir the dry ingredients together with a  fork.  Then, using that fork, cut the butter into the mixture until it’s crumbly and everything is incorporated into the butter.  Store in the refrigerator until ready to use.

To Make the Rhubarb Cardamom Custard Filling:  Beat together the first 6 ingredients in a medium-sized bowl until smooth.  Then stir in the rhubarb.  Set aside.

Shape the pie dough into a 9-inch pie plate.  Pour the rhubarb cardamom custard filling into the pie.  Bake for 15 minutes.  Then reduce heat to 350°F  and bake for another 30 minutes.  Remove pie from oven and add the crumble mixture evenly to the top of the pie.  Return to oven and increase the heat to 400°F and bake for 10 more minutes.  Remove from oven and let cool completely on a cooling rack.  Cover loosely with plastic wrap and place in the refrigerator.  This pie is best served cold and will keep for days.  Enjoy!

Thanks for stopping by Relishing It!

Laurie


Read Full Post »


Rhubarb and Strawberry Galette | Relishing It

If you’re a regular visitor to my little corner of the internet, today’s recipe will come as no surprise.  But for those of you new to Relishing It, witness my obsession with galettes. Sweet or savory, I love a good galette.  They’re so versitile, tasty, and just gorgeous.  Since we’re rolling right into Spring/Summer and there’s so much wonderful fruit, that means that we are rolling right into galette season, too.

Rhubarb and Strawberry Galette | Relishing It

Rhubarb and Strawberry Galette | Relishing It

I spent the better part of a recent rainy afternoon stocking my freezer with homemade pie dough, so I have it at the ready whenever I get the inclination to whip up a galette.  Having the pie dough at my disposal makes things a bit easier.  Not that making it is difficult– it isn’t.  It takes less than 5  minutes to make a batch of pie dough.  No lie.  And the galette itself is almost foolproof.  Even the imperfections give it a rustic look that I love.

Rhubarb and Strawberry Galette | Relishing It

Rhubarb and Strawberry Galette | Relishing It

Being a food blogger, there is a certain amount of self-promotion on social media that you have to do in order to tell people that “Hey, I wrote a post and it’s worth reading”.   It’s something that in the beginning of blogging feels silly and awkward and then 3 years later, you don’t give it another thought.  It’s all part of the process and I get that.  You want to convey how wonderful and delicious something is, without sounding like a grand-standing braggert.  So, with this in mind– when I tell you I make killer galettes, I mean it.  Really.  They are so damn good that I wish I could eat one everyday for every meal.  There I said it.  I’m a braggert now.

Rhubarb and Strawberry Galette | Relishing It

The key is the crust. It’s buttery and flakey…. and buttery. Did I mention that it’s buttery? It has a wonderful crunch and the right amount of tenderness.  And it comes out perfect every single time. No guess work. Just follow the recipe and directions. Use frozen, grated butter– it never disappoints. In this version I wanted to use some delicious Spring rhubarb.  I generally am a straight-up rhubarb gal, but my family loves strawberry with it.  They work well together.  I made sure to not sweeten it too much, as I still love the tartness from the rhubarb.  I think this galette reaches the perfect balance.  Not cloyingly sweet, and not too tart.  Perfection.  Give it a try for yourself and make sure to share.

Rhubarb and Strawberry Galette | Relishing It

The Recipe: Rhubarb and Strawberry Galette

1/2 of this recipe for All Butter Pie Crust

1 cup diced red rhubarb

1 cup diced fresh strawberries

1/3 cup granulated sugar

1 tablespoon corn starch

pinch of kosher salt

1 egg mixed with 1 teaspoon water, for egg wash

2 tablespoons turbinado or demerara sugar, for sprinkling (or any coarse sugar)

Follow the recipe and directions for the All Butter Pie Crust.  You will only use half of the recipe, but make the entire amount.  The other half will keep in the freezer until you are ready to use it.  Thaw in the refrigerator the night before use.

Preheat the oven to 375 °F.  Place the oven rack in the middle position.  Have a baking sheet ready for the galette.

In a medium-sized bowl, mix the rhubarb, strawberries, cornstarch, sugar, and pinch of salt together until everything is coated.  Set aside.

Lightly sprinkle flour on a piece of parchment paper that will fit onto your baking sheet.  On a flat surface, place the dough in the center and use a lightly floured rolling pin to roll out to 12-inches.  Pour the fruit mixture into the center of the dough.  Flatten the mixture a bit with your hands.  Fold up about 1 1/2-inches of the dough around the edge.  Make sure to pinch the seams together along the way.  Then use a pastry brush to apply the egg wash.  Sprinkle with turbinado or demerara sugar.  Place the galette and parchment paper onto the baking sheet and into the oven.  Bake for about 45 minutes, or until the crust is a deep golden brown and the liquid bubbles a bit.  You may see some liquid run from the galette during the baking process if the seams didn’t get adequately sealed.  Don’t worry, it’ll turn out just fine.  Let cool before cutting into it.  Simply cover leftovers with a dishtowel, if there are any.  Enjoy!

A few other galettes you may enjoy:  Sour Cherry Galette, Blueberry Galette, Rustic Potato, Sauerkraut and Beef Galette, and Rustic Apple Galette

Thanks for visiting today– have a great weekend!

Laurie


Read Full Post »

Spring Potato Salad with Ramps and Radishes | Relishing It

Finally.  Warm weather is finally here in Minnesota!  I know parts of the country have been having ridiculous heat waves recently, but we’ve been waiting (not-so-very) patiently for the weather to get nice here.  Yesterday  it finally did, and it was glorious!  It’s remarkable to see the change in attitude and manners once decent weather shows up.  Everyone– and I mean everyone– is just so much happier and more pleasant.  It’ll be another story once the high heat and humidity eventually find their way here.

Spring Potato Salad with Ramps and Radishes | Relishing It

Spring Potato Salad with Ramps and Radishes | Relishing It

I did my best yesterday to blind people with my extremely white Minnesota legs.  Not that this is any different than later in the summer.  I basically vary between stark white and just very pale.  Years ago I wished I had more color, but now I’m fine with my lack of sun-induced color, so I’ll continue to lather on the sunscreen.

Spring Potato Salad with Ramps and Radishes | Relishing It

Spring Potato Salad with Ramps and Radishes | Relishing It

Where was I going with all of this?  Oh yeah… summer, heat, shorts….potato salad!  Grilling last night was a no-brainer, so I made a bowl of one of my favorite summer potato salads to kick off the season.  In this version, I’ve accompanied the potatoes with spring ramps, radishes, celery, and parsley.  Ramps are fabulous, but are around for such a short time, scallions replace them when they are no longer available.  A delicate dressing of lemon, olive oil, garlic, and anchovies is poured on the warm yellow potatoes to really saturate them with flavor.  The crunchy vegetables are added later, once the potatoes have cooled a bit, then the remaining dressing is added.  This potato salad gets better and better the longer it sits.  And it’s perfect for picnics since it doesn’t contain any dairy.  I hope you give it a try!

Spring Potato Salad with Ramps and Radishes | Relishing It

The Recipe: Spring Potato Salad with Ramps and Radishes

3 pounds yellow potatoes, cut into bite sized pieces

1 bunch radishes, chopped

1 bunch ramps or scallions, chopped

handful of fresh parsley, chopped

2-3 stalks of celery, chopped

For the Dressing:

2 garlic cloves, finely chopped

2 teaspoons Dijon mustard

juice of 2 lemons (about 5 tablespoons)

3-4 small anchovies, smashed into a paste

1/2 cup good quality olive oil  (California Olive Ranch gets my vote)

salt and fresh cracked pepper

good crunchy sea salt to finish

Place a steamer in a large saucepan.  Add a bit of water to the bottom.  Add the potatoes and steam until potatoes are nearly done.  Turn off the burner and keep the cover on for an additional 10-15 minutes to ensure the potatoes are fully cooked.  This technique keeps the potatoes from being loaded with water, which sometimes happens when boiled, and from being over-cooked which can lead to mushiness.  Check them after 10 minutes, and if they’re tender, remove the lid.

Meanwhile, make the dressing.  In a medium bowl, add the garlic, anchovies, Dijon, lemon juice, and pinch of salt and pepper.  Whisk.  Then slowly add the olive oil, whisking the entire time.  Adjust seasonings, if necessary.  Remember that potatoes require a bit of salt to let their flavor shine through.  However, the anchovies will supply a lot of that saltiness, so I generally wait to make a final judgment about adding more salt until the potato salad has been refrigerated and the flavors have had a chance to meld together.

When the potatoes are done steaming, add them to a large bowl and pour about 2/3 of the dressing over them while they are hot.  Use a rubber spatula to gently fold the potatoes and dressing together.  Let sit until mostly cool, then add the vegetables and the remainder of the dressing.  Fold everything together, cover with plastic wrap, and refrigerate for a couple of hours.  When ready to serve, let it come to room temperature– the flavors are brighter when they are not completely cold.   Sprinkle with a crunchy sea salt before serving.  Enjoy!

Thanks for stopping by Relishing It!

Laurie

Read Full Post »

Today’s recipe is another healthy, vegetable-laden dish– a fresh, simple soup that is brilliant served hot or cold.  See, I told you I was going to eat my weight in veggies.  This week the seasonal produce in my refrigerator– asparagus, pea shoots, and leeks– was just begging to be made into something wonderful.  This soup is the result.  It’s simple, though with seriously impressive flavors.  What I mean is, even though it comes together in about 30 minutes from start to finish (if you’re skilled with a chef’s knife), it tastes surprisingly complex.

From the first spoonful, you can distinctly taste each of the main vegetables.  Clean and crisp.  And the lemon adds that nice acidity that frames the flavors of the asparagus, pea shoots, and leeks.  As you stroll through the recipe, you’ll notice there are no herbs or spices (aside from salt and pepper).  For this soup, I wanted the pure flavor of the vegetables to stand out.  I also knew I didn’t want it packed with cream (though I love, love creamy soups).  Instead, I added a Yukon Gold potato to provide that smooth texture.

This soup is very good by itself– especially as a chilled Summer dish.  I also love it warm with a piece of toasted french bread and poached egg gently laid on top.  Magic happens where egg yolk meets soup.  Give it a try, you’ll see.  One last thing to keep in mind is that the balance of flavors in this soup stands or falls on how much lemon and salt you add.  As always, taste, taste, taste!

The Recipe: Spring Vegetable Soup

(Serves 4 — enjoy hot or cold)

1 quart chicken stock

2 tablespoons extra virgin olive oil, plus more to drizzle

1 pound asparagus

1 large white onion, chopped

1 medium leek, chopped

2 stalks celery, chopped

1 large yukon gold potato, peeled and chopped

1 packed cup of pea shoots

squeeze of lemon

sea salt and freshly cracked black pepper

crusty french bread and poached eggs, optional

Prepare the asparagus by trimming the very ends.  If you have some thick ones, peel the last 1 1/2-inch of the stock with a vegetable peeler.  Cut off the tips of the asparagus and set aside.  Cut up the remaining asparagus into 1-inch pieces.

In a large Dutch oven or heavy-bottomed soup kettle, add the olive oil.  Over medium heat, sauté the onion, leek, celery and a sprinkle of salt and pepper until tender, about 5-7 minutes.  Add the chicken stock, potato, and asparagus.  Bring to a boil, then reduce heat.  Simmer for about 15-20 minutes, or until the potatoes and asparagus are tender.  Then, put the pea shoots into the soup and cook for about 1 minute, or until the pea shoots have wilted a bit.

Meanwhile, bring a small saucepan of water to a boil.  Add the reserved asparagus tips and cook for about 2 minutes.  Remove from water and place into an ice bath to stop the cooking process.  Set aside.

Remove soup from heat.  Use an immersion blender or carefully pour the soup into a stand blender (in batches), blend the soup until creamy.  Season with a squeeze of lemon, to taste, as well as salt and pepper.  Seasoning this soup properly is key.  A bit more lemon or salt can make all the difference.   Add the asparagus tips to the soup or serve as a garnish on top.  This soup is wonderful served hot or cold.   It is outstanding served with toasted french bread and a poached egg on top.  Drizzle with olive oil.  Enjoy!

Thanks for stopping by Relishing It!  Have a fantastic weekend!

Laurie

Read Full Post »

I just returned from my nine-hour-each-way road trip to North Dakota.  I do my best to eat healthy when I travel, but sometimes I end up failing miserably.  This trip I had a hard time saying no to the most delicious bacon cheeseburger in the universe– again.  And it went downhill from there.  Now I’m making up for my gluttony by trying to eat my weight in vegetables, and today’s post is a good start.

I’ve been craving a crisp spinach salad for awhile now.  Not the pre-packaged spinach that has “bag smell”, but fresh garden spinach that you can find at almost every farmers’ market.  I’m talking about the kind that is curly, has loads of wrinkles, and personality.  And although tomatoes aren’t quite in-season here in Minnesota, I knew I could get a few greenhouse-grown beauties.  Along with the veggies, I wanted a few crunchy bacon crumbles– not much, just a enough to add a nice saltiness.  Since I was thinking about a salad that could serve as a complete meal, I mixed in a whole grain.  You’ve probably noticed that I do this a lot with my salads.  This one and this one are two earlier favorites.  This time around, I chose farro.  It comes from the wheat family and has a nice, toothsome bite.  Finally, I wanted to bring it all these fresh ingredients together with a creamy gorgonzola dressing.

I know there are a many of you that purchase bottles of salad dressing from the grocery store.  My goal for today is to convince you to start making your own for every salad.  It’s easy, and tastes amazing.  No preservatives, and you know exactly what is going into your dressing.  Plus, you can play around with the ingredients.  Switch out the gorgonzola for blue cheese.  If you have extra yogurt on hand, use that instead of the buttermilk.  Just give it a try.  I’m guessing you’ll like it enough that you won’t buy bottles again.  This particular dressing is simple and beautiful.

One last note about Spring spinach.  You’ll need to clean it thoroughly– more than just a spray of water and throwing it in the salad spinner.  Instead, soak it in a large bowl of cold water for a minute or so to allow the dirt to settle to the bottom.  You don’t want to ruin this beautiful salad by biting into a fresh green leaf that still has dirt hidden in one of the folds.  Enjoy!

The Recipe:  Spinach, Farro, and Bacon Salad with Gorgonzola Dressing

1 large bunch fresh spinach

small bite-sized tomatoes

8 ounces bacon, cooked

handful of homemade croutons

1/2 cup farro, cooked

lemon

4 ounces (1/4 pound) gorgonzola cheese

1/2 cup buttermilk

sea salt and cracked black pepper

To start, rinse the farro in a mesh strainer.  Place the farro in a small saucepan and cover with water by about an inch.  Bring water to a boil, then reduce to a small/medium simmer.  When the farro is tender, but still has a toothsome bite to it,  remove from the heat — about 15-20 minutes.  Pour into a strainer and let cool.

Preheat oven to 350°F.  Prepare the homemade croutons by cubing about 1/4 of a fresh or day old baguette.  Place on a baking sheet and drizzle with a bit of olive oil (about 2 teaspoons) and a sprinkle of salt and pepper.  Toss to coat.  Place in the oven and toast for about 10-15 minutes, stirring a couple of times.  They are done when they are golden brown and have a nice crunch to them.

Prepare the dressing by placing the gorgonzola cheese in a medium-sized bowl.  Add the buttermilk.  Mash with a fork until it is mostly incorporated.  Be careful to leave some small chunks of cheese, as it adds to the texture of the dressing.  Add a squeeze of lemon and salt and pepper, to taste.  Set aside.

Fill a large bowl with cold water.  Place the spinach in the bowl and swish it around a bit, then leave it alone.  All the of the dirt will sink to the bottom.  Gently remove the spinach and place in a salad spinner.  Give it another rinse with running water and then spin it dry.

In a large salad bowl, place the spinach, tomatoes,  farro, and bacon.  Pour some of the dressing on it.  Toss and top with croutons.  Enjoy!

Thanks for stopping by Relishing It  — have a lovely day!

Laurie

Read Full Post »

Every once in awhile an idea for a recipe pops into my head, and I can’t believe I hadn’t considered it before.  On the one hand, I get a bit disappointed in myself for missing something so obvious.  But then I think, ‘Who cares?  This is going to be incredible!’  Today’s recipe came from one of those epiphanies.  I wanted something bursting with Spring flavors, and this pea shoot and mint pesto does just that.

Pea shoots should be showing up at your local farmers market right now.  If you haven’t tasted them before, please go buy some.   These tasty little shoots are the young tendrils and leaves of the pea plant.  They’re packed with nutrients, including vitamins A and C.  And they’re wonderful on sandwiches, salads, mixed into stir fry, pureed into soups– and of course, in this pesto.

Mint and peas make a great combination– remember this carbonara?  Pea shoots taste like fresh peas, but you don’t have to go through the fuss of shelling.  Here, I blanched the pea shoots for a few seconds to brighten their color.  I added a few mint leaves, and finished it off with a squeeze of fresh lemon.  Do not leave out the lemon!  It’s fine without, but we’re looking for better than ‘fine’ with this pesto.

A couple tips on the bruschetta:  First, make sure you grill the bread.  Season it with olive oil, salt, and pepper.  It makes a huge difference.  I also recommend tearing– rather than cleanly slicing– the mozzerella.  It creates nice crevices and curves to drizzle the olive oil into.  I think it also happens to  look much more interesting.  The radishes add an additional pop of color and fresh crunch.  Aside from using this pesto on bruschetta, you can add it to pasta.  If you think it’s going to be too thick to toss with pasta, add a little more olive oil and remember to always reserve a bit of hot pasta water to get the texture you want.  Either way, I think you’ll be happy with this fresh dish.  Enjoy!

The Recipe: Bruschetta with Pea Shoot Mint Pesto and Fresh Mozzarella

Pea Shoot Mint Pesto:

1 1/2 cups packed pea shoots

2-3 tablespoons freshly grated parmesan or grana padano cheese

1/4 cup lightly toasted walnuts, chopped

1 garlic cloves

10 fresh mint leaves

1/4 cup extra-virgin olive oil

squeeze of lemon juice, to taste

sea salt and freshly cracked pepper, to taste

hot pepper flakes, to taste

For the Bruschetta:

1-2 balls of fresh mozzarella

1 -2 cloves of garlic

extra-virgin olive oil

pea shoot  mint pesto

handful of radishes, diced

Good quality rustic bread, sliced  ( I used sour dough)

To make the pesto:  Bring a medium sized saucepan filled with water to a small boil.  Prepare an ice bath, set aside.  Place the pea shoots in the hot water for 30 seconds.  Remove immediately and submerge into the ice bath.  Remove pea shoots from water and gently “wring” them out.  It’s ok if they have a bit of water on them.  Let cool.

Place the pea shoots, mint leaves, and 1 clove of garlic in a mini-food processor.  Pulse a few times, until the greens are adequately chopped.  Add the parmesan or grana padano and walnuts, pulse a few more times.  With the processor running, slowly drizzle in the olive oil.  You may need to stop the machine and scrape down the sides of the bowl.  Once the pesto is thoroughly combined, taste it.  Stir in some salt, cracked pepper, hot pepper flakes, and a squeeze or two of lemon to brighten the pesto.  Use immediately or store in the refrigerator with plastic wrap placed directly on it.

To make the Bruschetta:  Fire up your grill.  Brush olive oil on both sides.  Sprinkle with salt and pepper. Place on a hot grill and let it toast on each side until it is beautifully golden, but not burnt.  Remove from the grill and while still hot, rub a clove of garlic on one side of the toast.  Spread the pesto on that.  Rip the mozzarella, to create crevices, and place on the pesto.  Top with the chopped radishes.  Drizzle with a bit of olive oil and finish with a sprinkle of sea salt.  Enjoy!

I’m currently in North Dakota with my kids — made the long 8 hour trip to spend Mother’s Day with my Mom.  I hope all of you Moms out there have a wonderful day.  Thanks to everyone for stopping in — see you next week!

Laurie

Read Full Post »

I hope you had a lovely weekend.  Mine was fantastic, despite– or perhaps because of– the rain here in Minnesota.  I love rainy days, and we certainly needed it here in the Midwest.  Everything is finally greening up after our nearly snow-less winter.  With an eye towards the forecast, I got the family up early to head to the farmers’ market before the downpour.  It was magnificent.  I’ll try to take photographs next time to share with you.  There were pops of color everywhere!  I was able to track down our usual early spring stores– spinach, scallions, pea shoots, asparagus, eggs, radishes, and more rhubarb.

Yes, I know I wrote about rhubarb last week in this coffee cake recipe, but if you’re ready for another go, this week I’m offering up a phenomenal tart with rhubarb and cardamom.  I ate almost the entire thing the day I made it.  It’s that good.  I spotted this tart years ago on Helene’s beautiful blog, Tartlette.  Rhubarb with cardamom is one of those brilliant combinations that you really must try.  The cardamom is very subtle– a little goes a long way– but it really seems to enhance the tart flavors of the rhubarb.

I wanted to make a relatively fuss-free crust for this tart– one that doesn’t have to be rolled out, but rather just gently patted into a pan.  This one turned out perfectly.  I blind baked the crust to ensure that it was nice and firm, since there’s nothing worse than having a fabulous filling ruined by a soggy crust.  As for that filling, this one is a divine creamy custard.  It’s just a few simple ingredients, but the creme fraiche makes it spectacular.  (Honestly, I think creme fraiche makes everything spectactular).  Like a little kid, I couldn’t stop licking the spatula!  With this recipe, you will probably have leftover custard, so pour it into baking cups and bake it along-side the tart.  They’ll be little bonus desserts.  Enjoy!

The Recipe: Rhubarb and Cardamom Tart

(Makes one 9-or-10-inch round tart or a 14-x-5-inch rectangle tart)

For poaching the Rhubarb:

5 stalks rhubarb, chopped (1 1/2 cups)

squeeze of lemon juice

1/2 cup water

1 tablespoon honey

For the Custard Filling:

3 eggs, room temperature

1 cup granulated sugar

1 cup creme fraiche (full-fat sour cream would work, too)

1/4 teaspoon cardamom

sprinkle of salt

For the Crust:

1 1/4 cups white whole wheat flour

3 tablespoons granulated sugar

1/2 teaspoon cardamom

sprinkle of salt

4 tablespoons cold butter, cut into 6-8 pieces

1 egg, beaten

To poach the rhubarb: In a small saucepan, bring the 1/2 cup of water, honey, and squeeze of lemon to a boil.  Place the chopped rhubarb in the water and cook for 2 minutes.  Remove rhubarb from water and set aside.  This can be done a day in advance — just place in a covered bowl in the refrigerator.  The water from the rhubarb is full of flavor — save it if you like and be creative with it!  Cook it down to form a syrup or mix it with a cocktail.

Meanwhile, prepare the tart crust.  Preheat an oven to 350°F.  In a large glass bowl, add the flour, sugar, cardamom, and salt.  Whisk them together to combine.  Using a pastry blender or fork, cut in the  butter, until the mixture resembles breadcrumbs.  Do not let the mixture become pasty.  Stir the beaten egg into the flour mixture.  The dough should look dry and crumbly.

Press the dough evenly and gently into a buttered tart pan, using floured fingertips.  Place a piece of lightly butter parchment paper over the tart and fill with baking weights or dried beans (I use the same beans over and over).  Blind bake for about 12-15 minutes, or until the tart is golden brown.  Remove from oven and let cool.

To make the custard filling:  In a bowl of a stand mixer fitted with a paddle attachment, add the eggs, sugar, cardamom, and sprinkle of salt.  Mix for  a couple of minutes until it is pale and airy.  Add the creme fraiche and mix until well combined.

To assemble the tart:  Distribute the poached rhubarb into the prepared tart crust.  Pour the custard filling over the rhubarb — being careful to not overfill it.  You will have leftover custard filling.  If you like, butter about 4 small ramekins and fill them with the custard.  Bake along side the tart for a bonus treat.  Place the tart on a baking sheet and bake for about 25-30 minutes, or until it is a beautiful golden brown.  Remove from the oven and let cool completely.  Serve with whipped cream, if desired.  Enjoy!

Source:  Custard filling adapted from Tartlette.  Crust adapted from How to Bake

Thanks for stopping in today!
Laurie

Read Full Post »

One of the best perks of late spring and early summer cooking is that so many dishes are quick and simple– there’s isn’t much fussing or preparation time.  This is a good thing– especially if you have little ones either underfoot or begging to get outside and enjoy the sunshine.  And even if you don’t have to keep one eye on the kids while you cook, who wants to spend these longer, warm days in the kitchen?  I know I sound like a skipping record, but I happen to be delighted that summer produce is starting to appear.  Aside from the fresh seasonal flavors, it’s easy– and that means more playtime.

This week, it’s time for asaparagus!  Yes, that sentence was worthy of an exclamation point.  You see, asaparagus isn’t around for long, so when it arrives, I go all out.  I have several simple asparagus dishes that I make this time of year.  This gorgeous tart is one of my favorites. And this one, which combines two fantastic seasonal ingredients– asparagus and morels, still makes me swoon. But the best of all is the dish in today’s post- roasted asparagus with balsamic browned butter.  It is, unquestionably, my favorite way to prepare asparagus.

I first made this dish years ago for my in-laws.  They loved it enough that they started preparing asparagus this way, too.  I think the chances are better than average that you’ll do the same.  This side is perfect because it relies on a simple flavor combination.  Browned Butter, balsamic vinegar, and soy sauce.  That’s it.  These three ingredients pack an amazing punch.  So much so, that you don’t want your asparagus swimming in the sauce.  Less is more, here.

A word or two about the preparation of the asparagus.  First, use fresh seasonal asparagus.  Don’t get me started on that asparagus you often see year-round in some grocery stores and restaurants.  Those oversized, tough, tasteless, shoots are not what I’m talking about.  Asparagus should be enjoyed when it was meant to be– for those few weeks in spring when it’s fresh and tastes amazing.  When looking for asparagus at the market, look for the tops of them to be tight and closed.  This indicates they were recently harvested.  Asparagus should be eaten as soon as possible after you buy it, as the flavor dissipates pretty quickly.  Also, I don’t follow the school of thought that you should snap huge chunks off the bottom of the stem to avoid the “woody” portion.  Instead, I simply use a vegetable peeler and peel the bottoms.  It becomes just as tender as the top section and you avoid wasting a fair amount.  Hope you enjoy this dish!

The Recipe:  Roasted Asparagus with Balsamic Browned Butter

1 pound asparagus

olive oil, to drizzle

kosher salt

cracked black pepper

2 tablespoons unsalted butter

2 teaspoons soy sauce

1 teaspoon balsamic vinegar

toasted, sliced almonds, optional

shaved lemon zest, optional

Preheat an oven to 400°F.  Line a baking sheet with parchment paper; set aside.

Wash and dry the asparagus.  Cut off the very bottoms with a sharp knife.  Use a vegetable peeler to peel the bottom 1-inch to 1  1/2 -inch.  Toss the asparagus with a drizzle of olive oil and a sprinkle of salt and pepper.  Place on the baking sheet and roast for about 12 minutes, or until tender.

Meanwhile, place the butter in a small sauce pan over medium heat.  Stirring frequently, melt the butter until it is a deep golden brown, about 3 minutes.  Be careful not to burn it.  Remove from heat and add the soy sauce and vinegar to the pan.  Mix it together well with a wooden spoon, making sure to incorporate any brown bits in the butter.

Place the asparagus on a serving platter and pour the balsamic browned butter over the top.  Sprinkle with toasted almonds and a bit of shaved lemon zest.  Serve immediately.  Enjoy!

Source:  Adapted from Cooking Light

Thanks for stopping in — have a wonderful weekend!

Laurie

Read Full Post »

And another seasonal food makes it’s first appearance!  This time it’s rhubarb’s turn in the spotlight.  You’ll probably see a similar line here next week with another ingredient–maybe even every week throughout Spring and Summer as I blog.  I can’t help it!  I just get so excited for all of this seasonal gorgeous, vibrant produce.

Rhubarb has been cropping up everwhere around here in the last week.  The first Twin Cities farmers’ markets of the season opened this weekend, so I hauled the family to our favorite one in St. Paul.  It was fun getting a chance to chat with the vendors again after the Winter break.  I’ve found that the first few weeks are a good time to connect with them– to see what they’ll be offering and how the season is shaping up– since they aren’t quite as busy as they’ll be by Summer.  I bought many things, including a bunch of rhubarb.  Even better, a friend was also kind enough to give me a huge bundle.  Perfect.

So what to do with all this rhubarb?  Well, this cake and this crumble are two of my favorite things to make with it.  But I’ve also found the coffee cake that you see in this post.  I love coffee cakes.  They’re perfect for…well…coffee in the afternoon, of course.  They’re also easy to make and stay moist for days.

The rhubarb is obviously the main attraction here.  It adds a notable, though restrained tartness.  The cake is perfectly sweetened.  I used my homemade 1 % yogurt, which was a nice substitute for sour cream.  It kept the cake wonderfully moist, and as a bonus, it has less calories.  The next time I make this one, I’m going to try it with white whole wheat flour to get the benefits of using a whole grain.  I’ll let you know how it turns out.  And if you try it that way first, let me know about it.  Enjoy!

The Recipe:  Rhubarb Crunch Coffee Cake

1/2 cup (1 stick) unsalted butter

1 cup granulated sugar

2 eggs at room temperature

1 teaspoon vanilla

1 cup yogurt or sour cream

2 cups all-purpose flour

1 1 /2 teaspoon baking powder

1 teaspoon baking soda

1/2 teaspoon kosher salt

For the Rhubarb and Crunch Topping:

2 cups chopped rhubarb

1 /4 cup plus 2 tablespoons brown sugar

1 tablespoon all-purpose flour

1 teaspoon cinnamon

1/2 cup chopped walnuts

1 tablespoon butter, softened

pinch of kosher salt

Preheat the oven to 350°F.   Butter an 8-inch square cake pan.

To prepare the Rhubarb and the Crunch Topping: Combine 2 cups of rhubarb with 2 tablespoons of brown sugar in a small bowl; set aside.  Using a fork, combine 1/4 cup of brown sugar, 1 tablespoon of flour, cinnamon, 1 tablespoon of butter, and a pinch of kosher salt in a small bowl until crumbly.  Stir in the walnuts; set aside.

In a medium-sized bowl, sift or whisk together 2 cups of all-purpose flour, baking soda, baking powder, and kosher salt; set aside.

In a bowl of a stand mixer fitter with a paddle attachment, cream together 1 stick of butter and granulated sugar until creamy.  Add the eggs, one at a time, scraping down the sides of the bowl after each one.  Cream for 2-3 minutes, until light and fluffy.  Add the yogurt and vanilla and mix until combined.  The mixture may look curdled at this point.  That is ok.  Add the dry ingredients and mix until everything is just combined, being careful not to over mix.

Place half of the cake batter into the pan and smooth out.  Sprinkle half of the crunch topping over the batter in the pan.  Dollop the remaining cake batter on top of the crunch topping and smooth out with an offset spatula.  Combine the remaining crunch topping with the rhubarb and pour that mixture evenly on the top of the cake.  Place in the oven and bake for about 55-60 minutes.  Check the center for doneness with a toothpick.  This cake will taste great right away and will be even more moist the following day.  Store covered at room temperature.  Enjoy!

Source:  Adapted from Kitchen Simplicity

Thanks for stopping by Relishing It!

Laurie

Read Full Post »


I seems like I’ve been preaching the ‘Spring vegetable gospel’ for the last few weeks.  I can’t help it.  That’s how excited I get about them.  For this dish, I decided to incorporate one of those Spring gems– fava beans.  They aren’t available for very long, so I grab them when I can.  Preparing fava beans is a little out-of-the-ordinary.  They need to first be shelled, then peeled.  Once you’ve removed the shells, boil for a few minutes and place them in an ice bath.  The light green peel then comes off easily.  It’s a bit of a process, but it’s worth it.  Fava beans are soft and delicious, and again, they’re versatile.  They’re perfect mixed into sauces, tossed into salads, or mashed into a fantastic bruschetta topping.

Fava beans are a great addition to the typical meat sauce like this one.  Here, they add an interesting texture, and pair wonderfully with the sweet Italian sausage and tomatoes.  I buy a local sausage that has plenty of seasoning, so I didn’t add much.  In fact, I didn’t use one grain of salt– the sausage and grana padano cheese added enough.  Test your sauce as you go, add seasonings and salt as you see fit.  I also didn’t have white wine on hand, but would have added a glug or two if I did.  Even my freezer wine stock was empty.  As an aside, you can freeze leftover wine in ice cube trays and add them to sauces as you need them.  Slick, huh?  For the pasta, you can use dry pappardelle, or if you want that silkiness of fresh pasta, use this recipe.  It’ll be more time-consuming, but the texture is amazing.  If you make it fresh, note that you’ll need to cut the pasta a bit wider than shown in the recipe.  Hope you give this pasta with fava beans a whirl.

The Recipe:  Pappardelle with Italian Sausage and Fava Beans

(serves 4)

1 pound fresh or dried pappardelle pasta (you can use this recipe for fresh pasta)

1 pound sweet Italian sausage

1 1/2 cups shelled fava beans

1/2 medium white onion, chopped (about 3/4 scant cup)

3 garlic cloves, finely chopped

1 teaspoon dried oregano

1 1/2 cups crushed canned tomatoes

2 tablespoons tomato paste

cracked black pepper

grated grana padano or parmesean-reggiano, for garnish

To begin, bring a small saucepan of water to a boil.  Once it is boiling, add the fava beans that have been shelled.  Boil for 1 1/2  to  2 minutes.  Remove from heat, drain, and immerse the beans into an ice bath (a bowl of cold water with ice in it).  Let cool in the water for a couple of minutes.  Next, remove the light green “peel” from the beans using your hands.  The fava beans will be dark green in color.  Set aside.

Bring a large pot of water to a boil for the pasta.  Meanwhile, begin making the sauce.  Heat a large skillet and add the Italian sausage to it.  When it is cooked, drain and discard any grease.  Add the onion and garlic to the pan of Italian sausage and continue to cook for a few minutes over medium-high heat until the onions start to become somewhat tender.  Add the tomatoes, tomato paste, oregano, and cracked black pepper.  Cook for a few minutes until the flavors have combined a bit and the sauce has thickened.  Add the fava beans and cook a few more minutes.  Taste the sauce and adjust the seasonings.

Add the pasta to the pot of boiling water when the sauce is nearly done.  Cook pasta until al dente.  Reserve a bit of the pasta water, in case you need to loosen your sauce with it.  Drain pasta and combine with the sauce.  Serve sprinkled with generous amounts of grana padano cheese!  Enjoy!

I hope you all have a wonderful weekend — do you have any big plans?  I’m looking forward to having some fun with my family and hopefully getting a chance to do some relaxing and a little cooking/baking.  See you next week!

Laurie

Read Full Post »

%d bloggers like this: