Feeds:
Posts
Comments

Posts Tagged ‘pastry’


Rhubarb and Strawberry Galette | Relishing It

If you’re a regular visitor to my little corner of the internet, today’s recipe will come as no surprise.  But for those of you new to Relishing It, witness my obsession with galettes. Sweet or savory, I love a good galette.  They’re so versitile, tasty, and just gorgeous.  Since we’re rolling right into Spring/Summer and there’s so much wonderful fruit, that means that we are rolling right into galette season, too.

Rhubarb and Strawberry Galette | Relishing It

Rhubarb and Strawberry Galette | Relishing It

I spent the better part of a recent rainy afternoon stocking my freezer with homemade pie dough, so I have it at the ready whenever I get the inclination to whip up a galette.  Having the pie dough at my disposal makes things a bit easier.  Not that making it is difficult– it isn’t.  It takes less than 5  minutes to make a batch of pie dough.  No lie.  And the galette itself is almost foolproof.  Even the imperfections give it a rustic look that I love.

Rhubarb and Strawberry Galette | Relishing It

Rhubarb and Strawberry Galette | Relishing It

Being a food blogger, there is a certain amount of self-promotion on social media that you have to do in order to tell people that “Hey, I wrote a post and it’s worth reading”.   It’s something that in the beginning of blogging feels silly and awkward and then 3 years later, you don’t give it another thought.  It’s all part of the process and I get that.  You want to convey how wonderful and delicious something is, without sounding like a grand-standing braggert.  So, with this in mind– when I tell you I make killer galettes, I mean it.  Really.  They are so damn good that I wish I could eat one everyday for every meal.  There I said it.  I’m a braggert now.

Rhubarb and Strawberry Galette | Relishing It

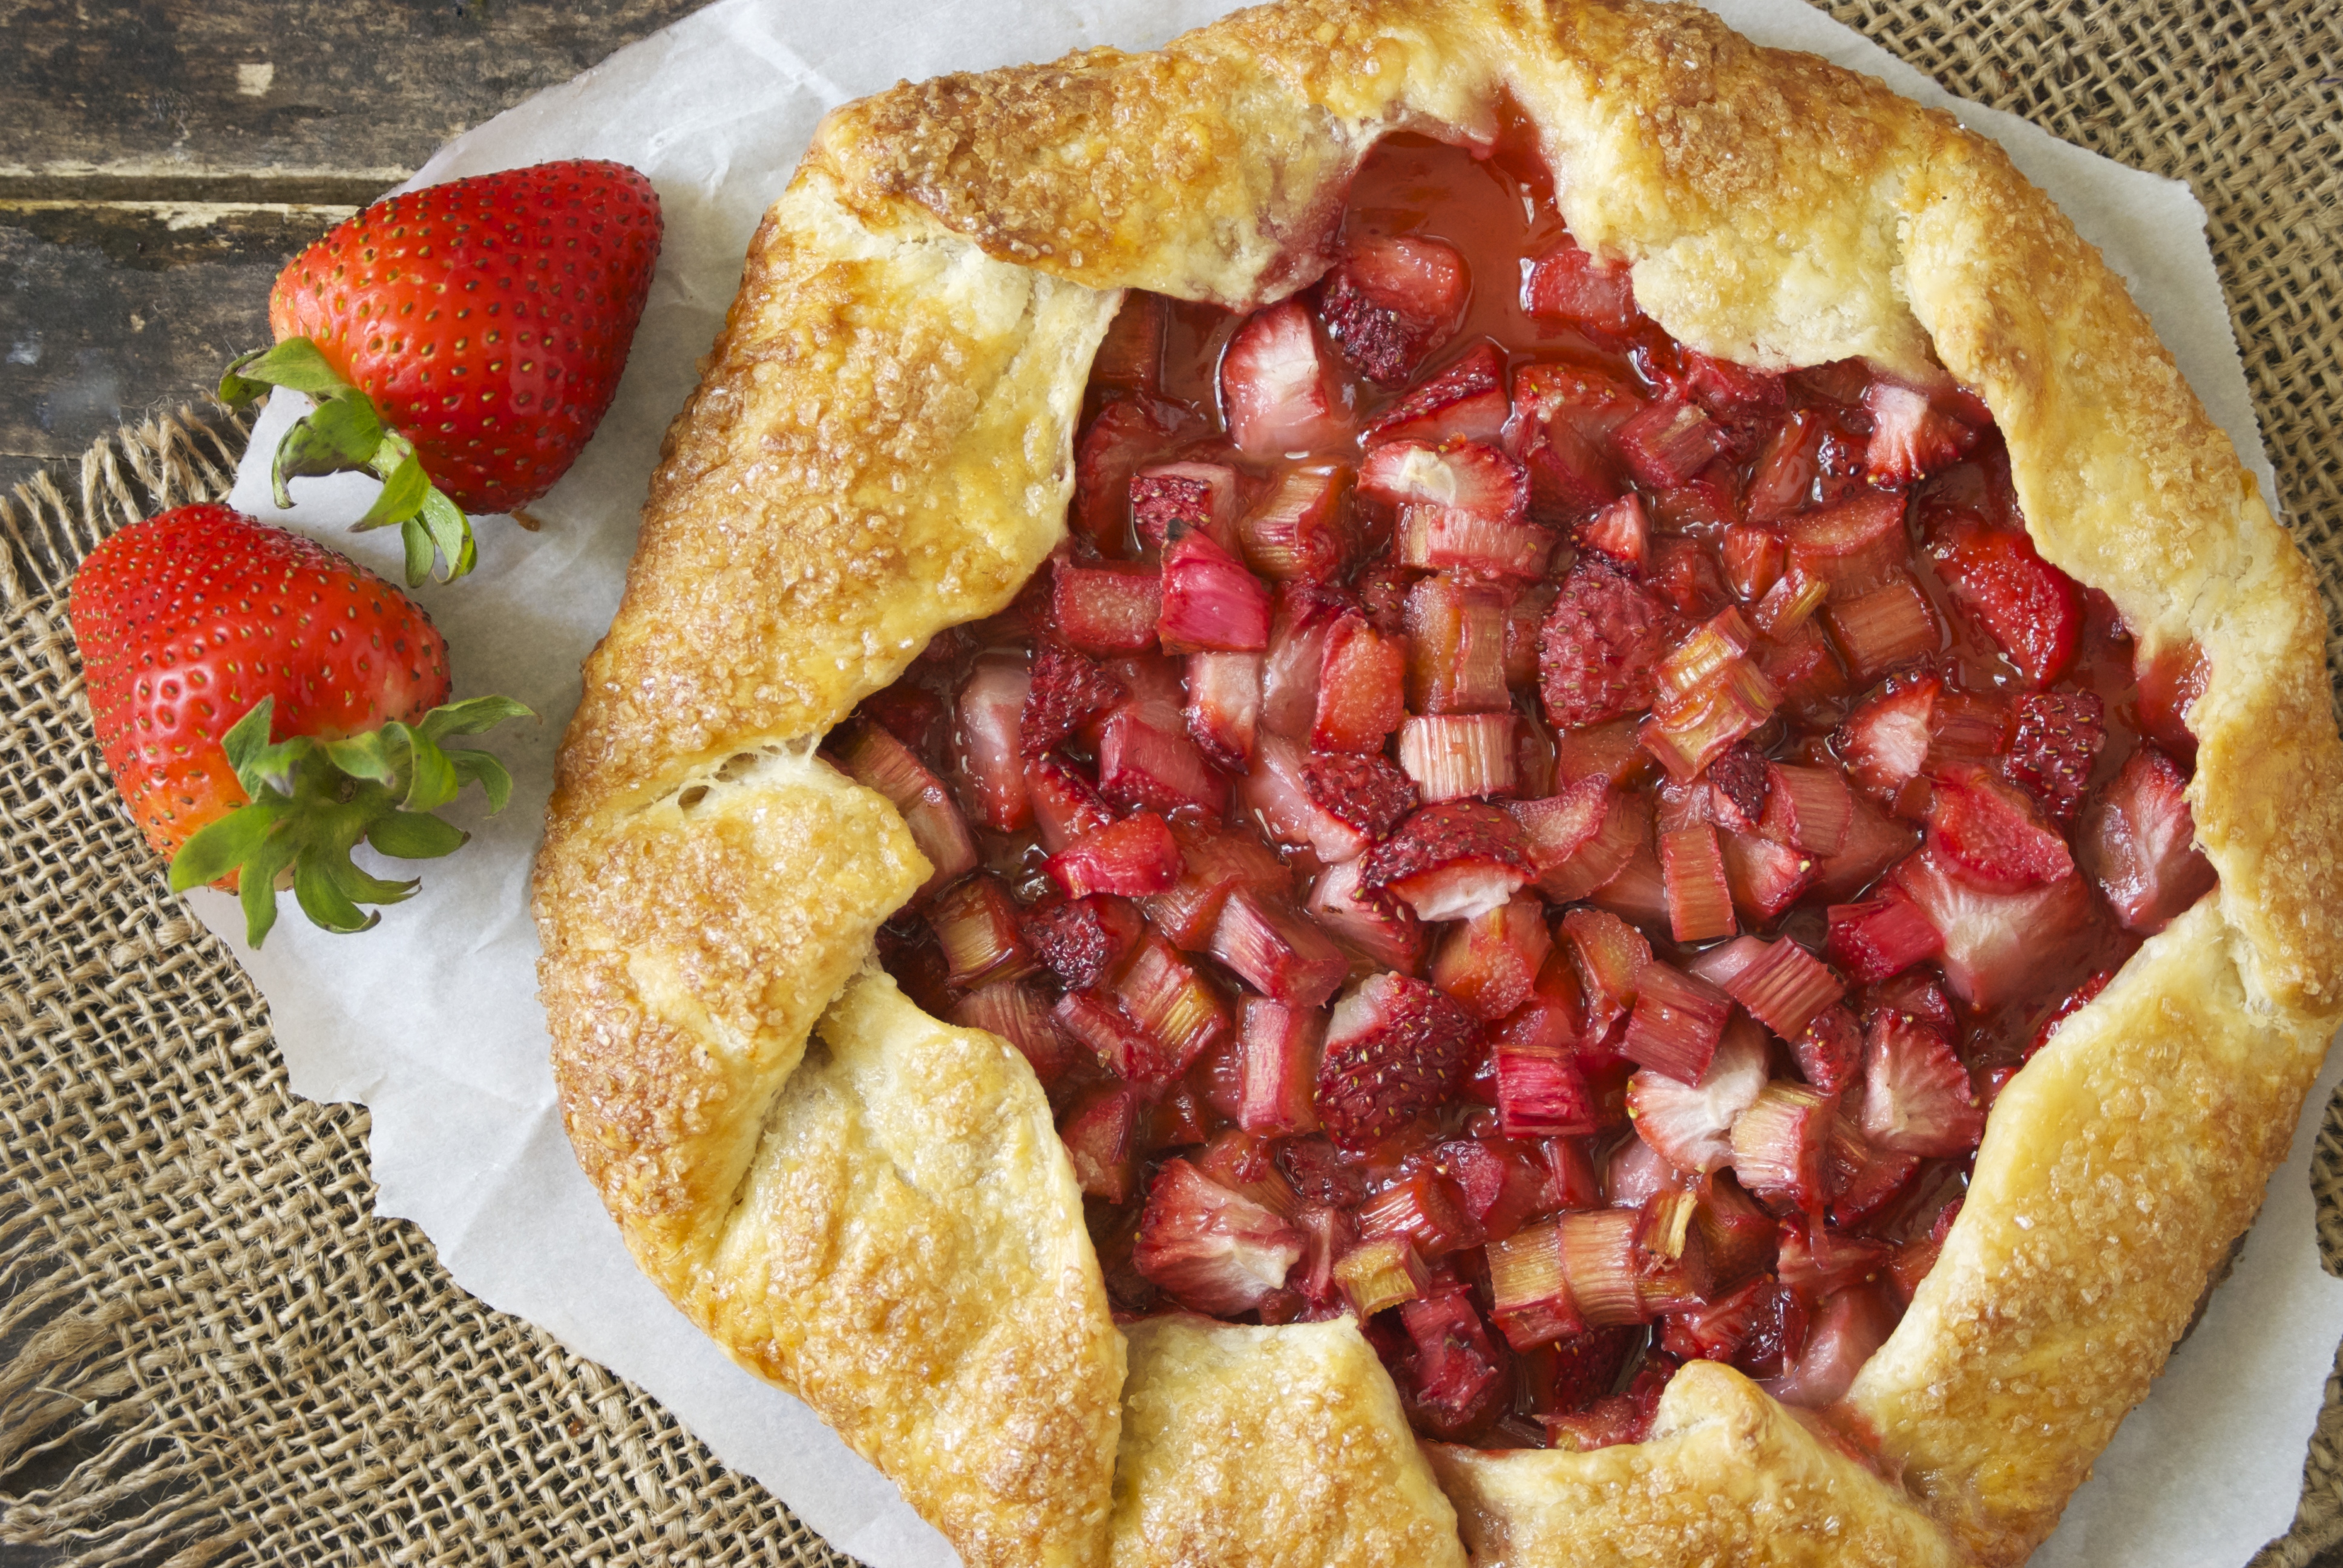
The key is the crust. It’s buttery and flakey…. and buttery. Did I mention that it’s buttery? It has a wonderful crunch and the right amount of tenderness.  And it comes out perfect every single time. No guess work. Just follow the recipe and directions. Use frozen, grated butter– it never disappoints. In this version I wanted to use some delicious Spring rhubarb.  I generally am a straight-up rhubarb gal, but my family loves strawberry with it.  They work well together.  I made sure to not sweeten it too much, as I still love the tartness from the rhubarb.  I think this galette reaches the perfect balance.  Not cloyingly sweet, and not too tart.  Perfection.  Give it a try for yourself and make sure to share.

Rhubarb and Strawberry Galette | Relishing It

The Recipe: Rhubarb and Strawberry Galette

1/2 of this recipe for All Butter Pie Crust

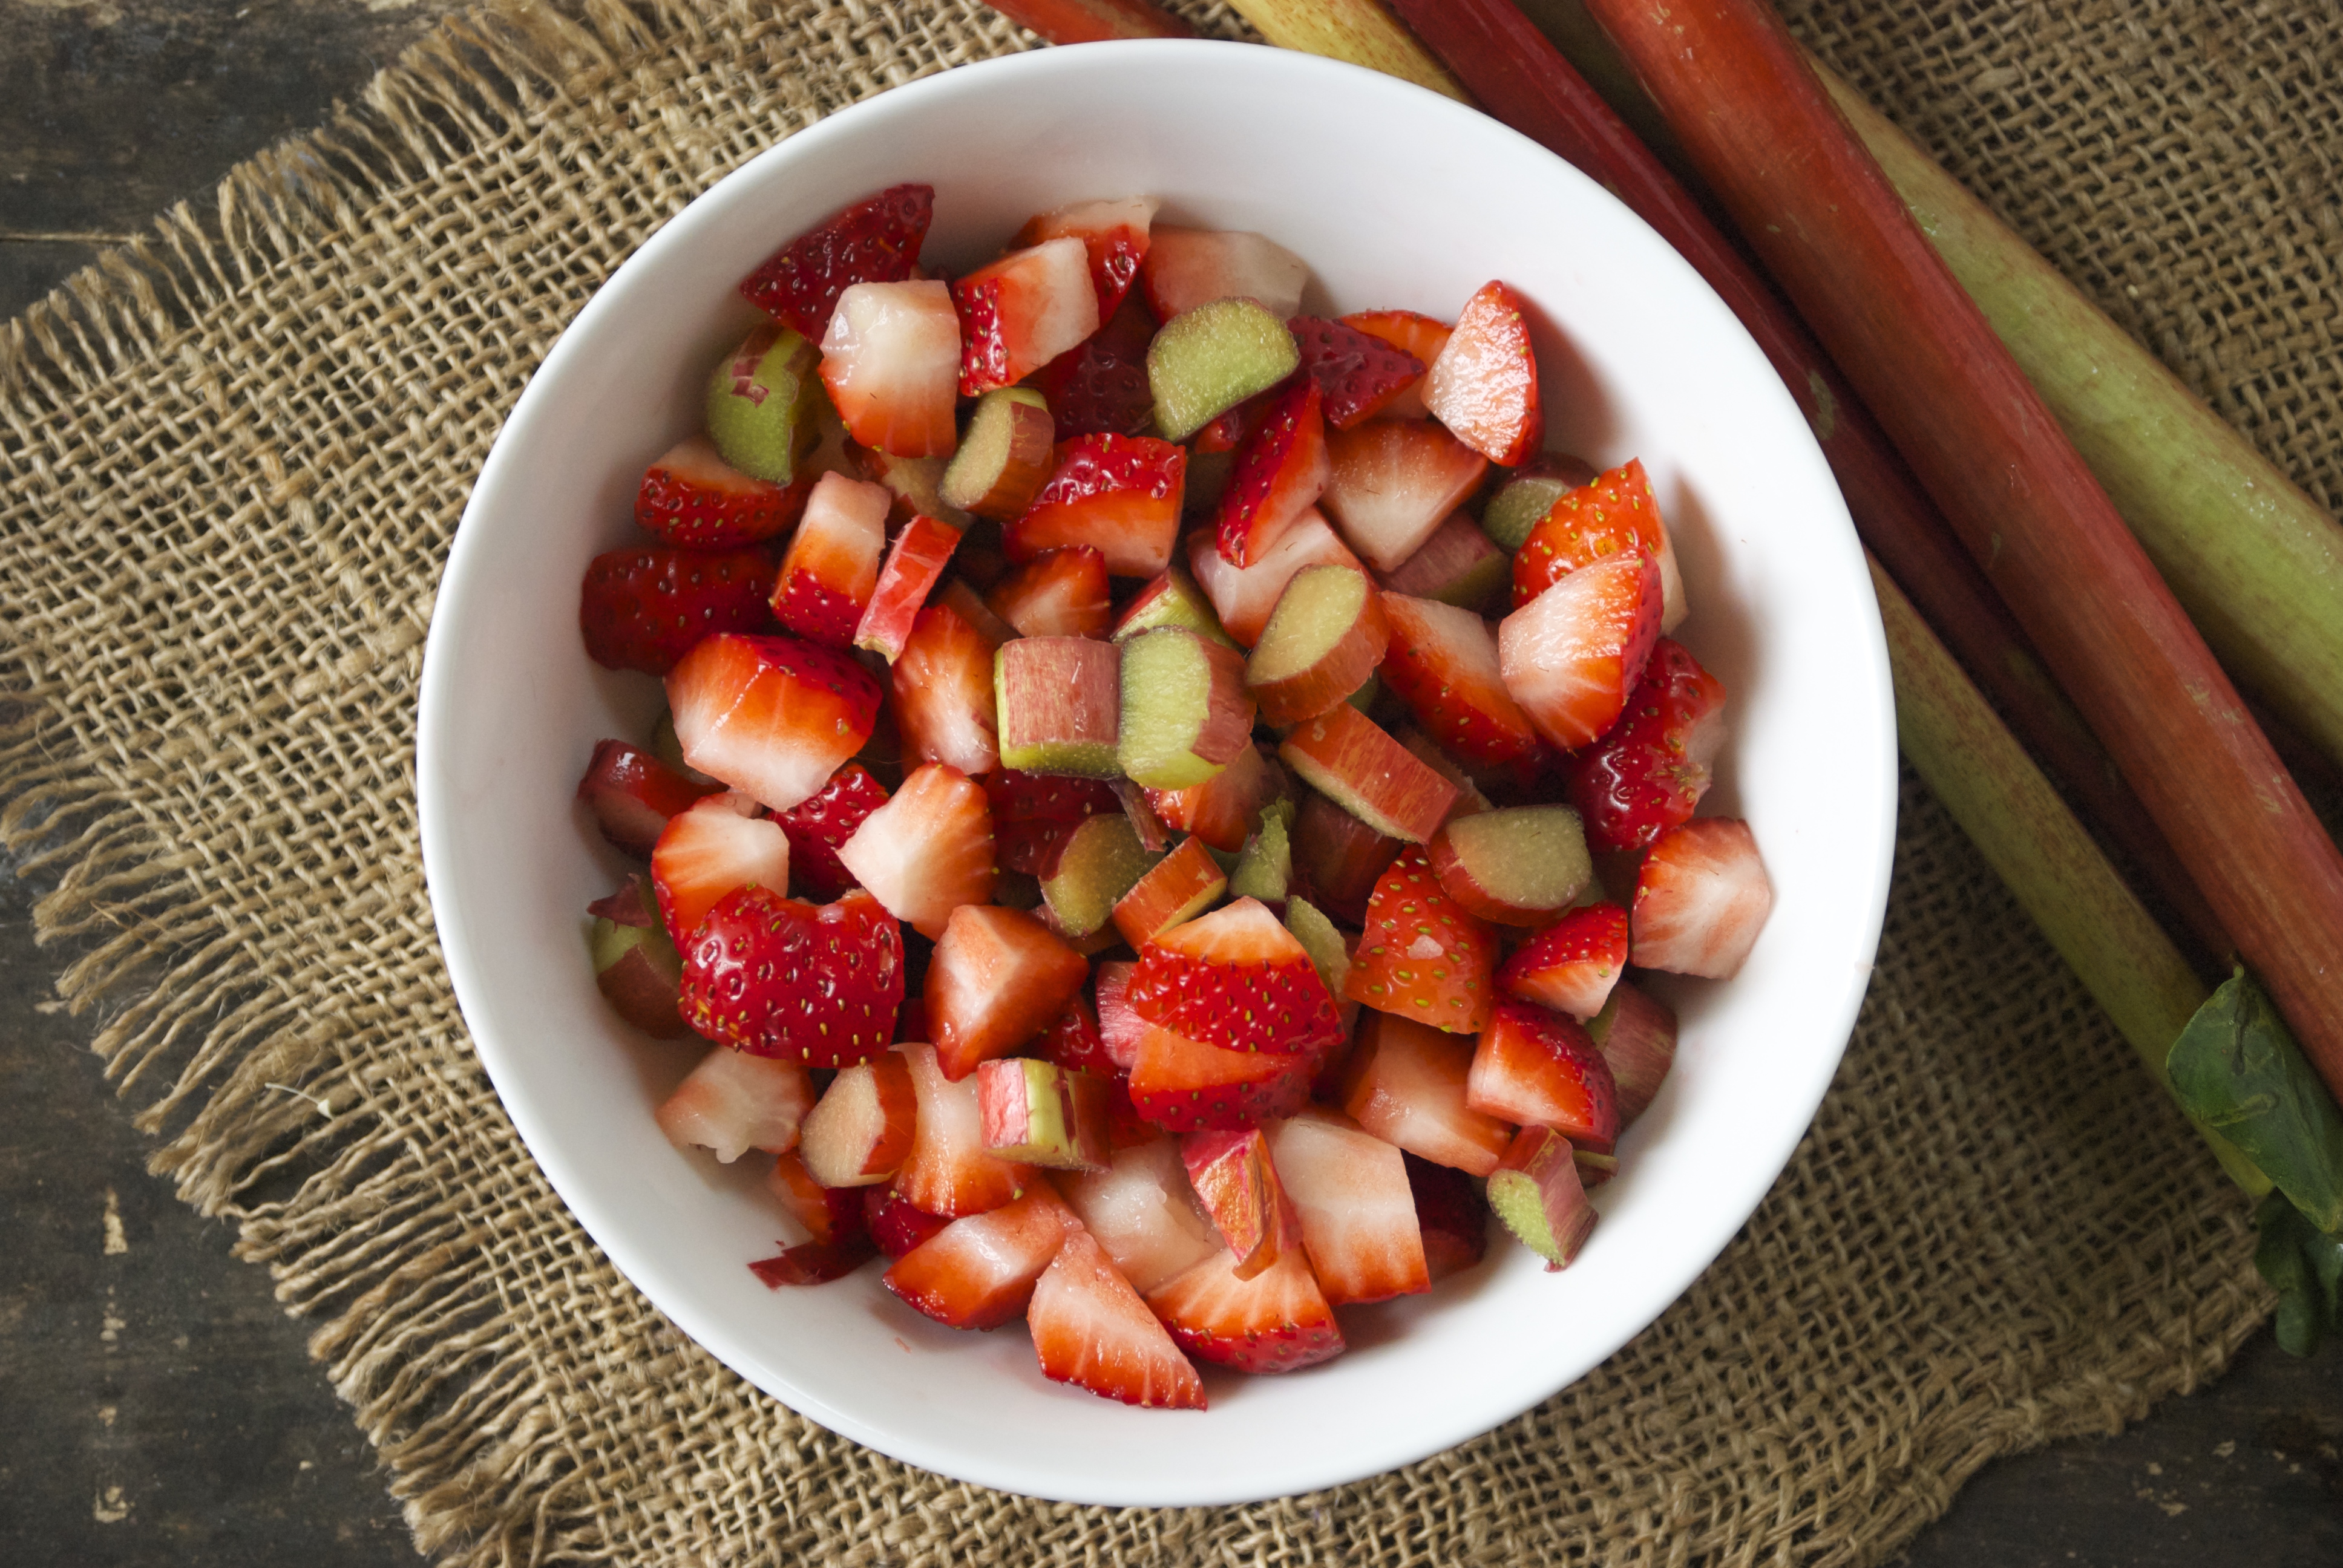
1 cup diced red rhubarb

1 cup diced fresh strawberries

1/3 cup granulated sugar

1 tablespoon corn starch

pinch of kosher salt

1 egg mixed with 1 teaspoon water, for egg wash

2 tablespoons turbinado or demerara sugar, for sprinkling (or any coarse sugar)

Follow the recipe and directions for the All Butter Pie Crust.  You will only use half of the recipe, but make the entire amount.  The other half will keep in the freezer until you are ready to use it.  Thaw in the refrigerator the night before use.

Preheat the oven to 375 °F.  Place the oven rack in the middle position.  Have a baking sheet ready for the galette.

In a medium-sized bowl, mix the rhubarb, strawberries, cornstarch, sugar, and pinch of salt together until everything is coated.  Set aside.

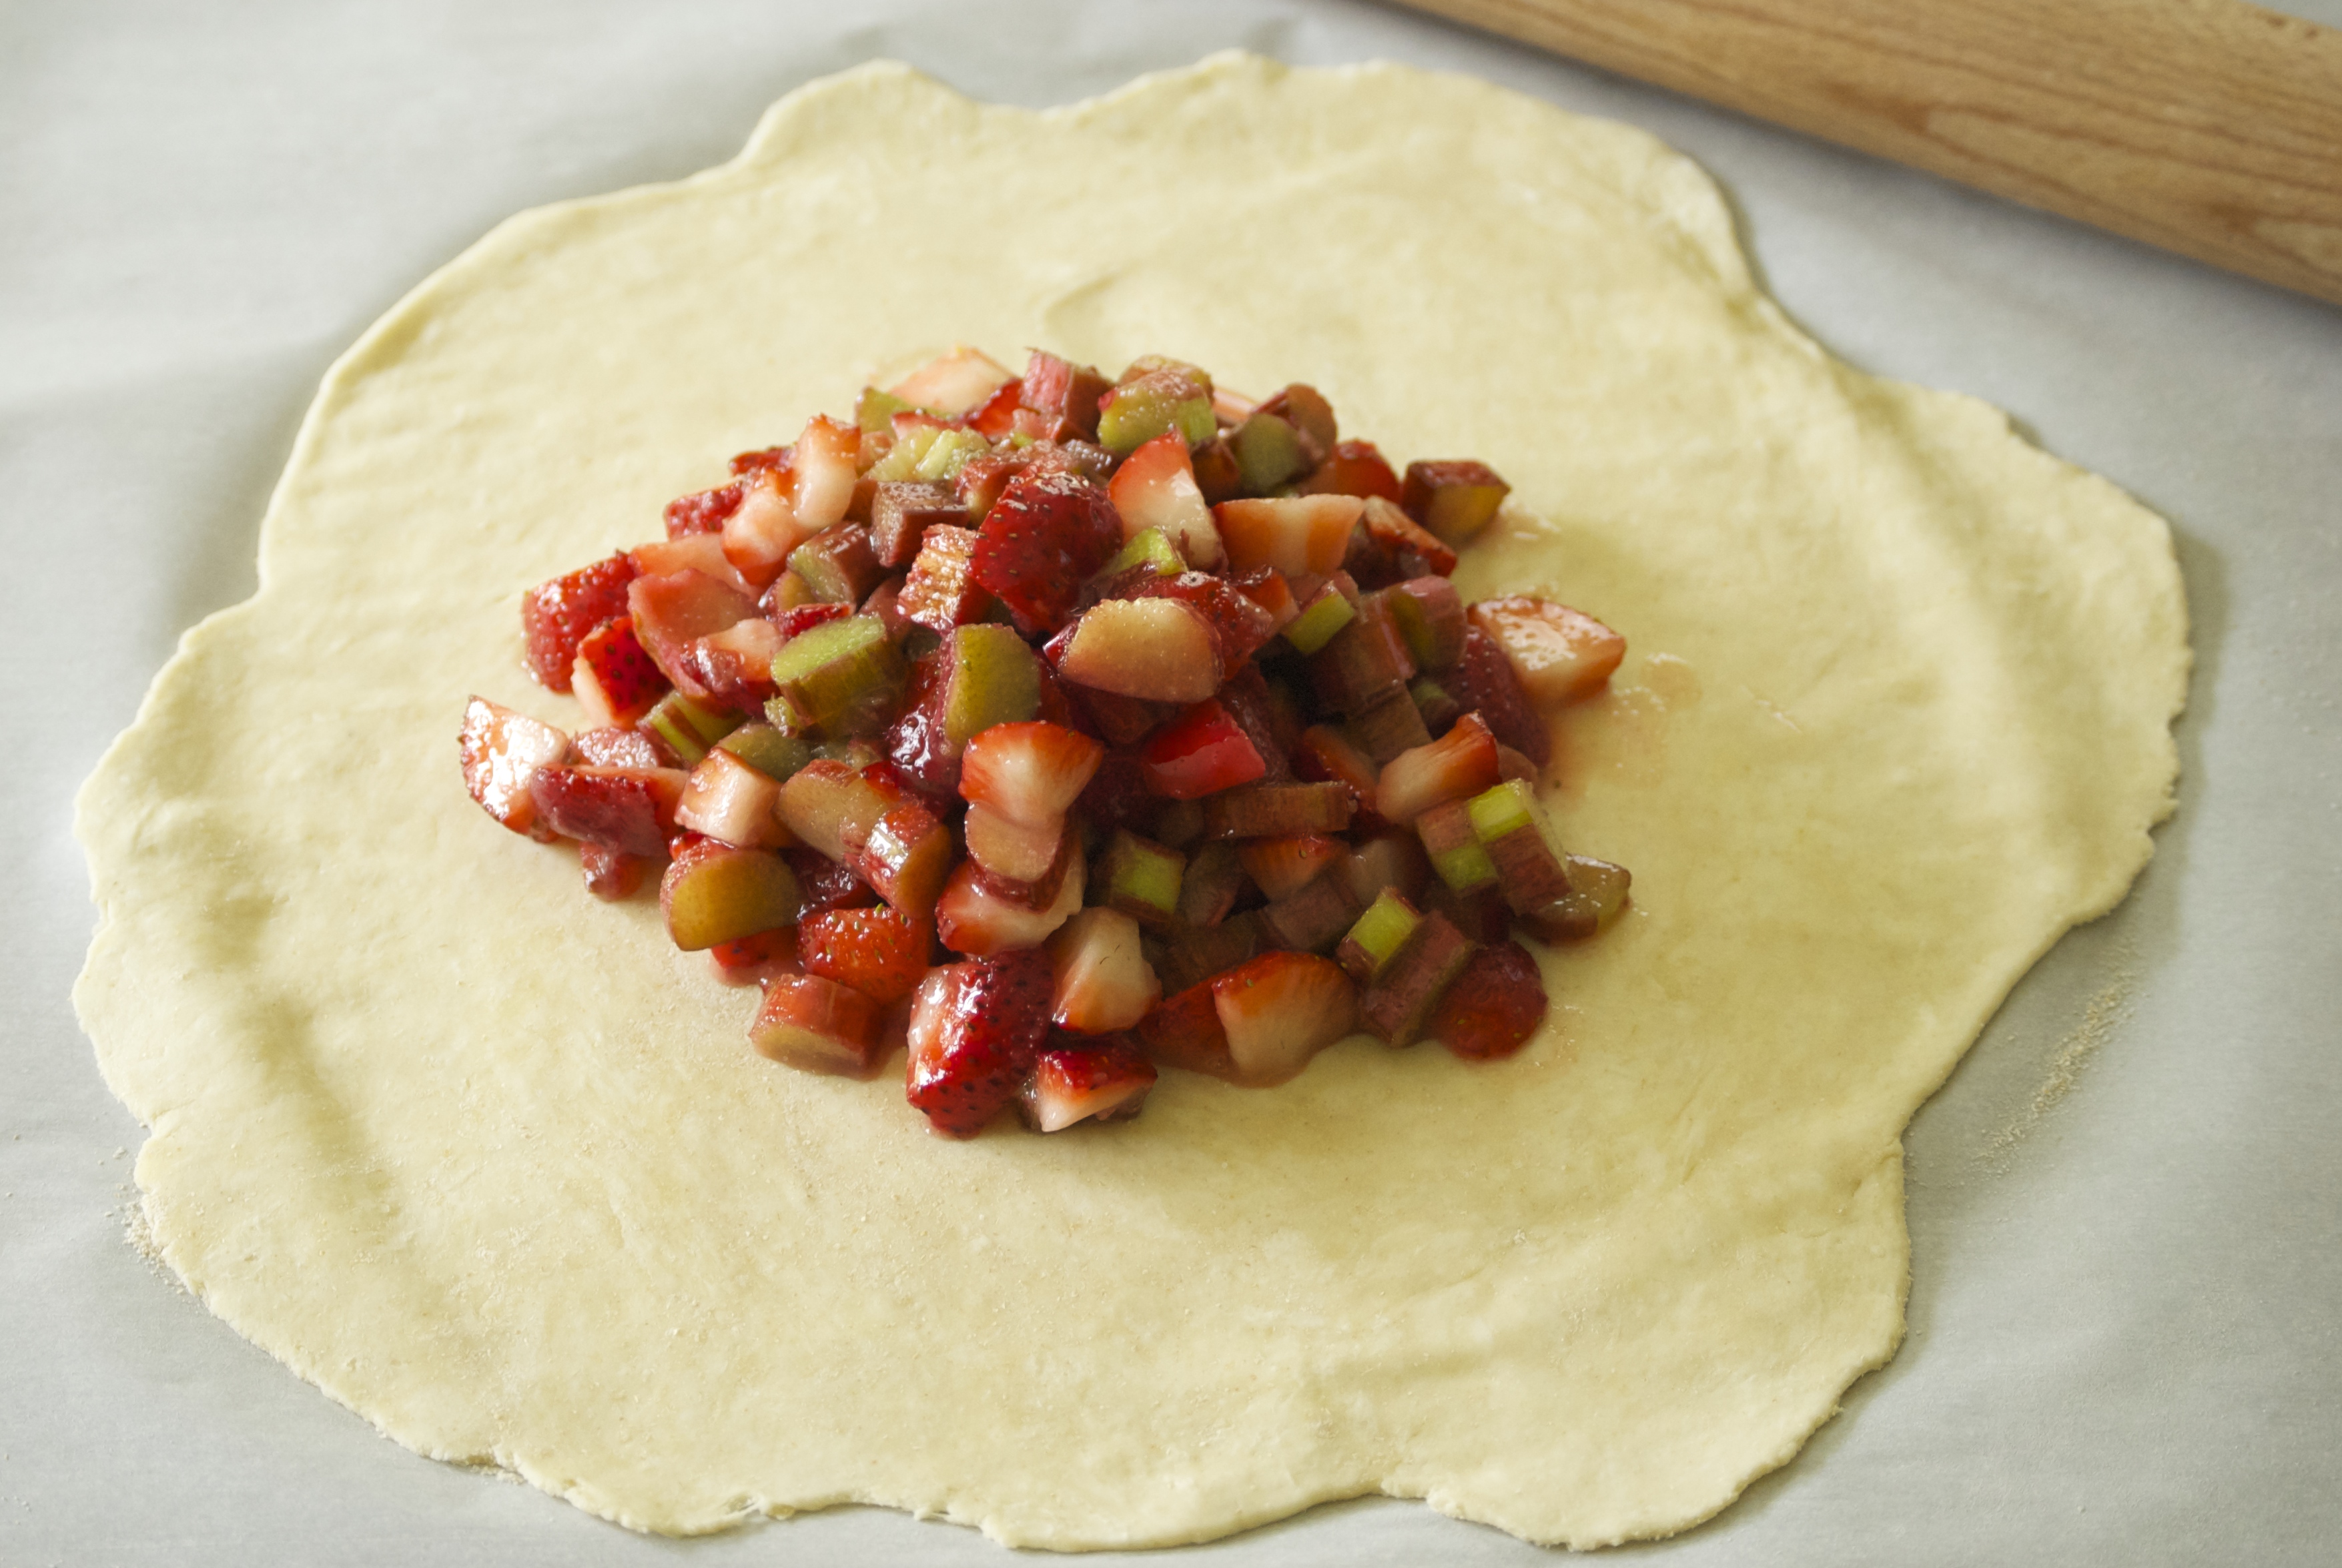
Lightly sprinkle flour on a piece of parchment paper that will fit onto your baking sheet.  On a flat surface, place the dough in the center and use a lightly floured rolling pin to roll out to 12-inches.  Pour the fruit mixture into the center of the dough.  Flatten the mixture a bit with your hands.  Fold up about 1 1/2-inches of the dough around the edge.  Make sure to pinch the seams together along the way.  Then use a pastry brush to apply the egg wash.  Sprinkle with turbinado or demerara sugar.  Place the galette and parchment paper onto the baking sheet and into the oven.  Bake for about 45 minutes, or until the crust is a deep golden brown and the liquid bubbles a bit.  You may see some liquid run from the galette during the baking process if the seams didn’t get adequately sealed.  Don’t worry, it’ll turn out just fine.  Let cool before cutting into it.  Simply cover leftovers with a dishtowel, if there are any.  Enjoy!

A few other galettes you may enjoy:  Sour Cherry Galette, Blueberry Galette, Rustic Potato, Sauerkraut and Beef Galette, and Rustic Apple Galette

Thanks for visiting today– have a great weekend!

Laurie


Read Full Post »

Ahhh…citrus in Spring.  Fresh, vibrant, and beautiful.  You already know that I’m a sucker for pretty much anything citrus-related– just take a look at these and this… and these… and this…and this..and these…and these…and this…  Wow!  I didn’t realize I was that big of a sucker for citrus!  Well, you get the point.  Another great way to indulge in these brilliant fruits is by making curd.  I know, the name doesn’t sound very appealing, but think of it more as a silky, citrus pudding.  Much better.

Today’s dish relies on my favorite citrus curd recipe.  It’s foolproof.  You can use any type of citrus (lemon, grapefruit, and lime work too!), and it’ll turn out perfect every time.  Personally, I love lemon curd the best, but Radd is a big fan of orange, so this batch was for him.

One of the best things about curd is that it’s so versatile.  It’s a great topping for shortbread or toast.  I often fill white cupcakes with it and top them with a beautiful meringue frosting.  And of course, it is perfect paired with classic scones, the second recipe for today’s dish.  You know the kind I’m referring to– the one’s that aren’t fussy or fancy.  The ones that go with anything.  Jam and clotted cream, anyone?  Spread a little fresh citrus curd on a scone, pour a cup of coffee, and take in the Spring morning.  Perfect.

The Recipe: Orange Curd with Classic Scones

Orange Curd

6 tablespoons (3 ounces) unsalted butter, at room temperature

1 cup granulated sugar

2 large eggs

2 large egg yolks

2/3 cup fresh orange juice

2 teaspoons grated orange zest

In a small bowl, combine the eggs and egg yolks and lightly beat, set aside.  In the bowl of a stand mixer fitted with the whisk attachment, add the butter and sugar.  Beat for about 2 minutes.  Slowly add the eggs.  Beat for 1 minute.  Pour in the orange juice and continue to mix.  The mixture will look curdled — this is fine, it will smooth out as it cooks.

In a medium heavy-bottomed saucepan, cook the mixture over low heat until it begins to look smooth.  The curdled appearance will disappear as the butter melts.  Increase the heat to medium and cook, stirring constantly, until the mixture thickens, between 10-15 minutes.  It should leave a path on the back of a spoon and a thermometer should read 170°F.  Do not let the mixture boil.

Remove from heat.  Stir in the orange zest.  Transfer to a bowl and place plastic wrap against the curd to keep a skin from forming.  Place in the refrigerator.  The curd will thicken as it chills.  It will last in the refrigerator covered for 1 week or frozen for up to 2 months.


Classic Scones

(Makes 8-10 scones)

2 cups unbleached cake flour (11 ounces), plus more as needed

1/2 teaspoon kosher salt

2 teaspoons baking powder

3 tablespoons turbinado sugar (or anything coarse), divided

5 tablespoons cold butter, cut into pieces

1 egg, lightly beaten

1/2 – 3/4- cup heavy cream, plus more for brushing

Preheat oven to 450°F.  Line a baking sheet with parchment paper.  Add the flour, salt, baking powder, and 2 tablespoons of the sugar into a food processor.  Pulse a few times to combine.  Add the butter, and pulse a few more times until the mixture resembles cornmeal.  Medium chunks of butter are just fine.

Add the egg and enough of the cream to form a slightly sticky dough.  It should stick to your hands a bit, but shouldn’t be overly wet.  Adjust cream/ flour as necessary.

Remove dough from food processor and place on a lightly floured surface.  With flour on your hands, pat dough into a flat 3/4-inch thick circle.  Use a round 2-inch biscuit cutter to cut out scones.  Place them on the baking sheet.  Brush with cream and sprinkle with remaining sugar.  Bake for 9-11 minutes, or until they are golden brown.

Source: Scones adapted from the New York Times.  Orange curd adapted from Fine Cooking

Thanks for stopping by Relishing It!  Hope you all have a wonderful weekend.

Laurie

Read Full Post »

Bostock

A few weeks back I wrote about brioche — that delicious buttery French bread.  I used half of the dough to make one of my favorite recipes, these sticky buns.   Here’s the thing, in that roll recipe I said you could use half of the dough recipe for rolls, while the other could be made into a fantastic bread.  Full disclosure, that bread loaf rarely stays in it’s original form at my house.  The reason is…bostock.  It’s simple, yet amazing.  Ordinary (though it’s anything but) brioche bread is transformed into a slightly sweet, almond-y treat that begs you to linger over a cup of coffee.  Its exterior is crisp, with a soft, filling body.  Bostock has become my pastry of choice when seeking out sweets at area bakeries.  Now, with the brioche bread recipe, I  make it at home and serve it with strong push-press French coffee.

While you can make as little of the loaf of brioche into bostock as you like, I suggest making the entire thing– you’ll end up craving it after you’ve had a piece or two.  The covered almond cream keeps in the refrigerator for up to 3 days.

The Recipe: Bostock

Use a loaf of brioche from this recipe.

Almond Cream:

3/4 stick (6 tablespoons) unsalted butter, at room temperature

2/3 cup sugar

3/4 cup ground blanched almonds (I usually don’t blanch mine)

2 teaspoons all-purpose flour

1 teaspoon cornstarch

1 large egg

2 teaspoons dark rum or 1 teaspoon vanilla extract

To Make the Cream Using a Food Processor:  Put the butter and sugar in the food processor and process until the mixture is smooth and satiny.  Add the ground almonds and continue to process until well blended.  Add the flour and cornstarch and process to blend, then add the egg.  Process for about 15 seconds more, or until the almond cream is homogeneous.  Add the rum or vanilla and pulse just to blend.

To Assemble the Bostock: Cut a slice of brioche to 1/2  to  3/4- inch thick.  Spread the bread with about 3 tablespoons almond cream, leaving a little border bare, and scatter over some sliced almonds, blanched or not.  Put the bread on a baking sheet lined with parchment paper or a silicone mat, and bake at 350°F until the almond cream is puffed and golden brown, 10 to 15 minutes.  Serve the bostock warm or at room temperature.

Source:  Dorie Greenspan’s Baking from my home to yours

You are going to love this little breakfast treat and you’ll find yourself baking and freezing an extra loaf of bread so you can have these gems whenever you want.  Thanks so much for stopping by!  As always — drop me a comment, I love hearing from you!

Laurie

Follow me on Twitter!

Read Full Post »

We’re hosting Easter Brunch this year.   In preparation, I spent much of whatever free time I could grab this weekend paging through cookbooks and magazines to put together the menu.   That was the goal, anyway– as usual, I got distracted.  Reading cookbooks, food magazines, and culinary blogs tends to have this effect.  And, of course, I always end up thinking that there is one more cookbook out there that I must have.  Anyway, my hours spent wandering through recipes paid off.  I’ve nailed down most of the brunch menu.  These Pecan Honey Sticky Buns from Dorie Greenspan will definitely make an appearance.  My family loves them.

Even if you’re not a bread baker, don’t be intimidated by this recipe.  While there are several steps, they’re straight-forward and the result is marvelous.  The buns are made from a very silky, buttery brioche dough.  The first time I worked with this dough, I was stunned.  Its soft, like satin– unlike any other dough I had worked with.  It makes the buns flakey, rather than doughy, as in a normal roll.  The brioche also doesn’t ‘puff up’ much, so the buns don’t get as big as you might expect.  I find them to be the perfect size.

The glaze, as you can see, is sublime.  It’s made of brown sugar, butter, honey, and pecans.  The result is firm, delicious toffee-like caramel.  Sprinkle a bit of sea salt on top when they’re done.  The salt will trick your taste buds in to emphasizing the sweetness.  Give ’em a try this weekend!

The Recipe:  Pecan Honey Sticky Buns

Brioche Dough

(Note:  Make sure to allow enough time to let the dough rest overnight in the refrigerator before proceeding with the Pecan Honey Sticky Bun recipe.)

2 packets active dry yeast

1/3 cup just-warm-to-touch water (110 – 115°F worked for me)

1/3 cup just warm-to-touch whole milk

3 3/4 cups all-purpose flour

2 teaspoons salt

3 large eggs, at room temperature

1/4 cup sugar

3 sticks (12 ounces) unsalted butter, at room temperature, but still slightly firm.

Glaze:  (If baking loaves of bread)

1 large egg

1 tablespoon water

To make the Brioche Dough: Put the yeast, water and milk in the stand of a mixer and, using a wooden spoon, stir until the yeast is dissolved.  Add the flour and salt, and fit the mixer with the dough hook, if your have one.  Toss a kitchen towel over the mixer, covering the bowl as completely as your can –  this will help keep your kitchen clean from flour.  Turn the mixer on for a few short pulses, just to dampen the flour.  Remove the towel and increase the mixer speed to medium-low and mix for a minute or two, just until the flour is moistened.  At this point you’ll have a fairly dry, shaggy mass.

Scrape the sides of the bottom of the bowl with a rubber spatula, set the mixer to low and add the eggs, followed by the sugar.  Increase the mixer speed to medium and beat for about 3 minutes, until the dough forms a ball.  Reduce the speed to low and add the butter in 2-tablespoon-size chunks, beating until each piece is almost incorporated before adding the next.  You’ll have a dough that is very soft, almost like a batter.  Increase the speed to medium-high and continue to beat until the dough pulls away from the sides of the bowl, about 10 minutes.   ( Note: Sometimes when I make this dough, it clumps around the hook and pieces don’t incorporate into the dough well.  I’ve found that if this happens, stop the machine, and with a rubber spatula separate the dough from the hook completely and start again.  It really helps to incorporate everything into a uniform dough.)

Transfer the dough to a clean bowl ( or wash out the mixer bowl and use it), cover with plastic wrap and leave at room temperature until nearly doubled in size, 40-60 minutes, depending upon the warmth of your room.

Deflate the dough by lifting it up around the edges and letting it fall with a slap into the bowl.  Cover the bowl with plastic wrap and put it in the refrigerator.  Slap the dough down every 30  minutes until it stops rising, about 2 hours, then leave the covered dough in the refrigerator to chill overnight.

From this point, you can proceed with the Pecan Honey Sticky Bun recipe.  Take note that that recipe calls for only half of this dough.  So, you can either bake two pans of the sticky buns or make the other half of the dough into a loaf of bread.

If choosing to make a loaf of bread:

Butter and flour a 8 1/2-x-4 1/2-inch loaf pan.  Using half of the brioche dough, cut each piece into 4 equal pieces and roll each piece into a log about 3 1/2 inches long.  Arrange  4  logs crosswise in the bottom of each pan.  Put the pans on a baking sheet lined with parchment paper or a silicone mat, cover the pans lightly with wax paper and leave the loaves at room temperature until the dough almost fills the pan, 1-2 hours. Again, it will depend on the warmth of your room.

Center a rack in the oven and preheat and preheat the oven to 400°F.

To make the GlazeBeat an egg with water.  Using a pastry brush, gently brush the tops of the loaf with the glaze.  Bake the loaf until it is well risen and deeply golden, 30-35 minutes.  Transfer the pan to a rack to cool for 15 minutes, then run a knife around the sides of the pans and turn the loaf out onto the racks.  Invert again and cool for at least an hour.

Pecan Honey Sticky Buns:  ( Makes 15-16 buns)

For the Glaze:

1 cup (packed) light brown sugar

1 stick ( tablespoons) unsalted butter, cut into 4 pieces

1/4 cup honey

1 1/2 pecans ( whole or pieces)

For the Filling:

1/4 cup sugar

3 tablespoons ground cinnamon

3 tablespoons unsalted butter, at room temperature

For the Buns:

1/2 recipe for the Brioche Dough, chilled.  Don’t be tempted to downsize the recipe.  The dough works better in a larger batch.

Generously butter a 9-x-13-inch baking pan ( a pyrex pan is perfect for this).

To make the Glaze:  In a heavy -bottomed saucepan, bring the brown sugar, buter, and honey to a boil over medium-low heat, stirring frequently to dissolve the sugar.  Pour the glaze into the buttered pan, evening it out as best you can by tilting the pan or spreading the glaze with a heatproof spatula.  Sprinkle over the pecans.

To make the Filling:  Mix  the sugars and cinnamon together in a bowl.  If necessary, in another bowl, work the butter with a spatula until it is soft, smooth and spreadable.

To shape the Buns:   On a flour-dusted work surface, roll the chilled dough into a 16-inch square.  Using your fingers or pastry brush, spread the softened butter over the dough.  Sprinkle the dough with the cinnamon sugar, leaving a 1-inch strip bare on the side farthest from you.  Starting with the side nearest you, roll the dough into a cylinder, keeping the roll as tight as your can.  ( At this point, you can wrap the dough airtight and freeze it for up to 2 months.  Defrost in refrigerator overnight, then proceed with the glaze and let them rise and bake as directed.)

With a chef’s knife, using a gentle sawing motion, trim away just a tiny bit from the ends of the roll of they’re ragged and not well filled, then cut the log into 1-inch-thick buns.  Fit the buns into the pan cut side down, leaving some space between them.

Lightly cover the pan with a piece of wx paper and set the pan in a warm place until the buns have doubled in volume, about 1 hour and 45 minutes.  The buns are properly risen when they are puffy, soft, doubled, and, in all likelihood, touching one another.

Baking the Buns:  When the buns have almost fully risen, center a rack in the oven and preheat the oven to 375°F.  Remove the sheet of wax paper and put the pan on a baking sheet lined with parchment paper or a silicone mat.  Bake the sticky buns for about 30 minutes, or until they are puffed and golden; the glaze will be bubbling.  Pull the pan from the oven.

The sticky buns must be unmolded minutes after they come out of the oven.  Be very careful –  the glaze is very hot and and sticky.

Source:  Dorie Greenspan’s Baking From My Home to Yours

I do hope your try this recipe — it isn’t as complicated as it seems, and the end result is so worth your time!  As always, I love to hear your feedback!   Thanks for stopping by.

Laurie

Follow me on Twitter!


Read Full Post »

Classic Lemon Tart

Welcome to Relishing It!  I’ve finally taken the leap and committed to writing a weekly blog.  Obviously I love to cook and bake, but more recently I’ve come to appreciate the photography aspect of food blogs as well.  Food has always been a significant part of my life– a passion, I guess.  It’s a creative and social outlet for me and my family.

So what about me?  Well, for more detail you can check here.  In brief, I’m originally a small-town North Dakota girl, now a thirty-something mother of two who lives in St. Paul, MN.  My children keep me busy, as they’re only four and two years old.  This makes the baking/cooking/photography “interesting” during the day.  I was lucky enough to marry my high-school sweetheart (who may make a guest appearance here every once in a while).

I have fairly strong views on food, from how it’s marketed, to nutrition, to its effect on the environment.  I generally subscribe to the Bittman/Pollan food models.  I use organic, locally-sourced ingredients when possible, and usually shy away from anything overly processed.  While I’ll do my best not to preach, you’ll likely get a sense of my convictions through individual recipes and asides on these topics.

One of my closest friends was kind enough to ask me to guest blog about my culinary experiences in a Blissful Eats section every Thursday on her beautiful “Bliss“.  This has not only given me a chance to get my feet wet, but it has also given me time to think about where to begin with my own blog.  To be honest, I’ve spent a fair amount of time pondering my first recipe.  Too long.  I finally decided to go with what I was really wanting to eat today– this Classic Lemon Tart.  I have so many organic lemons right now– I’ve taken to stockpiling these babies.

I first sampled this lemon tart three years ago.  We had a dinner party and one of our friends– a fellow ‘foodie’– brought this incredible dessert.  I was stunned, and had to have the recipe immediately. I realize that writing about one’s experience of food– trying to convey it to others– is usually imperfect.  The words just can’t capture the “punch” of a really powerful flavor, or the “silkiness” of creamy filling.  So how to describe this tart?  It’s intense.  Seriously intense.  The “jolt” of lemon in every bite is incredible.  You almost question whether or not its made from some super-distilled extract, though the natural flavor of the juice and zest of the lemons reassures you that you’re eating the real thing.  And then there’s the color.  If you use farm-fresh free-range egg yolks, the natural deep yellow color will be stunning.

In the past, I’ve tended to reserve this stellar dessert for special occasions– not because it’s difficult, but because it’s a real show-stopper. It’s beautiful and light with a flaky crust, making it perfect for Spring.  On the other hand, while we still have several feet of snow on the ground, it sure made my family happy this afternoon, too.  Come to think of it, I may not wait for a holiday or dinner party to make this one any more.  Why not brighten even an ordinary, everyday?

The Recipe:  Classic Lemon Tart

Sweet Tart Pastry:

1 large egg yolk

1 tablespoon heavy cream

1/2 teaspoon vanilla extract

1 1/4 cup all-purpose flour

2/3 cup confectioners’ sugar

1/2 teaspoon kosher salt

8 tablespoons unsalted butter ( 1 stick, very cold), cut into twenty-four 3/4-inch cubes

1 tablespoon unbleached all-purpose flour for dusting

Instructions:

Whisk together the yolk, cream, and vanilla in a small bowl; set aside.  Pulse to combine 1 1/4 cups flour, sugar, and salt in bowl of food processor  fitted with steel blade.  Scatter butter pieces over flour mixture; pulse to cut butter into flour until mixture resembles course meal, about fifteen 1-second pulses.  With the machine running, add egg mixture and process until dough just comes together, about 25 seconds.  Turn dough onto sheet of plastic wrap and press into 6-inch disk.  Wrap in plastic and refrigerate at least 2 hours.

If the dough feels too firm when you’re ready to roll it out, let it stand at room temperature for a few minutes.  If, on the other hand, the dough becomes soft and sticky while rolling, don’t hesitate to re-chill it until it becomes easier to work with.  Better to re-chill than add too much flour, which will damage the delicate, crisp texture of the dough.  Bake the tart in a 9 – 9 1/2 -inch tart pan with a removable bottom and fluted sides about 1 to 1 1/8 inches high.

Unwrap dough; lightly flour large sheet of parchment paper or plastic wrap and place dough in center.  Roll out dough and line tart pan.  Freeze dough 30 minutes.

Meanwhile, adjust one oven rack to upper-middle position and other to lower-middle position; heat oven to 375 degrees.  Place chilled tart shell on a cookie sheet; press 12-inch square of foil inside tart shell and fill with metal or ceramic pie weights ( I skipped the pie weights and just placed the foil down on the tart, which worked fine, because it was chilled).  Bake on lower rack for 30 minutes, rotating halfway through baking time.  Carefully remove foil and weights by gathering edges of foil and pulling up and out.  Transfer cookie sheet with tart shell to upper rack and continue to bake until shell is golden brown, about 5 minutes longer.

The Lemon Tart:

1 fully baked warm tart shell (9 to 9 1/2 inch)

7 large egg yolks, preferably organic

2 large eggs

1 cup granulated sugar

2 tablespoons granulated sugar

2/3 cup freshly -squeezed lemon juice, preferably organic, from 4 – 5 medium lemons

1/4 cup grated lemon zest

pinch of salt

4 tablespoons unsalted butter, cut into 4 pieces

3 tablespoons heavy cream

Instructions:

Once the lemon curd ingredients have been combined, cook the curd immediately; otherwise it will have a grainy finished texture.  To prevent the curd from acquiring a metallic taste, make absolutely sure that all utensils coming into contact with it — bowls, whisk, saucepan, and strainer — are made of non-reactive stainless steel or glass.  Since the tart has a removable bottom, it is more easily maneuvered when set on a cookie sheet.  If your pre-baked tart has already cooled, place it in the oven just before you start the curd and heat until warm, about 5 minutes.

Adjust the oven rack to upper-middle position and heat oven to 375 degrees.  Place the tart pan with shell on cookie sheet.

In medium non-reactive bowl, whisk together yolks and whole eggs until combined, about 5 seconds.  Add sugar and whisk until just combined, about 5 seconds.  Add lemon juice, zest, and salt; whisk until combined, about 5 seconds.  Transfer mixture to medium non-reactive saucepan, add butter pieces, and cook over medium-low heat, stirring constantly with wooden spoon, until curd thickens to thin sauce-like consistency and registers 170 degrees on an instant-read thermometer, about 5 minutes.  Immediately pour curd through single-mesh steel strainer set over clean non-reactive bowl.  Stir in heavy cream; pour curd into warm tart shell immediately.

Bake until filling is shiny and opaque and until center 3 inches jiggle slightly when shaken, 10 to 15 minutes.  Cool on wire rack to room temperature, about 45 minutes.  Serve with freshly whipped cream.  Enjoy!

Source:  Adapted from Cook’s Illustrated

Thanks for stopping by Relishing It today– I always appreciate feedback, so please leave a comment and let me know your thoughts.  See you soon!

Laurie

Read Full Post »

%d bloggers like this: