Feeds:
Posts
Comments

Archive for the ‘Salad’ Category

Caprese Salad with a Basil Vinaigrette | Relishing It

Now I’ve mentioned here before how much I love tomotoes, but just in case you’re new to Relishing It, let me emphasize this.  It’s not just that I love tomotoes– I’m obsessed with them.  Every summer I wait.  And wait.  And wait until the first ripe tomotoes show up at the farmers’ market.  And then I try to fit them into almost every meal.  For the record, I don’t buy tomatoes when they’re not in season for a number of reasons.  First, obviously, is the taste.  Out-of-season tomatoes tend to be stiff and flavorless.  Second, I have serious ethical concerns about the industrial tomato industry, which is where many of our “winter” tomatoes come from.  Take a look at ‘Tomatoland’, a brilliant book by Barry Estabrook if you’re interested in just how terrible the industry is.  Here’s a link to the NY Times review.  Now that THAT is out of the way…

Caprese Salad with a Basil Vinaigrette | Relishing It

I love creating all sorts of dishes with tomatoes.  This heirloom tomato tart is among my favorite summer dishes.  And this tomato Jam is a versitle spread for both sweet and savory things.  If you’ve ever wanted to make your own homemade ketchup–this recipe is a good one to try.  I also can salsa every year to share with family and friends, and can a huge supply of plain tomatoes that help get us through the winter.

Caprese Salad with a Basil Vinaigrette | Relishing It

Basil Vinaigrette | Relishing It

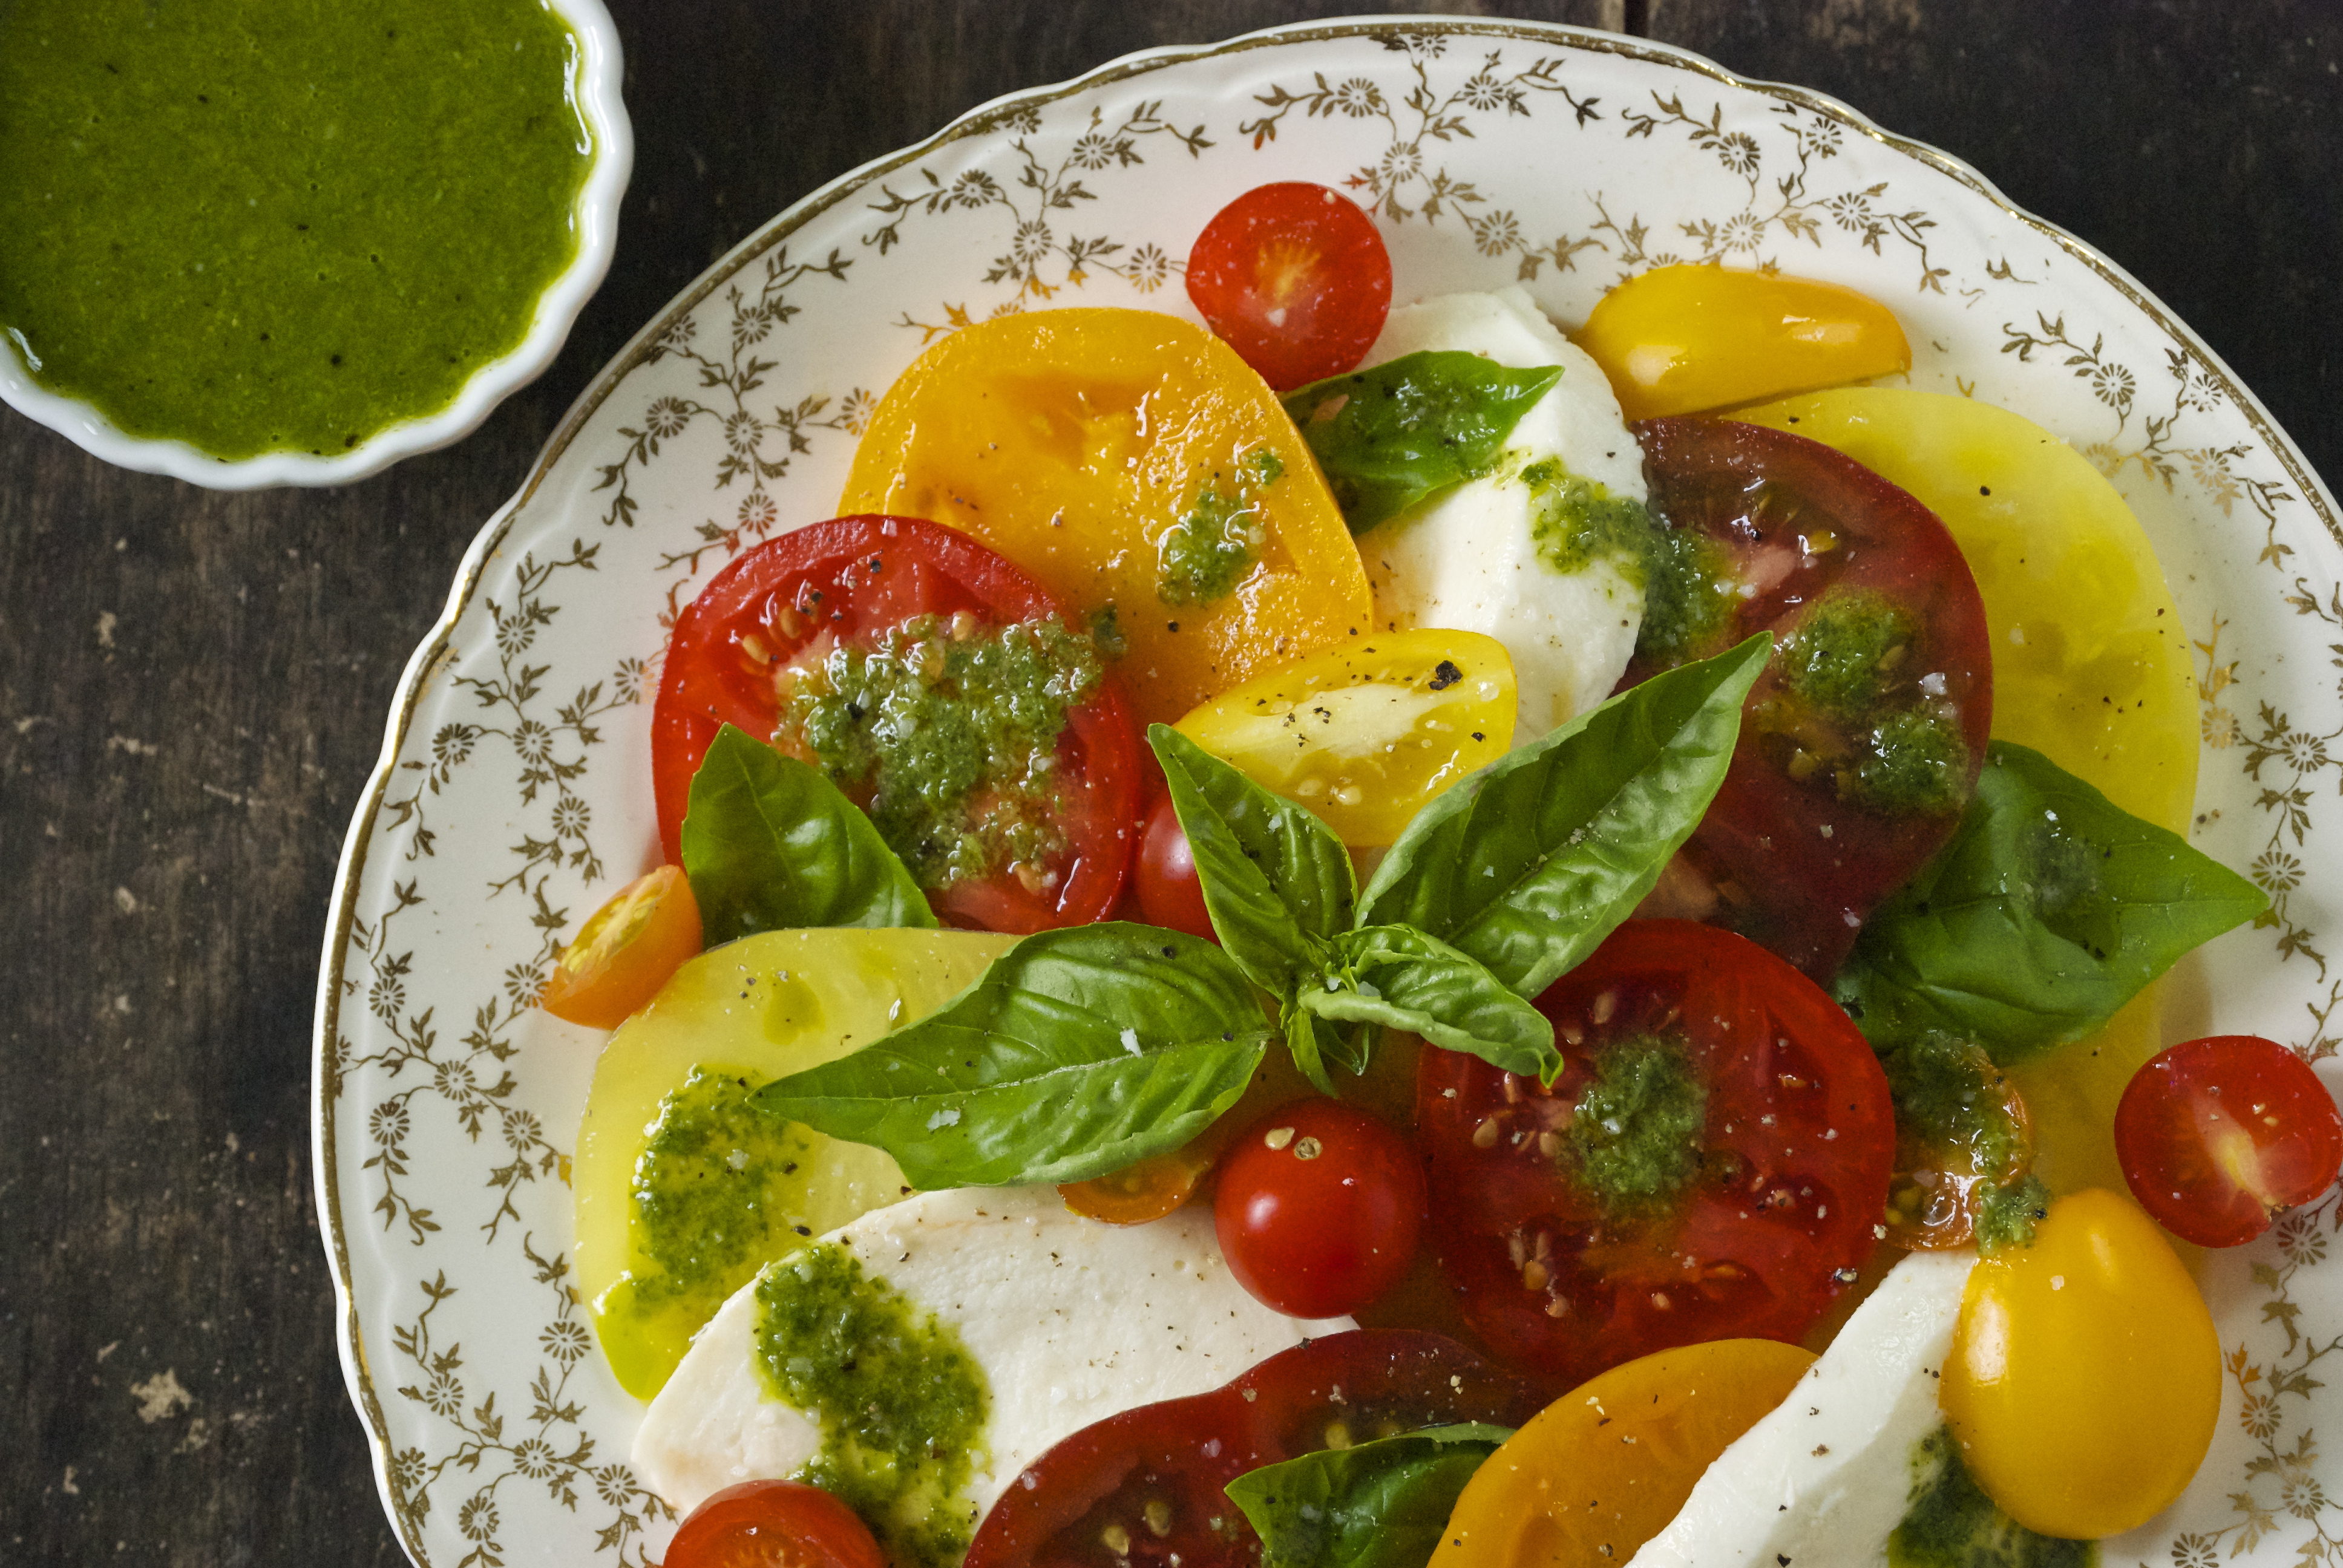
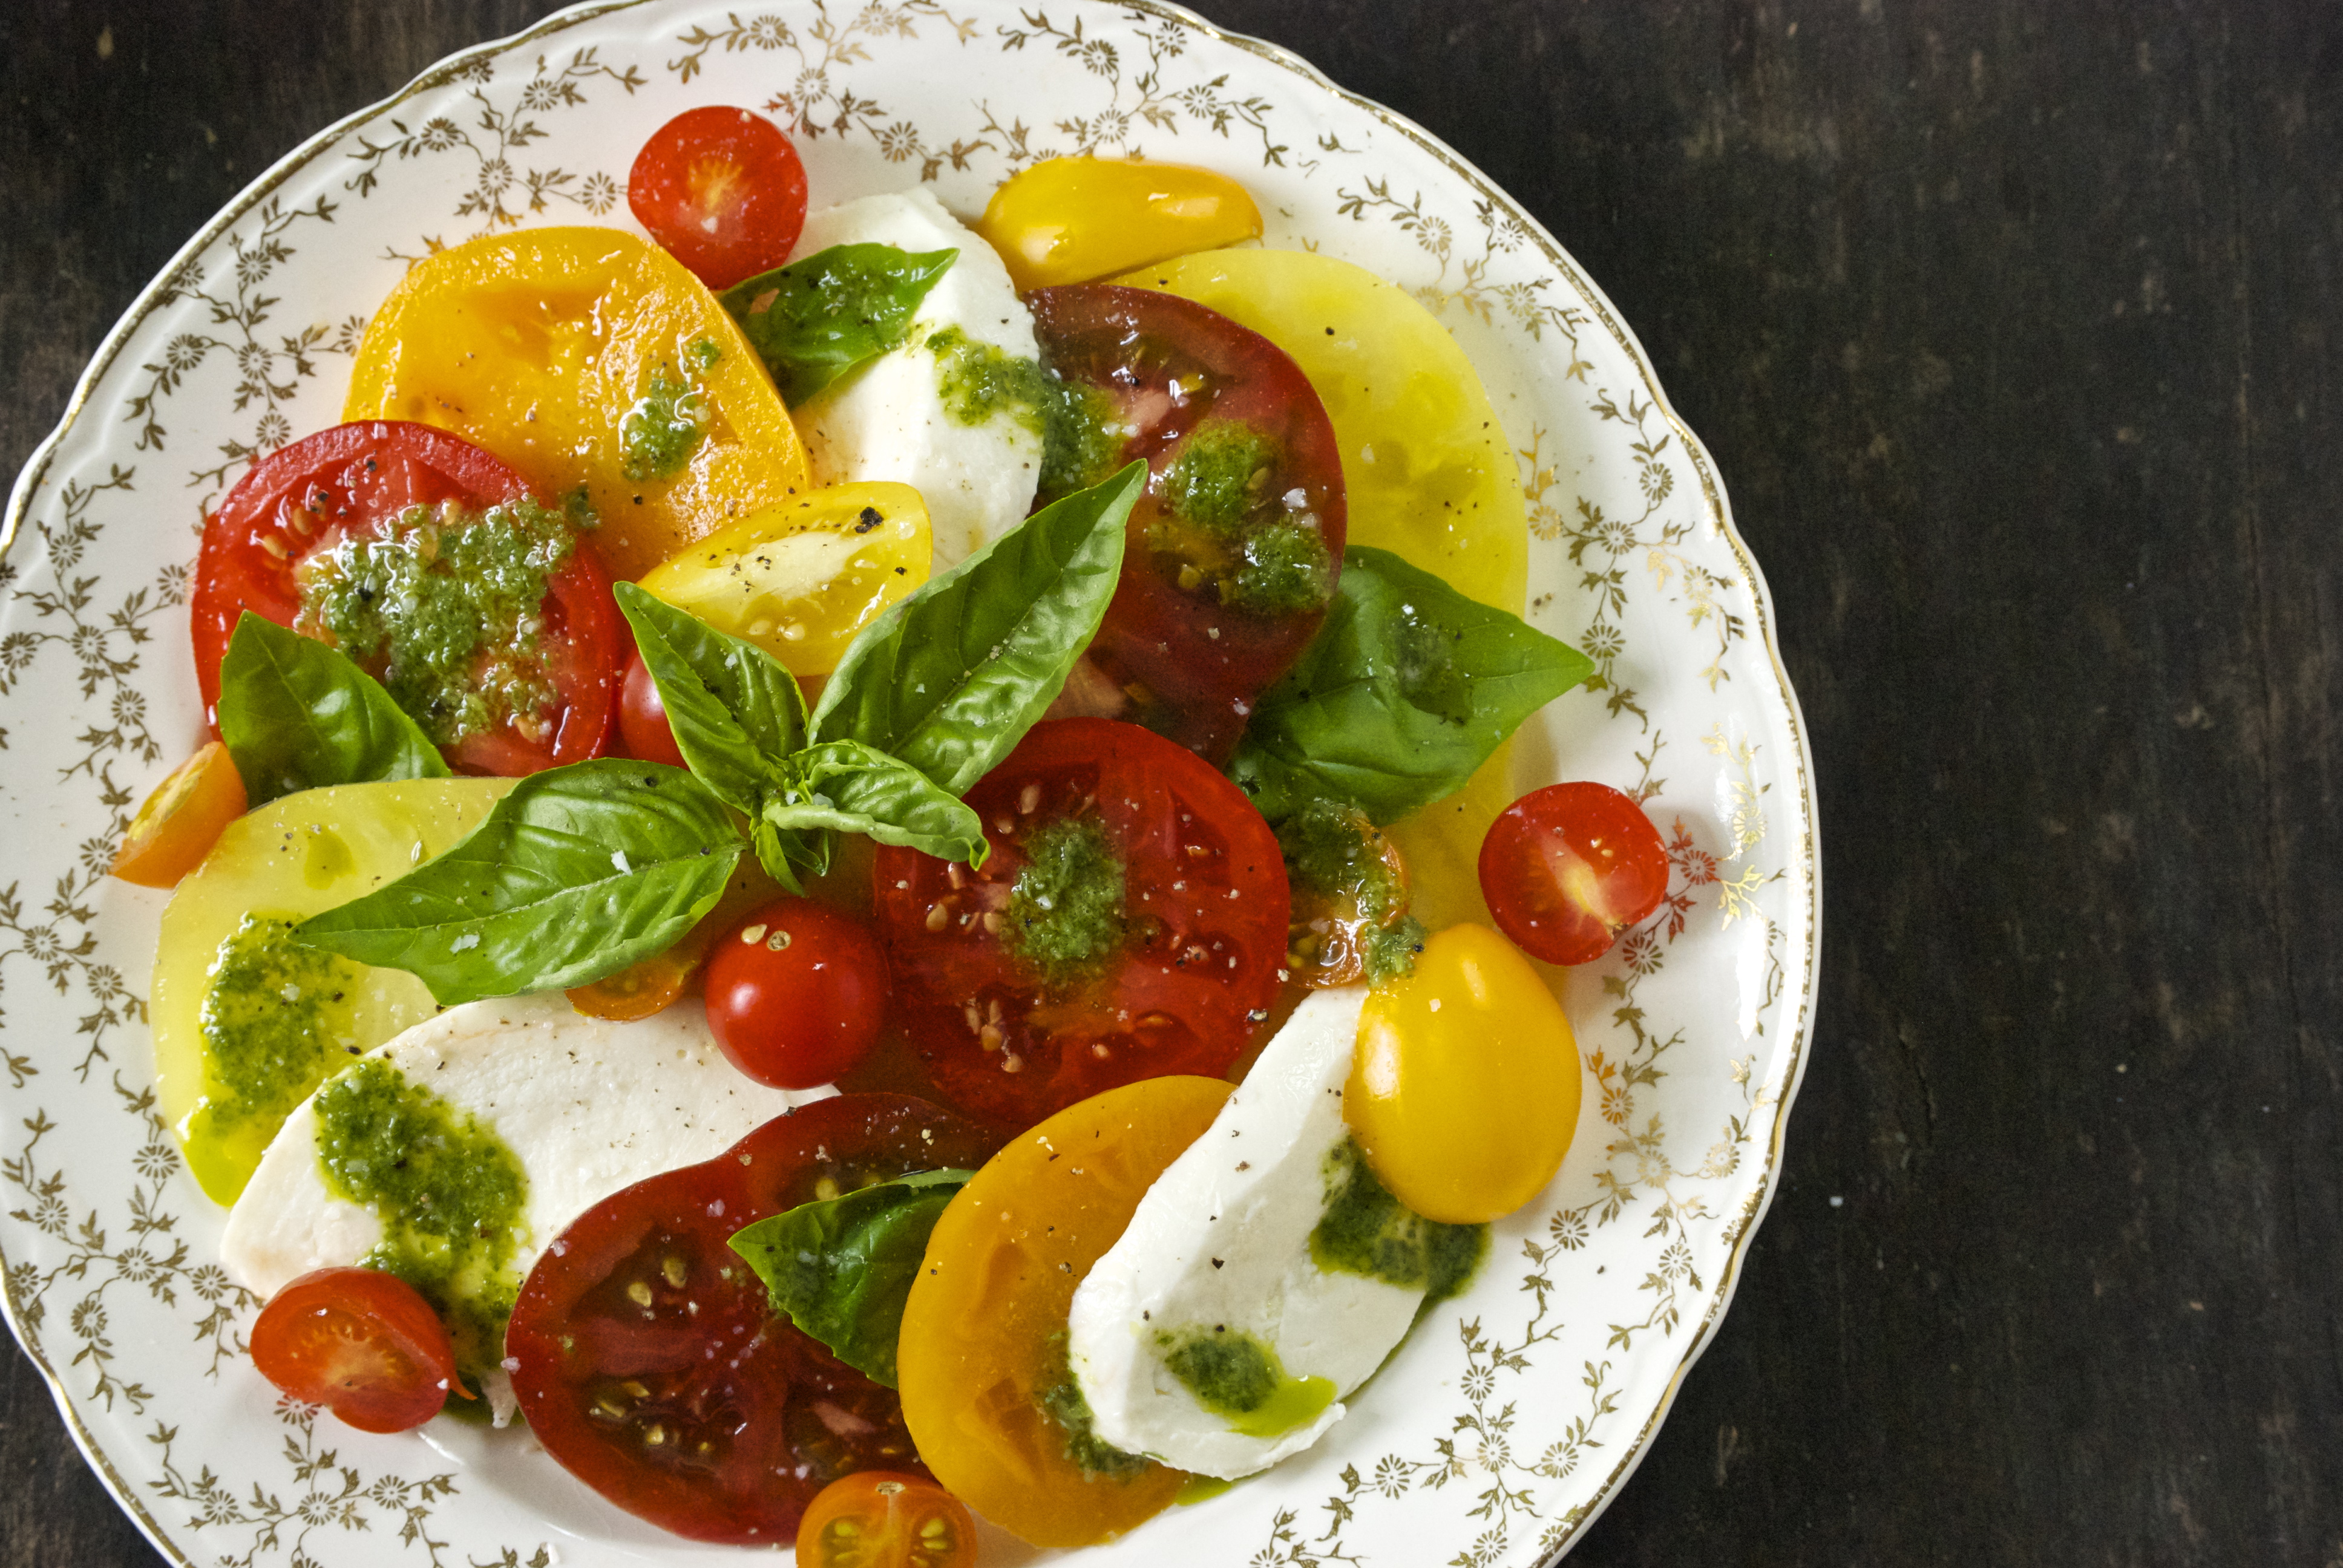
As much as I love to use them as an ingredient, nothing beats eating them in their natural state.  They are so juicy and slightly tender.  A sprinkle of salt brings out their amazing robust flavor.  I love a good caprese salad.  However, I’ve discovered that I’m not a huge fan of eating whole basil leaves.   A few here and there are fine, but I much prefer the basil flavor to come through in a delicious vinaigrette that I can let my tomatoes and fresh mozzarella swim in.  Every bite gets a little basil burst.  It works for me, and I hope it works for you!  Enjoy!

Caprese Salad with a Basil Vinaigrette | Relishing It

The Recipe:  Caprese Salad with a Basil Vinaigrette

Heirloom tomatoes, big and small

Fresh mozzarella

Extra basil leaves, for garnish

Sea salt and freshly ground pepper

For the Basil Vinaigrette:

(makes enough for a small platter)

2 tablespoons white wine vinegar

1 garlic clove, sliced

1/2 cup packed fresh basil

2 large anchovy fillets in olive oil, minced

1/3 cup extra virgin olive oil

sea salt and pepper, to taste

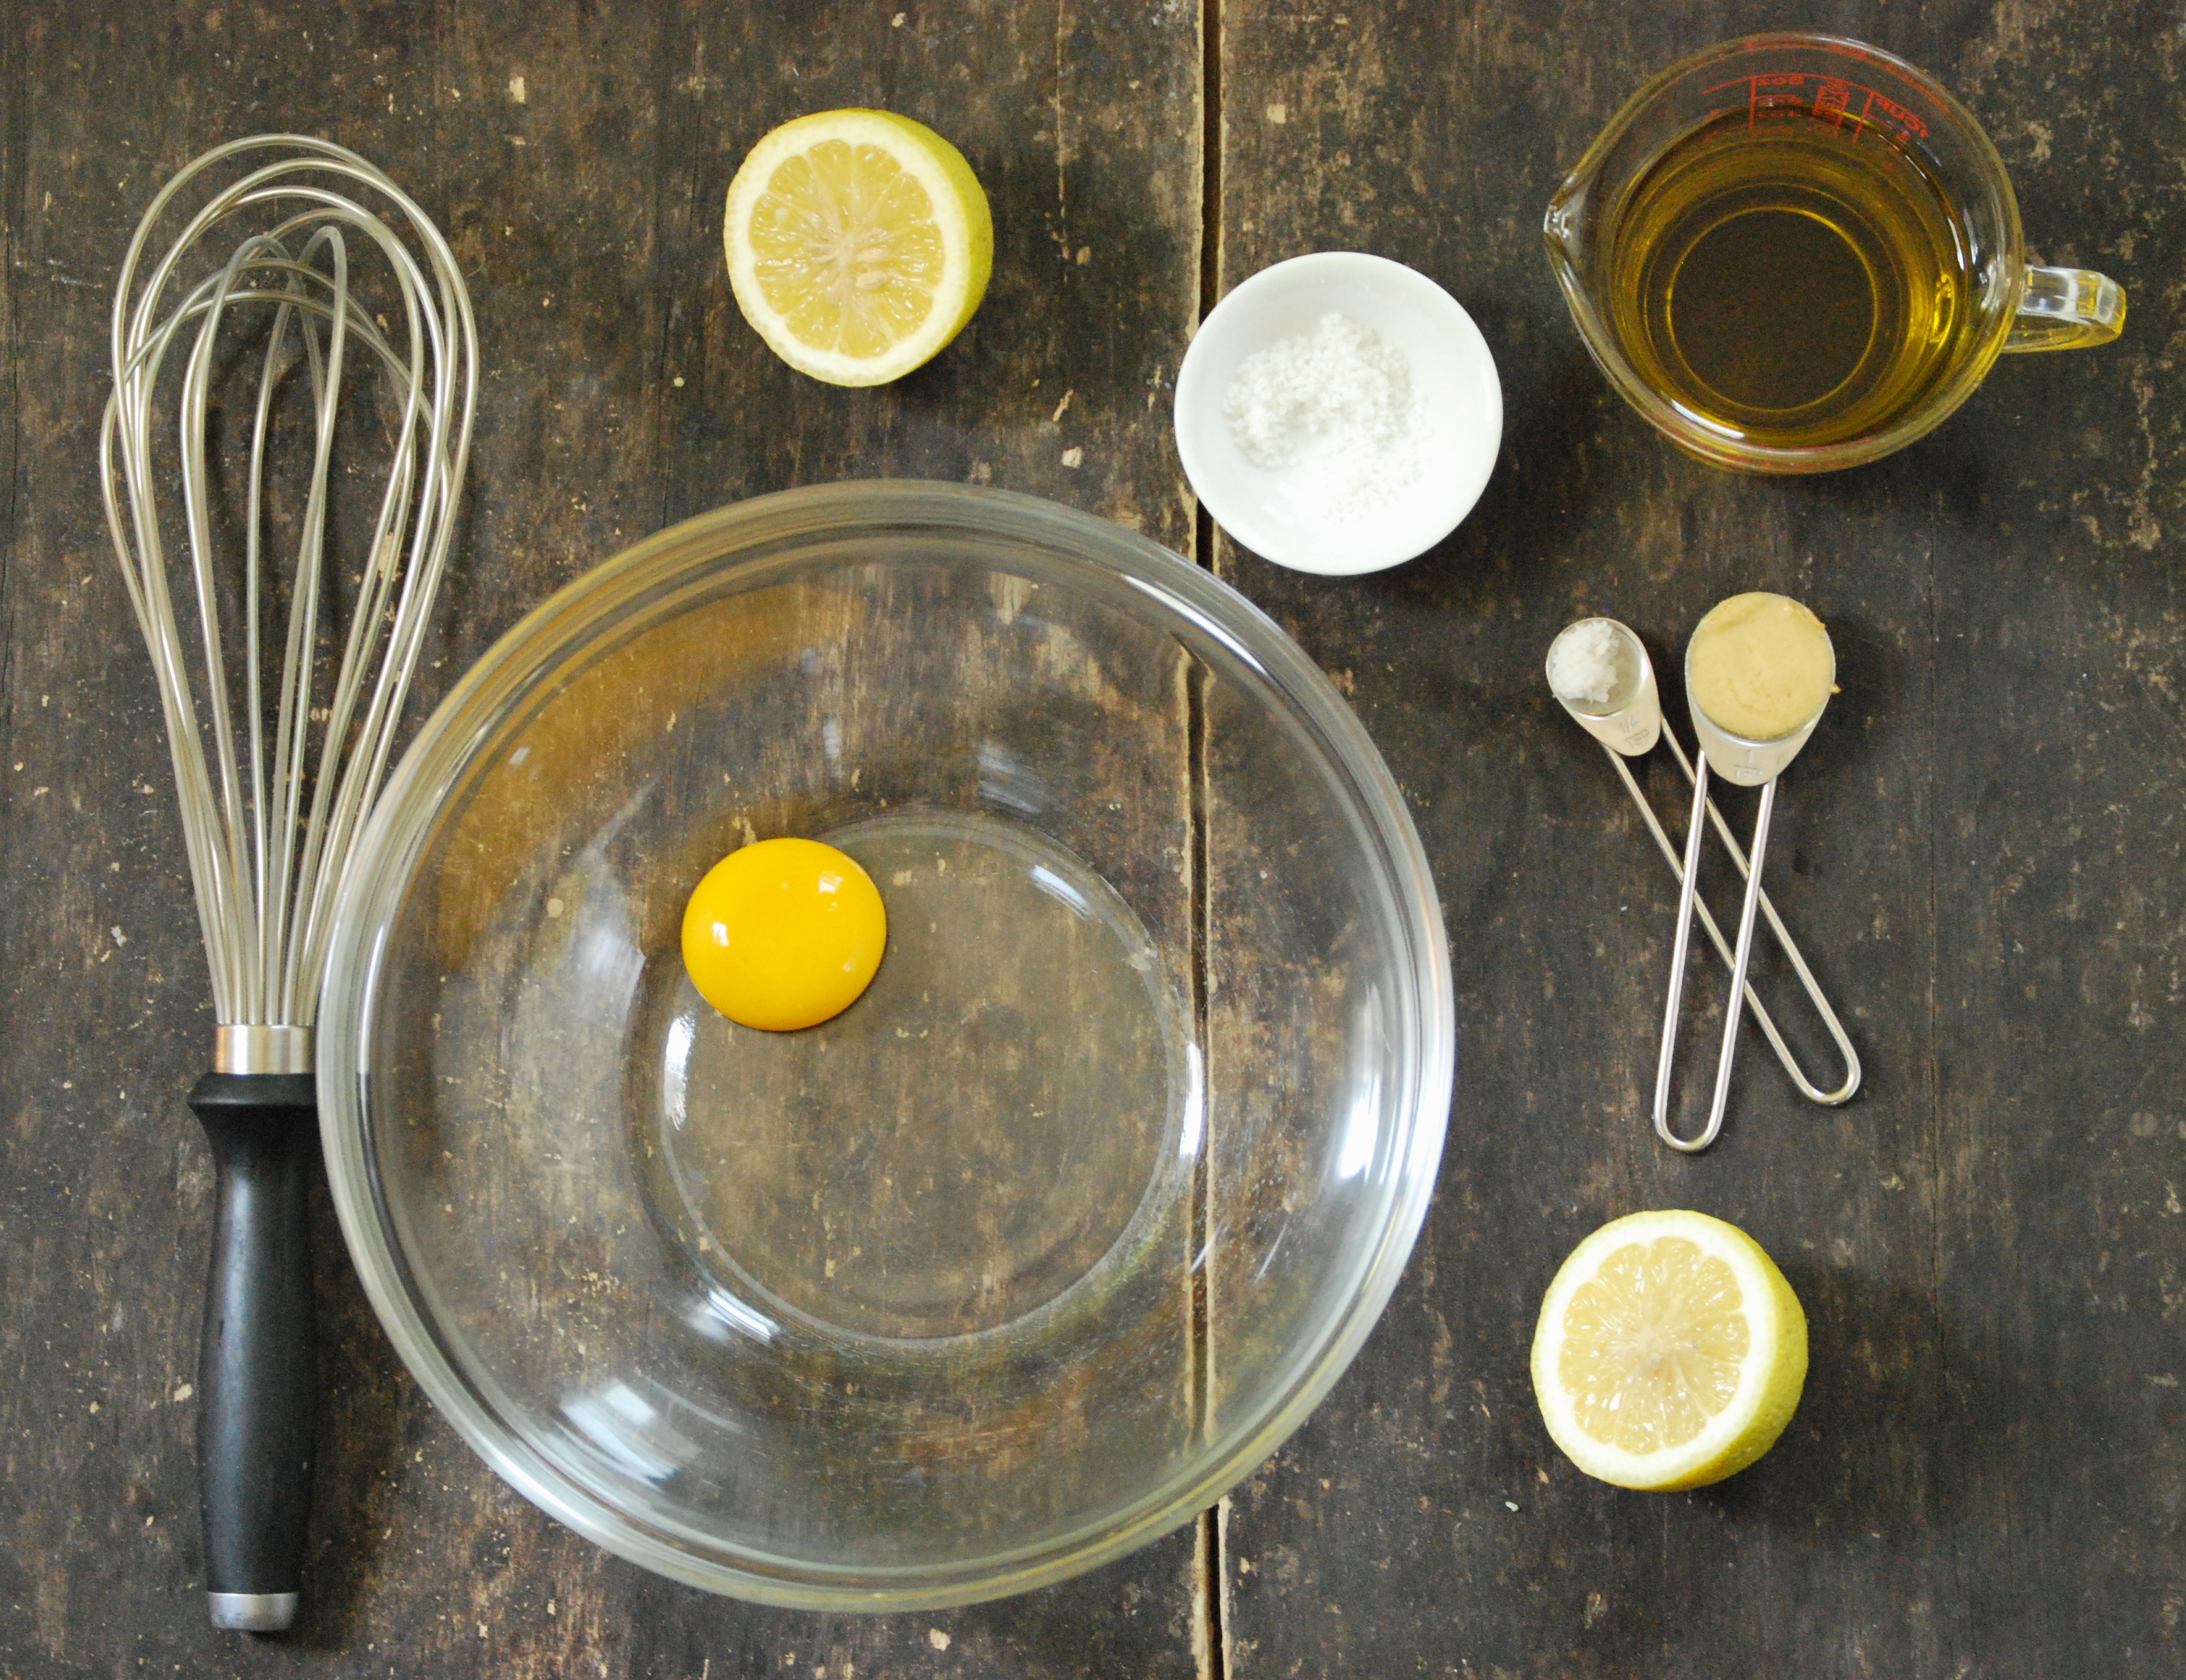
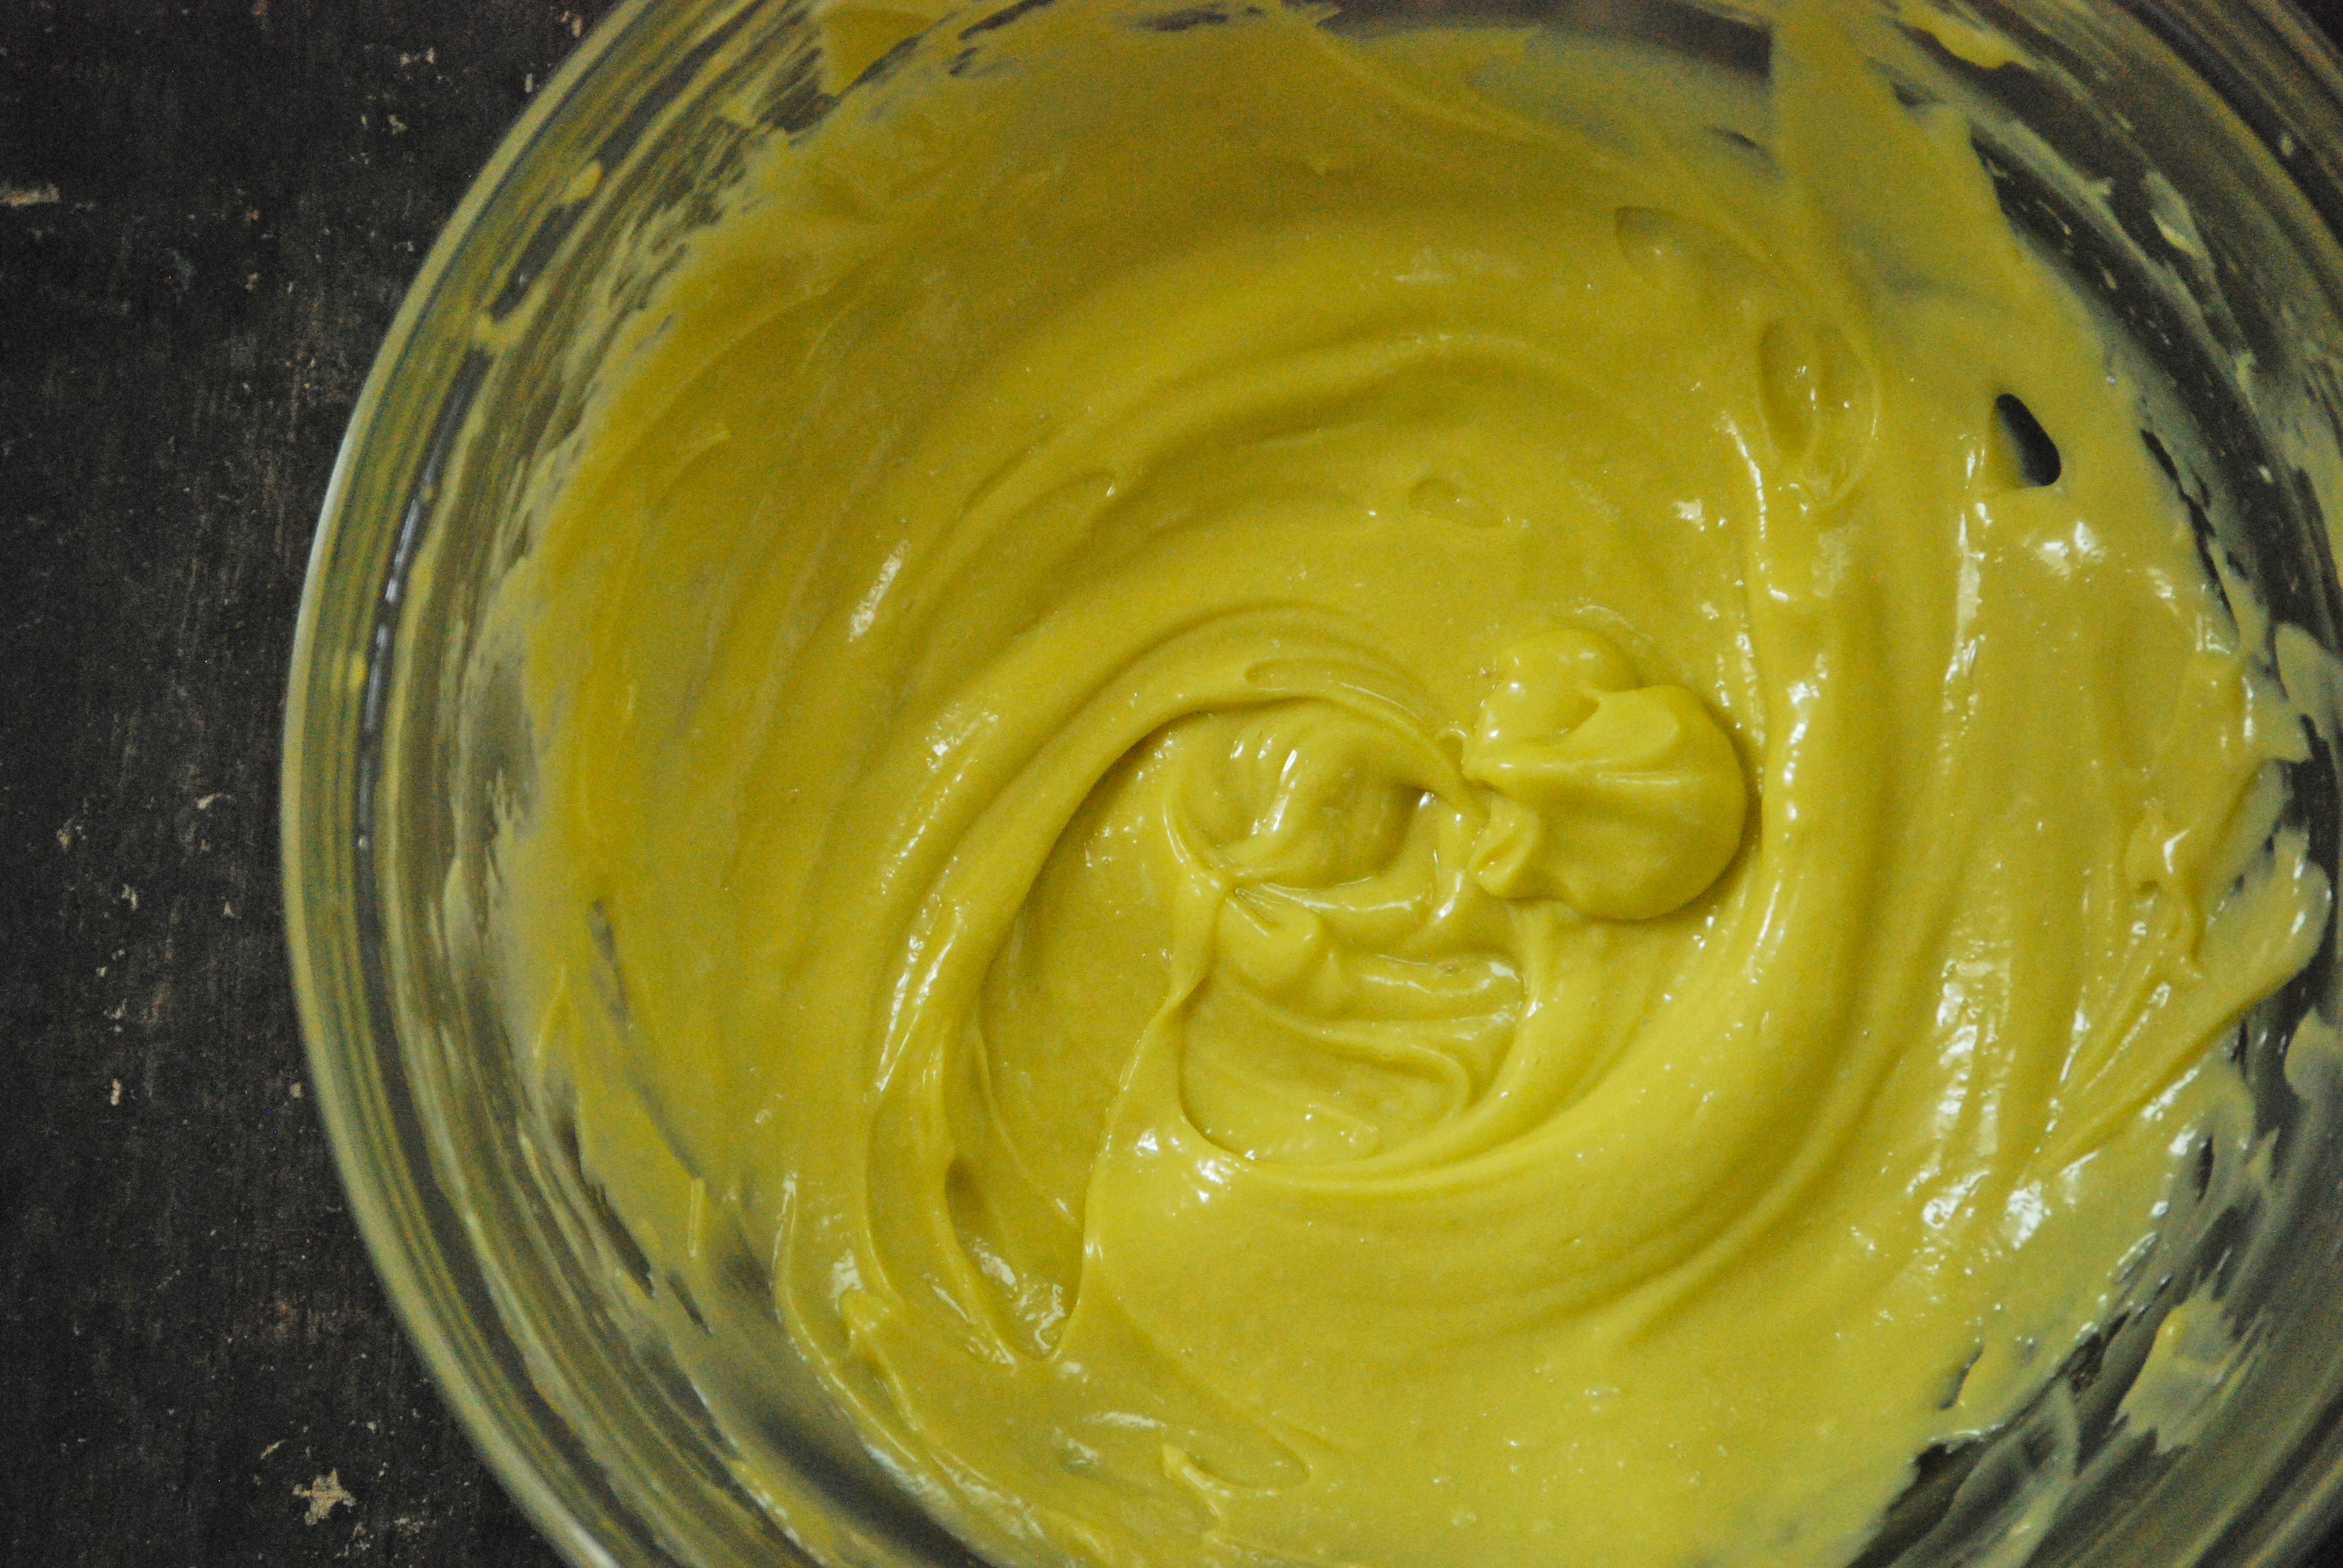
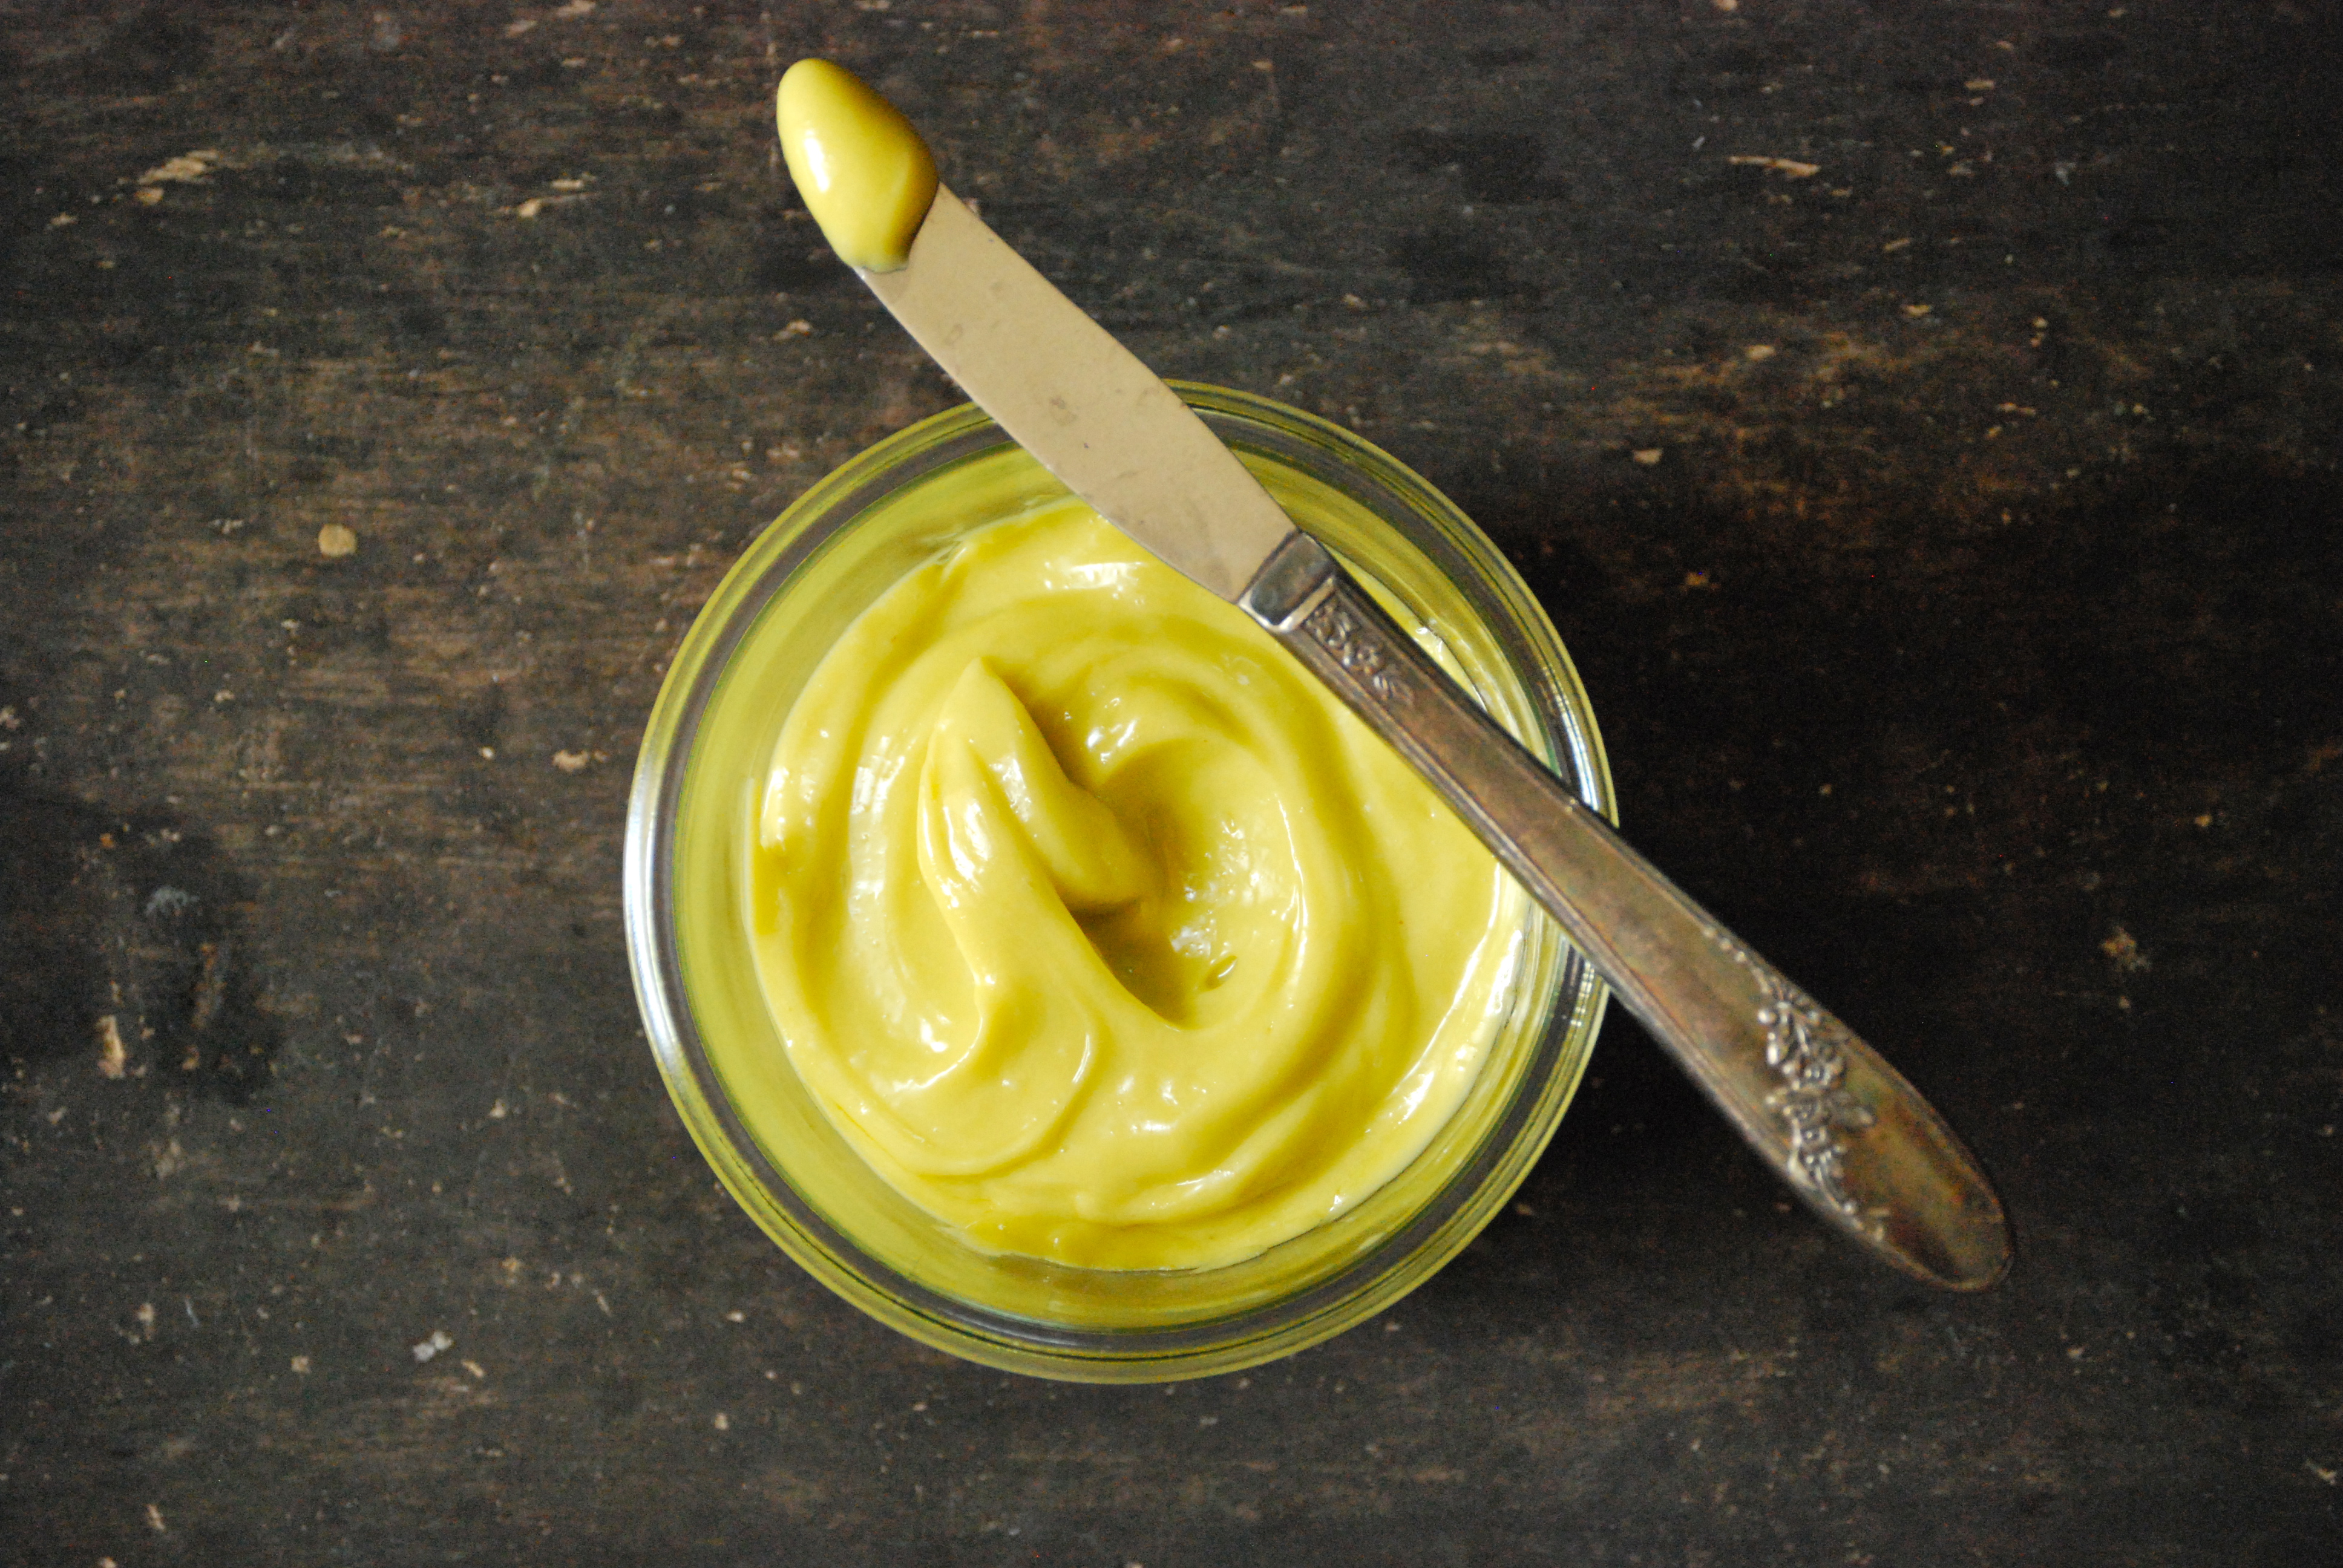
To make the Basil Vinaigrette:  Place all of the ingredients except the olive oil in a mini food processor.  Pulse it a few times to finely chop the basil.  Scrape the sides, as needed.  Slowly add the olive oil and continue running the machine until the vinaigrette is a relatively smooth consistency.  Use immediately, or store covered in the refrigerator for a few days.  Let it come to room temperature before using.

Arrange the heirloom tomatoes and fresh mozzarella on a platter, using as many as you would like (double the vinaigrette recipe, if making a larger portion).   Pour the dressing over and sprinkle with sea salt and pepper.  Eat immediately.  Enjoy!

Thanks for stopping by Relishing It!  Have a lovely weekend.

xo

Laurie

Read Full Post »

Homemade Mayonnaise via Relishing It

Are you ready for another do-it-yourself recipe?  This time it’s homemade mayonnaise.  And yes, there’s a pattern here– I love making my own condiments.  If you missed them, here’s are a few recipes for ketchup, mustard, and tomato jam.  They taste more interesting, and to be honest, better than the same old highly-processed formulas you find at the grocery store.  Making your own mayonnaise is easy, and despite what you may have read, doesn’t take long.  There’s only one catch– you’ll need to use it up within a week since it contains a raw egg yolk.  Trust me, you won’t have a problem finishing it off with all the fresh produce out this time of year.  Sandwiches, BLTs (fresh tomatoes, yay!), potato salad, aioli’s, everything tastes better with homemade mayonnaise.

Homemade Mayonnaise via Relishing It

Homemade Mayonnaise via Relishing It

Homemade Mayonnaise via Relishing It

Homemade Mayonnaise via Relishing It

Homemade Mayonnaise via Relishing It

I like to make my mayonaisse with healthy olive oil, which gives it a wonderful layered flavor.  You can use canola instead if you prefer something more subtle.  Or feel free to do a mix, just make sure you equal the amount of oil listed in the recipe and you’ll be fine.  One other note on this recipe that’ll make it almost foolproof.  A trick I learned from food writer, Melissa Clark.  Add one teaspoon of water to the mixture.  It’s such a simple step, but it can make a huge difference on whether or not the mayonnaise turns out perfectly silky.  That’s it.  It works every time for me.  Now get in there and whip up your own batch of homemade mayonnaise.  And don’t forget you can make it as interesting as you like by adding fresh herbs, spices, or harissa. Or you can simply fold it into a bowl of steamed fingerlings and top with freshly chopped parsley.  It’s one of the quickest and most delicious potato salads around.  Enjoy!

Homemade Mayonnaise via Relishing It

Fingerling Potato Salad with Homemade Mayonnaise via Relishing It

Fingerling Potato Salad with Homemade Mayonnaise via Relishing It

The Recipe: Homemade Mayonnaise

1 teaspoon Dijon mustard

1 pasteurized egg yolk, at room temperature

1 tablespoon lemon juice (from 1/2 large lemon)

1/4 teaspoon fleur de sel

1 teaspoon water

3/4 cup extra virgin olive oil (I prefer California Olive Ranch— both for the fantastic quality and the great price)

In a medium sized bowl, whisk all of the ingredients together, except the olive oil, for a minute or so until frothy.  Then, while continuously whisking, slowly begin adding the olive oil a drop at a time.  As it begins to thicken, you may start adding it in a very thin stream, remembering to whisk the entire time.  The slower you add the olive oil, the better chance you have of it not breaking.   The whole process will take about 15 minutes, or so.  Transfer it to a jar, and store in the refrigerator.  Re-season with salt, if necessary.  Use within one week.  Enjoy!

Thanks for stopping by!

Laurie

Read Full Post »

Salad of Green and Yellow Split Peas with Pesto via Relishing It

In case you haven’t caught on yet, I’m a huge advocate of having a pantry stuffed with dried goods.  Legumes, grains, you name it, I’ve got it in a mason jar ready for use.  And on those occasions when I notice it isn’t stocked full, I briefly panic and then run out to replenish whatever is missing.  I guess it’s almost a compulsion, since it’s not like I’m going to not have access to food– I live a few blocks from our co-op.  I may be a little crazy, but I embrace it.

Salad of Green and Yellow Split Peas with Pesto via Relishing It

Summer is a great time to combine those dried goods with some of the season’s freshest offerings.  I love the combination of peas and pesto.  Using dried yellow and green split peas here works beautifully and is absolutely stunning to look at.  The sliced scallion on top provides a nice crunch and a burst of freshness.  This salad is also very filling– it’s one of those that can be a stand-alone meal.  And with a smaller portion size, it pairs wonderfully with most any grilled foods.

Salad of Green and Yellow Split Peas with Pesto via Relishing It

Salad of Green and Yellow Split Peas with Pesto via Relishing It

About this time of year, I also start to make large batches of pesto to freeze for the winter.  I’ll pop a small portion into ice cube trays or muffin tins to fully freeze.  I then pop them out, wrap them in plastic wrap, and put them into freezer bags (or use my vacuum sealer).  It’s a wonderful treat in the cold winter months to have pesto to mix into pasta or to dollop into soups.  If you choose to do this– a word of advice.  If you blanch your greens for just 30 seconds or so, then put it into an ice bath to stop the cooking process and proceed with the recipe–your pesto will remain a beautiful, vibrant green, even after it has been frozen.  I always use this method if I’m planning to freeze my pesto, or even if I know I’m going to have leftovers that may sit in my refrigerator for a few days.  The color just ‘pops’.  One more trick regarding pesto, remember you have the option to add a bit of water instead of more olive oil to loosen it up if it’s a bit thick.  Either way, be sure to season it appropriately with kosher salt– the right amount can make the pesto sing!  Enjoy!

Salad of Green and Yellow Split Peas with Pesto via Relishing It

The Recipe: Salad of Green and Yellow Split Peas with Pesto

(serves 4-6)

Large bed of leafy lettuce leaves

1 cup dried green split peas

1 cup dried yellow split peas

1 bunch of sliced scallions to garnish

For the Pesto:

1 cup packed basil leaves

1/4 cup packed Italian leaf parsley

3 cloves garlic, smashed

1/4 cup grated parmesan or grana padano cheese

1/4 cup walnut halves, toasted and roughly chopped

1/3 – 1/2 cup extra virgin olive oil, or more

sprinkle of hot pepper flakes

kosher salt and freshly ground pepper, to taste

To cook the Split Peas:  Rinse the peas and place in a large saucepan.  Cover with salted water, making sure that about two inches of water are above the peas.  Bring to a boil, then reduce to a medium/low.  Cook for about 25 minutes, then begin testing them for doneness.  You may need to cook them longer, depending upon how high your heat was.  You will want them to be soft, but retain their shape.  Be careful not to overcook them, or they will turn to mush.  When done, drain the water and let cool.

To make the Pesto:  As I stated above, you can choose to blanch the greens or not, depending upon how fast you’re going to use the pesto.  You decide.  Place either the blanched or unblanched basil and parsley into a small food processor (use a large one, if making a bigger batch).  Pulse a few times to chop up a bit.  Add the parmesan, walnuts, garlic, red pepper flakes, and a pinch of salt and pepper.  Pulse a couple more times to combine.  With the machine running on low, slowly begin adding the olive oil.  Scrape down the sides, as necessary.  Add as much olive oil to reach your desired consistency.  Or, add a few tablespoons of water at the very end to loosen it up a bit.  Re-season with salt and pepper.  Use right away, or place in the refrigerator with plastic wrap tightly pushed onto it’s surface, or freeze.

Place the lettuce leave onto a large platter.  Mix the cooled split peas with about 1/3 cup of the pesto, use more if desired.  Add salt and pepper, if needed.  Pour mixture over the lettuce, top with sliced scallions, and a drizzle of good olive oil.  Enjoy!

Thanks for stopping by today!

xo

Laurie

Read Full Post »

The Un-Lettuce Salad via Relishing It

If you’re like me, this time of year you may go a little overboard with salads.  It’s hard not to with all of the fresh, crisp produce popping up in gardens and farmers markets.  I absolutely love a good leafy-green salad, but sometimes I want more than just a lettuce version– something a bit more substantial than those delicate little leaves.  When I’m looking for something heartier, I often turn to my favorite un-lettuce salad.  It’s my favorite way to incorporate a load of healthy vegetables into a meal.

The Un-Lettuce Salad via Relishing It

Alright, this “recipe” is more of a suggestion– an idea, if you will.  You can use what you have, but this is the combination that I like best.  All of these vegetables are currently available in Minnesota.  The pea tendrils give this dish it a nice slightly sweet flavor.  If you can’t find them, a few spinach leaves make a lovely replacement.  Roasted red peppers add a brilliant kick.  If you can’t find fresh ones, feel free to buy a jar.  Sun-dried tomatoes would be perfect in this salad, too.  Ricotta salata is my go-to cheese for summer salads– I love it’s subtle flavor, but parmesan, feta, goat cheese, or even a mild blue would all work.  I used pepitas here, though I often turn to sunflower seeds for a nice crunch.  Load it up with herbs, if you want.  I like dill with this combination.  Are you feeling me, here?  Use your imagination, you’ll be happy.

The Un-Lettuce Salad via Relishing It

Sometimes I make a simple vinaigrette with this salad.  This one works well.  But, more often, I choose to do something creamy, so I enjoy this simple herbed buttermilk dressing.  It’s less gloppy and bad for you than the bottled versions.  I like a dressing that lightly coats my greens, instead of sits on top of them.  I still use full-fat mayonnaise, but just less of it  (even better if you make your own completely out of olive oil– recipe coming soon on that).  The reduced-fat versions tend to have a sweetness to them that makes for an off-flavor.  And honestly, don’t even get me started on the fat-free bottled dressings that are on the grocery store shelves.  If you have them in the refrigerator, do yourself a favor and toss them out.  They are loaded with a bunch of junk (corn syrup to replace the fat?  Seriously?).  Not to mention, your body needs a little fat to absorb all of those healthy things that you eat a salad for in the first place.  Make your own and use less.  Hope you enjoy!

Herbed Buttermilk Dressing via Relishing It

The Un-Lettuce Salad via Relishing It

The Recipe:  The Un-Lettuce Salad

(Make this as big or as small as you like)

Handful of pea tendrils, large stems removed

english cucumbers,

broccoli

cauliflower

garden peas, left in the pod or not

radishes

roasted red peppers

ricotta salata cheese, crumbled

pepitas or sunflower seeds

dill or any herbs you prefer

Herbed Buttermilk Dressing:

2/3 cup buttermilk

4 tablespoons mayonnaise (full fat)

2 garlic cloves, minced

3 tablespoons finely chopped dill, oregano, and parsley

kosher salt and cracked pepper, to taste

To make the Dressing:  Combine all of the ingredients into a small jar and shake.  Make sure to season properly with salt and pepper.  If you prefer a thicker dressing, and a bit more mayonnaise.

Cut the vegetables into bite-sized pieces.  Place into a large salad bowl and coat with a bit of dressing.  Top with the cheese, nuts, and dill.  Enjoy!

Thanks for stopping by Relishing it today!

xo

Laurie

Read Full Post »

Chickpea and Black Rice Salad via Relishing It

So now that school is out, I’m trying to get my bearings straight.  We are four days into summer vacation, and while I am more than thrilled to have my son home all day long, it’s not without its…complications.  Aanen has this amazing contagious personality– he is truly a joy to be around.  He and his sister get along swimmingly.   And I love not having to pack his lunch every morning and rush him off to school.  Mornings around our house are brilliant.  However…it’s the rest of the day that gets a bit more hectic.  We’re I’m missing my schedule.  I knew exactly how much I could squeeze into a day and how much I could get done.  Now play dates, outings, parks, and pools have all taken its place.  And though I absolutely love all of these things, it’s hard to get any real work done.  I know I’m not unique in this situation or these feelings, but it sure feels good to ramble on about it.

Chickpea and Black Rice Salad via Relishing it

So how does that tie-in to today’s post?  Well, in the hustle and bustle of our summers we tend to eat much simpler food.  It’s easy to do with all of the fresh produce, so I’m absolutely fine with it.  I’ll often make a huge salad or two at the beginning of the week from legumes and grains and we’ll nibble on it for a few days.  It works well when we’re constantly running out the door.  This salad in particular keeps well.  And it’s absolutely perfect to pack for picnics.

Chickpea and Black Rice Salad via Relishing It

Chickpea and Black Rice Salad via Relishing It

I’ve always been a fan of chickpeas.  They’re loaded with protein, and they’re substantial enough to turn a salad into a meal.  If you’re not familiar with black rice, give it a chance.  Here’s a previous dish that I made using it.  I love black rice, sometimes called “forbidden rice”.   It’s nutty and similar in taste to wild rice.  It’s loaded with antioxidants, vitamins, minerals, and fiber.  You can read more about it here.  I realize that some of you may not the able to find black rice and that’s ok.  Quinoa is also a wonderful substitute and is loaded with its own health benefits.  Radishes give this meal a nice little crunch and they are so wonderful this time of year.  The preserved lemon adds a burst of brightness that makes you smile every time you bite into a tiny piece.  If you haven’t made preserved lemons yet, do it now.  They add so much to summer salads.  Here’s a recipe from my blog.  Or you can do the salt pack method, which is how I made this last batch.  This is a recipe for that method.  Obviously, if you don’t have preserved lemons on hand, you should still give this salad a try.  The parsley and subtle shallot vinaigrette bring all of the flavor together and I love the fact that it’s so healthy!  Makes me feel better about all of the ice cream that my kids are devouring.  Hope you enjoy!

Chickpea and Black Rice Salad via Relishing It

The Recipe:  Chickpea and Black Rice Salad with a Shallot Vinaigrette

2 cups dried chickpeas, cooked (see note)

1 cup black rice, cooked  (see note)

1 bunch radishes, chopped

2 tablespoons finely chopped preserved lemon

1 bunch Italian parsley, chopped

For the Shallot Vinaigrette:

1 -2 tablespoons finely chopped shallot, or red onion

2 tablespoons fresh lemon juice, from 2 small lemons

1 tablespoon white wine vinegar (champagne or plain rice vinegar can also be substituted)

about 1/3 cup extra virgin olive oil, or a bit more

sea salt and cracked pepper, to taste

Note:  To cook dried chickpeas, place in a large saucepan covered with cold, salted water.  Bring to a boil.  Let boil for a few minutes.  Cover and turn off the heat.  Let sit for 1-2 hours.  Bring to a boil again and cook for a few more minutes until they are your desired tenderness.  To make the black rice, place in a large saucepan and cover with cold, salted water by a couple inches.  Bring to a boil, then reduce heat just a bit.  Let cook until the rice is tender (about 25 minutes).  Drain the water.

To make the Shallot Vinaigrette:  Place the chopped shallot in a bowl, or jar, and sprinkle with a little salt.  Pour the vinegar and lemon juice on top and let soften for about 15 minutes.  Then whisk in the olive oil, or give the jar a shake.  Season to taste with salt and pepper.  Place in the refrigerator, let it warm up for a few minutes before you plan to use it.

Place the rice and chickpeas into a large serving bowl along with the parsley, radishes, and preserved lemon.  Pour as much dressing over the salad as you like.  Start with a little and add more, you will not need to use the entire amount that you made.  Toss the ingredients together and let the flavors meld for a bit.  You can even refrigerate it and let it warm a bit before serving.  This salad will keep well for days.  Enjoy!

Thanks for stopping by Relishing It!

xo

Laurie

Read Full Post »

Simple Carrot Salad with Harissa and Cilantro via Relishing It

Spring has finally arrived in Minnesota!  And by Spring, I mean it officially reached 80 degrees here yesterday.  Last night we grilled for the first time this season, and it was wonderful.  My husband is one of those guys that would be happy eating cereal for dinner several nights a week if I let him, yet he considers the grilling of a steak a sacred process.  He’s a master, and the New York strip that he grilled-up last night was heavenly.  I mean this now, I’d put it up against any fancy restaurant’s offering.  Anyway, I know we’ll be doing a lot more grilling now that the weather has turned, so I came up with this carrot salad that is a fantastic side dish.  It’s also perfect if you’re in the mood for a light lunch.

Simple Carrot Salad with Harissa and Cilantro via Relishing It

Simple Carrot Salad with Harissa and Cilantro via Relishing It

Simple Carrot Salad with Harissa and Cilantro via Relishing It

It seems as though carrots are often just an afterthought in most dishes.  Need a little color in some soup, throw a carrot in!  (Well, except in this soup– one of my favorites– where they’re the star.)  I happen to love carrots.  They have that nice slightly-sweet flavor, a wonderful crunch, and amazing longevity.  In this salad they take center stage.  The flavors are bright, yet there is a nice, complex, smokiness to give it depth.  Remember a couple of weeks ago when I made that homemade Harissa?  It is brilliant combined with these ingredients.  The ricotta salata cheese lends a bit of saltiness to this dish.  If you can’t find ricotta salata, feta is a good substitute.  Personally, I prefer ricotta salata for most salads, because its subtlety allows the other flavors to be more pronounced.  And the creaminess is a welcome addition to most any salad.  The cilantro and lime add that little zing of acidity that compliments the harissa and carrots wonderfully.  If your Harissa is a little on the thick side, feel free to thin it out with a few drops of water or olive oil.  Don’t overdo it though, since there is a squeeze of lime juice at the end that loosens everything up.

Simple Carrot Salad with Harissa and Cilantro via Relishing It

The Recipe:  Simple Carrot Salad with Harissa and Cilantro

(serves 1)

2 carrots, peeled, then thinly sliced with a vegetable peeler

1/2 cup long ribbons of red cabbage

handful of cilantro

1 tablespoon Homemade Harissa or store bought

lime wedges

2 tablespoons of crumbled ricotta salata cheese

sea salt, to taste

This is more of an idea, than a recipe.  Make as much or as little as you want.  This amount will serve one beautifully.  Cut the carrot anyway that you want, though I prefer long beautiful ribbons made by using a vegetable peeler.  They’re just so pretty that way!  Toss all of the ingredients, except the ricotta salata and lime into a large bowl.  Using tongs, gently incorporate the Harissa onto the vegetables.  Add more if you like.  If your Harissa is a bit on the thick side, add a bit of water or olive oil to thin it out.  Plate your salad and top with crumbled ricotta salata cheese and a couple squeezes of lime juice.  Add a sprinkle of salt, if necessary.  Enjoy!

Have a lovely week and thanks for stopping by Relishing it!

xo

Laurie

Read Full Post »

Curried Egg Salad via Relishing It

Last week, my little blog turned two.  It’s been a wonderful and busy couple of years.  I’ve made some incredible friends, both in real life and social media, that I would never have met had I decided not to try my hand at this blogging thing.  My children have grown– and no longer need quite as much minute-to-minute attention– which makes it a bit easier to do this sort of thing.  I guess I’ve also learned to better balance blogging along with taking care of my family.

That first year it felt like preparing, photographing, and writing consumed so much of my time.  I’m more efficient now, less focused on getting that perfect photo.  And while I still have a lot to learn, I realize that I’m not going to be  Cannelle et Vanille or What Katie Ate.  I adore those blogs, but that’s not why I’m here.  I’m comfortable being Laurie from Relishing It.  I’m here to show you some (hopefully) pretty photos of some (hopefully) healthy, tasty food, along with a few sweet indulgences.  I’m here to share ideas and thoughts about balanced eating and sustainable food production that can turn into conversations.  For me, food is more than sustenance.  It’s at the center of every gathering, it’s sharing and comparing cultural upbringings.  Most importantly, food is about taking care of my family.  I want to feed them well and keep them healthy, and I honestly believe that being aware of whether your food contains harmful chemicals, how it’s produced, and where it comes from can do that.  So, to you readers and friends that keep coming back to my little corner of the internet every week, I thank you.

Curried Egg Salad via Relishing It

Sweet Curry Powder via Relishing It

Now onto one of my favorite little dishes– egg salad!  I could eat egg salad every day of the year.  I’m serious.  This avocado egg salad is still the most popular post on Relishing It– by a long shot.  So today I figure it’s time to share an egg salad recipe that I actually like even a little bit more than that one.  This one relies on sweet curry powder and coconut milk for it’s primary flavors (it’s mayonnaise-free).  Those two ingredients combine to give this egg salad a wonderful, though not overpowering flavor.  And the cilantro, red onion, and garlic add a little freshness and complexity.  It’s simple and divine.

Curried Egg Salad via Relishing It

You may have noticed that the bread in these photos is…different.  Interested?  It’s actually a wonderful, hearty, gluten-free loaf that is full of healthy, delicious ingredients.  You can find the recipe at the My New Roots blog for Life Changing Loaf of Bread.  I love it with this– or any– egg salad.  I like to make a loaf and wrap the sliced leftovers in the freezer.  They are perfect when toasted.  Even if you’re not gluten-intolerant it’s worth giving it a try.  Enjoy!

Curried Egg Salad via Relishing It

The Recipe:  Curried Egg Salad 

(Serves 1)

2 hard-boiled eggs, peeled and chopped

1 tablespoon minced red onion

1 garlic clove, minced

1 tablespoon minced cilantro

1 teaspoon sweet curry powder

3 tablespoons coconut milk, (canned version)

1/4 teaspoon kosher salt

In a bowl, add the chopped eggs.  Using a fork, mash about 1/3 of them.  Add the rest of ingredients and gently mix together.  Cover and let sit in the refrigerator for about 20 minutes so the flavors can meld, or eat right away if you’re impatient like myself.  Enjoy!

Note:  Store your leftover coconut milk in a canning jar in the refrigerator– you will be amazed at how many wonderful things you can find to use it in!

Thanks for stopping by– have a great weekend!

xo

Laurie

Read Full Post »

I just returned from my nine-hour-each-way road trip to North Dakota.  I do my best to eat healthy when I travel, but sometimes I end up failing miserably.  This trip I had a hard time saying no to the most delicious bacon cheeseburger in the universe– again.  And it went downhill from there.  Now I’m making up for my gluttony by trying to eat my weight in vegetables, and today’s post is a good start.

I’ve been craving a crisp spinach salad for awhile now.  Not the pre-packaged spinach that has “bag smell”, but fresh garden spinach that you can find at almost every farmers’ market.  I’m talking about the kind that is curly, has loads of wrinkles, and personality.  And although tomatoes aren’t quite in-season here in Minnesota, I knew I could get a few greenhouse-grown beauties.  Along with the veggies, I wanted a few crunchy bacon crumbles– not much, just a enough to add a nice saltiness.  Since I was thinking about a salad that could serve as a complete meal, I mixed in a whole grain.  You’ve probably noticed that I do this a lot with my salads.  This one and this one are two earlier favorites.  This time around, I chose farro.  It comes from the wheat family and has a nice, toothsome bite.  Finally, I wanted to bring it all these fresh ingredients together with a creamy gorgonzola dressing.

I know there are a many of you that purchase bottles of salad dressing from the grocery store.  My goal for today is to convince you to start making your own for every salad.  It’s easy, and tastes amazing.  No preservatives, and you know exactly what is going into your dressing.  Plus, you can play around with the ingredients.  Switch out the gorgonzola for blue cheese.  If you have extra yogurt on hand, use that instead of the buttermilk.  Just give it a try.  I’m guessing you’ll like it enough that you won’t buy bottles again.  This particular dressing is simple and beautiful.

One last note about Spring spinach.  You’ll need to clean it thoroughly– more than just a spray of water and throwing it in the salad spinner.  Instead, soak it in a large bowl of cold water for a minute or so to allow the dirt to settle to the bottom.  You don’t want to ruin this beautiful salad by biting into a fresh green leaf that still has dirt hidden in one of the folds.  Enjoy!

The Recipe:  Spinach, Farro, and Bacon Salad with Gorgonzola Dressing

1 large bunch fresh spinach

small bite-sized tomatoes

8 ounces bacon, cooked

handful of homemade croutons

1/2 cup farro, cooked

lemon

4 ounces (1/4 pound) gorgonzola cheese

1/2 cup buttermilk

sea salt and cracked black pepper

To start, rinse the farro in a mesh strainer.  Place the farro in a small saucepan and cover with water by about an inch.  Bring water to a boil, then reduce to a small/medium simmer.  When the farro is tender, but still has a toothsome bite to it,  remove from the heat — about 15-20 minutes.  Pour into a strainer and let cool.

Preheat oven to 350°F.  Prepare the homemade croutons by cubing about 1/4 of a fresh or day old baguette.  Place on a baking sheet and drizzle with a bit of olive oil (about 2 teaspoons) and a sprinkle of salt and pepper.  Toss to coat.  Place in the oven and toast for about 10-15 minutes, stirring a couple of times.  They are done when they are golden brown and have a nice crunch to them.

Prepare the dressing by placing the gorgonzola cheese in a medium-sized bowl.  Add the buttermilk.  Mash with a fork until it is mostly incorporated.  Be careful to leave some small chunks of cheese, as it adds to the texture of the dressing.  Add a squeeze of lemon and salt and pepper, to taste.  Set aside.

Fill a large bowl with cold water.  Place the spinach in the bowl and swish it around a bit, then leave it alone.  All the of the dirt will sink to the bottom.  Gently remove the spinach and place in a salad spinner.  Give it another rinse with running water and then spin it dry.

In a large salad bowl, place the spinach, tomatoes,  farro, and bacon.  Pour some of the dressing on it.  Toss and top with croutons.  Enjoy!

Thanks for stopping by Relishing It  — have a lovely day!

Laurie

Read Full Post »

Today’s dish is one of the most-satisfying, healthy salads around.  It combines several healthy food pyramid components– protein, vegetables, and grains, so in a sense it’s a ‘one-plate meal’.  It has the added benefit of being convenient and delicious, not to mention looking gorgeous, too.  The centerpiece of this salad is the salmon.  In this dish, it’s simply prepared.

Now it’s time for a little story.  Radd and I have had an ‘on again/off again’ relationship with salmon over the last few years.  Have you ever eaten one particular food so often that its no longer appealing?  That’s what happened to us.  You see, during both of my pregnancies we ate a ton of wild salmon.  It’s loaded with omega 3’s, which are important for a baby’s developing brain.  So…we went overboard.  I’m sure my memory is tricking me now, but I swear we ate salmon three to four times a week.  It got to the point where it was almost torturous to sit down to a nice grilled meal.  After Aria was born we swore off salmon for awhile.  That ‘awhile’ turned into nearly two years, so our kids never really got to try it.  Well, we finally came around, gave it a try, and remembered all those things that we love about the fish.  And as luck would have it, turns out our kids love it too.

Along with the salmon, this salad has those wonderful Spring fava beans and radishes.  The beans add a nice ‘pop!’ of color along with their firm texture, while the radishes give the dish a healthy crunch.  Another ingredient is black rice.  Not familiar?  You can read about it here.  Aside from looking pretty cool, it’s loaded with fiber and iron.  It’s also an anti-inflammatory and great source for antioxidants.  I used ‘forbidden’ black rice in this dish.  The texture is the same as a firm white rice, but the flavor is a bit more ‘nutty’– kind of like wild rice.  If you can’t find black rice, you can use wild rice, quinoa, or wheat berries.  All will work well here.

The final ingredient is a mustard tarragon vinaigrette, which brings all of the flavors together.  It’s worth experimenting with tarragon vinegar, if you can find it– it’s so interesting.  Tarragon has a strong anise-like flavor, so make sure it suits your palate before you add it to the vinaigrette.  And if you don’t have it, a nice white wine or champagne vinegar will work just fine.  Enjoy!

The Recipe:  Wild Salmon with Black Rice, Fava Beans, and Spring Radishes

(Serves 4)

1 pound wild salmon

1 cup forbidden black rice, rinsed

1 bunch Spring radishes, sliced

1 head boston, bibb, or romaine lettuce, torn

1/2 – 1 cup shelled fava beans

olive oil, for drizzling

Mustard Tarragon Vinaigrette:

1 clove garlic

1 tablespoon shallot, chopped

1/4 cup tarragon vinegar, or white wine vinegar

2 teaspoons Dijon mustard, more if you like it more potent

1/2 cup extra-virgin olive oil

sprinkle of red pepper flakes

kosher salt and cracked pepper, to taste

To begin:  Place the rinsed black rice in a medium sauce pan with a scant 1 3/4 cup of water.  Bring to a boil uncovered.  Then cover and reduce heat to low and cook for about 35 minutes, or until the rice is tender and the water has been absorbed.  If the rice is tender, yet a bit of water remains, just drain it off.  Fluff with a fork and set aside.

Meanwhile, preheat an oven to 375°F.  Line a large baking sheet with aluminum foil.  Place the salmon on it along with a drizzle of olive oil and salt and pepper.  Bake for about 15-20 minutes, or until it just barely flakes when you twist a fork into it.  Keep in mind that it will continue to bake after you remove it from the oven from the residual heat, so be careful not to over-bake.  Remove from oven and break apart into chunks, when cool.

Prepare the fava beans by placing the shelled beans into a small saucepan of boiling water.  Boil for about 2 minutes.  Drain water and place beans in a bowl of ice water.  Remove the light green peel.  Set beans aside.

To make the vinaigrette:  place the garlic, shallot, Dijon, vinegar, salt, pepper, and hot pepper flakes into a bowl.  Slowly whisk in the extra-virgin olive oil.  Taste.  Adjust seasonings, if necessary.

On a large platter, place the torn lettuce, black rice, salmon, radishes, and fava beans.  Pour the mustard tarragon vinaigrette over the salad and gently toss.  Ricotta salata cheese also works very well with this meal.  Enjoy!

I hope you all have a fantastic weekend!  See you next week!

Laurie

Read Full Post »

First, I want to thank all of you who left comments on my One Year Blogiversary post.  I wanted to thank each of you individually, but that would have complicated things for the contest a bit.  I really do appreciate that you take time out of your day to stop by and see what has been happening in my kitchen.  Congratulations to Tammy Kimbler, who won the cookbook!  She chose that fantastic cookbook, Plenty, by Yotam Ottolenghi.

On to today’s recipe.  I know I’ve mentioned a time or two that I love beets.  Again, I’m not talking about the tasteless little purple cubes that come out of a can.  Beautiful, fresh beets can really be amazing.  One of my favorite ways to prepare them is by roasting.  Roasting brings out their natural sweetness, making them a perfect match for the honey and oranges in this salad.  The balsamic vinegar adds a nice tangy dimension, and the mint provides its signature crisp, freshnesh that ties this dish together.  I sometimes make this dish just for myself– no sharing.  True statement.  I hope you enjoy this salad as much as I do– it’s simple, stunning, and so tasty.

The Recipe:  Roasted Beets with Orange and Mint

(Serves about 4)

About 12 assorted small beets (dark reds, chioggia, and golden)

2 medium oranges, supremed

handful of mint leaves, torn

5 tablespoons olive oil

2 tablespoons balsamic vinegar

2 teaspoons honey

1 teaspoon dried thyme

salt and pepper, to taste

Preheat oven to 400°F.  Wash and trim the beets, but leave the skins on.  Place on a aluminum foil lined baking sheet and drizzle about 2 tablespoons olive oil on them. Cover with more foil and roast in the oven until tender and a knife can cut through them with ease, about 25 minutes.  Remove from oven and let cool.  Use a sharp knife to remove the skins and cut the beets into chunks.

Meanwhile, in a small bowl, mix the remaining olive oil, balsamic vinegar, honey and thyme together.  Place  the beets and the oranges that have been supremed into a large bowl and pour the dressing over the top. Gently toss to coat.  Add salt and pepper, if necessary, and sprinkle with the torn mint.  Enjoy!

Source:  Adapted from Harvest to Heat

Thanks for stopping by Relishing It!

Laurie

Read Full Post »

« Newer Posts - Older Posts »