Feeds:
Posts
Comments

Archive for the ‘Savory’ Category

Mexican Bake | Relishing ItSo, what are you planning to do with all of those delicious turkey leftovers after Thanksgiving?  Sandwiches?  Really?  I like a good cold-turkey sandwich as much as anyone, but today I have a recipe that is a great alternative.  And to be honest, even if you don’t have turkey leftovers you should make this dish.  It’s wonderful, and so versatile that you can make it with turkey, chicken, ground beef or even just beans, for a vegetarian option.

Mexican Bake | Relishing It

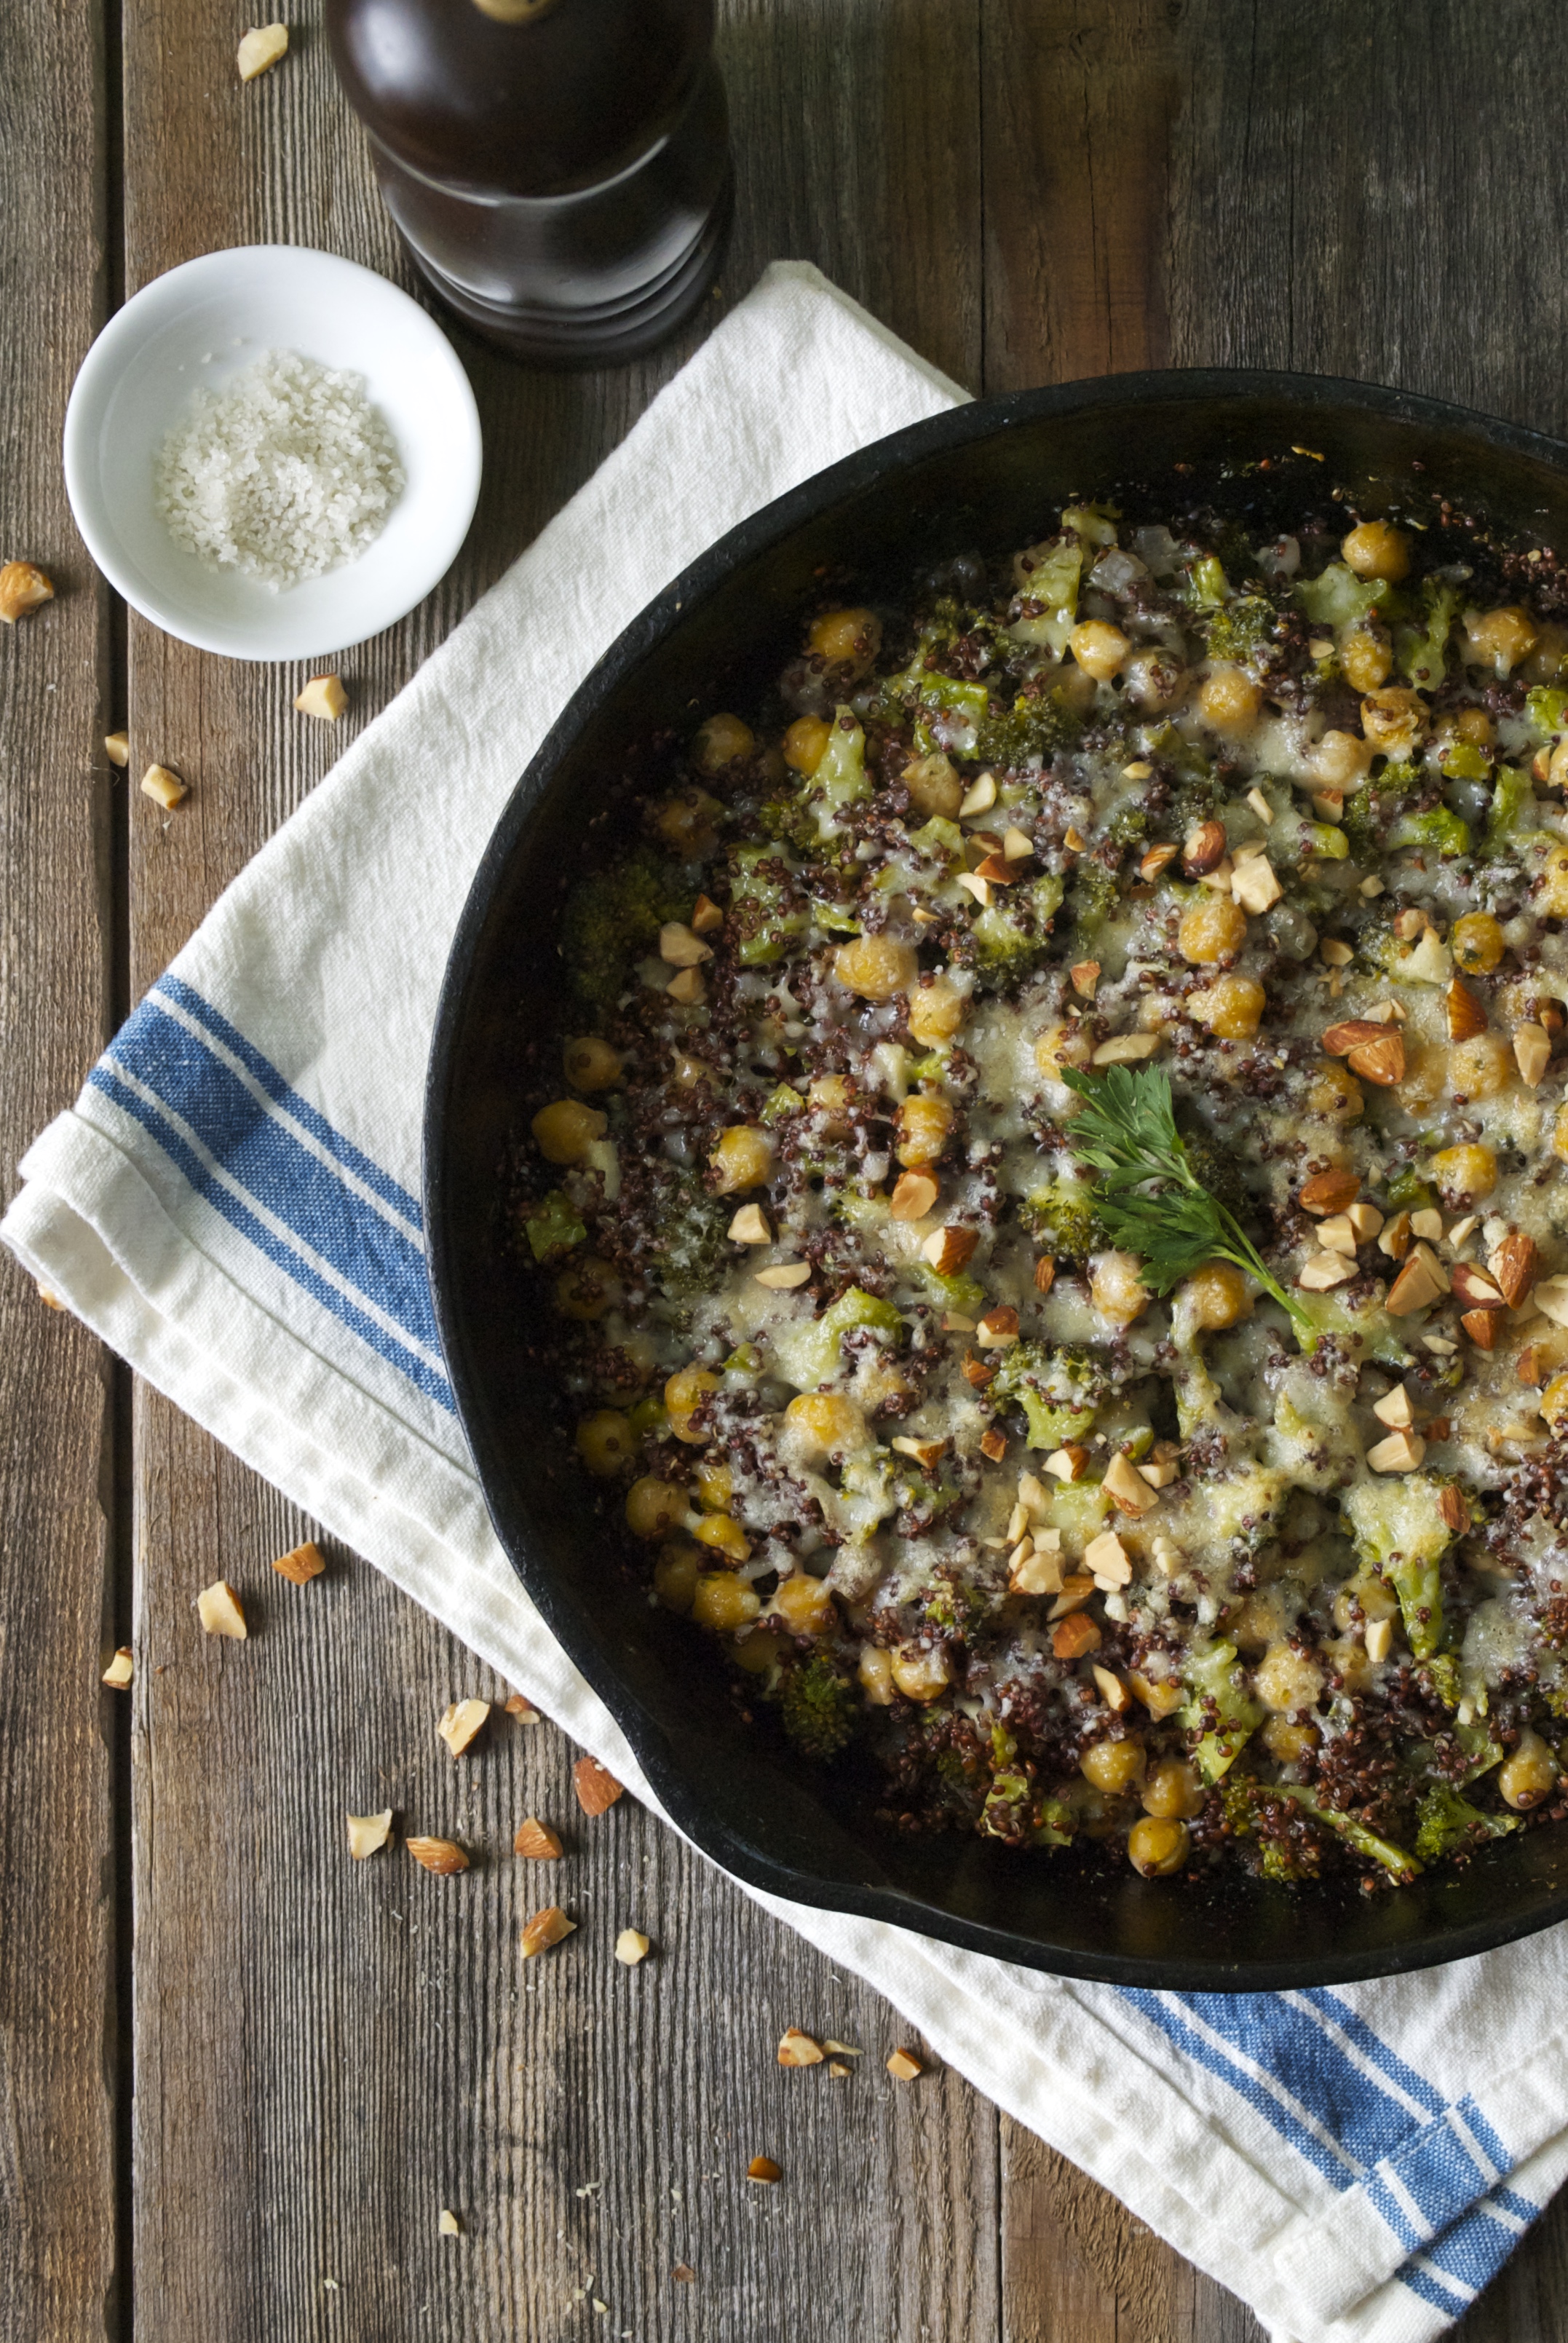
You’ve probably noticed that I’m into making ‘bakes’ a lot this year.  I’ve been having fun incorporating legumes, grains, and quinoa (technically a seed) into meals.  Aside from being so easy to throw together, they’re incredibly satisfying and a healthy option.  A big bowl of hot food is just what we all need as we gather around the dinner table together while it snows outside.  This particular bake has a Mexican flare. I’ve made it a number of ways depending on what we have in the house. I’ve been challenging myself this year to make meals out of food that we have, rather than running to the store every time an idea enters my brain. Aside from a smaller grocery bill, it cuts down on wasting otherwise-usable food, so that makes me happy.

Mexican Bake | Relishing It

This dish is fabulous with shredded chicken or turkey, but it’s also equally tasty using ground beef (or shredded beef, if you happen to have that).  Substituting beef broth for the chicken broth is an easy swap.  Of course, going completely vegetarian is a no-brainer, too.  Just add more beans and use vegetable broth, or even water.  Just amp up the spices a bit more to compensate. Whatever protein you decide to use, it will pair wonderfully with the brown rice, corn, and beans.

Mexican Bake | Relishing It

You all know that I pretty much can all of my tomatoes that I need to get me through the winter.  However, Red Gold Tomatoes generously sent me some different varieties of canned tomatoes to try (thanks, guys!).   So, I incorporated them in this dish and they were fantastic! I used the the lime juice and cilantro variety.  Of course, you can use any type of canned tomato that you have on hand, but these added a nice zesty flavor to the dish.

Mexican Bake | Relishing It

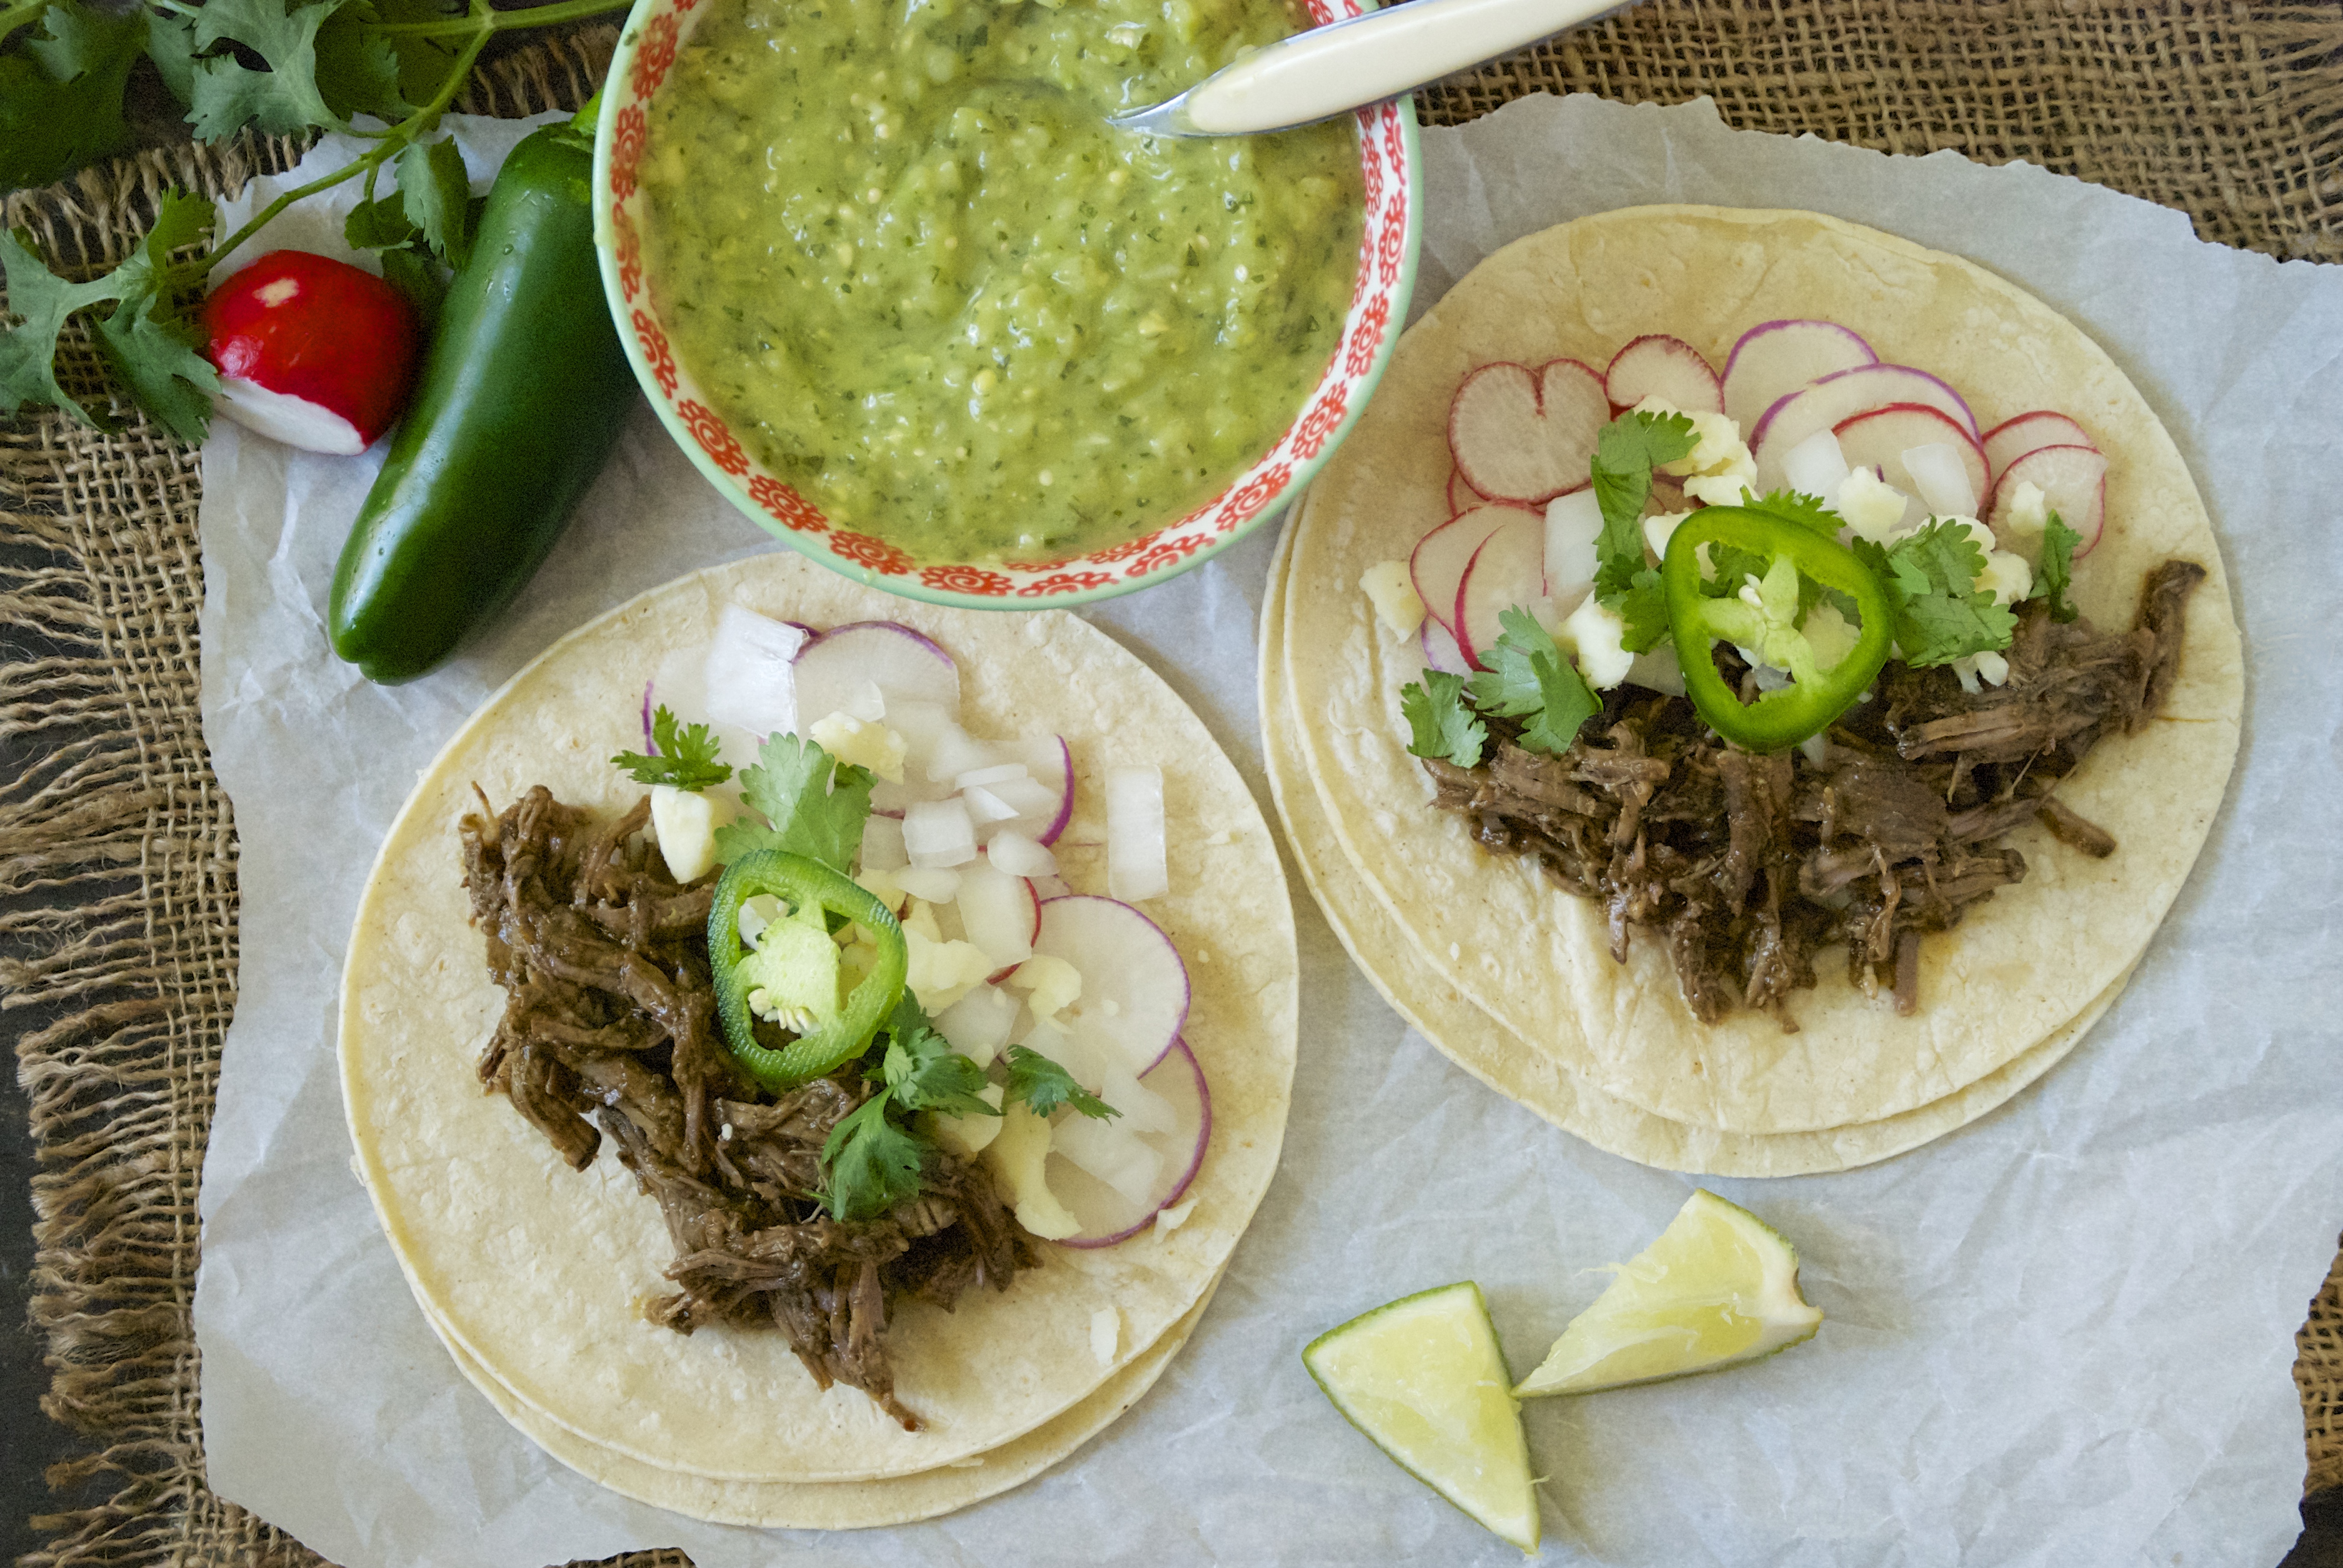
Load the bake up with as much cheese as you would like– that’s a personal preference.  Before serving, squeeze on some fresh lime juice, sprinkle with cilantro, slice up some jalapeños, and dollop on the sour cream.  Serve it with tortilla chips or plain tortillas and you are set.  You’re going to love this dish!

Mexican Bake | Relishing It

The Recipe: Mexican Bake

(serves 4)

olive oil

about 1 pound (or a bit more) of cooked shredded chicken, turkey, ground or shredded beef (see note)

1 small red or white onion, diced

about 4 garlic cloves, minced

about 14-15 ounces of cooked beans, drained and rinsed (any kind– red, black, pinto, or even white) (when I forget to soak my own, I’ve really been enjoying Simply Balanced Organic Beans (found at Target) for both the texture and the flavor.)

1 cup long grain brown rice, rinsed (any type of rice will work–if wanting to use white, just note that the cooking time will decrease)

1 tablespoon ancho chili powder

2 teaspoons ground cumin

1-2 teaspoons ground coriander

kosher salt and cracked pepper

about 1 cup frozen corn

1 1/2 cups homemade chicken or beef broth heated (depending upon what protein you are using)

1 15-ounce can Red Gold diced tomatoes with lime juice and cilantro (or anything similar)

shredded cheese, 1-2 cups  (sharp cheddar, mozzarella, and monterey jack are great options)

chopped fresh cilantro, fresh jalapeños, sour cream, fresh limes, hot sauce, tortilla chips, and/or fresh tortillas for serving

Note:  If wanting to use shredded chicken, simply sauté one pound (or a bit more) of chicken breasts seasoned with salt and pepper in a skillet with olive oil.  They should take about 3-4 minutes on each side, depending upon how high your heat is.  Check for doneness, then shred with a fork.  Or use rotisserie!

Preheat oven to 375°F.

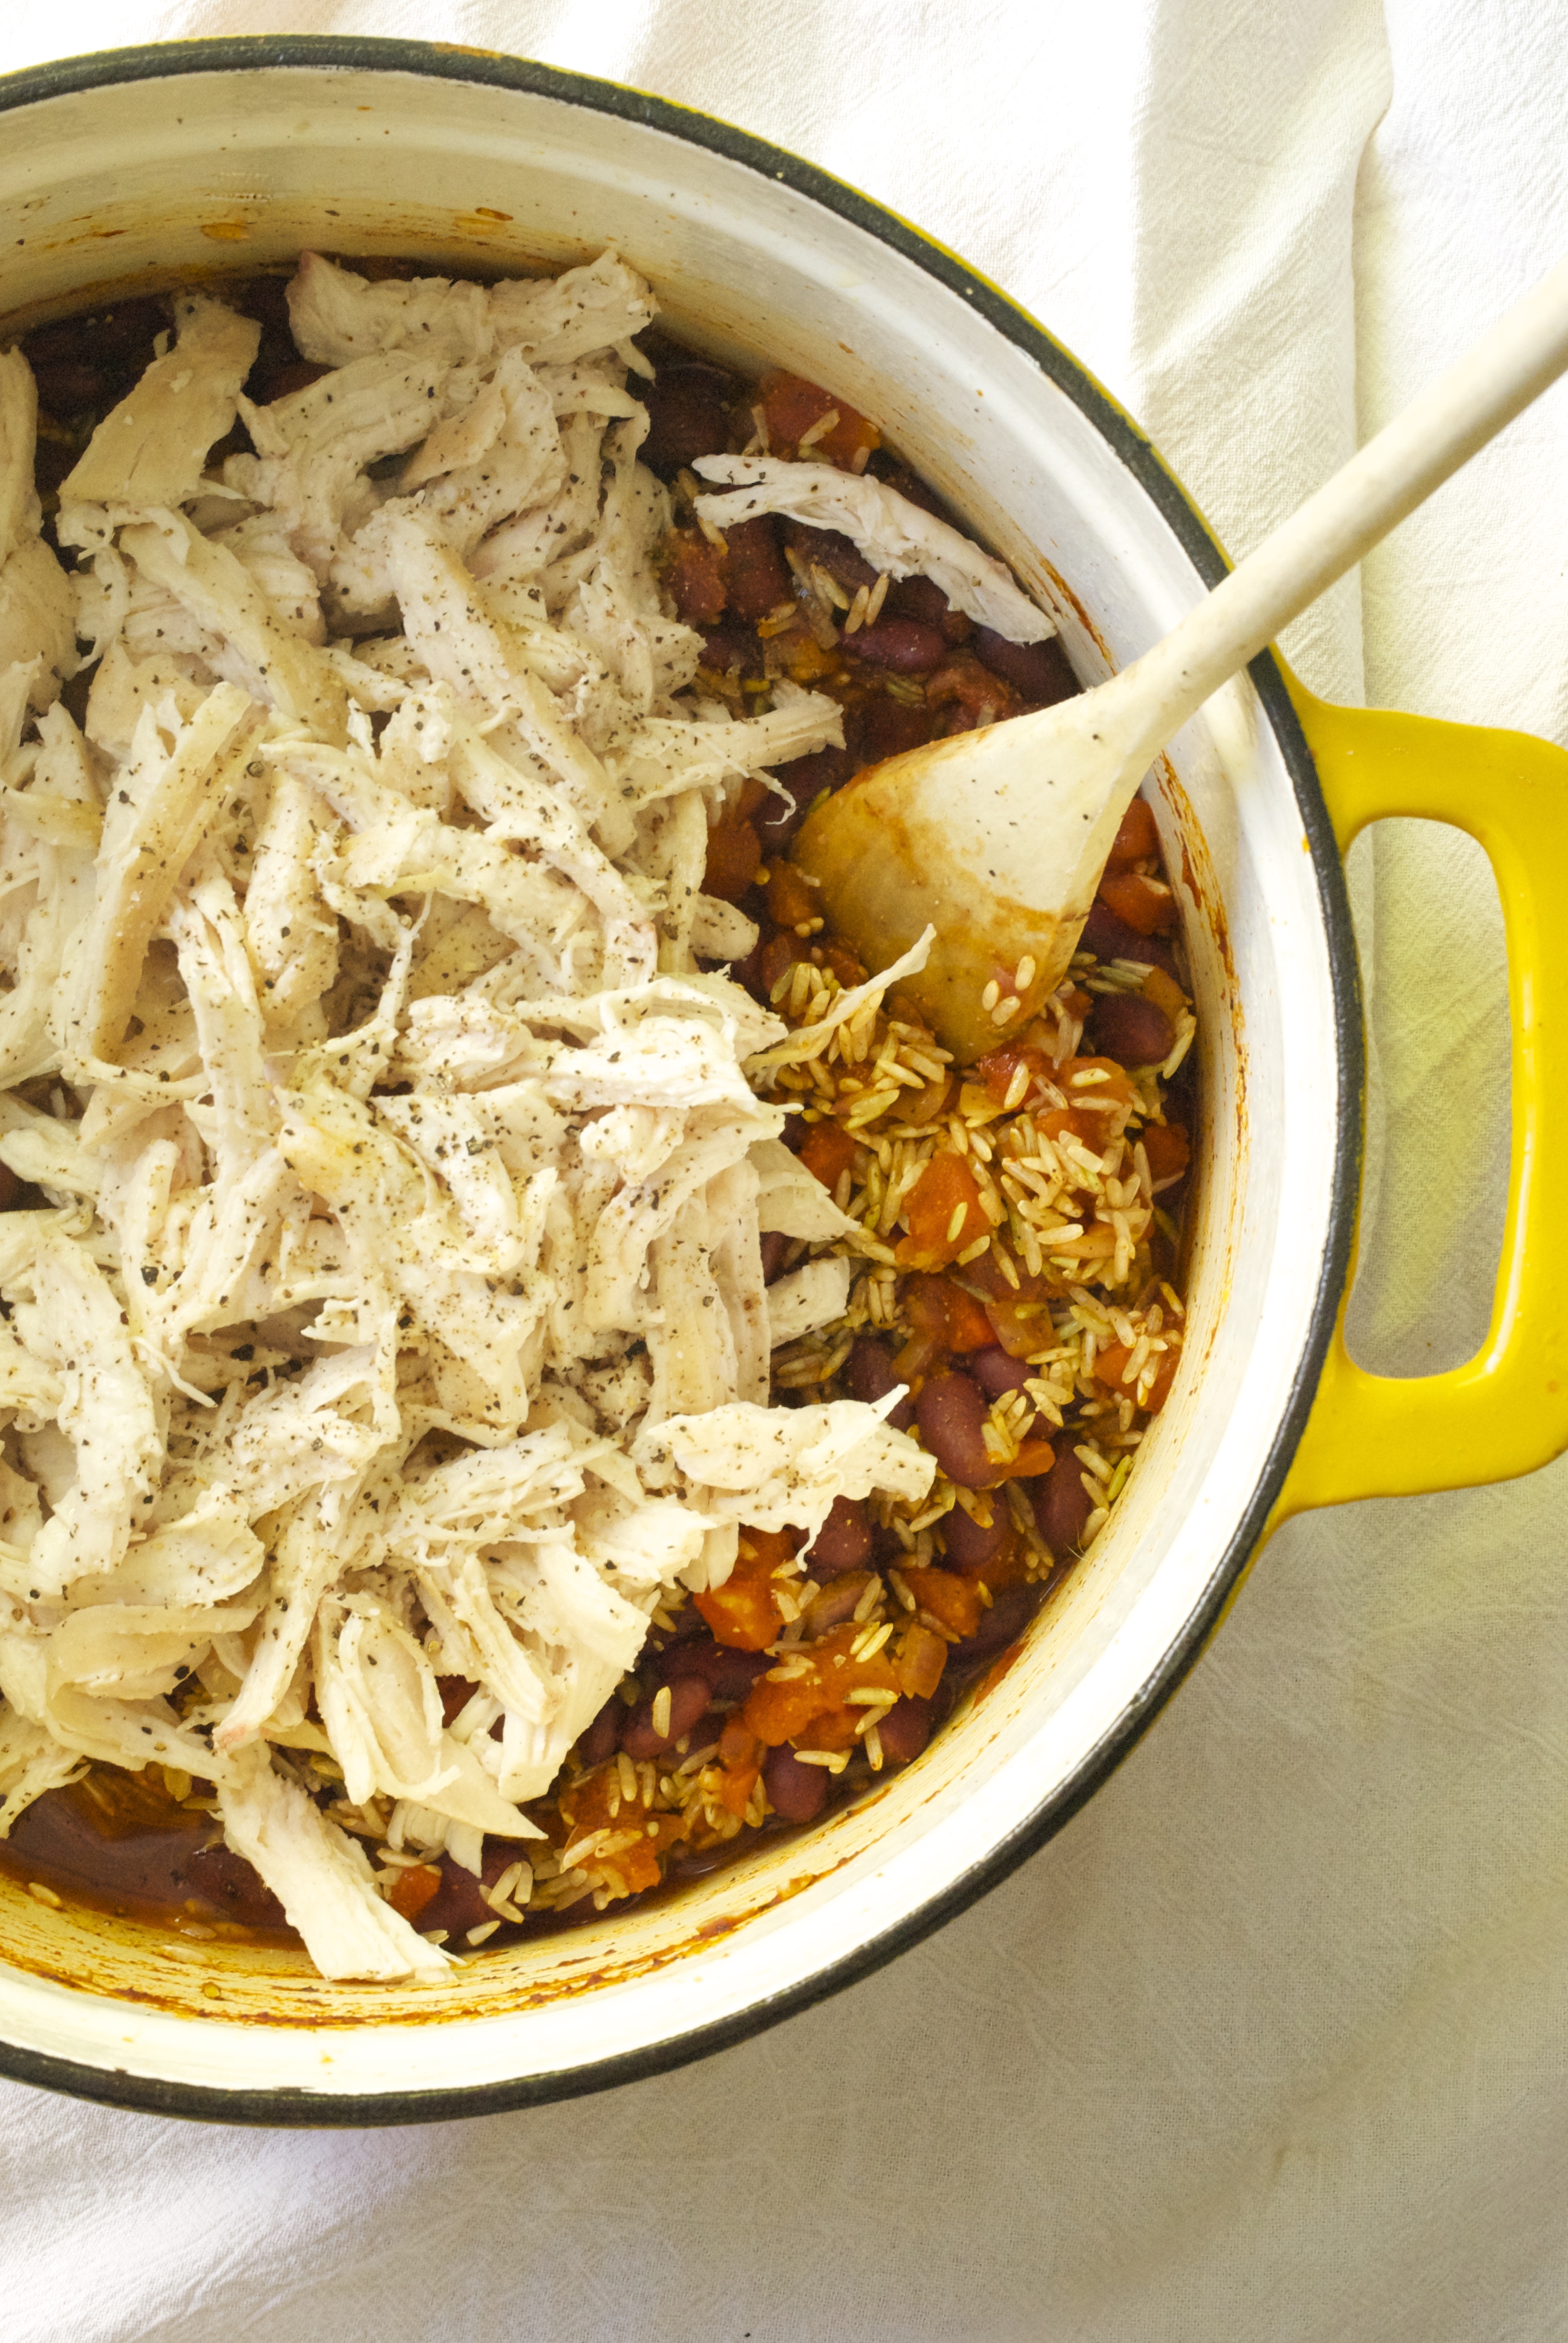
In a large Dutch oven add a couple tablespoons of olive oil and sauté the onion and garlic for a couple of minutes over medium-high heat until somewhat soft (you would brown the ground beef just prior to this, if using).  Add the chili powder, cumin, coriander, about 1-2 teaspoons of kosher salt, and cracked pepper to the pan.  Then add the canned tomatoes with juices, beans, rice, meat, corn, and heated broth and continue to cook for a couple of minutes over medium-high heat until everything is hot.

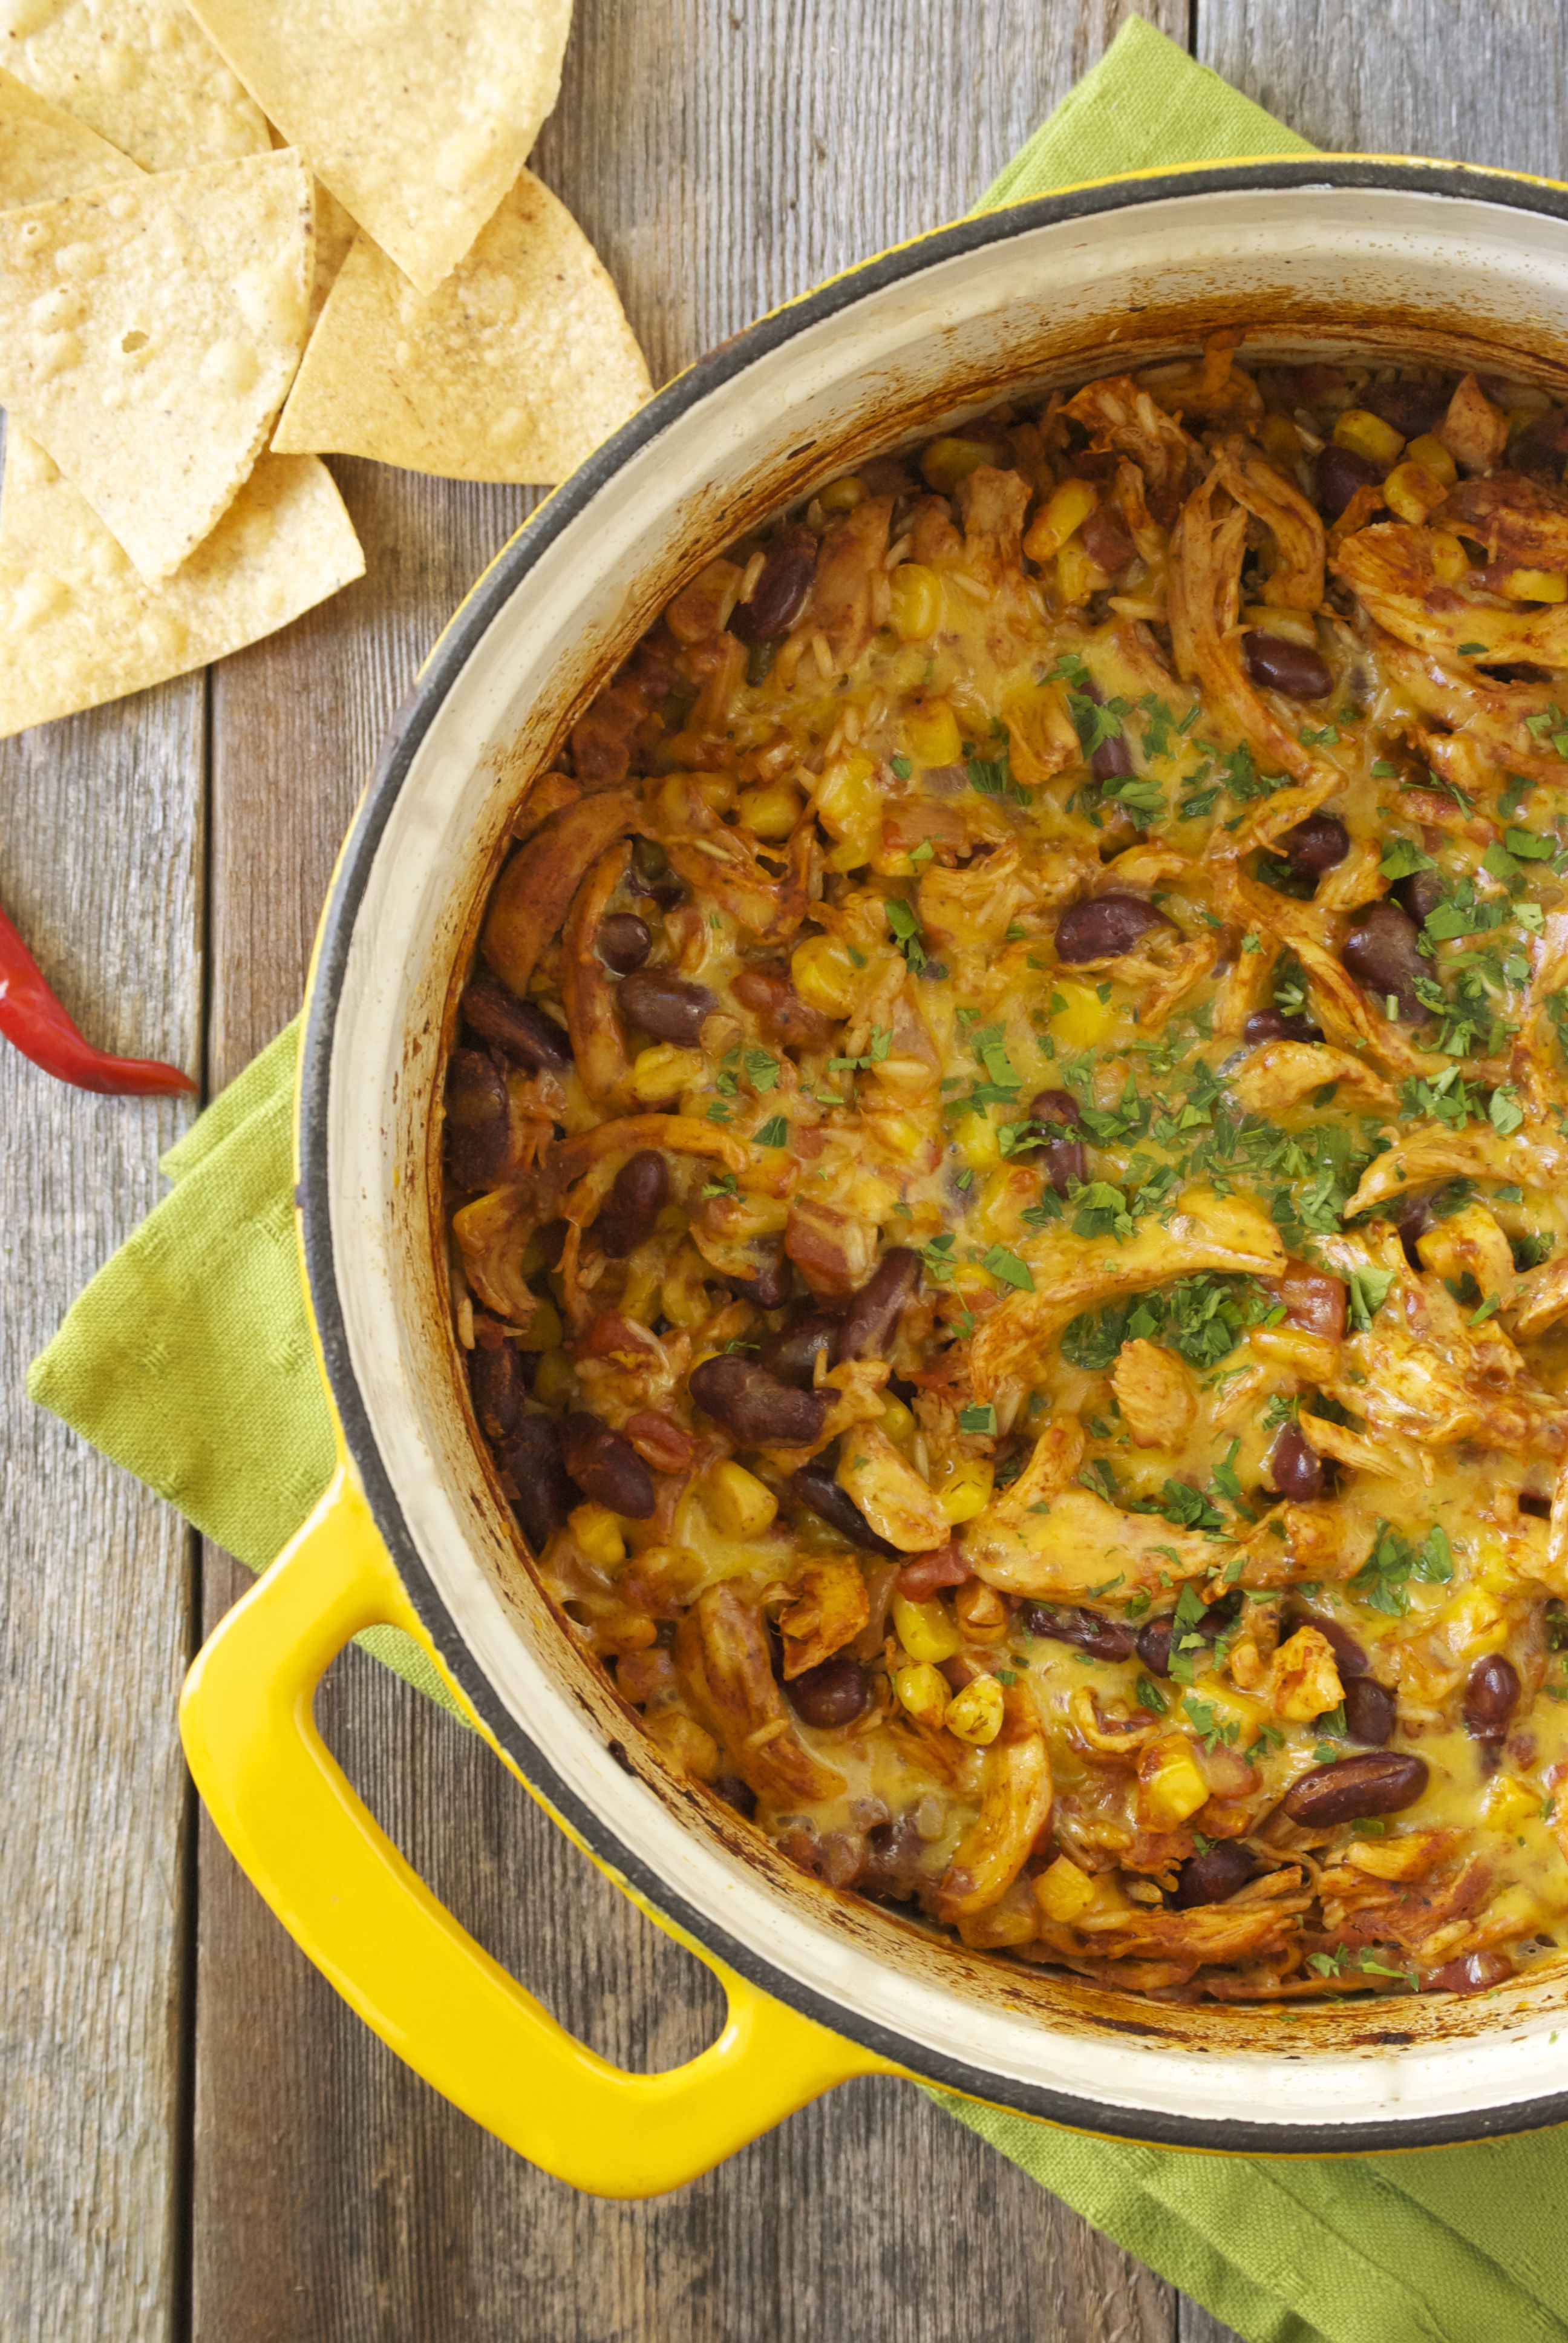
Mix in the meat.  Flatten everything with a spatula so the rice can cook properly in the liquids.  Place in the preheated oven and bake covered for 1 hour.  Remove from oven and add the cheese.  Return to oven, covered, for about 5 more minutes, or until cheese has melted.

Serve with lime wedges, chopped cilantro, sliced jalapeños, sour cream, hot sauce, tortilla chips and/or fresh tortillas.  Enjoy!

I hope you all have a safe and Happy Thanksgiving celebrating with your loved ones!  Peace to all.

Laurie


Read Full Post »

Quinoa Bake with Broccoli and Chickpeas | Relishing It

When I’m developing a new recipe for a meal there are two criteria that generally need to be met.  First, the recipe has to be mostly healthy.  Since I’m the main person that pumps food into my family, I need it to be loaded with nutrients.  Second– and this is the tricky one– I need it to be a meal that my family actually likes and will eat.  Finding this balance is often a challenge, but today’s recipe was spot-on.

Quinoa Bake with Broccoli and Chickpeas | Relishing It

Quinoa Bake with Broccoli and Chickpeas | Relishing It

Luckily for me, my family actually likes broccoli.  Seriously.  So, if I toss that into a dish I’m already one step to the good.  Here, I also relied on chickpeas for the protein and the texture.  And quinoa is one of my favorite things to build a meal around.  It cooks quickly, has a nice nutty flavor, and happens to be loaded with protein, as well.  Though it looks like a grain, quinoa is actually a seed–so it is gluten-free.

Quinoa Bake with Broccoli and Chickpeas | Relishing It

This isn’t a heavy bake loaded with cream or lots of cheese.  It’s simple and clean, if you will.  Aside from the main components of the dish, the subtle flavors of garlic and lemon really come through and work so well together.  I like to use my homemade chicken broth here because I always have it on hand and I love its flavor.  However, if you are vegetarian, feel free to use vegetable broth.  Finishing it with parmesan cheese that has become golden and chopped almonds for the texture is perfect.

Quinoa Bake with Broccoli and Chickpeas | Relishing It

One of the best parts about this dish just how easy it is to prepare.  From start to finish, your family will be eating dinner in about 30 minutes.  That’s not bad, especially considering most of that time it is in the oven. And you can feel good about the fact that every bite is healthy for them.  Hope you enjoy!

Quinoa Bake with Broccoli and Chickpeas| Relishing It

The Recipe: Quinoa Bake with Broccoli and Chickpeas

(serves 4)

olive oil

2 cups chopped broccoli

3 garlic cloves, finely minced

1 small red onion, finely chopped (about 1/3 cup)

1/4 cup chopped fresh parsley

13-15 ounces cooked chickpeas (about 1 1/3 cup)

1 cup dry quinoa, rinsed (any color will work)

zest of 1 large lemon

1 1/2 cups chicken broth (heated)

kosher salt and cracked pepper, to taste

handful of parmesan (about 1/2 – 3/4 cup)

handful of chopped roasted almonds, for garnish

Preheat oven to 450°F.

Heat olive oil in a cask-iron skillet, or anything similar. Sauté the onion, garlic, broccoli, and chickpeas for about 3 minutes.  Sprinkle with about 1 teaspoon of salt and some cracked pepper.  Then add the lemon zest, parsley, quinoa, and heated broth.  Make sure all of the quinoa is covered by the broth.  Cover with foil and place in the oven.

Bake for about 20 minutes, or until the quinoa has absorbed all of the liquid and is tender.  Remove from oven.  Place oven rack near the broiler and turn it on.  Sprinkle parmesan over the quinoa and return to oven uncovered.  Broil for just a couple of minutes until the parmesan has turned golden brown.  Keep a watchful eye, as it can burn quickly.  Remove from oven and sprinkle with chopped almonds before serving.  Leftovers can be kept in the refrigerator and reheated easily.  Enjoy!

Thanks for stopping by Relishing It!

Laurie


Read Full Post »

Braised Korean Beef Short Ribs | Relishing It

Full disclosure: this is a blog post in two parts.  First, I lure you in with this recipe for these amazing ribs.  Then “POW!”, I hit you with some truth about what’s wrong with the way we as a society eat and what we can do about it.  Deal?  Alright, let’s start with the ribs.  My husband was still raving about them days later– they’re that good.  Honestly.  Subtly-sweet and balanced with just the right amount of salt.  The ginger, garlic, and orange juice are key.

Braised Korean Beef Short Ribs | Relishing It

I happened to have some gochugaru (Korean red chili pepper powder) left from making homemade kimchi. It worked wonderfully in this dish, but don’t worry if you don’t have it– it will still be amazing without it. Oh, and don’t forget to buy your ribs from someone you can trust, because quality matters.  These beauties came from Bar Five.  Braising season is here, and you really should put these ribs high on your priority list of things to make.

Braised Korean Beef Short Ribs | Relishing It

Now for my sermon.  I was on a run this summer listening to a podcast– because tricking myself into forgetting that I’m running by listening to something interesting is the only way I can tolerate it.  I believe the podcast was the brilliantly-titled ‘Go Fork Yourself’ with Andrew Zimmern and Molly Mogren.  The hosts were discussing the documentary ‘Fed Up‘– an excellent take-down of the Big Food industry.  After hearing them chat, I had to see the film, which came out on DVD a few weeks back.  Now I read a fair amount on food and health, so I was mostly aware of the threats that the large-scale processed-food industry pose.  Even so, this film was eye-opening.  As a passionate food blogger that cares about eating healthy food and really wants the best for not only my family, but yours too– I really think you need to see this documentary.

Braised Korean Beef Short Ribs | Relishing It

So, what is ‘Fed Up’ all about?  Basically, it’s an investigation into why we as a society have become morbidly obese over the past few decades.  It follows food fads, big corporations, nefarious political lobbying efforts, the costs to our health and healthcare system, and in the end provides an answer.  The real reason we’ve become so overweight, why childhood diabetes has exploded, why for the first time children will have a lower life expectancy than their parents comes down to… sugar.  Intrigued?  You should be.

Braised Korean Beef Short Ribs | Relishing It

The industry would have you believe that we’ve become overweight because we’re lazy, or that they’re just offering more choices and it’s up to us to make healthy decisions.  But that is a finely-crafted message backed by millions of dollars in advertising and lobbying payouts to politicians.  It’s hard to make the right decision when there is so much misdirection.  It’s hard to make the right choices when we subsidize sugar, rather than whole fruits and vegetables, making processed foods the the affordable option.  The fact is, we’re addicted to sugar– in all of its confusingly-named forms.  And that’s exactly how they want it.  I was stunned to see how hard people try to make the right food choices– to eat healthy– but to be dead-wrong because of the flood of misinformation.  The most heartbreaking part is watching how children suffer because they have no choice in the matter.  The majority of public school lunch programs have been co-opted by corporations like Coca Cola and Pizza Hut, serving up nachos, soda, and sugary tomato paste (which the government counts as a vegetable).

Braised Korean Beef Short Ribs | Relishing It

Yes, I make homemade food from scratch because it tastes better, but I also do it so I know that my family is eating real, nourishing food.  This is why I rarely buy food in packages– most of it is loaded with unnecessary sugar.  And the key here is “unnecessary sugar.”  I cook and bake with sugar.  There’s a place for it in my kitchen.  But at least I know just how much my family is taking in when we sit down to eat a meal.  And yes, my kids still get to eat ice cream, and cookies, and candy.  But it’s in moderation, and balanced by the fact that the majority of their calories come from real food– not the hidden sugar in a box of so-called “healthy” cereal.  There.  I’ve said my peace.  Sometimes it’s good to get things off of one’s chest.  I really do hope you watch this film, think about it, talk about, and share it with others.  It’ll be difficult, but we can get a conversation going in this country and make things happen.  Thanks for listening, friends.

Braised Korean Beef Short Ribs | Relishing It

The Recipe: Braised Korean Beef Short Ribs

(serves 4)

3 pounds of grass-fed beef short ribs

1/2 cup soy sauce

1/4 cup chopped white onion

6 garlic cloves, minced

3 tablespoons finely minced fresh ginger

1/2 cup dark brown sugar

1/2 cup rice vinegar

1/4 cup fresh orange juice and zest from 1 orange

1 tablespoon sesame oil

1 teaspoon gochugaru (korean red chili pepper powder), optional

salt and pepper

olive oil

toasted sesame seeds and chopped green onions, for serving

Preheat oven to 325°F.

Heat about 2 tablespoons olive oil a large Dutch oven.  Sprinkle ribs with salt and pepper and then brown for a few minutes on each side, or until they become dark brown in color. You may want to brown the ribs in two batches, depending upon the size of your pan.  Use more olive oil, as necessary.

Meanwhile, in a food processor or blender, blend the soy sauce, onion, garlic, ginger, brown sugar, rice vinegar, orange juice and zest, sesame oil, and gochugaru until smooth.  Pour the liquid over the browned ribs, cover, and braise for about 2 hours, or until the meat is fork tender and practically falling off of the bones.  If after 2 hours, it doesn’t do that, braise a bit longer.

Feel free to spoon off some of the fat that will rise to the top before eating.  Serve ribs with plenty of sauce, rice, toasted sesame seeds, and green onions.  Enjoy!

Thanks for stopping by Relishing It!

Laurie


Read Full Post »

Roasted Tomatillo and Pork Stew | Relishing It

It has been a busy couple of weeks around our household lately.  School started for both of my kids and I’m happy to report that they are really loving it. Honestly, getting back onto the swing of things wasn’t that difficult despite the transition from late summer bedtimes and laid-back mornings around the house.  And I suddenly have a bit more free time now, which has fallen perfectly in-line with canning season! That wonderful time of the year when I dream of tomatoes. I’ve been busy in the kitchen stocking up on salsa, sauces, and plain tomatoes for the winter. Two more boxes I picked up from the farmers market this weekend are waiting for me as I write this. But, I wanted to share this ridiculously delicious recipe with you before I dive into chopping my day away again.

Roasted Tomatillo and Pork Stew | Relishing It

Roasted Tomatillo and Pork Stew | Relishing It

Roasted Tomatillo and Pork Stew | Relishing It

Roasted Tomatillo and Pork Stew | Relishing It

I was never exposed to tomatillos while growing up.  In fact, I didn’t really ever buy them before I moved to Minnesota.  Now, I just love them and making salsa with them is a no-brainer.  However, we’ve been getting a beautiful bag almost weekly from our CSA, so I wanted to do something a bit different, because how many chips can a girl really eat?  Kidding…I can eat A LOT of chips.  Pork and tomatillos are a perfect combination together– the tang from these little green gems is perfect.  This stew could not be easier to make or more satisfying. The flavors are bright and the pork is tender, yet doesn’t need to cook all day long, which makes it a bonus for a weeknight meal.  I love to serve it with a scoop of brown rice on top, but it can be equally satisfying if you prefer it without grains.  If your family loves heat, preparing it with jalapeños in the sauce would be ideal.  We put them on the side, because…kids.  I really hope you make this stew– it’s perfect with the changing weather.  Now, if you’ll excuse me– I need to get back to my little tomato factory.  Hope you are all well!

Roasted Tomatillo and Pork Stew | Relishing It

The Recipe: Roasted Tomatillo and Pork Stew

(serves 4)

2 pounds tomatillos, husks removed and tomatillos cut in half

1 bulb (yes, the entire bulb) garlic, separated into cloves

1 large white onion, chopped into large pieces

1/2 bunch fresh cilantro, roughly chopped

2 1/2 pounds – 3 pounds boneless pork shoulder, cut into 1-inch cubes

1 teaspoon cumin seed, toasted then ground with mortar and pestle OR 1 1/4 teaspoon ground cumin

fresh cilantro, jalapeño,and lime for garnish

olive oil, salt and pepper

1 cup uncooked brown rice, cooked according to directions, for serving

Preheat oven to 400°F.  Line a large baking sheet with parchment paper.  Place the tomatillos, onion chunks, and garlic cloves on the baking sheet.  Drizzle with olive oil and sprinkle with salt and pepper.  Roast for 30 minutes, then broil for 2-5 minutes until slightly browned.  Keep a watchful eye.

Meanwhile, heat a large Dutch oven over medium-high heat with about 2 tablespoons of olive oil.  Sprinkle the pork shoulder with salt and pepper and begin browning the meat in two batches, so as to not to overcrowd the pan.  When meat is done place it all back into the Dutch oven.

Reduce oven temperature to 375°F.

In a large food processor, place the contents of the roasting pan, plus 1/2 bunch of fresh cilantro, and ground cumin seed and pulse a few times.  You don’t want the mixture to be completely pureed– a little texture is nice.  Add the mixture to the browned pork.  Stir.  Bring almost to a boil on the stovetop then immediately place in the oven.  Bake for about 1 hour, or until the pork is tender.  Reseason with salt and pepper, if necessary.  Serve immediately with a scoop of rice, jalapeño, more fresh cilantro and a wedge of lime.  Enjoy!

Thanks for stopping by Relishing It!

Laurie


Read Full Post »

Roasted Smashed Potatoes with Rosemary and Preserved Lemon | Relishing It

I finally did the thing that’s been weighing on my mind for the last year.  I turned 40 years old on Tuesday.  My apprehension wasn’t about the number itself, or the accumulation of tiny wrinkles gathering under my eyes– it was heavier than that.  Those are superficial things that I can live with.  Instead, my dread has been a bit more existential.  Knowing that other inevitable changes are coming, like my children growing up, my parents aging, and that my limited time here is diminished with each passing year.  Those are the things that are harder to accept.

Roasted Smashed Potatoes with Rosemary and Preserved Lemon | Relishing It

But now that 40 has arrived, I’ve decided to do my best and be optimistic.  I’ll focus on the positives instead of dwelling on future loss.  I’m surrounded by  wonderful friends, and have been lucky enough to be born and married into two incredible families.  I get to spend every day with my best friend and love of 23 years, and we have two sweet children.  I’ve been fortunate with my health.  Right now, things are good by pretty much any standard.  I’m a lucky, lucky gal and I know it (and don’t think for one second that I didn’t knock on my wooden desk as I wrote that sentence).

Roasted Smashed Potatoes with Rosemary and Preserved Lemon | Relishing It

I’ve also decided to tackle new challenges.  My kids are at an age that I now have more time to pursue my own interests.  I’m ready to learn new things.  I want to take up pottery, learn to play the guitar and violin, to knit, and to read more.  I want to become more patient.  Mostly, I want to consciously be in the present, rather than always waiting for some vague future to just “happen”.   I also want to continue to learn new and exciting things about food and photography– this is the stuff that thrills me. Preparing the food, taking photos, and writing this blog make me very happy. I love connecting with all of you.

Roasted Smashed Potatoes with Rosemary and Preserved Lemon | Relishing It

With that little essay out of the way, there’s really no subtle segue into a recipe post, so I’ll just throw it out there– today I made simple, roasted smashed potatoes.  They’re kind of a hard one to name, but hopefully the photos help you out a bit. These little gems are all about texture, texture, texture!  Soft and pillowy on the inside and perfectly crispy on the outside.  I love to pick them up and snack on them, but they also pair well with a burger or steak.  Throw any herbs you fancy on them, but I particularly love the rosemary/preserved lemon combination.  So, so good!  Enjoy these potatoes over the weekend and thanks for listening to me ramble.

The Recipe: Roasted Smashed Potatoes with Rosemary and Preserved Lemon

about 2 pounds of small yukon gold potatoes (halve or quarter larger ones)

1 1/2 tablespoons finely chopped fresh rosemary, plus fresh sprigs for serving

1 1/2 tablespoons finely chopped preserved lemon

extra-virgin olive oil

good sea salt and freshly cracked pepper

Preheat oven to 400°F.  Line a large baking sheet with parchment paper.  Set aside.

Begin by steaming the potatoes until they feel done when a knife is inserted into them– about 15-20 minutes (depending upon how big your potatoes are).  Remove from heat and continue to let sit in covered pan just to be certain they are fully cooked.

Dry the potatoes off if any water remains on them.  Then place them on the prepared baking sheet and gently smash them down with a fork.  You don’t want the potato to completely fall apart, but you do want some of the inside to be exposed– that way more crevices can become crisped.  Drizzle a few glugs of olive oil over the potatoes, then the chopped rosemary, salt, and pepper.  Roast for about 20-25 minutes, or until they have become a beautiful golden brown (check the bottoms, too).   Remove from oven and top with more olive oil, more rosemary, preserved lemon, and salt and pepper to taste.  Enjoy!

Thanks for stopping by Relishing It!

Laurie


Read Full Post »

Roasted Vegetable Panzanella with Eggplant | Relishing It

One of my favorite summer meals is panzanella.  If you’re not familiar with this little dish, it is simply a bowlful of seasonal vegetables with homemade croutons or bread and a dressing of some sort.  And it is wonderful.  This fresh version with tomatoes and peppers is one that I make frequently.

Roasted Vegetable Panzanella with Eggplant | Relishing It

Roasted Vegetable Panzanella with Eggplant | Relishing It

Roasted Vegetable Panzanella with Eggplant | Relishing It

Today I wanted to create something just as pleasing, but a bit different.  I wanted to be both delicious and satisfying as well as be loaded with vegetables.  I know I’ve preached this before, but eating vegetables is key to keeping me feeling good, so I really try to pack them in throughout the day.  One of the vegetables that I wanted to rely on for this receipe is eggplant.  Why eggplant?  Well, because I can’t stop buying it at the farmers market– it’s just so darn gorgeous.  I have a weird relationship with this vegetable.  I don’t generally love the flavor, and at times I find the texture to be a bit…unique.  I needed to find a way to appreciate it, aside from the aesthetic, because admiring its beauty while it sits unused on my countertop is a bit wasteful.  And the other recipes I’ve tried have just seemed ho-hum or so loaded with other unhealthy things that it kind of defeated the point of eating healthy.  So that’s why eggplant.

Roasted Vegetable Panzanella with Eggplant | Relishing It

Thankfully, not only did I find a way to use it, I found a way to actually enjoy it!  This panzanella is everything that I wanted it to be.  Using small globe-like eggplants worked well in this recipe.  The seeds are smaller, which appeals to me.  The vegetables became tender and delicious when roasted.  Tossing them with homemade croutons, a red wine vinaigrette, and feta was a beautiful combination.  The feta melted slightly against the warm vegetables.  It was magical.  The smashed garlic cloves become soft and buttery.  Roast whatever vegetables you have on hand– it will work.  Change up the cheese, if you want.  Goat or ricotta salata will work well, too. Enjoy!

Roasted Vegetable Panzanella with Eggplant | Relishing It

The Recipe: Roasted Vegetable Panzanella with Eggplant

(serves 2)

about 10 small eggplants, diced

1-2 red peppers, cut into bite-sized pieces

handful of small cherry tomatoes

1 small red onion, diced

3 garlic cloves, smashed

1 hot pepper, optional

olive oil, salt, and pepper

1/4 – 1/2 baguette, cubed

Feta, goat, or ricotta salata cheese crumbles, to garnish

For the Vinaigrette:

1 garlic clove, finely minced

1/2 teaspoon Dijon mustard

3 tablespoons extra-virgin olive oil

1 tablespoon red wine vinegar

about 3-4 sprigs of fresh thyme, leaves removed

salt and pepper, to taste

Preheat the oven to 375°F.  On a large baking sheet with parchment paper, toss the eggplant, peppers, onions, tomatoes, and garlic cloves together with 1-2 tablespoons of olive oil and a sprinkle of salt and pepper.  Roast for 20-25 minutes, or until the vegetables are tender.

Meanwhile, toss the cubed baguette with 1-2 tablespoons of olive oil and spread on another baking sheet.  Sprinkle with salt and pepper and bake on the bottom rack until just crispy, about 10 minutes.  Remove from oven.

Make the vinaigrette by mixing the garlic clove, mustard, thyme leaves, and red wine vinegar together.  Then whisk in the olive oil.  Season with salt and pepper.

When the vegetables are done roasting, mix them together with the homemade croutons.  Then toss everything with the red wine vinaigrette.  Re-season with salt and pepper, if necessary.  Serve with feta crumbles on top and even a few more thyme leaves.  Enjoy!

Thanks for stopping by Relishing It!

Laurie


Read Full Post »


Curried Corn and Zucchini Fritters + Cilantro Mint Chutney | Relishing It

I realized this week that there is only one month left of my children’s summer vacation.  It was a punch to the stomach.   Only one month left to get out there and drink in the summer, to make memories.  They are 7 and 5, and for anyone that has or has had children of these ages, you probably understand why I feel that these ages are perfect.  They love to be around Radd and me, yet are independent enough to do things on their own.  All the hassles of tiny babes and toddlers are gone and we’re left to enjoy these perfectly sweet, intelligent, and hilarious tiny human beings.  Leaving the house is easy.  I remember when it used to be such a production:  diaper bags, extra clothes, baby food (in a cooler), etc.  Life is so effortless right now and I want to bottle this up and keep it forever.  Because it won’t be long before they’ll pick hanging out with their friends over being with us.  I know change is on the horizon and I can’t stop it.  I hate change– have I ever mentioned that before?  I do. It’s just how I am wired.

Curried Corn and Zucchini Fritters + Cilantro Mint Chutney | Relishing It

Curried Corn and Zucchini Fritters + Cilantro Mint Chutney | Relishing It

But not only is school break about to end, I’m grappling with the realization that I have one month left of my thirties.  A big (gulp) birthday is just around the corner.   I wish I could be one of those people that welcomed it, but again, I hate change.  So instead, I’m working on trying to embrace it as well as trying to enjoy the heck out of this next month.  We’ll be doing the things I love– just more of them.

Curried Corn and Zucchini Fritters + Cilantro Mint Chutney | Relishing It

Wait.  This is a food blog, right?  Okay, enough of the existential wrangling.  One of the things I’ll also be doing is tinkering in my kitchen, as I always do.  Recently, I made these fantastic corn and zucchini fritters.  If I’m being honest, I needed an acceptable way to eat the cilantro-mint chutney without simply drinking it and I figured a corn and zucchini fritter with an Indian flare would be perfect.  Indeed it was.  Eating a ton of vegetables that have been formed into a patty and crisped-up in olive oil is always a good idea.  These fritters are somewhat fragile, meaning you can’t pick them up with your hands.  I didn’t want to over-do the amount of flour that was in them.  They’re more of a “hash brown” texture.  And they are absolutely perfect with the cilantro-mint chutney.  I like to add some heat to mine with a jalapeño.  They are simple to make and come together rather quickly, which makes them perfect for a weeknight meal.  They are a wonderful meal on their own, or serve them alongside something else as a side.  Either way, I know you’re going to love them.

Curried Corn and Zucchini Fritters + Cilantro Mint Chutney | Relishing It

The Recipe: Curried Corn and Zucchini Fritters + Cilantro Mint Chutney

(makes 9 3-inch patties)

For the Corn and Zucchini Fritters:

2 ears of fresh sweet corn, cut off the cob

1 pound zucchini, coarsely grated

2 garlic cloves, minced

2 tablespoons all-purpose flour (GF flour can be substituted)

1/2 teaspoon sweet curry powder (this is subtle, use more for more of a punch)

1 teaspoon kosher salt, divided

freshly ground pepper

1 egg, lightly beaten

olive oil, for frying

For the Cilantro Mint Chutney:

1/2 cup cilantro, slightly packed

1/2 cup fresh mint, slightly packed

3-4 tablespoons plain yogurt

2 garlic cloves, minced

1 teaspoon freshly minced ginger

squeeze of lime

pinch of sugar

kosher salt to taste

minced jalapeño to taste (I used 1/4 of a large one)

To make the Cilantro Mint Chutney:  combine all of the ingredients in a food processor.  Blend until smooth.  Season properly with sugar, salt, and lime.  Set aside so the flavors can combine.

In a colander placed over a medium-sized bowl, combine the grated zucchini with 1/2 teaspoon kosher salt.  Let sit for 10 minutes.  Then gently squeeze the liquid from the zucchini with your hands. You want the zucchini to be as dry as possible, so it will crisp when fried.

In a medium-sized bowl, using your hands, gently combine the zucchini, corn, garlic, flour, curry powder, remaining 1/2 teaspoon of salt, and pepper together.  Making sure to evenly coat the vegetables with the flour.  Then add the egg and mix again using your hands until everything is evenly moistened.

Add 2 tablespoons of olive oil to a hot skillet–cast-iron worked well.  Form 3-inch patties that are about 1/2-inch thick with the zucchini mixture and gently place them in the skillet. Fry as many as will fit into the pan at a time.  Fry on medium-high heat until the underside is a deep golden brown, then flip.  Repeat until all of the mixture is gone.  Be sure to add more olive oil into the pan each time.  The fritters are best eaten immediately.  Top with the chutney and enjoy!

Thanks for stopping by Relishing It!

Laurie


Read Full Post »

Roasted Tomatoes with Garlic and Herbs | Relishing It

The tomatoes have finally arrived here in Minnesota!  Yes, that sentence deserves an exclamation point.  It’s always a long wait for me throughout the year for these babies.  I love tomatoes, but the sad store-bought versions just won’t do.  So, I can or freeze as much as I can to make it through the winter, then patiently wait for them to appear at the farmers markets the next summer.  Every year I somehow trick myself into thinking that they should appear earlier than they really do.  Tomatoes need time and lots of sun.  I have a few plants in my yard again this year that are coming along nicely, but the bulk of my preserving comes from the farmers markets, where I can buy bushel upon bushel of these little red gems.

Roasted Tomatoes with Garlic and Herbs | Relishing It

I’ve mentioned here before that I love to can salsa.  I’ll be makes lots of batches of this recipe in the coming weeks.  I also can plain tomatoes, and a couple different versions of tomato sauce.  The version I’m sharing today is not a canned one–so, you can exhale now.  It’s actually my favorite tomato sauce and I preserve it by freezing it.  Super easy and ridiculously delicious.  I love to can, as it’s a great way to preserve and we happen to have a large storage room in the basement, so it works well for our family.  But, in all honesty, I love the taste of this un-canned sauce even more.  The flavors are spot-on and lemon juice (which is used in canning to keep the ph levels safe) is not needed.  I use roma tomatoes here (they are wonderful for sauces) as they have a lower water content.

Roasted Tomatoes with Garlic and Herbs | Relishing It


Roasting tomatoes is one of my favorite ways to eat them.  Something magical happens when that tomato caramelizes a bit. The flavor intensifies and I simply can’t stop popping them into my mouth.  I love to pair them with some delicious cheese and crusty bread.  Simple summer meals are the best.  When we’ve eaten our fill, I put the rest of the tomatoes, garlic, and herbs into the food processor and give it a few pulses until it become this thick, fragrant tomato sauce that can be used in so many ways.  At this point, I freeze the sauce, unless I want to use it in the next day or so.  Freeze it in whatever you like– freezer bags or vacuum seal it in a special bag (freeze first, then vacuum seal it closed) are both methods that work well.  I use this sauce all winter long and it is always a sad day when I pull the last one from the freezer.  I hope you give this version a try.  Enjoy!

Roasted Tomatoes with Garlic and Herbs | Relishing It

The Recipe: Roasted Tomatoes with Garlic and Herbs

Roma tomatoes, cut in half (as many as will fit on 1-2 baking sheets–depending upon how many you want to roast)

1 bulb of garlic, peeled and cloves separated (per baking sheet)

handful of freshly chopped herbs: basil, thyme, oregano, parsley (per baking sheet)

olive oil

kosher salt and fresh black pepper

Preheat oven to 375°F.  Line 1-2 large rimmed baking sheets with parchment paper (depending upon how many tomatoes you want to roast).  Fit the tomatoes snuggly, cut-side up, in a single-layer onto the pan, they will decrease in size as they cook.  Drizzle with olive oil.  Sprinkle with the chopped herbs, garlic, salt, and pepper.  Roast for about 40-50 minutes (if using two pans, rotate them half-way through).  Then increase temperature to 400°F and roast for at least another 10 minutes to caramelize the tomatoes, sometimes a bit longer.  Check the bottom of them for a dark caramel color.  Remove from oven when done.  If wanting to make sauce, place all of the roasted ingredients into a food processor, juices too (or by hand).  Pulse for a few times until mixed.  Place in freezer bags or bags that can be vacuum sealed (freeze first, then seal), or any other container you want to store them in.  Enjoy throughout the winter!

Thanks for stopping by Relishing It!

Laurie


Read Full Post »

Zucchini Cauliflower Summer Gratin | Relishing It

Zucchini is not my favorite vegetable.  There, how’s that for an opening statement?  It truly isn’t, or wasn’t, rather.  It’s not that I really disliked zucchini, but in the past, if given the choice, I generally chose other ingredients to work with.  I thought of it as bland and lacking “personality.”  As it turns out, I’ve really come around to enjoying this wonderfully subtle vegetable.  It just took a little coaxing from a very good, very talented friend.

Zucchini Cauliflower Summer Gratin | Relishing it

Zucchini Cauliflower Summer Gratin | Relishing It

My friend, Amanda Paa, from HeartBeet Kitchen, has just published her very first cookbook, “Smitten with Squash”, dedicated entirely to that vegetable.  I first met Amanda a few years ago at a mutual food-blogger friend’s cabin.  I loved her ever-present smile and her calm demeanor.  She was chopping vegetables endlessly in the kitchen and more than happy to be doing so.  To say this girl is lovely doesn’t do her justice.  We both belong to the group Fortify (a local food group), so we continued to run into each other at events.  We eventually discovered that we live just a few blocks from one another.  We frequent the same restaurants, coffee shops, and farmers markets, and we never ever tire of talking about food together.  We’ve become wonderful friends and I couldn’t be happier to share a recipe from her new cookbook with you!

Zucchini Cauliflower Summer Gratin | Relishing It

Zucchini Cauliflower Summer Gratin | Relishing It

Zucchini Cauliflower Summer Gratin | Relishing It

It’s fun to have the inside scoop on someone’s book-writing journey.  In some small way, it made me feel like I was part of it.  She worked so hard and spent much of her winter huddled-up writing.  The result is this wonderful book full of recipes for both summer and winter squash.  Sweet or savory, she’s covered it all and then some. If you’re looking for inspiration for this particular vegetable, this is the cookbook you need.

During her creative process, I had the opportunity test a few of her recipes.  This wonderful zucchini cauliflower gratin is a heaping dish of chopped vegetables seasoned with herbs and parmesan cheese. There is just enough cream in it to give it a proper gratin feel, but the added milk keeps it from being too heavy.  And every single bite is laced with just enough rosemary to keep you wanting another.  Lastly, the parmesan crust on the top adds a little cheesiness, with a nice contrast in texture.  I pile this gratin high on my plate with no regrets.  It’s perfect paired with a grilled meat and a glass of wine.  Not to mention my kids and husband all love it, too.

Zucchini Cauliflower Summer Gratin | Relishing It

Zucchini Cauliflower Summer Gratin | Relishing It

I’m giving away a copy of Amanda’s book to one lucky reader (only in the US– sorry)!  You want this book, you really do.  She gets so creative with this vegetable– you’ll want to cook through the entire thing.  Even if you aren’t the winner, I would encourage you to order it from Amazon or Barnes and Noble— you won’t be disappointed.  To enter, follow the instructions on the Rafflecopter link below.  Good Luck!

Zucchini Cauliflower Summer Gratin | Relishing It And to you, Amanda– I am so happy to call you a friend.  You are one of the most selfless and giving people I’ve met.  Congratulations on your beautiful book– I’m truly excited to see what comes next for you.

Enter Giveaway Here — a Rafflecopter giveaway

Update: The winner is Carolsue Anderson!  Thanks to all who entered.

The Recipe: Zucchini Cauliflower Summer Gratin

(serves 4)

1 large head cauliflower

kosher salt

1 1/4 pounds zucchini, coarsely grated

2 tablespoons olive oil

3/4 cup chopped onion

2 garlic cloves, minced

1/2 teaspoon finely ground black pepper

2 tablespoons all-purpose flour (or gluten-free all-purpose flour)

1/4 cup milk

1/3 cup heavy cream

2/3 cup grated parmesan, divided (or more!)

1 tablespoon chopped fresh rosemary

3 tablespoons chopped fresh parsley

Prepare the cauliflower by removing the core and breaking the rest up into smaller pieces.  Then, using a food processor (or a sharp knife), pulse the cauliflower until they are tiny pieces that resemble rice grains.  Be care that the mixture doesn’t get mushy.  You may have to do this in batches.  You should yield about 3 1/2 cups.

Preheat oven to 375°F.  Lightly coat a shallow baking dish with olive oil and set aside. Stir 1 teaspoon salt and grated zucchini together, then place colander set over a bowl to drain.  In a large skillet, heat olive oil over medium-high heat, add onions and a big pinch of salt, and cook stirring, until softened, about 4-5 minutes.   Meanwhile, squeeze handfuls of zucchini over a bowl to catch the juices, removing most of the water from the zucchini, yielding 2/3 cup shreds.

When the onion is softened, reduce heat to medium and stir in the cauliflower, garlic, zucchini, 1/2 teaspoon kosher salt, and pepper.  Cook for about 7-8 minutes, until the vegetables are softened.  Sprinkle flour over the mixture and stir to combine.  Gradually stir in reserved zucchini water, milk, and cream, maintaining heat at medium so dairy does not curdle.  Cook for 2-3 minutes so liquid absorbs slightly. Remove from heat.  Stir in 1/3 cup parmesan, rosemary, and parsley.  Pour into prepared dish and bake for 20 minutes.  Remove from oven and top with remaining cheese (or more, if you like).  Return to the oven for another 10 or so minutes until gratin is brown and bubbly.  Sometimes I put the gratin under the broiler to brown up a bit faster for the final minute or two.  Enjoy!

Check out these other great blogs for more recipes from “Smitten with Squash”.  If you happen to live in the Twin Cities, be sure to stop by Solo Vino in St. Paul from 5:00-7:30 this evening for Amanda’s first book signing– I’ll be there, too!

A Farmgirl’s Dabbles — Bumper Crop Spicy Squash Pickles

Fresh Tart — Chimichurri Chicken and Vegetable Kabobs

Robin Writes — Garam Masala Dusted Pattypans & Crispy Chickpeas with Tahini Sauce

Dolly and Oatmeal — Banana and Oat Streusel Summer Squash Muffins

Healthy Green Kitchen — Cherry Tomato and Summer Squash Cobbler with Rosemary Biscuits

Thanks for stopping by Relishing It!

Laurie


Read Full Post »

Perfectly Tangy Barbacoa with Avocado Tomatillo Salsa | Relishing It

We eat an obscene amount of tacos in this house– especially in summer.  It’s just such a perfect time for them with all of the fresh ingredients so readily available for toppings.  Plus, they’re super easy, which is wonderful considering there are so many things I usually want to be doing other than standing over my stove or grill.  I’ve been searching for a perfect barbacoa recipe for awhile now.  And by golly, I’ve found it!  I’ve tried several that were fine, but not particularly memorable.  That is, until I stumbled upon this one.

Perfectly Tangy Barbacoa with Avocado Tomatillo Salsa | Relishing It

I wanted something that was somewhat saucy, but more importantly had a nice tang to it.  When I read this recipe, I immediately knew it had great potential– it contained both cider vinegar and lime juice.  Bingo!  It also had the freshness I was looking for with cilantro, garlic, and onions blended in to make a perfect sauce. A little intrigue from the addition of cloves and a bit of heat from the smokey chipotle peppers in adobo sauce confirmed that this was what I had been looking for.

Perfectly Tangy Barbacoa with Avocado Tomatillo Salsa | Relishing It

I knew I didn’t want to fire-up the oven long enough to cook five pounds of beef.  My house would be a sauna at the end of it.  Cooking overnight in the slow cooker was a perfect solution.  It yielded a perfectly tender piece of beef that was perfectly, “tang-ily”, seasoned.  Reducing the cooking liquid at the end really concentrated those flavors, too.  This barbacoa is perfect to feed a crowd of people, like we did, or make a big batch and freeze the leftovers for quick, delicious weeknight meals.  I finally caved-in a bought a tortilla press and have happily been perfecting my corn-tortilla skills– more on that later.  But, for now– feel free to make these tortillas and drink this margarita for your taco party.  Oh, and for variety– here’s a wonderful carnitas recipe! You’ll be inviting me over, right?  Adiós, muchachos!

Perfectly Tangy Barbacoa with Avocado Tomatillo Salsa | Relishing It

The Recipe:  Perfectly Tangy Slow Cooker Barbacoa with Avocado Tomatillo Salsa

(serves a large crowd)

For the Avocado Tomatillo Salsa:

Use this recipe and add 1 avocado.  Blend everything together.  Cover and keep in the refrigerator.

For the Barbacoa:

1 bunch cilantro, rough chopped

1 red onion, cut into chunks

1 head of garlic, peeled

4 canned chipotle peppers and the adobo sauce that they sit in (use less if you want less heat)

juice of 4 limes

1/2 cup cider vinegar

2 teaspoons ground cloves

1 tablespoon kosher salt

cracked black pepper, to taste

5 dried bay leaves

4-6 cups chicken or beef stock, preferably homemade

4-7 pounds beef roast (any tough piece of meat will work/brisket, chuck, etc.)

Place the beef in a large slow cooker, my oval one worked perfectly.  You can use 1 piece of meat, or cut what you have into a few pieces so it fits properly and so it cooks uniformly.

To a food processor add the following ingredients (or chop everything very finely using a knife): cilantro, onion, garlic, chipotle peppers and their sauce, lime juice, cider vinegar, ground cloves, salt, and pepper.

Pour the mixture over the beef and add enough broth to cover the meat.  Add the bay leaves.  Stir the sauce and broth together and cover with the lid.  Turn the sow cooker onto the “low” setting and cook for 8-10 hours.  The beef will be completely tender and shred easily with a fork when it’s done.  If your beef doesn’t appear this way when you feel that it’s done–cook it longer.  The collagen will eventually break down and yield a tender piece of meat.  Remember, every slow cooker cooks a bit differently.

When the beef is done, remove it from the liquid and shred it with two forks (removing any fat, too).  Place the liquid into a large sauce pan and heat uncovered until the liquid has reduced by about half or more (feel free to skim any fat off, too).  Use your best judgement, you will be pouring this mixture over the shredded meat, so it depends upon how much liquid you prefer in your barbacoa.

Combine the sauce and beef together in the slow cooker.  Use it to make tacos!  Serve it with tortillas, queso fresco or coitja cheese, radishes, cilantro, onions, jalapenos, limes, and the Avocado Tomatillo Salsa.  The barbacoa reheats and freezes very well.  Enjoy!

Recipe adapted from the Kitchn

Thanks for stopping by Relishing It!

Laurie

Read Full Post »

« Newer Posts - Older Posts »

%d bloggers like this: