Feeds:
Posts
Comments

Posts Tagged ‘Healthy’

Asian Lettuce Wraps | Relishing It

Continuing with the ginger theme from last week, I give you these Asian lettuce wraps.  This is one of my go-to meals when I feel like stuffing my face with some serious flavor, but I still want to keep it on the healthy side.  Texture is the key here.  Adding crisp veggies and crunchy peanuts make this wrap stand out.

Asian Lettuce Wraps | Relishing It

Asian Lettuce Wraps | Relishing It

The black bean garlic sauce gives this dish a bit of oomph and can be found at most any Asian or even some regular grocery stores.  The beans are fermented, which lends a unique flavor to the dish.  If you’ve never tried using black bean garlic sauce before, you will soon find many ways to incorporate it into your Asian cooking– it’s wonderful, plus it lasts forever in your refrigerator.  The hoisin sauce is also instrumental in bringing a touch of sweetness to the mixture.  Both ingredients work well with fresh ginger and garlic.

Asian Lettuce Wraps | Relishing It

The meat mixture is very versatile and can be adjusted to fit what you have on hand.  Ground chicken, turkey, or even pork all work well.  Sometimes I even toss in some frozen peas, which my kids really enjoy.  However you make it, I know you’re going to love these lettuce wraps!

Asian Lettuce Wraps | Relishing It

The Recipe: Asian Lettuce Wraps

(serves four)

1 pound ground chicken, turkey, or pork

1 tablespoon minced fresh ginger

3 garlic cloves, minced

2 tablespoons black bean garlic sauce

2 tablespoons hoisin sauce

1/2 teaspoon (or more) chili garlic sauce

1 tablespoon rice vinegar

1 teaspoon soy sauce

sprinkle of Togarashi on each wrap, optional

About 2 heads of bibb (sometimes called butter) lettuce

fresh bean sprouts, 2 grated carrots, hot peppers, crushed peanuts, and Sriracha sauce, for serving

In a small mixing bowl, combine the black bean garlic sauce, hoisin sauce, garlic chili sauce, rice vinegar, and soy sauce. Set aside.

In a large skillet over medium-high heat,  brown the meat.  Drain off and discard any grease.  Add the garlic and ginger to the pan and sauté for a minute or two.  Add the contents of the bowl to the meat and mix together until warmed through.  Taste and re-season, if necessary.

Assemble the wrap with a piece of lettuce, a bit of the meat mixture, sprouts, carrots, hot peppers, peanuts, sriracha, and a sprinkle of Togarashi, if desired.  Enjoy!

Thanks for stopping by Relishing It!

Laurie

Read Full Post »

Homemade Beef Broth | Relishing It

Well this week has flown by.  My little boy has been sick for a few days, so my usual routine has been interrupted.  I absolutely don’t mind the interruption, and like having him home with me all day again, but I just hate it when my little ones are sick.  Since he hasn’t been eating a whole lot (sore throat), I’m so thankful to have frozen broth at the ready for both the ease and the nourishment that it can give to him.  I guess this is as good a time as any to post this recipe, then.

Homemade Beef Broth | Relishing It

Making broth isn’t a new concept, but it seems as though the foodie/health world has rediscovered it lately.  There’s a good reason for that.  Making broth is simple and it offers so many healthy benefits that store-bought versions simply do not.  They also taste so much better.  Make a homemade broth and then do a taste-test with a store brand.  I have.  The difference is stunning.

Homemade Beef Broth | Relishing It

Homemade Beef Broth | Relishing It

For my beef broth, I start with finding some good, properly-raised beef.  You know I’m a grass-fed beef advocate.  So, I suggest you find some grass-fed beef bones (you’ll want a mix of marrow bones and some with a bit of meat on them) to make the healthiest, most nourishing broth possible.  Soup bones can easily be found at a good co-op or grocery store, your local butcher, or from the farmers market. They’re cheap.  Sometimes they’re even labeled “pet bones”– which is kind of odd.  But trust me, they’ll make a rich broth that you’ll love.

Homemade Beef Broth | Relishing It

The other ingredients you likely already have at home– carrots, celery, onion, garlic, cider vinegar, and some dried or fresh herbs.  It’s a simple process that involves roasting the bones and vegetables first– to really amp up their flavors– then simmering on the stove for hours with water, herbs, and vinegar.  The vinegar is added to, supposedly, draw out some of the minerals from the bones.  I’ve read conflicting information on this, but I finally decided that since I love the flavor it imparts, I’m going to go with it.  Simmer this broth as long as you can.  The longer you do, the more nutrients it will draw out of the bones.

Homemade Beef Broth | Relishing It

The flavor will be good after three hours, or so– but shoot for 8 or even 24, if that’s a possibility for you. Also, after simmering for about 2-3 hours, I remove the bone with meat on it, and trim the cooked meat off. I put the bone back into the broth and save the meat to use another time. At this point it hasn’t been overcooked, but it has still added plenty of flavor to the broth already. If you don’t want to bother, just leave it in the broth for the duration of the time. As long as you hit that three-hour mark, the broth will taste amazing! Use it in soups like this Paprikash that is one of our family favorites. Fill your freezer up with both this beef broth and this chicken broth for quick, healthy soups this winter.

Homemade Beef Broth | Relishing It

The Recipe: Homemade Beef Broth

(makes a few quarts)

about 6 pounds of good quality, preferably grass-fed, beef bones (some containing marrow and some containing a bit of meat)

about 3 carrots, halved

2 celery stalks, halved

1 large onion, quartered

1 garlic bulb (that’s the entire thing), halved and not peeled

3 dried bay leaves

1 teaspoon dried thyme

1 tablespoon black peppercorns

handful of fresh parsley, rough chopped

2 tablespoons kosher salt, or more to taste

6 tablespoons apple cider vinegar (I use Bragg’s)

Preheat oven to 400°F. Line a rimmed baking sheet with parchment paper (for easy clean-up). Place the beef bones, carrots, celery, onion, and garlic on the pan with a bit of olive oil and a sprinkle of salt.  Roast for about 40-45 minutes, or until the beef and vegetables have a bit of color. Remove from oven.

Add the beef, vegetables, and any juices (leave the grease behind) to a large kettle.  Top it with the bay leaves, thyme, peppercorns, fresh parsley, cider vinegar, and enough cold filtered water to cover it all.

Bring everything to a high simmer so that it’s almost boiling, but not quite.  Then reduce the heat with the lid ajar to just a low simmer that is barely bubbling and let it cook away for as many hours as you can.  Three hours for sure, but shoot for more, if you can. If wanting to use the meat from the meaty bone (and you should– it’s great for quick meals and/or snacks), remove from bone after about 2-3 hours, put the bone back in the pot.

After you have finished simmering the broth, remove the large pieces with tongs and strain the liquid through a cheesecloth.  This will give you a nice clear broth. At this point you can put it in jars (or BPA-free plastic quart-sized containers) leaving about an inch of head-space (the liquid will expand as it freezes) or leave it in a large pot and refrigerate until completely cold (this will take hours, so overnight works well) and pour into jars afterwards. This makes removing the top layer of grease a cinch. Once that has been completed, throw a lid on it and freeze.

Thanks for stopping by Relishing It! Have a great weekend.

Laurie


Read Full Post »

Quinoa Bake with Broccoli and Chickpeas | Relishing It

When I’m developing a new recipe for a meal there are two criteria that generally need to be met.  First, the recipe has to be mostly healthy.  Since I’m the main person that pumps food into my family, I need it to be loaded with nutrients.  Second– and this is the tricky one– I need it to be a meal that my family actually likes and will eat.  Finding this balance is often a challenge, but today’s recipe was spot-on.

Quinoa Bake with Broccoli and Chickpeas | Relishing It

Quinoa Bake with Broccoli and Chickpeas | Relishing It

Luckily for me, my family actually likes broccoli.  Seriously.  So, if I toss that into a dish I’m already one step to the good.  Here, I also relied on chickpeas for the protein and the texture.  And quinoa is one of my favorite things to build a meal around.  It cooks quickly, has a nice nutty flavor, and happens to be loaded with protein, as well.  Though it looks like a grain, quinoa is actually a seed–so it is gluten-free.

Quinoa Bake with Broccoli and Chickpeas | Relishing It

This isn’t a heavy bake loaded with cream or lots of cheese.  It’s simple and clean, if you will.  Aside from the main components of the dish, the subtle flavors of garlic and lemon really come through and work so well together.  I like to use my homemade chicken broth here because I always have it on hand and I love its flavor.  However, if you are vegetarian, feel free to use vegetable broth.  Finishing it with parmesan cheese that has become golden and chopped almonds for the texture is perfect.

Quinoa Bake with Broccoli and Chickpeas | Relishing It

One of the best parts about this dish just how easy it is to prepare.  From start to finish, your family will be eating dinner in about 30 minutes.  That’s not bad, especially considering most of that time it is in the oven. And you can feel good about the fact that every bite is healthy for them.  Hope you enjoy!

Quinoa Bake with Broccoli and Chickpeas| Relishing It

The Recipe: Quinoa Bake with Broccoli and Chickpeas

(serves 4)

olive oil

2 cups chopped broccoli

3 garlic cloves, finely minced

1 small red onion, finely chopped (about 1/3 cup)

1/4 cup chopped fresh parsley

13-15 ounces cooked chickpeas (about 1 1/3 cup)

1 cup dry quinoa, rinsed (any color will work)

zest of 1 large lemon

1 1/2 cups chicken broth (heated)

kosher salt and cracked pepper, to taste

handful of parmesan (about 1/2 – 3/4 cup)

handful of chopped roasted almonds, for garnish

Preheat oven to 450°F.

Heat olive oil in a cask-iron skillet, or anything similar. Sauté the onion, garlic, broccoli, and chickpeas for about 3 minutes.  Sprinkle with about 1 teaspoon of salt and some cracked pepper.  Then add the lemon zest, parsley, quinoa, and heated broth.  Make sure all of the quinoa is covered by the broth.  Cover with foil and place in the oven.

Bake for about 20 minutes, or until the quinoa has absorbed all of the liquid and is tender.  Remove from oven.  Place oven rack near the broiler and turn it on.  Sprinkle parmesan over the quinoa and return to oven uncovered.  Broil for just a couple of minutes until the parmesan has turned golden brown.  Keep a watchful eye, as it can burn quickly.  Remove from oven and sprinkle with chopped almonds before serving.  Leftovers can be kept in the refrigerator and reheated easily.  Enjoy!

Thanks for stopping by Relishing It!

Laurie


Read Full Post »

Wild Rice, Roasted Butternut Squash, and Kale with Citrus Curry Dressing | Relishing It

We have had a busy couple of weeks, in the most wonderful way.  We went on an epic vacation to Disney World with our extended family.  There were twelve of us in all– six adults and six children– and it was fantastic,  I’m more than a little sad that this long-planned trip has now come and gone.  Luckily, the transition back to our normal lives here in Minnesota was pretty easy.  We’re having a beautiful fall, with stunning colors and perfect temperatures.  October is my favorite month anyway, and this one is living up to every expectation I’ve ever had.  Both of my sweet little ones celebrate birthdays this month– which makes me love it even more.

Wild Rice, Roasted Butternut Squash, and Kale with Citrus Curry Dressing | Relishing It

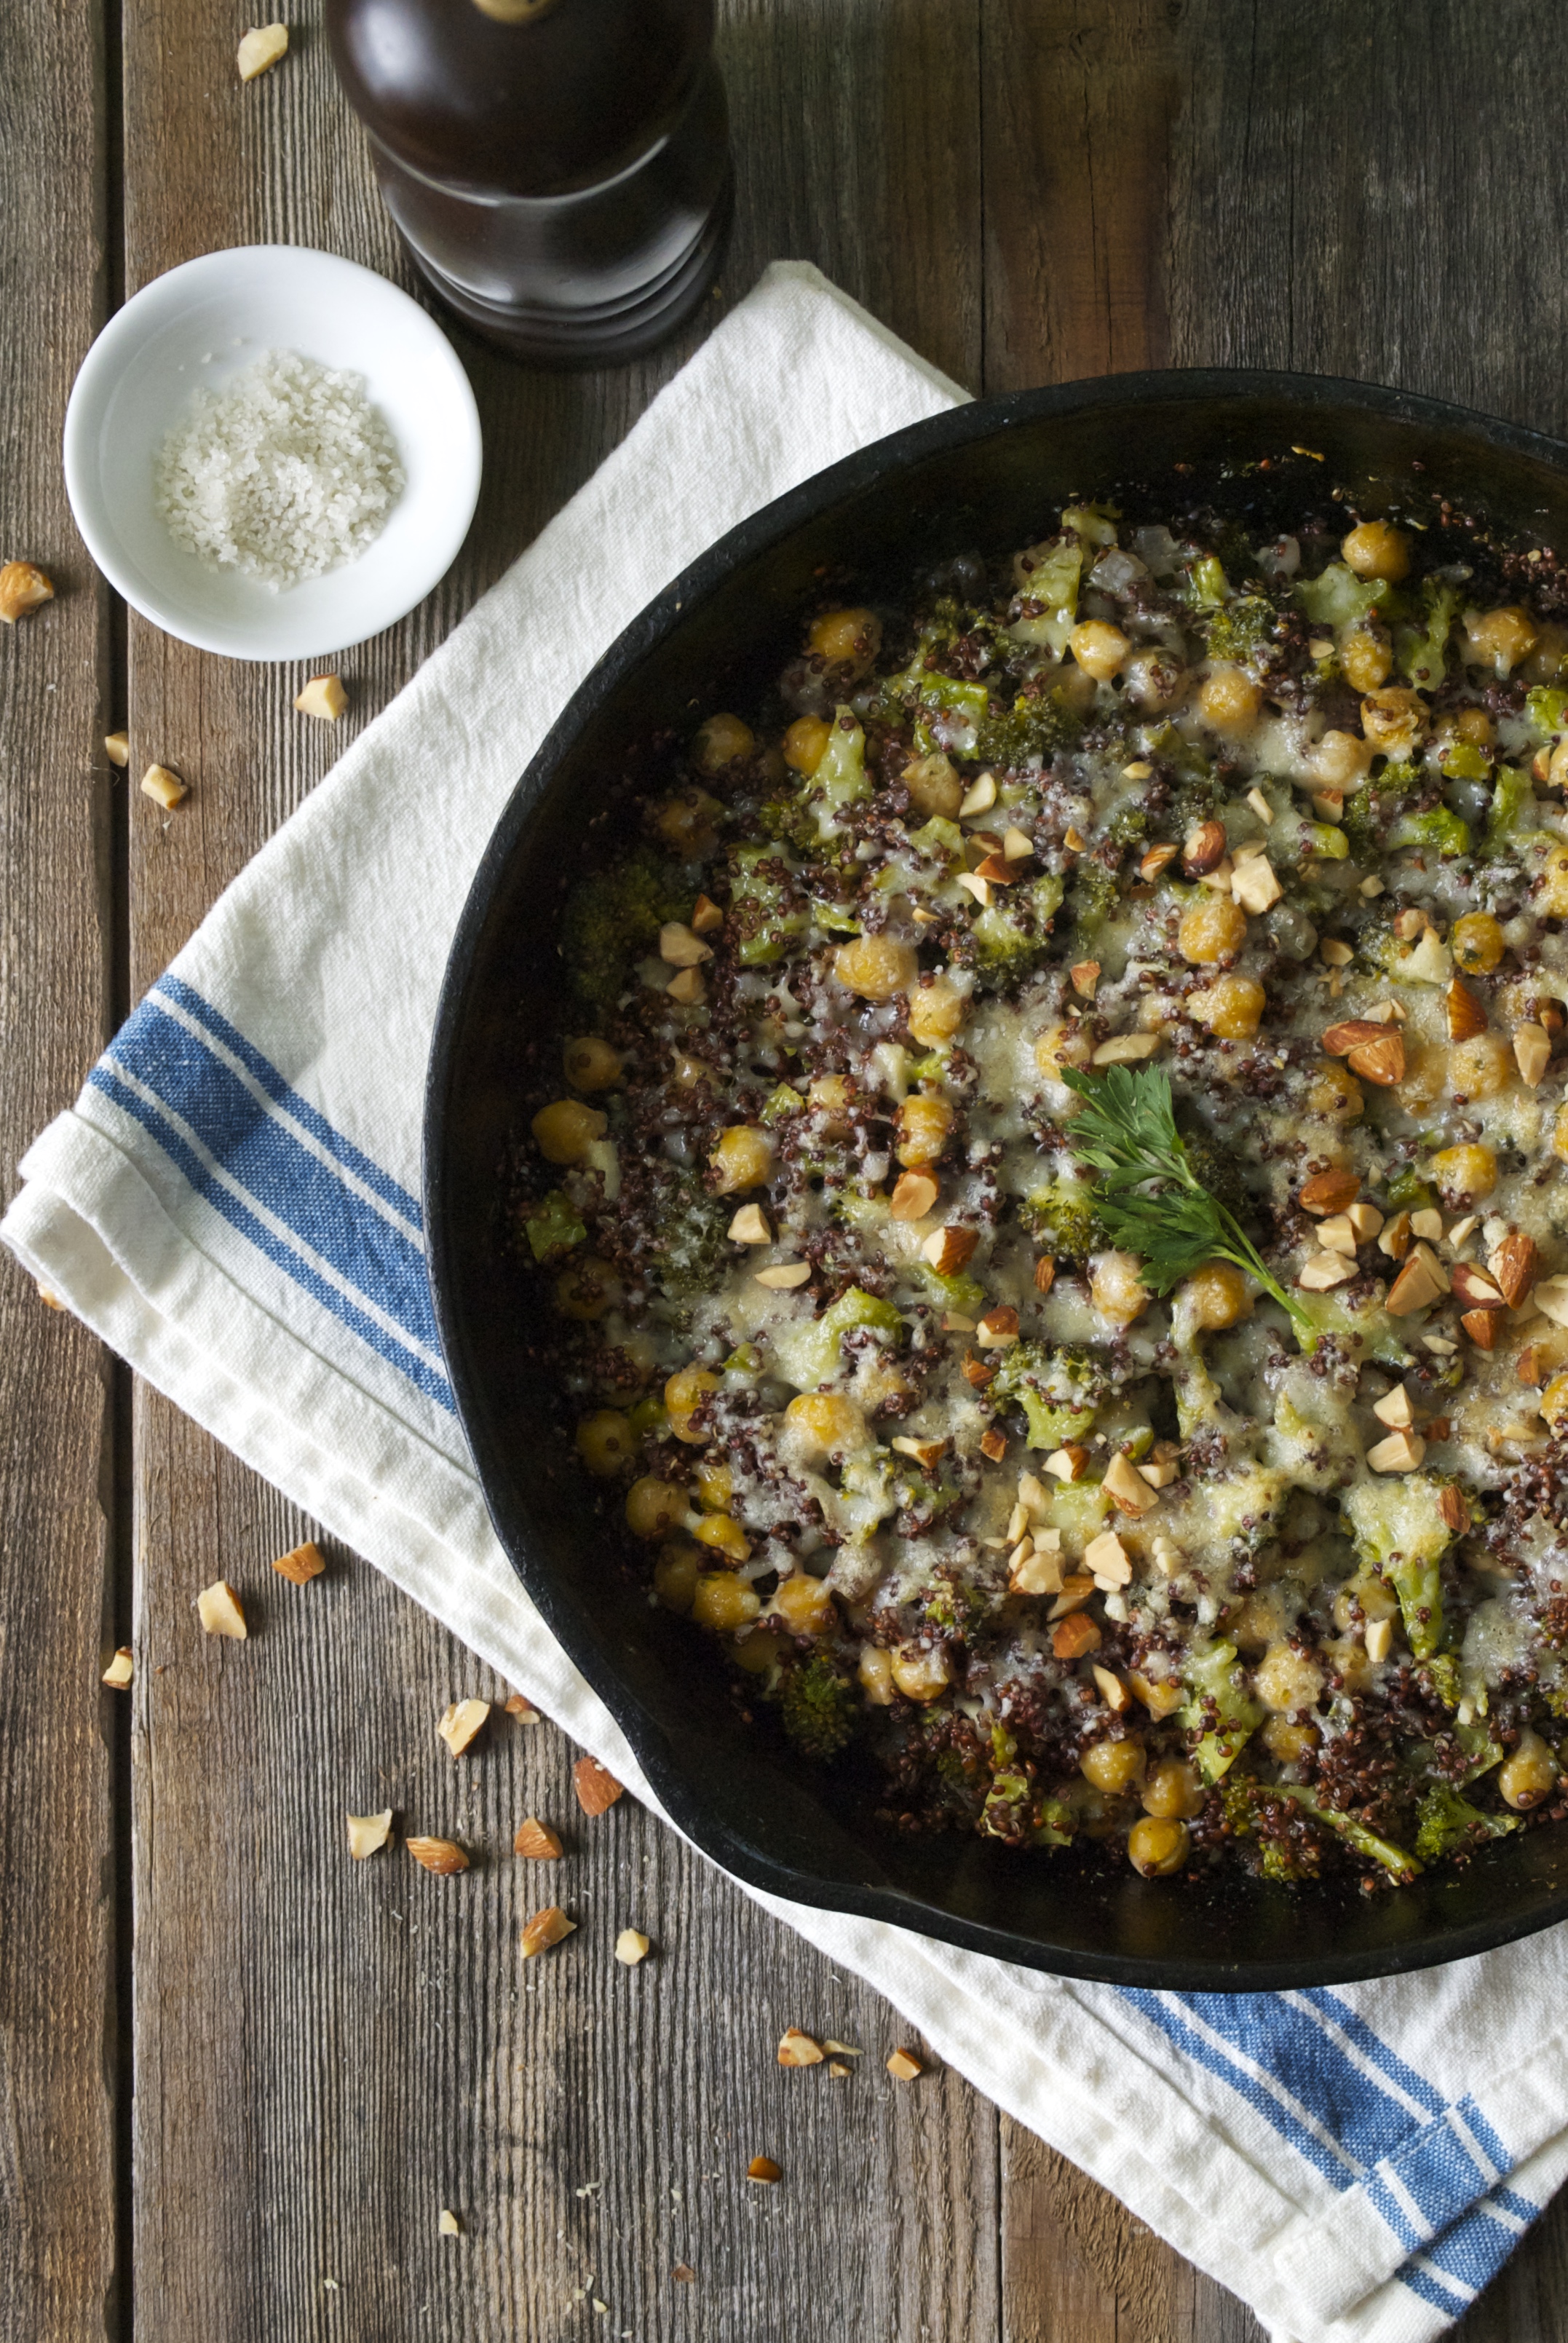
As for that getting back into the swing of things, we went to a neighborhood potluck last night where our friends smoked an impressive 36 pounds of pork.  It was ridiculously delicious!  I made this autumnal dish for the get-together and received some nice comments, so I figured I’d share it with you as well.  It’s a cross between a side dish or a salad, or maybe even a main course.  Let’s just call it food, shall we?  It has a wonderful feel of fall to it and contains some of my favorite things.   I fancy rice and squash as a combination, and a few of you may remember this dish from last year? This time I went with the nutty, toothsome, wild rice.  I’ve been tossing it into soups and salads whenever I can.  I also stocked up on Winter squash at the farmers market yesterday, so I figured I’d add some in as well.

Wild Rice, Roasted Butternut Squash , and Kale with Citrus Curry Dressing | Relishing It

Wild Rice, Roasted Butternut Squash, and Kale with Citrus Curry Dressing | Relishing It

Wild Rice, Roasted Butternut Squash, and Kale with Citrus Curry Dressing | Relishing It

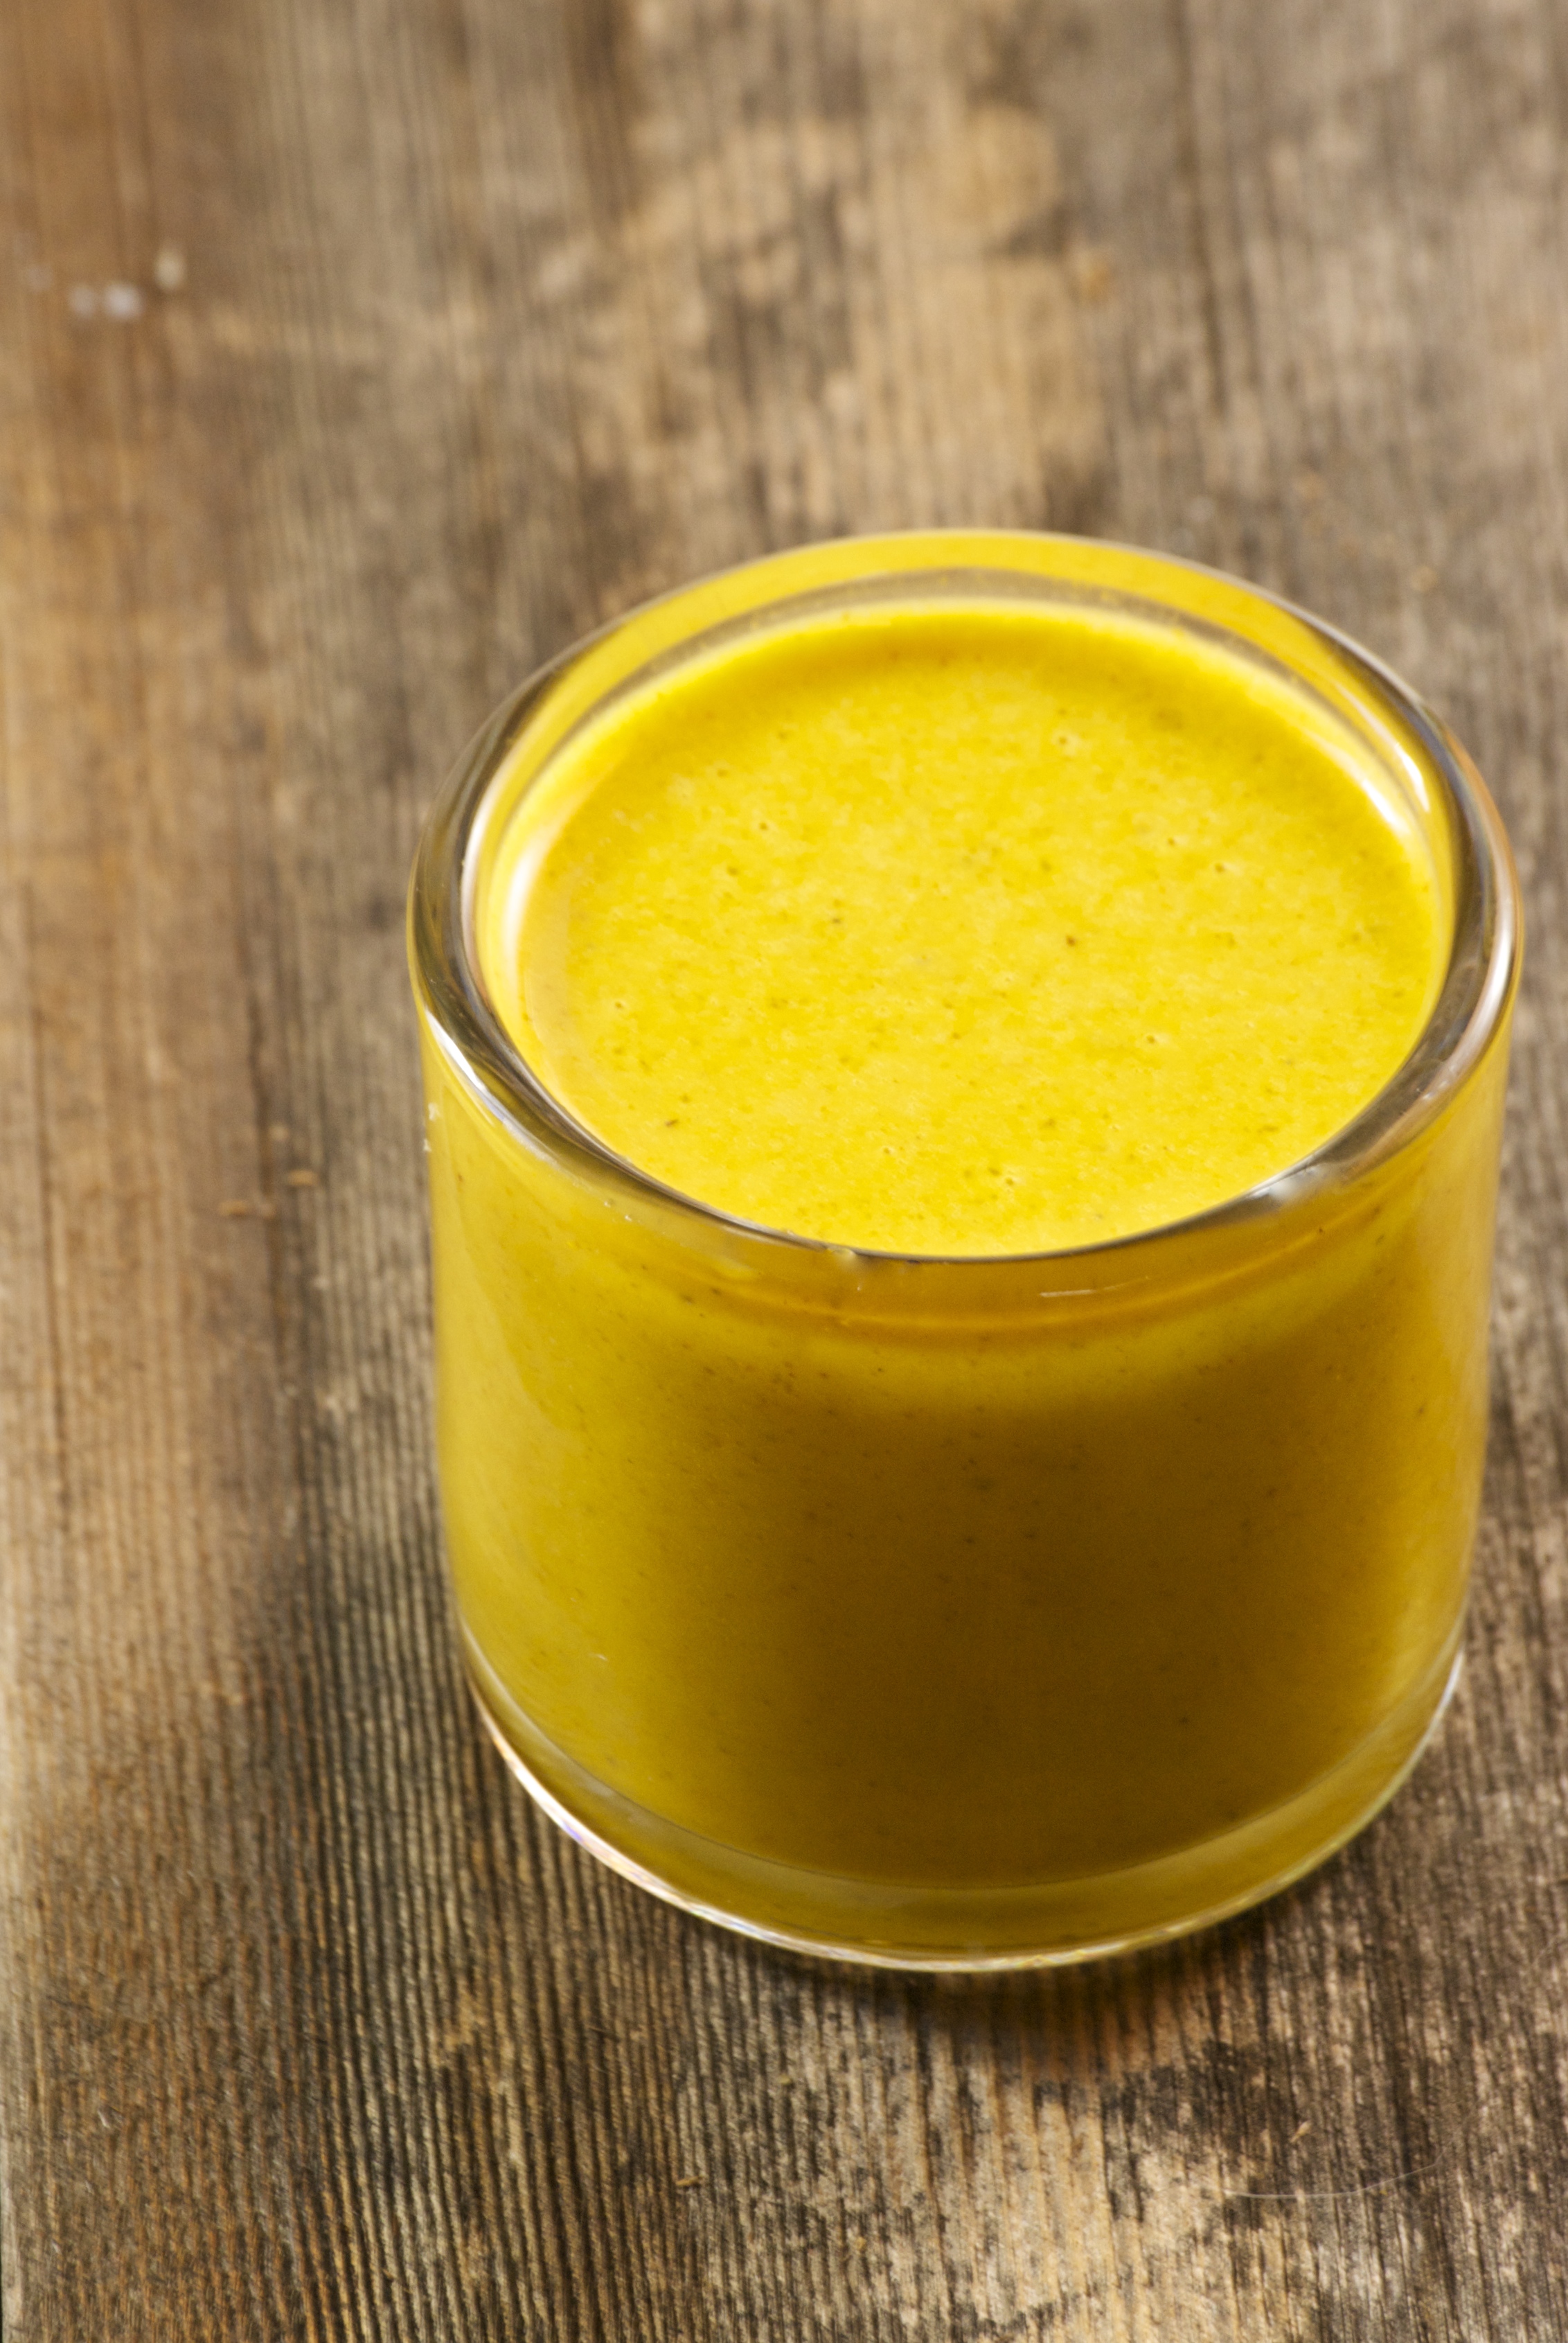
Then I decided to make this delicious citrus curry dressing to pour on top of everything.  I’d been dreaming about this dressing after having recently gone out to lunch with a couple girlfriends.  This dressing was on all of our salads and it was insanely delicious.  (No worries, ladies– I think I’ve got it down.  Or something very close and fantastically delicious in it’s own right.) The dressing’s base is orange juice that has been reduced to amp up its flavor.  The curry addition makes it unique and almost addictive.  Bite after bite, you’ll keep wanting more.  I also decided to add some kale into the mix, since I had a bit left from my final CSA box.  I massaged it first with a tiny drizzle of olive oil and salt for about 3-5 minutes.  Massaging kale helps it soften a bit, and in this dish, it is worth the little extra effort.

Wild Rice, Roasted Butternut Squash, and Kale with Citrus Curry Dressing | Relishing It

Wild Rice, Roasted Butternut Squash, and Kale with Citrus Curry Dressing | Relishing It

I came across some wonderful honey goat cheese at our co-op and knew it would work perfectly in this dish.  Wow!  There is a smidge of honey in the dressing, so it tied in beautifully.  Of course regular goat cheese would work fine, too.  I topped the dish with coarsely-chopped roasted and salted hazelnuts, but walnuts or even almonds would serve the purpose, too.  Anything that provides a little crunch for texture. The dish can be served warm, but I prefer it at room temperature.  Which makes it a perfect make-ahead dish for the holidays.  Hope you are all doing well– enjoy!

Wild Rice, Roasted Butternut Squash, and Kale with Citrus Curry Dressing | Relishing It

The Recipe: Wild Rice, Roasted Butternut Squash, and Kale with Citrus Curry Dressing

1 cup uncooked wild rice

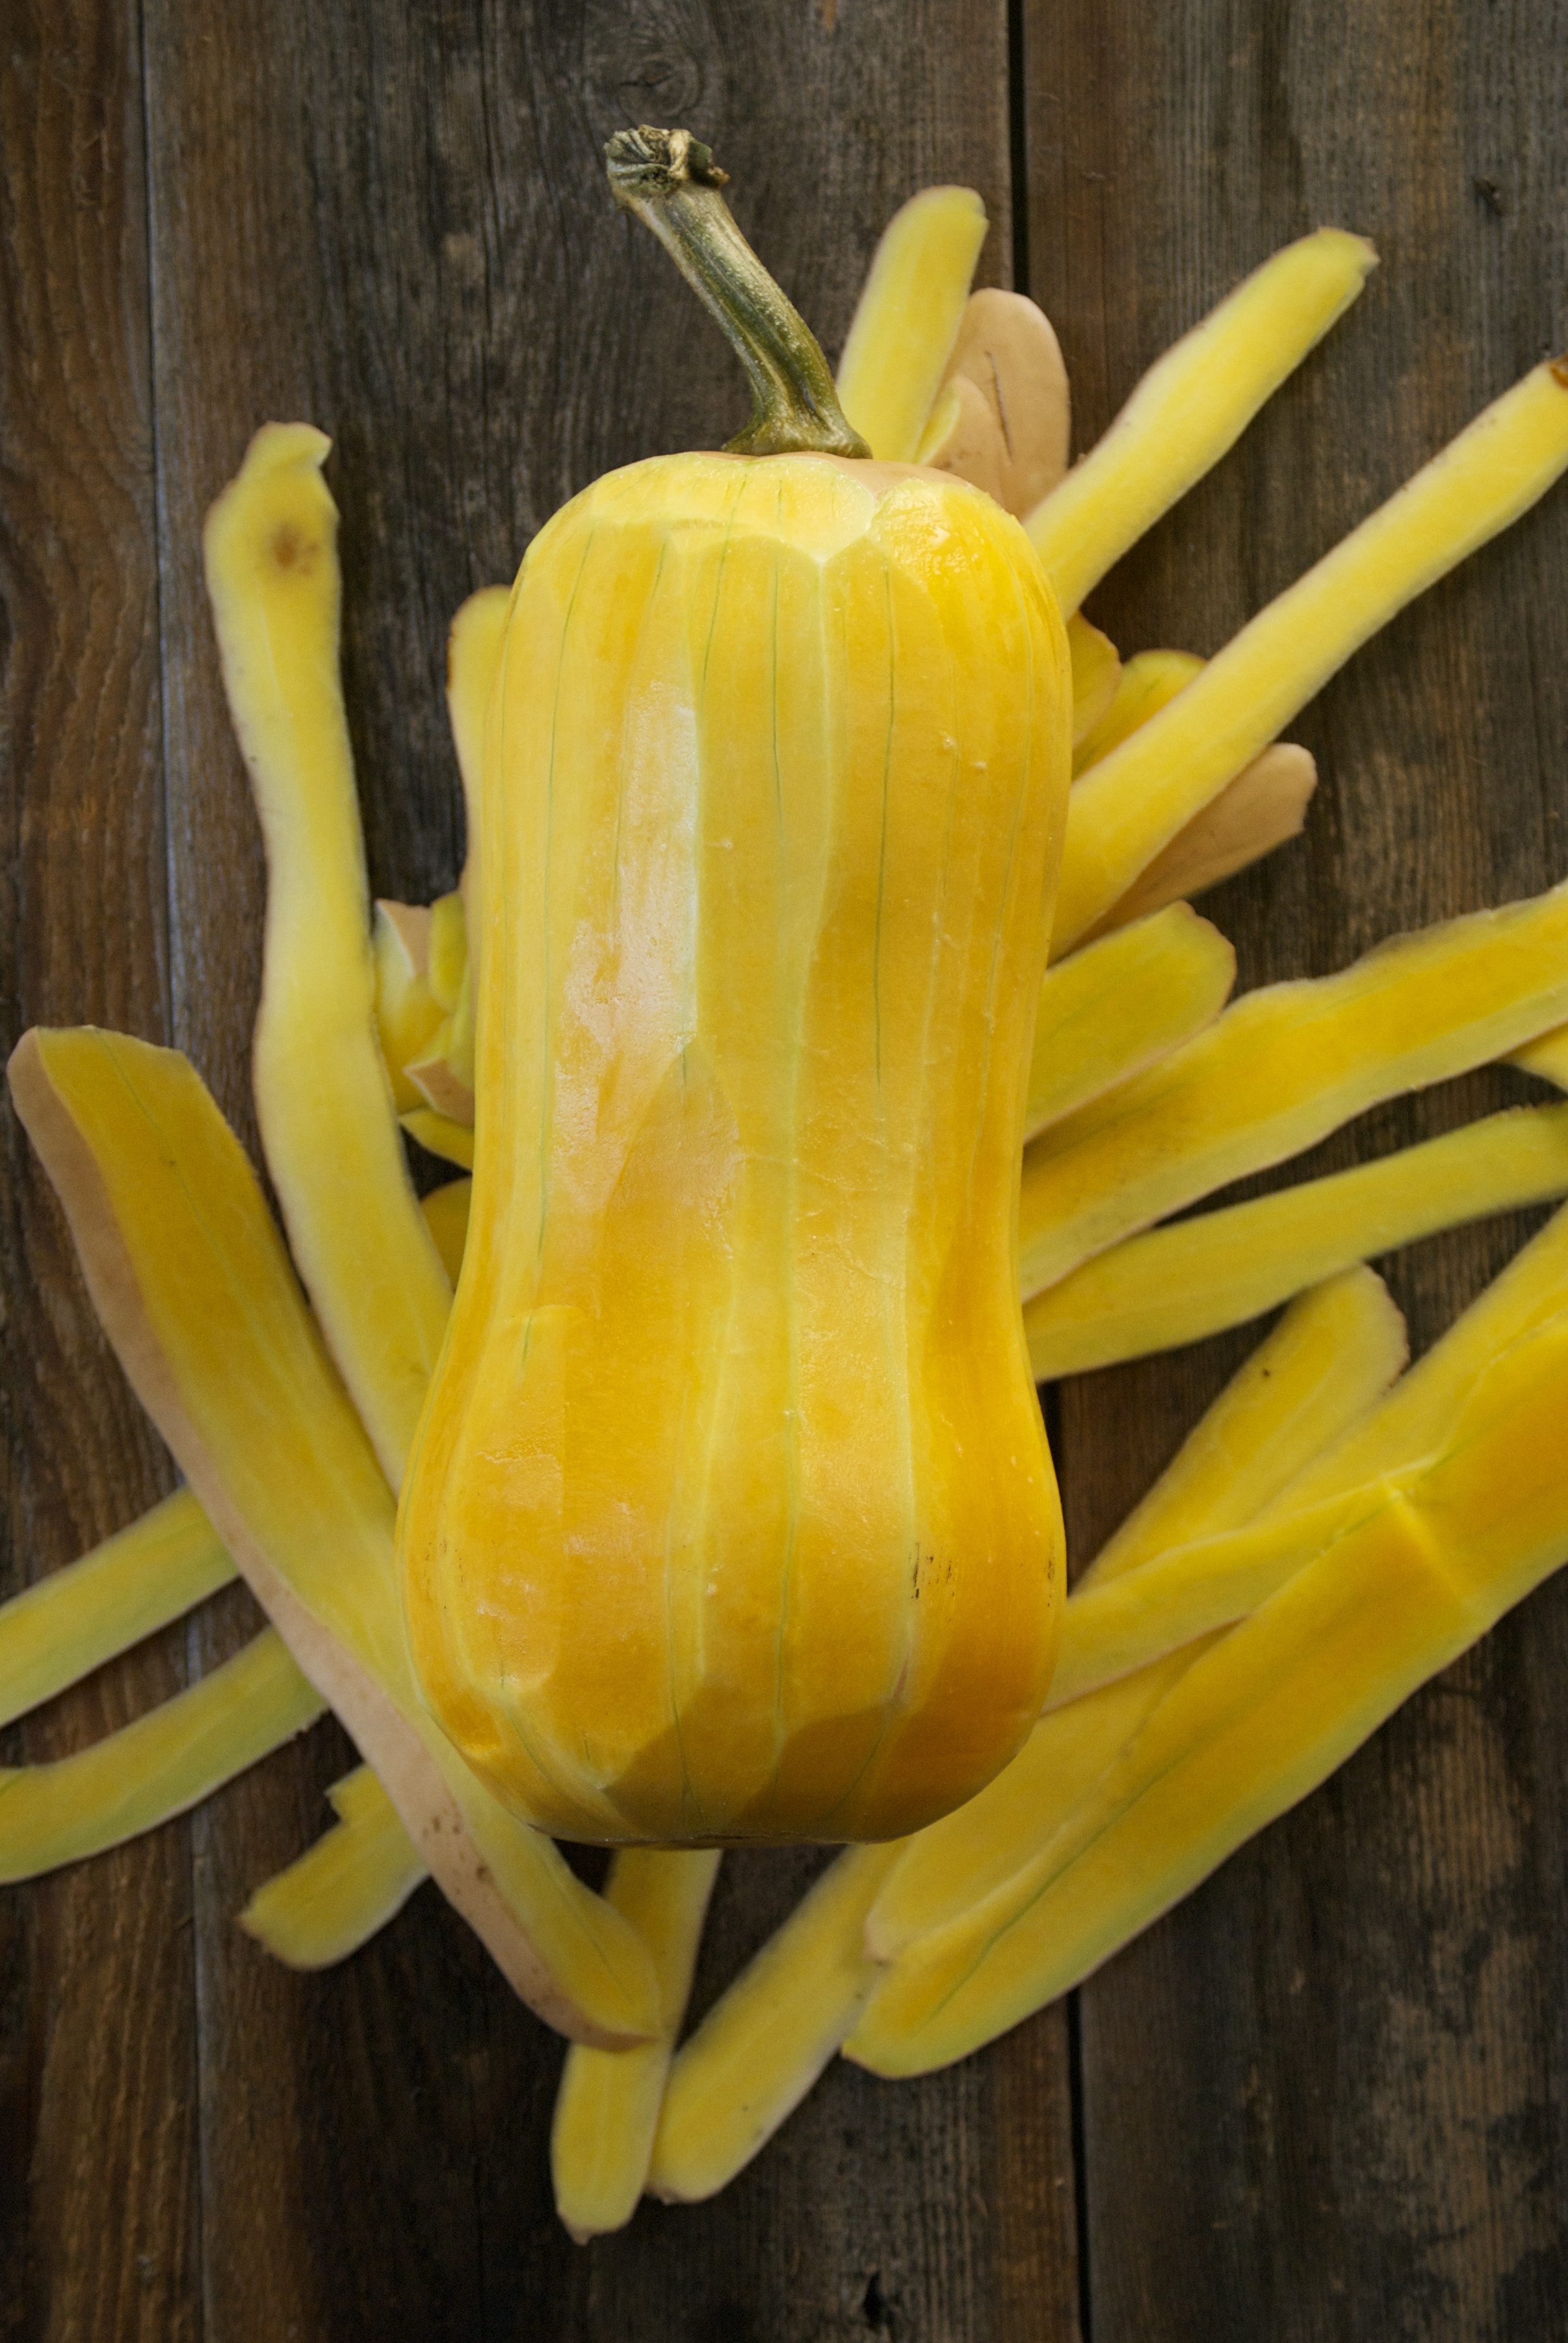
1 medium-large butternut squash, peeled and cut into small cubes

1 1/2- 2 cups coarsely chopped kale (any variety will work)

roasted and salted hazelnuts, for garnish (about 1/2-3/4 cup)

crumbled honey goat cheese (or regular), for garnish (about 1/2 cup)

olive oil

kosher salt and cracked pepper

For the Citrus Curry Dressing:

1 cup freshly squeezed orange juice, from 2 oranges  (Valencia worked great)

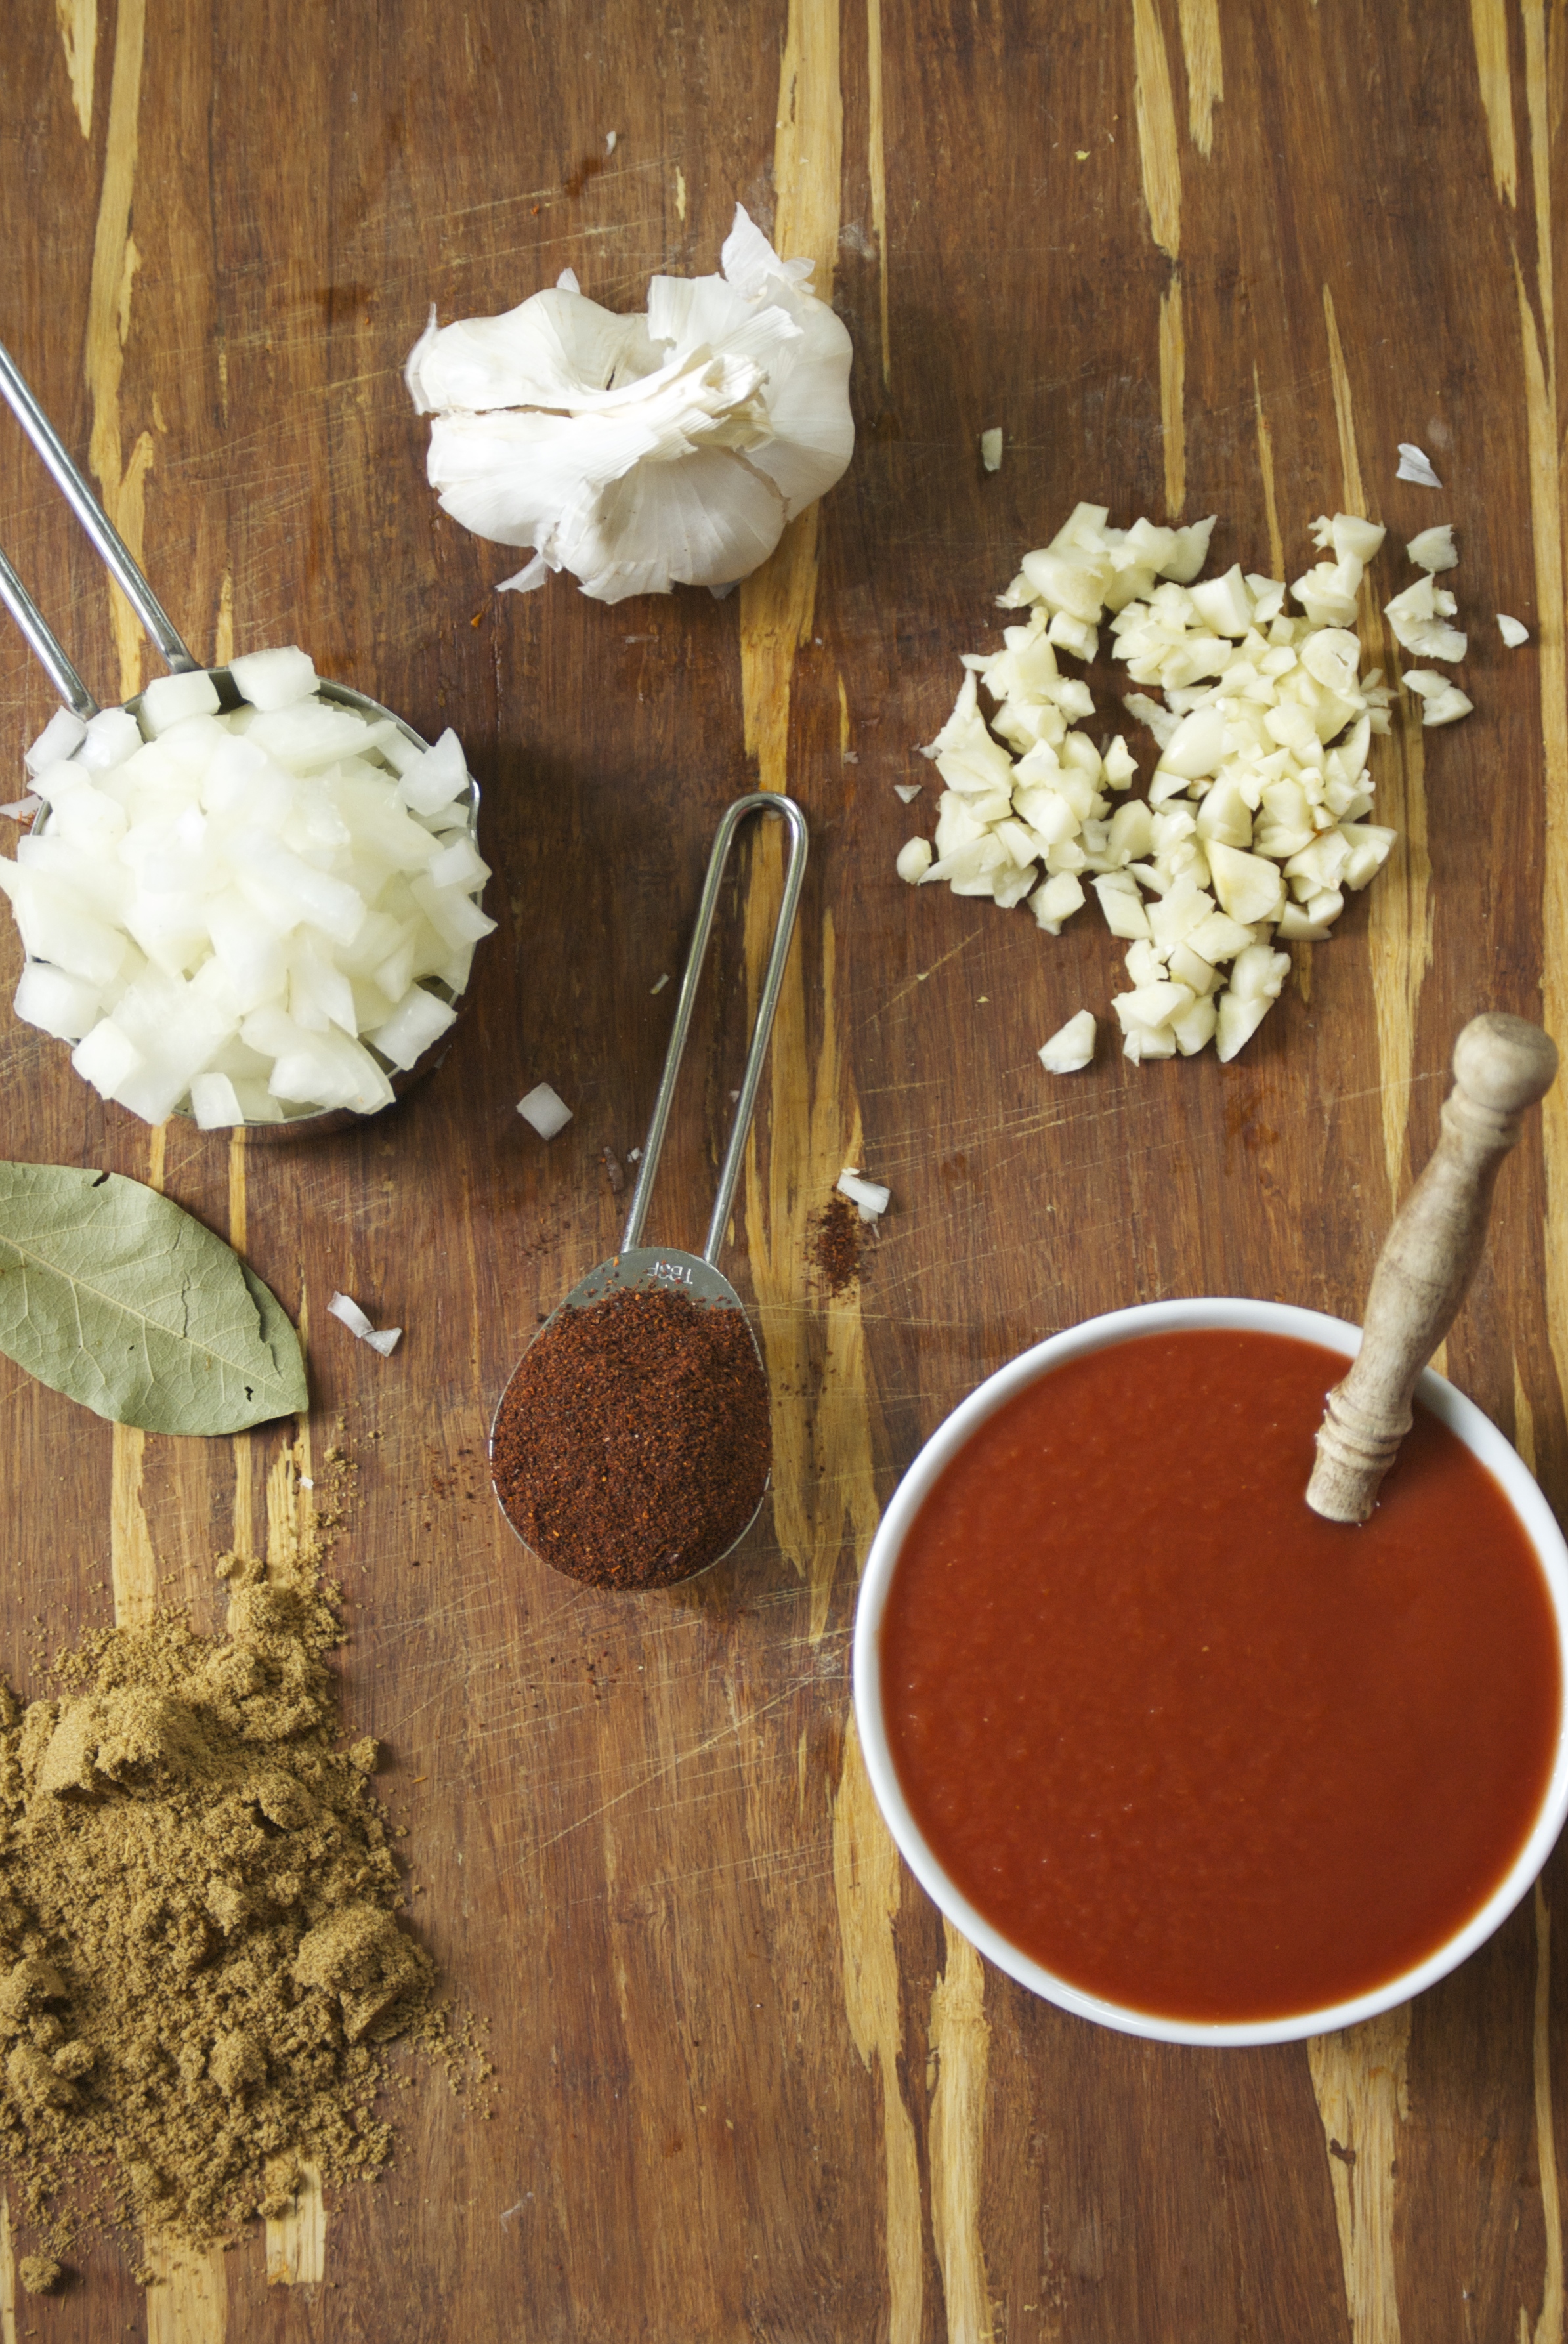
1 tablespoon finely minced shallot or red onion

1 garlic clove, finely minced

1/2 teaspoon Dijon mustard

1 teaspoon honey

1 tablespoon cider vinegar

2 teaspoons sweet curry powder

1/3 cup extra virgin olive oil

kosher salt and cracked pepper to taste

Preheat oven to 400°F.  Place the diced butternut squash on a large rimmed baking sheet and coat with a little bit of olive oil, salt, and pepper.  Roast for about 20-25 minutes, or until tender.  Turn the squash once while roasting.  The amount of roasting time will depend on how big or small the squash pieces were cubed, so keep a watchful eye.  Remove from oven when tender and let cool a bit.  Squash that is really hot is fragile and will fall apart more easily.

Meanwhile, rinse the wild rice in water and place into a large saucepan with 4 cups of cold water a little salt.  Bring to a boil, then reduce heat to a simmer.  The rice should be tender after about 45 minutes.  Then drain the remaining water and fluff with a fork.  Let cool for a bit. This method uses a bit more water than usual, but helps in that you don’t have to keep such a watchful eye so it doesn’t burn.

To make the dressing, begin by placing the orange juice into a small saucepan and reduce (uncovered) over medium-high heat for about 10 minutes, or until 1/3 cup orange juice remains.  Stir often. Let cool.  Then you may begin making the dressing by using one of two methods.  The first method uses an immersion blender (which I couldn’t live without).  Place all of the dressing ingredients into a tall cylinder shaped container (my blender came with one) and pulse a few times with an immersion blender until the dressing is uniform and well blended.  If you don’t have an immersion blender, you can simply use the bowl and whisk method to make the dressing (or even shake in a lidded jar).   Add all of the ingredients to the bowl, except the olive oil.  Mix together, and then slowly whisk in the olive oil.  Season with kosher salt and cracked pepper.  You may be surprised that you’ll have to add a bit of salt to bring out the flavor of the dressing.

Add the coarsely chopped kale to a medium-sized bowl and drizzle with a tiny bit of olive oil and salt. Massage kale for a few minutes until it is tender and has wilted a bit.

When all of the ingredients are ready, add them to a huge serving platter or bowl.  Pour half of the dressing over everything and gently mix.  Taste.  Add more dressing if you like.  Season with salt and pepper.  Then top with crumbled goat cheese and chopped roasted hazelnuts.  I prefer this dish at room temperature.  Refrigerate leftovers.  Enjoy!

Thanks for stopping by Relishing It!

Laurie

Read Full Post »

Easy Homemade Enchilada Sauce | Relishing ItWith the exception of this past warm weekend– a farewell gift from summer as it left– my mind has been drifting towards cool-weather comfort food.  You know, those meals that you can settle in to and cozy up with in the evening.  I’m ready for less running about, more family meals at the table, and that smell that you greets you at the door and permeates the house– when you know something delicious awaits you for dinner.  Yes, I’m ready for fall food.  I’m ready to eat hot soups and sip hot drinks.  I’m ready to braise things again.

Easy Homemade Enchilada Sauce | Relishing It

Easy Homemade Enchilada Sauce | Relishing It

Enchiladas may seem like an odd place to start, but for me, it’s a perfect seasonal-transition meal.  It’s warm, substantial, and very much a comfort food.  I intended to share this really quick enchilada sauce with you last year, but didn’t get to it.  If you’re a regular reader here, you know that I’m a big proponent of making homemade sauces.  It takes just a little extra effort, and the results are almost always worth it.  They taste so much fresher than store-bought jars, and I like having control over exactly what goes into them.  This homemade enchilada sauce is no exception.  It tastes delicious and comes together in a matter of minutes.  This is a quick enchilada sauce, made from already ground spices, which works well for weeknight meals.  I have a fantastic recipe coming up later in the week for you that uses this sauce. It’s a perfect meal for those crisp, autumn nights.  Be well, everyone.

Easy Homemade Enchilada Sauce | Relishing It

Easy Homemade Enchilada Sauce | Relishing It

The Recipe: Easy Homemade Enchilada Sauce

(makes 3 1/4 cup)

1 tablespoon olive oil

4 garlic cloves, minced

1/2 cup diced onion

3 1/2 tablespoons ancho chile powder

2 tablespoons ground cumin

1 bay leaf

15 ounces organic tomato sauce (plain)

1 1/2 cups chicken broth (preferably homemade)

1/4 teaspoon dried oregano

1 dried bay leaf

kosher salt, to taste

In a large sauce pan, heat the olive oil over medium-high heat.  Sauté the onion and garlic for a few minutes until soft.  Add the remaining ingredients and let simmer for about 15 minutes, stirring occasionally.  Remove the bay leaf and blend ingredients together with an immersion or regular blender. Season with more kosher salt, if necessary.  At this point, the sauce is ready to use.  Refrigerate it to use later in the week, or freeze for another time. Enjoy!

As always, thanks for stopping by to say hello or just to peek around!

Laurie

Read Full Post »

Roasted Tomatillo and Pork Stew | Relishing It

It has been a busy couple of weeks around our household lately.  School started for both of my kids and I’m happy to report that they are really loving it. Honestly, getting back onto the swing of things wasn’t that difficult despite the transition from late summer bedtimes and laid-back mornings around the house.  And I suddenly have a bit more free time now, which has fallen perfectly in-line with canning season! That wonderful time of the year when I dream of tomatoes. I’ve been busy in the kitchen stocking up on salsa, sauces, and plain tomatoes for the winter. Two more boxes I picked up from the farmers market this weekend are waiting for me as I write this. But, I wanted to share this ridiculously delicious recipe with you before I dive into chopping my day away again.

Roasted Tomatillo and Pork Stew | Relishing It

Roasted Tomatillo and Pork Stew | Relishing It

Roasted Tomatillo and Pork Stew | Relishing It

Roasted Tomatillo and Pork Stew | Relishing It

I was never exposed to tomatillos while growing up.  In fact, I didn’t really ever buy them before I moved to Minnesota.  Now, I just love them and making salsa with them is a no-brainer.  However, we’ve been getting a beautiful bag almost weekly from our CSA, so I wanted to do something a bit different, because how many chips can a girl really eat?  Kidding…I can eat A LOT of chips.  Pork and tomatillos are a perfect combination together– the tang from these little green gems is perfect.  This stew could not be easier to make or more satisfying. The flavors are bright and the pork is tender, yet doesn’t need to cook all day long, which makes it a bonus for a weeknight meal.  I love to serve it with a scoop of brown rice on top, but it can be equally satisfying if you prefer it without grains.  If your family loves heat, preparing it with jalapeños in the sauce would be ideal.  We put them on the side, because…kids.  I really hope you make this stew– it’s perfect with the changing weather.  Now, if you’ll excuse me– I need to get back to my little tomato factory.  Hope you are all well!

Roasted Tomatillo and Pork Stew | Relishing It

The Recipe: Roasted Tomatillo and Pork Stew

(serves 4)

2 pounds tomatillos, husks removed and tomatillos cut in half

1 bulb (yes, the entire bulb) garlic, separated into cloves

1 large white onion, chopped into large pieces

1/2 bunch fresh cilantro, roughly chopped

2 1/2 pounds – 3 pounds boneless pork shoulder, cut into 1-inch cubes

1 teaspoon cumin seed, toasted then ground with mortar and pestle OR 1 1/4 teaspoon ground cumin

fresh cilantro, jalapeño,and lime for garnish

olive oil, salt and pepper

1 cup uncooked brown rice, cooked according to directions, for serving

Preheat oven to 400°F.  Line a large baking sheet with parchment paper.  Place the tomatillos, onion chunks, and garlic cloves on the baking sheet.  Drizzle with olive oil and sprinkle with salt and pepper.  Roast for 30 minutes, then broil for 2-5 minutes until slightly browned.  Keep a watchful eye.

Meanwhile, heat a large Dutch oven over medium-high heat with about 2 tablespoons of olive oil.  Sprinkle the pork shoulder with salt and pepper and begin browning the meat in two batches, so as to not to overcrowd the pan.  When meat is done place it all back into the Dutch oven.

Reduce oven temperature to 375°F.

In a large food processor, place the contents of the roasting pan, plus 1/2 bunch of fresh cilantro, and ground cumin seed and pulse a few times.  You don’t want the mixture to be completely pureed– a little texture is nice.  Add the mixture to the browned pork.  Stir.  Bring almost to a boil on the stovetop then immediately place in the oven.  Bake for about 1 hour, or until the pork is tender.  Reseason with salt and pepper, if necessary.  Serve immediately with a scoop of rice, jalapeño, more fresh cilantro and a wedge of lime.  Enjoy!

Thanks for stopping by Relishing It!

Laurie


Read Full Post »

Roasted Vegetable Panzanella with Eggplant | Relishing It

One of my favorite summer meals is panzanella.  If you’re not familiar with this little dish, it is simply a bowlful of seasonal vegetables with homemade croutons or bread and a dressing of some sort.  And it is wonderful.  This fresh version with tomatoes and peppers is one that I make frequently.

Roasted Vegetable Panzanella with Eggplant | Relishing It

Roasted Vegetable Panzanella with Eggplant | Relishing It

Roasted Vegetable Panzanella with Eggplant | Relishing It

Today I wanted to create something just as pleasing, but a bit different.  I wanted to be both delicious and satisfying as well as be loaded with vegetables.  I know I’ve preached this before, but eating vegetables is key to keeping me feeling good, so I really try to pack them in throughout the day.  One of the vegetables that I wanted to rely on for this receipe is eggplant.  Why eggplant?  Well, because I can’t stop buying it at the farmers market– it’s just so darn gorgeous.  I have a weird relationship with this vegetable.  I don’t generally love the flavor, and at times I find the texture to be a bit…unique.  I needed to find a way to appreciate it, aside from the aesthetic, because admiring its beauty while it sits unused on my countertop is a bit wasteful.  And the other recipes I’ve tried have just seemed ho-hum or so loaded with other unhealthy things that it kind of defeated the point of eating healthy.  So that’s why eggplant.

Roasted Vegetable Panzanella with Eggplant | Relishing It

Thankfully, not only did I find a way to use it, I found a way to actually enjoy it!  This panzanella is everything that I wanted it to be.  Using small globe-like eggplants worked well in this recipe.  The seeds are smaller, which appeals to me.  The vegetables became tender and delicious when roasted.  Tossing them with homemade croutons, a red wine vinaigrette, and feta was a beautiful combination.  The feta melted slightly against the warm vegetables.  It was magical.  The smashed garlic cloves become soft and buttery.  Roast whatever vegetables you have on hand– it will work.  Change up the cheese, if you want.  Goat or ricotta salata will work well, too. Enjoy!

Roasted Vegetable Panzanella with Eggplant | Relishing It

The Recipe: Roasted Vegetable Panzanella with Eggplant

(serves 2)

about 10 small eggplants, diced

1-2 red peppers, cut into bite-sized pieces

handful of small cherry tomatoes

1 small red onion, diced

3 garlic cloves, smashed

1 hot pepper, optional

olive oil, salt, and pepper

1/4 – 1/2 baguette, cubed

Feta, goat, or ricotta salata cheese crumbles, to garnish

For the Vinaigrette:

1 garlic clove, finely minced

1/2 teaspoon Dijon mustard

3 tablespoons extra-virgin olive oil

1 tablespoon red wine vinegar

about 3-4 sprigs of fresh thyme, leaves removed

salt and pepper, to taste

Preheat the oven to 375°F.  On a large baking sheet with parchment paper, toss the eggplant, peppers, onions, tomatoes, and garlic cloves together with 1-2 tablespoons of olive oil and a sprinkle of salt and pepper.  Roast for 20-25 minutes, or until the vegetables are tender.

Meanwhile, toss the cubed baguette with 1-2 tablespoons of olive oil and spread on another baking sheet.  Sprinkle with salt and pepper and bake on the bottom rack until just crispy, about 10 minutes.  Remove from oven.

Make the vinaigrette by mixing the garlic clove, mustard, thyme leaves, and red wine vinegar together.  Then whisk in the olive oil.  Season with salt and pepper.

When the vegetables are done roasting, mix them together with the homemade croutons.  Then toss everything with the red wine vinaigrette.  Re-season with salt and pepper, if necessary.  Serve with feta crumbles on top and even a few more thyme leaves.  Enjoy!

Thanks for stopping by Relishing It!

Laurie


Read Full Post »

Fresh Corn Salsa | Relishing It

I’ll get to the corn salsa in a minute– but first I want to talk about beer!  Admittedly, I’ve been drinking too darn much beer this summer.  Not at one time– nothing like that.  But this summer, more than any other, it’s just been so easy to sit outside with Radd in the evening and visit over a beer or two.  I suppose it’s partly to do with our mild weather– not too hot, not too humid.  It has been perfect, which is excellent for my happiness.  And while I probably don’t need those calories at the end of the day, instead of stressing, I’ve decided to embrace it.

Fresh Corn Salsa | Relishing It

Fresh Corn Salsa | Relishing It

So what have I been sipping on?  Mostly farmhouse ales and saisons.  Two that I love are Saison Dupont and a local farmhouse ale from Liftbridge called Farm Girl.  Speaking of local beer, I’ve also been enjoying a few others like Bent Paddle’s Paddle Break Blonde and Steel Toe’s Size 7 IPA.  Now before this post turns into an essay on local beer, let me just say this– our craft beer scene here in Minnesota is just incredible right now.  So many wonderful breweries and taprooms, and I’ve been testing them out like it’s my job.  I’m owning it, I don’t mind saying.  A few other great summer favorites (not local) are Leffe Blonde and Pyramid’s Apricot Ale.  There, that’s my beer confession.

Fresh Corn Salsa | Relishing It

So what goes smashingly well with summer beer?  Yup– chips and fresh corn salsa.  I love salsa of any variety– tomato, tomatillo… but, there’s something about fresh corn salsa that wins the salsa competition for me.  I would choose corn every time.  It’s fresh, slightly sweet, spicy, and loaded with that citrusy lime/cilantro flavor.  Not to mention, it is simple to make– so simple that it’s somewhat silly to even give a recipe.  But, I think the same can be said for most summer fare– fresh and simple and that’s just fine.  So, get out your chefs knife and start cutting up that corn.  Then pour yourself a glass of cold beer and soak up some summer fun.  Cheers!

Fresh Corn Salsa | Relishing It

The Recipe: Fresh Corn Salsa

6-8 ears of fresh corn, cut

1 large red onion, diced

1 bunch fresh cilantro, finely chopped

2 jalapeños, chopped (remove seeds/ribs if heat is a factor)

2 cloves garlic, finely minced

juice of one lime

kosher salt

In a medium-sized bowl mix all of the ingredients.  Add more lime juice to taste.  Season appropriately with salt.  You may need more salt than you are used to — corn needs a bit to bring out its wonderful flavor.  Let flavors meld for a bit before serving.  Store leftovers covered in the refrigerator.  Enjoy!

Fresh Corn Salsa | Relishing It

Thanks for stopping by Relishing It!

Laurie

Read Full Post »


Crunchy Refrigerator Pickles with Dill + Garlic | Relishing It

You know what’s awesome?  Handing your daughter a pickle and having her proclaim (without knowing where it was from) “This is amazin’!”.  That, my friends, is what I call winning.  She didn’t see me make the first batch of refrigerator pickles this year, but she’s been helping me make every batch since.  She is fascinated by the fact that it doesn’t take very long to transform a cucumber into a wonderful pickle.

Crunchy Refrigerator Pickles with Dill + Garlic | Relishing It

Crunchy Refrigerator Pickles with Dill + Garlic | Relishing It

I decided to wing-it this year and make up my own pickle recipe.  After waiting rather impatiently for my mom to send me her recipe (you’re in trouble, mother), I decided to conjure up my own version.  Sure, I’ve made lots of refrigerator pickles in the past, but nothing that kept me wanting to make the same batch again.  I was reaching too far, to be honest– over-complicating things.  I kept looking for something “interesting” that would blow me away.  Last year I even tried a version with mint, and while they were fine, they just were not what I was looking for.  I realized that what I was really after wasn’t complicated at all.  I wanted something that was really crunchy, fresh, garlicy, and had a clean dill taste.  Simple. Classic.  So, I stopped searching and just made them the way I wanted.  Duh.

Crunchy Refrigerator Pickles with Dill + Garlic | Relishing It

Crunchy Refrigerato Pickles with Garlic + Dill | Relishing It

The key for me to keeping them refreshing is to lessen the salt and vinegar amount a bit.  I remember this trick from my mom, which is why I probably loved her pickles so much.  Add a little filtered water to the vinegar and it creates the most refreshing brine.  Too much salt makes me want to stop eating something in a hurry, but just the right amount– and I can chomp on these babies all day long.  The dill and garlic are just what you’d expect them to be– delicious.  No surprises here.  I always add carrots to my refrigerator dills– they’re fantastic.  They take a bit longer to pickle than the cucumbers do.  Using young small cucumbers is the key to a crunchy pickle, as is not heating up the brine mixture.  Keep everything cold and you’ll have a fantastic crunch– I promise you.

Crunchy Refrigerator Pickles with Dill + Garlic | Relishing It

Crunchy Refrigerator Pickles with Dill + Garlic | Relishing It

These pickles are perfect to bring to a barbecue or neighborhood gathering.  Bring a huge bowl of them– they’ll disappear quickly.   There is nothing better than sinking your teeth into a cold, crunchy pickle on a hot summer evening.  National Night Out is next Tuesday in the US.  I plan on bringing a big bowl of these crunchy dills, and I think you should do the same.  Or just make a jar or two to keep in your refrigerator for when you need that tangy, satisfying crunch.

Crunchy Refrigerator Pickles with Dill + Garlic | Relishing It

The Recipe: Crunchy Refrigerator Pickles with Dill + Garlic

Smallish cucumbers, cut however you like– I prefer spears

carrots, cut into spears

3-4 cloves of garlic, peeled

1 1/2 teaspoons kosher salt ( I use Diamond Crystal–and weirdly this matters.  Different salt.  Different results.)

fresh dill

white vinegar

Make as many jars as you want.  Fill each clean quart jar with cucumber spears, carrots, 3-4 cloves of garlic, and fresh dill. Make sure everything is packed in there tightly.  Sprinkle with kosher salt.  Pour vinegar into the jar until it is  3/4 full.  Then finish filling the jar with filtered water, leaving about 1/2-inch space at the top.  Cover with lid and gently shake to combine.  Refrigerate.  Pickles will be ready within a few hours, but it’s best to wait at least a day for optimum results.  Carrots often take a bit longer to fully become pickled, but I generally eat them before the fact.  Enjoy!

Thanks for stopping by Relishing it!

Laurie


Read Full Post »

Pickled Eggs with Fresh Beets and Dill | Relishing It

My Mom used to raise chickens on our farm when I was growing up.  To be honest with you, sometimes those crabby hens would scare the heck out of me, but I sure developed a love of the eggs they provided.  Farm fresh eggs– there is nothing better.  One of my favorite ways to eat them is pickled.  I previously shared a favorite recipe of mine for pickled eggs.  And though I absolutely love that version– the spicy heat is just too much for my kids.  Today’s version with beets and dill has absolutely no heat– but the flavor is unreal.  I was worried that my husband wouldn’t quite go for it.  I love beets, but I thought it might be too much for him to embrace.  I was completely wrong.  Even without the heat, he was loving them.

Pickled Beets with Fresh Beets and Dill | Relishing It

Beets and dill are an excellent combination.  Here, the eggs take on a beautiful deep purple hue and are laced with a dill flavor.  The beets and onions become perfectly pickled, as well.  Chopped up they work wonderfully atop egg-salad sandwiches, paired with pork, or just eaten as a snack.  The beets remain somewhat crunchy, which I love.  The eggs pickle rather quickly–and the lovely purple hue is present after just a day or so.  The longer the eggs sit in the vinegar, the less white from the eggs will be present.  Eventually the entire egg will be purple.  Which tastes amazing, but if dramatic effects are what you are after– it’s best to eat them within 5 days, or so.

Pickled Beets with Fresh Beets and Dill | Relishing It

Eggs are a perfect, portable protein to snack on– we pack them a lot for school lunches and for summer outings. Make sure to buy good quality eggs, preferably from a farmers market or co-op.  You’ll end up worrying a lot less when you feed them to your family. Give this version a try–I hope you enjoy it as much as I do!

Pickled Beets with Fresh Beets and Dill | Relishing It

The Recipe: Pickled Eggs with Fresh Beets and Dill

(makes 2 quarts)

10-12 hard-boiled eggs, peeled  *see note

2 beets, peeled and thinly sliced

1 small white onion, peeled and thinly sliced

6-8 garlic cloves

4 dried bay leaves

1 tablespoon pickling spice

1 teaspoon whole black peppercorns

1 teaspoon kosher salt

Fresh dill sprigs

white vinegar (enough to fill each jar)

Note: To properly boil eggs– add eggs to a large sauce pan filled with water.  Bring to a boil.  Boil for one minute, cover with lid, and remove from heat.  Let stand for 10 minutes.  Then immediately drain the eggs and place them in a bowl of cold water filled with ice.  This will stop the cooking process and yield a perfectly hard-boiled egg.

Divide all the ingredients between the two quart jars.  Layer the eggs, beets, and onions.  Fill each jar with enough vinegar to cover all of the ingredients.  Put lids on the jars and give a gentle shake to mix the ingredients.  Place in the refrigerator.  Eggs will be ready in about 2 days.  The flavor and color will deepen the longer they sit.  After about 2 weeks, their texture may start to change and be less firm, so it’s best to eat them before that happens. Enjoy!

Have a great day and thanks for stopping by Relishing It!

Laurie


Read Full Post »

Older Posts »

%d bloggers like this: