Feeds:
Posts
Comments

Posts Tagged ‘Roasted’

Roasted Tomatillo and Pork Stew | Relishing It

It has been a busy couple of weeks around our household lately.  School started for both of my kids and I’m happy to report that they are really loving it. Honestly, getting back onto the swing of things wasn’t that difficult despite the transition from late summer bedtimes and laid-back mornings around the house.  And I suddenly have a bit more free time now, which has fallen perfectly in-line with canning season! That wonderful time of the year when I dream of tomatoes. I’ve been busy in the kitchen stocking up on salsa, sauces, and plain tomatoes for the winter. Two more boxes I picked up from the farmers market this weekend are waiting for me as I write this. But, I wanted to share this ridiculously delicious recipe with you before I dive into chopping my day away again.

Roasted Tomatillo and Pork Stew | Relishing It

Roasted Tomatillo and Pork Stew | Relishing It

Roasted Tomatillo and Pork Stew | Relishing It

Roasted Tomatillo and Pork Stew | Relishing It

I was never exposed to tomatillos while growing up.  In fact, I didn’t really ever buy them before I moved to Minnesota.  Now, I just love them and making salsa with them is a no-brainer.  However, we’ve been getting a beautiful bag almost weekly from our CSA, so I wanted to do something a bit different, because how many chips can a girl really eat?  Kidding…I can eat A LOT of chips.  Pork and tomatillos are a perfect combination together– the tang from these little green gems is perfect.  This stew could not be easier to make or more satisfying. The flavors are bright and the pork is tender, yet doesn’t need to cook all day long, which makes it a bonus for a weeknight meal.  I love to serve it with a scoop of brown rice on top, but it can be equally satisfying if you prefer it without grains.  If your family loves heat, preparing it with jalapeños in the sauce would be ideal.  We put them on the side, because…kids.  I really hope you make this stew– it’s perfect with the changing weather.  Now, if you’ll excuse me– I need to get back to my little tomato factory.  Hope you are all well!

Roasted Tomatillo and Pork Stew | Relishing It

The Recipe: Roasted Tomatillo and Pork Stew

(serves 4)

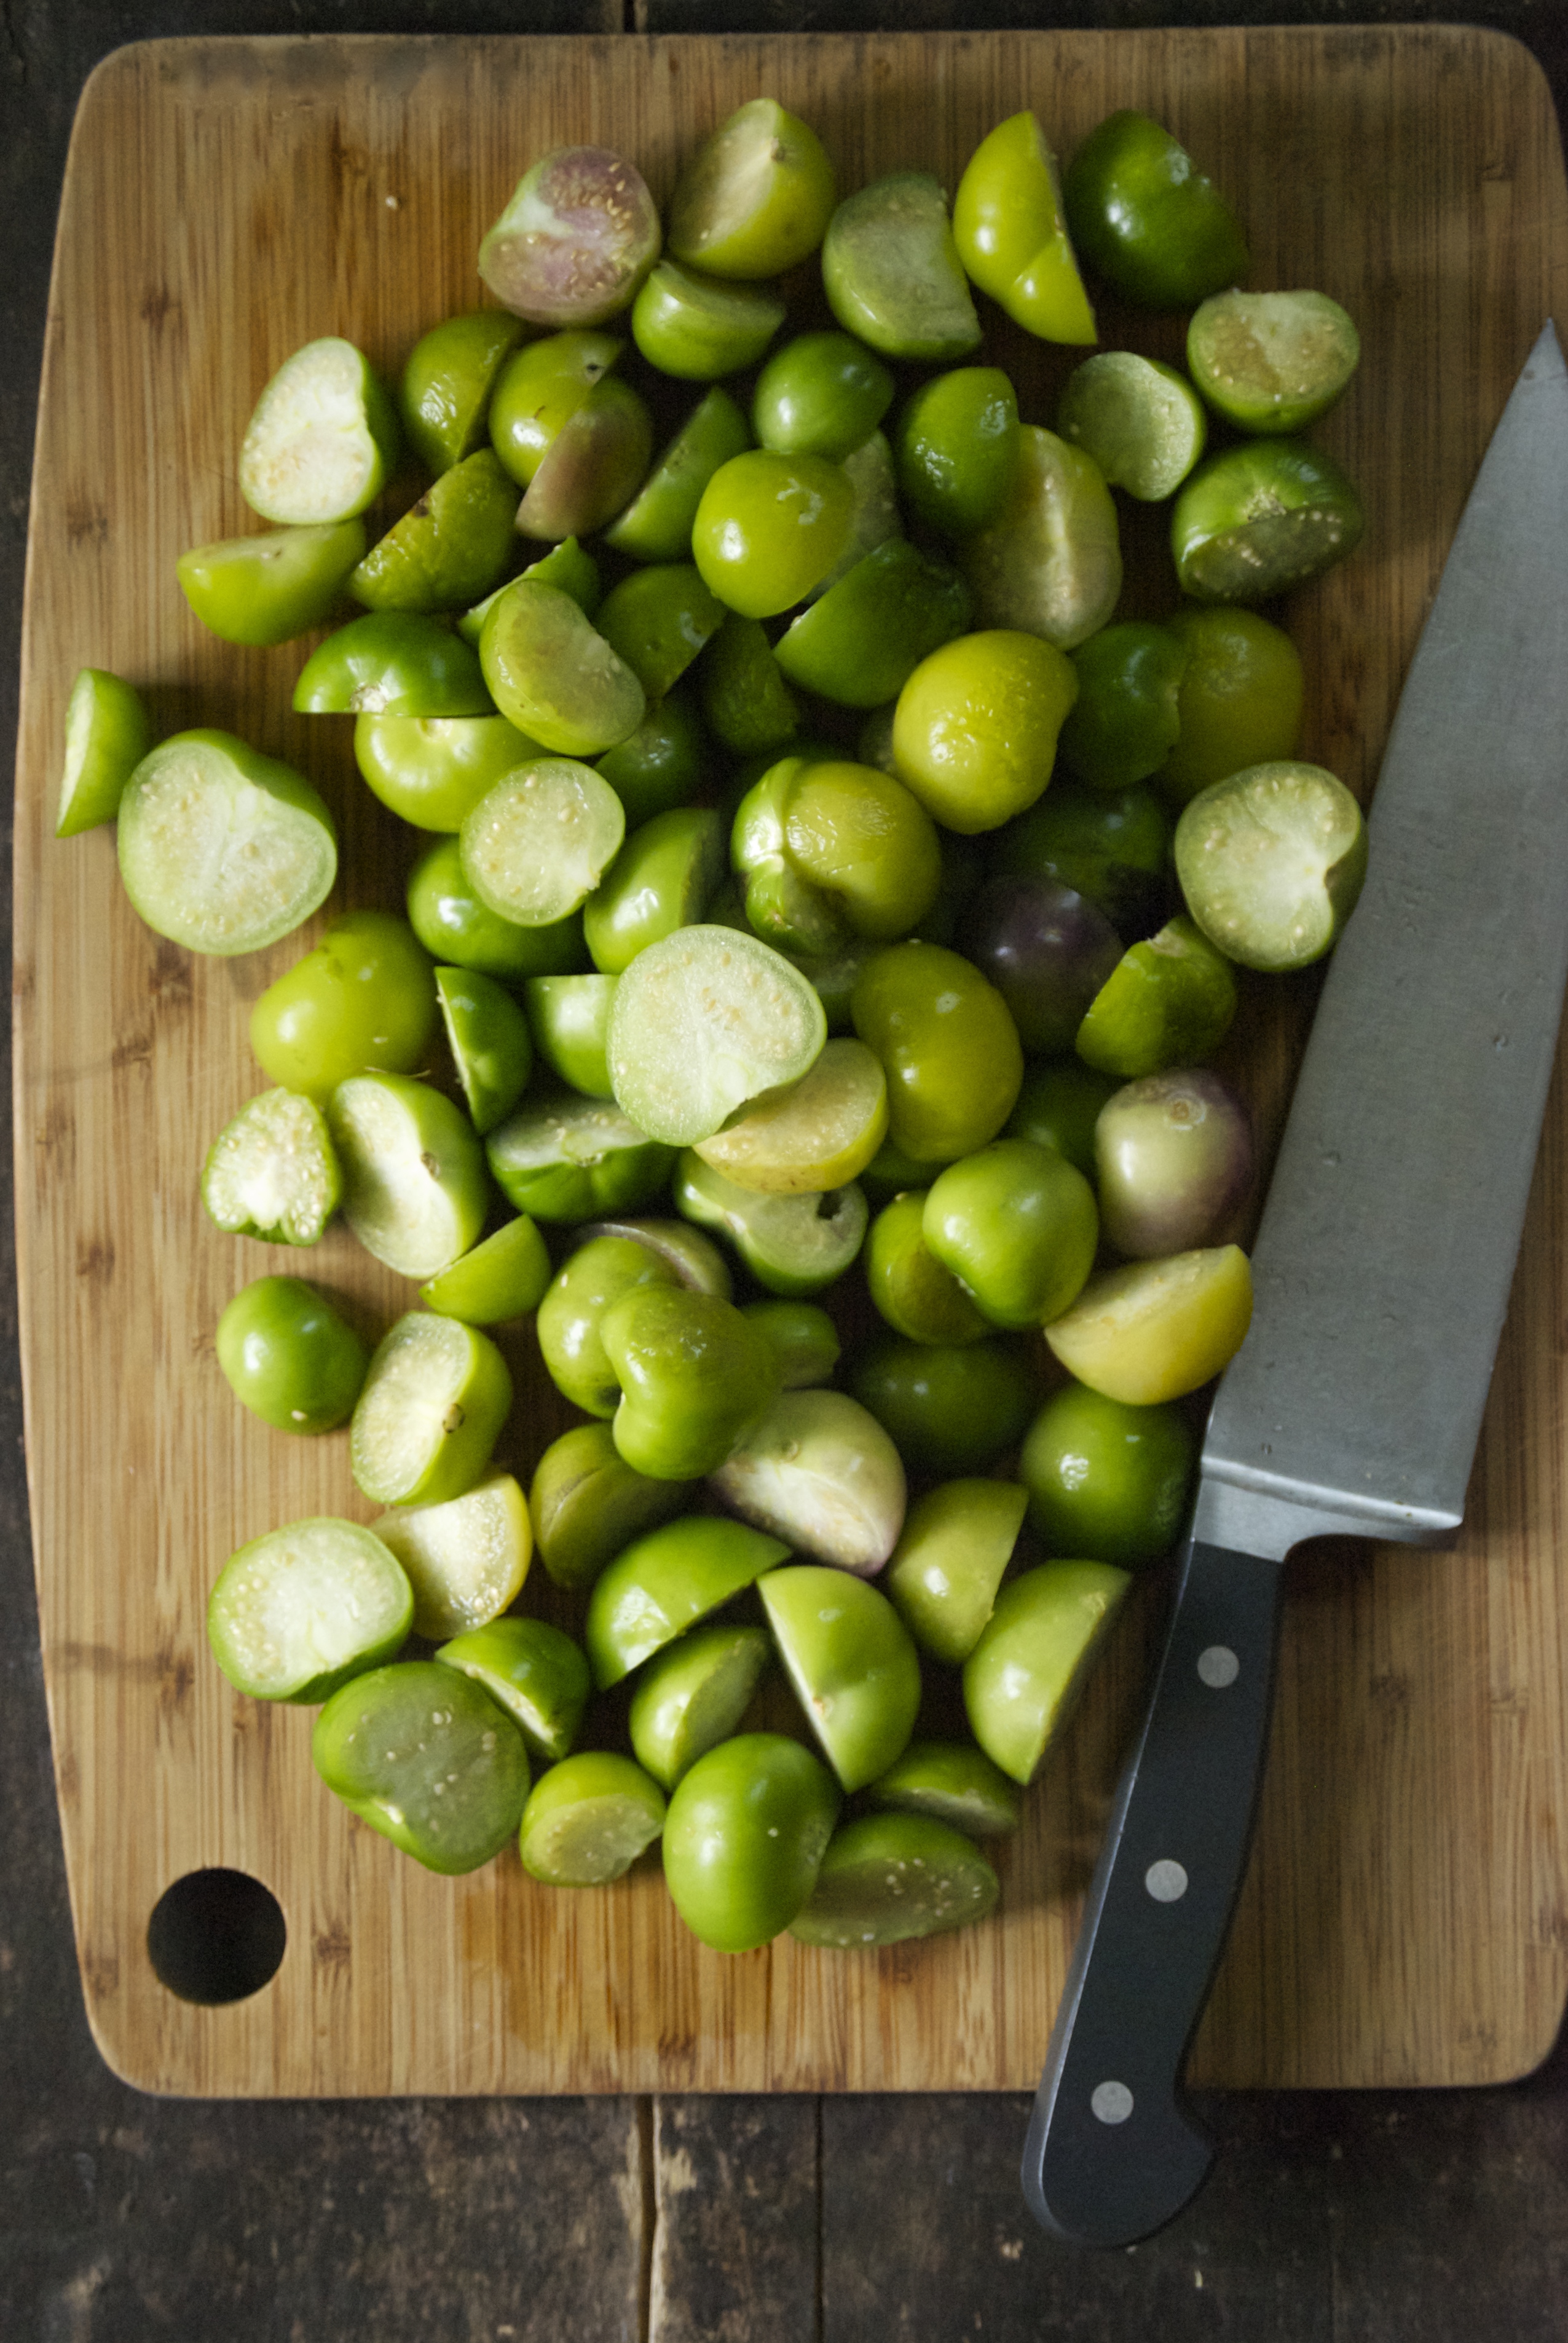
2 pounds tomatillos, husks removed and tomatillos cut in half

1 bulb (yes, the entire bulb) garlic, separated into cloves

1 large white onion, chopped into large pieces

1/2 bunch fresh cilantro, roughly chopped

2 1/2 pounds – 3 pounds boneless pork shoulder, cut into 1-inch cubes

1 teaspoon cumin seed, toasted then ground with mortar and pestle OR 1 1/4 teaspoon ground cumin

fresh cilantro, jalapeño,and lime for garnish

olive oil, salt and pepper

1 cup uncooked brown rice, cooked according to directions, for serving

Preheat oven to 400°F.  Line a large baking sheet with parchment paper.  Place the tomatillos, onion chunks, and garlic cloves on the baking sheet.  Drizzle with olive oil and sprinkle with salt and pepper.  Roast for 30 minutes, then broil for 2-5 minutes until slightly browned.  Keep a watchful eye.

Meanwhile, heat a large Dutch oven over medium-high heat with about 2 tablespoons of olive oil.  Sprinkle the pork shoulder with salt and pepper and begin browning the meat in two batches, so as to not to overcrowd the pan.  When meat is done place it all back into the Dutch oven.

Reduce oven temperature to 375°F.

In a large food processor, place the contents of the roasting pan, plus 1/2 bunch of fresh cilantro, and ground cumin seed and pulse a few times.  You don’t want the mixture to be completely pureed– a little texture is nice.  Add the mixture to the browned pork.  Stir.  Bring almost to a boil on the stovetop then immediately place in the oven.  Bake for about 1 hour, or until the pork is tender.  Reseason with salt and pepper, if necessary.  Serve immediately with a scoop of rice, jalapeño, more fresh cilantro and a wedge of lime.  Enjoy!

Thanks for stopping by Relishing It!

Laurie


Read Full Post »

Roasted Smashed Potatoes with Rosemary and Preserved Lemon | Relishing It

I finally did the thing that’s been weighing on my mind for the last year.  I turned 40 years old on Tuesday.  My apprehension wasn’t about the number itself, or the accumulation of tiny wrinkles gathering under my eyes– it was heavier than that.  Those are superficial things that I can live with.  Instead, my dread has been a bit more existential.  Knowing that other inevitable changes are coming, like my children growing up, my parents aging, and that my limited time here is diminished with each passing year.  Those are the things that are harder to accept.

Roasted Smashed Potatoes with Rosemary and Preserved Lemon | Relishing It

But now that 40 has arrived, I’ve decided to do my best and be optimistic.  I’ll focus on the positives instead of dwelling on future loss.  I’m surrounded by  wonderful friends, and have been lucky enough to be born and married into two incredible families.  I get to spend every day with my best friend and love of 23 years, and we have two sweet children.  I’ve been fortunate with my health.  Right now, things are good by pretty much any standard.  I’m a lucky, lucky gal and I know it (and don’t think for one second that I didn’t knock on my wooden desk as I wrote that sentence).

Roasted Smashed Potatoes with Rosemary and Preserved Lemon | Relishing It

I’ve also decided to tackle new challenges.  My kids are at an age that I now have more time to pursue my own interests.  I’m ready to learn new things.  I want to take up pottery, learn to play the guitar and violin, to knit, and to read more.  I want to become more patient.  Mostly, I want to consciously be in the present, rather than always waiting for some vague future to just “happen”.   I also want to continue to learn new and exciting things about food and photography– this is the stuff that thrills me. Preparing the food, taking photos, and writing this blog make me very happy. I love connecting with all of you.

Roasted Smashed Potatoes with Rosemary and Preserved Lemon | Relishing It

With that little essay out of the way, there’s really no subtle segue into a recipe post, so I’ll just throw it out there– today I made simple, roasted smashed potatoes.  They’re kind of a hard one to name, but hopefully the photos help you out a bit. These little gems are all about texture, texture, texture!  Soft and pillowy on the inside and perfectly crispy on the outside.  I love to pick them up and snack on them, but they also pair well with a burger or steak.  Throw any herbs you fancy on them, but I particularly love the rosemary/preserved lemon combination.  So, so good!  Enjoy these potatoes over the weekend and thanks for listening to me ramble.

The Recipe: Roasted Smashed Potatoes with Rosemary and Preserved Lemon

about 2 pounds of small yukon gold potatoes (halve or quarter larger ones)

1 1/2 tablespoons finely chopped fresh rosemary, plus fresh sprigs for serving

1 1/2 tablespoons finely chopped preserved lemon

extra-virgin olive oil

good sea salt and freshly cracked pepper

Preheat oven to 400°F.  Line a large baking sheet with parchment paper.  Set aside.

Begin by steaming the potatoes until they feel done when a knife is inserted into them– about 15-20 minutes (depending upon how big your potatoes are).  Remove from heat and continue to let sit in covered pan just to be certain they are fully cooked.

Dry the potatoes off if any water remains on them.  Then place them on the prepared baking sheet and gently smash them down with a fork.  You don’t want the potato to completely fall apart, but you do want some of the inside to be exposed– that way more crevices can become crisped.  Drizzle a few glugs of olive oil over the potatoes, then the chopped rosemary, salt, and pepper.  Roast for about 20-25 minutes, or until they have become a beautiful golden brown (check the bottoms, too).   Remove from oven and top with more olive oil, more rosemary, preserved lemon, and salt and pepper to taste.  Enjoy!

Thanks for stopping by Relishing It!

Laurie


Read Full Post »

Roasted Tomatoes with Garlic and Herbs | Relishing It

The tomatoes have finally arrived here in Minnesota!  Yes, that sentence deserves an exclamation point.  It’s always a long wait for me throughout the year for these babies.  I love tomatoes, but the sad store-bought versions just won’t do.  So, I can or freeze as much as I can to make it through the winter, then patiently wait for them to appear at the farmers markets the next summer.  Every year I somehow trick myself into thinking that they should appear earlier than they really do.  Tomatoes need time and lots of sun.  I have a few plants in my yard again this year that are coming along nicely, but the bulk of my preserving comes from the farmers markets, where I can buy bushel upon bushel of these little red gems.

Roasted Tomatoes with Garlic and Herbs | Relishing It

I’ve mentioned here before that I love to can salsa.  I’ll be makes lots of batches of this recipe in the coming weeks.  I also can plain tomatoes, and a couple different versions of tomato sauce.  The version I’m sharing today is not a canned one–so, you can exhale now.  It’s actually my favorite tomato sauce and I preserve it by freezing it.  Super easy and ridiculously delicious.  I love to can, as it’s a great way to preserve and we happen to have a large storage room in the basement, so it works well for our family.  But, in all honesty, I love the taste of this un-canned sauce even more.  The flavors are spot-on and lemon juice (which is used in canning to keep the ph levels safe) is not needed.  I use roma tomatoes here (they are wonderful for sauces) as they have a lower water content.

Roasted Tomatoes with Garlic and Herbs | Relishing It


Roasting tomatoes is one of my favorite ways to eat them.  Something magical happens when that tomato caramelizes a bit. The flavor intensifies and I simply can’t stop popping them into my mouth.  I love to pair them with some delicious cheese and crusty bread.  Simple summer meals are the best.  When we’ve eaten our fill, I put the rest of the tomatoes, garlic, and herbs into the food processor and give it a few pulses until it become this thick, fragrant tomato sauce that can be used in so many ways.  At this point, I freeze the sauce, unless I want to use it in the next day or so.  Freeze it in whatever you like– freezer bags or vacuum seal it in a special bag (freeze first, then vacuum seal it closed) are both methods that work well.  I use this sauce all winter long and it is always a sad day when I pull the last one from the freezer.  I hope you give this version a try.  Enjoy!

Roasted Tomatoes with Garlic and Herbs | Relishing It

The Recipe: Roasted Tomatoes with Garlic and Herbs

Roma tomatoes, cut in half (as many as will fit on 1-2 baking sheets–depending upon how many you want to roast)

1 bulb of garlic, peeled and cloves separated (per baking sheet)

handful of freshly chopped herbs: basil, thyme, oregano, parsley (per baking sheet)

olive oil

kosher salt and fresh black pepper

Preheat oven to 375°F.  Line 1-2 large rimmed baking sheets with parchment paper (depending upon how many tomatoes you want to roast).  Fit the tomatoes snuggly, cut-side up, in a single-layer onto the pan, they will decrease in size as they cook.  Drizzle with olive oil.  Sprinkle with the chopped herbs, garlic, salt, and pepper.  Roast for about 40-50 minutes (if using two pans, rotate them half-way through).  Then increase temperature to 400°F and roast for at least another 10 minutes to caramelize the tomatoes, sometimes a bit longer.  Check the bottom of them for a dark caramel color.  Remove from oven when done.  If wanting to make sauce, place all of the roasted ingredients into a food processor, juices too (or by hand).  Pulse for a few times until mixed.  Place in freezer bags or bags that can be vacuum sealed (freeze first, then seal), or any other container you want to store them in.  Enjoy throughout the winter!

Thanks for stopping by Relishing It!

Laurie


Read Full Post »

Curry-Scented Cauliflower with Golden Raisins | Relishing It

We joined a CSA recently!  For a vegetable-obsessed girl like me, this is big news.  So much so that I want to tell everyone I interact with…but that would be a bit weird, so I’ll just tell you.  I’m already anxious for June to roll around– for that first box to arrive, full of vegetables grown for my family by people that I know.   To be honest, we haven’t been CSA members for a couple of years now.  I know, I know.  You see, the previous CSA that we belonged to didn’t quite meet my family’s needs.  We ended up spending a ton of money every week to supplement the offering.  This year we dove back in, and decided to go with Bossy Acres.  The fabulous ladies that run this CSA are heavily involved in the Twin Cities food community.  I had heard remarkable things about their CSA from several friends.  And then, once I had a chance to talk with the owners about the excitement and passion that they put into their work, it made me realize that I wanted my family to be part of it.  And I am so darn excited!  Did I already mention that?

Curry-Scented Cauliflower with Golden Raisins | Relishing It

Curry-Scented Cauliflower with Golden Raisins | Relishing It

Alright, now that I’m done with my mini celebration it’s on to today’s post.  Even though this is THE NEVER-ENDING WINTER here in Minnesota, I’ve moved on to think about lighter, quicker fare.  Spring has to arrive eventually, right?  It’s just a matter of time before the farmers’ markets are loaded with fresh vegetables, and I’ll also be getting my first CSA delivery.  Waiting is hard.  I want strawberries and tomatoes now.  But until then, I’ll enjoy this gorgeous cauliflower.Curry-Scented Cauliflower with Golden Raisins | Relishing It

I love how hearty cauliflower is.  It’s reliable and always a good option in the Summer or Winter.  Out-of-season tomatoes and cucumbers can’t claim that.  I enjoy this side dish (though I eat it as a main course) when the cauliflower is roasted just a bit. Not entirely soft, but not raw either.  Once it’s done, I like to toss it immediately with red onion and golden raisins on the hot roasting pan.  It warms them through and takes the edge off the onion.  Infusing the spices in warmed olive oil is a great way to maximize the flavor.  This is a subtle dish.  It’s not swimming in a sauce or loaded with flavors that punch you in the face.  And it comes together in a matter of minutes.  The golden raisins are key– the slight sweetness that they add is crucial here.  Hope you enjoy!

Curry-Scented Cauliflower with Golden Raisins | Relishing It

The Recipe:  Curry-Scented Cauliflower with Golden Raisins

(serves 2-4)

1 large head of organic cauliflower, broken into small bite-sized pieces

1 small red onion, thinly sliced

1/3 cup organic golden raisins

handful of fresh cilantro

2 tablespoons extra-virgin olive oil, plus more for roasting

1 teaspoon hot curry powder  ( I love Penzys’ version)

1/2 teaspoon ground turmeric

1/2 teaspoon ground cumin

pinch of kosher salt to taste

lime wedges, for serving

Preheat an oven to 400°F.  Toss the cauliflower pieces with a drizzle of olive oil and place on a baking sheet. Roast for 15-20 minutes, or until the cauliflower has browned slightly but isn’t completely soft.  Remove from oven and immediately toss the sliced red onion and golden raisins on the hot pan with the cauliflower.

Meanwhile, prepare the curry-scented olive oil by placing 2 tablespoons of olive into a small skillet.  Mix the curry powder, turmeric, and cumin into the oil and heat on medium for about 1-2 minutes, or until the oil becomes warm and fragrant.  Make sure to stir it.  Remove from heat and pour over the vegetables.  Toss with cilantro.  Season with salt, if necessary.  Serve with a squeeze of lime.  Enjoy!

Thanks for stopping by Relishing It!

Laurie


Read Full Post »

Ginger Sesame Butternut Squash, Brussel Sprouts, and Black Rice | Relishing ItI just know many of you are in the thick of planning your Thanksgiving menus, and I’ve got a side dish that would look absolutely grand on your table.  I’m one of those who think the Thanksgiving meal is all about the sides.  Sure, the turkey is fine, but there just isn’t a lot of excitement there.  It’s the side dishes that have the variety of flavors and colors that make the meal so interesting.   At least that’s how I feel.  My husband habitually defaults to two servings of turkey, gravy, potatoes, and stuffing.  That’s it.  I’m not sure what’s wrong with him.  Anyway, even if you’re not looking for a Thanksgiving idea, this dish is pretty incredible for any occasion.  I like to make it and enjoy the leftovers throughout the week– it keeps and heats up beautifully, never losing any texture or flavor.

Ginger Sesame Butternut Squash, Brussel Sprouts, and Black Rice | Relishing It

Ginger Sesame Butternut Squash, Brussel Sprouts, and Black Rice | Relishing It

Ginger Sesame Butternut Squash, Brussel Sprouts, and Black Rice | Relishing It

Ginger Sesame Butternut Squash, Brussel Sprouts, and Black Rice | Relishing It

I usually have some baked squash in my refrigerator on most any day during winter.  It’s just one of those healthy, filling vegetables that works with so many meals.  Butternut squash holds it’s shape really well in this dish.  Brussels are also a favorite, and here they go particularly well with the squash.  If you haven’t yet tried black rice, here’s your chance.  It’s healthy and has a wonderfully nutty flavor.  The slightly-chewy, toothsome texture balances out the softer vegetables in this dish.  And if you can’t get your hands on black rice, any wild rice would be a good substitute.

Ginger Sesame Butternut Squash, Brussel Sprouts, and Black Rice | Relishing It

Finally, let’s talk about this amazing ginger sesame dressing.  Ginger adds such a unique and robust flavor, so a little goes a long way.  The sesame oil give the dressing an additional layer of nuttiness (flavor, not craziness).  It’s worth buying a bottle.  Side note, keep it in your refrigerator, so it lasts longer.  This dressing is amazing on these vegetables– but would be wonderful on so many other things, as well.  Be creative!  Enjoy!

Ginger Sesame Butternut Squash, Brussel Sprouts, and Black Rice | Relishing It

The Recipe:  Ginger Sesame Butternut Squash, Brussel Sprouts, & Black Rice

(makes enough for 4-6 people, easily)

About 1 pound small brussel sprouts, halved (or quartered, if large)

About 1 pound (or a bit more) butternut squash, peeled and cubed

2/3 cup dry black rice, rinsed

2 tablespoons extra-virgin olive oil, for roasting

1 tablespoon sesame seeds, toasted, for garnish

Ginger Sesame Dressing:

3 tablespoons balsamic vinegar

1 teaspoon finely minced ginger

1 garlic clove, minced

1 teaspoon honey

1/2 teaspoon soy sauce

1 teaspoon sesame oil

1/4 cup extra virgin olive oil

Preheat oven to 375°F.

To make the black rice:  Place the rinsed rice in a medium saucepan along with 1 1/3 cups of water.  Add a sprinkle of salt.  Cover and bring to a boil.  Reduce heat to low-medium  and cook for about 20 minutes, or until the rice is mostly tender.  Turn off the heat and let it sit in the pan covered for 15 minutes, or so .  Fluff with a fork when ready to use.

Meanwhile, place the brussel sprouts and butternut squash on a large baking sheet.  Toss with two tablespoons of olive oil.  Roast for abut 25-30 minutes, or until the vegetables are tender.  Make sure to flip the vegetables once or twice for even browning.

To make the Ginger Sesame Dressing:  In a medium-sizd bowl, whisk together all of the ingredients except the olive oil.  Then, slowly add the olive oil while continuing to whisk.  Set aside until ready to use.

In a large serving bowl or platter, gently combine the roasted butternut squash, brussel sprouts, black rice, and ginger sesame dressing.  Taste and season with kosher salt, if necessary.  Top with the toasted sesame seeds.  Enjoy!

Thanks for stopping by today!

Laurie

Read Full Post »

One of the best perks of late spring and early summer cooking is that so many dishes are quick and simple– there’s isn’t much fussing or preparation time.  This is a good thing– especially if you have little ones either underfoot or begging to get outside and enjoy the sunshine.  And even if you don’t have to keep one eye on the kids while you cook, who wants to spend these longer, warm days in the kitchen?  I know I sound like a skipping record, but I happen to be delighted that summer produce is starting to appear.  Aside from the fresh seasonal flavors, it’s easy– and that means more playtime.

This week, it’s time for asaparagus!  Yes, that sentence was worthy of an exclamation point.  You see, asaparagus isn’t around for long, so when it arrives, I go all out.  I have several simple asparagus dishes that I make this time of year.  This gorgeous tart is one of my favorites. And this one, which combines two fantastic seasonal ingredients– asparagus and morels, still makes me swoon. But the best of all is the dish in today’s post- roasted asparagus with balsamic browned butter.  It is, unquestionably, my favorite way to prepare asparagus.

I first made this dish years ago for my in-laws.  They loved it enough that they started preparing asparagus this way, too.  I think the chances are better than average that you’ll do the same.  This side is perfect because it relies on a simple flavor combination.  Browned Butter, balsamic vinegar, and soy sauce.  That’s it.  These three ingredients pack an amazing punch.  So much so, that you don’t want your asparagus swimming in the sauce.  Less is more, here.

A word or two about the preparation of the asparagus.  First, use fresh seasonal asparagus.  Don’t get me started on that asparagus you often see year-round in some grocery stores and restaurants.  Those oversized, tough, tasteless, shoots are not what I’m talking about.  Asparagus should be enjoyed when it was meant to be– for those few weeks in spring when it’s fresh and tastes amazing.  When looking for asparagus at the market, look for the tops of them to be tight and closed.  This indicates they were recently harvested.  Asparagus should be eaten as soon as possible after you buy it, as the flavor dissipates pretty quickly.  Also, I don’t follow the school of thought that you should snap huge chunks off the bottom of the stem to avoid the “woody” portion.  Instead, I simply use a vegetable peeler and peel the bottoms.  It becomes just as tender as the top section and you avoid wasting a fair amount.  Hope you enjoy this dish!

The Recipe:  Roasted Asparagus with Balsamic Browned Butter

1 pound asparagus

olive oil, to drizzle

kosher salt

cracked black pepper

2 tablespoons unsalted butter

2 teaspoons soy sauce

1 teaspoon balsamic vinegar

toasted, sliced almonds, optional

shaved lemon zest, optional

Preheat an oven to 400°F.  Line a baking sheet with parchment paper; set aside.

Wash and dry the asparagus.  Cut off the very bottoms with a sharp knife.  Use a vegetable peeler to peel the bottom 1-inch to 1  1/2 -inch.  Toss the asparagus with a drizzle of olive oil and a sprinkle of salt and pepper.  Place on the baking sheet and roast for about 12 minutes, or until tender.

Meanwhile, place the butter in a small sauce pan over medium heat.  Stirring frequently, melt the butter until it is a deep golden brown, about 3 minutes.  Be careful not to burn it.  Remove from heat and add the soy sauce and vinegar to the pan.  Mix it together well with a wooden spoon, making sure to incorporate any brown bits in the butter.

Place the asparagus on a serving platter and pour the balsamic browned butter over the top.  Sprinkle with toasted almonds and a bit of shaved lemon zest.  Serve immediately.  Enjoy!

Source:  Adapted from Cooking Light

Thanks for stopping in — have a wonderful weekend!

Laurie

Read Full Post »

%d bloggers like this: