Feeds:
Posts
Comments

Posts Tagged ‘Healthy’

Socca with Greek Vegetable Salsa | Relishing It

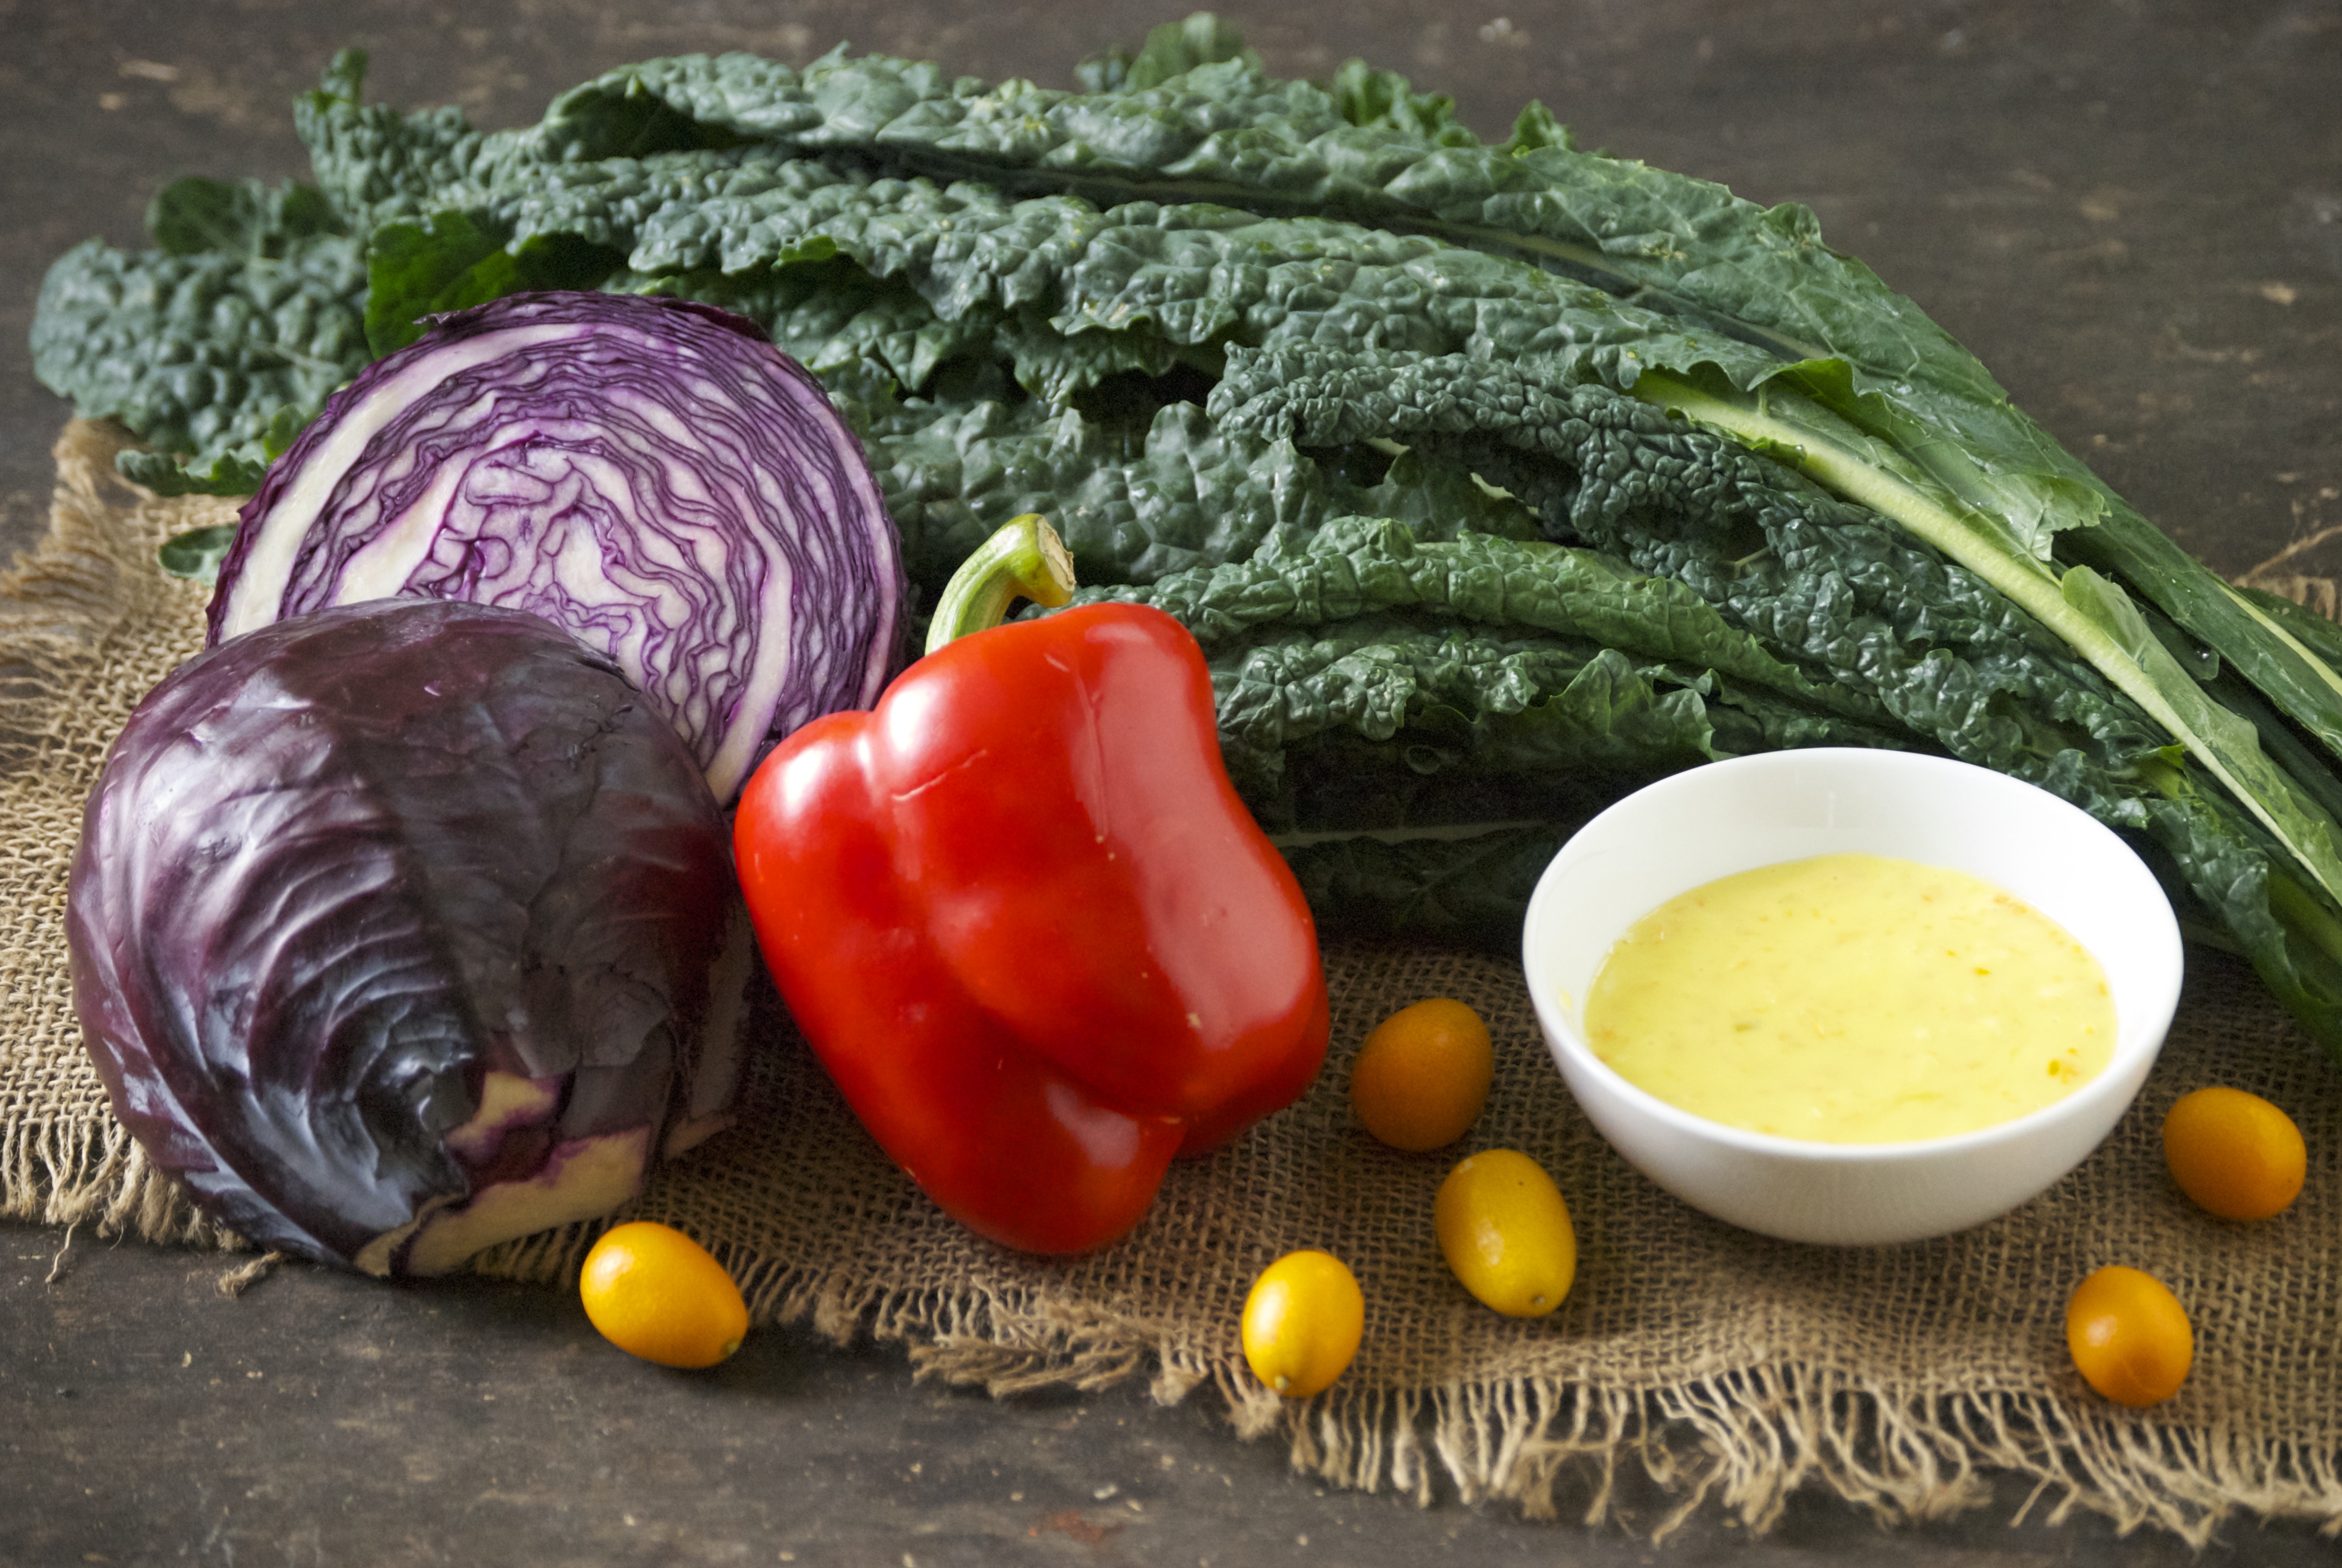
By now you must have heard of socca, right?  Well if you haven’t, it’s simply garbanzo bean (chickpea) flour made into a pancake or flatbread.  It’s a nice gluten-free alternative that tastes fantastic– I bet I eat it about once a week.  Chickpeas are a great source of protein with a wonderful flavor.  A while back I posted a different recipe for socca.  It’s still one of my favorites– especially with the sweet potatoes, kale, italian sausage, and creamy buttermilk dressing.  That one is more of a pancake, while this most-certainly is not.

Socca with Greek Vegetable Salsa | Relishing It

Socca with Greek Vegetable Salsa | Relishing It

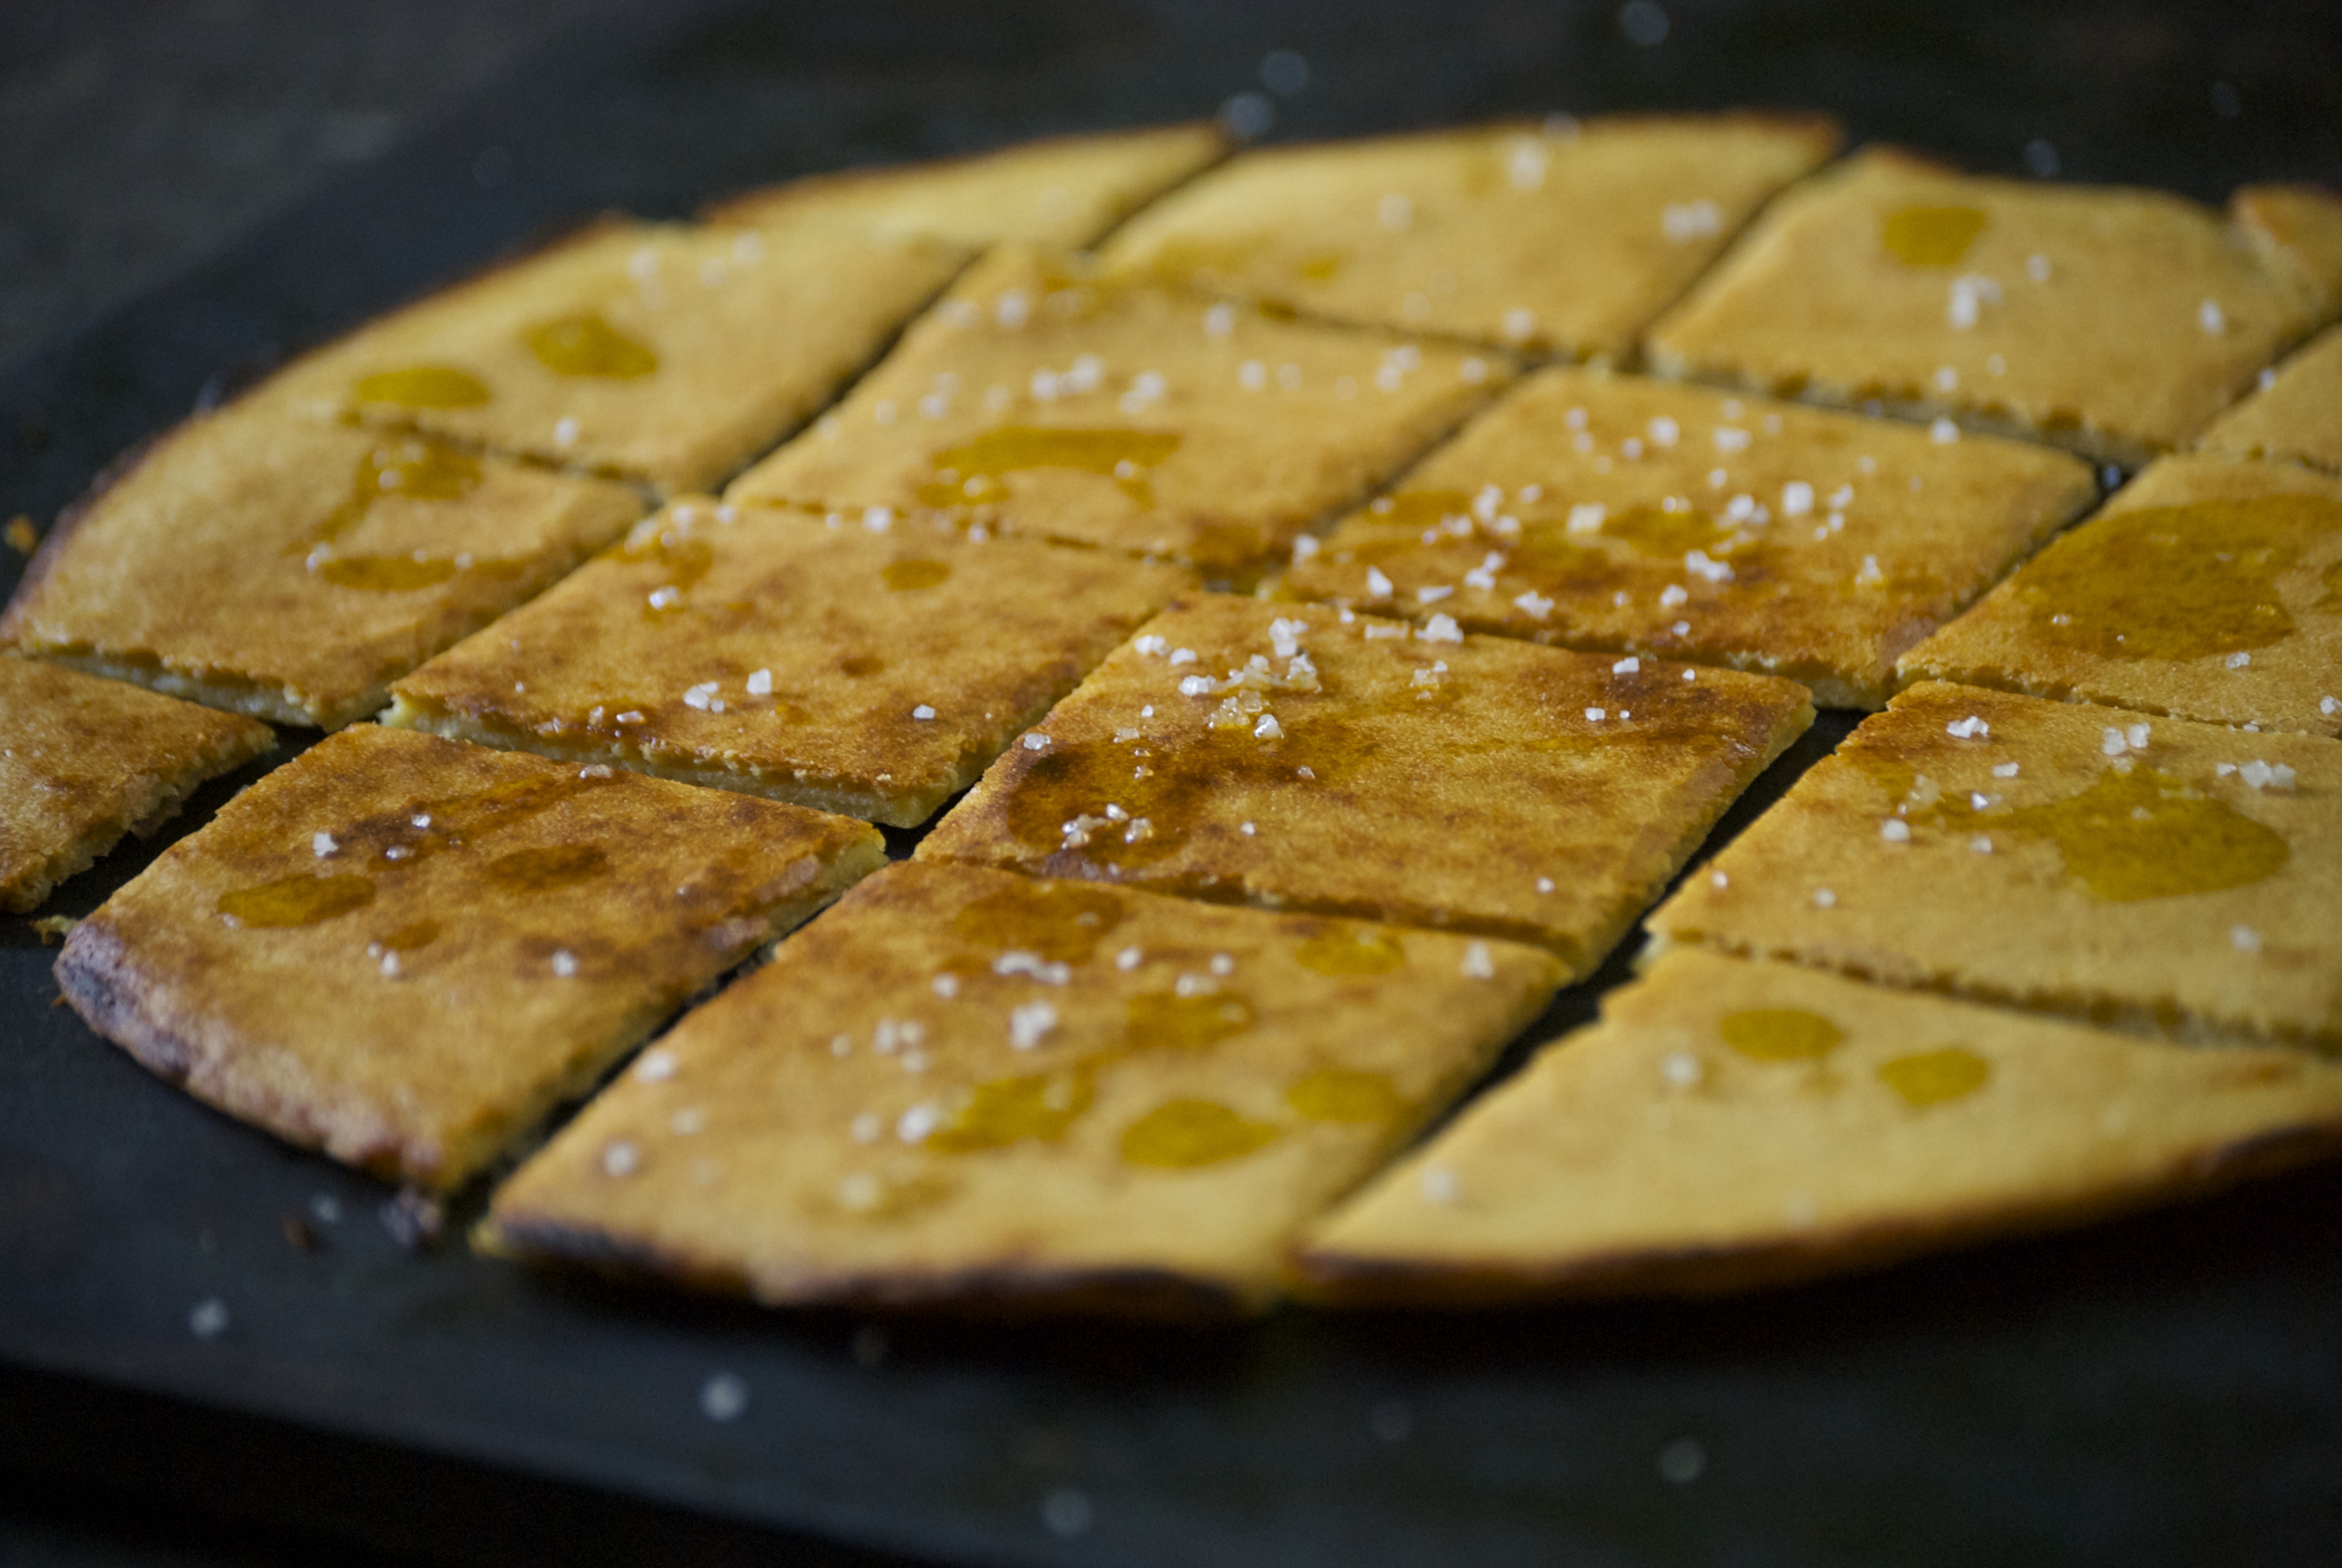
This version is thinner and crispier, with the characteristics of a flatbread.  I like to eat this one as a piece of “bread” piled high with delicious toppings– usually vegetables.  Today I made a lovely little greek vegetable ensemble that works so well with the socca.  Other times, fresh corn, tomatoes, scallions, and cotija cheese serve the purpose.  You get the idea.  Use whatever you have around the house/garden and let the socca be the instrument to get it into your mouth.

Socca with Greek Vegetable Salsa | Relishing It

Socca with Greek Vegetable Salsa | Relishing It

It’s nice in that the ingredient list is small to make socca and the cooking time is barely five minutes.  The longest part of this process is waiting about 30 minutes for the flour to fully absorb the water.  Believe me, I’ve rushed this part before, and it’s not a huge deal.  But, if you can wait– you’ll end up with perfect, crispy-edged flatbread that is sturdy enough for toppings.  Rather than frying the flatbread, you cook it under the broiler– a technique that my friend, Angharad (another fellow socca lover), introduced me to.  It works really slick.  All sides get browned and crispy.  This meal is perfect to whip up on a moments notice and you’ll love it.  Trust me.

Socca with Greek Vegetable Salsa | Relishing It

Socca with Greek Vegetable Salsa | Relishing It

The Recipe: Socca with Greek Vegetable Salsa

(serves 1)

For the Socca:

1/2 cup chickpea flour (garbanzo bean flour)

1/2 cup water

pinch of salt

1 teaspoon olive oil, plus more for the pan

For the Greek Vegetable Salsa:

1/2 large cucumber, diced

2 radishes, diced

1/2 cup grape tomatoes, halved

1 red scallion, diced

2-3 tablespoons feta cheese, crumbled

3-4 tablespoons kalamata olives, chopped

2 peperoncinis, diced (optional)

handful fresh parsley and sprig of thyme, minced

drizzle of olive oil

salt and pepper, to taste

In a medium-sized bowl, whisk together the chickpea flour, water, salt, and olive oil.  Let rest for about 30 minutes.

Meanwhile, combine the ingredients for the Greek vegetable salsa in a medium-sized bowl.  Set aside.

After the batter has rested for 30 minutes, place the oven rack in the position closest to the broiler.  Heat a cast-iron skillet under the broiler for 5 minutes (this helps cook the bottom of the socca quickly).  Remove from the oven an add enough olive oil to coat the pan when swirled.  Then add the batter and swirl around until the bottom of the pan is evenly coated.  Place under the broiler and cook until the top is a deep golden brown, about 5-7 minutes.  You will probably have to move the pan around once or twice during this time, to bake evenly.  Remove from oven and use a spatula to carefully remove from the pan.  Drizzle with olive oil and sea salt.  Cut.  And serve with the greek vegetable salsa, or any other topping you would like.  Or eat it plain– it’s all delicious!  Enjoy!

Thanks for stopping by Relishing It!  Have a great day.

Laurie

Read Full Post »

Giardiniera | Relishing It

When I first started writing here on Relishing It more than three years ago, figuring out what to make and blog about was… a process… and sometimes a struggle.  Back then my focus was on making things that I thought you would want to see, which it turn, would bring you back here more often.  It wasn’t really about web traffic or anything like that– I guess it was more about validation.  Knowing that people were seeing what I could do.

I used to bake a lot more here.  Baking posts always get the ‘oohhs’ and ‘aahs’.  I also used to pour through cookbooks and magazines to discover that impressive dish that would be “blog-worthy”.  To be honest, it was a bit stressful, and more than a bit exhausting at times.  Fast forward to the present, and I’m much more comfortable with my posts.  I feel like I’m more true to myself and my interests– which is really why I started this blog in the first place.  It wasn’t to try to make money, or to show off complex recipes that I would make only once.  I really started Relishing It to build up a recipe index that reflects who I am, and to chronicle my relationship with food.  I go back to previous posts to reference recipes so often. Many are my absolute favorites, with a smidge of randoms and experiments while I was trying to figure this whole thing out.

I still do bake, but not as much.  It can appear more impressive, but it’s also more exacting, time consuming, and from a health perspective, just not very sustainable.  Now, I focus much more on food that I’m interested in , and that my family regularly eats.   Mostly-healthy, nutritious food that I can feel good about eating.  I still enjoy learning new techniques, I think I love to tinker in the kitchen now more than ever.  Blogging has been wonderful for that.  Where was I going with all of this? Well, I guess the point is, I no longer have to seek out things to blog about– the process is just so much more organic now. For awhile now, I’ve been just making things that make me happy, and that has made blogging so much easier.

Giardiniera | Relishing It

Giardiniera | Relishing it

Now that sumer is here, I’m eating a ton of vegetables.  And not just boring run-of-the-mill-broccoli-as-a-side-dish vegetables.  I love pickled vegetables, and with this recipe I hope that you will too.  It takes almost no time to make and tastes so much better than those store-bought versions.  Grab whatever vegetables you have, chop them up, add a few dried herbs, make a super-quick brine, throw it all in a jar, and put them in the fridge.  There you have it– you just made yourself giardiniera.  It’s wonderful on sandwiches (roast beef, in particular!), salads, or straight from the jar.  Once you taste this– you’ll be making it every week, it’s that easy, and it really is a perfect snack.  Many recipes have lots of sugar (not my deal) and some have olive oil mixed in.  I’m a little frugal with my olive oil, and don’t feel like it is necessary.  For me, this is a perfect balance  of vegetables, vinegar, and sugar (just a smidge to temper the vinegar).  Add spicy peppers, if you want.  Or don’t.  As I always say– make it yours!  I truly love this version and I hope you do, too.  Give them a try!

Giardiniera | Relishing It

Giardiniera | Relishing It

The Recipe: Giardiniera

(Makes 2 quarts)

* Chop a variety of your favorite vegetables to fit snuggly into 2 quart jars

The above mix contains:

1/2 head cauliflower, chopped into small florets

3-4 large carrots, peeled and cut into coins

2 celery stalks, chopped

6-7 large radishes, sliced

1/2 red onion, diced

1 red pepper, diced

4-5 garlic cloves, sliced

4 serrano peppers, sliced

2 teaspoons dried oregano

1 teaspoon dried thyme

2 teaspoons whole black peppercorns

For the Brine:

3 cups white vinegar

1 cup water

3 tablespoons granulated sugar

1 tablespoon kosher salt

2 dried bay leaves

Divide the chopped vegetables evenly between 2 sterilized quart jars.  Pack them in there!  Divide the oregano, thyme, and peppercorns between the two jars, as well.  Bring the brine ingredients to a boil– this infuses the bay leaves and dissolves the salt and sugar.  Remove from heat, then place one bay leaf in each jar.  Pour the brine into each of the jars while it is hot.  This will soften the vegetables just a bit.  Let cool at room temperature.  Place a lid on them, give a shake and refrigerate.  Contents will be fully ready within a day.  If you’re impatient, you may even try them sooner. Enjoy!

Thanks for stopping by Relishing It!  Hope you all have a wonderful weekend!

Laurie


Read Full Post »

Spring Potato Salad with Ramps and Radishes | Relishing It

Finally.  Warm weather is finally here in Minnesota!  I know parts of the country have been having ridiculous heat waves recently, but we’ve been waiting (not-so-very) patiently for the weather to get nice here.  Yesterday  it finally did, and it was glorious!  It’s remarkable to see the change in attitude and manners once decent weather shows up.  Everyone– and I mean everyone– is just so much happier and more pleasant.  It’ll be another story once the high heat and humidity eventually find their way here.

Spring Potato Salad with Ramps and Radishes | Relishing It

Spring Potato Salad with Ramps and Radishes | Relishing It

I did my best yesterday to blind people with my extremely white Minnesota legs.  Not that this is any different than later in the summer.  I basically vary between stark white and just very pale.  Years ago I wished I had more color, but now I’m fine with my lack of sun-induced color, so I’ll continue to lather on the sunscreen.

Spring Potato Salad with Ramps and Radishes | Relishing It

Spring Potato Salad with Ramps and Radishes | Relishing It

Where was I going with all of this?  Oh yeah… summer, heat, shorts….potato salad!  Grilling last night was a no-brainer, so I made a bowl of one of my favorite summer potato salads to kick off the season.  In this version, I’ve accompanied the potatoes with spring ramps, radishes, celery, and parsley.  Ramps are fabulous, but are around for such a short time, scallions replace them when they are no longer available.  A delicate dressing of lemon, olive oil, garlic, and anchovies is poured on the warm yellow potatoes to really saturate them with flavor.  The crunchy vegetables are added later, once the potatoes have cooled a bit, then the remaining dressing is added.  This potato salad gets better and better the longer it sits.  And it’s perfect for picnics since it doesn’t contain any dairy.  I hope you give it a try!

Spring Potato Salad with Ramps and Radishes | Relishing It

The Recipe: Spring Potato Salad with Ramps and Radishes

3 pounds yellow potatoes, cut into bite sized pieces

1 bunch radishes, chopped

1 bunch ramps or scallions, chopped

handful of fresh parsley, chopped

2-3 stalks of celery, chopped

For the Dressing:

2 garlic cloves, finely chopped

2 teaspoons Dijon mustard

juice of 2 lemons (about 5 tablespoons)

3-4 small anchovies, smashed into a paste

1/2 cup good quality olive oil  (California Olive Ranch gets my vote)

salt and fresh cracked pepper

good crunchy sea salt to finish

Place a steamer in a large saucepan.  Add a bit of water to the bottom.  Add the potatoes and steam until potatoes are nearly done.  Turn off the burner and keep the cover on for an additional 10-15 minutes to ensure the potatoes are fully cooked.  This technique keeps the potatoes from being loaded with water, which sometimes happens when boiled, and from being over-cooked which can lead to mushiness.  Check them after 10 minutes, and if they’re tender, remove the lid.

Meanwhile, make the dressing.  In a medium bowl, add the garlic, anchovies, Dijon, lemon juice, and pinch of salt and pepper.  Whisk.  Then slowly add the olive oil, whisking the entire time.  Adjust seasonings, if necessary.  Remember that potatoes require a bit of salt to let their flavor shine through.  However, the anchovies will supply a lot of that saltiness, so I generally wait to make a final judgment about adding more salt until the potato salad has been refrigerated and the flavors have had a chance to meld together.

When the potatoes are done steaming, add them to a large bowl and pour about 2/3 of the dressing over them while they are hot.  Use a rubber spatula to gently fold the potatoes and dressing together.  Let sit until mostly cool, then add the vegetables and the remainder of the dressing.  Fold everything together, cover with plastic wrap, and refrigerate for a couple of hours.  When ready to serve, let it come to room temperature– the flavors are brighter when they are not completely cold.   Sprinkle with a crunchy sea salt before serving.  Enjoy!

Thanks for stopping by Relishing It!

Laurie

Read Full Post »

Black Rice Ramen with Sesame Garlic Ginger Scallion Sauce | Relishing It

I just got back from an amazing walk.  The temperature was perfect at a nice cool 60 degrees, the birds were singing, and a beautiful assortment of tulips soaked up the sun.  A walk on a day like today is good for clearing my head.  So, now I’m home with a full cup of coffee, ready to tell you about this fantastic recipe that I conjured up.

Black Rice Ramen with Sesame Garlic Ginger Scallion Sauce | Relishing It

I recently came across organic black rice (forbidden rice) ramen noodles at my co-op.  You may remember this recipe that has black rice.  Or this one, with a bit of a Spring twist.  I love black rice– it’s ridiculously healthy.  So, when I found it in pasta form, I was excited.  I generally use brown rice noodles, so I’m thrilled to have another healthy option.  Fear not, if you can’t find black rice ramen– most any thin pasta will work here–regular ramen, vermicelli, angel hair pasta, just about anything really.

Black Rice Ramen with Sesame Garlic Ginger Scallion Sauce | Relishing It

This is a really quick dinner that can be whipped-up in about 20 minutes.  It’s versatile in that it can be served hot or cold, which is a nice option for the upcoming warmer months.  It’s also versatile in that you can pair any of your favorite vegetables with it and it will be fantastic.  Red peppers come to mind.  I’m on a broccoli kick…still.  And so are my kids, so that’s what I went with.  The vegetables can be roasted, quickly sautéed, or even raw.  You decide. I generally roast mine, but I know that will stop with the summer heat.   The sauce is simple and packed with flavor.  The sesame, garlic, ginger, and scallions all compliment one another.  The sauce is light– it barely coats the noodles and vegetables.  I didn’t want it loaded with oil (read calories), but I still wanted it potent.  When you toss all of the ingredients together, make sure to reserve a bit of pasta water.  You can use that to loosen everything up, if necessary.  Be sure to taste and re-season with more soy sauce or sesame oil, if you want a bit more punch.  Hope you enjoy!  We sure did.

Black Rice Ramen with Sesame Garlic Ginger Scallion Sauce | Relishing It

The Recipe: Black Rice Ramen with Sesame Garlic Ginger Scallion Sauce

(serves 2)

2 squares of ramen, (about 5 ounces total)

2 tablespoons olive oil or peanut, if you have it

4 teaspoons finely chopped fresh ginger

6 garlic cloves, finely chopped

1/2 teaspoon red pepper flakes

2 tablespoons rice vinegar

1/2 teaspoon hoisin sauce

4 teaspoons sesame oil

2 tablespoons soy sauce

4 scallions, thinly sliced

handful of broccoli and crimini mushrooms, bite-size

sesame seeds and chopped peanuts for garnish

(Note: This meal comes together rather quickly– you’ll need to work fast and be attentive.)

Preheat oven to 375ºF.  Bring a medium sauce pan filled with water to a boil.

On a baking sheet, roast the broccoli and mushrooms for 3-4 minutes, or until slightly tender.  Remove from oven.   Place the ramen in the boiling water and keep a watchful eye.  It will only need about 5 minutes to cook.  Test along the way.  Reserve some cooking water.  When tender, drain.

Meanwhile, in a medium-sized skillet over medium-low heat,  heat the olive oil and add the ginger, garlic, and red pepper flakes.  Sauté for about 1-2 minutes until aromatic.  Then add the vinegar, hoisin, sesame oil, and soy sauce and whisk together until warmed through.  Add most of the scallions, reserving a few for garnish.  Sauté for 30 seconds.  Toss in the vegetables and then the ramen.  Use tongs to toss everything together.  Loosen with 1-2 tablespoons of pasta water, if need be.  Taste.  Re-season with soy sauce and sesame oil, if desired.  Top with sesame seeds, chopped peanuts, and reserved scallions.  If wanting to make a cold version, run the pasta under cold water.   You may need a bit more oil to loosen the pasta, if cold.  Enjoy!

Thanks for stopping by Relishing It today!

Laurie

Read Full Post »

Strawberry Balsamic Vinaigrette with Spinach | Relishing It

Hey everyone!  I hope you all had a wonderful Easter (for those of you that celebrate it).  We had a fabulous week.  My parents made the trip to St. Paul to take care of our kids, while Radd and I took a quick trip to Chicago.  We went to see the rock band The National play at the Chicago Theater.  We’re slightly obsessed with this band.  In fact, I’d go so far as to say they’re the best band of all time.  I know that’s a bold statement, but I stand by it.  So there’s my little musical recommendation for you.  Chicago was fabulous and so was time away with my husband. The kids were spoiled by their grandparents, so everyone was happy.

Strawberry Balsamic Vinaigrette with Spinach | Relishing It

Let’s be honest, vacationing usually includes throwing caution to the wind and eating whatever one wants.  We did that.  And we drank too many craft beers and cocktails.  Getting back on track is always in order when we return home.  I’ve been eating lots of salads this week.  I had a few spinach salads with this strawberry balsamic vinaigrette and it is– as my five-year old would say “Amazin!”  I’m always hesitant about posting such easy recipes on my blog (this dressing only contains 3 ingredients).  I generally figure that everyone already makes it or uses this trick.  My sister-in-law (whom I chat with everyday on the phone) assures me that is not the case.  I was telling her about this dressing and I think she’ll be making it very soon.

Strawberry Balsamic Vinaigrette with Spinach | Relishing It

I usually make this dressing when my jam jar is pretty much empty, but there is still a slight film of jam in it.  I hate to waste, so I pour in some good balsamic vinegar and a splash of good olive oil, put the lid on, and give it a shake.  Voilà!  Out comes this delicious vinaigrette.  The strawberry jam and balsamic vinegar are a match made in heaven–cherry works great, too.   Of course you don’t have to wait until you’re nearly out of jam.  And you certainly don’t have to make just one portion, as I’ve given in this recipe.  Make a jar of it– it’ll keep well in your refrigerator.  It’s great poured onto spinach and topped with chopped almonds and hemp seeds, or whatever you happen to fancy.  Enjoy!

The Recipe: Strawberry Balsamic Vinaigrette with Spinach

(serves 1)

1 teaspoon good quality strawberry jam

1 tablespoon good quality balsamic vinegar

1 tablespoon good quality extra-virgin olive oil (California Olive Ranch is my favorite)

Combine ingredients in a jar and shake.  Season with salt and pepper, if necessary.  And add a bit more olive oil, if you prefer it less vinegary.  Increase amounts for a larger portion size.  Store extras in the refrigerator.  Toss with fresh spinach.  Top with chopped almonds, hemp seeds, or even blue cheese, if desired.

Thanks for stopping by Relishing It today!

Laurie

Read Full Post »

Curry-Scented Cauliflower with Golden Raisins | Relishing It

We joined a CSA recently!  For a vegetable-obsessed girl like me, this is big news.  So much so that I want to tell everyone I interact with…but that would be a bit weird, so I’ll just tell you.  I’m already anxious for June to roll around– for that first box to arrive, full of vegetables grown for my family by people that I know.   To be honest, we haven’t been CSA members for a couple of years now.  I know, I know.  You see, the previous CSA that we belonged to didn’t quite meet my family’s needs.  We ended up spending a ton of money every week to supplement the offering.  This year we dove back in, and decided to go with Bossy Acres.  The fabulous ladies that run this CSA are heavily involved in the Twin Cities food community.  I had heard remarkable things about their CSA from several friends.  And then, once I had a chance to talk with the owners about the excitement and passion that they put into their work, it made me realize that I wanted my family to be part of it.  And I am so darn excited!  Did I already mention that?

Curry-Scented Cauliflower with Golden Raisins | Relishing It

Curry-Scented Cauliflower with Golden Raisins | Relishing It

Alright, now that I’m done with my mini celebration it’s on to today’s post.  Even though this is THE NEVER-ENDING WINTER here in Minnesota, I’ve moved on to think about lighter, quicker fare.  Spring has to arrive eventually, right?  It’s just a matter of time before the farmers’ markets are loaded with fresh vegetables, and I’ll also be getting my first CSA delivery.  Waiting is hard.  I want strawberries and tomatoes now.  But until then, I’ll enjoy this gorgeous cauliflower.Curry-Scented Cauliflower with Golden Raisins | Relishing It

I love how hearty cauliflower is.  It’s reliable and always a good option in the Summer or Winter.  Out-of-season tomatoes and cucumbers can’t claim that.  I enjoy this side dish (though I eat it as a main course) when the cauliflower is roasted just a bit. Not entirely soft, but not raw either.  Once it’s done, I like to toss it immediately with red onion and golden raisins on the hot roasting pan.  It warms them through and takes the edge off the onion.  Infusing the spices in warmed olive oil is a great way to maximize the flavor.  This is a subtle dish.  It’s not swimming in a sauce or loaded with flavors that punch you in the face.  And it comes together in a matter of minutes.  The golden raisins are key– the slight sweetness that they add is crucial here.  Hope you enjoy!

Curry-Scented Cauliflower with Golden Raisins | Relishing It

The Recipe:  Curry-Scented Cauliflower with Golden Raisins

(serves 2-4)

1 large head of organic cauliflower, broken into small bite-sized pieces

1 small red onion, thinly sliced

1/3 cup organic golden raisins

handful of fresh cilantro

2 tablespoons extra-virgin olive oil, plus more for roasting

1 teaspoon hot curry powder  ( I love Penzys’ version)

1/2 teaspoon ground turmeric

1/2 teaspoon ground cumin

pinch of kosher salt to taste

lime wedges, for serving

Preheat an oven to 400°F.  Toss the cauliflower pieces with a drizzle of olive oil and place on a baking sheet. Roast for 15-20 minutes, or until the cauliflower has browned slightly but isn’t completely soft.  Remove from oven and immediately toss the sliced red onion and golden raisins on the hot pan with the cauliflower.

Meanwhile, prepare the curry-scented olive oil by placing 2 tablespoons of olive into a small skillet.  Mix the curry powder, turmeric, and cumin into the oil and heat on medium for about 1-2 minutes, or until the oil becomes warm and fragrant.  Make sure to stir it.  Remove from heat and pour over the vegetables.  Toss with cilantro.  Season with salt, if necessary.  Serve with a squeeze of lime.  Enjoy!

Thanks for stopping by Relishing It!

Laurie


Read Full Post »

Simple Homemade Kimchi | Relishing It

Last week my little blog had an anniversary!  I’ve been occupying this small corner of the internet for three years now.  Goodness time has flown by!  I’m so very thankful for the friends it has brought into my life.  It is such an amazing feeling to find people that share my interests– people that give a damn where their food comes from and believe that it makes a difference.  Making food does more than just nurture my body, it nutures my soul.  Thank you for stopping back week after week to see what I’ve been doing– I am truly grateful.

Homemade Kimchi | Relishing It

Homemade Kimchi | Relishing It

Homemade Kimchi | Relishing It

Homemade Kimchi | Relishing It

I suppose you’re expecting a celebratory cake recipe, but no, today I’m marking the occassion with…kimchi!  You know I’m a sucker for fermented foods (they are so ridiculously healthy for you)– this  homemade sauerkraut gets made ever month in our house.  Kimchi is along the same lines– it’s also lacto-fermented– but it’s made with a different type of cabbage and a couple of other vegetables. The red color comes from a Korean ground red pepper called gochugaru.  It has a wonderful flavor.  Finding gochugaru can be a bit of a hunt, even in a large city.  Definitely check an Asian specialty store.  I found mine at United Noodles in Minneapolis.  You can also order in online at Amazon.  A package will last you awhile, so you won’t have to reorder very often. Kimchi is easy to make and doesn’t take very long to ferment.  It’s as simple is mixing up a flavorful paste with garlic, ginger, and the gochugaru and tossing it with the vegetables.  If you love kimchi, there is absolutely no reason not to make your own.

Simple Homemade Kimchi | Relishing It

Homemade Kimchi | Relishing It

Simple Homemade Kimchi | Relishing It

The big question is, what do you do with kimchi once you’ve made it?  The possibilities are endless, really.  Toss some into a batch of fried rice, throw some into your stir-fry, put it into soups, eat it with dumplings, or straight out of the jar.  I love to eat it on a pizza with spicy ground pork.  It adds that extra “oomph” that some dishes need.  Make it.  You’ll be happy that you did!

Homemade Kimchi | Relishing It

The Recipe: Homemade Kimchi

(makes nearly 2 quarts)

1 /3 cup kosher salt

1 (3 1/2 pound) head napa cabbage, remove core and cut cabbage into 2-inch strips

water

7 green onions, cut into 1-inch pieces

12 ounce daikon (white radish) peeled and cut into matchsticks

7 garlic cloves, smashed

3 tablespoons fish sauce (or water, if making vegetarian)

1 1/2 teaspoon minced fresh ginger

1 1/4 teaspoon granulated sugar

5 tablespoons gochugaru (less to taste)

To prepare the cabbage:  Place the cut cabbage in a large bowl and sprinkle with salt.  Massage well so the the cabbage starts to soften and become watery.  Then add enough filtered water to cover the cabbage.  Weigh it down with a plate and then place something heavy on the plate.  Let it stand for 1-2 hours.

Meanwhile, make the red pepper paste.  In a small bowl, add the ginger, garlic, fish sauce, sugar, and gochugaru.  Mix until uniform.  Set aside.

When the cabbage is ready, rinse it with cold water about 3 times.  You want to thoroughly wash the salt off of it.  Then drain in a colander for 15 minutes and gently squeeze out any remaining water.  Return to the bowl that has since been cleaned.  Add the daikon, green onions, and red pepper paste and gently mix with your hands (use gloves, if you want) to coat all of the vegetables.  Pack the kimchi into clean jars and press down until the brine covers the vegetables.  Leave about an 1-inch space at the top of the jars (you will just be shy of 2 quarts for this recipe, so space shouldn’t be an issue).

Let the jars stand at room temperature for 1-5 days ( I generally do 5 days, but it’ll depend upon the temperature of your house).  There may be some bubbling action and you may want to open the jar to release some of the gas, so it doesn’t bubble over and create a mess.  Taste it along the way, when it is fermented to your liking, put it into the refrigerator.  The flavors will continue to enhance when it’s been in the refrigerator for a while.  Enjoy!

Source:  Adapted from The Kitchn

Thanks for stopping by!

Laurie

Read Full Post »

Healthy Asian Peanut Slaw | Relishing it

I love a good slaw.  Basically, I love any salad that is made from cabbage and crunchy vegetables.  Sure, once summer rolls around I’ll be thrilled to dig into a plate of delicate, tender greens.  But, in the meantime, I never tire of crunchy, hearty vegetables.  They satisfy me when I’m hungry.  They have a great mouth-feel– as in, I actually feel like I’m eating something substantial.  Like I’m eating a meal.

Healthy Asian Peanut Slaw | Relishing It

Healthy Asian Peanut Slaw | Relishing It

Healthy Asian Peanut Slaw | Relishing It

Cabbage (and kale) are really my go-to winter salad fare.  Remember this salad?  I still eat it at least once a week.  The same goes for the one I’m sharing today.  I love combining Asian flavors into a slaw.  It just works.  Making a dressing using plain yogurt is a perfect way to “health it up”, yet still satisfies that need for something a bit more indulgent and creamy.

Healthy Asian Peanut Slaw | Relishing It

I used freshly ground peanut butter in this dressing, but you can buy good organic peanut butter at your market.   Be sure to look for a kind that only contains ground peanuts.  Added salt is fine.  If you have to use something else with other ingredients, just be warned that the flavor of the dressing may be a bit off, as those other kinds generally contain a lot of sugar.  Most of the other ingredients for the dressing are things that you probably have in your refrigerator already.  The lime juice is the perfect backdrop for the flavors.  And as for the vegetables, the combination of red cabbage, carrots, carrots, cilantro, and broccoli are wonderful together.  I love using broccoli in this finely-sliced form.  Broccoli has a wonderful flavor, but I don’t always like chewing on the florets, so this is a nice solution.  I’ve also added golden raisins to this slaw.  Taking a bite with one in it feels like hitting the lottery.  Perhaps I should just toss more in next time?!  Cheers– hope you enjoy the slaw!

Healthy Asian Peanut Slaw | Relishing It

The Recipe: Healthy Asian Peanut Slaw

(serves 1-2)

For the Asian Peanut Dressing:

2 tablespoons organic natural peanut butter (containing only peanuts and salt)

1/4 cup plain yogurt

1 tablespoon soy sauce

1 tablespoon fresh lime juice

1 teaspoon sesame oil

1 teaspoon garlic chili sauce

honey (optional)

For the Slaw:

2 medium carrots, grated on the large hole of a box grater

1/4 small head of red cabbage, thinly sliced

5-6 large broccoli florets, thinly sliced

1/4 large red pepper, julienned

small handful of cilantro leaves, stems removed

2-3 tablespoons golden raisins

chopped salted peanuts or cashews, for serving

In a medium bowl, whisk the ingredients for the dressing together.  Set aside.  In a larger bowl, combine all the ingredients for the slaw,  sans peanuts.  Pour the dressing onto the vegetables and mix together using tongs.  You may not want to pour all of the dressing on at once (I generally have a bit leftover).  It’ll depend on your personal taste.  Top with the chopped peanuts or cashews.  Enjoy!

As always, thanks for stopping by Relishing It today!

Laurie

Read Full Post »

Sunshine Smoothie with Kumquats and Turmeric | Relishing It

Another round of snow paired with a gray sky in the midwest this morning– at least the temperatures aren’t so bad.   I needed to brighten up my surroundings, so I blended up a Sunshine Smoothie.  I’ve likely mentioned this before, but I go through a bit of a kumquat love-fest this time of year.  They’re brilliant in this marmalade, perfect in vinaigrettes for salads, and they are downright fabulous blended into smoothies.

Sunshine Smoothie with Kumquats and Turmeric | Relishing It

This time, I’ve decided to craft a smoothie using kumquats as the star ingredient.  Yes, I love a smoothie loaded with greens as much as the next person (this one is my personal favorite), but sometimes I want something…a little less green.  The kumquats give this smoothie a fresh vibrancy that will wake you right up.  I also recommend using either fresh or frozen organic mango.  Plain yogurt is the protein that will keep you from getting hungry– I suggest using whole milk yogurt to also help with that.  And turmeric– a fantastic, healthy ingredient that you should eat more of anyway.  You can read about it’s specific properties here.  Curries are a great way to incorporate more turmeric into your diet, or throw a little into a soup, such as this one.  Adding just a bit to this smoothie completely works, too.  It pairs wonderfully with the cinnamon and citrus flavors.  No need to peel the kumquats, just cut them in half and remove the seeds.  Place everything in a blender or food processor and whiz it together.  Hope you enjoy!

Sunshine Smoothie with Kumquats and Turmeric | Relishing It

The Recipe:  Sunshine Smoothie with Kumquats and Turmeric

(makes 1 cup)

7-8 small organic kumquats, cut in half and seeds removed

1/3 cup diced fresh or frozen organic mango

1/3 cup organic whole milk yogurt

1/4 cup organic, unsweetened almond milk

1 teaspoon honey

1/4 teaspoon ground cinnamon

1/4 teaspoon ground turmeric

Place all of the ingredients into a blender or food processor and blend until smooth.  Serve with a sprinkle of cinnamon on top.  Enjoy!

Thanks for stopping by Relishing It today!

Laurie

Read Full Post »

Winter Salad with a Kumquat Vinaigrette | Relishing It

Apparently I’ve been craving a little color lately.  I recently bought a couple of brightly colored sweaters (orange and electric blue).  I just replaced my everyday-lipstick with a few colors that have a bit more pizzazz.  Yep, I just need to see a bit more color this time of year.  The dull gray skies and monotonous white snow just don’t do it for me by late January.   So…this colorful salad fits the bill perfectly.  And aside from the visual beauty, this one is delicious.  I could eat it every day.  Actually, I pretty much did for month straight last year.

Winter Salad with a Kumquat Vinaigrette | Relishing It

Winter Salad with a Kumquat Vinaigrette | Relishing It

Let’s start with the red cabbage.  I rely on it a lot during winter.  It tastes great, works both hot or cold, and it can hang out it your refrigerator for a while.  This last reason is important, because if you don’t happen to want to eat a salad every day, this ingredient will be waiting for you.  Tuscan kale is another great ingredient.  It’s perfect in soups or massaged and made into a simple salad.  Red peppers were on sale at our co-op the other day, so I bought a few of those too.  My kids love to snack on them all summer long, but they go through withdrawal in winter.  They were probably happier than I was when I brought them home.

Winter Salad with a Kumquat Vinaigrette | Relishing It

Finally, I present to you the kumquats.  They have such a fresh, powerful citrus flavor.  Take a look at this kumquat marmalade that I shared here a while back.  Kumquats always remind me of sunshine, which is obviously just what I need right now.  They’re sweet, tangy, and so fragrant.  I love them thinly sliced and tossed into salads– no need to peel them.  Just remove the few tiny seeds that will be inside. In this recipe, I blend them up (peel too) into a delicious vinaigrette that goes perfectly with any winter salad.  I also add a touch of honey to it to bring out the sweetness a bit more.  It’s a bit on the thick side for a vinaigrette, because the acidic component (the kumquats) is blended whole– but I think it’s absolutely lovely and the hearty winter vegetables work well with it.  The almonds are the perfect finishing touch to the salad.  I hope you give this little salad a try if you need to brighten up your day– I bet it will.  Enjoy!

Winter Salad with a Kumquat Vinaigrette | Relishing It

The Recipe:  Winter Salad with a Kumquat Vinaigrette

Serves 2

For the Vinaigrette:

10 kumquats, cut and seeded (leave the peel on)

1 teaspoon finely chopped shallot, white, or red onion

1 teaspoon honey

pinch of kosher salt

1/4 cup extra virgin olive oil

For the Salad:

About half of a small red cabbage, cored and finely sliced

handful of Tuscan kale (6-7 stalks) stems removed and thinly sliced into ribbons OR a handful of fresh spinach

1/2 red pepper, julienned

handful of almonds, coarsely chopped

3-4 kumquats, seeded and thinly sliced

To make the vinaigrette, place the kumquats into a small food processor and pulse a few times until they are finely chopped.  Add the shallot, honey, and salt.  Pulse a few more times until nearly smooth.  Add the olive oil and blend.  This vinaigrette will remain somewhat thick.  Adjust salt, if necessary.

It’s best to place your salad ingredients (sans almonds and kumquats) into a bowl and pour the vinaigrette on top of them.  Toss to coat.  Plate the salads and top with the almonds and kumquats.  Leftover vinaigrette can be stored covered in the refrigerator.  Let it come to room temperature before using.  Enjoy!

Thanks for stopping by Relishing It today!  Have a wonderful weekend.

xo

Laurie

Read Full Post »

« Newer Posts - Older Posts »