Feeds:
Posts
Comments

Archive for the ‘Savory’ Category

Sun-Dried Tomatoes with Rosemary and Thyme | Relishing It

Alright, I’m using “sun-dried” very loosely here, as these little beauties are not…well…sun-dried at all.  I just couldn’t bring myself to call these “sitting on a counter in a dehydrator” tomatoes.  No, I like to imagine that they were patiently crafted in Italy, with tables upon tables of tomatoes laying out in the sun, as I sipped a Chianti and and read a good book.  Alas, my reality is Minnesota, and I used a food dehydrator.  Not quite as romantic, is it?  Even so, these tomatoes are fantastic, and seriously recommend you give making them a try.

Sun-Dried Tomatoes with Rosemary and Thyme | Relishing It

I love having a nice supply of sun-dried tomatoes to get me through the winter.  Buying jarred versions at the market can be expensive, and to be honest, they’re just so simple to make.  You can use any type of tomato, though smaller ones will require less cooking time.  Roma’s are a fantastic choice– simply cut them in half or quarters.  The tomatoes take time to dehydrate– perhaps a day or more for the thicker end pieces.  I sprinkle mine with rosemary, thyme, with a little sea salt and cracked black pepper.   The flavors are wonderful!

Su-Dried Tomatoes with Rosemary and Thyme | Relishing It

You can snack on them as soon as they’re dried, or preserve them to use later.  As for the texture, some like them a bit chewier– I made sure mine were completely dry since I intended to preserve them.  It’s really up to you how dry you want them to be.  These tomatoes can be kept in airtight containers (plastic bags work well), vacuum sealed, or even stored in the freezer.  I also made a jar of sun-dried tomatoes in olive oil, and they are ridiculously delicious.  These would make fabulous gifts around the holidays if you’re looking for something homemade to share.  I hope you give these a try!

Sun-Dried Tomatoes with Rosemary and Thyme | Relishing It

Sun-Dried Tomatoes with Rosemary and Thyme | Relishing It

The Recipe:  Sun-Dried Tomatoes with Rosemary and Thyme

any variety of tomatoes, sliced or halved

fresh rosemary, chopped

fresh thyme, chopped

sea salt and fresh cracked pepper

To Dehydrate the Tomatoes:  Slice the tomatoes or half them, depending upon their size.   Sprinkle with the chopped herbs, salt and pepper.  It will take about 24 hours to dehydrate a full load, sometimes longer depending upon how thick the tomatoes are sliced.  Store in a resealable bag and use within a few weeks.  Freeze any amount you want to keep longer.

To Oven-Dry them:  Preheat oven to 200°F.  Slice tomatoes and sprinkle with chopped herbs, salt and pepper.  Place on a large baking sheet lined with parchment paper.  It will generally take between 2-6 hours (possibly more) to dry the tomatoes– much will depend upon how thickly they are sliced.  Store in a resealable bag and use within a few weeks.  Freeze any amount you want to keep longer.

To make Sun-Dried Tomatoes in Olive Oil:  Prepare dehydrated tomatoes by dipping them in white wine vinegar (this help keep bacterial growth from occuring) and shaking off any excess.  Place in a small jar along with 1/2 cup of red wine vinegar.  Then fill the jar up with olive oil.  Make sure that all of the tomatoes are submerged.  Store in the refrigerator and try to use within 2 weeks.  If placing fresh herbs or garlic into your mix, you must use up the jar within 1 week.  The olive oil will become hard in the refrigerator, simple let sit at room temperature for a few minutes before using.  Be mindful to use clean utensils when removing the tomatoes from the jar.

Thanks for stopping by Relishing It today!

Laurie

Read Full Post »

Tomato Galette with Herbs and Fresh Mozzarella | Relishing It

I have just a few more tomato recipes that I want to share with all of you before tomato season disappears with the nice weather.  The first is this wonderful Tomato Galette with Herbs and Fresh Mozzarella.  As my husband stated after taking a bite, “That’s one of the best things I’ve eaten all summer.  Maybe ever”.  True story.

Tomato Galette with Herbs and Fresh Mozzarella | Relishing It

Tomato Galette with Herbs and Fresh Mozzarella | Relishing It

Tomato Galette with Herbs and Fresh Mozzarella | Relishing It

Yes, yes, tomatoes and fresh mozzarella are a heavenly match– we all know that, right?  But generally, fresh mozzarella isn’t baked into a galette with tomatoes due to its water content.  Much harder cheeses are the norm.  Obviously I was a bit hesitant in trying the fresh mozzarella– I had visions of a huge sloppy mess ruining that wonderful crust.  There was even a moment during the baking time when I peered into the oven and almost cried.  There was a lot of liquid pooling.  I was certain the galette was ruined.  I mention this, because if you see the same pooling– just wait it out.  By the end of the baking time, the water was gone and a beautiful crisp crust was left behind with cheese that had bubbled up into a golden brown.  The smell of the the baked tomatoes and cheese with the herbs was unbelievable.

Tomato Galette with Herbs and Fresh Mozzarella | Relishing It

Tomato Galette with Herbs and Fresh Mozzarella | Relishing It

This galette comes together so quickly, especially if you have pie crusts hanging out in your freezer (have I mentioned that you definitely should get on that?).  And it’s a perfect meal when you want to fancy things up a bit.  Add a salad to the side, and perhaps a glass of wine and you’re set.  Now go and enjoy the heck out of those tomatoes before they’re gone for the season!

Tomato Galette with Herbs and Fresh Mozzarella | Relishing It

The Recipe:  Tomato Galette with Herbs and Fresh Mozzarella

(serves 4 or 1, depending upon how hungry you are)

1 single All-Butter Pie Crust

2-3 ripe tomatoes, sliced

about 1/4 pound of fresh mozzarella, sliced

a hefty sprinkling of chopped fresh rosemary and thyme, plus more for garnish

1 egg mixed with 1 teaspoon water, for egg wash

salt, pepper, plus olive oil for drizzling

Preheat oven to 375°F.

Follow the instructions for the All-Butter Pie Crust.  After it has chilled it will be ready to use.  Roll the dough out into an 11-inch circle (not the typical 12-inch, because I want the crust to be a bit sturdier) on a piece of floured parchment paper.  Place the mozzarella into the center of the dough, leaving about 1 1/2 inch border.  Sprinkle the chopped herbs on the cheese.  Then place the tomatoes on top of that.  Fold up the sides of the galette and pinch the seams together.  Using a pastry brush, apply the egg wash to the dough.  Then sprinkle salt and pepper onto the egg wash.  Slide the galette and parchment paper onto a large rimmed baking sheet.  Bake for 45-50 minutes or until the crust is a deep golden brown and the cheese has bubbled up and browned a bit, too.  Remove from oven and let cool for a few minutes.  Drizzle with olive oil and sprinkle with fresh herbs, salt and pepper before serving.  Enjoy!

Thanks for stopping by today!

Laurie

Read Full Post »

Garlic Habanero Hot Sauce | Relishing It

There’s a fair chance that our household goes through more hot sauce than any other in the Twin Cities.  I often wish it was sold in vats, rather than puny little bottles.  Speaking of those bottles, we have no fewer than six different kinds of hot sauce in the refrigerator.  And I’ve just added a seventh– my own.  I knew I wanted to make hot sauce this year, and I was initially interested in making a fermented version.  But after talking to a vendor at our farmers market (and I love his unfermented styles), I decided to forge ahead and make a fresh super-spicy version.

Garlic Habanero Hot Sauce | Relishing It

This hot sauce is not for the timid.  It will make you tough or else destroy you.  The primary pepper is the amazing habanero.  I just love it’s unique, sweet, flavor.  With the first bite, it plays nice, and you think, “That’s not so hot.”  But then the burn starts to build.  Of course, you keep eating because it tastes so good, and while the heat is ratcheting up, you think you can handle it.  You start sweating, thinking maybe you should go grab a glass of milk, but no, just one more bite.  And then your face melts off.  That’s this hot sauce.

Garlic Habanero Hot Sauce | Relishing It

Obviously this recipe isn’t for everyone.  But, for those of you who enjoy a good habanero hot sauce, it’s pretty darn amazing.  It has a nice balanced combination of the sweet habanero flavor, a bit of garlic, and vinegar.  It’s also really easy to make.  I decided against making a canned version, instead opting for something that will keep for a while in my refrigerator.  I haven’t tracked down any cute little hot-sauce bottles in the area yet (hence the jars you see here), but I found some on Amazon that are going to work marvelously.  Enjoy!

Garlic Habanero Hot Sauce | Relishing It

The Recipe: Garlic Habanero Hot Sauce

(makes about 3 cups)

1 pound fresh habanero peppers

1 – 1 1/2 bulbs of fresh garlic, peeled and chopped

2 1/4 – 2 1/2 cups white vinegar

1/2 teaspoon kosher salt

Note: Working with habaneros is serious business.  Use plastic or latex gloves, if you have them.  Be careful of what you touch.  Also, be mindful of how close you breath-in near the chopped peppers– or coughing will ensue.

Carefully remove the stems from the habaneros and chop them, seeds and all.  Place the habaneros, garlic, salt, and 2 1/4 cups of white vinegar in a large saucepan.  Cook the habaneros on medium/high heat for about 30 minutes, or until the peppers feel a bit soft to the touch  (note: be cautious when removing the lid to check the peppers).  When they are soft enough, place the mixture into a blender, or food processor.  Blend until smooth.  Taste.  If you still want a bit more tang, add the remaining 1/4 cup of vinegar.  Place in jars or bottles and store in the refrigerator.  Enjoy!

Thanks for stopping by Relishing It!

Laurie

Read Full Post »

Perfect Canned Summer Salsa | Relishing It

Alright everybody, this post has been a long time coming.  We have here one of my most cherished recipes.  It’s the salsa that causes me to miss out on the first few weeks of fall.  I’m busy chopping tomatoes and canning so many batches that I don’t get a chance to get out and enjoy the beautiful weather.  Sounds a bit exaggerated, I know.  But, it’s not.  Now don’t let my canning-in-bulk experience deter you from making this wonderful salsa.  Obviously you need not make as many batches as I do, and realistically you should be able to get everything done in one sitting.  That is, until your friends and family get a taste of it…

Perfect Canned Summer Salsa | Relishing It

I know that was a bit of bragging, but the truth is, nearly everyone I’ve share this salsa with has loved it.  I started small, giving a few jars here and there to family.  Then friends had a chance to sample it at get-togethers, and suddenly I was spending a few weeks every September in the kitchen making batch after batch.  Even now, I inevitably run out of jars to give away by winter’s end.  For me, all the time spent with boxes of tomatoes and piles of peppers is worth it.  I like to share–it’s like giving a little part of myself to those closest to me.  Sometimes, the easiest way for me to say I care is through food.

Perfect Canned Summer Salsa | Relishing It

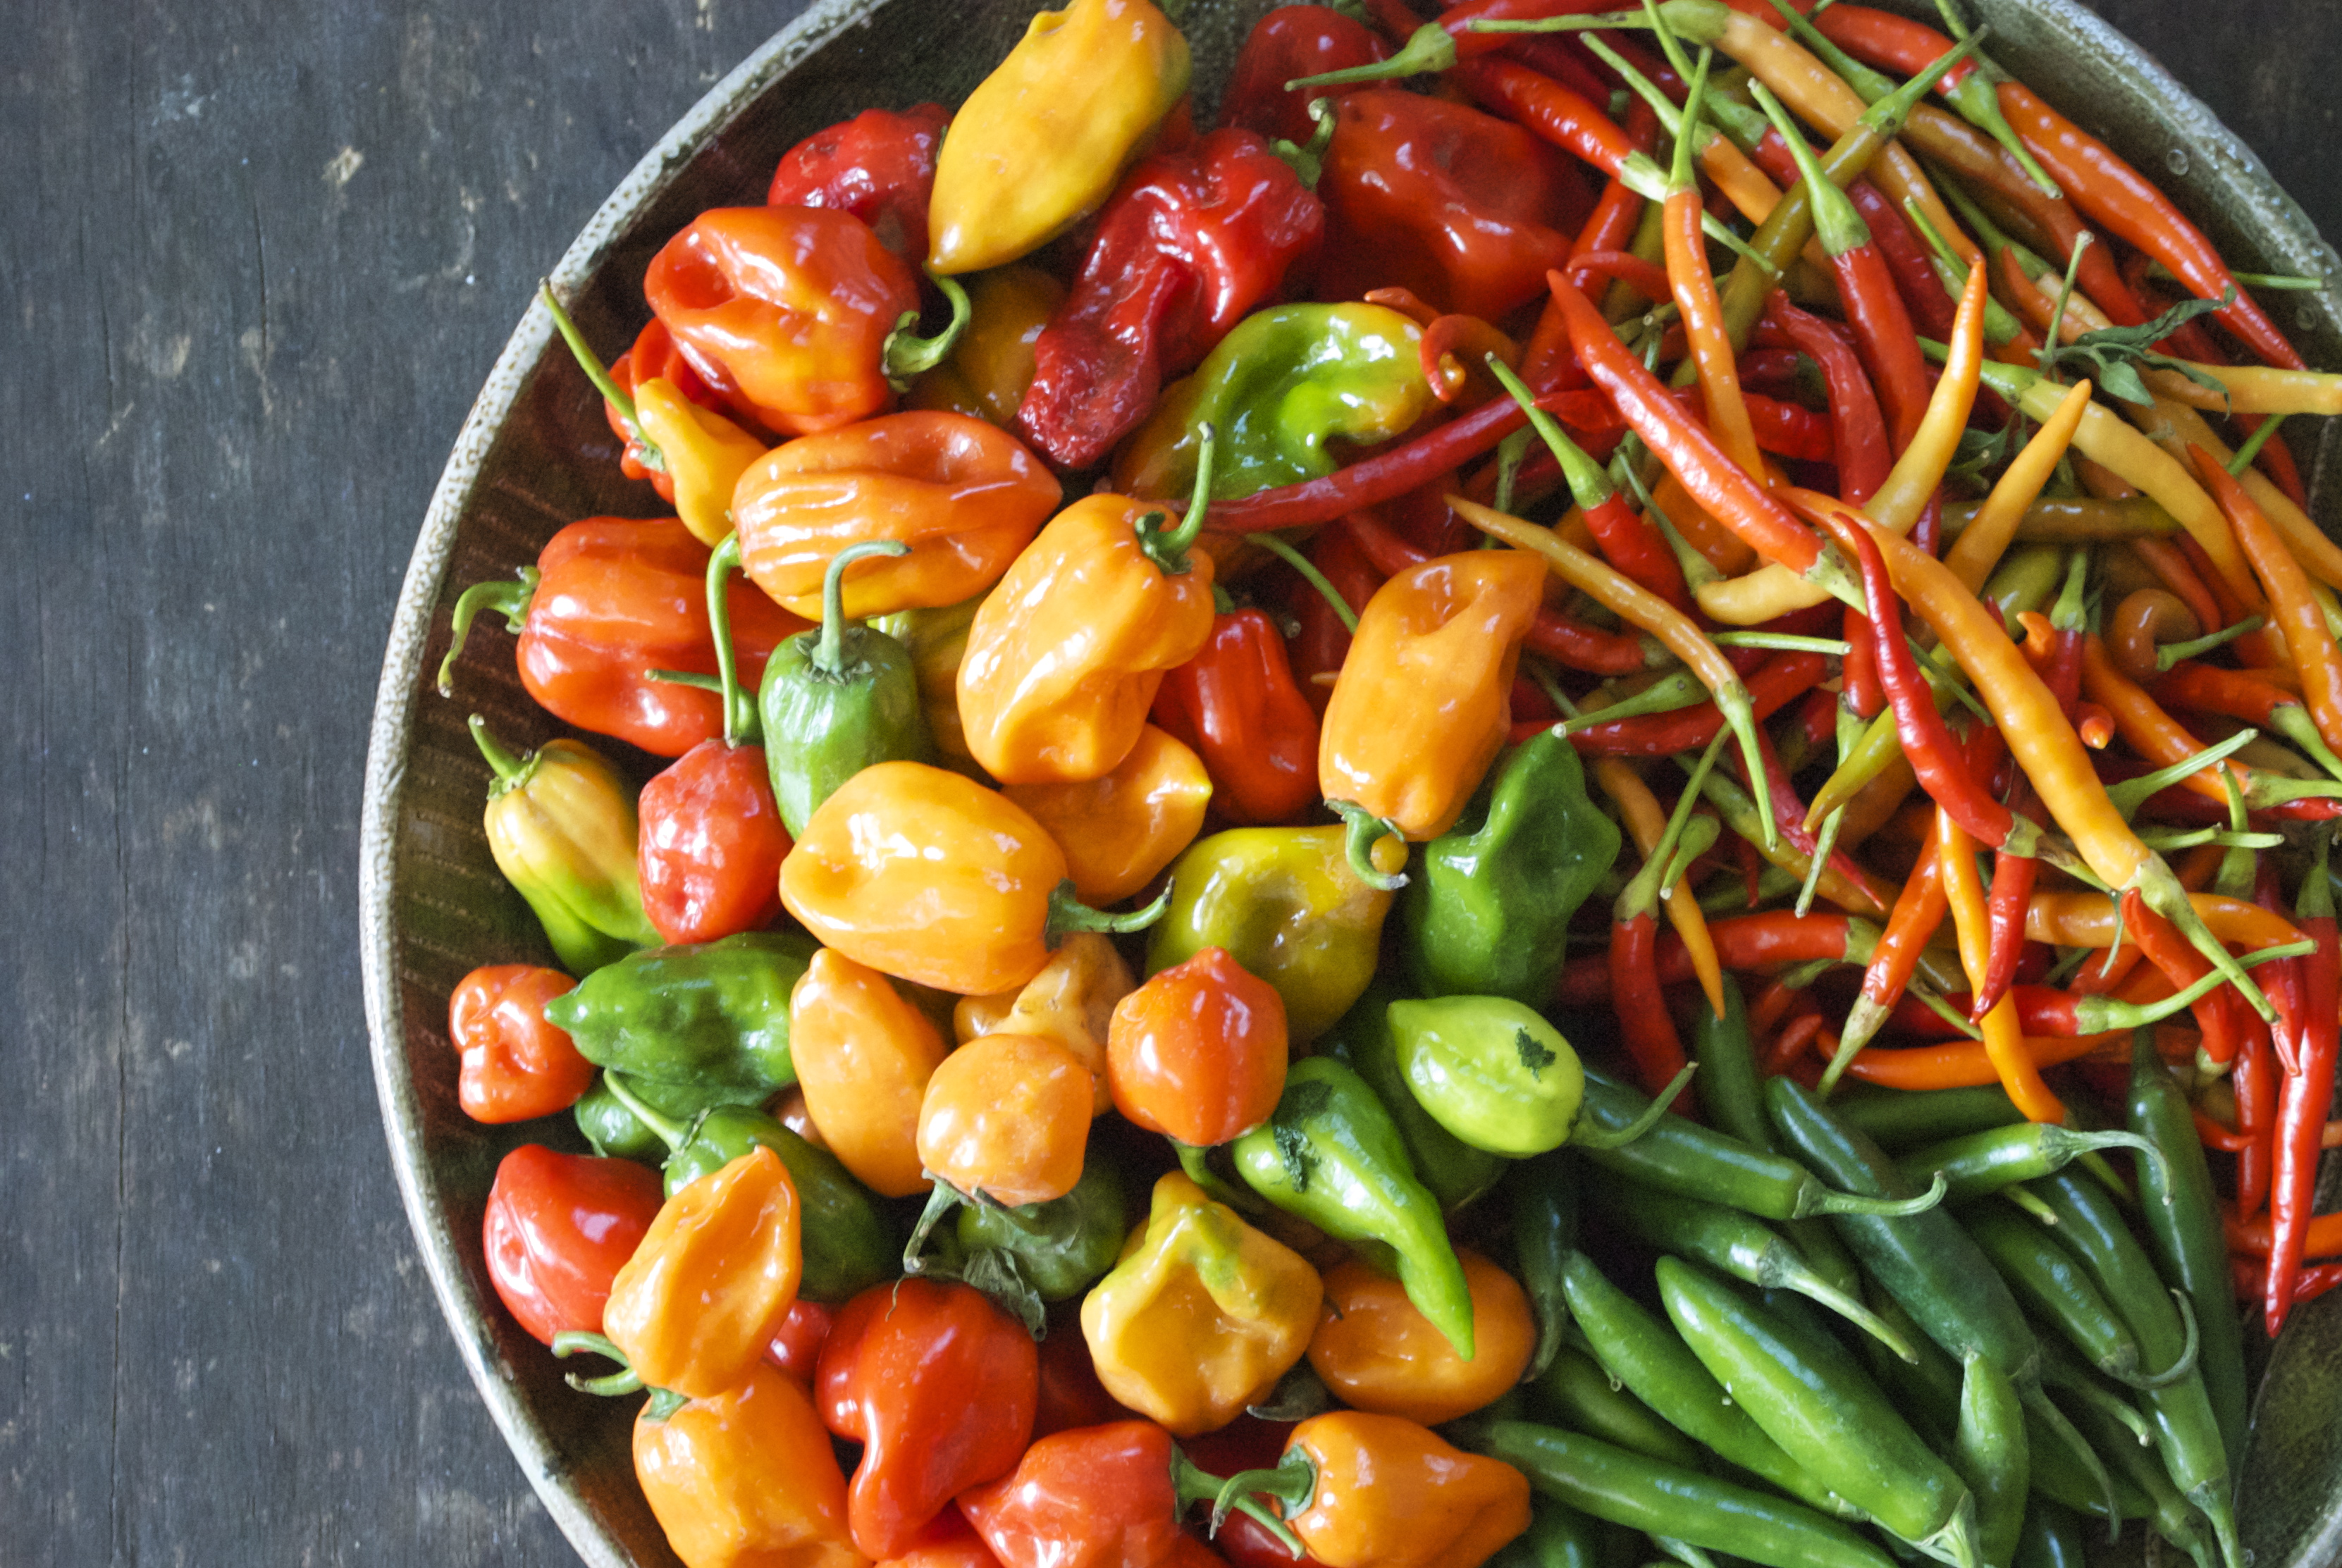
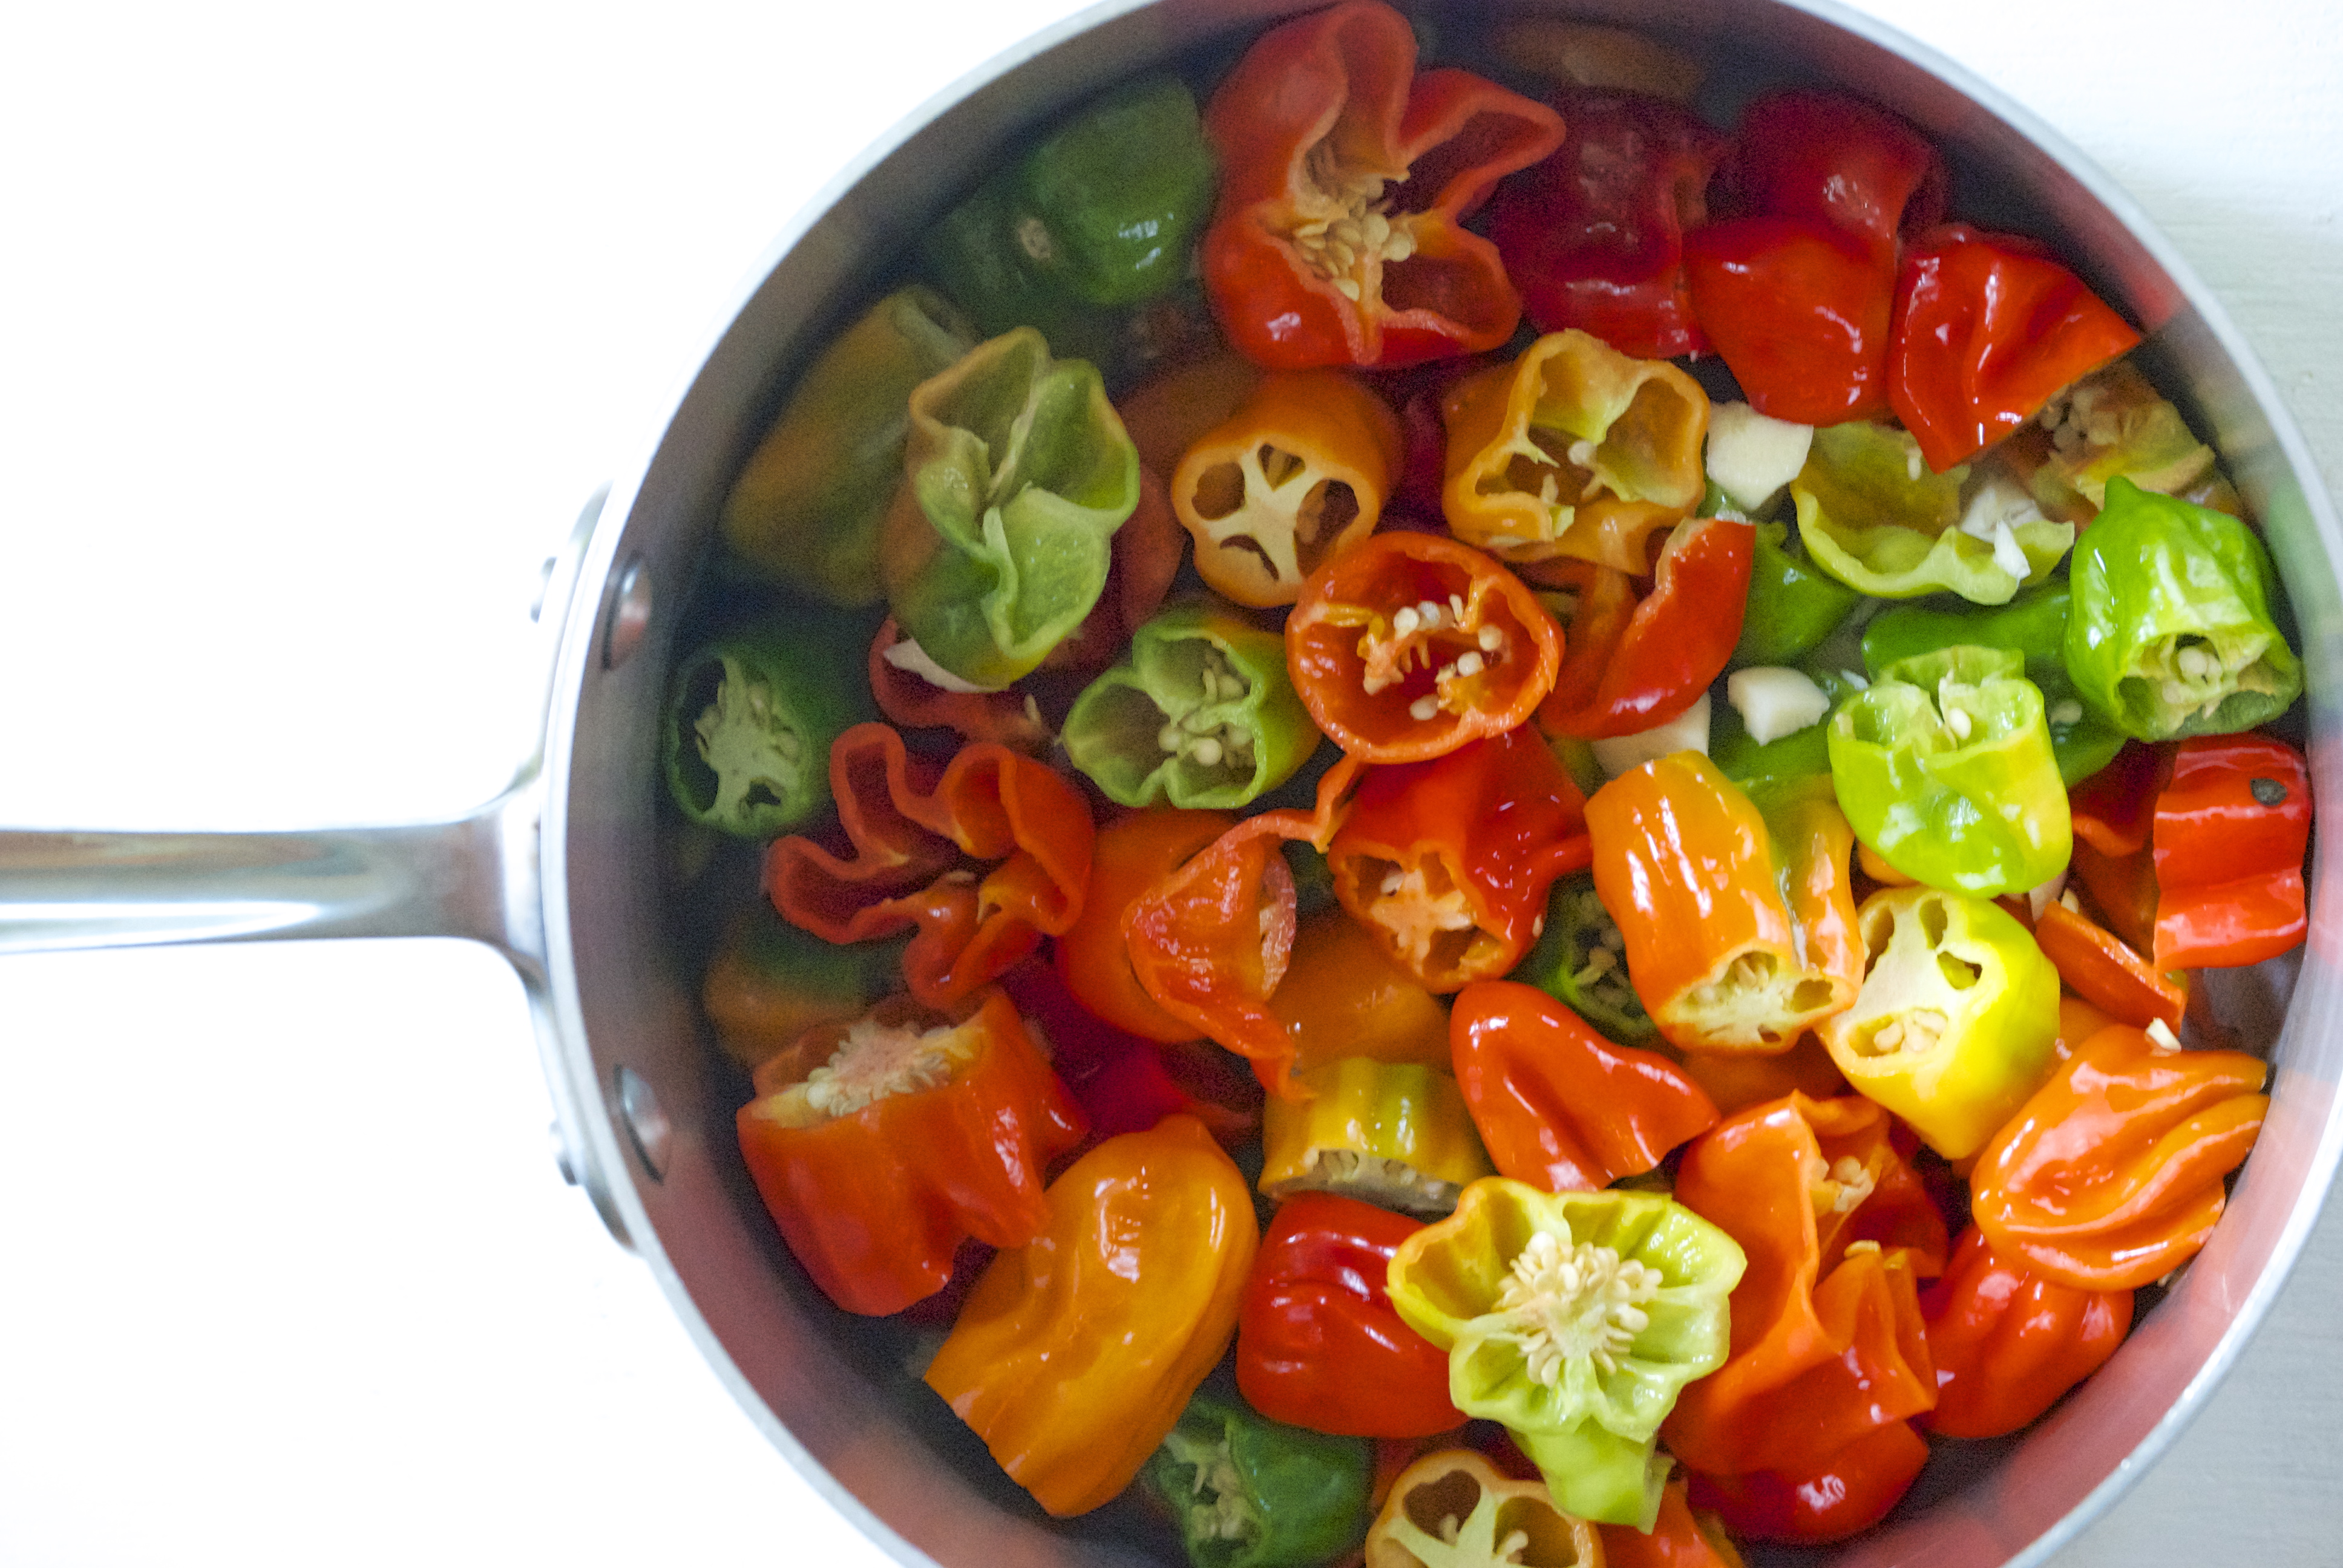
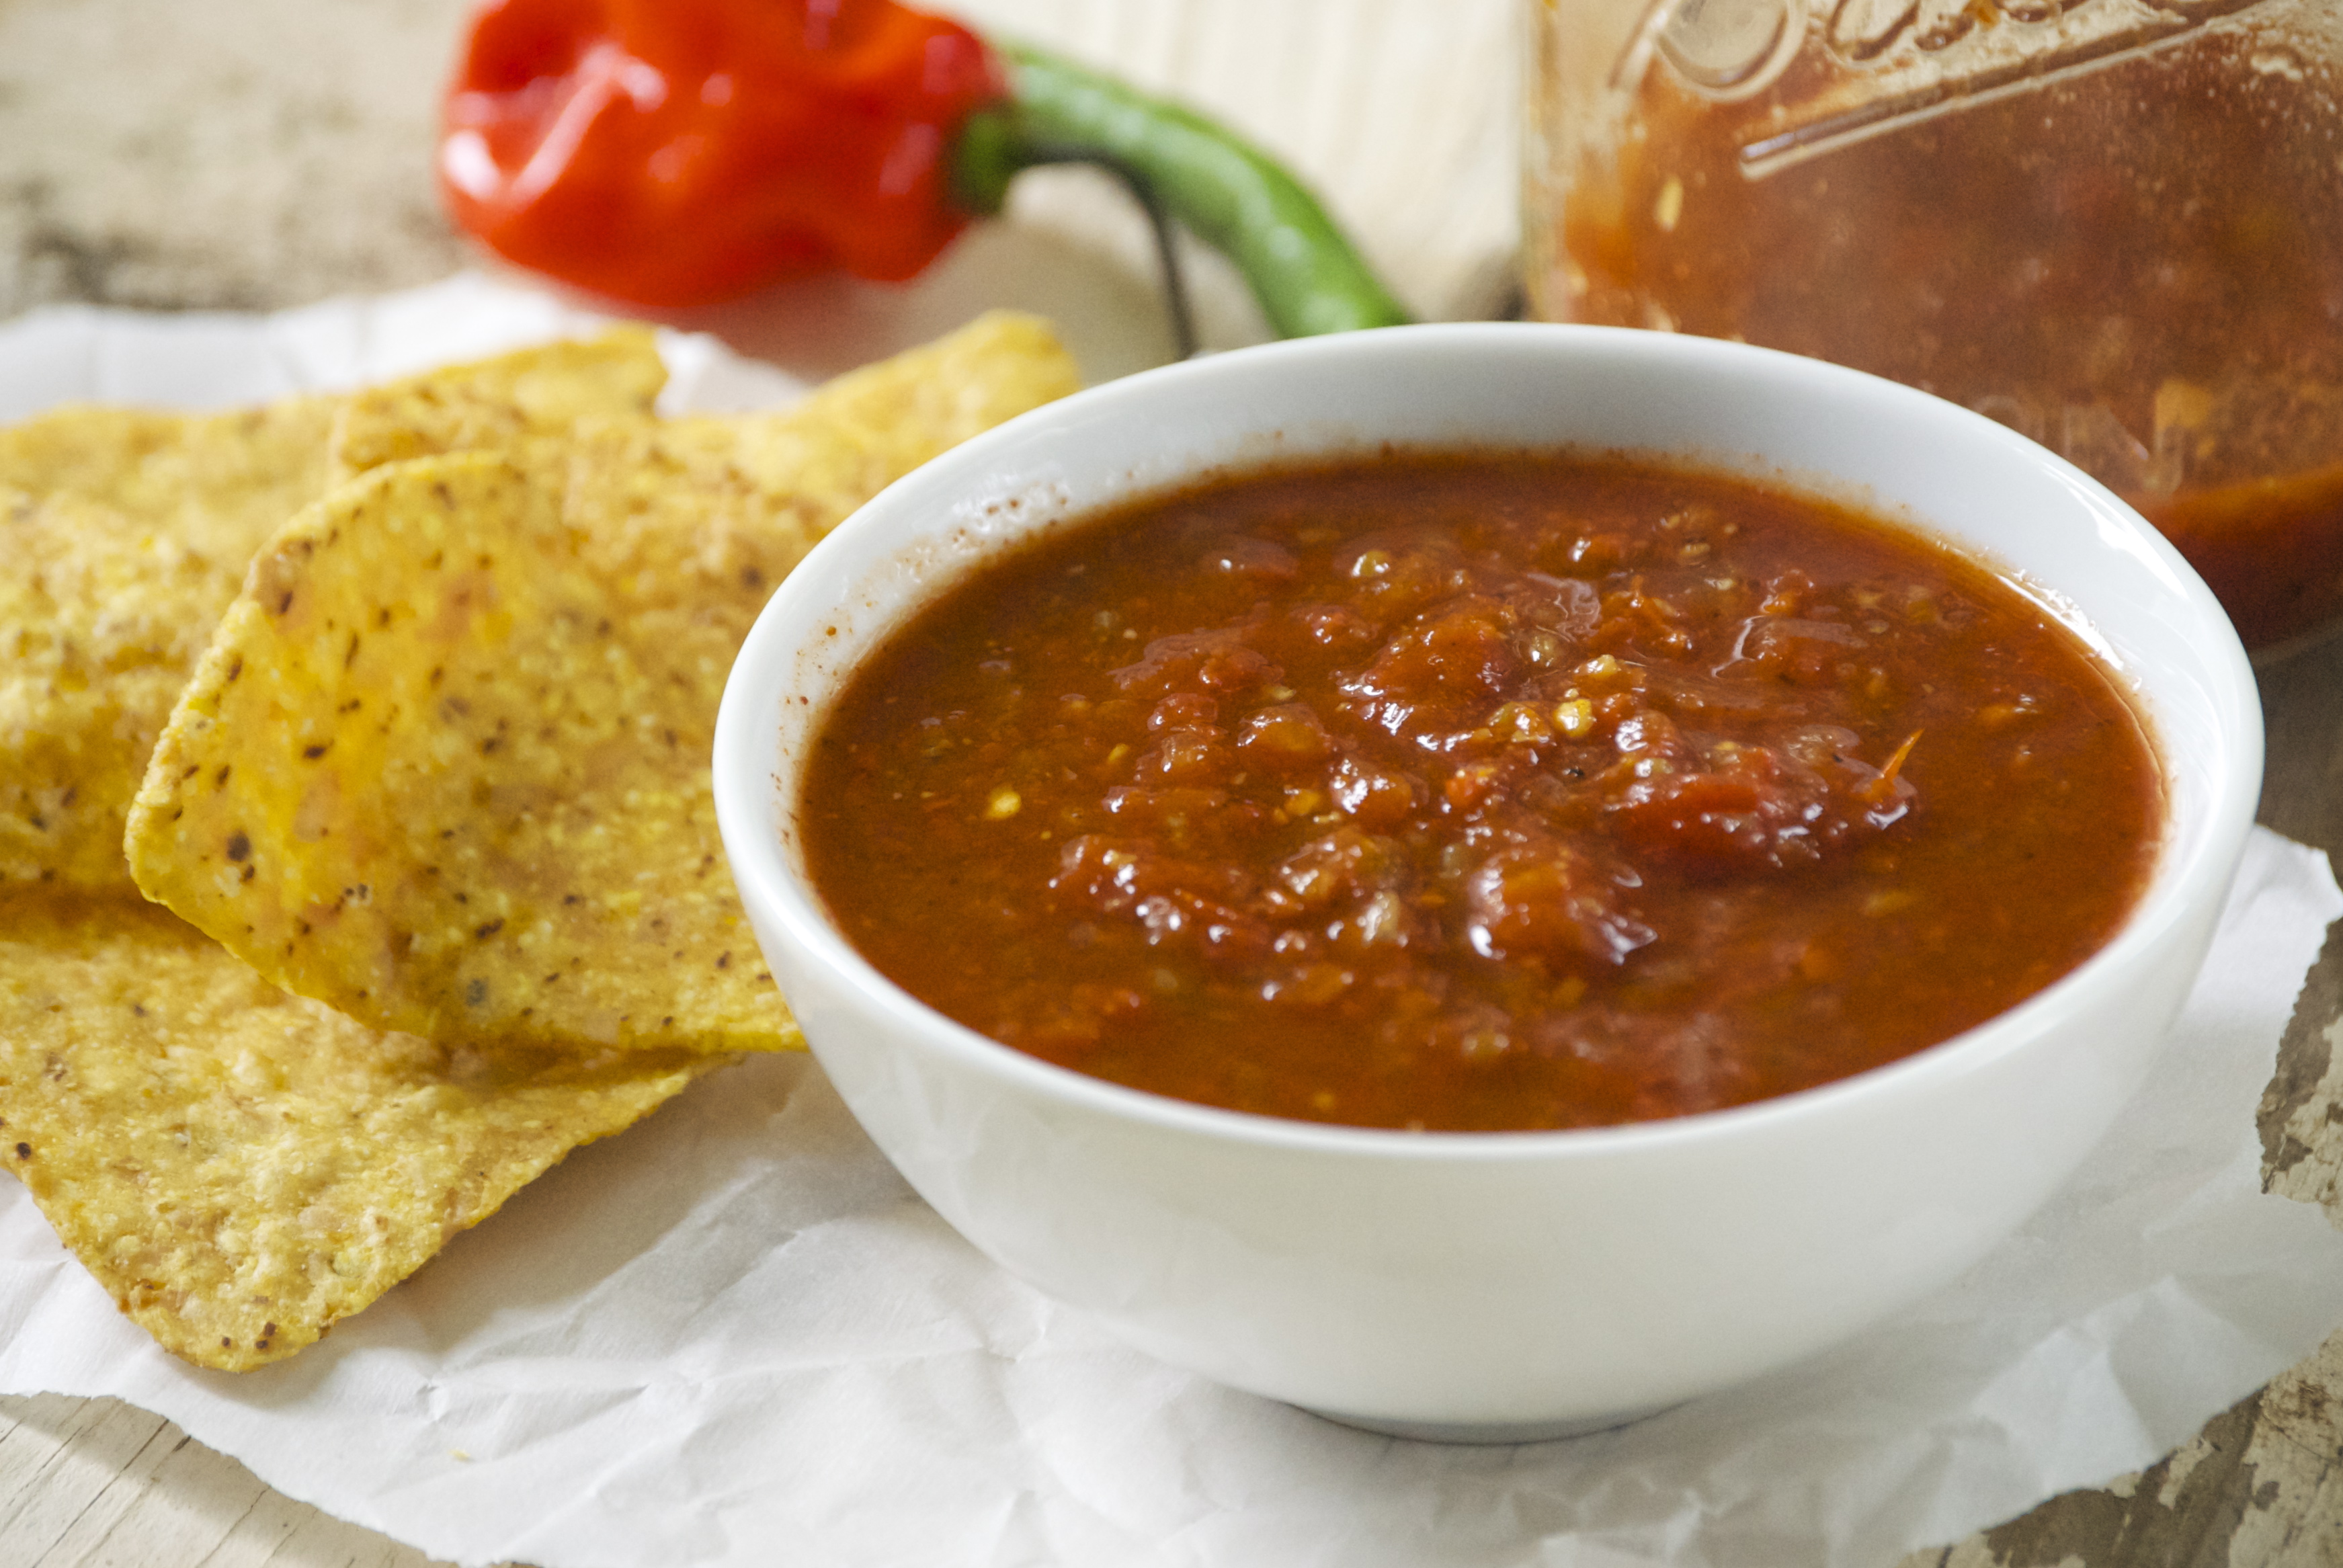
I started making a version of this salsa years ago– Radd’s aunt shared her base recipe with me.  Over time and many, many experimental batches, the recipe evolved into what you see here.  As you likely know, we like things spicy in our house.  For those less-courageous friends, as well as our kids, I make a much milder version.  The point is, you really have full control over how fiery you want this salsa to be.  If you have questions on how much heat a specific type of pepper adds, take a look here for comparison.  This year I made my mild version, but for my hotter “Inferno” batches I used a pile of habaneros.  And this weekend I tracked down some Bhut Jolokia “Ghost” peppers  (1,000,000+ Scovilles!) for a batch that I hope will be face-meltingly hot for my husband, who is crazy.

Perfect Canned Summer Salsa | Relishing It

Aside from control of the heat, you can also vary how chunky you want the salsa to be.  Over the years I’ve changed my method.  I used to roughly chop everything and then use an immersion blender at the end for a very smooth texture.  More recently, I’ve stopped doing that, since I like my salsa to have a few more chunks.  Instead, I pulse everything in the food processor before cooking it.  It cooks down to the perfect consistency for my taste.  If you don’t have a food processor– you can just chop, chop chop!  To be honest, the bulk of the work in making salsa is chopping the ingredients– the rest is a waiting game.  Waiting for it to become the right consistency.  Waiting for it to process in the water bath.  All in all, it generally takes me about 3-4 hours from start to finish.  But it’s well worth the time.  Especially when you get to open up a jar and settle in front of the t.v. during a January snowstorm.

Perfect Canned Summer Salsa | Relishing It

Just a few notes on preserving your salsa.  Since this recipe is my own, it obviously doesn’t come from a canning website.  Canning is a big responsibility.  It’s not difficult, but there can be risks.  I’ve poked around the internet to compare this recipe with others for safety purposes.  The amounts and ratios of vinegar, tomatoes, and peppers is typical of many from canning sites.  I’ve made my salsa this way for about 15 years and have never encountered a problem.  Even so, if you do have any concerns, I suggest taking a look at one of the many websites and blogs devoted to canning.

Perfect Canned Summer Salsa | Relishing It

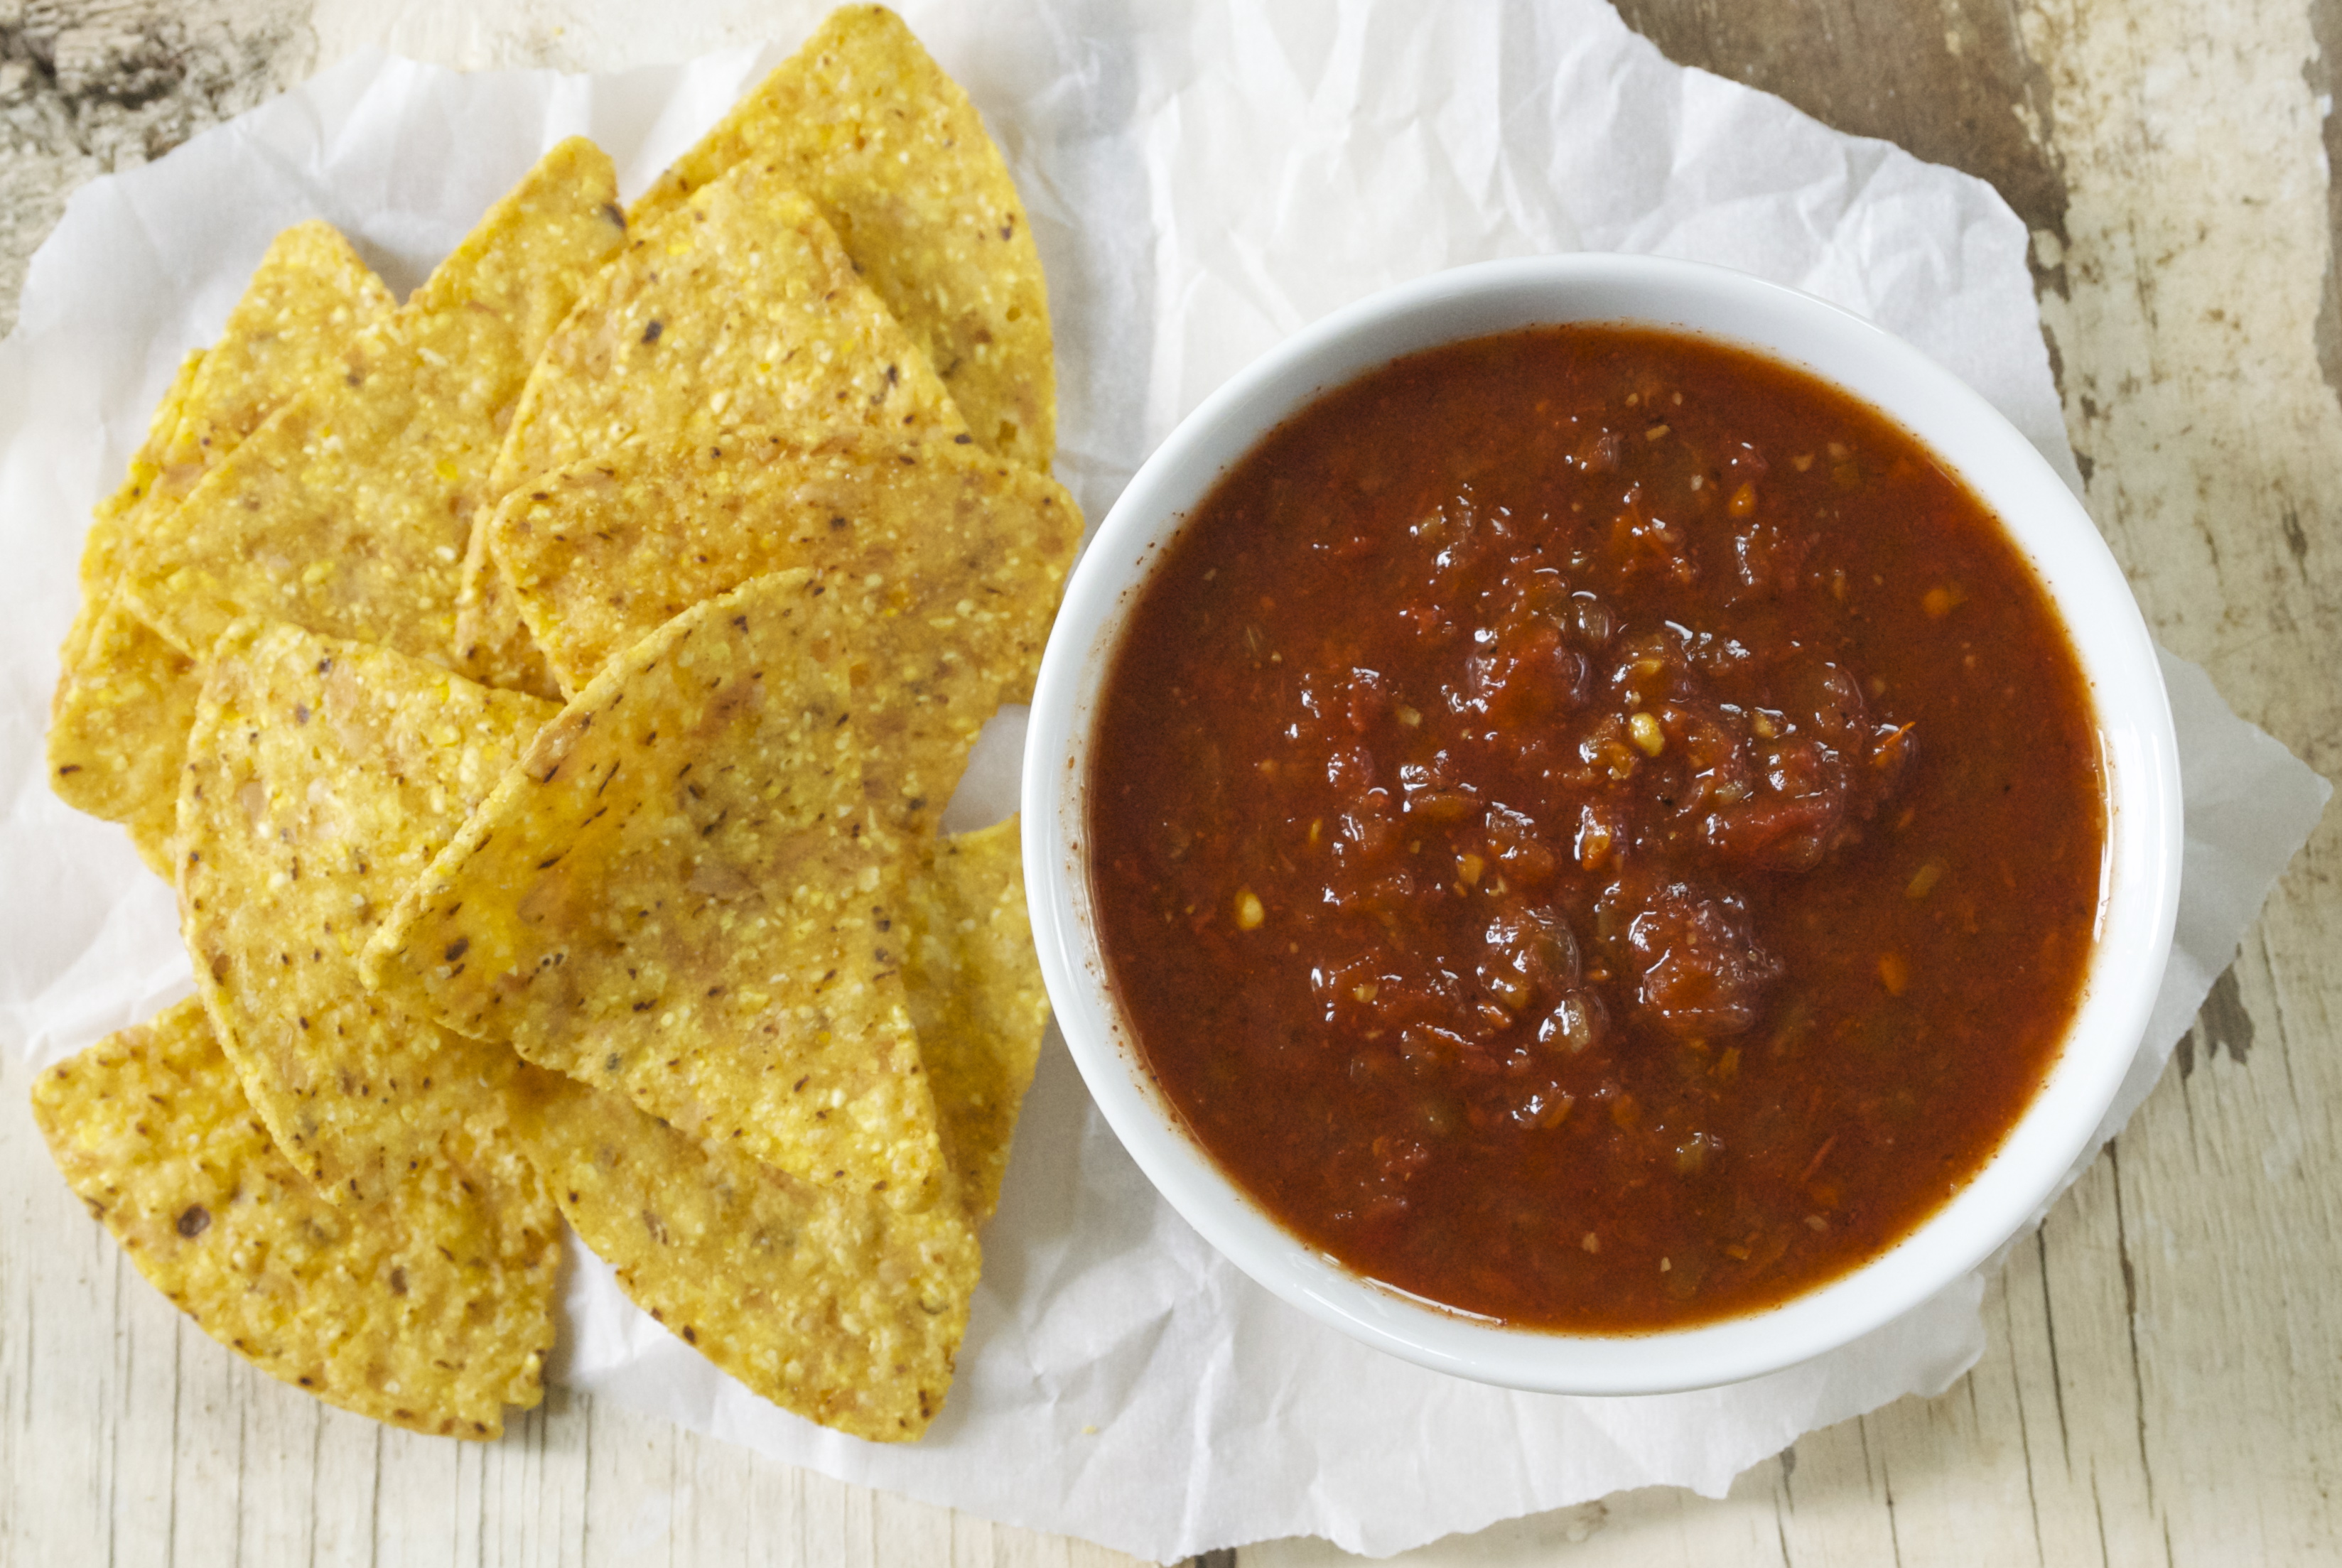
So, for those of you who have been patiently waiting for me to share this recipe– here you go!  I hope you love it so much that you make batches upon batches for your family and friends, as well.  Cheers.

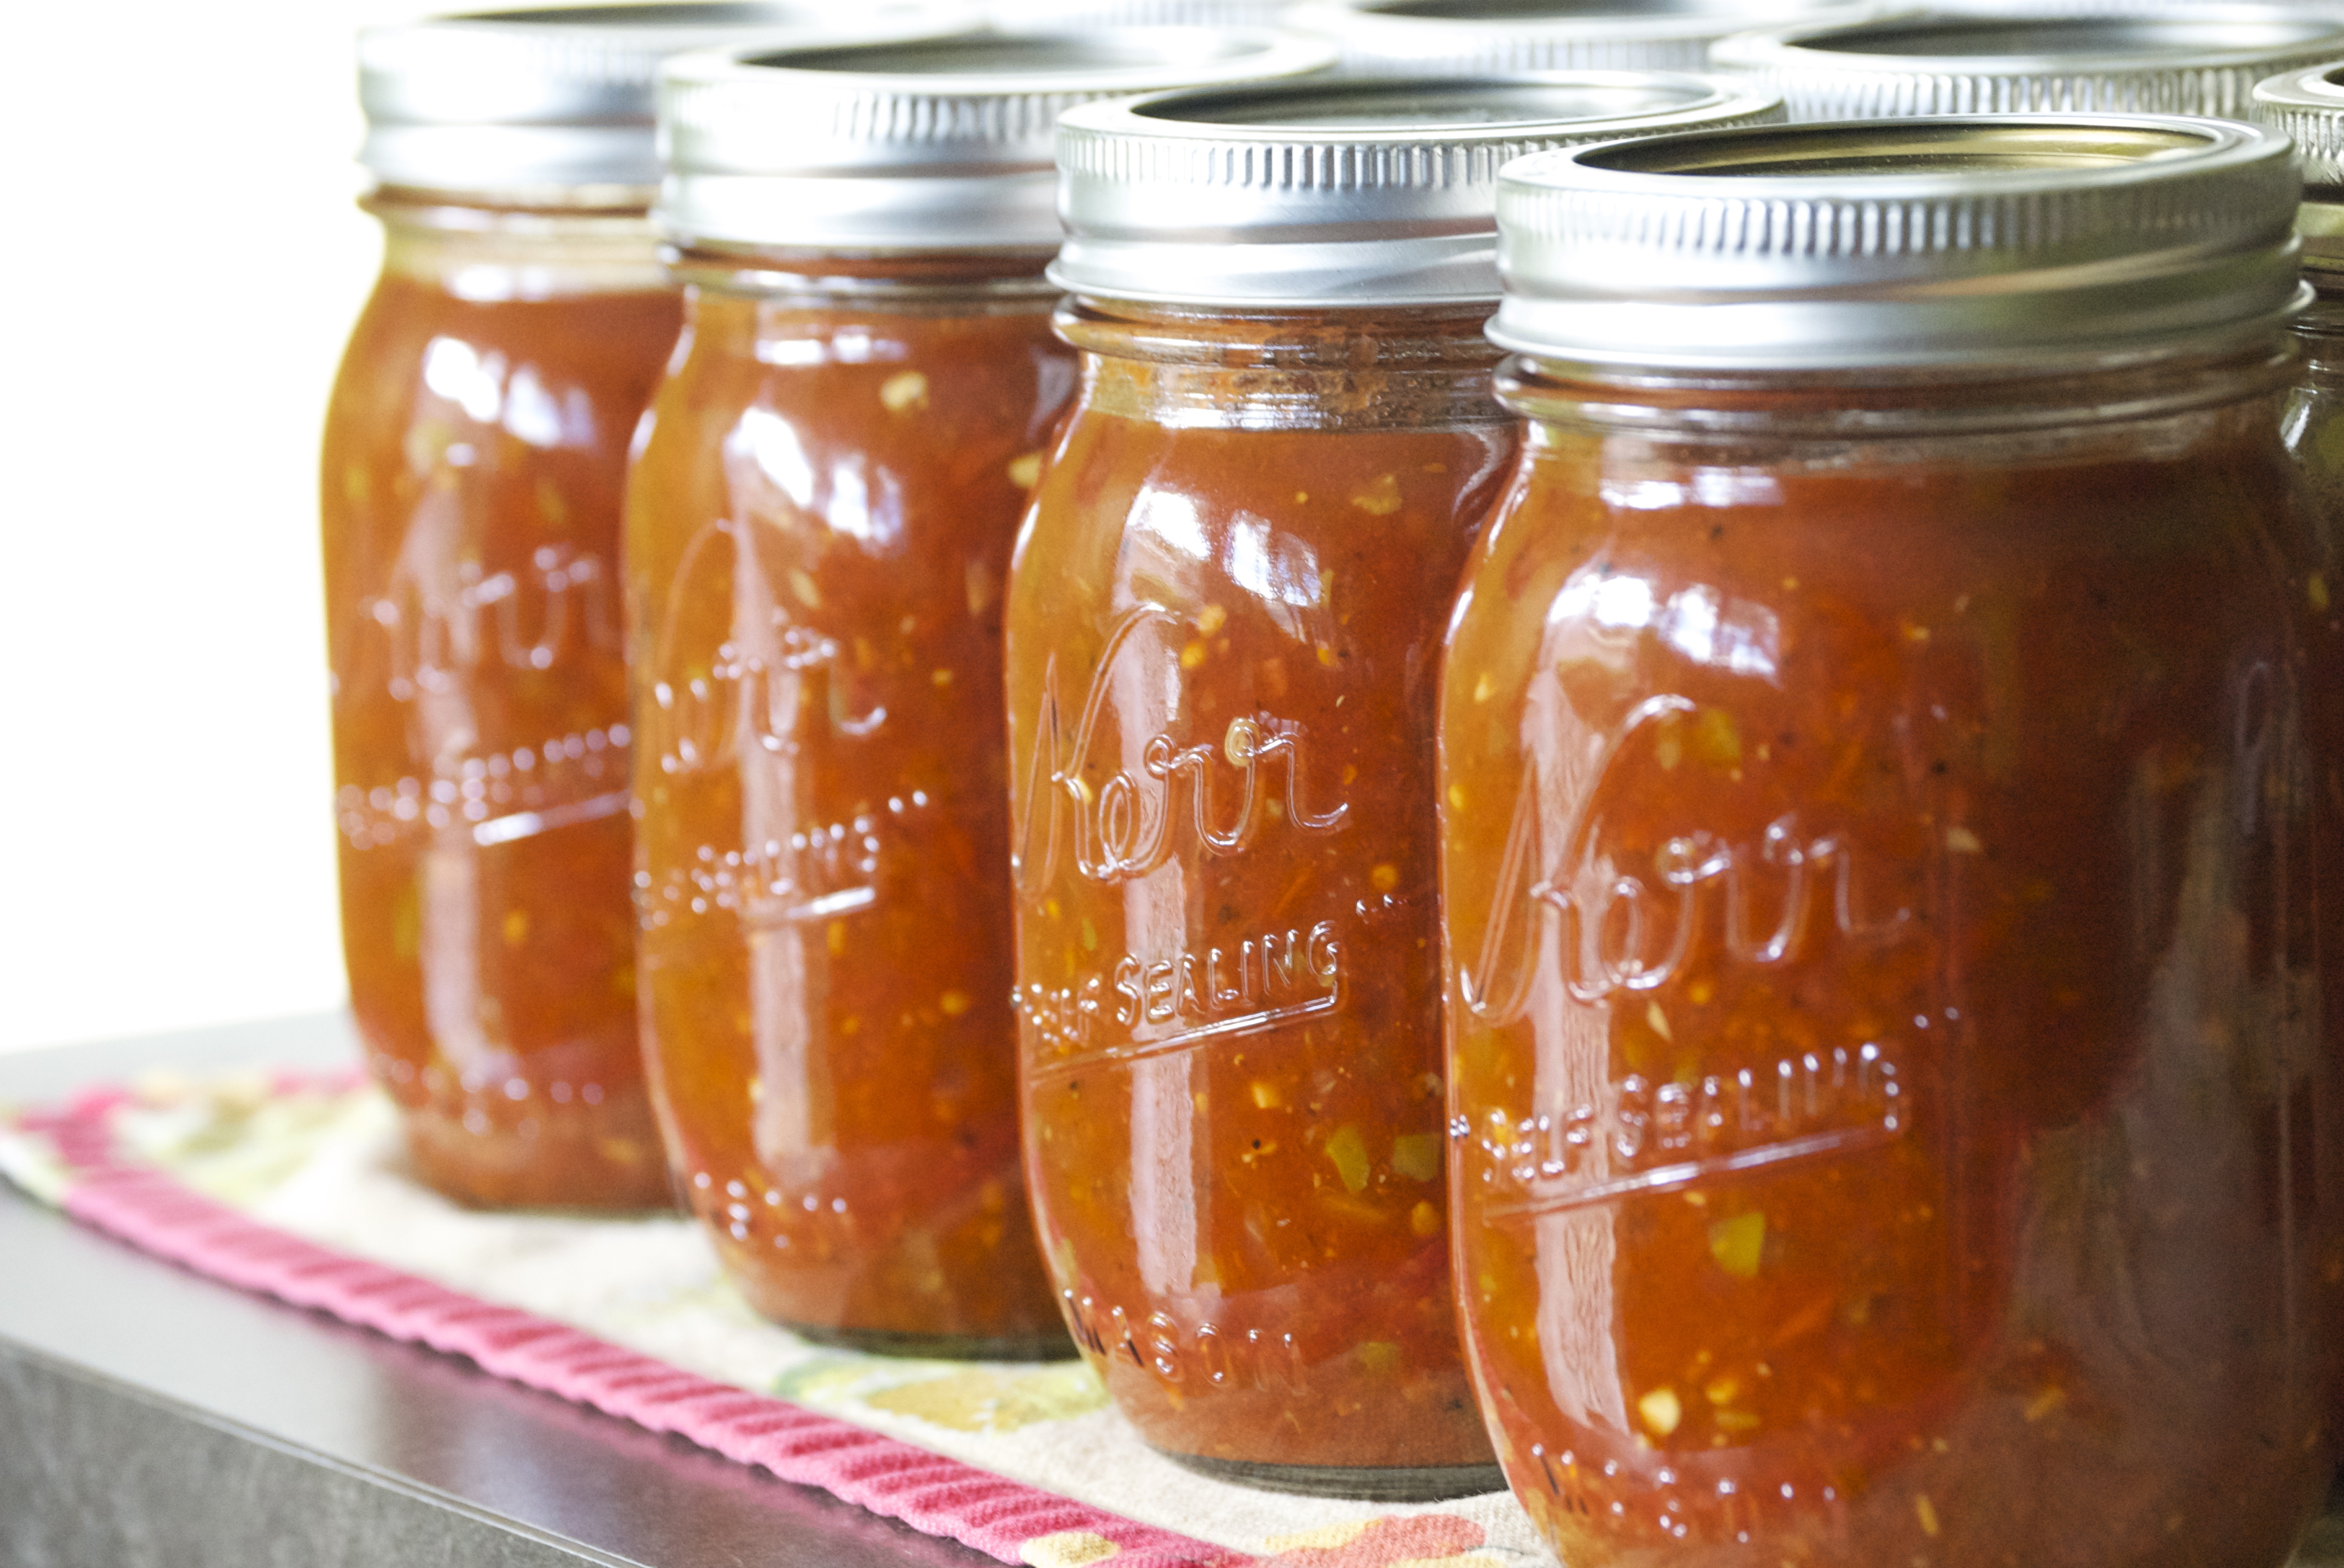
The Recipe: Perfect Canned Summer Salsa

(makes about 14-15 pints.  Though I generally get different amounts each batch.  Much will depend on the water content of your tomatoes and how long you cook the salsa.)

16 cups chopped tomatoes  *measured in a liquid measuring cup after they have been through the food processor  (about 8 pounds) I use big, huge canning tomatoes– no need to peel them

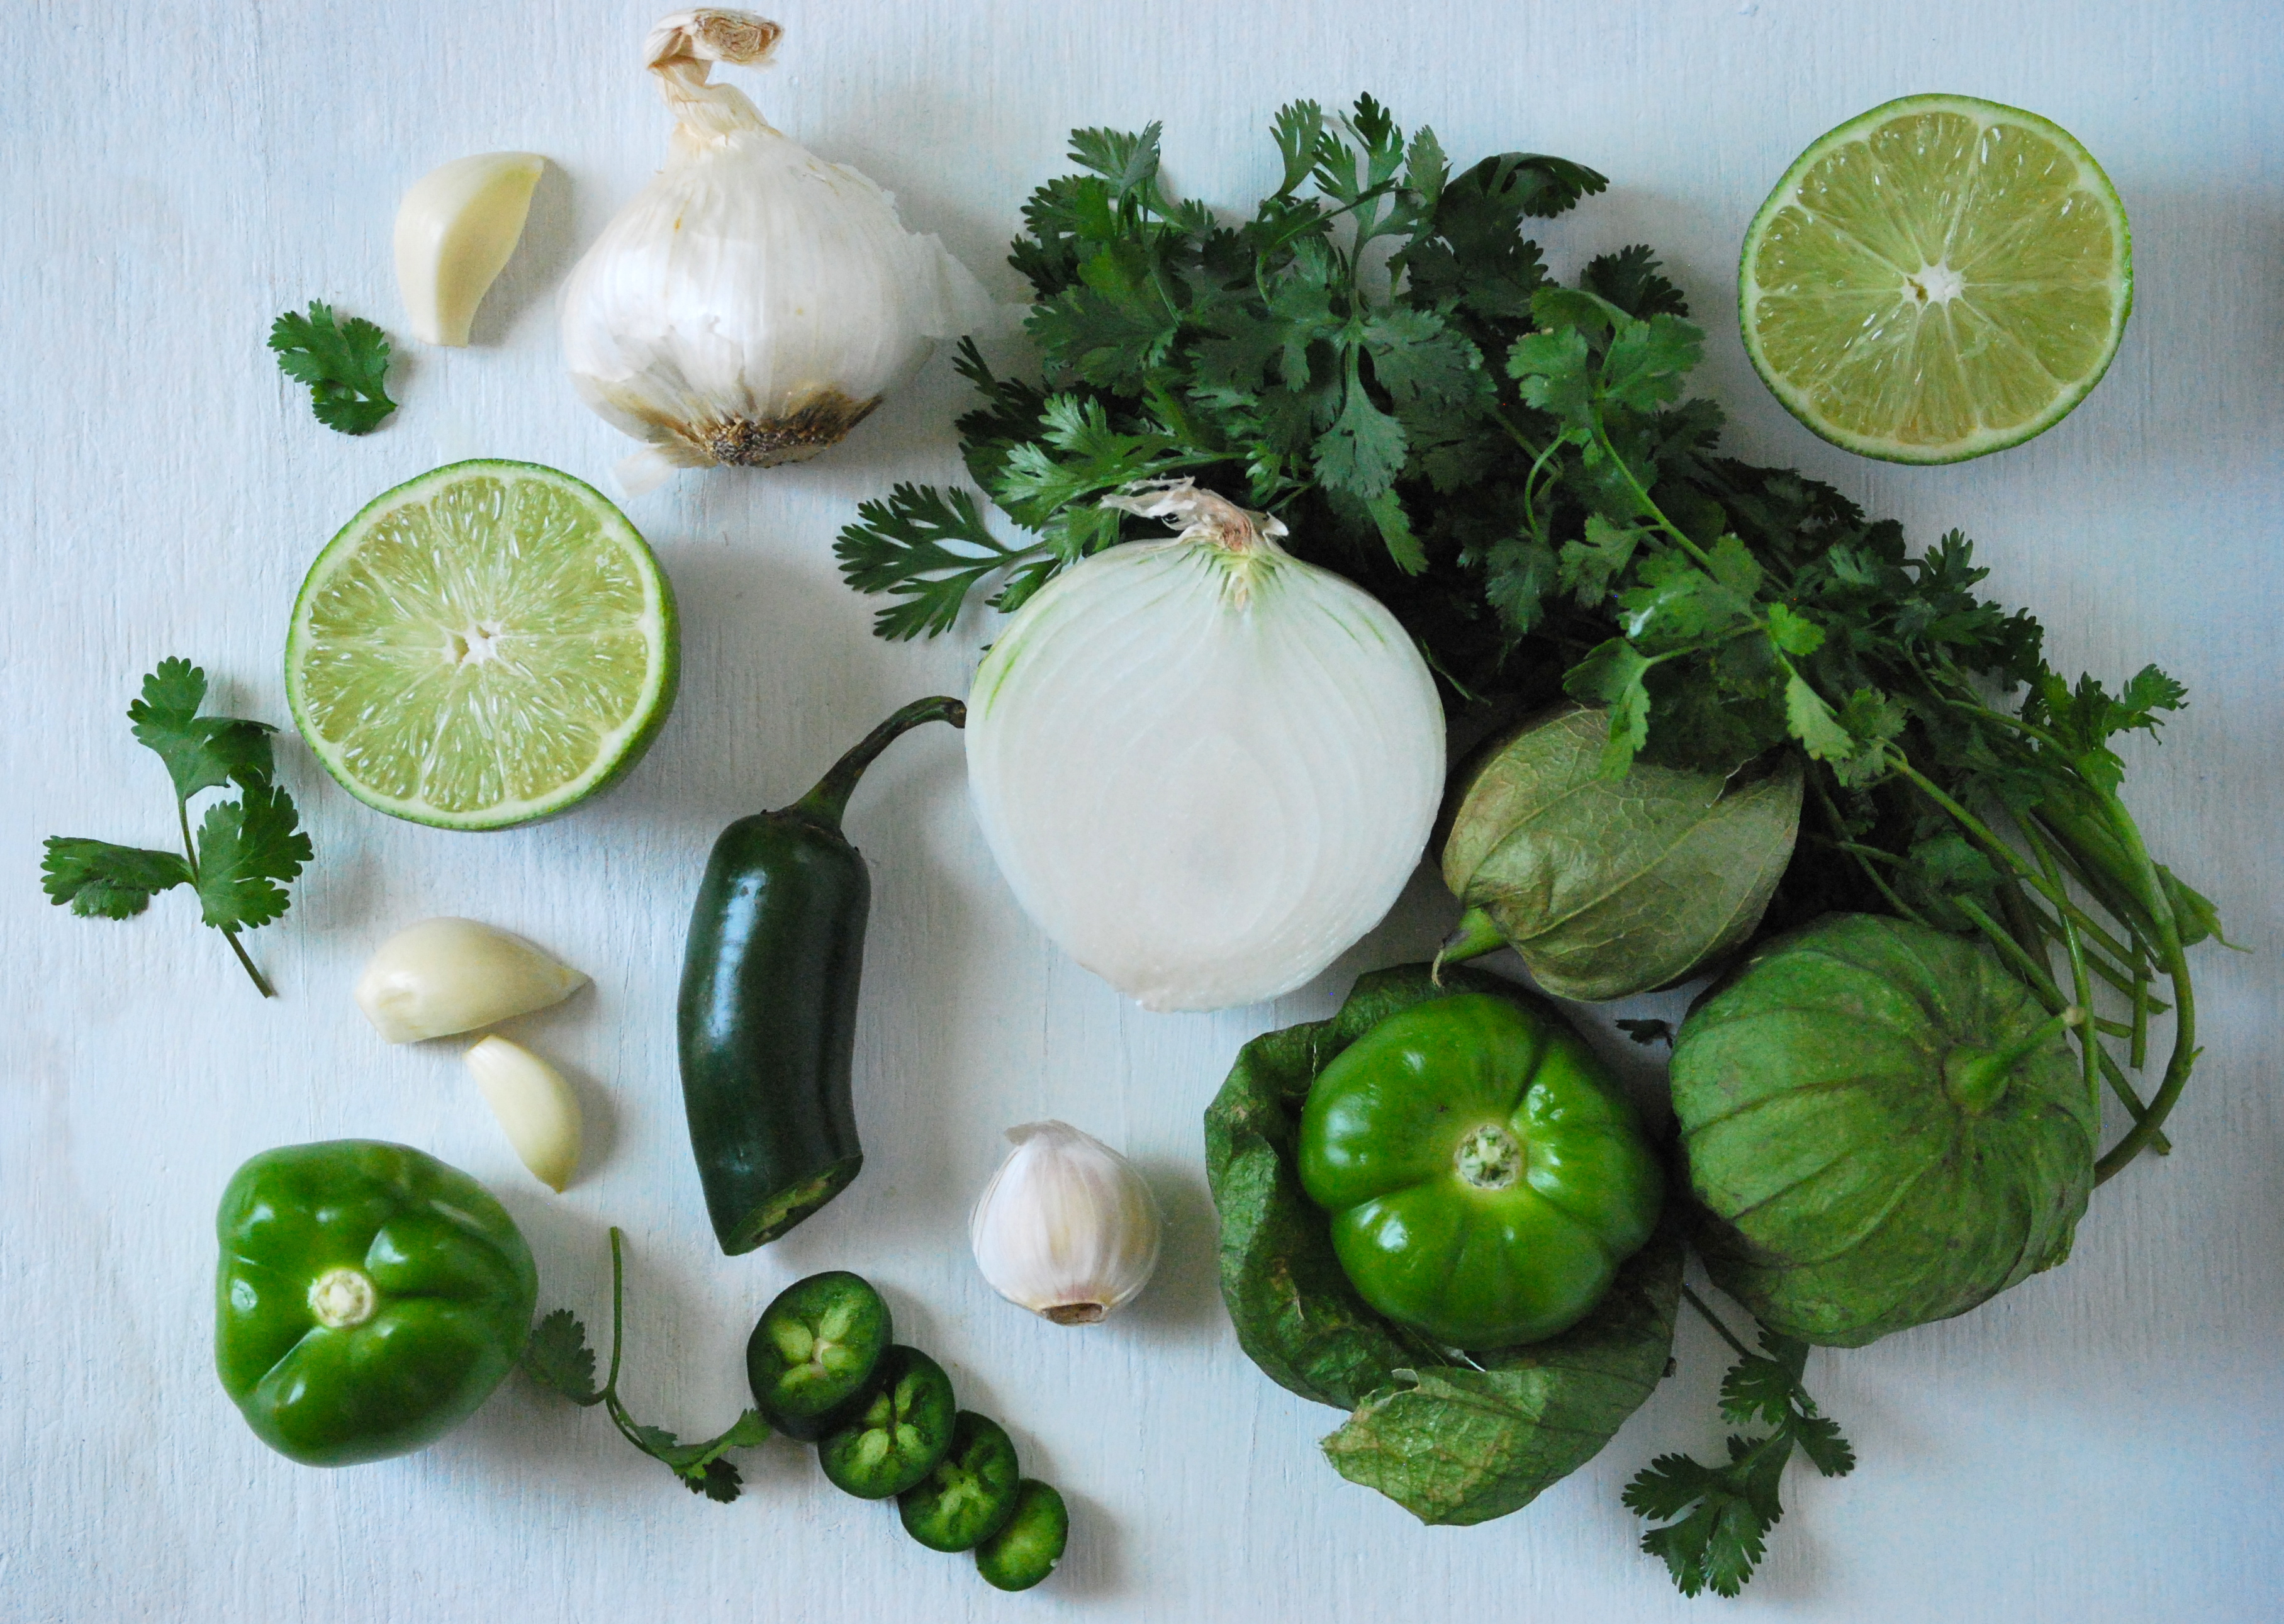
3 large green bell peppers, chopped

3 large white onions, chopped

2 bulbs of garlic, chopped  (not 2 cloves–2 entire bulbs!)

hot peppers, seeds too  (to your liking)  *See Note

5 tablespoons ancho chili powder

3 tablespoons canning salt

3 tablespoons granulated sugar

2 tablespoons coarsely ground black pepper

2 teaspoons smoked paprika

1/2 teaspoon of EACH of these:

ground cumin, onion powder, garlic powder, and oregano

1 cup plus a splash extra cider vinegar

15 ounce can of plain tomato sauce- preferably organic and definitely without added sugar  (Muir Glen works well)

Note:  You can make this salsa as hot or as mild as you want.  I would suggest using about 3 jalapeños for a mild version.  I chop the seeds and all.  It won’t be spicy, but the jalapeños will give it a great flavor.  For our favorite version that we call “Inferno”, I use: 12 habaneros, 5 jalapeños, 12 chilis, and 8 serranos.  If you do enjoy hot salsa, I would encourage you to seek out some habaneros, as their unique, almost sweet-like flavor cannot be beat.  When working with the very spicy peppers, it is a good idea to use plastic or latex gloves, if possible.  Be very careful about what you touch.  Also, be careful about inhaling too closely to the chopped peppers.  

Note: Jars and rims can be re-used over and over again.  Lids (the flat piece with a glue-like substance)  needs to be replaced every time you can something.  

You will need:  A very large heavy-bottomed canning kettle to hold all of the chopped ingredients.  Another very large kettle (or two) to process the filled jars of salsa, and hopefully a rack to set on the bottom of it (though you’ll be fine without, too).   A small saucepan to boil the lids and tongs to lift them out of the hot water.  A ladle to fill the jars.  A jar lifter, to remove the processed salsa from the hot water bath.  Paper towels, for wiping the edge of the jars clean.  15-16 pint jars with lids and rims.

Let’s get started!  Use a food processor (or a knife and cutting board) and pulse each type  of vegetable separately.  I do mix the onions and garlic together.  You will not want large chunks and you will not want it finely puréed, but something in between.  Place all of the ingredients for the salsa into a large heavy-bottomed kettle and stir.  Bring to a boil, then reduce heat to medium (uncovered) and let cook for about an hour (or more), or until it is your desired consistency.  It should be bubbling, but not at a rolling boil.  You may need to cook it longer to get it as thick as you want it.  A lot will depend on your tomatoes and their water content.  Make sure to stir frequently, to avoid scorching.

Meanwhile, fill a large canning kettle (or two) halfway full of water and begin to heat.   You will be using this to give your filled jars a hot water bath.  I used to use two smaller kettles for this, but recently discovered that my husbands huge kettle for brewing beer worked very well.  If you can fit a cooling rack on the bottom, do it.  It’s good to not have the jars on direct heat– but, you should be fine if you don’t have one.  At this point, you should have decided how you want to sterilize your jars and rims.  Some people like to dip them in the boiling water to do so.  I use my dishwasher on the “sterilize cycle” and time it out for them to be done just as the salsa is ready to be jarred.  You will also want to fill a small saucepan with water and place the lids in it.  Turn it on low/medium– this is an important step as it not only sterilizes the lids, but more importantly, it softens the glue-substance, so it can seal properly.

When your salsa is ready, begin ladling each jar with salsa.  Make sure to leave about 1/4 – 1/2-inch space at the top.  Wipe the edge of the jar clean with a wet paper towel.  Place a lid (using tongs to grab them out of the hot water), and then a rim on each jar.  Repeat until all the jars are full and the salsa is gone.  Next,  use a jar lifter to gently place the filled jars into the hot water bath.  Fit as many as you can into the kettle.  The jars should be covered with boiling water.  Cover and process for 20 minutes.  Remove using the jar lifter and place on a kitchen towel.  You will most likely hear the seals start to pop within minutes.  This is a good thing.   Repeat until all the jars are processed.  After a few hours, touch the tops of the jars, they should all be flat against the jar and not make a sound if tapped.   If not, it did not seal properly and you should place that particular jar in the refrigerator and use first.

Alright!  You did it– let me know if you have anymore questions.  I hope I covered everything.  Your first canning experience may seen lengthy, but the more you do it, the more comfortable you will become.  Enjoy!

As always, thanks for stopping by Relishing It!

xo

Laurie

Read Full Post »

Homemade Sandwich Buns

Homemade Sandwich Buns | Relishing It

St. Paul was buzzing yesterday.  School started and everyone was excited as the kids headed out the door.  My sweet boy, Aanen, proudly made the walk down the street and into our nearby school, hand-in-hand with his dad.   I was both proud and sad to see him wave goodbye.  I have Aria for several more days at home, since pre-kindergarten doesn’t start until next week.  To be honest, I’ve been surprised that these first few days went off without a hitch.  All summer our kids stayed up far too late, and slept in until 9 a.m. every morning.  But the change in schedule didn’t seem to affect them too much, and we haven’t skipped a beat.

Homemade Sandwich Buns | Relishing It

The other big news in my world is that one of my dearest friends, Angharad, is moving to the UK.  Yesterday Aria and I had a chance to say our goodbyes to her at lunch.  She and her husband are moving to London, and while I’m happy and excited for them, I’m more than a bit sad.  I will miss this girl tremendously.  I’m already plotting how to save money for a visit to England.  Best of luck to the both Dan and Angharad as they settle in on their new life overseas.

Homemade Sandwich Buns | Relishing It

Alright, on to talking about food.  I’ve been excited to share this amazing bun recipe with you all summer.  I’ve made several batches, and every time they’ve turned out perfectly.  The flavor can’t be beat.  The buttermilk gives them a subtle tang, while the butter keeps them moist (sorry to those of you that hate that word).  These are great all-purpose buns.  We’ve eaten them with pulled pork (doused with this amazing mustard sauce), burgers, and regular summer sausage.  This bun is it!  It holds up really well– it isn’t too soft, or too dense, and has a nice beautiful crust.  Best of all, it lasts for a few days (when properly re-warmed in the oven).  It really is the only bun recipe you’ll ever need.

Homemade Sandwich Buns | Relishing It

A couple thoughts on baking bread.  First of all, if you dismiss the idea of baking your own because you think it’s too difficult and not worth the trouble, reconsider.  There is virtually no work involved in these buns (or most any bread, for that matter).  Most of it is a waiting game. The results are fabulous and you will feel so happy when you pull that pan out of the oven.  Second, and I know I’ve mentioned this before, but if you invest in a scale, your baking will turn out perfectly almost every time.  Accuracy is the key to better results.  I hope you give these buns a try and enjoy them as much as we have!

Homemade Sandwich Buns | Relishing It

The Recipe:  Homemade Sandwich Buns

21 1/4 ounces (4 1/4 cups) bread flour

2 teaspoons rapid rise yeast

1 1/2 teaspoon kosher salt

3 tablespoons granulated sugar

1/4 cup (4 tablespoons) butter, cut into pieces,  at room temperature

1 1/2 cups buttermilk, heated to 100°F

1 egg, lightly beaten, at room temperature

1 egg mixed with 1 teaspoon water, for egg wash

Poppy and sesame seeds, for sprinkling, if desired

Note:  I’m giving the instructions for making these buns using a stand mixer, because I have one.  If you don’t, they buns can easily be made the old-fashioned way.  Instead of using a dough hook, just knead it with your hands/arms for several minutes.  You’ll want the dough to be smooth and silky.  You don’t want it to be too dry or too sticky.  If it is a bit dry, simply add more buttermilk.

In the bowl of a stand mixer fitted with a paddle attachment, add the flour, salt, yeast, and sugar.  Mix to combine for a few seconds.  Then add 1 egg, butter pieces, and warmed buttermilk.  Mix on low until the liquid has absorbed and the dough forms a ball.  Remove the paddle attachment and use the dough hook.  Mix on medium for about 6-8 minutes, or until a beautiful, silky ball has formed.  Then place in an oiled bowl.  Drizzle a bit of oil on the top of the dough and gently smooth it all over.  Cover the bowl with plastic wrap and place in a draft-free area.  Let rise for about 1 1/2 – 2 hours, or until doubled in size.

When the dough has properly risen, divide the dough into 12  3-ounce balls (you may have a smidge of dough leftover).  Work the balls into proper bun shapes, placing the seam side down.  Place them on a 12 x 15 baking sheet (or use two smaller ones) that has been lined with parchment paper.  Spray olive oil on top of the buns and cover with plastic wrap for 20 minutes.  Then, with the plastic wrap still on the buns,  gently press down on each bun with your fingers to flatten it a bit.  Otherwise you will end up with a round dinner roll (which can be great, but not for sandwiches).  Let rise again for another 1- 1 1/2 hours, or until they are big enough for your liking.

Meanwhile, preheat the oven to 400°F.  When the buns have adequately risen, use a pastry brush to apply the egg wash.  Sprinkle with sesame or poppy seeds.  Bake for about 15 – 20 minutes, or until the tops of the buns are a deep, golden brown.  Enjoy immediately or keep for days in an airtight container.  Re-warm in a 350°F oven for a couple minutes before eating.

Source:  Adapted from Brown-Eyed Baker.

Thanks for stopping by Relishing It!

xo

Laurie

Read Full Post »

Homemade Mayonnaise via Relishing It

Are you ready for another do-it-yourself recipe?  This time it’s homemade mayonnaise.  And yes, there’s a pattern here– I love making my own condiments.  If you missed them, here’s are a few recipes for ketchup, mustard, and tomato jam.  They taste more interesting, and to be honest, better than the same old highly-processed formulas you find at the grocery store.  Making your own mayonnaise is easy, and despite what you may have read, doesn’t take long.  There’s only one catch– you’ll need to use it up within a week since it contains a raw egg yolk.  Trust me, you won’t have a problem finishing it off with all the fresh produce out this time of year.  Sandwiches, BLTs (fresh tomatoes, yay!), potato salad, aioli’s, everything tastes better with homemade mayonnaise.

Homemade Mayonnaise via Relishing It

Homemade Mayonnaise via Relishing It

Homemade Mayonnaise via Relishing It

Homemade Mayonnaise via Relishing It

Homemade Mayonnaise via Relishing It

I like to make my mayonaisse with healthy olive oil, which gives it a wonderful layered flavor.  You can use canola instead if you prefer something more subtle.  Or feel free to do a mix, just make sure you equal the amount of oil listed in the recipe and you’ll be fine.  One other note on this recipe that’ll make it almost foolproof.  A trick I learned from food writer, Melissa Clark.  Add one teaspoon of water to the mixture.  It’s such a simple step, but it can make a huge difference on whether or not the mayonnaise turns out perfectly silky.  That’s it.  It works every time for me.  Now get in there and whip up your own batch of homemade mayonnaise.  And don’t forget you can make it as interesting as you like by adding fresh herbs, spices, or harissa. Or you can simply fold it into a bowl of steamed fingerlings and top with freshly chopped parsley.  It’s one of the quickest and most delicious potato salads around.  Enjoy!

Homemade Mayonnaise via Relishing It

Fingerling Potato Salad with Homemade Mayonnaise via Relishing It

Fingerling Potato Salad with Homemade Mayonnaise via Relishing It

The Recipe: Homemade Mayonnaise

1 teaspoon Dijon mustard

1 pasteurized egg yolk, at room temperature

1 tablespoon lemon juice (from 1/2 large lemon)

1/4 teaspoon fleur de sel

1 teaspoon water

3/4 cup extra virgin olive oil (I prefer California Olive Ranch— both for the fantastic quality and the great price)

In a medium sized bowl, whisk all of the ingredients together, except the olive oil, for a minute or so until frothy.  Then, while continuously whisking, slowly begin adding the olive oil a drop at a time.  As it begins to thicken, you may start adding it in a very thin stream, remembering to whisk the entire time.  The slower you add the olive oil, the better chance you have of it not breaking.   The whole process will take about 15 minutes, or so.  Transfer it to a jar, and store in the refrigerator.  Re-season with salt, if necessary.  Use within one week.  Enjoy!

Thanks for stopping by!

Laurie

Read Full Post »

Salad of Green and Yellow Split Peas with Pesto via Relishing It

In case you haven’t caught on yet, I’m a huge advocate of having a pantry stuffed with dried goods.  Legumes, grains, you name it, I’ve got it in a mason jar ready for use.  And on those occasions when I notice it isn’t stocked full, I briefly panic and then run out to replenish whatever is missing.  I guess it’s almost a compulsion, since it’s not like I’m going to not have access to food– I live a few blocks from our co-op.  I may be a little crazy, but I embrace it.

Salad of Green and Yellow Split Peas with Pesto via Relishing It

Summer is a great time to combine those dried goods with some of the season’s freshest offerings.  I love the combination of peas and pesto.  Using dried yellow and green split peas here works beautifully and is absolutely stunning to look at.  The sliced scallion on top provides a nice crunch and a burst of freshness.  This salad is also very filling– it’s one of those that can be a stand-alone meal.  And with a smaller portion size, it pairs wonderfully with most any grilled foods.

Salad of Green and Yellow Split Peas with Pesto via Relishing It

Salad of Green and Yellow Split Peas with Pesto via Relishing It

About this time of year, I also start to make large batches of pesto to freeze for the winter.  I’ll pop a small portion into ice cube trays or muffin tins to fully freeze.  I then pop them out, wrap them in plastic wrap, and put them into freezer bags (or use my vacuum sealer).  It’s a wonderful treat in the cold winter months to have pesto to mix into pasta or to dollop into soups.  If you choose to do this– a word of advice.  If you blanch your greens for just 30 seconds or so, then put it into an ice bath to stop the cooking process and proceed with the recipe–your pesto will remain a beautiful, vibrant green, even after it has been frozen.  I always use this method if I’m planning to freeze my pesto, or even if I know I’m going to have leftovers that may sit in my refrigerator for a few days.  The color just ‘pops’.  One more trick regarding pesto, remember you have the option to add a bit of water instead of more olive oil to loosen it up if it’s a bit thick.  Either way, be sure to season it appropriately with kosher salt– the right amount can make the pesto sing!  Enjoy!

Salad of Green and Yellow Split Peas with Pesto via Relishing It

The Recipe: Salad of Green and Yellow Split Peas with Pesto

(serves 4-6)

Large bed of leafy lettuce leaves

1 cup dried green split peas

1 cup dried yellow split peas

1 bunch of sliced scallions to garnish

For the Pesto:

1 cup packed basil leaves

1/4 cup packed Italian leaf parsley

3 cloves garlic, smashed

1/4 cup grated parmesan or grana padano cheese

1/4 cup walnut halves, toasted and roughly chopped

1/3 – 1/2 cup extra virgin olive oil, or more

sprinkle of hot pepper flakes

kosher salt and freshly ground pepper, to taste

To cook the Split Peas:  Rinse the peas and place in a large saucepan.  Cover with salted water, making sure that about two inches of water are above the peas.  Bring to a boil, then reduce to a medium/low.  Cook for about 25 minutes, then begin testing them for doneness.  You may need to cook them longer, depending upon how high your heat was.  You will want them to be soft, but retain their shape.  Be careful not to overcook them, or they will turn to mush.  When done, drain the water and let cool.

To make the Pesto:  As I stated above, you can choose to blanch the greens or not, depending upon how fast you’re going to use the pesto.  You decide.  Place either the blanched or unblanched basil and parsley into a small food processor (use a large one, if making a bigger batch).  Pulse a few times to chop up a bit.  Add the parmesan, walnuts, garlic, red pepper flakes, and a pinch of salt and pepper.  Pulse a couple more times to combine.  With the machine running on low, slowly begin adding the olive oil.  Scrape down the sides, as necessary.  Add as much olive oil to reach your desired consistency.  Or, add a few tablespoons of water at the very end to loosen it up a bit.  Re-season with salt and pepper.  Use right away, or place in the refrigerator with plastic wrap tightly pushed onto it’s surface, or freeze.

Place the lettuce leave onto a large platter.  Mix the cooled split peas with about 1/3 cup of the pesto, use more if desired.  Add salt and pepper, if needed.  Pour mixture over the lettuce, top with sliced scallions, and a drizzle of good olive oil.  Enjoy!

Thanks for stopping by today!

xo

Laurie

Read Full Post »

Homemade Cultured Butter via Relishing It

The first time I made homemade butter I was eight years old.  I distinctly recall sitting in a circle with my classmates in Mrs. Peterson’s second-grade class.  We passed around a quart jar filled with fresh cream from a fourth-grade girl’s family dairy farm.  Each student shook the jar to exhaustion, and then passed it to the next.  Hand-to-hand, that jar moved around the circle until it suddenly transformed.  Mrs. Peterson spread a bit of that golden butter onto a saltine cracker for each of us to try.  It was amazing!

Homemade Cultured Butter via Relishing it

Homemade Cultured Butter via Relishing It

I still make homemade butter, though not nearly as often as I should.  And every time I do, I’m reminded of that first experience, and how incredibly simple it is.  You can either shake it in a jar, like I did that first time, but if you have a stand mixer you’ll find it’s even easier.  Really good store-bought butter is expensive, so it’s nice to be able to make my own.  My version is an organic, grass-fed cow, European-style (meaning it has a higher fat/less water content than traditional American butter).  It’s also cultured, which means it has a bit of a tangy flavor.  I add a little whole milk yogurt to the cream to achieve this.  You can control the level of  tanginess by varying how long you leave the mixture out at room temperature.  It’s that simple.

Homemade Cultured Butter via Relishing It

Homemade Cultured Butter via Relishing it

As always, use the best possible ingredients you can find.  Cream that hasn’t been ultra-pasteurized will give you the best result.  Though, if you don’t have access to such ingredients, give it a try anyway.  In Minnesota, my favorite cream comes from the Cedar Summit Farm.  Their products are organic, delicious, and they are the only 100 % grass-fed dairy in the state.  You may remember that I grew up on a small dairy farm, so I have a bit of a soft spot for a good one.  These guys are the real deal.

Homemade Cultured Butter via Relishing It

Homemade Cultured Butter via Relishing It

I prefer my cultured butter with a bit of sea salt.  Remember that your butter will last longer in the refrigerator with salt in it– it acts as a preservative.  Since the water content in this butter differs from regular varieties, it might be a good idea to not bake with it.  Instead, spread it on bread or fresh corn-on-the-cob and enjoy it’s unique, robust flavor.  I recently bought a flat of strawberries and made some jam.  It was absolutely heavenly swiping my piece of bread with butter and then spreading the strawberry jam on top.  Pure bliss.  Enjoy your butter making experience!

Homemade Cultured Butter via Relishing it

The Recipe:  Homemade Cultured Butter

1 pint good quality heavy cream, preferably organic and not ultra-pasteurized

2 tablespoons whole milk organic yogurt

1/2 teaspoon good sea salt, plus more to taste

In a large bowl, whisk the ingredients together and cover with a towel.  Let sit at room temperature until your desired level of tanginess is present, about 2 hours or longer.  When it tastes the way you prefer, pour the mixture into a stand mixer fitted with a paddle attachment, (or into a quart jar with a lid).  Turn the mixer on low.  Then wait and watch for a few minutes until the mixture first becomes somewhat fluffy and homogenous, and then starts to separate.  The buttermilk will separate from the cream.  Carefully pour that buttermilk into a container and save it.  It will be amazing used in your favorite pancake recipe.  Next, pour 1/2 cup of ice cold water into the butter and continue to mix.  Pour out the water and discard as it becomes cloudy.  Continue to do this until no buttermilk remains in the butter.  The whole process takes about 10-15 minutes.  Taste the butter and smooth out with a rubber spatula, add more sea salt, if desired.  The more salt in it, the longer it will keep in your refrigerator.  Enjoy!

Thanks for stopping by Relishing It!  Have a great weekend!

Laurie

Read Full Post »

Smashed Summer Pea Spread via Relishing It

I’ve mentioned here more than once that as the weather warms, I try to prepare more simple, fresh foods.  This spread is a perfect example.  I love peas.  Their slightly sweet flavor, that beautiful pop of color– they make every dish better.  When they start to become available at the local farmers markets, we eat them by the pound.  But– and here’s some real talk now– they rarely make it into a recipe.  By the time we’re done shelling them, they have been mostly eaten raw.  And if not, they’re a stand-alone side for our summer meals.  Here, I wanted to keep things simple, yet incorporate peas as the star ingredient.

Smashed Summer Pea Spread via Relishing It

Smashed Summer Pea Spread via Relishing It

For this dish I’ve added a few simple ingredients and a different style of preparation in order to turn ordinary peas into a delicious and healthy appetizer.  Sun-dried tomatoes, garlic, mint, and a bit of anchovy really work with the subtle flavor of peas. Don’t be scared of the anchovy– it adds depth, a bit of saltiness, but doesn’t taste fishy.  Add a few other nibbles, and you’ve got yourself a meal.  Make them with your freshly shelled peas, if you have them, or just rely on a bag of frozen organic ones from the freezer.  It just takes a few minutes from start to finish to get this delicious spread on the table.

Smashed Summer Pea Spread via Relishing It

Smashed Summer Pea Spread via Relishing It

My favorite way to serve this spread is on a grilled baguette brushed with olive oil and sprinkled with sea salt and black pepper.  It is heavenly.   And if you’re worried about the bread, no problem.  I also serve it along with other vegetables, including radishes and endive.  It’s brilliant.  As for the endive, if you’re not familiar with it, you should become so.  It’s a wonderful vegetable that is fantastic served with spreads– the shape makes it easy to fill.  It tastes great, and is a wonderful option if you are gluten-free or just trying not to consume as much wheat.  These smashed summer peas are a delicious healthy option for your 4th of July celebration (for my American friends) this weekend.   It’s easy to get caught up in the moment and over-indulge on chips, burgers, and all other sorts of less-healthy foods in the midst of celebrating.  With this on your table, you don’t have to worry about it.  Hope you enjoy!

Smashed Summer Pea Spread via Relishing It

Smashed Summer Pea Spread via Relishing It

The Recipe: Smashed Summer Pea Spread

10 ounces fresh or frozen organic peas (If using fresh, blanch for a minute or so.  If using frozen, just thaw)

2 garlic cloves, finely minced

3 large sun-dried tomatoes, minced

1-2 anchovies, finely minced

1/2 – 1 teaspoon kosher salt

juice of 1/4 small lemon

2 tablespoons extra virgin olive oil

4 large mint leaves, finely minced

In a medium-sized bowl, add the peas, garlic, anchovies, sun-dried tomatoes, lemon, salt, olive oil, and mint.  Using a potato masher or fork, smash the ingredients together.   The final texture is up to you.  I like it to be a little bit creamy, with definite chunks of ingredients within it.  Taste and re-season, if necessary.  Serve it with endive, radishes, and grilled bread.  Enjoy!

I hope you all have a wonderful and safe 4th of July!

Cheers!

Laurie

Read Full Post »

Carnitas Tacos and Fresh Tomatillo Salsa via Relishing It

I’m now well into my sixth month of being obsessed with tacos.  Seriously, we’ve been eating them at least once a week for more than a half year, and I’m not even close to getting sick of them.  Tacos al pastor?  Sure.   Spicy shredded beef?  Yes.  And then there are these amazing carnitas tacos that we’ve been enjoying.  They’re perfect to prepare in advance (and I live for meals like this in the summer), they’re healthy (if you don’t go overboard), and they’re oh so tasty.

Carnitas Tacos and Fresh Tomatillo Salsa via Relishing It

Carnitas Tacos and Fresh Tomatillo Salsa via Relishing It

Carnitas Tacos and Fresh Tomatillo Salsa via Relishing It

Carnitas, or “little meats”, can be served simply as a stand-alone dish, but I love it in these tacos even more.  It’s a new addition to my repetoire, which also includes these, and these— both of which are also favorites.  This carnitas version combines the lively flavors of lime and orange, which pair beautifully with pork, cumin, and garlic.  The recipe couldn’t be simpler–  you can make it on the stovetop.  Perfect for when firing up the oven in the summer heat doesn’t sound so tantalizing.  Put all of the ingredients into a pot, no sautéing required.  When cutting your pork shoulder up into cubes, don’t trim off any fat– you’re going to need that so the meat doesn’t get dry.  Let it cook down for about 2 hours and then sear the pork at the end.  That’s it.  Did I mention that it’s completely delicious?

Fresh Tomatillo Salsa via Relishing It

Carnitas Tacos and Fresh Tomatillo Salsa via Relishing It

The fresh tomatillo salsa is a fantastic compliment to the carnitas.  You may be tempted to buy a ready-made salsa from the store, but don’t.  The freshness of this topping cannot be bottled and you’ll end up spending more on a store-bought version that pales in comparison.  It only takes a minute to either chop or pulse the ingredients together– definitely worth your time.  And as far as toppings go, I’m stuck on queso fresco cheese, white onions, and cilantro.  The combination is sublime and it tastes so fresh.  Hope you enjoy them as much as my family does.

Carnitas Tacos and Fresh Tomatillo Salsa via Relishing It

The Recipe: Carnitas Tacos and Fresh Tomatillo Salsa

For the Carnitas:

4 pounds boneless pork shoulder, cut into 2-inch cubes (do not trim the fat)

2/3 cup freshly squeezed orange juice (about 3 oranges)

1/3 cup freshly squeezed lime juice (about 3 limes)

1 1/2 teaspoon cumin seed, toasted then ground

2 teaspoons kosher salt

6-7 garlic cloves, chopped

Corn tortillas, queso fresco cheese, limes, cilantro, and white onions for toppings

For the Tomatillo Salsa:

4 tomatillos

1/2 medium white onion

4 garlic cloves

1 jalapeño

small handful of cilantro (around 1/3 cup)

juice of 1 lime

kosher salt

To make the Carnitas:  Place all of the ingredients into a large Dutch oven.  Add enough water to just cover the pork.  Bring to a boil, then simmer the pork uncovered for about 2 hours.  Do not touch the pork.  Let it do it’s thing.  After 2 hours, bring the heat up to medium/high and begin reducing the liquid for about the next 45 minutes.  When the liquid is mostly gone, sear all the sides of the pork pieces.  They will be tender and practically fall apart.  Keep a watchful eye at this point, as you don’t want them to burn.

To make the Tomatillo Salsa:  Rough chop the ingredients and place them into a food processor and give them a few pulses until the salsa is your desired consistency.  Alternatively, you can chop all of the ingredients by hand.  Make sure to season correctly with salt.

Source:  Carnitas recipe adapted from The Homesick Texan

Thanks for stopping by Relishing It today!

Laurie

Read Full Post »

« Newer Posts - Older Posts »