Feeds:
Posts
Comments

Boozy Homemade Horchata Cocktail | Relishing It

Oh, the holidays!  Such a joyous time of the year celebrating with family and friends– and, of course, a few cocktails.  This one here is gold, my friends.  Apparently, I had been living underneath a rock, because up until recently I had never tried Rumchata. I’d heard of it, but to be honest, thought it sounded a bit lame.  A little “too girly” for me, I guess. I’m more of a boozy, classic cocktail girl– a manhattan is my winter elixir of choice– so perhaps it’s not so surprising that I overlooked this little white bottle of cheer.

Boozy Homemade Horchata Cocktail | Relishing It

Boozy Homemade Horchata Cocktail | Relishing It

Well I’ve tried it now, and it turns out, it’s quite good. It’s sweet and tastes pretty much like rice pudding in a glass. And sometimes sweet is exactly what’s called for, right? For those of you who also live under rocks (I kid), Rumchata is a liqueur made from horchata and a bit of rum. Which begs the question, what’s horchata? It’s a Spanish drink made by soaking rice or a mixture of rice and almonds or tigernuts in water and cinnamon for a day or so. Then it’s blended and sweetened with sugar and milk. So, in my usual fashion, I decided that I wanted to make this stuff from scratch.  Because a bottle of Rumchata costs a whole-lotta (you see what I did there?). Actually, it’s not that expensive, but really there isn’t that much alcohol in it, so I’m basically paying for rice water?  No thanks.  I’ll make it myself. And it will be even better.

Boozy Homemade Horchata Cocktail | Relishing It

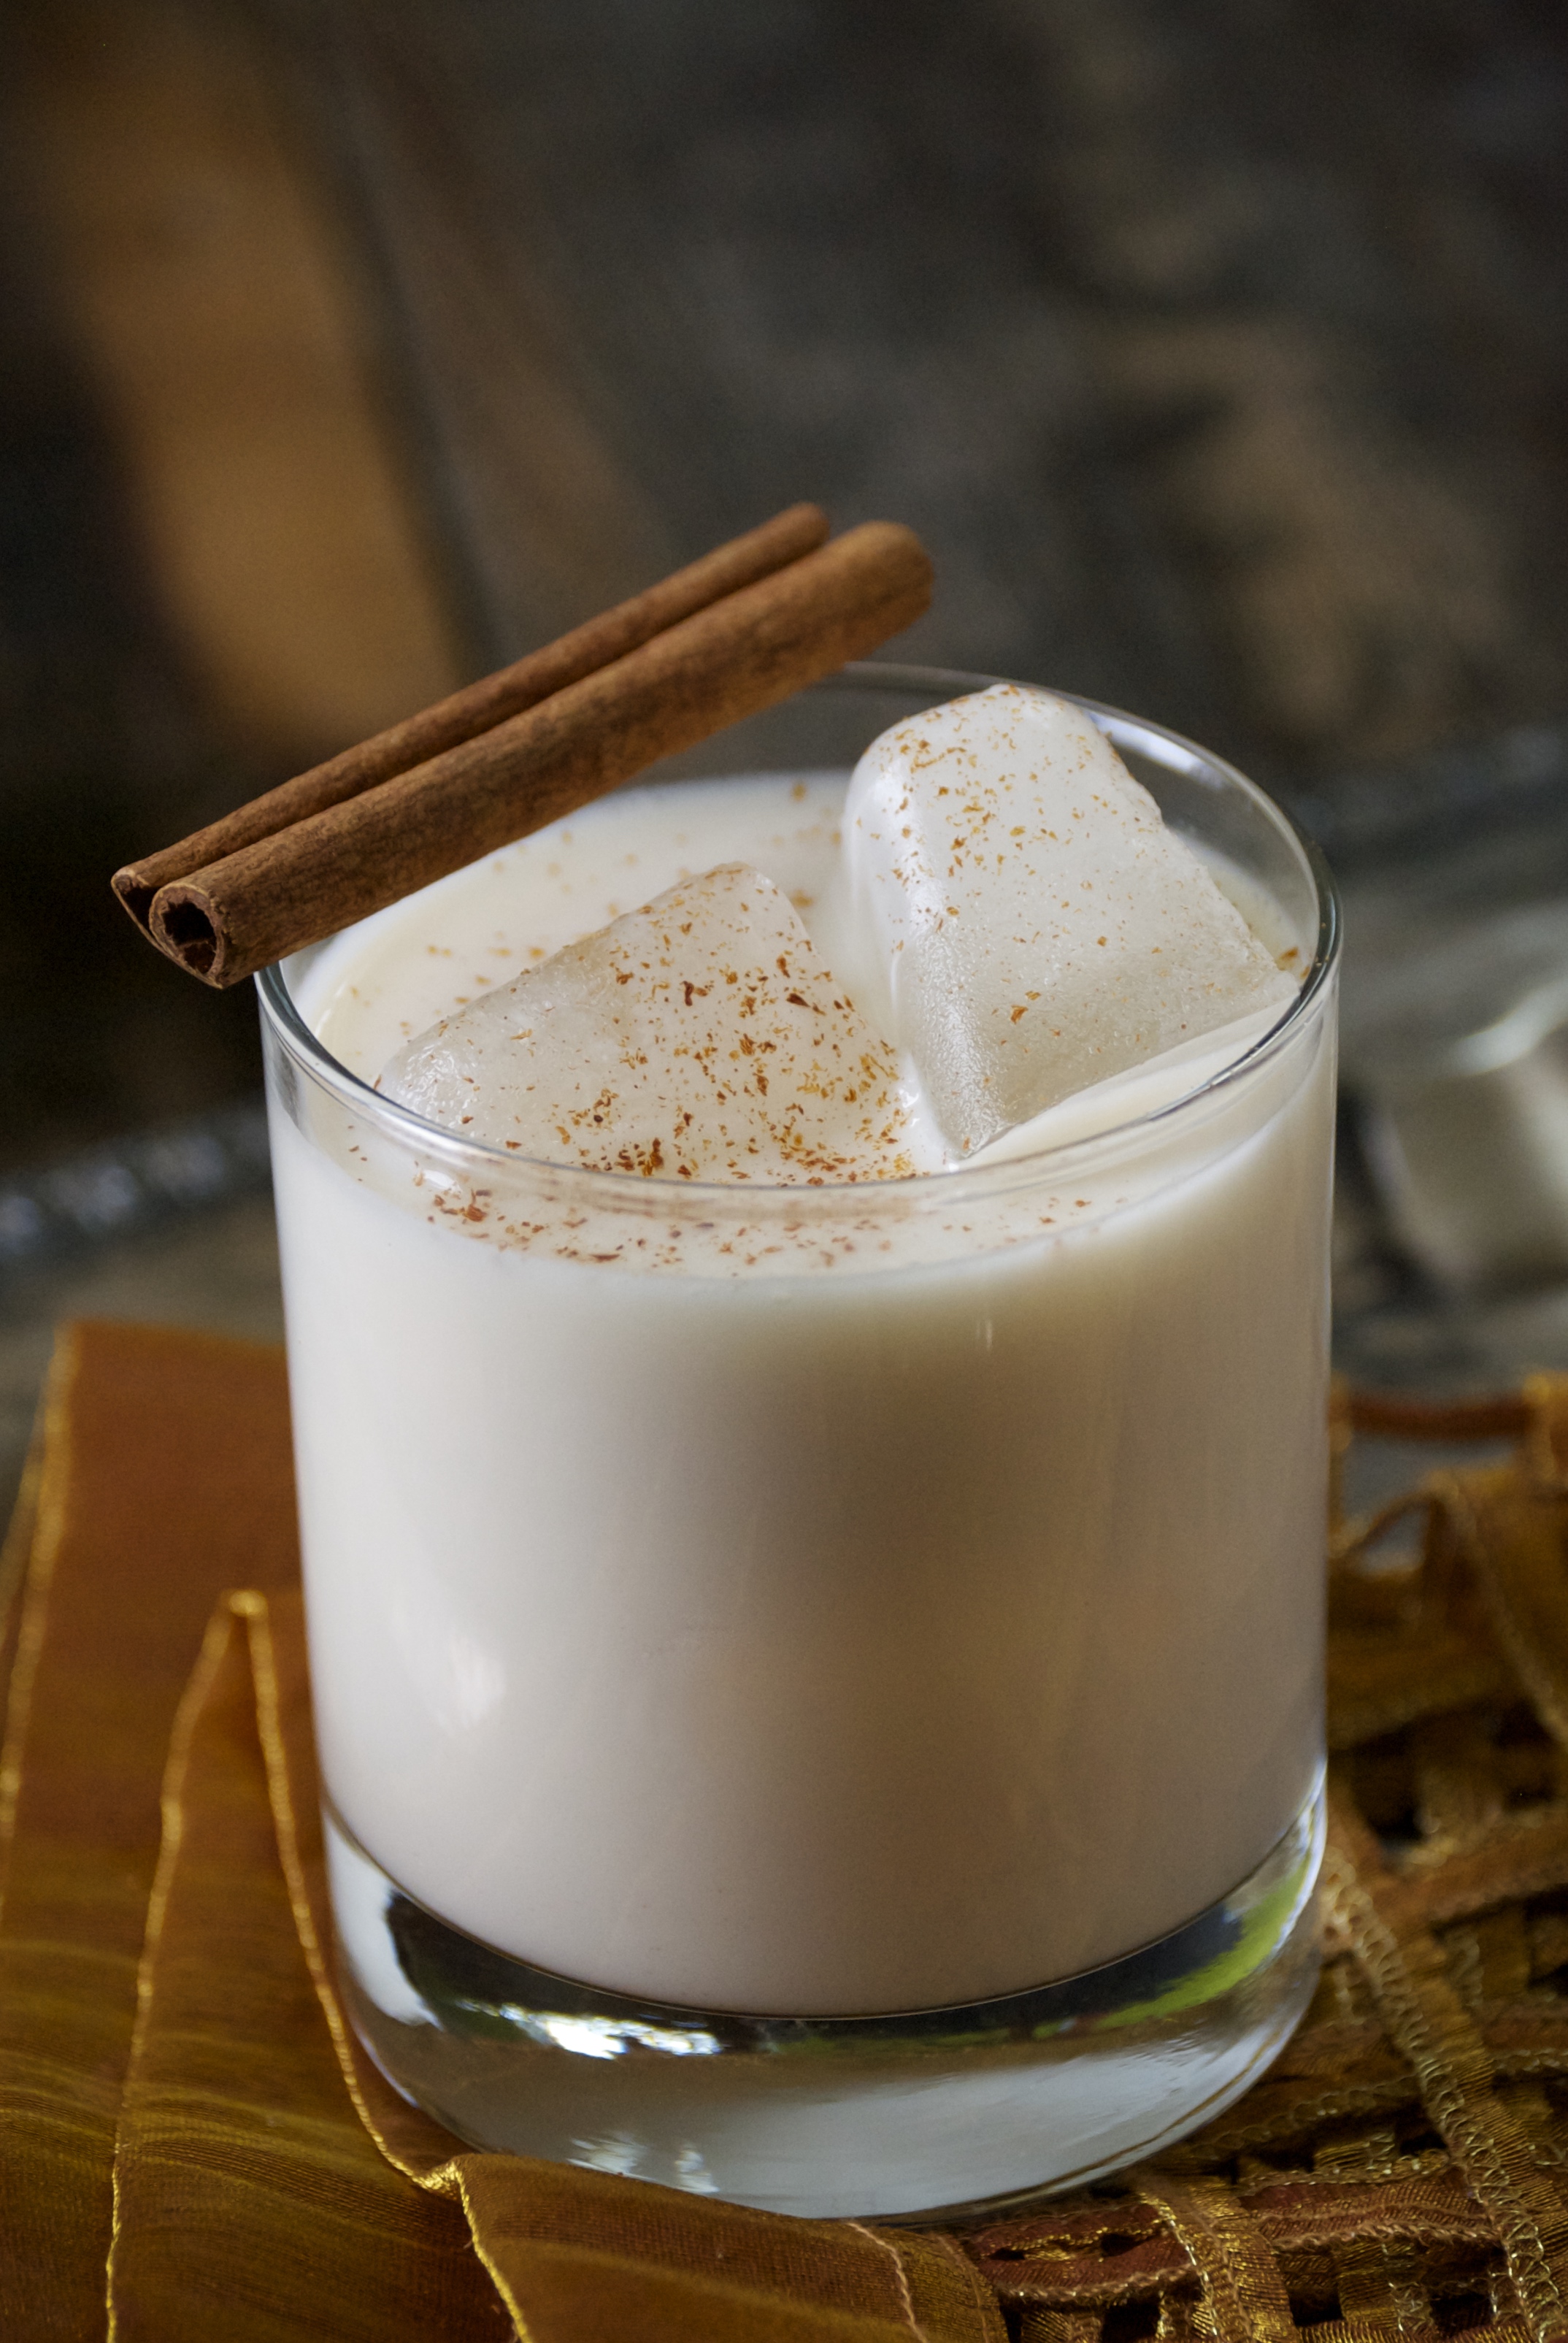
Voilà!  It’s ridiculously easy and tastes oh-so delicious. Making your own rumchata does require a bit of planning because soaking the rice in water overnight yields the best flavor.  I like to mix the horchata with both a bit of rum and a bit more vodka.  My theory is if you’re going to drink a cocktail, drink a damn cocktail.  Making it yourself lets you decide exactly how sweet you want it to be.  I don’t like mine cloyingly so.  You can also decide how rich you’d like it.  Whole milk does the trick for me, but perhaps you’d like to use a mixture of milk and cream?  You decide.  This is such a delicious cocktail that tastes like holiday cheer in a glass with creamy flavors of rice pudding and cinnamon– be careful, it goes down rather easily.  It’s absolutely perfect to make for a party. Cheers!

Boozy Homemade Horchata Cocktail | Relishing It

The Recipe: Homemade Horchata Cocktail

To make the Horchata:

(makes about 5 cups)

2/3 cup white rice (I used long grain)

3 cups warm water

1 two-inch cinnamon stick

1/2 cup granulated sugar

splash of vanilla

2 cups whole milk  (or a mixture of whole milk and cream) *See Note

ground cinnamon, for serving

To make the Cocktail:

(makes 1)

1 1/2 ounces (1 full shot) vodka

3/4 ounce (1/2 shot) dark rum (Jamaican or Caribbean work well)

4 1/2 ounces (3 shots) horchata

cinnamon, for dusting

Note: almond milk can be substituted for a dairy-free version.  Coconut milk works too, just be sure to adjust the amount of sugar you add. 

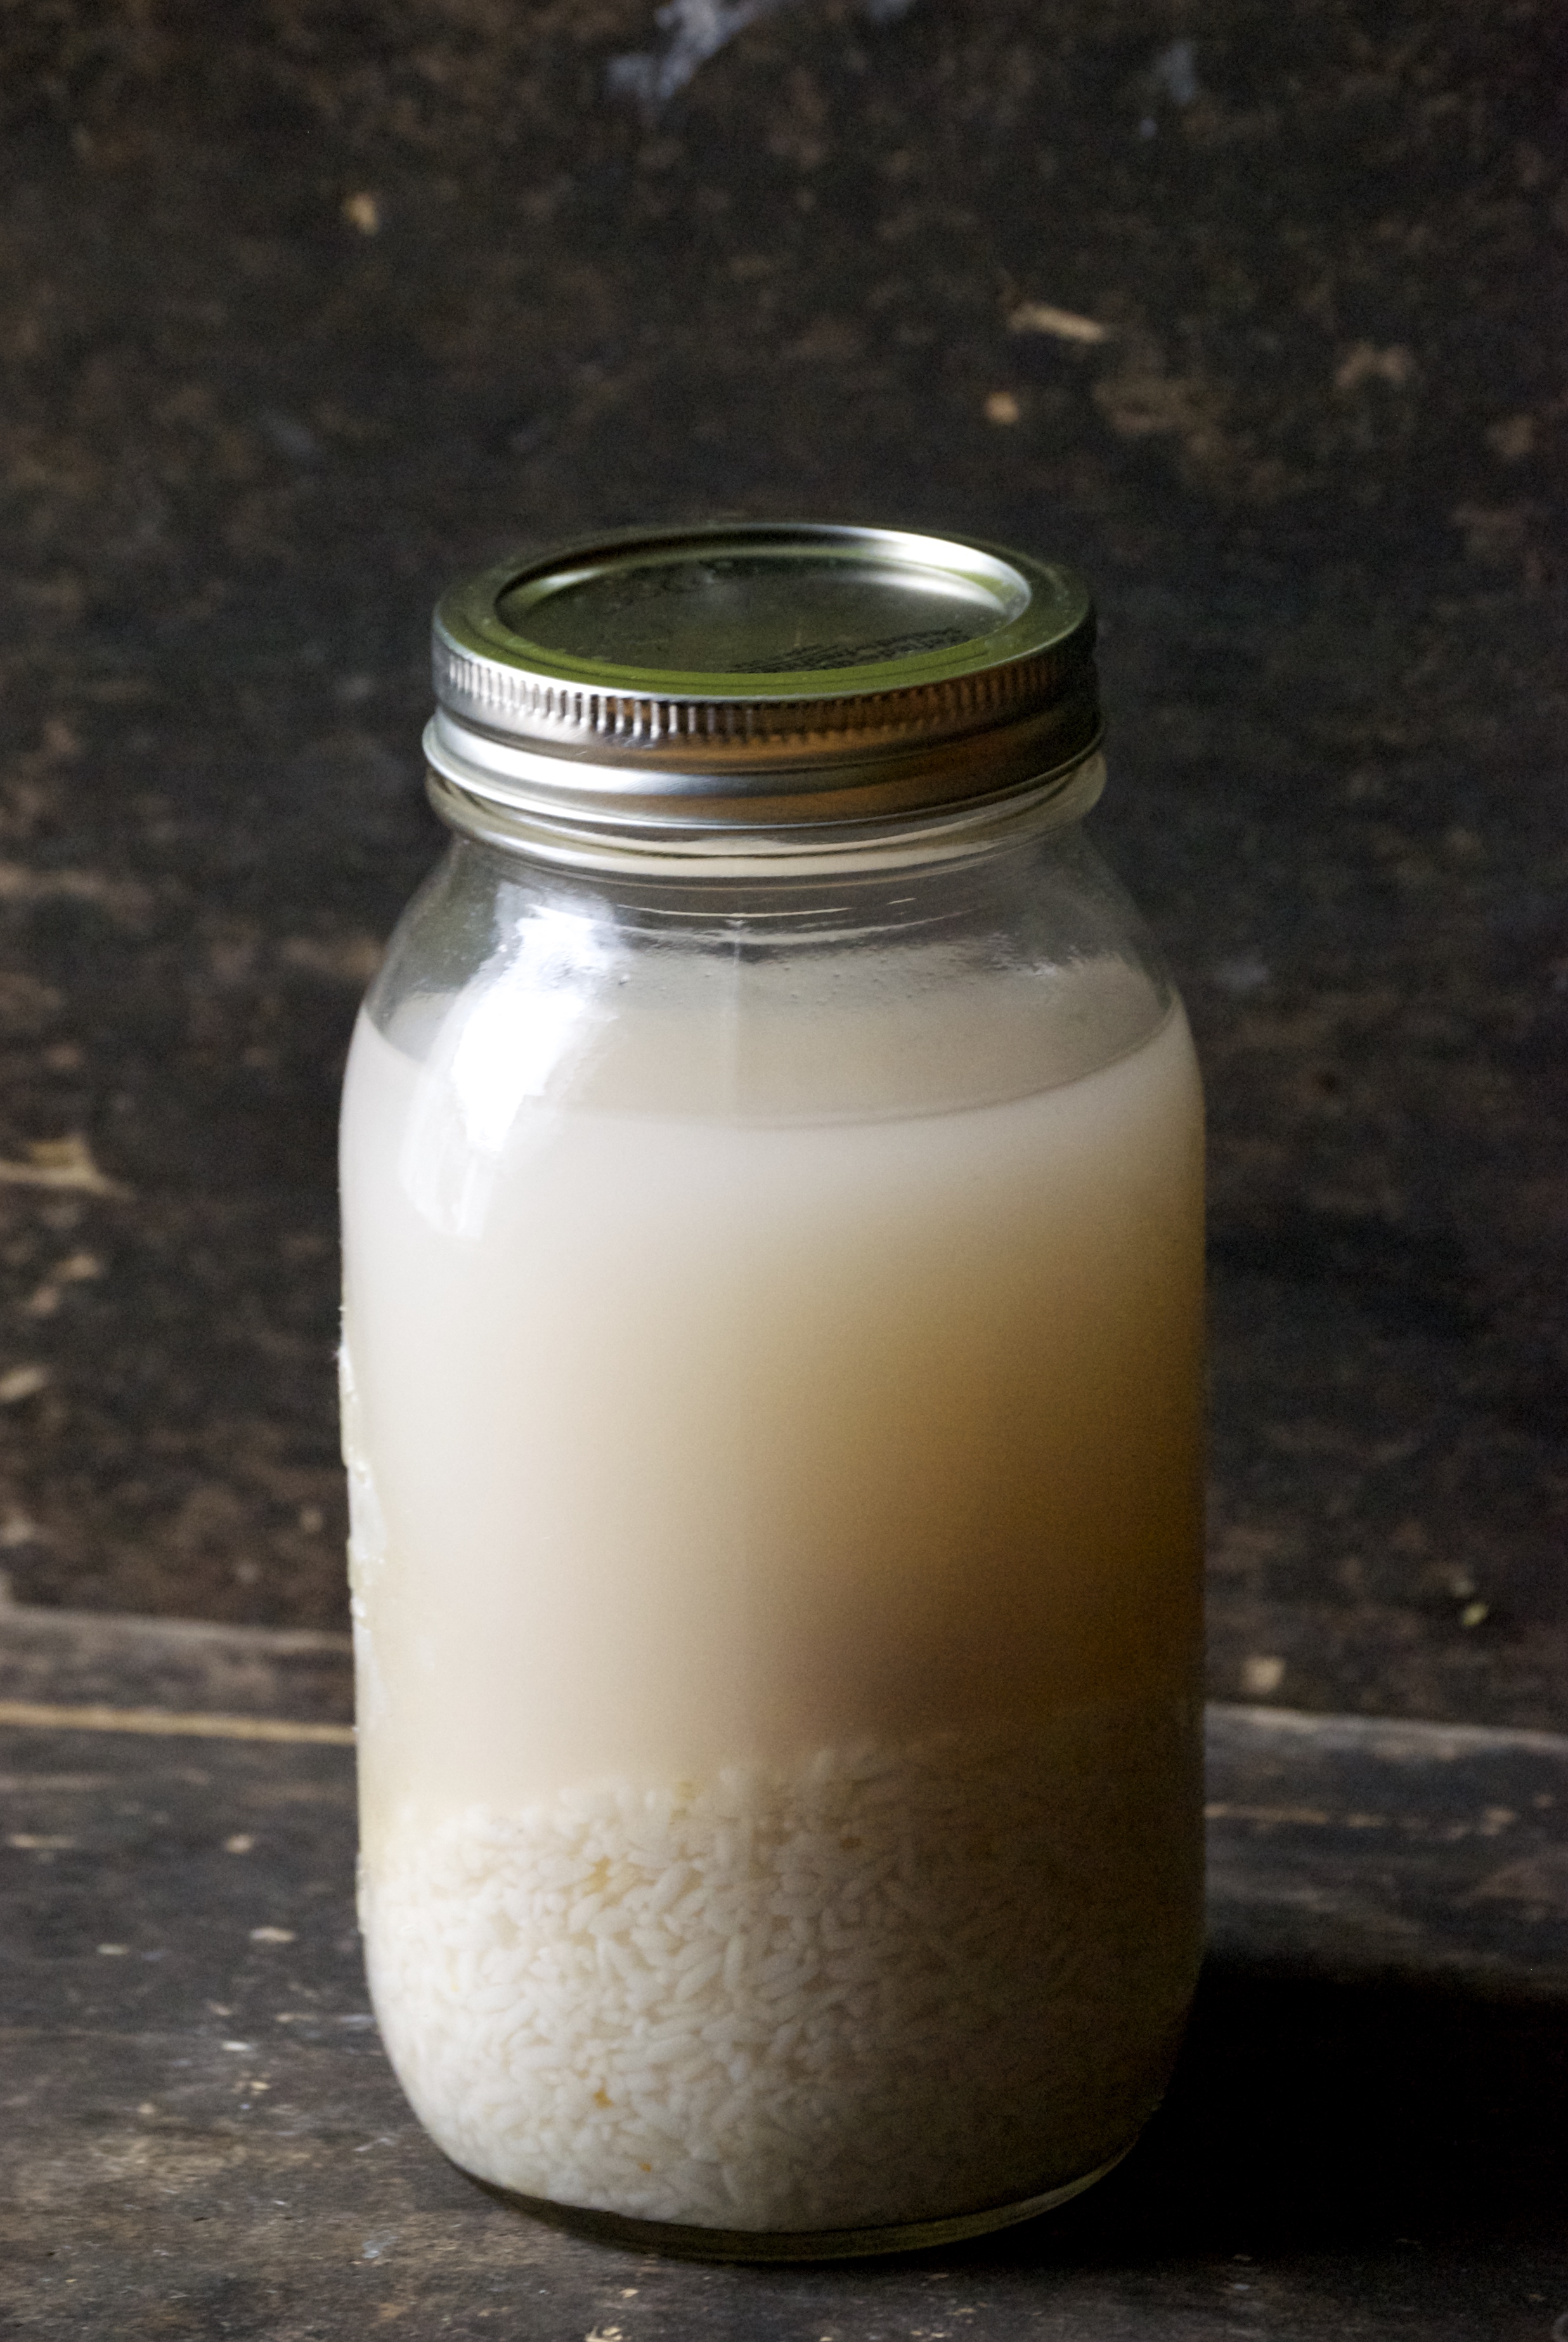
To make the Horchata: begin by pulsing the rice in a blender or food processor until it’s the consistency of coarse polenta.  Your blender may or may not do a good job with this task.  Mine was mediocre.  So, don’t worry if yours doesn’t do this well.  Place the rice in a quart jar and add the cinnamon stick and 3 cups of warm water.  Refrigerate for at least 8 hours, but preferably overnight.

Place the mixture back into the blender, cinnamon stick included and blend once again.  There may be some splattering, so throw a towel over the mixer or food processor.  Don’t expect the cinnamon stick to get fully blended.  Into a large pitcher, strain the mixture through a mesh strainer lined with cheesecloth and give it a squeeze at the end to extract as much liquid as possible.  Then add the milk, 1/2 cup of sugar, and a splash of vanilla to the pitcher.  Stir until the sugar has dissolved.  Store in the refrigerator. Your kids will love this served over ice with a sprinkle of cinnamon.

For your cocktail, mix the vodka, rum, and horchata into a shaker for a second or two.  Then pour into a low-ball glass filled with ice. Grate some fresh cinnamon on top and cheers away!

Horchata recipe adapted from David Lebovitz

Thanks for stopping by Relishing It!  Have a great weekend.

Laurie


Crispy and Chewy White Chocolate, Peppermint Candy, and Marshmallow Cookies | Relishing It

That’s a loooong title, I admit.  But it’s the only way to capture the glory that are these amazing holiday cookies.  I came up with this recipe last year around the holidays and have played around with the recipe since.  I think I’ve nailed it here, folks.  These cookies have everything– crispy, chewy, a holiday twist.  There’s a fair chance that when you make them, you’ll eat them all in a day.  They won’t make it to the holiday party.  They’re that good.

Crispy and Chewy White Chocolate, Peppermint Candy, and Marshmallow Cookies | Relishing It

Crispy and Chewy White Chocolate, Peppermint Candy, and Marshmallow Cookies | Relishing It

Crispy and Chewy White Chocolate, Peppermint Candy, and Marshmallow Cookies | Relishing ItThe flavors in this recipe remind me of one of my favorite holiday desserts that my mom would make.  The dessert was one of those refrigerator pan desserts that gets better the longer it sits.  She would buy that huge candy cane for this one and crush it up.  It was folded into a custard of some sort along with some marshmallows.  Then it was poured onto a graham cracker crust and put in the refrigerator.  As a kid, I thought this dessert was just about the best thing about the holidays, aside from the presents.  I haven’t had it in years, so I’m not so sure that my adult self would enjoy it quite so much.  Spoonfuls of marshmallows don’t really do it for me anymore.

Crispy and Chewy White Chocolate, Peppermint Candy, and Marshmallow Cookies | Relishing It

Crispy and Chewy White Chocolate, Peppermint Candy, and Marshmallow Cookies | Relishing It

Even so, I decided to try my hand at a cookie version of that nostalgic dessert.  I love the flavors, but just wanted a better way to get them together.  And I love what happens to marshmallows when you bake them into a cookie.  They add a chewiness that is fantastic, but the ones on the outer-edges practically turn into a crisp toffee.  The peppermint candy makes the whole thing taste like the holidays.  And the white chocolate, well, that’s a no-brainer.  All good stuff.  I know you’re going to love these– enjoy!

Crispy and Chewy White Chocolate, Peppermint Candy, and Marshmallow Cookies | Relishing It

Crispy and Chewy White Chocolate, Peppermint Candy, and Marshmallow Cookies | Relishing It

The Recipe: Crispy and Chewy White Chocolate, Peppermint Candy, and Marshmallow Cookies

(makes 2 dozen)

1 stick (8 tablespoons) unsalted butter, at room temperature

1/2 cup granulated sugar

1/2 cup light brown sugar

1 egg, at room temperature, lightly beaten with a fork

1 teaspoon vanilla

1 1/2 cups (6 3/4 ounces) all-purpose flour

1 teaspoon baking soda

1 teaspoon baking powder

1 teaspoon kosher salt

1 cup miniature marshmallows

1 cup white chocolate chips

about 3/4 cup crushed peppermint candies, divided (from about 9-10 6-inch candy canes) *see note

coarse sea salt

Note:  Place the candy canes in a large resealable plastic bag and use a rolling pin to crush them.  It works best to gently pound rather than roll over them. 

Preheat oven to 350°F. Line a large rimmed baking sheet with parchment paper.

In a small bowl, whisk together the flour, salt, baking soda, and baking powder.  Set aside.

In a bowl of a stand mixer fitter with a paddle attachment (or use a regular bowl and wooden spoon), beat the butter and sugars together until nice and creamy, about 2 minutes.  Then add the egg and vanilla and beat on medium for about 3-4 minutes, or until the mixture is light and fluffy and has incorporated enough air into it.  Remember to scrape down the sides with a rubber spatula along the way.  Then add the flour mixture to the butter and mix just until everything is incorporated.  Do not over-mix.  Remove bowl from the stand mixer and using a rubber spatula, fold in the white chocolate chips, 1/2 cup crushed peppermint candy, and marshmallows until everything is evenly distributed.

Line a cutting board or another sheet pan with parchment paper.  Using a small scoop form the dough into balls.  You should end up with about 24 cookies.  Sprinkle them with the remaining crushed peppermint candy and a bit of sea salt. Place them in the freezer for about 15 minutes.  Then take six out (leave the rest remaining) and place on the lined cookie sheet.  This particular cookie spreads out a bit, so six on a cookie sheet works well.  Bake for about 11 minutes, or until the edges become golden-brown.  Remove from oven and let rest on the pan for about two minutes (a bit longer than the average cookie because the marshmallow needs to set).  Once the cookie feels sturdy enough to move, place it on a cooling rack and repeat with the rest of the cookies– taking them out of the freezer as you need them.  They are magnificent the first and second day if left out uncovered.  They tend to lose their crispiness in an airtight container, but are still quite delicious. Hope you enjoy them!

Thanks for stopping by Relishing It!

Laurie


Homemade Beef Broth | Relishing It

Well this week has flown by.  My little boy has been sick for a few days, so my usual routine has been interrupted.  I absolutely don’t mind the interruption, and like having him home with me all day again, but I just hate it when my little ones are sick.  Since he hasn’t been eating a whole lot (sore throat), I’m so thankful to have frozen broth at the ready for both the ease and the nourishment that it can give to him.  I guess this is as good a time as any to post this recipe, then.

Homemade Beef Broth | Relishing It

Making broth isn’t a new concept, but it seems as though the foodie/health world has rediscovered it lately.  There’s a good reason for that.  Making broth is simple and it offers so many healthy benefits that store-bought versions simply do not.  They also taste so much better.  Make a homemade broth and then do a taste-test with a store brand.  I have.  The difference is stunning.

Homemade Beef Broth | Relishing It

Homemade Beef Broth | Relishing It

For my beef broth, I start with finding some good, properly-raised beef.  You know I’m a grass-fed beef advocate.  So, I suggest you find some grass-fed beef bones (you’ll want a mix of marrow bones and some with a bit of meat on them) to make the healthiest, most nourishing broth possible.  Soup bones can easily be found at a good co-op or grocery store, your local butcher, or from the farmers market. They’re cheap.  Sometimes they’re even labeled “pet bones”– which is kind of odd.  But trust me, they’ll make a rich broth that you’ll love.

Homemade Beef Broth | Relishing It

The other ingredients you likely already have at home– carrots, celery, onion, garlic, cider vinegar, and some dried or fresh herbs.  It’s a simple process that involves roasting the bones and vegetables first– to really amp up their flavors– then simmering on the stove for hours with water, herbs, and vinegar.  The vinegar is added to, supposedly, draw out some of the minerals from the bones.  I’ve read conflicting information on this, but I finally decided that since I love the flavor it imparts, I’m going to go with it.  Simmer this broth as long as you can.  The longer you do, the more nutrients it will draw out of the bones.

Homemade Beef Broth | Relishing It

The flavor will be good after three hours, or so– but shoot for 8 or even 24, if that’s a possibility for you. Also, after simmering for about 2-3 hours, I remove the bone with meat on it, and trim the cooked meat off. I put the bone back into the broth and save the meat to use another time. At this point it hasn’t been overcooked, but it has still added plenty of flavor to the broth already. If you don’t want to bother, just leave it in the broth for the duration of the time. As long as you hit that three-hour mark, the broth will taste amazing! Use it in soups like this Paprikash that is one of our family favorites. Fill your freezer up with both this beef broth and this chicken broth for quick, healthy soups this winter.

Homemade Beef Broth | Relishing It

The Recipe: Homemade Beef Broth

(makes a few quarts)

about 6 pounds of good quality, preferably grass-fed, beef bones (some containing marrow and some containing a bit of meat)

about 3 carrots, halved

2 celery stalks, halved

1 large onion, quartered

1 garlic bulb (that’s the entire thing), halved and not peeled

3 dried bay leaves

1 teaspoon dried thyme

1 tablespoon black peppercorns

handful of fresh parsley, rough chopped

2 tablespoons kosher salt, or more to taste

6 tablespoons apple cider vinegar (I use Bragg’s)

Preheat oven to 400°F. Line a rimmed baking sheet with parchment paper (for easy clean-up). Place the beef bones, carrots, celery, onion, and garlic on the pan with a bit of olive oil and a sprinkle of salt.  Roast for about 40-45 minutes, or until the beef and vegetables have a bit of color. Remove from oven.

Add the beef, vegetables, and any juices (leave the grease behind) to a large kettle.  Top it with the bay leaves, thyme, peppercorns, fresh parsley, cider vinegar, and enough cold filtered water to cover it all.

Bring everything to a high simmer so that it’s almost boiling, but not quite.  Then reduce the heat with the lid ajar to just a low simmer that is barely bubbling and let it cook away for as many hours as you can.  Three hours for sure, but shoot for more, if you can. If wanting to use the meat from the meaty bone (and you should– it’s great for quick meals and/or snacks), remove from bone after about 2-3 hours, put the bone back in the pot.

After you have finished simmering the broth, remove the large pieces with tongs and strain the liquid through a cheesecloth.  This will give you a nice clear broth. At this point you can put it in jars (or BPA-free plastic quart-sized containers) leaving about an inch of head-space (the liquid will expand as it freezes) or leave it in a large pot and refrigerate until completely cold (this will take hours, so overnight works well) and pour into jars afterwards. This makes removing the top layer of grease a cinch. Once that has been completed, throw a lid on it and freeze.

Thanks for stopping by Relishing It! Have a great weekend.

Laurie


Mexican Bake | Relishing ItSo, what are you planning to do with all of those delicious turkey leftovers after Thanksgiving?  Sandwiches?  Really?  I like a good cold-turkey sandwich as much as anyone, but today I have a recipe that is a great alternative.  And to be honest, even if you don’t have turkey leftovers you should make this dish.  It’s wonderful, and so versatile that you can make it with turkey, chicken, ground beef or even just beans, for a vegetarian option.

Mexican Bake | Relishing It

You’ve probably noticed that I’m into making ‘bakes’ a lot this year.  I’ve been having fun incorporating legumes, grains, and quinoa (technically a seed) into meals.  Aside from being so easy to throw together, they’re incredibly satisfying and a healthy option.  A big bowl of hot food is just what we all need as we gather around the dinner table together while it snows outside.  This particular bake has a Mexican flare. I’ve made it a number of ways depending on what we have in the house. I’ve been challenging myself this year to make meals out of food that we have, rather than running to the store every time an idea enters my brain. Aside from a smaller grocery bill, it cuts down on wasting otherwise-usable food, so that makes me happy.

Mexican Bake | Relishing It

This dish is fabulous with shredded chicken or turkey, but it’s also equally tasty using ground beef (or shredded beef, if you happen to have that).  Substituting beef broth for the chicken broth is an easy swap.  Of course, going completely vegetarian is a no-brainer, too.  Just add more beans and use vegetable broth, or even water.  Just amp up the spices a bit more to compensate. Whatever protein you decide to use, it will pair wonderfully with the brown rice, corn, and beans.

Mexican Bake | Relishing It

You all know that I pretty much can all of my tomatoes that I need to get me through the winter.  However, Red Gold Tomatoes generously sent me some different varieties of canned tomatoes to try (thanks, guys!).   So, I incorporated them in this dish and they were fantastic! I used the the lime juice and cilantro variety.  Of course, you can use any type of canned tomato that you have on hand, but these added a nice zesty flavor to the dish.

Mexican Bake | Relishing It

Load the bake up with as much cheese as you would like– that’s a personal preference.  Before serving, squeeze on some fresh lime juice, sprinkle with cilantro, slice up some jalapeños, and dollop on the sour cream.  Serve it with tortilla chips or plain tortillas and you are set.  You’re going to love this dish!

Mexican Bake | Relishing It

The Recipe: Mexican Bake

(serves 4)

olive oil

about 1 pound (or a bit more) of cooked shredded chicken, turkey, ground or shredded beef (see note)

1 small red or white onion, diced

about 4 garlic cloves, minced

about 14-15 ounces of cooked beans, drained and rinsed (any kind– red, black, pinto, or even white) (when I forget to soak my own, I’ve really been enjoying Simply Balanced Organic Beans (found at Target) for both the texture and the flavor.)

1 cup long grain brown rice, rinsed (any type of rice will work–if wanting to use white, just note that the cooking time will decrease)

1 tablespoon ancho chili powder

2 teaspoons ground cumin

1-2 teaspoons ground coriander

kosher salt and cracked pepper

about 1 cup frozen corn

1 1/2 cups homemade chicken or beef broth heated (depending upon what protein you are using)

1 15-ounce can Red Gold diced tomatoes with lime juice and cilantro (or anything similar)

shredded cheese, 1-2 cups  (sharp cheddar, mozzarella, and monterey jack are great options)

chopped fresh cilantro, fresh jalapeños, sour cream, fresh limes, hot sauce, tortilla chips, and/or fresh tortillas for serving

Note:  If wanting to use shredded chicken, simply sauté one pound (or a bit more) of chicken breasts seasoned with salt and pepper in a skillet with olive oil.  They should take about 3-4 minutes on each side, depending upon how high your heat is.  Check for doneness, then shred with a fork.  Or use rotisserie!

Preheat oven to 375°F.

In a large Dutch oven add a couple tablespoons of olive oil and sauté the onion and garlic for a couple of minutes over medium-high heat until somewhat soft (you would brown the ground beef just prior to this, if using).  Add the chili powder, cumin, coriander, about 1-2 teaspoons of kosher salt, and cracked pepper to the pan.  Then add the canned tomatoes with juices, beans, rice, meat, corn, and heated broth and continue to cook for a couple of minutes over medium-high heat until everything is hot.

Mix in the meat.  Flatten everything with a spatula so the rice can cook properly in the liquids.  Place in the preheated oven and bake covered for 1 hour.  Remove from oven and add the cheese.  Return to oven, covered, for about 5 more minutes, or until cheese has melted.

Serve with lime wedges, chopped cilantro, sliced jalapeños, sour cream, hot sauce, tortilla chips and/or fresh tortillas.  Enjoy!

I hope you all have a safe and Happy Thanksgiving celebrating with your loved ones!  Peace to all.

Laurie


Perfect Pumpkin Bars with Maple Cream Cheese Frosting | Relishing ItI’ll admit it, one of the main reasons I’m writing this post is so next year, when I’m craving a perfect pumpkin bar, I’ll know exactly where to look.  But that doesn’t mean they’re not for you, too.  They make an excellent dessert alternative for Thanksgiving.  I like pumpkin bars that are thick– I have no time for those weak, thin and flimsy ones. I suppose one could even say that this is more a pumpkin cake, but the fact that I swoop into the pan and eat this treat with my hands, makes me comfortable with the bar title.

Perfect Pumpkin Bars with Maple Cream Cheese Frosting | Relishing It

Perfect Pumpkin Bars with Maple Cream Cheese Frosting | Relishing ItOne of things that makes these bars stand out is the use of virgin coconut oil.  I try to swap out vegetable or canola oil whenever I can.  I find the smell and taste of those to be somewhat off-putting.  And aside from the better flavor, coconut oil is much healthier.  Both the coconut oil and the pumpkin make these bars stay moist for days and days.  The maple cream cheese frosting is the perfect way to top them.

Perfect Pumpkin Bars with Maple Cream Cheese Frosting | Relishing It

Perfect Pumpkin Bars with Maple Cream Cheese Frosting | Relishing It

These bars would be fantastic on your Thanksgiving table for those guests who aren’t into pie so much.  They can be left in a regular cake pan, or to fancy things up a bit, put them on a festive platter.  Using parchment paper in the pan makes them really easy to lift out.  However you decide to serve them, I know your friends and family are going to love them.  Enjoy!

Perfect Pumpkin Bars with Maple Cream Cheese Frosting | Relishing It

The Recipe: Perfect Pumpkin Bars with Maple Cream Cheese Frosting

(makes a 9 x 13 pan)

2 cups (9 ounces) all-purpose flour

2 teaspoons baking powder

1 teaspoon baking soda

1 teaspoon kosher salt

1 1/2 tablespoons ground cinnamon

1/2 teaspoon ground cloves

1/2 teaspoon freshly grated nutmeg

1/2 teaspoon ground ginger

1 cup granulated sugar

1/2 cup packed light brown sugar

1 cup coconut oil, melted, then cooled a bit

4 eggs, room temperature

1 15- ounce can plain pumpkin purée

1 teaspoon vanilla

For the Frosting:

3 cups confectioners sugar (about 12 ounces), sifted

8 ounce package of cream cheese (full fat)

1/2 stick unsalted butter, at room temperature

1 teaspoon salt

2 tablespoons real maple syrup

toasted walnuts, for garnish

Preheat oven to 350°F.  Line 9 x 13 cake pan with parchment paper (let enough hang over the edges to be able to grasp and lift the cake out with) and coat with non-stick cooking spray (if wanting to remove from pan in one large piece) or just grease pan with coconut oil, butter, or spray.

In a medium-sized bowl, whisk together the flour, baking powder, baking soda, salt, cinnamon, cloves, nutmeg, and ginger.  Set aside.

In a bowl of a stand mixer (or using a regular bowl and wooden spoon) fitted with the paddle attachment, mix the coconut oil and sugars together until blended well.  Add the eggs and vanilla and mix until somewhat creamy, 3 minutes or so.  Then add the pumpkin puree and blend until uniform.

Sprinkle the dry ingredients on top of the wet and use a spatula to fold everything until moistened, (this will prevent a big cloud of flour from landing on your countertop), then using the paddle attachment again mix until just combined.  Do not over mix.  Bake for 35 minutes or until a cake tester comes out clean.

While the cake is cooling, make the frosting.  Using the paddle attachment of a stand mixer (or a hand mixer, or wooden spoon) mix all of the ingredients together, except the confectioners sugar, until smooth and creamy. Then add the sifted confectioners sugar and mix until smooth.

Remove cake from pan once it has cooled, if desired.  Or frost it in the pan. Sprinkle with toasted walnuts, if you like.  Keeps well for days covered at room temperature.  Enjoy!

Thanks for stopping by Relishing It!

Laurie


Pumpkin Scones with Maple Nutmeg Icing | Relishing It

With Thanksgiving just a week away, I imagine you’re knee-deep in recipe ideas.  Well here’s one more.  No, it’s not a dish or dessert for the big meal, but rather something quick and delectable to pull together when your overnight guests wake in the morning.  Something that will make them feel warm and cozy and loved.  These pumpkin scones are fantastic, and you’d do well to remember that I’m very fussy about my scones. Too hard– forget it. Too dry– kick them to the curb. But those ones that are just right– firm on the outside and flakey on the inside– well, I could devour a whole pan. These fit into that just right, or rather “perfect” category.

Pumpkin Scones with Maple Nutmeg Icing | Relishing It

Pumpkin Scones with Maple Nutmeg Icing | Relishing It

Pumpkin Scones with Maple Nutmeg Icing | Relishing It

Pumpkin Scones with Maple Nutmeg Icing | Relishing It

So, through the years of playing around with different scone recipes, I’ve learned that one thing is the key.  And I’ve shared this before, but it’s so important that I’ll emphasize it again.  Use grated frozen butter.  Always use grated frozen butter.  In fact– use grated frozen butter for most baked goods– pie crusts and biscuits included.  Keeping the dough completely cold is the key to it’s flakiness.   It’s so simple to grab a stick of butter from the freezer on a whim and whip these up. Aside from the convenience, grated butter means that you don’t have to work as hard to incorporate it into the flour.  It’s already in tiny pea-sized pieces.  I’ve found that using my hands works best. Toss it around a bit and then mix in the wet ingredients with a fork or spatula. The less you work with scone dough, the better they’ll turn out.

Pumpkin Scones with Maple Nutmeg Icing | Relishing It

Pumpkin Scones with Maple Nutmeg Icing | Relishing It

Keep in mind that all of the flour does not need to be fully incorporated– it’s ok if your dough has a bit of flour on the top– in fact it’ll be easier this way. This dough is more wet than my usual scone recipe because of the pumpkin.  So be sure to sprinkle a bit of flour on your hands before you pat it out into a circle and cut it into wedges. Because it’s a wetter dough, freezing them on the pan for 15 minutes before they bake is also important to help them keep their shape.  These scones have all the autumnal spices you’d expect and taste amazing with a hot cup of coffee.  I love the addition of maple and nutmeg into the icing.  It adds character.  I hope these scones find their way onto your kitchen table one of these cold, snowy mornings.  Enjoy!

Pumpkin Scones with Maple Nutmeg Icing | Relishing It

The Recipe: Pumpkin Scones with Maple Nutmeg Icing

(makes 6-8)

For the Scones:

2 1/4 cups all-purpose flour (11 1/4 ounces)

1 tablespoon baking powder

1 teaspoon kosher salt

1/2 teaspoon fresh nutmeg

1/2 teaspoon ground cloves

1/2 teaspoon ground allspice

1 1/2 tablespoons ground cinnamon

3 tablespoons packed light brown sugar

1/2 cup plain canned pumpkin (Farmers Market Organic Pumpkin is my favorite brand)

1/2 cup plain whole milk yogurt

3 eggs, divided

1 teaspoon vanilla extract

6 tablespoons frozen unsalted butter, coarsely grated

turbinado or demerara sugar for sprinkling

For the Icing:

1 cup confectioners sugar

2 tablespoons real maple syrup

1/2 teaspoon freshly grated nutmeg

about 5 tablespoons heavy whipping cream

pinch of salt (this is important– it will enhance the flavor of the icing, so don’t be stingy)

roasted salted hazelnuts, for topping (almonds, pistachios, or walnuts would work, too)

Preheat oven to 400°F.  Line a large baking sheet with parchment paper.

In a large bowl, whisk together the flour, baking powder, salt, nutmeg, cloves, allspice, and cinnamon.

In a medium-sized bowl mix together the brown sugar, pumpkin, yogurt, 2 eggs, and vanilla.

In a small bowl, use a fork to mix 1 egg with 1 teaspoon of water, the the egg wash.

Coarsely grate the butter using the largest holes on a box grater.  Work quickly, so the ingredients stay cold.  Mix the butter into the flour mixture using your fingertips.  You want the butter to be coated with the flour.  Work quickly.  Then, using a fork or spatula, mix the wet ingredients into the butter/flour mixture. Do not over-mix.  It’s ok to see specks of flour that haven’t been fully incorporated.  Sprinkle countertop with flour, as well as your hands. The dough will be sticky. Place dough on the counter and pat into a 6-inch round circle. Use a bench knife or a chef’s knife to cut into 6-8 wedges.  Place the wedges on the lined baking sheet and put into the freezer for 15 minutes.

Remove from freezer and apply egg wash with a pastry brush.  Then sprinkle generously with turbinado sugar.  Bake for 25 minutes, or until they feel set in the middle and they have developed a beautiful deep golden color. Remove from oven and let cool slightly.

To make the Icing: Whisk all of the ingredients together until creamy.  Add more cream, if need be.  Dollop the icing onto the scones and smooth out.  Top with salted roasted hazelnuts, or your nut of choice.  Store leftovers in an airtight container, but they are best if eaten the first day.  Enjoy!

Thanks for stopping by Relishing It!

Laurie

Quinoa Bake with Broccoli and Chickpeas | Relishing It

When I’m developing a new recipe for a meal there are two criteria that generally need to be met.  First, the recipe has to be mostly healthy.  Since I’m the main person that pumps food into my family, I need it to be loaded with nutrients.  Second– and this is the tricky one– I need it to be a meal that my family actually likes and will eat.  Finding this balance is often a challenge, but today’s recipe was spot-on.

Quinoa Bake with Broccoli and Chickpeas | Relishing It

Quinoa Bake with Broccoli and Chickpeas | Relishing It

Luckily for me, my family actually likes broccoli.  Seriously.  So, if I toss that into a dish I’m already one step to the good.  Here, I also relied on chickpeas for the protein and the texture.  And quinoa is one of my favorite things to build a meal around.  It cooks quickly, has a nice nutty flavor, and happens to be loaded with protein, as well.  Though it looks like a grain, quinoa is actually a seed–so it is gluten-free.

Quinoa Bake with Broccoli and Chickpeas | Relishing It

This isn’t a heavy bake loaded with cream or lots of cheese.  It’s simple and clean, if you will.  Aside from the main components of the dish, the subtle flavors of garlic and lemon really come through and work so well together.  I like to use my homemade chicken broth here because I always have it on hand and I love its flavor.  However, if you are vegetarian, feel free to use vegetable broth.  Finishing it with parmesan cheese that has become golden and chopped almonds for the texture is perfect.

Quinoa Bake with Broccoli and Chickpeas | Relishing It

One of the best parts about this dish just how easy it is to prepare.  From start to finish, your family will be eating dinner in about 30 minutes.  That’s not bad, especially considering most of that time it is in the oven. And you can feel good about the fact that every bite is healthy for them.  Hope you enjoy!

Quinoa Bake with Broccoli and Chickpeas| Relishing It

The Recipe: Quinoa Bake with Broccoli and Chickpeas

(serves 4)

olive oil

2 cups chopped broccoli

3 garlic cloves, finely minced

1 small red onion, finely chopped (about 1/3 cup)

1/4 cup chopped fresh parsley

13-15 ounces cooked chickpeas (about 1 1/3 cup)

1 cup dry quinoa, rinsed (any color will work)

zest of 1 large lemon

1 1/2 cups chicken broth (heated)

kosher salt and cracked pepper, to taste

handful of parmesan (about 1/2 – 3/4 cup)

handful of chopped roasted almonds, for garnish

Preheat oven to 450°F.

Heat olive oil in a cask-iron skillet, or anything similar. Sauté the onion, garlic, broccoli, and chickpeas for about 3 minutes.  Sprinkle with about 1 teaspoon of salt and some cracked pepper.  Then add the lemon zest, parsley, quinoa, and heated broth.  Make sure all of the quinoa is covered by the broth.  Cover with foil and place in the oven.

Bake for about 20 minutes, or until the quinoa has absorbed all of the liquid and is tender.  Remove from oven.  Place oven rack near the broiler and turn it on.  Sprinkle parmesan over the quinoa and return to oven uncovered.  Broil for just a couple of minutes until the parmesan has turned golden brown.  Keep a watchful eye, as it can burn quickly.  Remove from oven and sprinkle with chopped almonds before serving.  Leftovers can be kept in the refrigerator and reheated easily.  Enjoy!

Thanks for stopping by Relishing It!

Laurie


Healthy Stuffed Cabbage Roll Soup | Relishing It

It’s early November and the first winter storm of the season just rolled through Minnesota.  I generally try to have a positive tone when I share my thoughts here, but this… sucks.  No time to acclimate to lower temperatures over a few weeks, no light dusting of snow that melts away in the sun.  Nope.  Winter is here and I’m not ready for it yet.  Thankfully, we got the leaves raked (barely) and taken to the compost pile, the summer furniture is tucked away in the shed, and my small garden has been cut down.  But still, this is ridiculous.  Last winter was grueling, to say the least.  I want more crunchy leaves on the sidewalks and more bonfires with our neighbors.  I want more outdoor runs without the worry of slipping on ice. I realize that I’m going to have to wait months for these simple pleasures again.  And I will wait patiently and enjoy them all-the-more when they arrive.  There.  Now I’m feeling a little bit better.

Healthy Stuffed Cabbage Roll Soup | Relishing It

Healthy Stuffed Cabbage Roll Soup | Relishing It

For now, I will pour myself into doing the things that I love to keep my mind off of the frigid temperatures.  Today it’s warm soup and fresh bread.  This stuffed cabbage roll soup is a favorite in our house.  It has all the wonderful flavors and textures of stuffed cabbage rolls with less work.  It’s hearty and filling– total comfort food.  But, it’s also healthy.  Like, really healthy.  It’s loaded with whole foods–grass-fed beef, fresh cabbage, canned tomatoes, brown rice, and zingy fermented sauerkraut.  I love to eat cabbage year-round– it’s an underrated vegetable, in my opinion.  Not only is it good for you, it has a long refrigerator life.  This is much more than a soup– almost a stew.  Feel free to add more broth or tomatoes if you like it a little less thick.  I think it’s perfect as is, but especially fantastic with a dollop of sour cream or plain yogurt on top and a sprinkle of fresh dill or parsley.  I hope you give it a try.  Enjoy!

Healthy Stuffed Cabbage Roll Soup | Relishing It

Healthy Stuffed Cabbage Roll Soup | Relishing It

The Recipe: Healthy Stuffed Cabbage Roll Soup

(serves 4)

1 pound grass-fed ground beef

3/4 cup dry long grain brown rice

1 small white or yellow onion, diced

2 garlic cloves, minced

2 teaspoons kosher salt, plus more if needed

cracked black pepper

1 quart chicken broth, preferably homemade

2 cups crushed canned tomatoes (or a 15 ounce can–Muir Glen Organic is great)

2 cups homemade tomato sauce (or a 15 ounce can — again, go with Muir Glen)

3 cups, thinly shredded cabbage ( I used 1 somewhat smallish one)

1 teaspoon fresh thyme

1 bay leaf

1/4 cup packed chopped fresh parsley

2 cups homemade sauerkraut or store-boughten, preferably fermented

sour cream or yogurt, dill or parsley for garnish

Begin by rinsing the brown rice.  Then add it along with 1 1/2 cups of cold water and a pinch of salt to a large sauce pan.  Bring to a boil, then cover and reduce heat to a simmer and cook until the rice is tender and the water has been absorbed, about 40 minutes.  Keep a watchful eye or you may burn the rice.  You can always add more water and drain any extra, if you’re worried about that happening.

In a large Dutch oven over medium-high heat, brown the ground beef.  Drain the grease, if there is any and add the onion and garlic to the pan along with 2 teaspoons of kosher salt and some cracked black pepper.  Cook the ground beef/onion mixture for just a few minutes, stirring occasionally, until the onion softens a bit.

Add the crushed tomatoes, tomato sauce, chicken broth, chopped cabbage, cooked brown rice, fresh thyme, and bay leaf to the Dutch oven.  Cook for about 30-40 minutes over low-medium heat, or until the cabbage has wilted and is tender.  Add the sauerkraut and freshly chopped parsley and cook for another 5 minutes, or until the sauerkraut has warmed.  Remove bay leaf before serving.  Top with sour cream or plain yogurt and fresh dill or parsley.  Leftovers may become somewhat thick from the rice absorbing more liquid– it can be thinned out with more tomatoes or broth.

Thanks for stopping by Relishing It!

Laurie


Bittersweet Chocolate Cinnamon Rolls | Relishing It

I’ve been on a reading tear lately, and it’s just what I needed.  Usually it feels like my mind never gets a chance to focus on one thing, or to just contemplate.  I’m constantly jumping from topic to topic, and though technology certainly contributes to this, in the end the responsbility is mine.  So I’ve slowed down a bit and decided to concentrate on a few good books.  It’s the perfect cure for all of the multi-tasking that seems to take up my day. In the past, I’ve often had a hard time jumping into another book right after reaching the end of a good one.  It was like I went through a period of mourning.  I’m done doing that.  I’m diving right back into the next one, and thankfully I’ve been getting some great recommendations with the help of friends.   But, I’d like more!  Please share with me any must-reads.

Bittersweet Chocolate Cinnamon Rolls | Relishing It

Bittersweet Chocolate Cinnamon Rolls | Relishing It

Why am I going off about books right now?  Well actually, because these amazing chocolate cinnamon rolls were the result of one of my last reads.  The book was ‘The Storyteller’ by Jodi Picoult.  It takes place partially in present day and partially during World War II.  It’s a wonderful read.  The recipe is the one the father (a baker) would lovingly make for his daughter.  After reading about the delicious description of the bittersweet chocolate and cinnamon twirled together into a soft roll, I couldn’t get them out of my mind.  Luckily for me, there was a recipe at the end of the book.  So I made them.

Bittersweet Chocolate Cinnamon Rolls | Relishing ItBittersweet Chocolate Cinnamon Rolls | Relishing ItBittersweet Chocolate Cinnamon Rolls | Relishing It

I’m so glad that I did, because my kids absolutely loved them.  And chocolate and bread are a perfect combination.  This has been a family favorite for some time.  These rolls are about to earn the same title.  These are a perfect chocolate cinnamon combination, with neither overpowering the other.  You may be tempted to chop more chocolate, but don’t.  This amount was spot on.  I can already imagine snowy winter weekend mornings with the smell of these bittersweet cinnamon rolls wafting through the air, as I sip my coffee and read another incredible book.  That is until my kids shout “Mommy!”, and need something.  Hope you enjoy the rolls!

Bittersweet Chocolate Cinnamon Rolls | Relishing ItBittersweet Chocolate Cinnamon Rolls | Relishing It

The Recipe: Bittersweet Chocolate Cinnamon Rolls

1/2 cup warm milk, (I used whole) (110°F)

2 teaspoons active dry yeast

1/2 cup plus a pinch, granulated sugar, divided

2 large eggs, room temperature

1 large egg yolk

2 cups all-purpose flour (9 ounces), plus extra

1/4 teaspoon kosher salt

6 tablespoons room temperature unsalted butter, divided, plus more for pan

1/4 pound bittersweet chocolate, finely chopped

1 teaspoon cinnamon

coarse sugar (such as turbinado or demerara)

powdered sugar to sprinkle

Pour the milk into a small bowl and sprinkle with the yeast and a pinch of sugar. Whisk. Let stand for 5 minutes until foamy.

In a large bowl, whisk together 1/4 cup of sugar, 1 egg and 1 egg yolk.  Whisk the egg mixture and the yeast mixture together. In a bowl of an electric mixer fitted with the paddle attachment (or using a bowl and wooden spoon), combine the flour and salt. Add the egg mixture and beat on low until most of the flour is incorporated. Switch to the dough hook and knead on low adding 1 tablespoon of butter at a time until 3 tablespoons of the butter are incorporated. You will knead the dough for about 10 minutes.  You may need to stop the machine and remove the dough from around the hook to make sure everything is getting properly incorporated along the way.  The dough will be sticky.

Place the dough in a large buttered bowl. Cover with plastic wrap or a dishtowel.  Set in a warm, draft-free place to rise until the dough doubles in size.  About 1 hour. The length of time will depend upon how warm your area is.

Prepare the filling by using a fork to mix the chocolate, remaining 1/4 cup sugar, and cinnamon in a medium bowl.  Add the remaining 3 tablespoon of butter and use the fork to combine. Set aside.

Preheat oven to 350°F. Once the dough has double, roll it out into a 16 x 12 rectangle on a well-floured surface.  Sprinkle filling over the dough and roll into a log.  You may need to trim the jagged end of the log slightly. Cut the log into 9 equal pieces. Place into a 8 x 8 buttered pan. Cover with plastic wrap and let rise again for about 20 minutes.

When the rolls have risen slightly, remove the plastic wrap and mix the remaining egg with 1 teaspoon water.  Gently apply the egg wash to the rolls using a pastry brush then sprinkle with about 1 tablespoon or more of coarse sugar.  Bake for about 25 minutes, or until the tops are a deep golden brown and the center feels set. Cool on a wire rack and serve sprinkled with powdered sugar on top.

Enjoy!

Thanks for stopping by Relishing It!

Laurie


Roasted Brussel Sprouts, Mushrooms, and Beef with Horseradish Cream Sauce | Relishing It

Today’s recipe is a simple little dish that my my husband and I both love.  You’ll note that I didn’t say my kids love it, because…well they’re kids, and I guess they just don’t yet appreciate brussel sprouts and horseradish   I, on the other hand, love brussel sprouts and I’m always trying to put them into new dishes.  I enjoy them raw, such as in this salad that I still make often.  But I also love to roast them to add a little complexity to their flavor.  Roasted Brussel sprouts alone can be a meal or a hearty side, but adding leftover braised beef and crimini mushrooms takes them from “boring vegetable” status in my husbands eyes to “that was an amazing meal”.  Topping the entire dish with a delicious horseradish cream sauce made it perfect.

Roasted Brussel Sprouts, Mushrooms, and Beef with Horseradish Cream Sauce | Relishing It

Roasted Brussel Sprouts, Mushrooms, and Beef with Horseradish Cream Sauce | Relishing It

Roasted Brussel Sprouts, Mushrooms, and Beef with Horseradish Cream Sauce | Relishing ItAs a kid, my grandpa used to grow horseradish in his massive garden. He’d process it into a creamy version and my parents and grandparents would slather it on the homemade sausage. Like my kids, at the time I didn’t appreciate the horseradish… or the sausage, for that matter. The horseradish was strong– it had “bite” to it, as my grandpa would always say.  I’m sure you’ve all made a beef roast and wanted to create something new with the leftovers.  Well, this is a nice quick option.  No leftover beef on hand?  No problem– it will still be amazing without it. This meal only takes about 15-20 minutes to make and it’s so satisfying.  Top it with a drizzle of the horseradish cream sauce and a few chopped hazelnuts (trust me on this) for crunch.  It’s a perfect weeknight dinner and you can feel good about the fact that you’re eating healthy, whole foods.  Enjoy!

Roasted Brussel Sprouts, Mushrooms, and Beef with Horseradish Cream Sauce | Relishing It

Roasted Brussel Sprouts, Mushroom, and Beef with Horseradish Cream Sauce | Relishing It

The Recipe: Roasted Brussel Sprouts, Mushrooms, and Beef with Horseradish Cream Sauce

brussel sprouts, halved (or quartered if very large)

crimini mushrooms, halved

leftover braised beef, preferably grass-fed

hazelnuts, coarsely chopped

olive oil

kosher salt and cracked pepper

For the Horseradish Cream Sauce:

1/4 cup sour cream

2 tablespoons creamy, prepared horseradish

2 tablespoons whole milk (any kind will work)

1 tablespoon apple cider vinegar  ( I use Bragg’s organic raw)

1 tablespoon finely minced shallot or red onion

1 tablespoon finely minced fresh chives

1 garlic clove, finely minced

kosher salt and cracked pepper

You’ll notice that I didn’t give amounts for the main ingredients.  Amounts aren’t really needed in this recipe, make as much or as little as you want.  One pound of brussel sprouts will generally feed about four people.  Add as much mushrooms and beef as you like.

To make the Horseradish Cream Sauce: add all of the ingredients to a medium-sized bowl and mix with a spoon.  Taste and properly season with salt and pepper.  Set aside.

Preheat the oven to 400°F.  On a large rimmed baking sheet, toss the halved brussel sprouts with 1-2 tablespoons of olive oil and a sprinkle of salt and pepper.  Roast for about 10-15 minutes, flipping once.  You want a nice golden brown color to appear on the brussels. When they are nearly done and have nice color, add the mushrooms and beef to the pan and roast for a few more minutes until they are heated through and the mushrooms begin to shrink in size. Remove from pan.  Place onto a serving dish and top with the horseradish cream sauce immediately (so it can warm slightly) and hazelnuts.  Enjoy!

Thanks for stopping by Relishing It!

Laurie


%d bloggers like this: