Feeds:
Posts
Comments

Archive for the ‘Savory’ Category

Meyer Lemon and Thyme Roasted Chicken | Relishing It

Today’s recipe is one that looks impressive and tastes incredible, yet comes together with little effort.  Roasted chicken is another fine example of how good food does not have to be complicated.  It’s easy to prepare, and makes a perfect family meal that can be complimented by so many wonderful flavors.  I’ve used Meyer lemons for this version.  Whenever they are  in season, I prepare a lemon sauce and drizzle it over roasted chicken.  These lemons taste a bit different than traditional ones.  I detect a hint of a pine, as well as a little more sweetness.  They are perfect in this dish, since their skin is thinner and can be eaten– they almost become ‘candied’ when roasted.

Meyer Lemon and Thyme Roasted Chicken | Relishing It

I like to roast chicken on a high heat.  It creates such a nice, dark exterior that I just love.  Fear not, the inside remains wonderfully juicy.  One thing to be aware of– your chicken pieces should all be relatively the same size.  This will ensure even roasting.  The breasts should be cut in half if they are too large.

Meyer Lemon and Thyme Roasted Chicken | Relishing it

The sauce is a simple one.  It showcases the lemons perfectly.  I suppose it’s worth exploring the idea of marinating the chicken in a portion of the sauce for a few hours before roasting.  The lemon would really permeate the chicken.  But, to be honest with you, I’ve never bothered.  Let me know if you decide to give it a go.  If thyme isn’t your favorite herb, this dish is also delightful with rosemary.  Enjoy!

Meyer Lemon and Thyme Roasted Chicken | Relishing It

The Recipe:  Meyer Lemon and Thyme Roasted Chicken

(serves 4)

1 whole pasture-raised chicken cut into pieces (breasts cut in half, if too large)

1/2 cup fresh Meyer lemon juice (from about 5 Meyer lemons)

1/3 cup extra-virgin olive oil

2 tablespoons Dijon mustard

fresh thyme

1/2 tablespoon honey (more or less to taste)

1-2 Meyer lemons, thinly sliced for roasting

kosher salt and freshly cracked black pepper

Preheat the oven to 475°F.  Line a baking sheet with parchment paper.

In a small bowl, mix the lemon juice, Dijon, honey, and salt and pepper together.  Slowly whisk in the olive oil. Set aside.

Place the chicken on the parchment paper and pour 2/3 of the sauce over it, coating all sides of the chicken.   Reserve 1/3 of the sauce for serving.  Remove and discard the stems from some of the thyme and sprinkle the leaves over the chicken, along with salt and pepper.  Place the thinly sliced Meyer lemons on the pan, as well.  Bake for about 35 minutes on the middle rack.  Remove from the oven and serve with additional sauce and fresh thyme.  Salt and pepper, as needed.  Enjoy!

Thanks for stopping by Relishing It today!

Laurie

Read Full Post »

Paella | Relishing It

I’ve been wanting to share this amazing recipe with you for awhile now, and since Valentine’s Day is approaching I figure it’s finally time.  I’m not sure why, but to me this is a romantic dish.  Maybe it’s the beautiful color, the seafood, the scent of saffron, or even the wine.  In any case, for me this is an ideal Valentine’s Day dinner.

Paella | Relishing It

Yes, the dish looks impressive, but it’s not difficult to make.  It comes together quickly and the cooking time is relatively short.  The most labor intensive task is actually vegetable chopping.  And the flavors– my oh my, they’re unbelievable.  First, there’s the saffron.  Along with providing the beautiful red/orange hue, it adds a wonderful flavor.  Saffron is an impressive spice, but keep in mind it’s also the most expensive one out there.  With that in mind, I’ve given you the option of using between  1/2 – 1 teaspoon for this dish.  I’ve made it both ways, and it’s turned out great each time.  Just don’t skip the saffron entirely, because it makes a difference here.

Saffron for Paella | Relishing It

Spanish Chorizo for Paella | Relishing It

The other main star of the dish is the Spanish chorizo.  This is an aged chorizo with a delicious smokey flavor.  It can be difficult to find, but again, it’s worth the search.  I get mine at the St. Paul Cheese Shop, for those of you who live nearby.  The rice in this dish is supposed to be separated– not creamy like a risotto.  Look for a spanish rice, such as Bomba (also called Valencia) or Calasparra as they will absorb the liquid properly.  Another option is the more readily-available short-grain rice, Arborio.  For my version of paella, I use shimp, mussels, and clams.  I know chicken is often a component, but I stick with the seafood.  You can use whichever you like– you know my theory on making the dish your own.  The seafood paired with the clam juice and wine create a wonderfully intense flavor with a hint of brininess.

Paella | Relishing It

Paella | Relishing It

Seafood Paella | Relishing It

There are many different methods to cook paella.  I settled on heating the oven really hot (to 500°F) and placing a pizza stone in it.  I use a 14-inch stainless-steel skillet, so it’s nice in that it heats evenly in the oven as opposed to sitting on a small burner.  The pizza stone adds additional heat to the bottom of the pan in hopes that it will create a tasty, caramelized crust on the bottom called socarrat.  If you have a smaller 12-inch pan– feel free to cook it on the stove top.  Just be sure to move the pan around a bit for an even heat, while being diligent about not stirring it. If you do use a 12-inch pan rather than a 14-inch, you won’t be able to fit as much meat/seafood into the dish.  Use your judgment, and it’ll turn out just fine.  And of course, if you’re lucky enough to be able to cook it over an open flame outdoors, kudos to you!

Paella | Relishing It

Paella | Relishing It

The Recipe: Seafood Paella

(serves 4)

2 tablespoons olive oil

1 red bell pepper, finely chopped

1 green bell pepper, finely chopped,

1 white onion, finely chopped

3 garlic cloves, finely chopped

1 tomato (preferably from a local greenhouse), finely chopped

2 teaspoons concentrated tomato paste

1 1/2 teaspoons smoked paprika

1 cup bottled clam juice

1 cup dry white wine, more if necessary

2 1/2 cups chicken stock (preferably homemade)

1/2- 1 teaspoon saffron (crushed using a mortar and pestle)

2 cups short grain rice–Bomba (Valencia), Calasparra, or Arborio

8 ounces (1/2 pound) spanish chorizo, cut into 1/4-inch slices

1/2 pound littleneck clams

1/2 pound mussels

1/2- 1 pound shrimp (peeled and deveined)

Lemon wedges, fresh parsley, and red pepper flakes  for garnish

Place a pizza stone into an oven and heat to 500°F for about a half hour.  Combine the chicken stock, clam juice, white wine, and saffron into a large sauce pan and bring to a high simmer.

Meanwhile, using a 14-inch skillet or a paella pan (12-inch will work, too) heat the olive oil and cook the chorizo over medium heat until some of the fat has rendered.  Remove the chorizo from the pan and add the red and green peppers, garlic, and the onions.  Sauté for a few minutes until tender.  Then add the tomato paste, spanish paprika, and the rice.  Sauté for about 1 minute.  Add the hot liquid and the chorizo to the skillet and place pan onto the pizza stone in the oven.  Do not stir after this point.  After 10 minutes, add the chopped tomatoes, mussels, and clams to the pan– crack side up.  Then, after 5 more minutes, push the shrimp into the rice and cook for about 5 more minutes.  If at any point the rice seems to be drying out too quickly, add more broth, water, or wine (go for the wine!) to the pan.  If the rice seems to be done cooking (it will only take about 20 minutes total) before the shrimp is done or the clams and mussels have opened up– just place tin foil over the entire dish to trap some of the steam.  I tend to do this when I place the shrimp into the dish. Discard any mussels and clams that ultimately never open up.  Serve with lemon wedges and fresh parsley.  Enjoy!

Thanks for stopping by today!

Laurie

Read Full Post »

Beer-Braised Pork Shoulder with Polenta | Relishing It

Another polar vortex, another no-school day for the kids.  So another cozy, cold-weather meal is in order.  It was difficult to come up with a name for this dish that would capture the flavors here.  It has so many things going on, but they don’t necessarily fit nicely into a category.  A little bit of Mexican from the ancho chiles and the cumin, and a little bit of Asian from the star anise and the cloves, brought together by the American craft beer.  At any rate, let me tell you about this delicious pork shoulder that you’re going to want to make more than once this winter.

Beer Braised Pork Shoulder with Polenta | Relishing It

For those of you who have a fear of tackling a large cut of meat, this recipe is an ideal entry point.  Braising a pork shoulder could not be easier and the results are dynamite.  For starters, and not to sound like a broken record– please use a piece of meat that has been raised properly, preferably local.  Braising can be done using any variety of liquids– broth, wine, milk, or plain water.  In this recipe I used a local craft beer that paired with the spices to develop a deep, wonderful flavor.  The pork works wonderfully with the sweeter tones of cinnamon/cloves/star anise/and allspice.  It also works well with ancho chiles and cumin.  Marrying the two combinations together is fantastic.  You’ll love it.  Be sure to top it with a bit of fresh jalapeño– it’s not that hot and the freshness really brightens up the flavors.

Beer-Braised Pork Shoulder with Polenta | Relishing It

We generally serve the pork shoulder on top of  polenta.  I love a creamy, hot bowl of polenta when it’s cold outside.  Polenta is basically just yellow cornmeal.  It’s origin is Italian and from what I gather, true Italians wouldn’t dream of putting dairy into their polenta, instead making it only with water.  I’m not Italian.  So, I opted for a couple pats of butter and a sprinkle of parmesan mixed in with mine.  I think my Fortify friends may have influenced this a bit.  You will find different variations of the grind size when buying polenta.  Medium ground seems to make the most satisfying polenta.  Some people think making polenta is fussy, but I haven’t found that to be the case.  I do however advise you to be ready to sit down and eat the moment the polenta is done.  It doesn’t stay creamy all that long before it starts to harden and become a bit clumpy.  While it still maintains it’s lovely flavor, the silky texture will be lost.  So, be ready to sit down at the table and enjoy this lovely meal.

Beer-Braised Pork Shoulder with Polenta | Relishing It

The Recipe: Beer-Braised Pork Shoulder with Polenta

(serves about 4 with leftovers)

For the Pork Shoulder:

2 tablespoons olive oil, for browning

about a 4-pound pork shoulder (bone-in gives a great flavor)

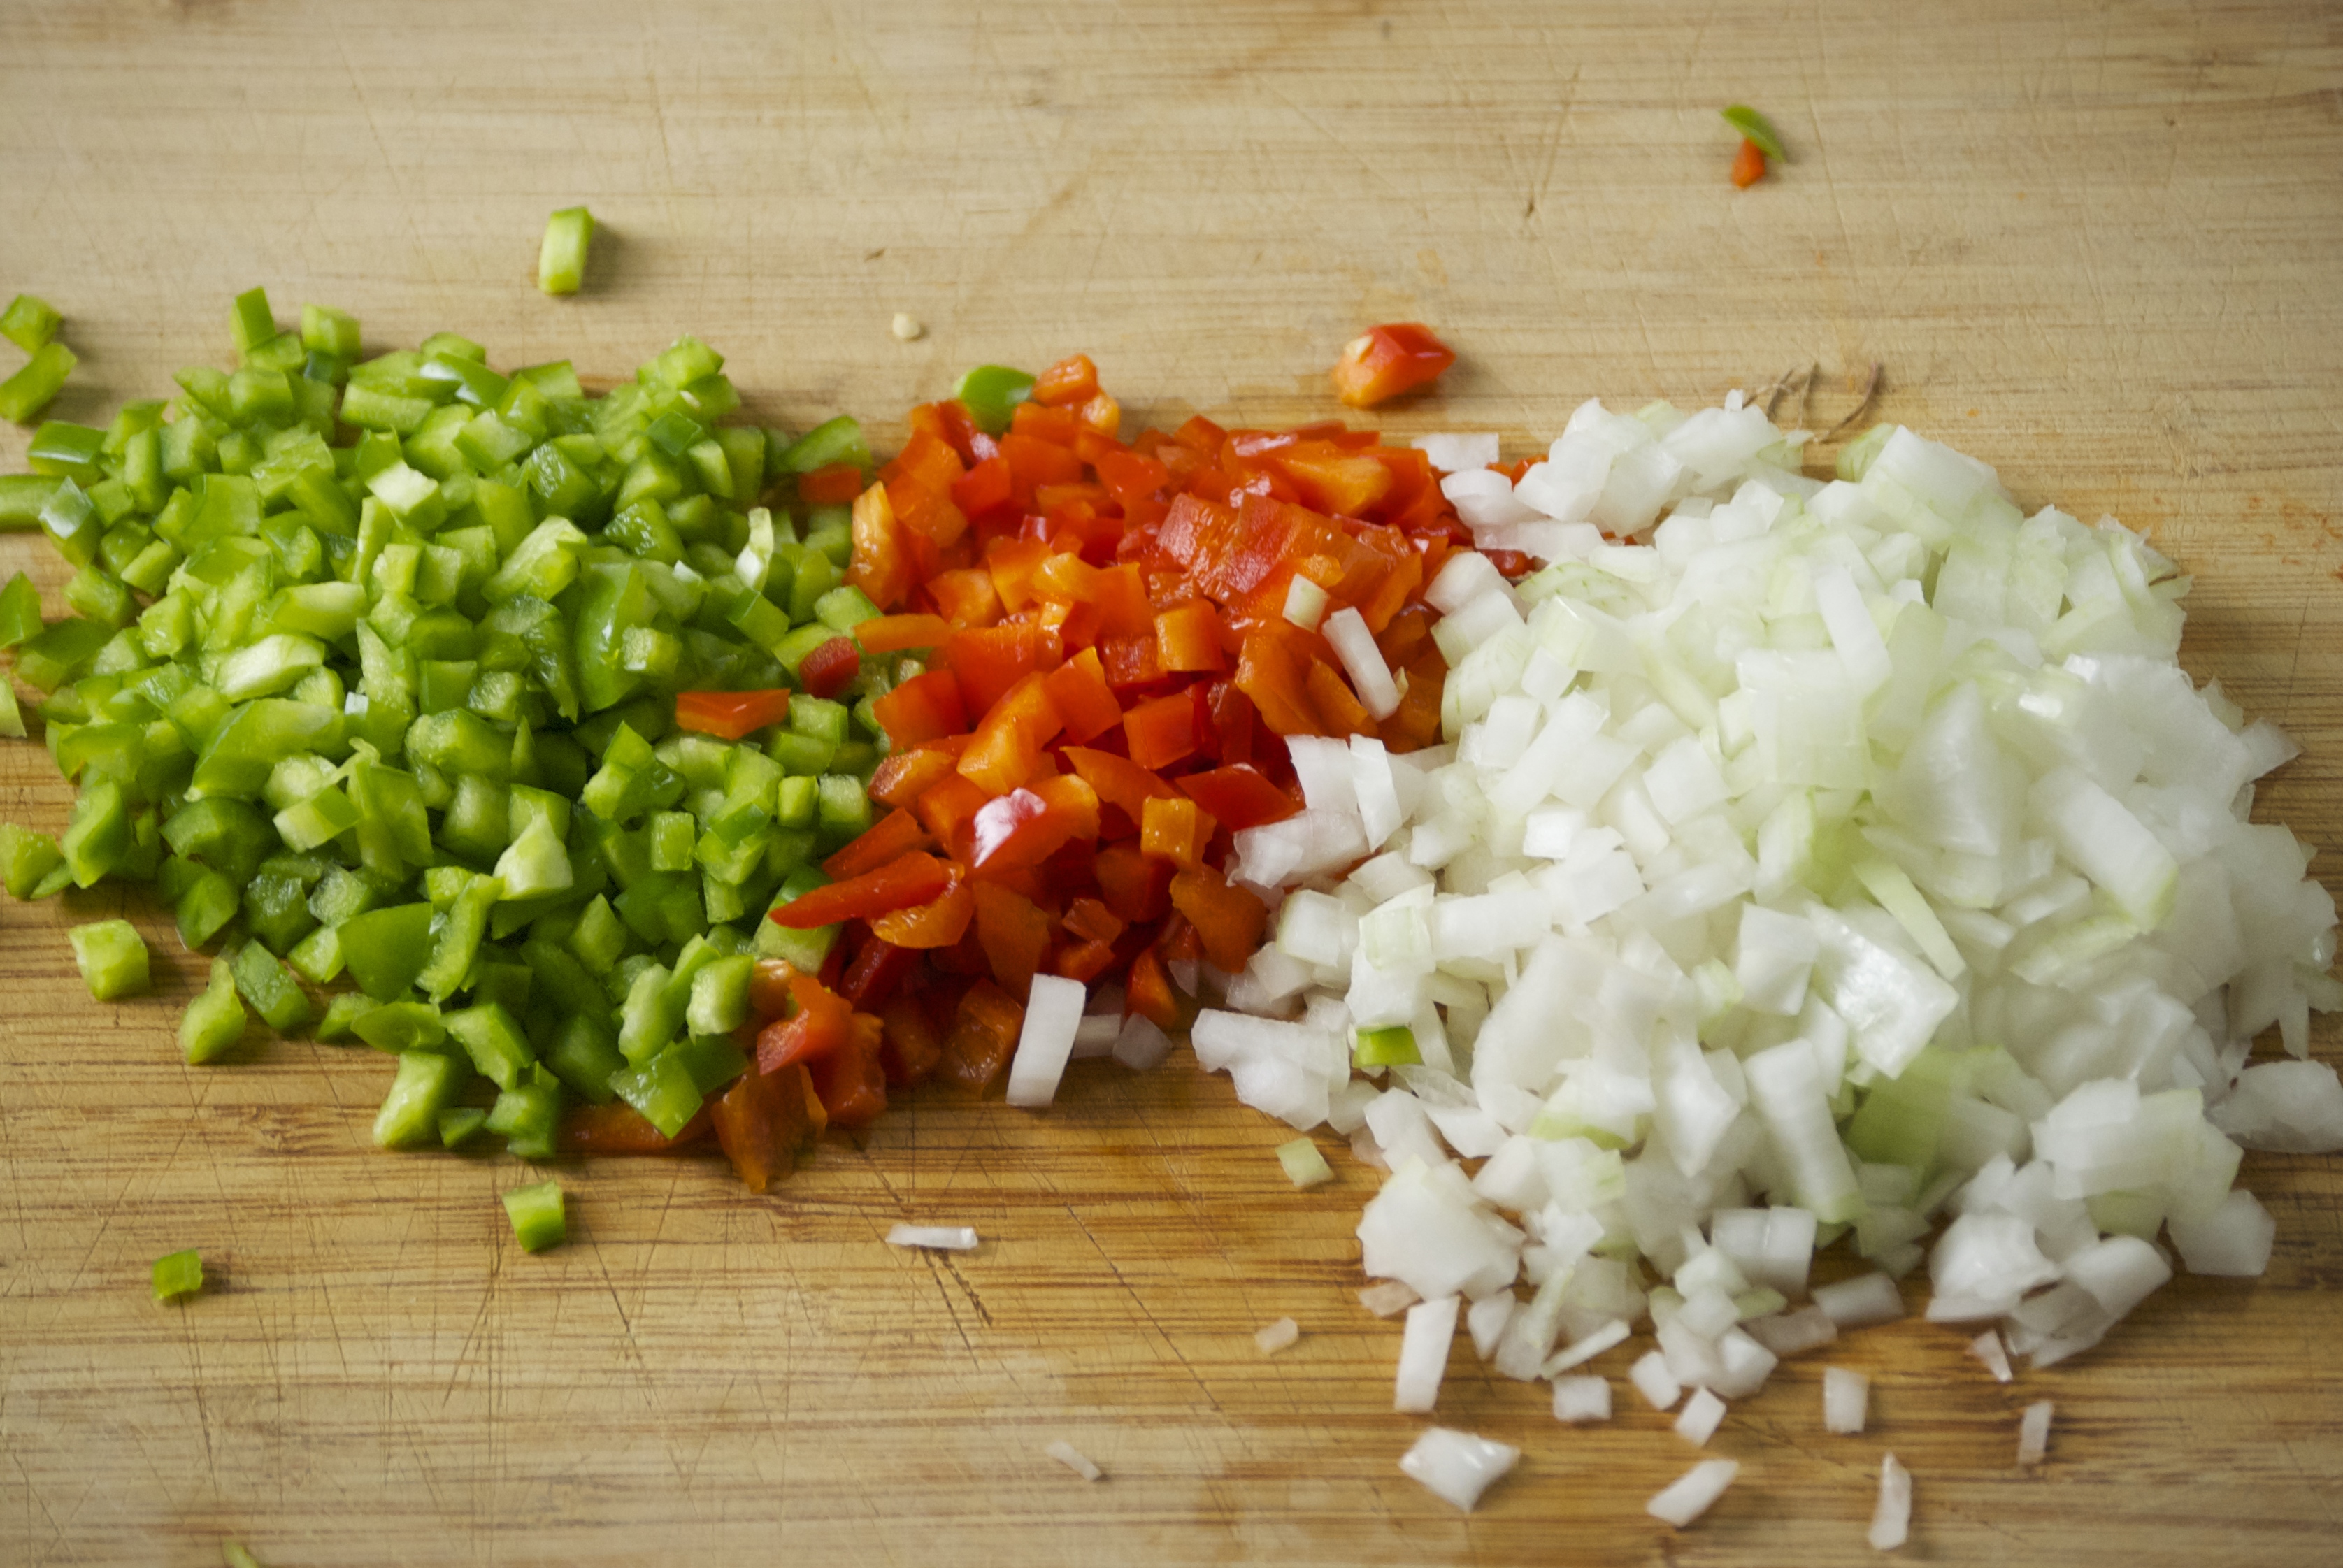
1 medium white onion, diced

7-8 garlic cloves, minced

1 tablespoon ancho chile powder

1 teaspoon ground cumin

1/2 teaspoon ground allspice

1/4 teaspoon chipotle chile powder

1/4 teaspoon ground cloves

1/4 teaspoon ground coriander

1 4-inch long cinnamon stick

1 whole star anise

1 dried bay leaf

Kosher salt and freshly cracked black pepper

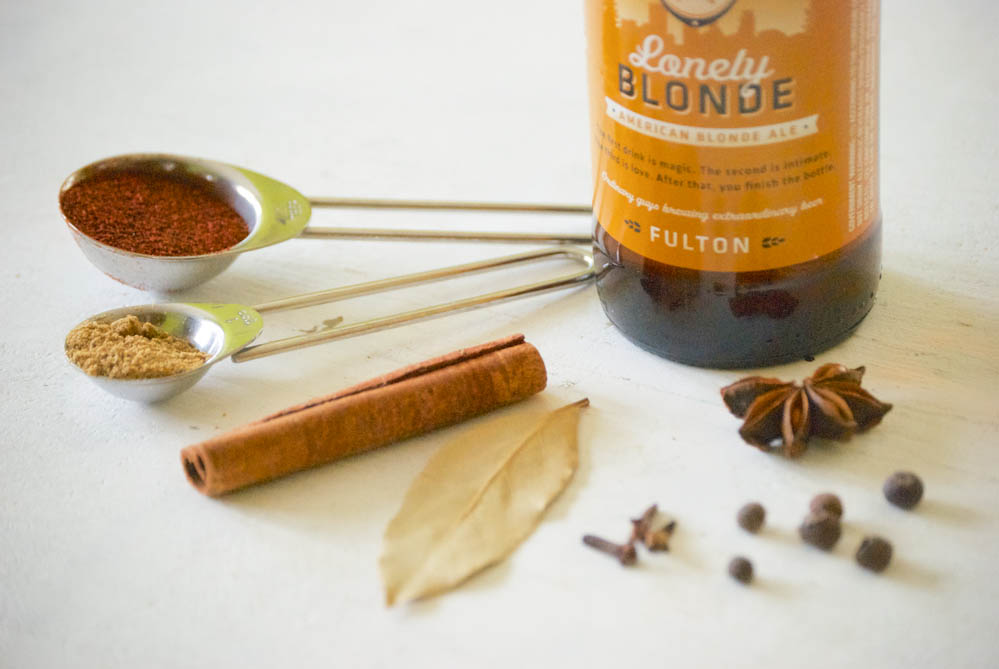
1 12-ounce bottle of really good craft beer (Locally,  Fulton’s Lonely Blonde or Indeed’s Midnight Ryder work really well.  One is a lighter beer and the other is a black ale.  The end results are each different, but both equally delicious.)

For the Polenta:

5 cups water

1 cup polenta, preferably medium grind

salt

a couple pats of butter

a few grates of fresh parmesan cheese

Pre-heat oven to 250 °F.  Over a med-high flame, heat a large Dutch oven coated with olive oil until it is hot.  Pat the pork shoulder dry with a paper towel and season both sides of it with salt and pepper.  Place the pork in the Dutch oven and brown every side (ends, too) until a deep, dark caramel color has formed on all sides.  Remove from the pot and place on a plate.  In the same pot, add the onion and garlic, and a bit more olive oil, if needed.  Sprinkle with salt and pepper.  After about 3 minutes, add the the entire list of spices.  Stir and then add the beer.  Place the pork, along with any juices back into the pot.  Bring to an almost boil, then remove from heat.  Cover and place in the heated oven for about 3 hours.  You will know when the pork is done when you touch it with a fork.  It should feel tender, not tough.  It should practically fall off of the bone when gently tugged at.  If there is too much resistance, roast it a bit longer.  Be sure to have an oven thermometer, so you know the accuracy of your oven.

Meanwhile, begin the polenta.  In a large saucepan heat 5 cups of water seasoned with salt.  When it is boiling, sprinkle the polenta on the top.  Whisk everything together and reduce the heat to a medium simmer.  Continue to whisk every so often to avoid the bottom burning.  The mixture will eventually thicken up– the exact time will depend upon the size of the grain and how high you have the heat– so, I won’t give an exact measurement in minutes (anywhere from 20-40 minutes), just look for it to be the thickness that you desire.  When it is done, remove from heat and mix in a couple of pats of butter and a few grates of fresh parmesan cheese.  Polenta requires a decent amount of salt, to bring out the flavor– re-season, if necessary.  (Note:  leftover polenta can be spread out smoothly onto a baking sheet.  Refrigerate, then cut into squares.  You can bake or fry it and top it with all sorts of things– use your imagination!)

While the polenta is cooking, tend to the pork.  When the pork is done, remove it from the pot.  I like to make a smooth sauce out of the liquid, but the choice is entirely yours.  You can certainly skip this step.  Strain the liquid.  Then pour the liquid portion into a gravy separator to remove the fat, or use a spoon to skim it from the top.   Remove the cinnamon, star anise, and bay leaf and discard.  Place the remaining onions and garlic into a blender.  Then pour the liquid (sans fat) into the blender and blend it together (always be careful when blending hot liquids).  Return the mixture to the Dutch oven and re-season with salt and pepper, if necessary.  Meanwhile, separate the meat from the bone and tear it into big chunks.  Place the meat into the sauce.  Serve with jalapeños and polenta, if desired.  This is a wonderful dish to re-warm, as the flavors deepen even more overnight.  Enjoy!

Thanks for stopping by Relishing It!

Laurie

Read Full Post »

Homemade Tortillas | Relishing It

Well, I’ve finally solved “The Great Taco Dilemma” in our house.  You see, there’s been a long-running disagreement over which tortillas to use.  The kids like those big, floppy, mass-produced white tortillas, while I’ve always favored the smaller, more authentic corn tortillas that are so good when served at the local tacquerias.  But as my husband usually points out while grappling with a rapidly-disintegrating taco, the store-bought versions just crumble in half.  Now, I’ve had a revelation– homemade tortillas that strike that perfect balance.  Soft and pliable because they’re made with wheat, yet with the homemade feel of authentic tortillas.   I hadn’t tried making my own before because I wasn’t convinced that there could be much difference in quality.  The fact is, store-bought tortillas don’t even come close.  And you can roll them out and fry them up in about 10 minutes flat.  That is 10 minutes well spent, my friends.

Homemade Tortillas | Relishing It

Homemade Tortillas | Relishing It

Homemade Tortillas | Relishing It

Now that the tortilla situation is resolved, we’ve been enjoying the heck out of homemade tacos.  In the time it takes me to roll one dough ball out, another tortilla has completed the frying process.   It’s quick– just 30 seconds on each side.   The ones seen here are a delicious classic Americanized version.  We used this fresh tomatillo salsa and this homemade taco mix.  If you’re up for a more a little more variety, this or this recipe are fabulous options.  Whichever you end up trying, these tortillas are the perfect canvas to showcase amazing flavors.  I also love the fact that I can make these as healthy as I want.   Traditionally, tortillas are made with lard, but I like to use grass-fed butter along with organic white whole wheat flour.  Feel free to use shortening or lard and all-purpose flour, if you want.  One note about rolling the dough out– roll it as thin as you possibly can (see the photograph).  The tortillas also keep very well in the refrigerator for several days, as long as they’re in an airtight bag.  Freezing them is also a great option.  Enjoy!

Homemade Tortillas | Relishing It

Homemade Tortillas | Relishing It

Homemade Tortillas | Relishing It

The Recipe:  Homemade Tortillas

(makes 11)

9 ounces (2 cups) white whole wheat flour (all-purpose can be substituted)

1 1/4 teaspoon kosher salt

1/4 teaspoon baking powder

1/4 cup cold unsalted butter, cut into cubes (shortening or lard can be substituted)

2/3 cup warm water (not fully hot)

In a large bowl, whisk the dry ingredients together.  Cut in the butter with a pastry blender or a fork.  Mix in the warm water with a fork.  The mixture will be a shaggy mess at this point.  Knead on a lightly floured surface for 3-4 minutes, or until smooth. Adding more flour to the surface as necessary.  Roll into 1 1/2 ounce balls.  Place on parchment paper and cover with a kitchen towel for 1-2 hours.

On a lightly floured surface, roll the dough balls out until they are paper thin.  Try to maintain a circle, but it doesn’t have to be perfect.  Heat a dry cast-iron skillet on medium-high heat.  When hot, place the tortilla in the pan and cook each side for about 30 seconds, or until the tortilla begins to lightly brown in some spots.  Keep a watchful eye so it does not burn.

Meanwhile, roll out another dough ball and place in pan when the current one is done cooking.  Continue the process until all the tortillas are made.  As each tortilla is done, place and cover them in a towel lined basket to keep them warm. Enjoy!

Thanks for stopping by Relishing It today!

xo

Laurie

Read Full Post »

Deconstructed Stuffed Peppers | Relishing It

I’m willing to place a sizable bet that most of you are a little tired of turkey leftovers.  Well let’s switch it up then, with this little dish to revive your tastebuds.  This is one of those quick, healthy meals that I promised you a few weeks ago.  It’s loaded with healthy ingredients and the combination of flavors is one of my favorites– sauerkraut and beef.  (Remember this galette?)  This time I’ve also added the tang of tomatoes and the ever-so-slight crunch of green peppers.  Lovely.

Deconstructed Stuffed Peppers | Relishing It

A few comments on how I’ve titled this dish.  Let me go on record as saying I’m not a huge fan of the word “deconstructed” when it come to food.  It’s often misleading, pretentious, or both.  I know others have the same gripe about describing oneself as a “foodie”.  (Personally, I’m fine with foodie).  Anyway…here I couldn’t really come up with another way to describe this dish.  The fact is, it takes all of the wonderful components of stuffed peppers, and, well, deconstructs them.  There’s really no other way to describe it unless I decided to go with “pile of peppers, rice, ground beef, sauerkraut, and tomatoes”.  And for some reason that just doesn’t seem quite as appealing.

Deconstructed Stuffed Peppers | Relishing It

Just because this variation comes together more quickly, don’t for a moment think they aren’t as good as the original.  That would be a huge mistake, because this dish is about 10 times better than any traditional version.  Here’s why– you know that moment when you cut into what used to be a vibrant green pepper, and the liquid just floods out on to your plate because the pepper has baked far too long to ensure the filling reached the right temp?  Yeah, that doesn’t happen here.  No disappointing mushiness to the green pepper, no pieces of hamburger submerged in puddles of tomato-y water.  Here, the green peppers retain their vibrant green color and a bit of their crunch, because you decide what texture you’d like them to be.  The tomato sauce (or crushed tomatoes), whichever you choose to use, are the perfect base for the rice and ground beef.  The whole dish is finished with a healthy dose of really good sauerkraut to add that wonderful zip.  Use this saurkraut recipe to make your own, or buy a good quality version.  Bubbies has wonderful fermented products.  The entire dish takes only the amount of time that you need to make the brown rice.  So…get going, time’s a ‘wasting!   Enjoy!

Deconstructed Stuffed Peppers | Relishing It

The Recipe: Deconstructed Stuffed Peppers

(makes enough for 4 people)

1 cup dry long grain brown rice, rinsed

1 pound grass-fed ground beef

2 large green bell peppers, cut into large bite-size chunks

1 small white onion, diced

1/2 quart homemade tomato sauce, or a bit more  (your favorite purchased sauce or crushed tomatoes will work, too)

1 cup good quality sauerkraut

fresh parsley, for garnish

salt and pepper, to taste

Place the rinsed brown rice in a large saucepan with 2 cups of cold water and a sprinkle of salt.  Cover and bring to a boil, then reduce to a medium simmer and let rice cook for about 30 minutes or until it is tender and the water has been absorbed.  Fluff with fork.

Meanwhile, when the rice is about halfway through it’s cooking time, begin to brown the beef  over medium-high heat in a large skillet.  For this dish, I like to leave the beef in somewhat big chunks.  When it is cooked, drain and discard the grease.  Season the beef with salt and pepper and add add the onion to the pan.  Cook the onion until it begins to get tender, just 2-3 minutes.  Add the green peppers and cook just a few minutes until they are a bit tender, but still have a slight crunch to them.  Add the tomato sauce and warm through.  When the rice is ready, add it to the skillet and stir.  If the dish is hot enough, add the sauerkraut and stir just enough to warm the kraut, but not enough to cook it.  It’s lovely when it has a bit of a crunch to it.  Re-season with salt and pepper, if necessary.  Garnish with freshly chopped parsley.  Enjoy!

If you’re looking for gift ideas for the favorite foodie in your life, I’ve compiled a list of my favorites.  Stop over to Becki’s site, “Shopping’s My Cardio” and have a look!  Thanks for stopping by Relishing It today.  xo

Image 2

Read Full Post »

Ginger Sesame Butternut Squash, Brussel Sprouts, and Black Rice | Relishing ItI just know many of you are in the thick of planning your Thanksgiving menus, and I’ve got a side dish that would look absolutely grand on your table.  I’m one of those who think the Thanksgiving meal is all about the sides.  Sure, the turkey is fine, but there just isn’t a lot of excitement there.  It’s the side dishes that have the variety of flavors and colors that make the meal so interesting.   At least that’s how I feel.  My husband habitually defaults to two servings of turkey, gravy, potatoes, and stuffing.  That’s it.  I’m not sure what’s wrong with him.  Anyway, even if you’re not looking for a Thanksgiving idea, this dish is pretty incredible for any occasion.  I like to make it and enjoy the leftovers throughout the week– it keeps and heats up beautifully, never losing any texture or flavor.

Ginger Sesame Butternut Squash, Brussel Sprouts, and Black Rice | Relishing It

Ginger Sesame Butternut Squash, Brussel Sprouts, and Black Rice | Relishing It

Ginger Sesame Butternut Squash, Brussel Sprouts, and Black Rice | Relishing It

Ginger Sesame Butternut Squash, Brussel Sprouts, and Black Rice | Relishing It

I usually have some baked squash in my refrigerator on most any day during winter.  It’s just one of those healthy, filling vegetables that works with so many meals.  Butternut squash holds it’s shape really well in this dish.  Brussels are also a favorite, and here they go particularly well with the squash.  If you haven’t yet tried black rice, here’s your chance.  It’s healthy and has a wonderfully nutty flavor.  The slightly-chewy, toothsome texture balances out the softer vegetables in this dish.  And if you can’t get your hands on black rice, any wild rice would be a good substitute.

Ginger Sesame Butternut Squash, Brussel Sprouts, and Black Rice | Relishing It

Finally, let’s talk about this amazing ginger sesame dressing.  Ginger adds such a unique and robust flavor, so a little goes a long way.  The sesame oil give the dressing an additional layer of nuttiness (flavor, not craziness).  It’s worth buying a bottle.  Side note, keep it in your refrigerator, so it lasts longer.  This dressing is amazing on these vegetables– but would be wonderful on so many other things, as well.  Be creative!  Enjoy!

Ginger Sesame Butternut Squash, Brussel Sprouts, and Black Rice | Relishing It

The Recipe:  Ginger Sesame Butternut Squash, Brussel Sprouts, & Black Rice

(makes enough for 4-6 people, easily)

About 1 pound small brussel sprouts, halved (or quartered, if large)

About 1 pound (or a bit more) butternut squash, peeled and cubed

2/3 cup dry black rice, rinsed

2 tablespoons extra-virgin olive oil, for roasting

1 tablespoon sesame seeds, toasted, for garnish

Ginger Sesame Dressing:

3 tablespoons balsamic vinegar

1 teaspoon finely minced ginger

1 garlic clove, minced

1 teaspoon honey

1/2 teaspoon soy sauce

1 teaspoon sesame oil

1/4 cup extra virgin olive oil

Preheat oven to 375°F.

To make the black rice:  Place the rinsed rice in a medium saucepan along with 1 1/3 cups of water.  Add a sprinkle of salt.  Cover and bring to a boil.  Reduce heat to low-medium  and cook for about 20 minutes, or until the rice is mostly tender.  Turn off the heat and let it sit in the pan covered for 15 minutes, or so .  Fluff with a fork when ready to use.

Meanwhile, place the brussel sprouts and butternut squash on a large baking sheet.  Toss with two tablespoons of olive oil.  Roast for abut 25-30 minutes, or until the vegetables are tender.  Make sure to flip the vegetables once or twice for even browning.

To make the Ginger Sesame Dressing:  In a medium-sizd bowl, whisk together all of the ingredients except the olive oil.  Then, slowly add the olive oil while continuing to whisk.  Set aside until ready to use.

In a large serving bowl or platter, gently combine the roasted butternut squash, brussel sprouts, black rice, and ginger sesame dressing.  Taste and season with kosher salt, if necessary.  Top with the toasted sesame seeds.  Enjoy!

Thanks for stopping by today!

Laurie

Read Full Post »

Easy Homemade Sauerkraut | Relishing It

I grew up in a small town in western North Dakota settled way-back-when mostly by German immigrants. Not surprisingly, sauerkraut has always been a part of my family’s meals. My grandmothers, aunts, and my mom have always made their own.  I can’t tell you how many times in my childhood I had to trudge down the stairs to the cool basement to retreive another jar of kraut from the shelves packed with canned goods. It was always there– an endless supply. I loved sauerkraut as a kid, and still do. I’m that person who orders it on pizza any chance I get.  My favorite way to eat it is simply really cold, in a bowl.  I like my sauerkraut to have a lot of crunch to it.

Easy Homemade Sauerkraut | Relishing It

I don’t exactly make my sauerkraut the same way the rest of my family does.  My version tastes the same– I’ve nailed down the technique that gives that deliciously tangy and crunchy sauerkraut.  But, I don’t can my batches. There are so many good, healthy things happening when you ferment food, that I just can’t bring myself to ruin those benefits by heating it up too much. Instead, I make small batches and let it ferment for a few weeks at room temperature, and then refrigerate.  If you’re not familiar with fermentation and the health benefits, be sure to look into it.

Easy Homemade Sauerkraut | Relishing It

I’ve made saurkraut in a traditional crock in th past, which though seemingly fun, didn’t give me the results I was looking for. I loved the idea of the crock sitting out and fermenting for all to smell and see, but there was no crunch when it was all said and done. I’ll find another use for that crock, though.

Easy Homemade Sauerkraut | Relishing It

Easy Homemade Sauerkraut | Relishing It

I’ve found that my sauerkraut turns out precisely how I want it when I pack it into mason jars and let it ferment on the counter for a couple of weeks.  It becomes deliciously tangy and stays crisp and crunchy.  Every few days in the beginning of the fermentation process, I’ll open the jar to release some of the gas.  It doesn’t take long for the cabbage to take on that tell-tale sauerkraut scent.  The first time or two that you do this, there will be quite a lot of bubbles and fizzing action.  Exciting! After about 2-3 weeks of sitting out at room temperature, I test it out and when it’s the perfect tanginess– I put it in the refrigerator, ready to eat. Then I start another batch, and the process just rolls along. I always have fresh sauerkraut to use in my favorite dishes, such as this Rustic Potato, Sauerkraut, and Beef Galette.  Or mix it into this beautiful Ham, Bean, and Sauerkraut Soup by Fresh Tart.   I hope you give this a try.  It’s ridiculously easy and the rewards are fantastic.

Easy Homemade Sauerkraut | Relishing It

The Recipe:  Easy Homemade Sauerkraut

(makes about 2 quarts)

5 pounds of fresh cabbage, cored and sliced into ribbons (not too thick, not too thin).  Reserve a couple of the large outer leaves to use later.

3 tablespoons kosher or sea salt  (nothing with chemicals, please)

2 sterilized mason jars with lids  (preferably regular mouth jars– the “shoulders” on the sides will keep the cabbage pressed down and submerged in the liquid better)

I’ve  found that if I slice my cabbage too thin, it doesn’t have the crunch that I’m looking for.  Too thick, and it’s awkward to chew.  Using a chef’s knife works the best for me.  Slice it into not-too-thin, but not-too-thick ribbons (use your best judgement and refer to the photos).

Place the sliced cabbage in a huge bowl and sprinkle with salt.  Use a masher, if you have one,  to mix the salt and cabbage together.  Bruising the cabbage a bit with the masher with soften the cabbage up and release some of the water from it.  Inevitably, I turn to my hands and massage the cabbage and salt together.  Let it sit for about an hour, or so.   Keep massaging it a couple of times throughout that hour, or place a plate directly on top of the cabbage and something heavy on the plate to weigh it down.  The pressure will release the water faster.  There should be a pool of liquid that has formed.  Pack it into the mason jars and push down– the liquid should come above the cabbage.  Next, fold the extra cabbage leaf and place on top of the cabbage.  This will push your cabbage down so it remains in the liquid to ferment.  Put the cover on the jar and wait.  After a day or two, open the jar and let the gas out.  There will be a lot of bubbles and fizzing action.  This is good!  It’s beginning to ferment.  Check it again every couple of days.  Occasionally, mold may form on top of the cabbage.  This is fine and normal.   Just scoop it out and continue to ferment.  I’ve found that mold occurs more often when using the crock method, as opposed to mason jars.

 After about 2-3 weeks (depending upon how tangy you like your sauerkraut), remove the cabbage leaf and place the jar in the refrigerator to use.  I’m not exactly sure how long it will last in the refrigerator, as we always use ours before it’s even a question.  It should be fine for a few weeks, possibly a couple months.  Enjoy!

Thanks for stopping by Relishing It!

Laurie

Read Full Post »

Roasted Potatoes with a Curry Dipping Sauce | Relishing It

Sometimes you make mistakes.  Sometimes, you have to admit when you’ve simply been wrong.  Now don’t get too excited– this isn’t some juicy confession.  I’m talking about my misguided idea that potatoes should be avoided.  That they aren’t “good for you.”  I ate them sparingly for years, but then it occured to me, they’re a whole food.  Nature makes them all on it’s own.  Come on!  They’re potatoes.  Why did I think this was a bad thing?  Yes, they’re a carbohydrate, but I’m cool with that.  I need carbs in this body.  They give me energy.  I know I shouldn’t go crazy and pile starches onto my plate every meal, but, the same can be said about almost every food.  Well, maybe not broccoli…or kale…but you get the point.

Roasted Potatoes with a Curry Dipping Sauce | Relishing It

I’m glad I’ve rediscovered my love of potatoes.  I’ve probably mentioned here in the past that my Mom has always had an amazing garden.  When I was a little girl, we lived on a farm where there was plenty of space for her to grow almost anything.  Even so, rather than restrict them to the garden, the potatoes had a special HUGE section in a field near the house.  My grandparents would come over and we’d have potato-planting parties out in that field.  True story.  My favorite part was when, after a few months, we’d all head back out to the field and dig ’em up.  I can still see my Dad, with the salt shaker that he’d bring out into the field (seriously), shining up a few potatoes to crunch-away on while we dug.

Crispy roasted potatoes are amazing.  Here I’ve paired them with a delicious coconut curry dipping sauce.  The most important thing to keep in mind when making roasted potatoes is that you simply can’t cut them up and put them in the oven.  You need to cook them a fair amount beforehand.  Some people choose to boil them slightly, I always steam my potatoes.  I find that they don’t get saturated and fall apart this way.  It also keeps them from losing some of their nutrients.  For convenience, you can steam up a big batch of potatoes in the beginning of the week and leave them sit in your fridge– that way they’re ready to use whenever you need them.  You’d be surprised how many ways you can find to use them.

Roasted Potatoes with a Curry Dipping Sauce | Relishing It

The curry sauce here is delicious.  It’s simple and not overly fancy.  You should have most of these ingredients on hand already.  With the crispy potatoes, it makes a brilliant combination.  I hope you give these a try!

The Recipe:  Roasted Potatoes with a Coconut Curry Dipping Sauce

(serves 4)

1 pound small, yellow potatoes

1/3 cup finely chopped white onion

3 garlic cloves, finely minced

1 teaspoon finely minced fresh ginger

1 1/2 tablespoons sweet curry powder (I love Penzys’ version)

1/4 teaspoon ground turmeric

1/4 teaspoon garam masala

pinch of sugar, to taste

1 1/2 cups chicken broth, (1 tablespoon reserved)

1 teaspoon tomato paste

1/2 cup coconut milk

1 tablespoon cornstarch

salt and pepper

fresh cilantro for serving

In a large sauce pan, place a steamer basket (or you can choose to simply boil them) and fill with the potatoes and a bit of water.  Cover with a tight fitting lid and steam until the potatoes are tender when tested.  I steam my small potatoes whole, but if you only have large ones– just cut them up before steaming.  Make sure to not over-steam them, as they will fall apart.  I’m not going to give an exact time, as it will depend upon the size of your potato.  It’s best to just test them.  When they feel as if they’re nearly done.  Remove from heat and let them sit covered for a few minutes to finish cooking and then let cool.  At this point you can either put them in the refrigerator to use at a later time, or continue with the recipe.

Preheat the oven to 450°F.  Quarter the potatoes and place on a large baking sheet that has been coated with a thin layer of olive oil.  Drizzle a bit more olive oil on top of them and toss.  Sprinkle with salt and pepper.  Keep in mind that potatoes tend to need a lot of salt.  Don’t be too shy.  Roast for about 15 minutes, then carefully flip the potatoes.  Yes, I do this individually, because I really enjoy crispy potatoes and I want all the sides to be properly golden browned.   It doesn’t take that long.  Roast for another 15 minutes.  Give another toss and test them.  Roast longer if necessary (again, much will depend upon how big your potatoes were cut).  Mine are usually done after 30 minutes.  Taste.  re-season, if necessary.

While your potatoes are roasting, begin the curry.  In a medium-sized skillet, heat 2 tablespoons of olive oil.  Add the onion, garlic, and ginger and sauté for a couple of minutes until somewhat tender.  Add the curry powder, turmeric, and garam masala and toast for abut 30 seconds.  Add the chicken broth (sans 1 tablespoon), tomato paste and coconut milk and a pinch of sugar.  Whisk together until smooth.  Cook over medium heat for about 10-15 minutes,  stirring frequently.  Taste as you go, add more salt or sugar, if necessary.  In a small bowl, mix 1 tablespoon cornstarch with 1 tablespoon chicken broth until it’s smooth.  Whisk mixture into the skillet and cook for about another 10 minutes until the mixture is somewhat thickened.  Reseason, if necessary.

Immediately sprinkle chopped cilantro on the hot, crispy potatoes when removed from the oven and serve along side the curry sauce.  The potatoes are best eaten immediately.  Enjoy!

photo

Last week was a busy one.  Along with the excitement of Halloween and indulging in far too much candy, our precious girl turned five!  You add so much happiness and joy to our lives, Aria.  We love you so much– Happy birthday!

Thanks for stopping by!

Laurie

Read Full Post »

Rustic Potato, Sauerkraut, and Beef Galette | Relishing It

Autumn.  The best of all the seasons, even if it’s only brief here in Minnesota.  Yes, Spring is a close second, but when Autumn rolls around, I’m really, truly happy.  I love the brilliantly colored, crisp, maple leaves that my daughter brings me as bouquets for our dining room.  We live in an old Victorian with dark wood and decor in our living and dining rooms.  I always think about re-painting to brighten things up, but when Fall rolls around, it feels so comfortably warm and cozy, and I’m thankful I haven’t changed a thing.

Rustic Potato, Sauerkraut, and Beef Galette | Relishing It

Rustic Potato, Sauerkraut, and Beef Galette | Relishing It

Rustic Potato, Sauerkraut, and Beef Galette | Relishing It

Rustic Potato, Sauerkraut, and Beef Galette | Relishing It

On of my favorite Fall (and even winter, for that matter) dishes is this amazing Rustic Potato, Sauerkraut, and Beef Galette.  The combination of beef and sauerkraut is incredible.  It’s also a bit nostalgic for me.  I grew up with huge pots of meatballs that had been simmering in tangy sauerkraut for hours.  Wonderful stuff.  This galette showcases those flavors.  Just like my other galettes, the crust is crisp and light.  The potatoes add substance, while the fresh mozzarella ensures that the dish is moist enough.  Of course, you can substitute another mild cheese, like grated regular mozzarella, if you like.  I really wanted the tang from the sauerkraut to be showcased here, rather that hidden underneath a more assertive cheese.  I’m planning to share with you all a quick sauerkraut recipe and technique very soon.   I really hope you give this galette a try– I think you’ll really enjoy it!

Rustic Potato, Sauerkraut, and Beef Galette | Relishing It

The Recipe:  Rustic Potato, Sauerkraut, and Beef Galette

Use this pie crust recipe  (with 1/2 tablespoon chopped fresh rosemary and 1/2 tablespoon chopped fresh thyme mixed into the dough)

1/2 pound ground beef

1/4 cup chopped white onion

2 garlic cloves, minced

1/2 teaspoon kosher salt

black pepper

3/4 pound small steamed yellow potatoes, sliced

1/2 cup sauerkraut, drained a bit

6 slices of fresh mozzarella  (or a bit more)

1 teaspoon fresh chopped parsley, plus more for garnish

olive oil

1 egg mixed with 1 teaspoon water, for an egg wash

Follow these directions to make the pie dough.  You will only be using one of the dough balls for this recipe.  Freeze the other one for another time.  Add the fresh herbs when you are mixing the dough.  Refrigerate for 2 hours.  Proceed.

Preheat your oven to 375°F.

In a large skillet, brown the ground beef over medium/high heat.  Drain and discard the grease.  To the skillet of ground beef add the chopped onions, garlic, 1/2 teaspoon kosher salt, and a bit of black pepper (you may want to add a glug or two of olive oil, if the pan seems a little dry). Sauté for a couple of minutes until the onions are tender.  Remove from heat and set aside.

On a lightly floured piece of parchment paper, roll the pie dough out to a 12-inch circle using a lightly floured rolling pin.  Place the sliced potatoes on the dough, leaving about 1 1/2-inch space around the edge.  Sprinkle salt and pepper on the potatoes.  Next, put the sauerkraut on top, followed by the chopped parsley.  Then add the ground beef mixture, and finally place the fresh mozzarella on the very top.  Fold the edges of the dough up and pinch together to seal the seams as much as possible.  Use a pastry brush to apply the egg wash to the edge of the dough.  Sprinkle salt and pepper on the egg wash.

Slide the parchment paper with the galette onto a baking sheet and bake for 43-45 minutes or until the crust is a deep golden brown.  (Keep in mind that every oven is a bit different.  If you don’t already have an oven thermometer, I highly recommend you get one.  Cheap ones are about $7 and work great.  My oven runs 15 degrees hot.)  Top the galette with chopped parsley and a drizzle of olive oil before serving.  Enjoy!

Thanks for stopping by Relishing It today!

xo

Laurie

Read Full Post »

Orecchiette with Sausage, Broccoli, and Sun-Dried Tomatoes | Relishing It

As much as I love to dabble in the kitchen all day long, I admit that there are days when our family is busy or I just don’t feel like dedicating  that much time to dinner.  The problem is, I don’t like to fall back on some overly-processed meal-in-a-box as the alternative.  Sound familiar?  I’ve found that it’s helpful to have a few quick, delicious dishes up my sleeve, and in talking with friends and family I’ve come to realize that I need to blog more about those types of meals.  If you need a little inspiration, I hope you find it in a few of the coming recipes for quick meals that I’ll be writing about throughout the winter.

Orecchiette with Sausage, Broccoli, and Sun-Dried Tomatoes | Relishing It

This orecchiette with sausage, broccoli, and sun-dried tomatoes, takes barely any time at all.  Maybe 30 minutes to get it on the table, if even.  I love to load a meal up with a healthy vegetable– the broccoli (or broccoli rabe, if you prefer) is just lovely in this dish.  Pairing it with sweet italian sausage is always a good decision.  Make sure to buy a good sweet italian sausage– we get ours locally and the spices are amazing!  And remember all of those sun-dried tomatoes I’ve been making?  The ones I put in a jar of olive oil are absolutely sublime in here.  If you didn’t dedicate the time to preparing your own, you can always buy a jar at your local market.  I like to kick this dish up with a few sprinkles of red pepper flakes and some freshly grated parmesan.  So, even if you’re pressed for time, I hope you can sit down and enjoy a delicious home-cooked meal.  Enjoy!

Orecchiette with Sausage, Broccoli, and Sun-Dried Tomatoes | Relishing It

The Recipe:  Orecchiette with Sausage, Broccoli, and Sun-Dried Tomatoes

(serves 4)

1 pound sweet Italian sausage

1 large head broccoli, cut into small florets (around 4 1/2 cups)

1/2 pound dried orecchiette

4 garlic cloves, minced

1/4 – 1/3 cup extra virgin olive oil  (or substitute part of it with the olive oil from sun-dried tomatoes, if you can spare any)

1/3  cup chopped sun-dried tomatoes in olive oil

1/3 cup (or more) parmesan cheese, for garnish

red pepper flakes, for garnish

Fill a large saucepan with water and bring to a boil.

In a large 12-inch skillet over medium-high heat, brown the sweet italian sausage.  Drain grease.  Meanwhile, cook the pasta.  To the skillet add the olive oil (if you can spare any from the sun-dried tomatoes, the flavor is incredible), garlic, and broccoli and cook until the broccoli is tender, but not mushy– about 5 minutes.  When the pasta is al dente (follow the cooking instructions), reserve a bit of the water, and drain the rest.  Add the hot pasta to the pan of sausage and broccoli.  Toss in the sun-dried tomatoes.  If more moisture is needed, either loosen with more olive oil, or a bit of pasta water.  Salt and pepper, as needed.  This is big– don’t forget the salt!  Top with parmesan cheese and red pepper flakes.  Enjoy!

Thanks for stopping by Relishing It!

Laurie

Read Full Post »

« Newer Posts - Older Posts »