Feeds:
Posts
Comments

Black Bean Soup with Pineapple via Relishing It

Greetings!  With another wave of snowstorms moving into Minnesota this weekend, it’s time for a new soup recipe here at Relishing It.  You already know that I’m soup-obsessed, so I won’t go into that again.  But I always find that Winter is a bit more bearable knowing I can eat soup as often as I like.  Honestly, if you were to take a peak into our refrigerator on any given day this time of year you’d find a couple of soups.  And the leftovers are just easy, quick lunches.  I think so many soups actually get better after sitting for a day or two.

Black Beans via Relishing It

This particular soup takes me back.  Many years ago, I flew out to the East Coast for my best friend’s wedding.  A few days before the ceremony, we found a cute little restaurant that made an amazing black bean soup with pineapple chunks.  Having spent my whole life in North Dakota up to that point, I’d never eaten anything like it.  Black beans with pineapple simply weren’t a pairing you’d find in the local Midwest diners.  The soup was so delicious that we went back for it several times that week.  Since I’ve thought about that soup so often, I finally decided to create my own version of it at home.

Roasted Red Peppers via Relishing It

First up are the beans.  These fantastic little legumes are delicious and good for your body.  More on that here.  I love how versatile they are– they’re staples in Mexican, Indian, and Caribbean cuisine.  Add to that the fact that they’re inexpensive, and it’s a total win.  I put beans in so many dishes that it’s ridiculous.  In this soup, the pineapple makes for a perfect pairing with the black beans.  It adds a nice subtle sweetness to contrast with the savoriness.  And the acidity from the fruit gives this soup a fresh flavor that you don’t often find in bean-based dishes.

Black Bean Soup with Pineapple via Relishing It

I also delved into my frozen supply of roasted red peppers from this past summer.  They worked great in this soup.  If you can’t find any roasted red peppers, feel free to use a regular one, but be sure to sauté it a bit before adding it to the soup.   The cilantro on top gives it another burst of freshness, and the jalapeño lends just the right amount of heat.  So gather up your ingredients and get this one simmering for the snowfall this weekend.  Cozy-up, my friends!

Black Bean Soup with Pineapple via Relishing It

The Recipe:  Black Bean Soup with Pineapple

(serves 4-6)

2 tablespoons olive oil

2 2/3 cups dried organic black beans, soaked overnight (or 4 – 15 ounce cans, drained)

1/2 cup white onion, chopped

4 garlic cloves, chopped

1/2 cup roasted red peppers, chopped

1 1/2 tablespoons cumin seed, toasted then ground

1 teaspoon coriander seed, toasted then ground

1/2 teaspoon smoked paprika

1 dried bay leaf

1 pineapple, cut and cubed,  yielding about 2 cups (canned can also be substituted)

4 cups water

kosher salt and pepper, to taste

Sliced jalapeños and chopped cilantro, for garnish

In a large Dutch oven, sauté the onion and garlic in the olive oil over medium heat for a couple of minutes.  When the onions are soft, add the ground cumin, coriander, and smoked paprika.  Sauté for about 30 seconds.  Add the roasted red pepper, soaked beans, water, bay leaf, and salt and pepper.  Cook for about a half hour over medium heat or until the beans start to feel nice and soft.  Add the pineapple and continue to cook for another 20 minutes, or until the beans are completely soft and tender.  When they are, carefully remove about 1 cup of the black beans and place it into a blender.  Blend until smooth, then return to the pot.  If you want the soup thicker, blend a few more beans.  Like your soup thinner, add a bit more water.  You get the idea.  Adjust seasoning with salt and pepper, if necessary.   Top with chopped cilantro and sliced jalapeños.  Keeps well for days in the refrigerator.  Enjoy!

Have a lovely weekend!

Laurie

Homemade Corned Beef via Relishing It

We were bracing for a whopper of a Winter storm here in St. Paul this past weekend.  In anticipation, I prepared a braised pork shoulder and polenta to keep us warm.  We dusted off the sleds for some post-storm riding.  We even stopped by the hardware store, since I had hopes of getting a few home projects completed while we expected to be snowed in.  Alas…the storm turned out not to be much of a storm at all.  Even so, the few inches of snow that fell made for a lovely weekend.  Nearly perfect, in fact.  I suppose I should back up a moment.  You see, my husband and I love a good storm.  It’s a cause for celebration around our house.  And while we were a bit disappointed that one never really materialized, we were still able to enjoy all of our preparations.  The pork shoulder was incredible, we finished most of the home projects (even after being out-and-about a lot), and sledding with the little ones was a blast.

Toasting Spices for Homemade Corned Beef

So what does this have to do with corned beef?  Absolutely nothing, I guess.  Even so, now is as good a time as any to share this wonderful recipe with you.  While St. Patrick’s Day is still several weeks away, I’m going to try to convince you to make your own corned beef.  The word “corned” was originally a term used for the word grain or kernel.  It refers to curing beef with “grains” of salt.   We eat this dish every couple of months.  It’s so good that I can’t possibly make it just once a year in celebration of my husband’s (very minimal) Irish heritage.  And for the record, this version is the best corned beef I’ve ever tasted.  Full stop.

Spices for Homemade Corned Beef via Relishing It

Making corned beef is so simple it’s almost silly.  Gather some spices, brine the beef for five days, boil, and eat.  That’s it.  And yes, you read correctly, you boil the beef.  I know, weird.  That was my reaction, too.  When I first made this dish, I thought that there was really no way I was going to ruin a beautiful five-pound piece of farm-raised beef (which I purchased from these lovely folks) by boiling it.  However, the more I read, I knew I had to give it a try.  The result is a succulent, tender piece of meat, with that perfect “corned-beef” flavor.

Spices for Homemade Corned Beef via Relishing It

Indulge me for a moment while I talk about buying ingredients.  You should always use the best quality meat you can find.  And by best, I don’t mean most expensive.  I’m talking about buying from a reputable producer.  Buy it from the farmer’s market, co-op, or your local butcher.  Avoid mass-retail supermarket beef that has been raised in crammed cattle yards, corn-fed,  and pumped full of antibiotics.  Not all meat is created equal.  I can’t stress enough how strongly I feel about this.  I do my best to minimize our food chain by buying meats, cheeses, milk, and vegetables from folks that I’ve developed relationships with.  I want to know where my food comes from, and how it was raised.  You’ll find that even the cheapest chuck roast from your farmer’s market will give you spectacular results, and be healthier for your family.  Now I’ll step down off of this soapbox.

Homemade Corned Beef via Relishing It

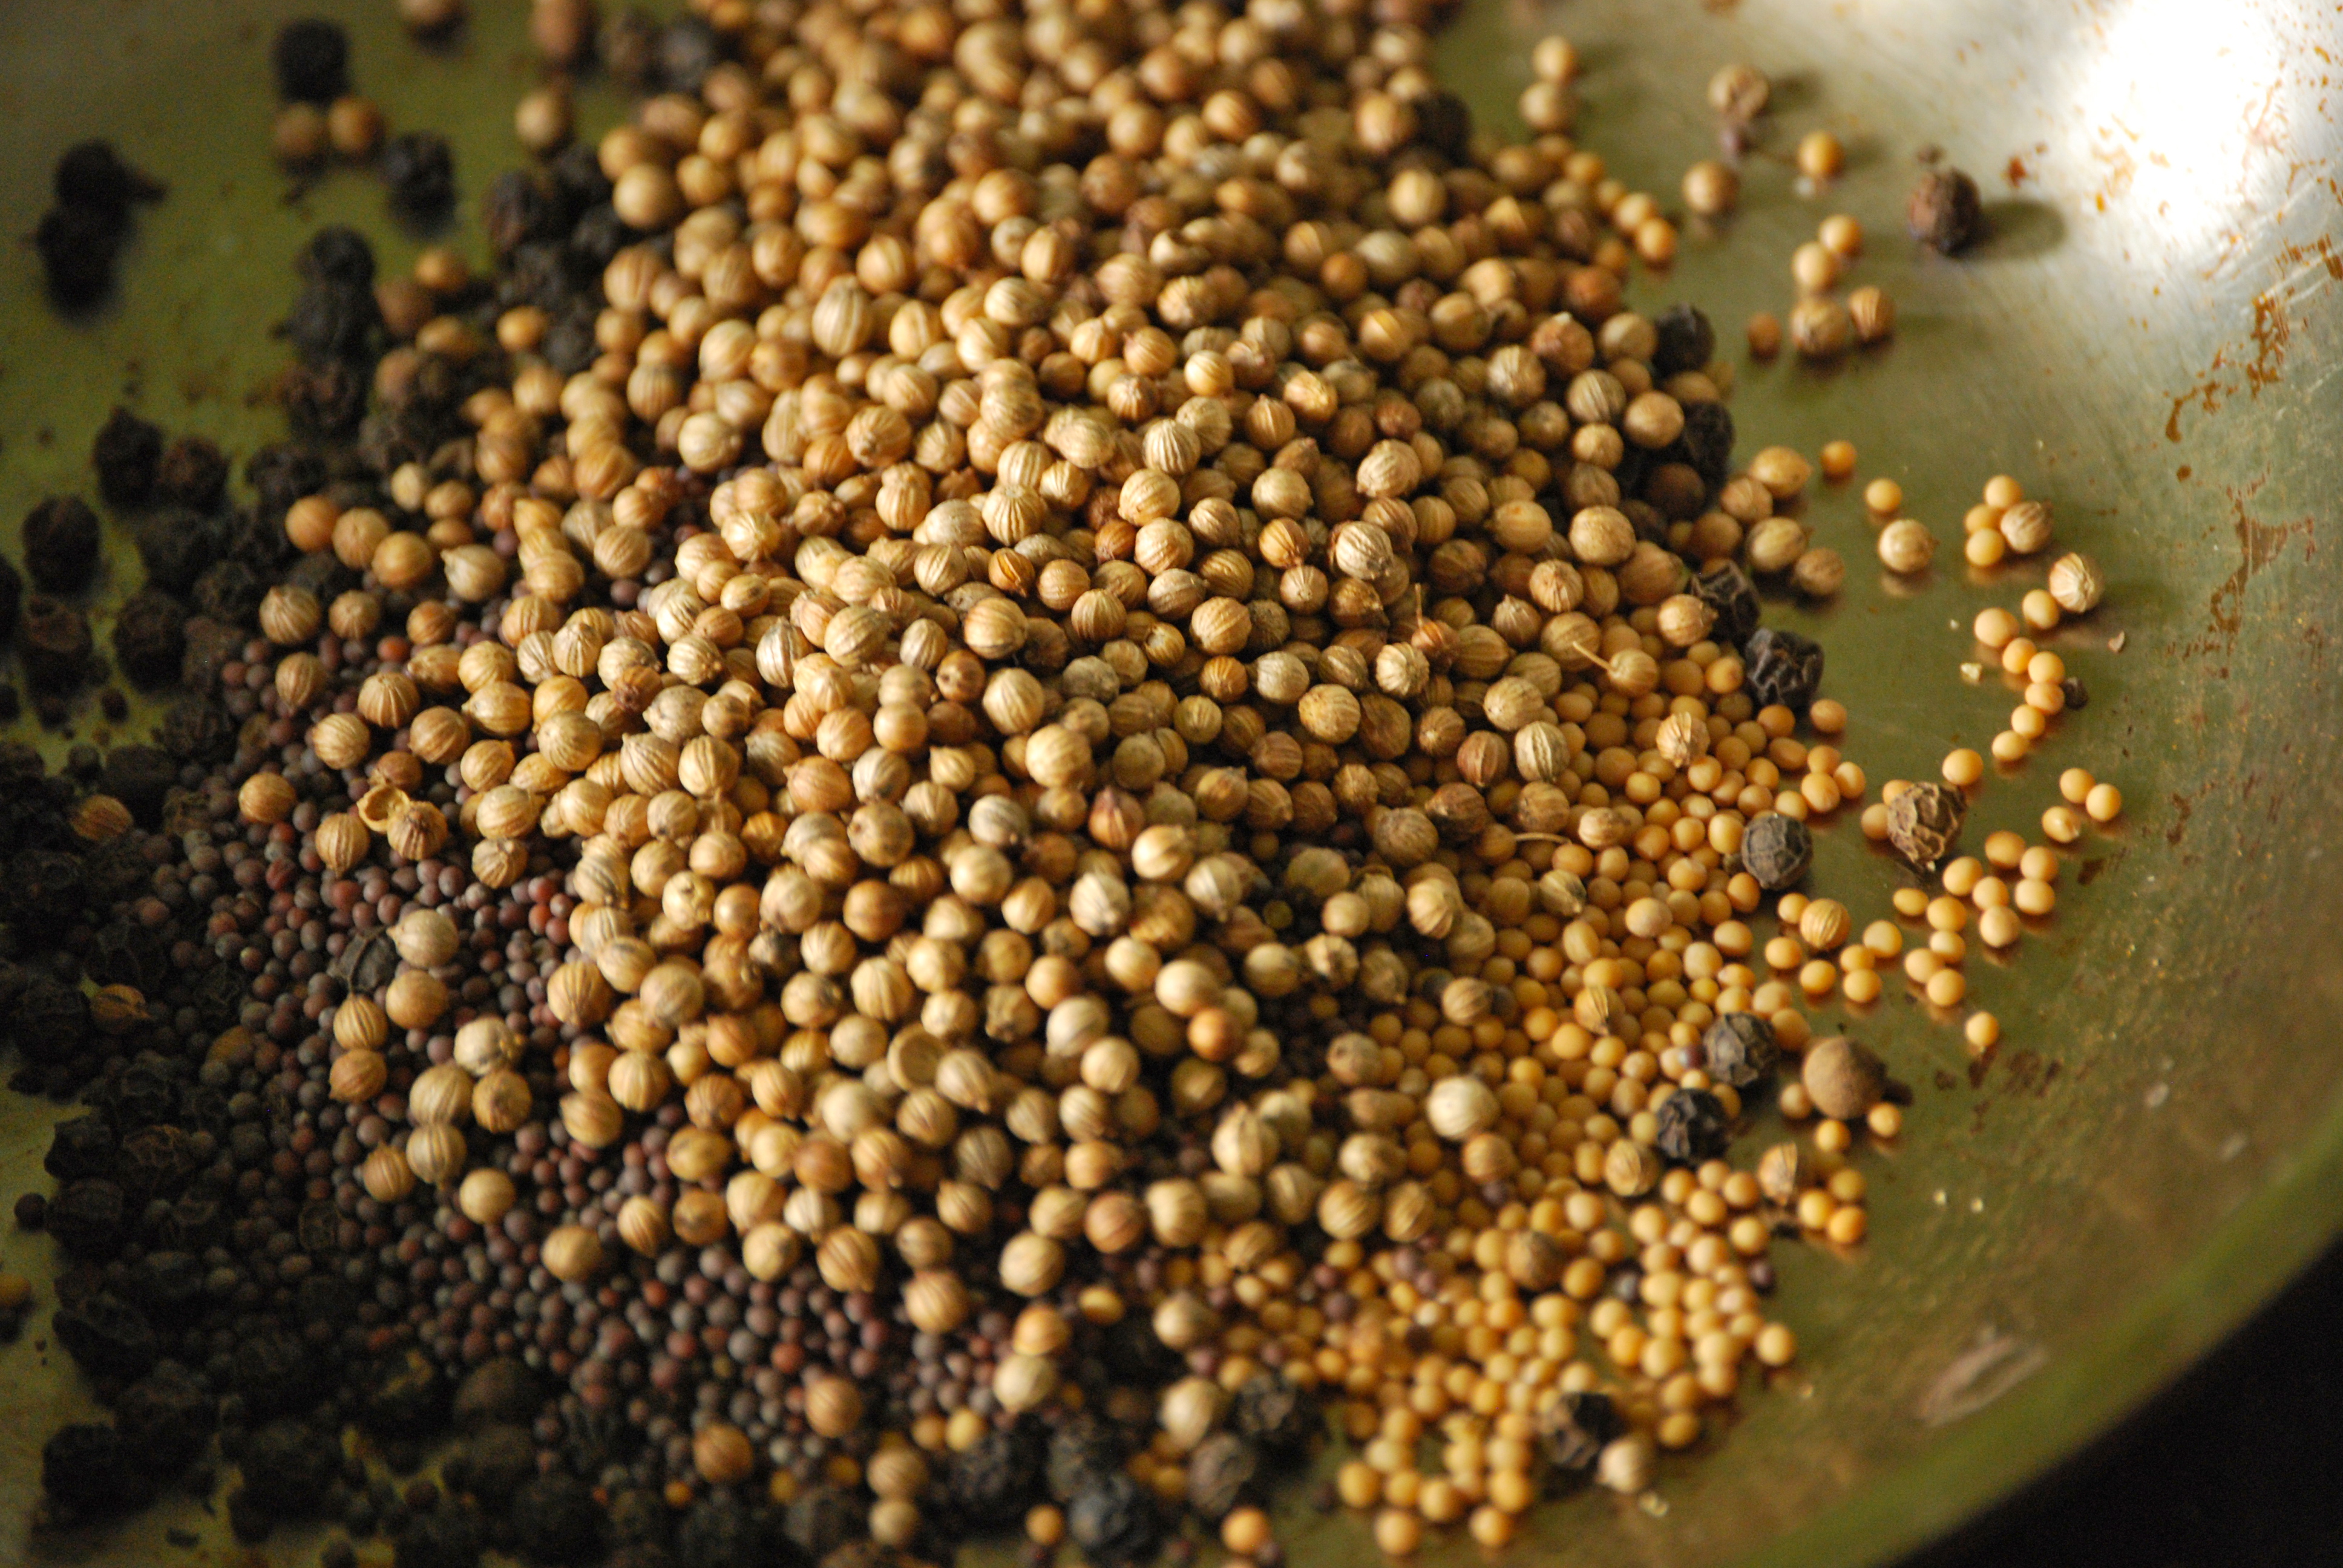
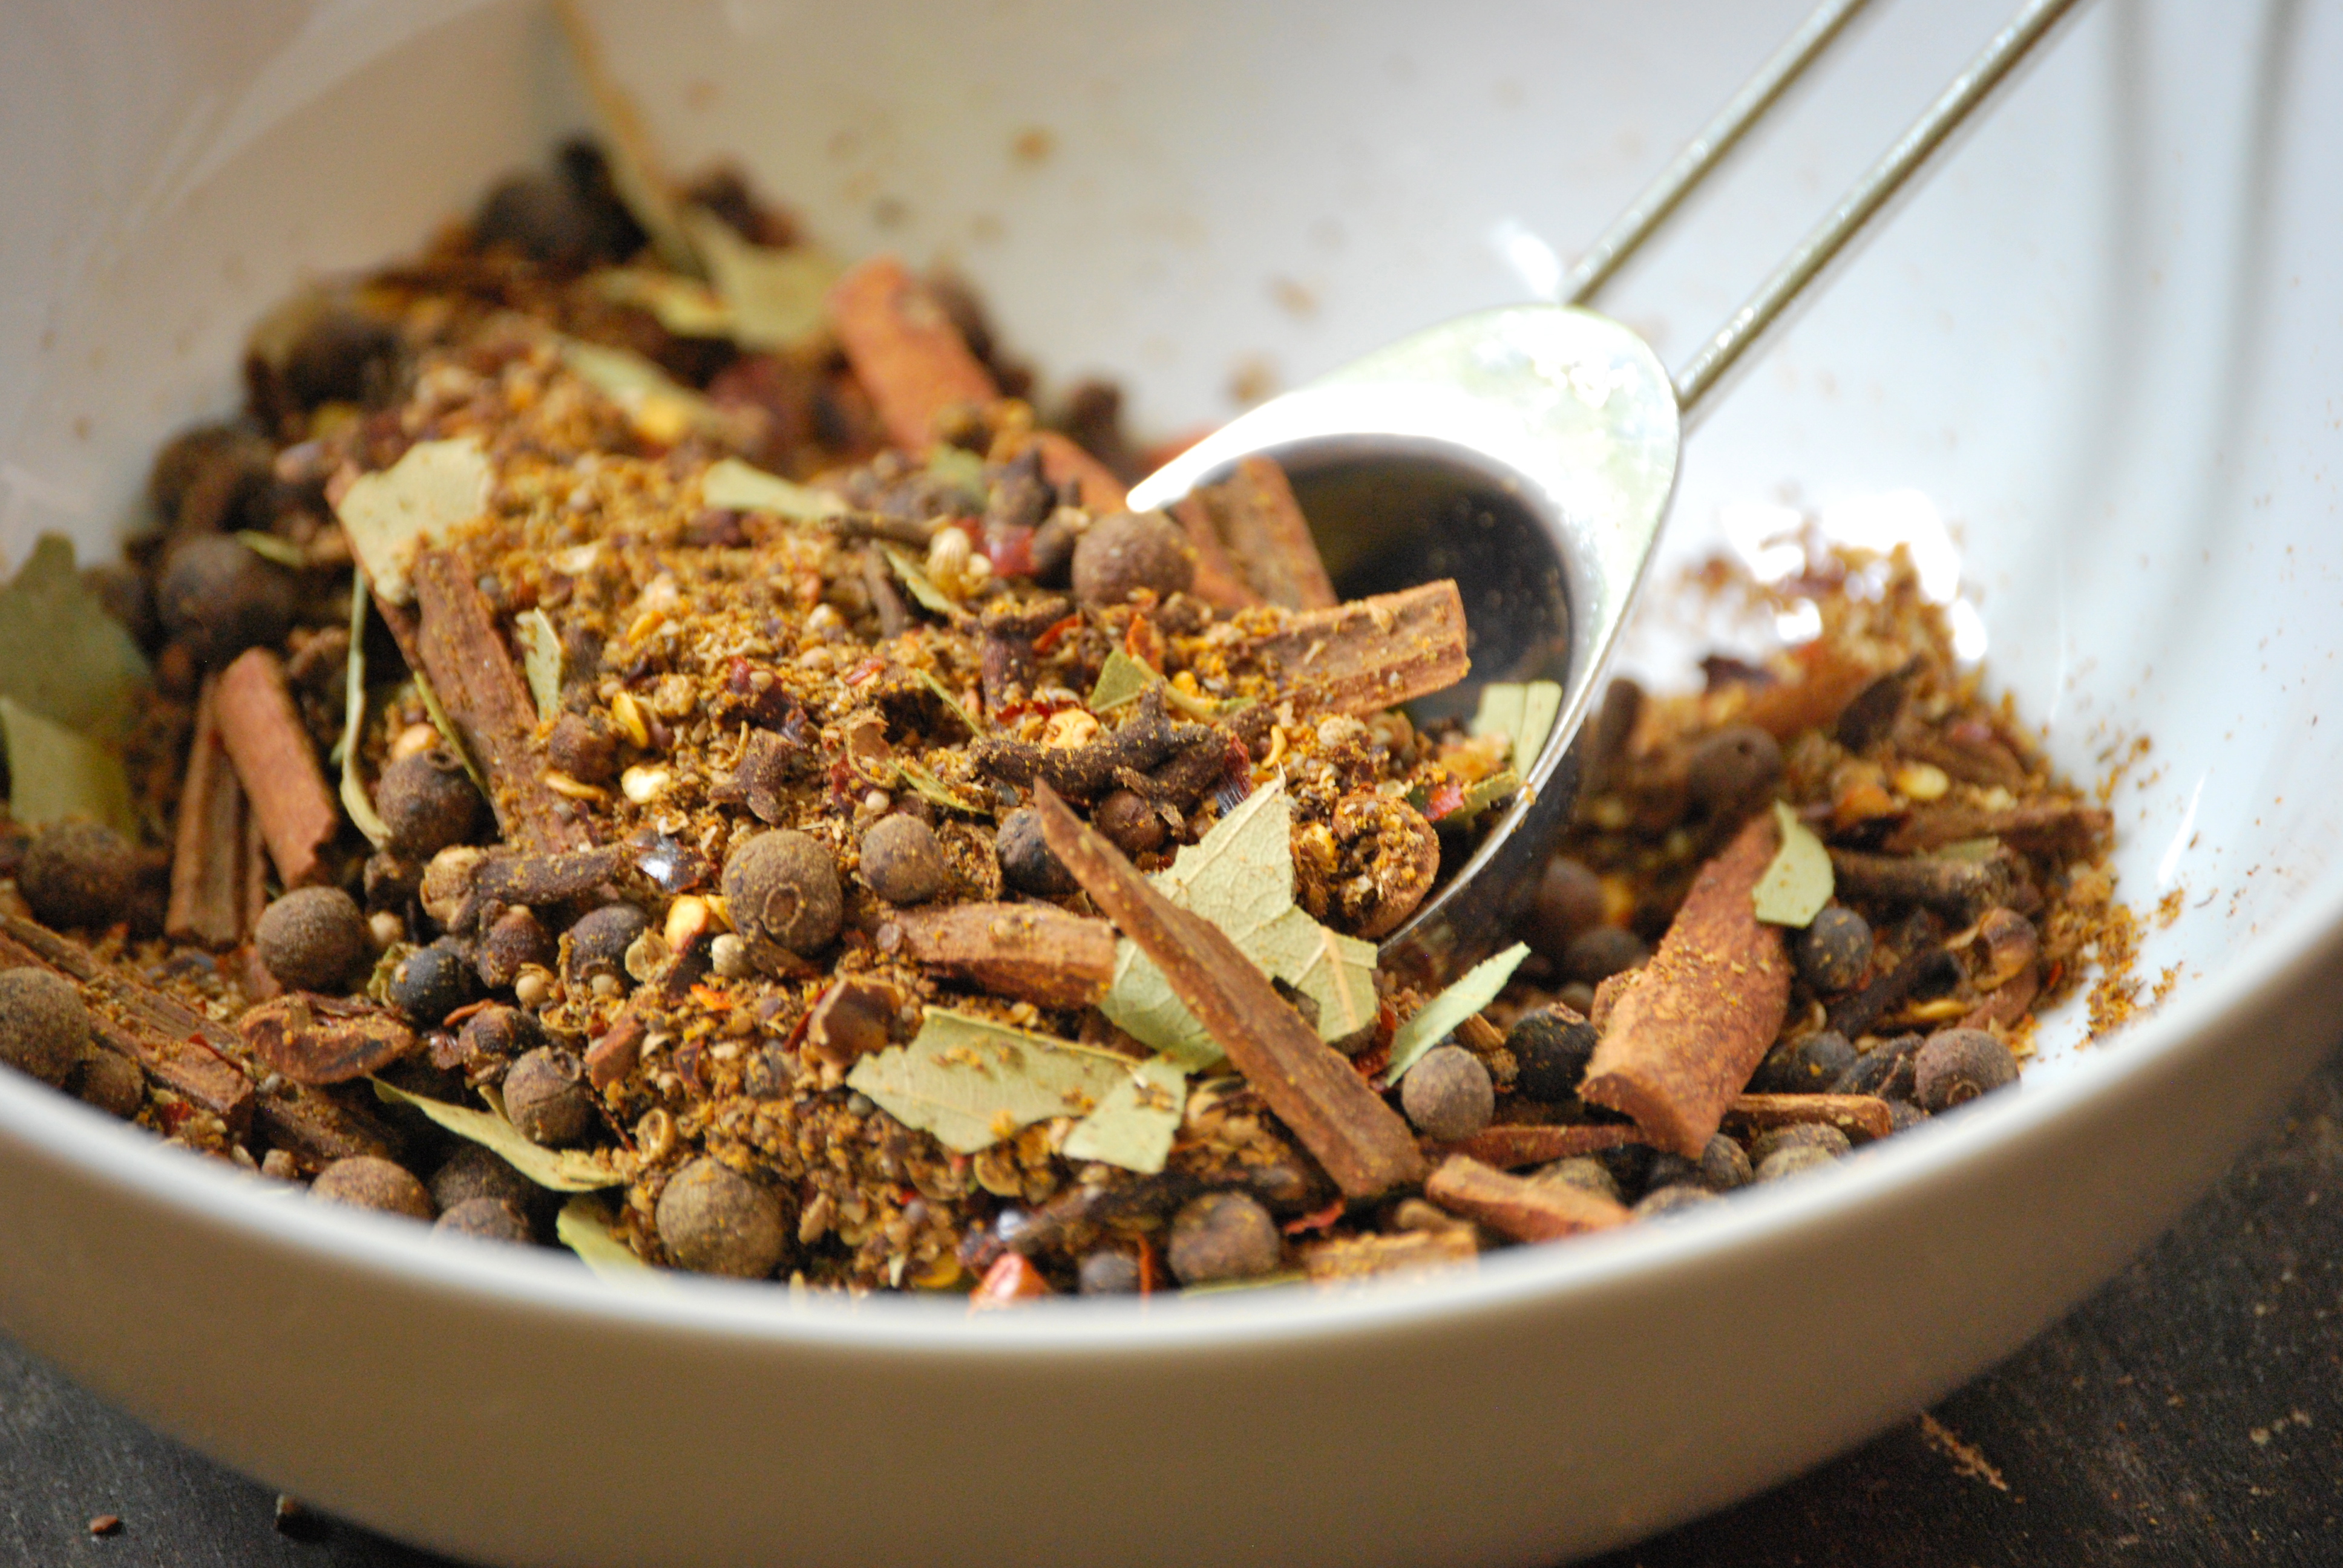
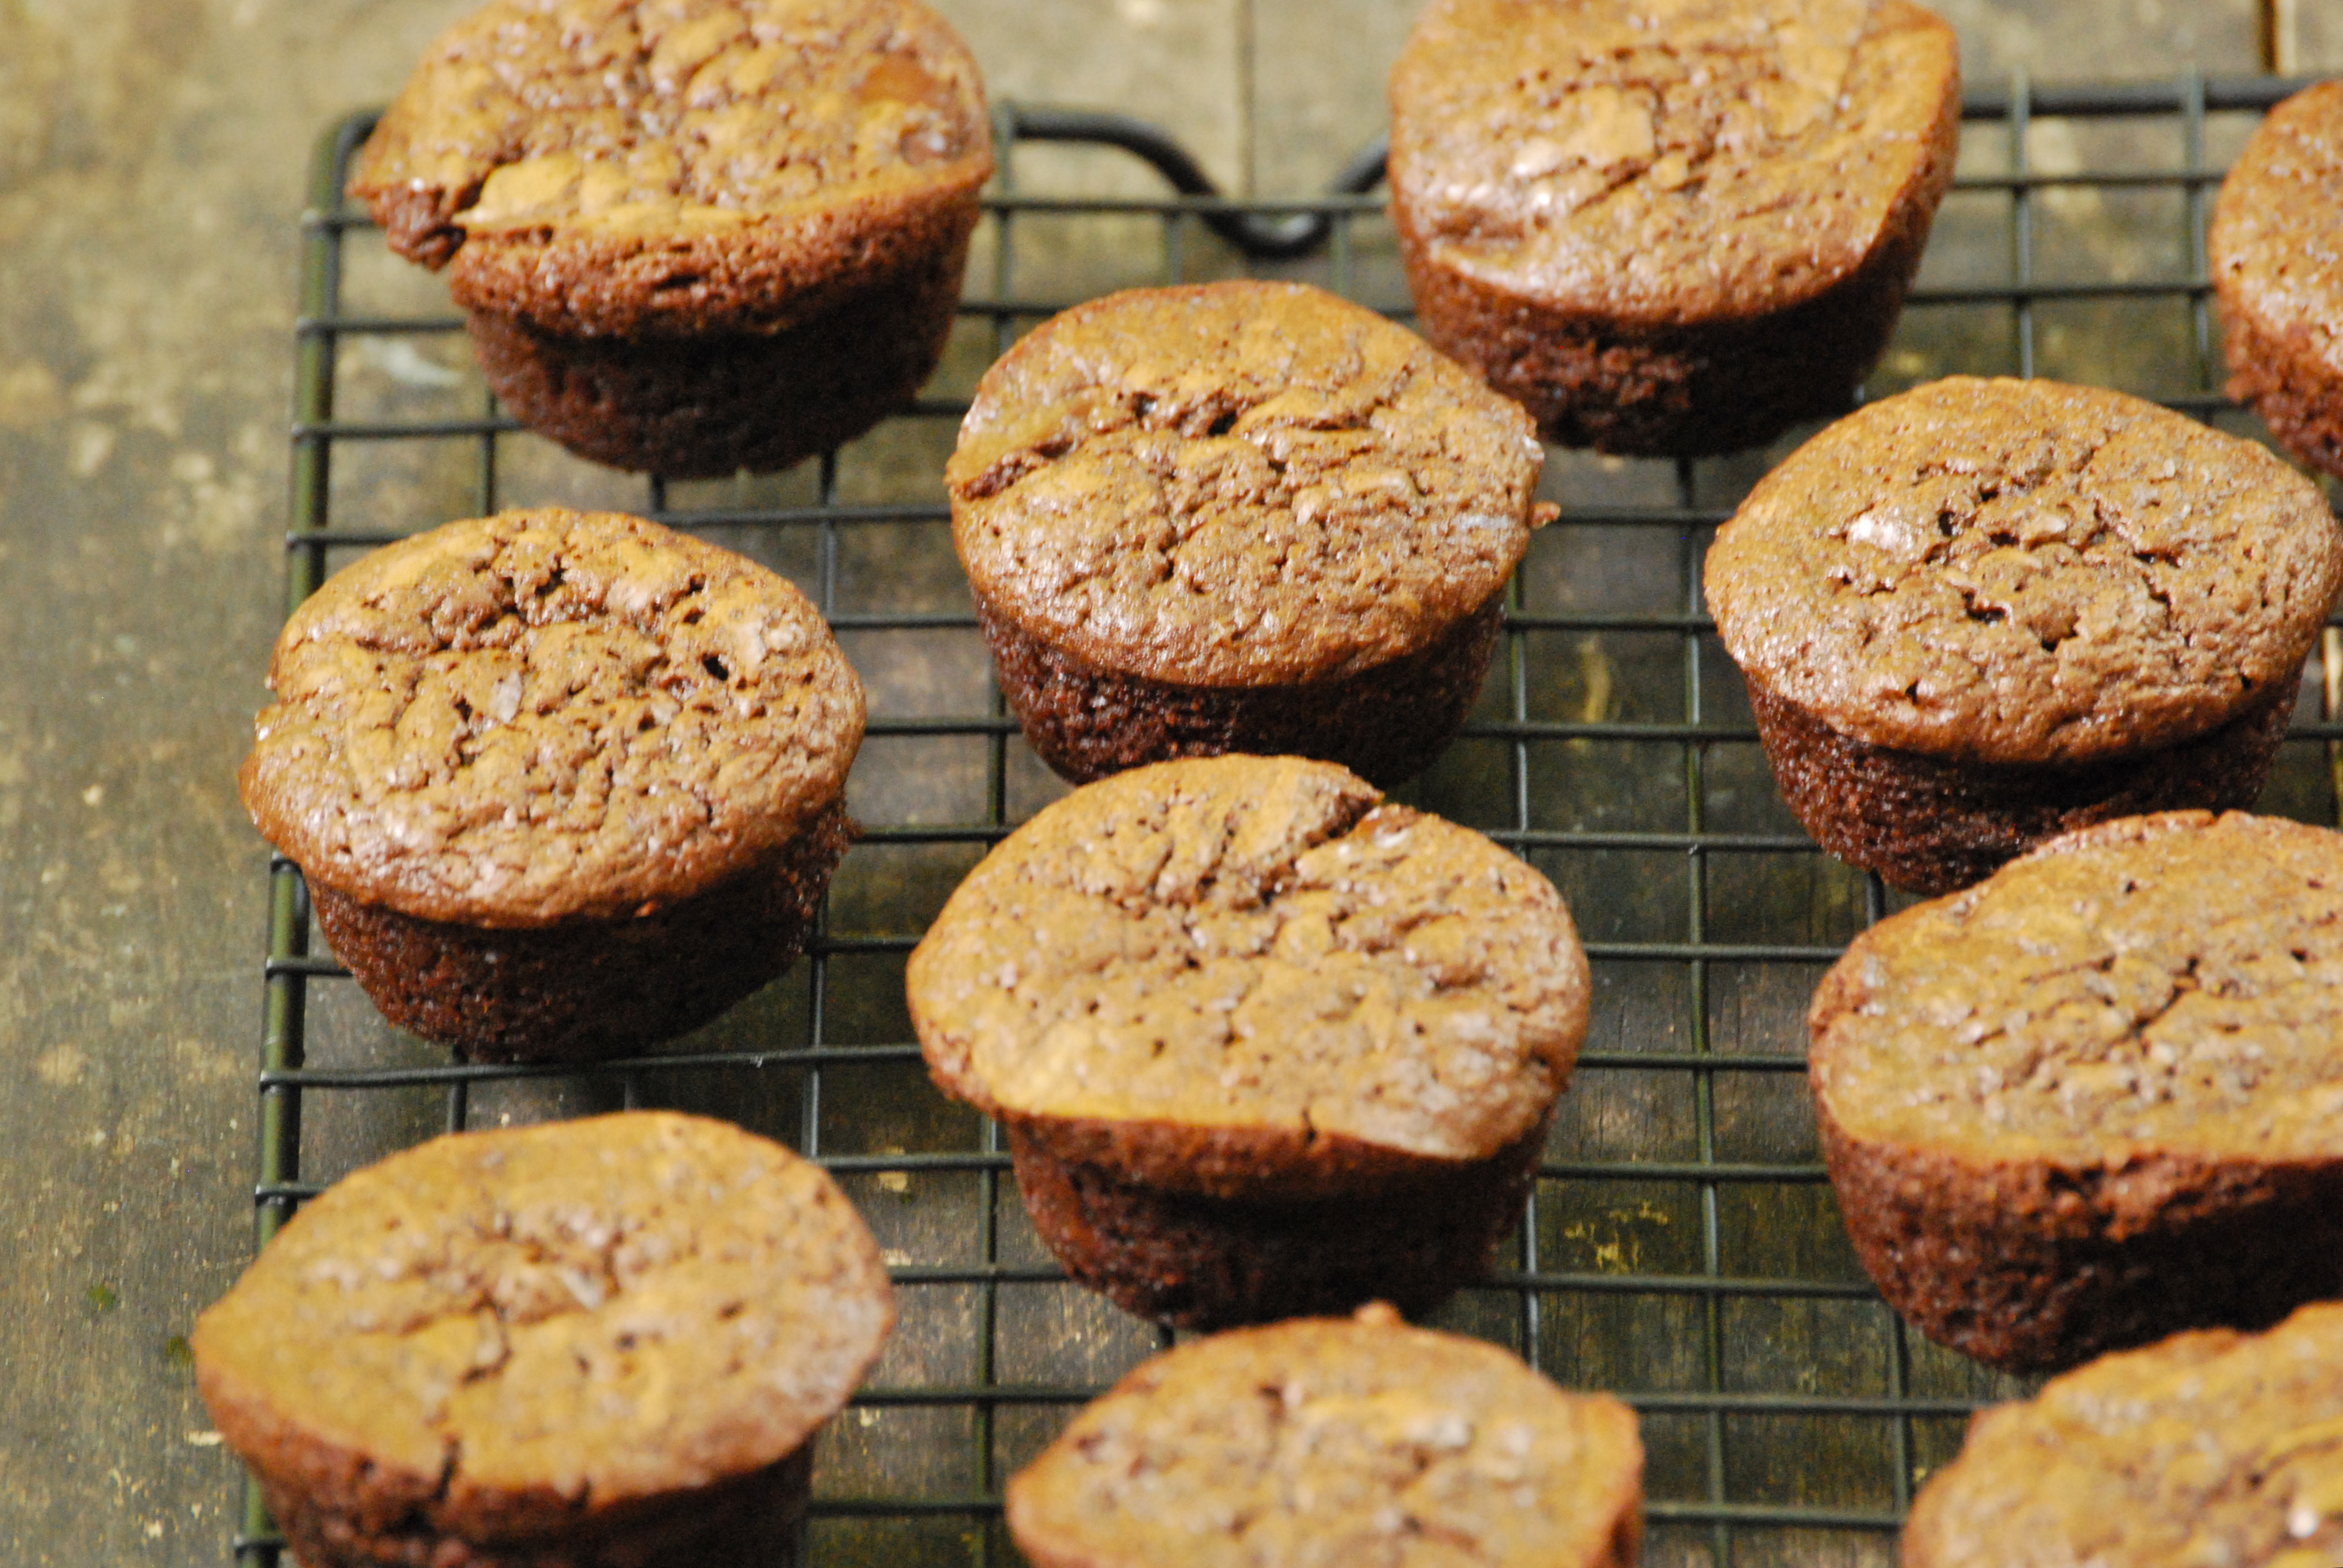
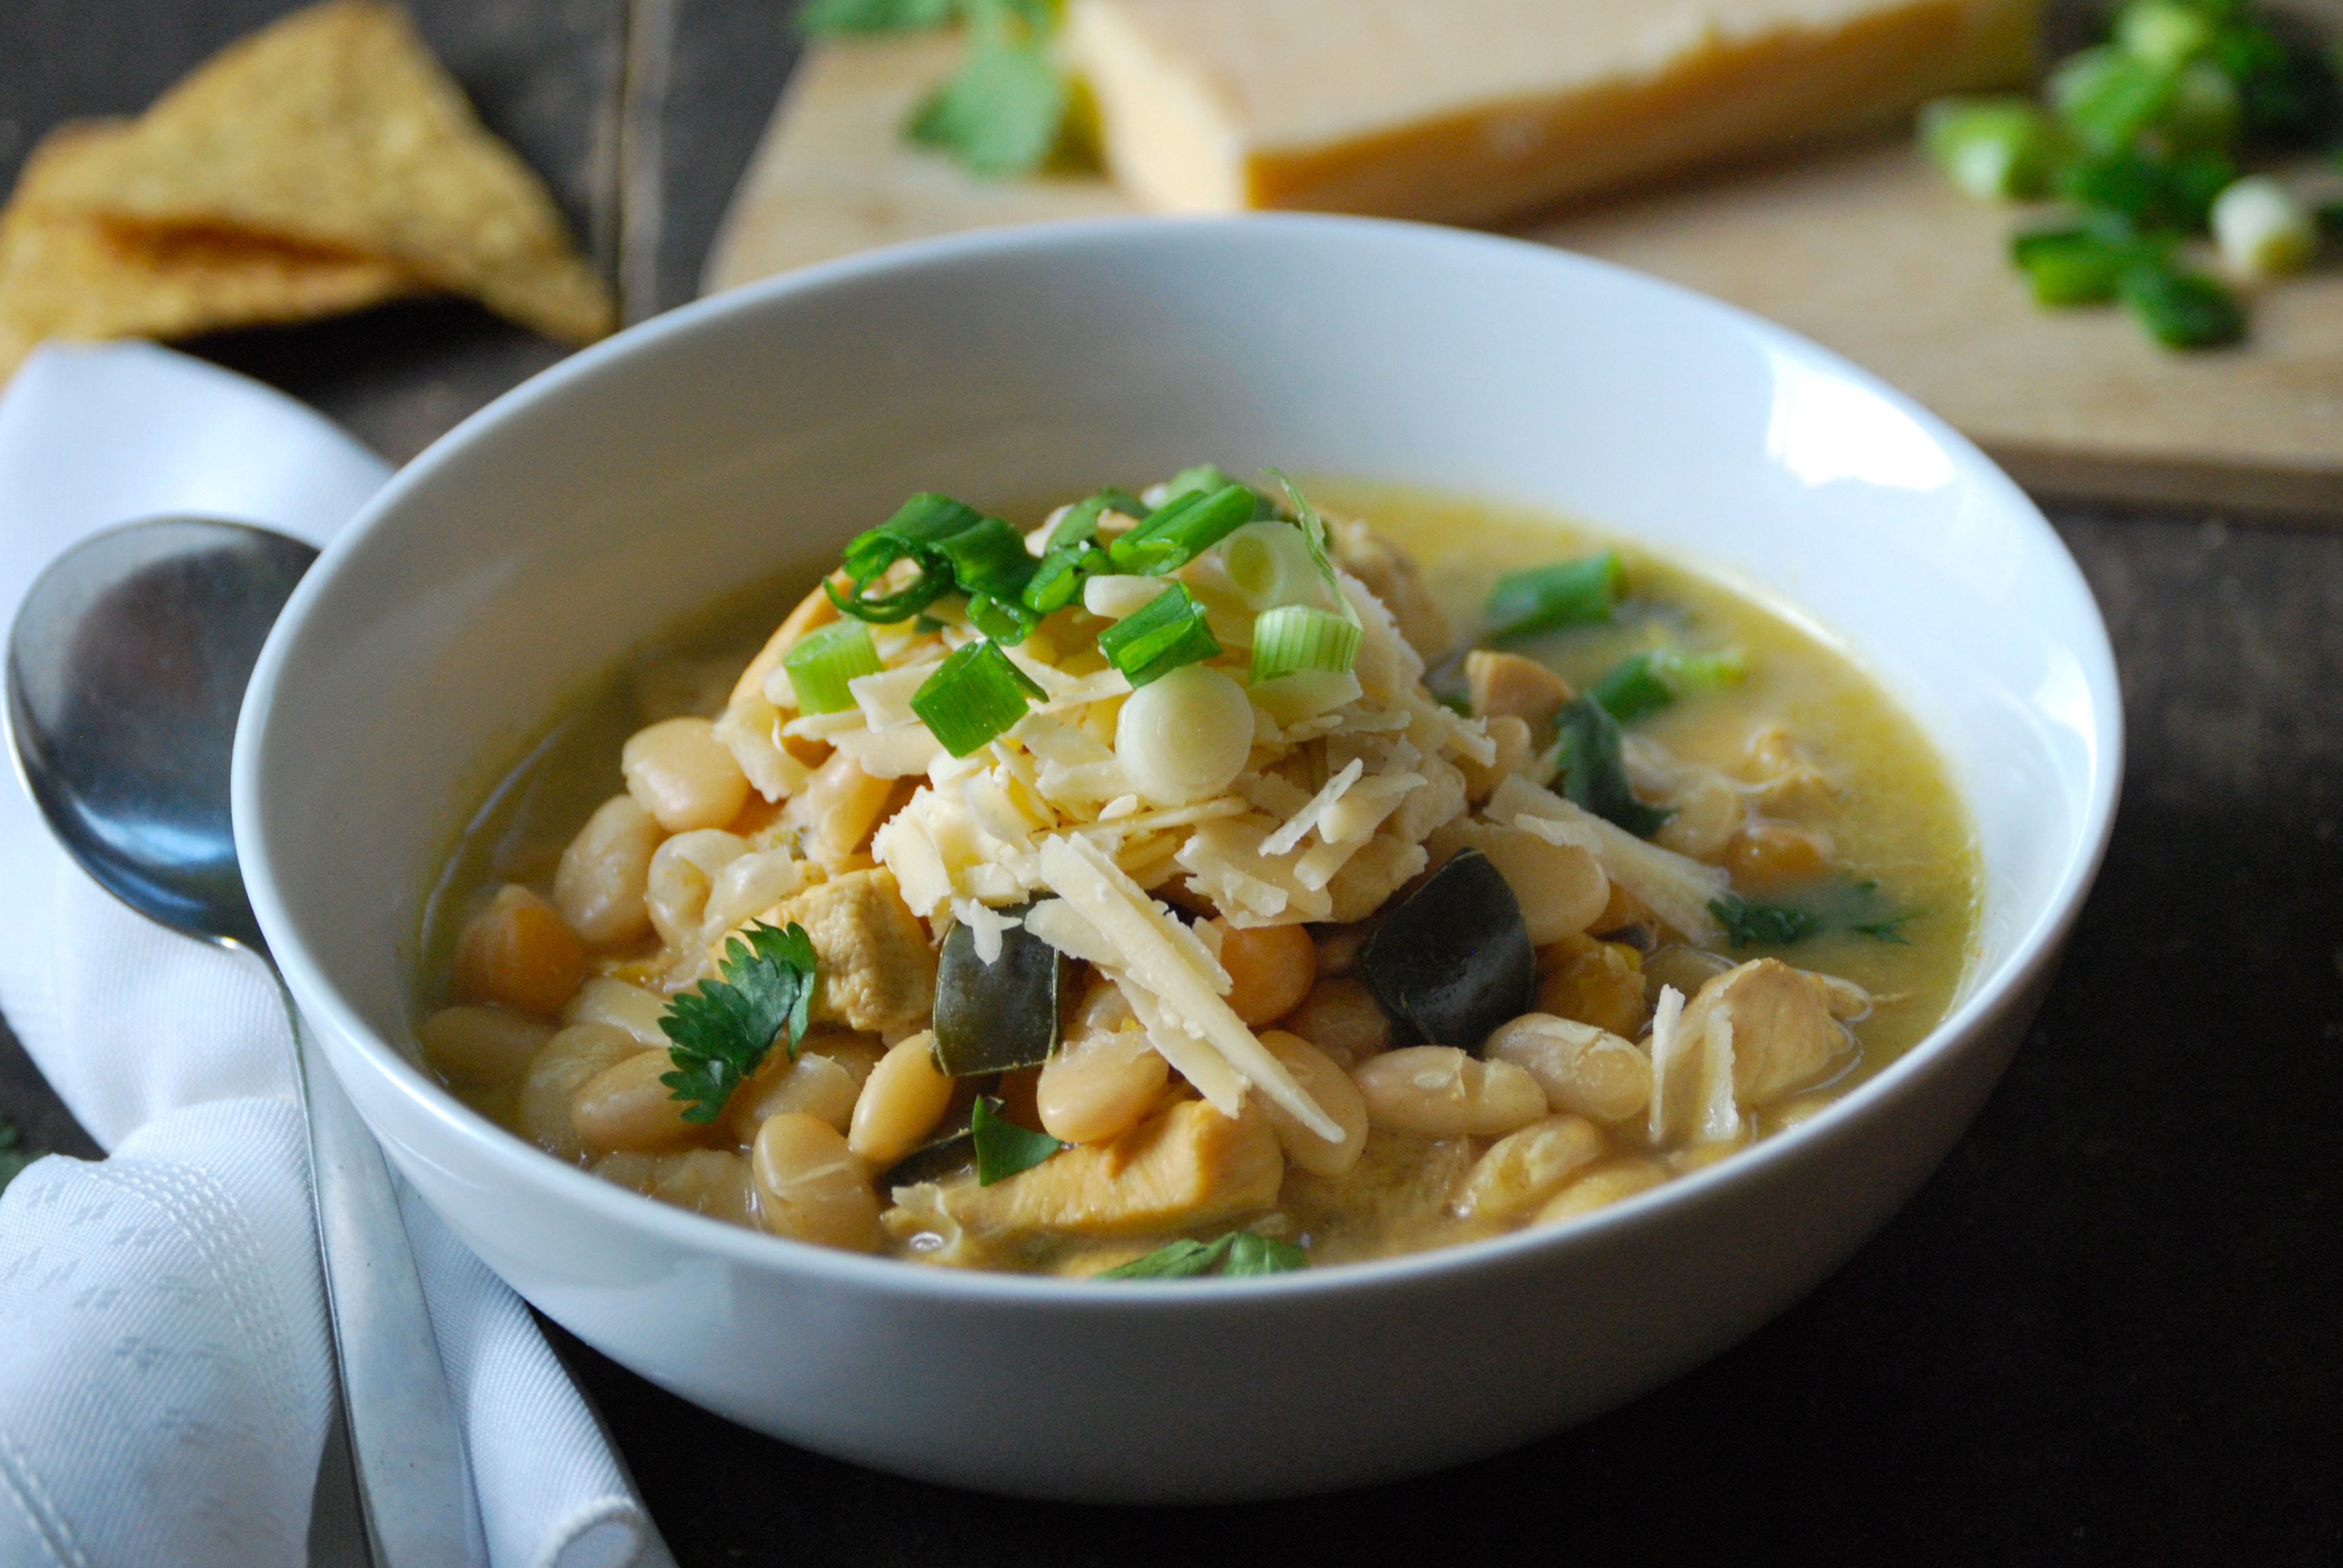
Aside from the quality of the meat, the spices really make this corned beef stand out.  I decided to mix my own pickling spices.  I toasted and ground several, which really heightened their flavor.  Trust me, it makes a difference, because toasting spices really helps them come to life.  Pre-packaged pickling spice, though not necessarily a bad option, doesn’t have the same effect.  If you find you’re missing a few that this recipe calls for, Penzeys is an excellent place to order good-quality spices (and dried herbs).  They even have a high-quality pickling spice blend if you’re not interested in making your own.  If you do make your own, you’ll have some extra to add to other dishes.  Put it in this soup, and you’ll be happy.  I made a batch of these recently and put it in there, too.  It was lovely.

Homemade Corned Beef via Relishing It

Now to the interesting part of this recipe.  You’ll need to track down some sodium nitrate, more commonly called “pink salt”.  This is not to be confused with a type of pink salt that can be sprinkled on top of your food.  Sodium nitrate is a preservative used in cured meats.  It’s what gives corned beef (and bacon) their deep red color and distinctive flavor.  In large amounts, sodium nitrate can be toxic, but it is perfectly safe when used correctly.  Michael Ruhlman, the creator of this recipe, states that he feels it’s important– but not necessary– to use it if you’re concerned about safe-handling.  I researched the heck out of this topic, because you know how I feel about unecessary chemicals in food (see my lecture, above).  The fact is, when I eat bacon, or corned beef from a store or farmer’s market, it usually contains sodium nitrate.  And I really wanted to make a corned beef that captured that authentic flavor and coloring.  So after all my research, and based on the recommendation of this renowned chef, I decided to give it a go.  I purchased my pink salt from Clancy’s in Minneapolis.  Most butchers who cure their own meats will have it on hand, or you can order it here.  Amazon also sells it, but in larger quantities.

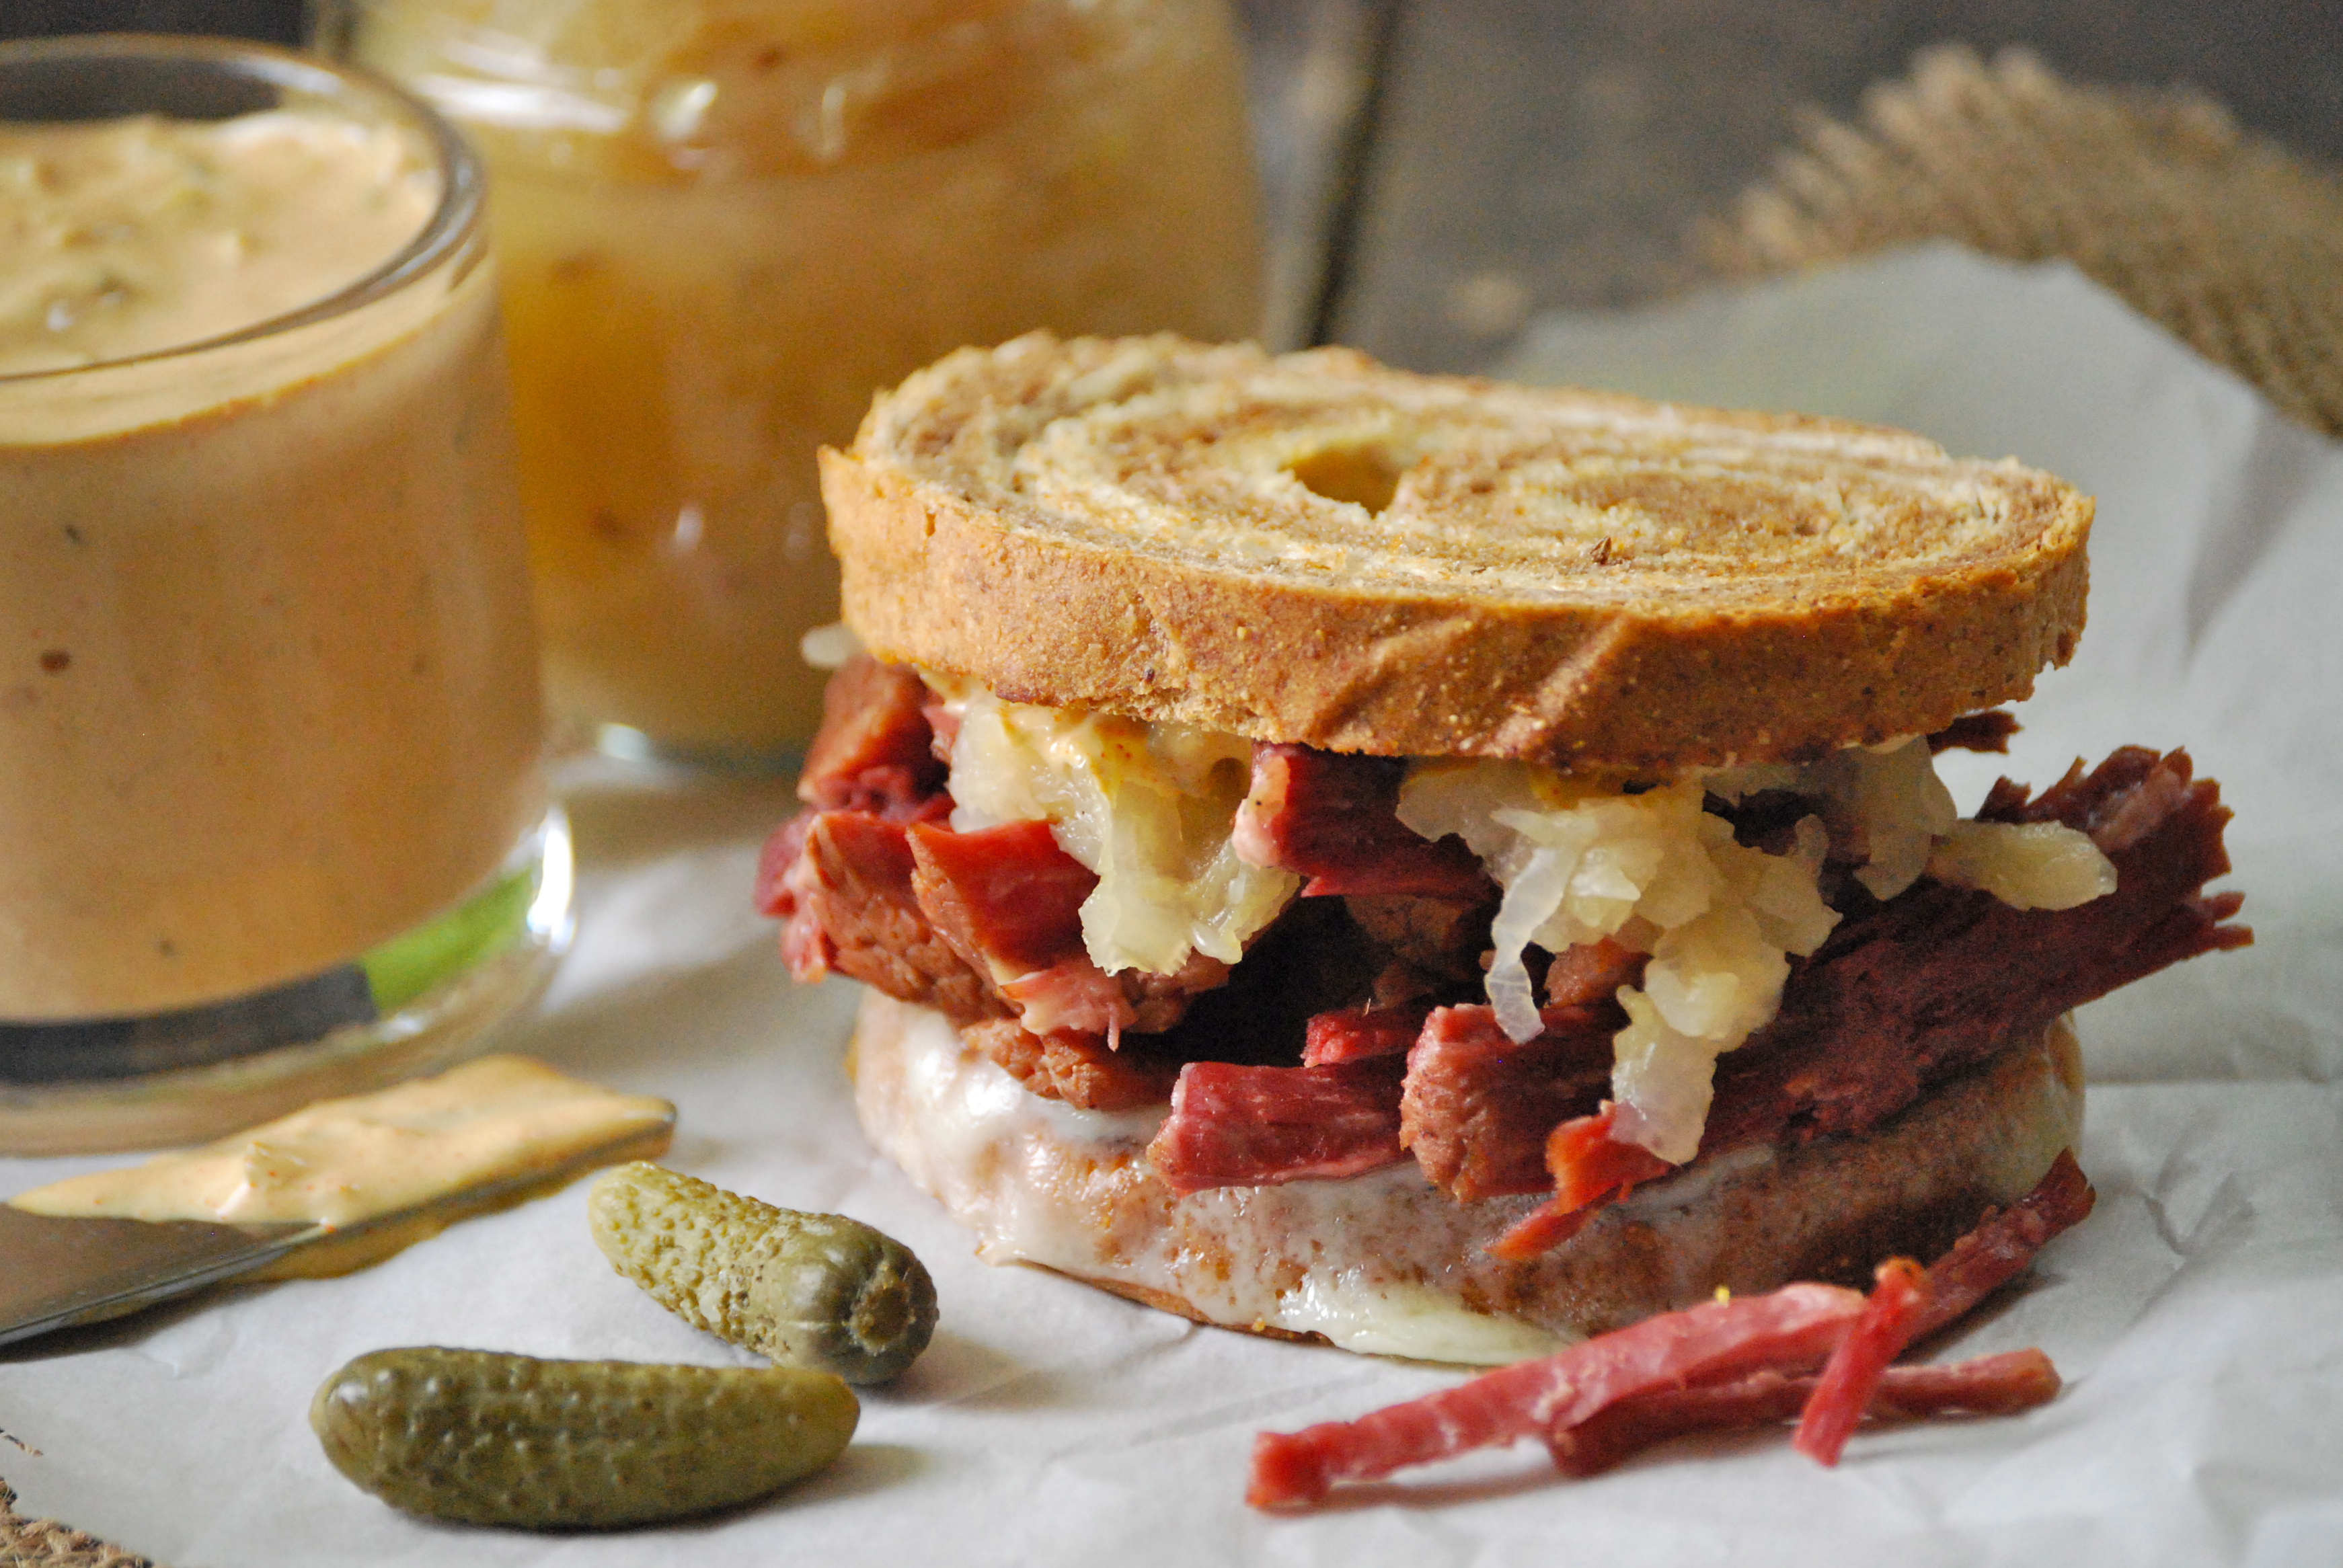
Once you’ve boiled your beef, you can use that same brine to boil the potatoes and cabbage, if you’re making those too.  It gives them an incredible flavor.  Aside from eating the corned beef with potatoes and cabbage, you can make amazing sandwiches too.  I probably went a little overboard when I made my own sauerkraut, baked a loaf of marbled-rye, and whipped up some homemade thousand island dressing.  It was so worth it.  Hope you enjoy!

Reuben Sandwich with Homemade Corned Beef via Relishing It

The Recipe:  Homemade Corned Beef

1 1/2 cups Diamond Crystal kosher salt

1/2 cup granulated sugar

4 teaspoons sodium nitrate (pink salt)

3 cloves garlic

4 tablespoons pickling spice

1 – 5 pound beef chuck roast or brisket

1 medium onion, peeled and quartered

2 celery stalks, roughly chopped

For the Pickling Spice:

2 tablespoons black peppercorns

1 tablespoon yellow mustard seeds

1 tablespoon brown mustard seeds

2 tablespoons coriander seeds

2 tablespoons hot pepper flakes

2 tablespoons allspice berries

1 tablespoon ground mace

2 small cinnamon sticks, broken into pieces

4 dried bay leaves, broken into pieces

2 tablespoons whole cloves

1 tablespoon ground ginger

To make the pickling spice:  Combine the peppercorns, mustard seeds, and coriander seeds in a small dry pan.  Toast over medium heat until they are very fragrant, being careful not to burn them.  Have a lid at the ready, as they may start to “pop”.  Use a mortar and pestle (or be creative with a rolling pin or side of a chef’s knife) and pulverize the seeds.  Combine with other spices.  Store in a sealed container, as you will have extra.

To make the Corned Beef:  In a pot large enough to hold the beef, combine 1 gallon of water with the kosher salt, sugar, sodium nitrate (if using), garlic and 2 tablespoons of the pickling spice.  Bring to a simmer, stirring until the salt and sugar have dissolved.  Remove from heat and let cool until it is room temperature, then refrigerate (or place outside, if you live in a cold climate!) until chilled.

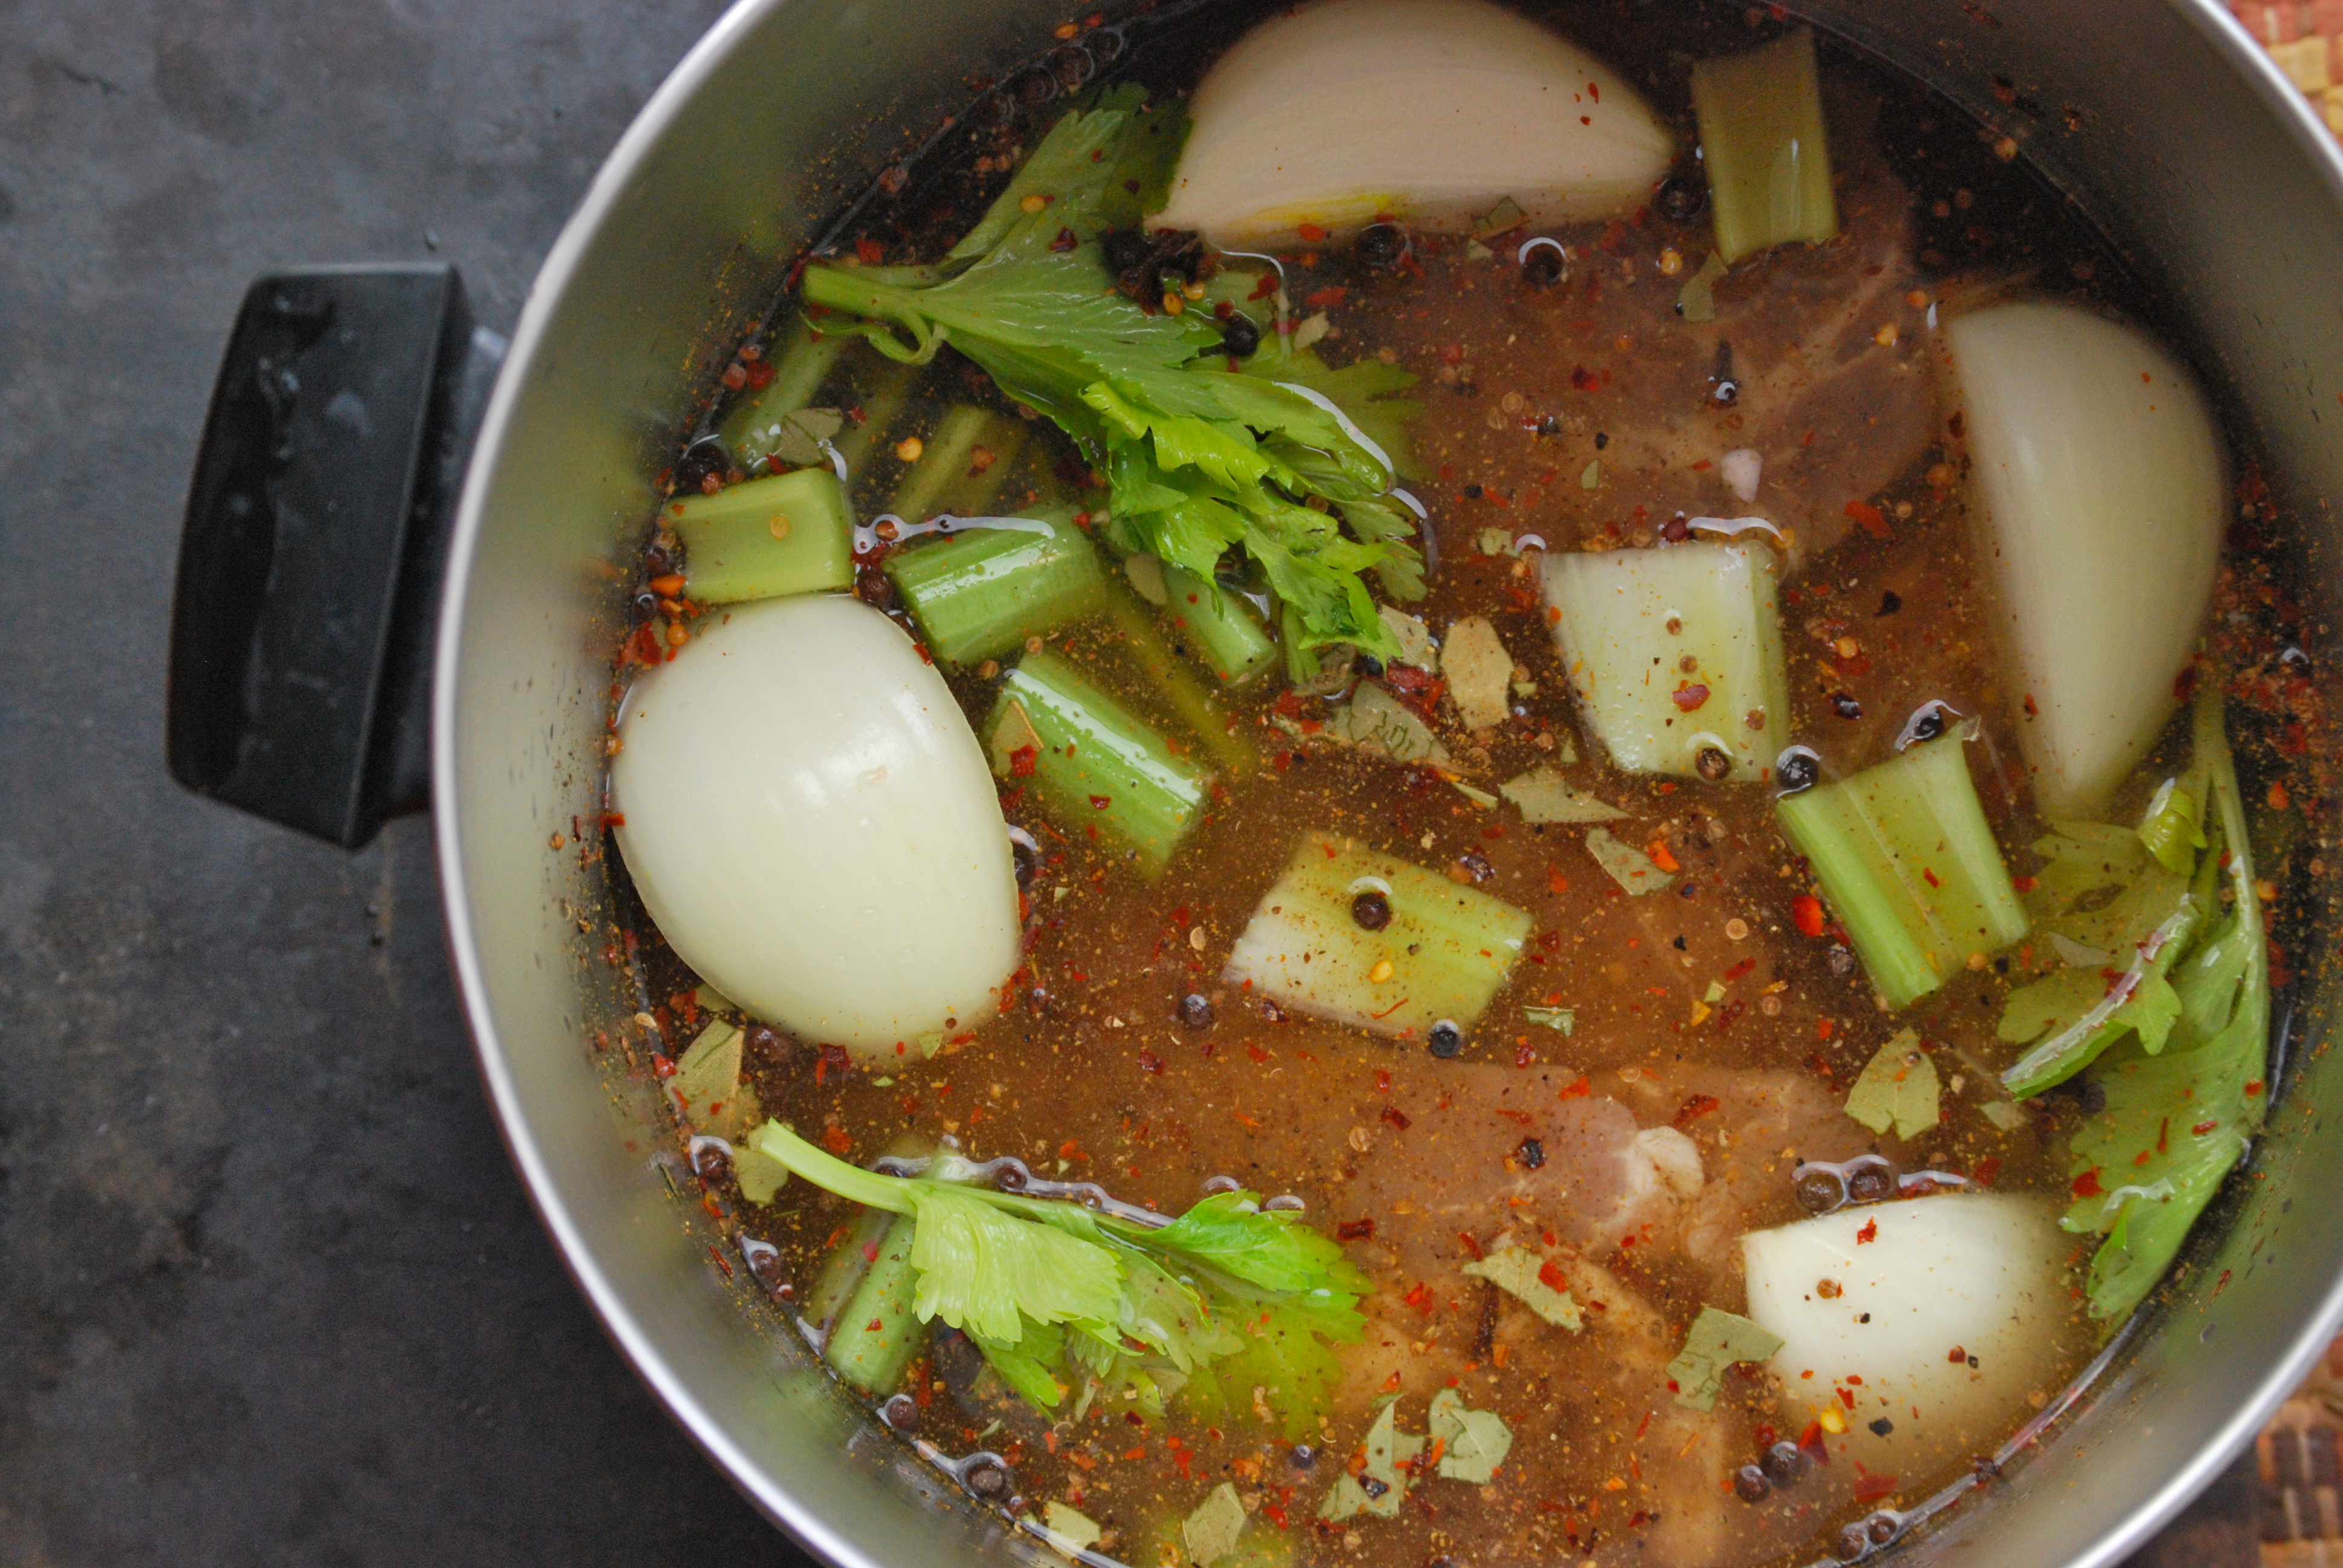
Once the brine is cold, place the beef into it.  Place a plate on top of it to keep it submerged, then cover.  Refrigerate for 5 days.  When the time comes, remove the beef from the brine and rinse thoroughly.  Dump out the contents of the pot, give it a wash with soap and water, and place the beef back inside along with the onion, celery, and 2 tablespoons of pickling spice.  Fill with just enough water to cover it.  Bring to a boil, then reduce heat to low-medium, and cover.  Simmer gently for about 3 1/2 hours.  Check it near the end,  as it may take a bit longer, or may need less time.  The meat will be fork-tender and practically fall apart.  If it isn’t quite like this, keep cooking it, and it will soon get there.

This can be made ahead of time and refrigerated for several days in the cooking liquid.  Reheat in the liquid, or served chilled.  The liquid can be used to boil potatoes and cabbage, if making.  Enjoy!

Source:  Adapted from Michael Ruhlman’s Charcuterie:  The Craft of Salting, Smoking, and Curing

Thanks for stopping by!  Hope you’re all having a wonderful Valentine’s Day.  XO

Laurie

Fudge Brownies with Chocolate Malted Buttercream via Relishing It

What should you make for the special people in your life for Valentine’s Day?  I’ve been waiting to answer that question for awhile now.  These cute little brownies are the perfect sweet treats for your loved ones.  I love brownies when I need a chocolate fix.   These, from an earlier post, are always a hit.  They have a perfect balance of chocolate-y chewiness.  And these are fabulous when I’m in the mood for something a little out of the ordinary. But the fudge brownie bites with chocolate malted buttercream that you see here are perfect for turning brownies into an indulgent dessert for Valentine’s Day.  The chocolate malted buttercream is spectacular.

DSC_0851

DSC_0859

To be honest, I’m not exactly sure how many batches of these I made this summer.  They’ve become a favorite in our house.  And in the mini-muffin pan, they’re transformed into perfect bite-sized treats.  The brownie is more chewy than cake-like, which is how I prefer them.  The stirred-in chocolate chips add a nice pool of chocolate throughout .  Yes, they’re delicious on their own, but the malted-milk buttercream frosting makes these mini-desserts.

Fudge Brownies with Chocolate Malted Buttercream via Relishing It

Fudge Brownies with Chocolate Malted Buttercream via Relishing It

I’ll be baking up another batch of these sweets for our Valentine’s Day this year.  We’ve had a tradition for years– even before our little ones were born– of making a nice meal, opening a bottle of wine, and enjoying a candlelight dinner at home.  Now that we have kids, I always look forward to making a meal with them.  In the past we’ve had a nice pasta dish, such as this one.  Heart shaped pizzas would be fun, too.  Though, I’ve been in the mood for seafood lately, so this is also an option.  Whatever we choose to make, I know it will be fun.  Have a lovely Valentine’s Day!

Fudge Brownies with Chocolate Malted Buttercream via Relishing It

The Recipe:  Fudge Brownies with Chocolate Malted Buttercream

(makes an 8×8 square pan or 24 mini-brownie bites)

For the Fudge Brownies:

3/4 cup (3 3/4 ounces) all-purpose flour

1 teaspoon baking powder

3/4 teaspoon kosher salt

1/4 teaspoon espresso powder

1/2 cup butter

3 ounces unsweetened chocolate, chopped

1/2 cup packed brown sugar

1/2 cup granulated sugar

2 large eggs, at room temperature

1 large egg yolk, at room temperature

1 teaspoon vanilla extract

1/2 cup semi-sweet chocolate chips (preferably Ghiradelli’s 60% cacao)

For the Chocolate Malted Buttercream: 

(Note: double this buttercream recipe if you enjoy your brownie bites loaded with frosting, such as in the photos.  If you prefer a normal amount, one batch will be fine)

6 tablespoons unsalted butter, at room temperature

1/4 cup unsweetened cocoa powder

1/2 teaspoon kosher salt

1 1/4 – 1 1/2 cups powdered sugar, sifted

1 tablespoon milk

1/2 teaspoon vanilla extract

1/4 cup heavy cream

3 tablespoons malted milk powder

Preheat the oven to 350°F and place the rack in the middle of the oven.  Prepare either an 8×8-inch square pan or a mini-muffin pan with either butter/flour, or a shot of cooking spray with the flour in it.  Set aside.

To make the brownies:  In a medium sized bowl, whisk together the flour, salt, and baking powder.  Set aside.  In a large bowl, melt the butter and chopped chocolate in a microwave for 25 seconds (or you place the bowl of chocolate/butter over a saucepan of steaming water).  Stir and repeat until the chocolate is melted.  Whisk in the brown and granulated sugars, and espresso powder.  Then, mix in the eggs, egg yolk, and vanilla.  When it is uniform, fold in the flour mixture, being careful not to over mix.  Fold in the chocolate chips.  Bake for 25-30 minutes for the 8×8-inch pan or 14-16 minutes for the mini-muffin pan.  A tester inserted should come out clean and the tops of them should be slightly cracked with a bit of color around the edges.  Cool in 8×8-inch pan completely.  Remove the mini-brownies once they have cooled in the pan for about 3 minutes.  Let cool completely before frosting.

To make the frosting:  Mix together the cream and malted milk powder.  Set aside.  In a bowl of a stand mixer fitted with the paddle attachment (a hand mixer or your muscles will work, too), cream together the butter, cocoa powder, and salt for about 3 minutes on medium speed.  As always, scrape down the sides of the mixer, as necessary.  Add about 1 1/4 cups of powdered sugar and mix on low to combine.  Add the milk and vanilla and mix.  Slowly add the cream/malted milk mixture while mixing on medium speed.  Mix until it is the consistency you like, add more powdered sugar, if necessary.

Spread frosting onto cooled brownies.  They will keep well for days covered with aluminum foil or in an airtight container.  Enjoy!

Source:  Adapted from Joy Wilson’s Joy the Baker Cookbook

Thanks for stopping by Relishing It today!

Laurie

Asian-Inspired Meatballs via Relishing It

Now we come to it.  The day when snacks and appetizers take center stage alongside over-hyped commercials and two football teams that I can’t– for the life of me– name.  That’s right, Superbowl Sunday is just a few days away!  Now my husband will tell you that the ‘Big Game’ on Sunday is actually Liverpool against Manchester City, but then again, he’s a soccer nut.  Even so, we’ll be hunkered down on the couch on Sunday night eating a variety of tasty appetizers.  If you haven’t planned out your Superbowl menu, I have a few ideas for you.  First, take a look at this incredible dip.  If you make it once, you’ll make it every year.  I promise.  And these pickled eggs are the perfect snack for beers with friends.  If you make them today, they just might be ready in time for the game.  This chili will please a crowd, and so will this one.

Asian Meatball Ingredients

But if you’re in the mood for something a little more exotic, give these fantastic Asian-inspired Meatballs a try.  I found this recipe on Ali Ebright’s blog, Gimme Some Oven.  While you’re waiting for the next commercial break on Sunday night, go on-line and check out her site.  It’s lovely.  I tweaked this particular recipe to suit my taste.

Asian-Inspired Meatballs via Relishing It

We generally eat these meatballs as a meal alongside brown rice or quinoa, served with a salad, but they would make a fantastic appetizer, as well!  The meatballs are packed with fresh, bright flavors from the garlic, ginger, and scallions.  But the real show-stopper is the Asian sauce.  It is amazing!  It’s slightly sweet, but also has a nice tang to it.  Fresh ginger makes everything better, right?  Hope you enjoy them as much as we have.  And whatever you decide to eat this weekend– have a great time surrounded by fun people.

Asian-Inspired Meatballs via Relishing It

The Recipe:  Asian-Inspired Meatballs

(makes 35-37 small)

For the Meatballs:

2 pounds ground beef or pork

2 teaspoons sesame oil

1 heaping tablespoon finely grated fresh ginger

2 eggs, lightly beaten

4 garlic cloves, minced

1 teaspoon kosher salt

1/2 cup breadcrumbs (preferably Panko)

1/2 cup finely chopped scallions (about 3 large)

For the Asian Sauce:

2/3 cup hoisin sauce

1/4 cup rice vinegar

2 garlic cloves, minced

2 tablespoons soy sauce

1 teaspoon sesame oil

1 teaspoon finely grated fresh ginger

Garnish with extra sliced scallions, sesame seeds, and sriracha sauce

Preheat the oven to 400°F.  Line a large 12 x 17 baking sheet with parchment paper.  Set aside.

In a large bowl, lightly combine all of the ingredients for the meatballs together using your hands.  Be careful not to over mix, as that will lead to tough meatballs.   Use a 1 1/2 tablespoon scoop (or you can eyeball it) to form the balls.  Place them on the prepared pan and bake for about 17-19 minutes, they will turn a nice golden brown color  along the edges when done.

Meanwhile, in a small bowl, combine all of the ingredients for the asian sauce.  When the meatballs are done, you can either serve them alongside the sauce as a dip, or you can gently coat the meatballs in the sauce and serve them that way.  I like to warm the sauce up beforehand.  Serve the meatballs with sliced scallions, sesame seeds, and a bit of sriracha for an extra kick.  Enjoy!

Source:  Adapted from Ali at Gimme Some Oven

Thanks for stopping by today!  Hope you all have a great weekend.  xo

Laurie

White Chili via Relishing It

If you’ve spent much time with me here on Relishing It, you already know that I love spending time in the kitchen, working my way through an intricate recipe.  Not much makes me happier than pouring through ingredients in the afternoon sun, with the sound of my little ones playing in the next room.  Yes, that’s my heaven.  But of course, the sun doesn’t stream through the windows much here in January, and– let’s be honest– kids generally have a way of needing something every 15 minutes.  So I often have to be more realistic, and for that I love turning to one-pot meals.  This white chili is a great meal that doesn’t require much attention.  It’s hot, healthy, delicious, and best of all, mostly tends to itself.  Perfect for a cold Sunday afternoon when you’re busy playing inside, or (lucky you) when you get a chance to just settle into the couch with a good book.

Dried Beans via Relishing It

We eat more than our fair share of chili here in the cold months.  I like that it’s relatively healthy, and that I get a chance to experiment with different ingredients and flavor combinations.  Last weekend I made a batch with cubed beef, dark chocolate, toasted cumin seed, an oyster stout beer, and dried ancho chiles that I toasted and ground myself.  Loved it!  But enough about that (for now).  Today’s recipe is for my favorite version of white chili.  I prefer this style to not be too heavy.  If you’ve ordered it in a restaurant, you probably know what I’m talking about.  To get the right consistency, I smash a few of the beans as a thickener, and then use evaporated milk to give it a nice creaminess.  The chickpeas have a wonderful, firm texture that holds up well, while the white cannellini beans add a nice silkiness.  The combination is sublime.  A generous squeeze of lime into the pot for the finish gives it vibrancy and freshness.

White Chili via Relishing It

White Chili via Relishing It

The Recipe: White Chili

(serves at least 4)

1 pound chicken breast, cubed OR about 2 cups shredded roasted chicken (see note 1)

2-3 tablespoons olive oil

1/2 large white onion, chopped

1 jalapeño, finely chopped

1 large poblano pepper, chopped

3 garlic cloves, finely chopped

1 1/3 cups dried chickpeas, soaked OR two 15 ounce cans (see note 2)

1 1/3 cups cannellini beans, soaked OR two 15 ounce cans (see note 2)

1 quart chicken broth

3 tablespoons ground cumin

2 teaspoons ground coriander

1 can evaporated milk

juice of 1/2 – 1 lime, to taste

kosher salt and cracked black pepper

cilantro, lime, green onions, and white cheddar cheese for garnishes

Note 1:  If you choose to use shredded roasted chicken, do not add it to the chili immediately or it will fall apart.  Add it after you purée some of the beans near the end of the cooking time.  Make sure it has enough time to warm through.

Note 2:  Soaking the beans overnight in the refrigerator is one way to prepare the beans ahead of time.  However, if that isn’t possible, place the dried chickpeas and cannellini beans in a large pot and cover with a few inches of water and a couple teaspoons of salt.  Bring the water to a boil.  Cover and remove from heat and let sit for at least two hours.  At this point, check the beans for doneness.  If they are not quite done, you may want to bring them back to a boil once again for a few minutes to soften up a bit more (I find that the chickpeas take a little longer). If you add them to the chili and they are not fully tender, they will soak up a bit more of the liquid.  When they are your preferred texture, drain and set aside.

In a large Dutch oven over medium-high heat, add the olive oil. When it is hot, add the chicken and a sprinkle of salt and pepper.  Brown for a few minutes until cooked through.  Remove the chicken from pan.  To the same pan add a bit more olive oil, if necessary, and the poblano pepper, jalapeño, onions, and garlic.  Sauté for a few minutes until somewhat tender.  Return the chicken to the pan, along with the cumin and coriander.  Cook for 1 minute and then add the chicken stock, chickpeas and cannellini beans.  Bring to a boil.  Reduce heat to low-medium and cook for about 30 minutes – 1 hour.  More if the beans need extra time to soften, less if they don’t.

When the texture of the chili seems right to you, remove about 1 1/2 cups of beans from the pot and place in a shallow bowl.  Use a fork to smash the beans and make smooth.    This will help thicken the chili naturally.  Return the smashed beans to the pot.  Add the evaporated milk and cook uncovered  for a few minutes longer.   Add the juice of 1/2 of a lime to start, and more if you choose.  Taste and re-season with salt and pepper, if necessary.  Enjoy!

Thanks for stopping in today! xo
Laurie

Apple Challah via Relishing It

Despite the frigid weather, we survived this week’s arctic blast here in Minnesota.  And while I managed to get out-and-about a couple of times, much of the long weekend was spent tidying up the house and pre-Spring cleaning.  By January our home is so cluttered with Christmas toys, winter gear, and heaping piles of kindergarten projects that it’s almost unbearable.  So we bought more toy shelves (I really need to have a garage sale this Spring), organized the important school work, and re-arranged a few rooms.  And somehow, once everything was in order, it felt like we’d uncovered two new rooms.  Now I can finally think clearly again!

Apples for Apple Challah via Relishing It

Diced apples for Apple Challah via Relishing It

Aside from the re-organization and playing countless games of Munchkin and Memory with the little ones, I also managed to squeeze in a little baking.  It was a nice way to help warm the house when the windchill dropped to -30°F.  This apple challah turned out perfectly.  One of my favorite things to play around with in the kitchen is bread made with yeast.  I’m fascinated by how yeast grows and changes, creating such interesting flavor.  Baking bread takes patience and planning, but not a lot of work.  And the aroma of freshly baked bread, alone, is worth the small effort.

Challah dough stuffed with apples via Relishing It

Challah stuffed with apples via Relishing It

Apple Challah ready to bake via Relishing It

If you have reservations about working with yeast, just relax and start with something simple.  This apple challah is a nice entry point.  You basically shove everything into a pan and bake it up.  But the results are a magical, tender, rustic-looking bread.  This one isn’t overly sweet– it’s amazing flavors come from the apples, honey, and cinnamon.  One of my favorite characteristics of this challah is the nice ‘crunch’ provided by sprinkling turbinado sugar on top.  The crust is best on the day it’s baked, since it tends to soften over time in a sealed container.  Even so, it keeps well for several days, and the inside stays soft and moist.  Enjoy it drizzled with a bit of honey and a nice cup of hot coffee.

Apple Challah via Relishing It

Apple Challah via Relishing It

The Recipe:  Apple Challah

For the Dough:

4 cups (20 ounces) unbleached all-purpose flour  (see note)

1 1/2 teaspoons kosher salt

6 tablespoons canola oil

2 large eggs, at room temperature

1/4 cup honey

1 package instant yeast  (2 1/4 teaspoons)

1/2 cup luke-warm water (between 100-110°F)

For the Filling:

3 smallish apples, diced into 3/4-inch chunks with the skin on

1 teaspoon cinnamon

3 tablespoons granulated sugar

For the Glaze:

1 large egg beaten with 1 teaspoon water

Turbinado sugar for sprinkling

Note: The recipe from King Arthur called for 4 cups of flour.  I generally assume that 1 cup of all-purpose flour weighs 5 ounces.  So, I added 20 ounces of flour to this recipe.  King Arthur called for 4 cups of flour, but stated 17 ounces as their weight measurement.  I did feel the dough was a bit stiffer than I was accustomed to working with, but the outcome was absolutely perfect.  It was a soft and tender bread that was sublime.  I think it’s safe to say that anything between 17-20 ounces would work here, though I haven’t tried the 17 ounce version first-hand.  Can you tell that I love my scale? 

In a bowl of a stand mixer (the recipe can also be done by hand, of course), mix the yeast, honey, and water together until it is dissolved.  Let stand for 5-10 minutes, or until it begins to get a bit foamy.

Add the remaining ingredients for the dough to the yeast mixture and slowly mix using the paddle attachment until the dough just comes together.  Remove the paddle attachment and add the dough hook.  Knead the dough for a few minutes until it is soft and smooth.  Place the dough in a slightly oiled large bowl and cover it with a dishtowel or lightly greased plastic wrap.  Allow to rise for about 2 hours, or until it has doubled in size.

Lightly grease a 9 or 10-inch springform pan or a 9-inch cake pan that is at least 2-inches deep.  Mix the apple filling ingredients together in a bowl.

Gently deflate the dough and transfer it to a lightly floured work surface.  Roll the dough out into a 8 x 10-inch rectangle.  Place the apples on the dough in two 10-inch rows near the center of the dough.  Fold each side over the row of apples closest to it.  Pushing down as you go to seal it.  Using a sharp knife, cut the dough down the center, and then across 8 times.  You should end up with 16 pieces of dough.  Hopefully the photographs will help with a visual.  Place the pieces of dough into the prepared pan so they create a single layer.  Tuck any apples that have fallen out into the mixture.

Cover the challah with a lightly greased piece of plastic wrap.  Allow to rise for about 1 1/2 hours, or until it’s about 2-inches high.

Preheat the oven to 325°F toward the end of rising time.  Brush the top of the dough with the egg wash and sprinkle heavily with turbinado sugar (or any coarse sugar).  Bake for about 55 minutes, or until the top is a beautiful golden brown.  Some of the higher pieces may get dark brown, and that’s ok.  The dough needs to bake all the way through in the middle, so be patient.  Remove challah from oven and after 5 minutes loosen the edges and transfer it to a rack.  Serve hot or cold, preferably with a drizzle of honey.  Keeps well for days in a covered container.  Enjoy!

Source:  Adapted from King Arthur Flour

Thanks so much for stopping by!  xo

Laurie

Pad Thai via Relishing It

Let’s all give a big cheer for the fact that the weekend has arrived!  It is going to be a cold one here in Minnesota with highs below zero farenheit, and I am seriously excited!  Why am I looking forward to the coldest temperatures of the last four years?  Not surprisingly, because I  start thinking of what meals to make while we’re nuzzled in at home.  I’ve eyeballed a few of my favorites, but haven’t quite decided on which to make.  This Paprikash is the perfect cold-weather comfort food.  And this African Peanut Soup would certainly warm us up.  Then again, a hot sandwich made from this Cheddar and Stout Meatloaf is also tempting, or maybe these Roasted Root Vegetables .  Since we’ll likely be house-bound the whole weekend, I may even make this Ragu alla Bolognese on Sunday night, as Aria has been begging for pasta.  Bring on that frigid north wind!

Pad Thai via Relishing It

Then again, this pad thai is also a perfect cold-weather meal.  While it may sound odd, there’s just something about a piping-hot Asian noodle dish that reminds me of Winter in St. Paul.  I suppose it’s because we often trek to our favorite Thai restaurant for bowls of spicy coconut curry or pad thai once the season turns.  My kids– like most, I suppose– can be frustratingly picky eaters at times.  But they love ethnic food, and for that I am so thankful.  I never really had the opportunity to try ethnic foods while growing up in western North Dakota, but once we moved to a large city, I was hooked.  And Thai cuisine is one of my favorites.  While we still love to eat pad thai at our fantastic local hole-in-the-wall restaurant, I decided to look for a recipe to make this amazing dish at home.  It was surprisingly difficult to find one that perfectly captured the sweet richness of the peanut sauce, as well as the ‘tang’ I was looking for.  I tried several from various cookbooks, but was always disappointed.  In the end, I tried my own hand at it, and it turned out to be exactly what I was after.

Green onions for Pad Thai via Relishing It

Chopped Peanuts for Pad Thai via Relishing It

I also love that I can make pad thai healthier at home.  I like to use brown rice noodles, rather than the white; and I buy good locally-sourced free-range chicken that has been properly raised.  You can also make it with shrimp, or leave the meat out and go vegetarian.  This version has just the right amount of sweetness, perfectly balanced by vinegar.  Feel free to customize it a bit to fit your exact taste.  The one bit of advice I’ll give about making this dish, is to be prepared and work quickly.  This dish doesn’t take much time to get on the table, but, once it’s done you’re going to want to sit down and eat it right away.  If there’s one rule about eating pad thai, it’s that it doesn’t have a long table life.  Eat it while the noodles are steaming hot, or they’ll cool and begin to clump together.  Give it a try, and enjoy your weekend!

Pad Thai via Relishing It

The Recipe: Pad Thai

(Serves 4)

1/3 cup hoisin sauce

1/3 cup tamarind concentrate

3 tablespoons rice vinegar

1 1/2 tablespoons fish sauce

1 bunch green onions

8 ounces of bean sprouts

8 ounces Pad Thai brown rice noodles

1 pound chicken breasts, thinly sliced

2 eggs

reserved pasta water

Olive oil

1/2 cup chopped peanuts, or more to taste

1/4 cup chopped cilantro, or more to taste

Thai chiles, thinly sliced (optional)

1 lemon, cut into wedges

Sriracha sauce

Bring a large pot of water to a boil.

In a small bowl, mix the hoisin sauce, tamarind concentrate, rice vinegar, and fish sauce together.  Set aside.  In another small bowl, add the two eggs and mix with a fork.  Set aside.

Prepare the green onions by cutting them in half, and then slicing them thinly or at a diagonal — however you prefer.  In a 12-14 inch skillet add a bit of olive oil and begin the cook the chicken over medium heat.  This will not take very long, as it should be sliced a bit thinly.  Meanwhile, add the rice noodles to the boiling water.  Cook for about 8-10 minutes, or until the noodles are al dente.  Make sure not to over-cook them, as they will turn to mush rather quickly.

While the noodles are cooking, push the chicken to the outside of the pan.  Add a bit of olive oil to the center and scramble the eggs.  When they are scrambled, and about 2-3 minutes before the noodles are done, add the green onion.  Then a minute later, the sprouts (you’ll want these to remain crisp, but still get warm).  Pour the sauce into the pan, as well.  Stir.  Make sure to reserve some pasta water.  Drain the noodles when they are done.  And quickly add them to the pan.  Using tongs, begin folding all of the ingredients together.   Add a medium ladle of pasta water to loosen the mixture up.  Add more if needed.  When everything is combined, mound onto a plate and garnish with peanuts, cilantro, lemon, and Thai chiles and serve with sriracha sauce, if you can handle the heat.  Enjoy!

Thanks for stopping by Relishing It.  Hope you all have a wonderful weekend!  xo

Laurie

Image

Socca— also called farinata or cecina– is an unleavened pancake made from chickpea flour.  It originated in Italy, and has a distinct earthy flavor that sublimely compliments all sorts of savory toppings.  Aside from tasting fantastic, socca has the added benefit of being gluten-free.  And while I’m not gluten-intolerant, I have been trying to go easy on my intake.  I like that they are so versatile and can be topped with any number of ingredients.  This dish is one of my favorite ways to enjoy them.

Image

Here I’ve added kale, sausage, and squash as toppings to the socca.  The flavor combination is magnificent.  Roasted sweet potato is another nice option.  And the buttermilk vinaigrette stands out just enough to tie everything together without overwhelming the dish.  It’s made with an apple cider vinegar that compliments the other flavors remarkably well.  The vinaigrette calls for raw egg yolk, which you can opt to leave it out, if you like.  I’ve noticed that this changes the texture a fair amount– it’s not as rich and silky.  Personally, I recommend making the dressing with the yolk, but make sure to use it up right away as it won’t keep long in the refrigerator– which won’t be a problem once you taste it.  It’s that good.

Image

This is a meal that comes together rather quickly as long as you manage your time wisely.  As in many dishes, a little bit of preparation goes a long way.  One thing to note, like typical pancake batters, you’ll get the best results if you let the water absorb into the flour for a couple of hours.  Even so, if you don’t have time to let it rest, it’ll still be fine.  Perhaps not quite as amazing, but good nonetheless.  Socca is great to try if you are gluten-intolerant or just want to change up your routine a bit.  It is loaded with protein and is a nice healthy choice for you and your family.  Hope you give it a try!

Image

The Recipe:  Socca with Squash, Kale, and Italian Sausage topped with a Buttermilk Vinaigrette

Serves 4 people

Socca (Chickpea Pancakes)

2 cups chickpea flour

1 3/4 cups water

1 egg

1 teaspoon smoked paprika

1 tablespoon olive oil

sprinkle of sea salt

Medium-sized butternut squash, peeled and cubed

1 pound sweet Italian sausage, browned

1 bunch of Lacinato kale (also called Tuscan or Dino), washed and cut into thin ribbons

olive oil

Buttermilk Vinaigrette:

3/4 cup canola oil

1 egg yolk

2 teaspoons Dijon mustard

1 garlic clove

3 tablespoons buttermilk

2 tablespoons apple cider vinegar

salt and pepper

To make the Socca: Combine the chickpea flour, water, egg, olive oil, smoked paprika, and salt in a large bowl.  If possible, let mixture rest in the refrigerator for 2 hours, so that the water can absorb adequately into the flour.  Though, I’ve made them without doing this step, and they were still fine.   When ready to make the socca, heat a large skillet on medium-high heat.  Put a thin coating of olive oil on it and a sprinkle of kosher salt.  Pour the batter into the pan and cook until tiny bubbles appear in the batter.  Flip the pancake.  Repeat until the batter is gone, re-coating the pan with olive oil, as needed.

Things to do beforehand:  Make the Buttermilk Vinaigrette.  Combine all the ingredients, except the oil in a blender.  Slowly add the oil while the blender is running.  Refrigerate for about an hour and then re-blend.  This will thicken the vinaigrette up even more.  Re-season with salt and pepper, if necessary.

Prepare a medium-sized butternut squash by peeling it and cutting into cubes.  Coat with a splash of olive oil and a sprinkle of salt and pepper.  Place on a baking sheet and bake at  400°F for about 25 minutes, or until tender.  Tossing a couple of times while baking.   Set aside.

Brown the Italian sausage, drain grease and set aside.  Right before the socca is ready to be cooked, sauté the kale in a hot skillet with a thin coating of olive oil.  Cook for just a minute or so.  The kale will wilt just slightly.  Sprinkle with sea salt.

Assemble the pancakes by topping with the kale, sausage, and squash.  Drizzle the buttermilk vinaigrette on top.  Enjoy!

Buttermilk Vinaigrette was inspired by Chef Adam Vickerman from Cafe Levain in Minneapolis, MN

Thanks for stopping by today!  xo

Laurie

Continue Reading »

Rustic Rhubarb Tartlets via Relishing It

Rhubarb in January?!  No, I haven’t lost my mind, and I generally try to prepare and write about foods that are in season.  But every now and then I get tired of following the unwritten ‘rules’ of food blogging.  And since I had a few bags of rhubarb in my freezer just crying out to be made into more of these lovely tartlets, I figured why not?  So rhubarb in January it is.  Rhubarb freezes remarkably well, so there is no reason you shouldn’t be enjoying it’s unique, tart, splendor any time of the year.

Rhubarb

Rustic Rhubarb Tartlets via Relishing It

I’ve always loved rhubarb.  Especially the gorgeous, vibrant, red variety.  These tartlets are one of my favorite ways to enjoy this sometimes overlooked fruit.  Or vegetable.  Actually, it turns out rhubarb is a vegetable, but– and I’m not making this up– a court in New York ruled in 1947 that rhubarb is classified as a fruit in the U.S.  Anyway… the whole grains in the crust work impeccably well here.  One of the best ingredients in this recipe is the addition of the cornmeal.  It lends a nice toothsome bite that perfectly contrasts the soft rhubarb compote.

Rustic Rhubarb Tartlets via Relishing It

Rustic Rhubarb Tartlets via Relishing It

Aside from the flavors, I love the size of these tartlets.  They’re perfect little individual servings.  I’m not sure why, but I’m a sucker for most any miniaturized dessert.  There’s something so appealing about them.  I also love the rustic, ‘free-form’ look of the crust.  They have that homemade quality that just feels…genuine.  Like it was made just for you.  And since they’re ‘free-form’, there’s no wrong way to shape them.  Enjoy!

Rustic Rhubarb Tartlets via Relishing It

The Recipe:  Rustic Rhubarb Tartlets

(Makes 10 individual Tartlets)

The Rhubarb Compote:

1 pound fresh or frozen rhubarb, cut into pieces

1/2 cup brown sugar

1 teaspoon orange zest

The Pastry Dough:

1 cup unbleached all-purpose flour

1 cup whole wheat flour

1/2 cup fine cornmeal

1/4 cup granulated sugar

1 teaspoon kosher salt

1 stick cold butter, cut into small cubes

1/4 cup plus 2 tablespoons heavy cream

2 egg yolks

1 egg plus 1 teaspoon water, mixed together for an egg wash

To make the rhubarb compote:  Place the rhubarb plus brown sugar in a heavy-bottomed saucepan over medium heat.  Stir frequently.  Cook for 10-15 minutes, or until the rhubarb has softened and broken down a bit.  Remove from heat and stir in the orange zest.  Set aside.

Preheat your oven to 375°F.  Line a large baking sheet with parchment paper.

To make the pastry dough:  In a small bowl, mix the egg yolks and cream together.  Set aside. Sift the all-purpose flour, whole wheat flour, cornmeal, sugar, and kosher salt together and place into the bowl of a food processor (this recipe can easily be done by hand, too).  Next, add the butter and turn the mixer to low.  Increase to medium once the butter begins to get incorporated.  When the flour is coarse, like cornmeal, add the egg yolks/cream mixture and mix until just combined.  The dough will appear crumbly, but will hold it’s shape when squeezed together.

This dough is best when shaped right away, as it is really easy to work with.  If you need to refrigerate it for some reason, make sure to let it warm up before trying to roll it out.

Divide the dough into 10 equal pieces.   Lightly flour your work surface and roll each dough ball out to about a 5-inch circle.  Use a bench scraper, if your dough begins to stick.  Divide the rhubarb compote evenly among the circles — about 1/4 cup each.  Turn the edges of the dough up and around the compote and pinch the sides together.  The dough may split or break, but just keep pinching it together to create a seal.  Place the tartlets onto your prepared baking sheet.  Use a pastry brush and brush the dough with the egg wash.  Bake for about 35 minutes, or until the edges are a beautiful deep golden brown.  Remove from oven and cool.  These will keep well for days in a sealed container.  Enjoy with freshly whipped cream and a sprinkle of turbinado sugar!

Source:  Adapted from Good to the Grain by Kim Boyce

So glad you stopped by today ! xo

Laurie

Simple White Beans with Rosemary and Garlic

Greetings friends!  It feels so good to be back here at Relishing It.  Turns out my Summer vacation from posting lasted a little longer than I intended.  At any rate, I’ve missed writing and talking with all of you.  I hope you’ve had a fantastic few months.  Life has been great in my little corner of Minnesota.  The holidays were good to us– we had beautiful traveling weather for our trip back to North Dakota, where we were able to spend time with our families.  Everyone remains in good health, and that is basically all that I need.

Simple White Beans with Rosemary and Garlic via Relishing It

Despite not writing as much lately, I’ve been very busy in the kitchen making new things.  I’ve tried desperately to not bake quite so much, because frankly, we just don’t need all those sweets around.  But…I’ve fallen short of keeping that vow every couple of weeks.  Simply put, I love to bake.  It makes me (and my kids) happy.  So now I’ve modified the vow– we just share more.

I’ve spent the rest of my time in the kitchen preparing healthy and delicious meals.  The pressure to ‘change your diet!’ and ‘lose weight!’ always amps up this time of year, but to be honest, I’m pretty content with where we are.  While I do make foods with butter, oils, sugar, and flour, I do my best to use limited amounts, or find healthier alternatives.  Not to sound too preachy, but there really isn’t a thing I’d change about my diet (especially with the ‘share baked goods vow’).  And that feels pretty good.

I continue to try to learn about how various foods affect my body, as well as how the production of those foods affects the environment.  And I feel lucky to have connected with so many people that feel the same way.  I want to stay healthy and fit for me and for my family, so I stick with the mantra that whole foods and exercise are the key.  If you’ve come here looking for healthy ideas for family meals, you’ll see there’s plenty to choose from.  I love helping people figure out how to eat “clean”.  It’s easier than you think.  Just stay away from packages and long lists of ingredients, add more vegetables, and eat whole foods.  You’ll be amazed.

Simple White Beans with Rosemary and Garlic via Relishing It

This simple pot of beans is a good example of the type of meal I’m talking about.  It’s not fancy, but is perfect for a cold night.  This dish is creamy, comforting, and bold.  The flavors can change dramatically depending on how you season this one, so play to your palate.  If you like Dijon, add a bit more.  Want more of a tang, be liberal with the vinegar.  Play around with it a bit!  The recipe below is how I enjoy it the most.  I generally make a batch of these beans and we eat half of it served alongside roasted buttercup squash (they’re perfect together).  I freeze the other half, and then use it in a simple cassoulet for a quick weeknight meal.  For that cassoulet, prepare some kielbasa sausage and/or some leftover pork shoulder, cut it into chunks,  place it in a shallow baking dish, cover with the thawed then re-warmed white beans, and top with some panko bread crumbs.  Bake at about 375°F for 10-15 minutes (or until the bread crumbs are toasted).  Sprinkle with fresh parsley, and voila!

Simple White Beans with Rosemary and Garlic via Relishing It

The Recipe:  Simple White Beans with Rosemary and Garlic

Serves 4-6

3 cups dried white beans (preferably cannellini, buy navy would work, too)

1/2 large white onion, chopped

2 bulbs garlic, peeled

2 large sprigs of fresh rosemary, chopped

a few sprigs of fresh thyme, left whole

1 dried bay leaf

extra-virgin olive oil

kosher salt and cracked pepper

1-2 tablespoons red wine vinegar

1 heaping tablespoon Dijon mustard

Begin by either covering the white beans with cold water in a large pot and soaking overnight (which I never do) or do a quick-soak method (which I always do) by placing the beans in a large pot or Dutch oven, cover with cold water and a sprinkle of kosher salt.  Bring the beans to a boil.  Boil for one minute.  Remove pot from heat and cover with a lid.  Let sit for two hours.  Drain beans when ready to use.

In that same Dutch oven, to the beans add the chopped onion, garlic cloves (from the two bulbs), chopped rosemary, whole sprigs of thyme, bay leaf, a bit of kosher salt and cracked black pepper.  Just barely cover the beans with fresh cold water.  Then add a couple of glugs of olive oil — about 1/4 cup.   Bring to a boil, then immediately reduce heat to a medium/low simmer.  Let cook for about one hour, stirring every so often, or until the beans are your desired consistency.  I like mine to be rather soft, but still hold their shape a bit.

When they are done cooking, remove from the heat.  Remove the thyme twigs and the bay leaf.  Using an old potato masher or a fork, mash a few of the beans to thicken them up a bit,  3/4 cup or so.  Add the Dijon and red wine vinegar and stir a bit to emulsify.  Re-season with more salt and pepper.  Drizzle with a bit more olive oil when serving and some fresh thyme leaves on top.    Enjoy!

Thanks for stopping by!  xo

Laurie